- Posted on
- • Lens repairs
Canon 50mm f/1.4 - autofocus repair and some refreshening
- Author
-
-

- User
- Photo-parts
- Posts by this author
- Posts by this author
-
The Canon 50mm f/1.4 is arguably the most popular - and probably the most failure-prone - lens in photo history. Yes, popularity amplifies the number of complaints, but objectively, there are genuine issues.
- Early batches were sensitive to even minor impacts — the helicoid ring would deform, and both manual and autofocus would fail.
- Over time, the planetary gear system would wear out, causing annoying rattle during manual and auto focusing.
- The motor used has a limited lifespan and fails eventually — even without drops, water damage, or abuse.
The instance I got my hands on had the first two issues combined — so let’s tear it down and fix it.
Disassembly is very simple — so much so that there’s no point in detailing every step. The photos speak for themselves.
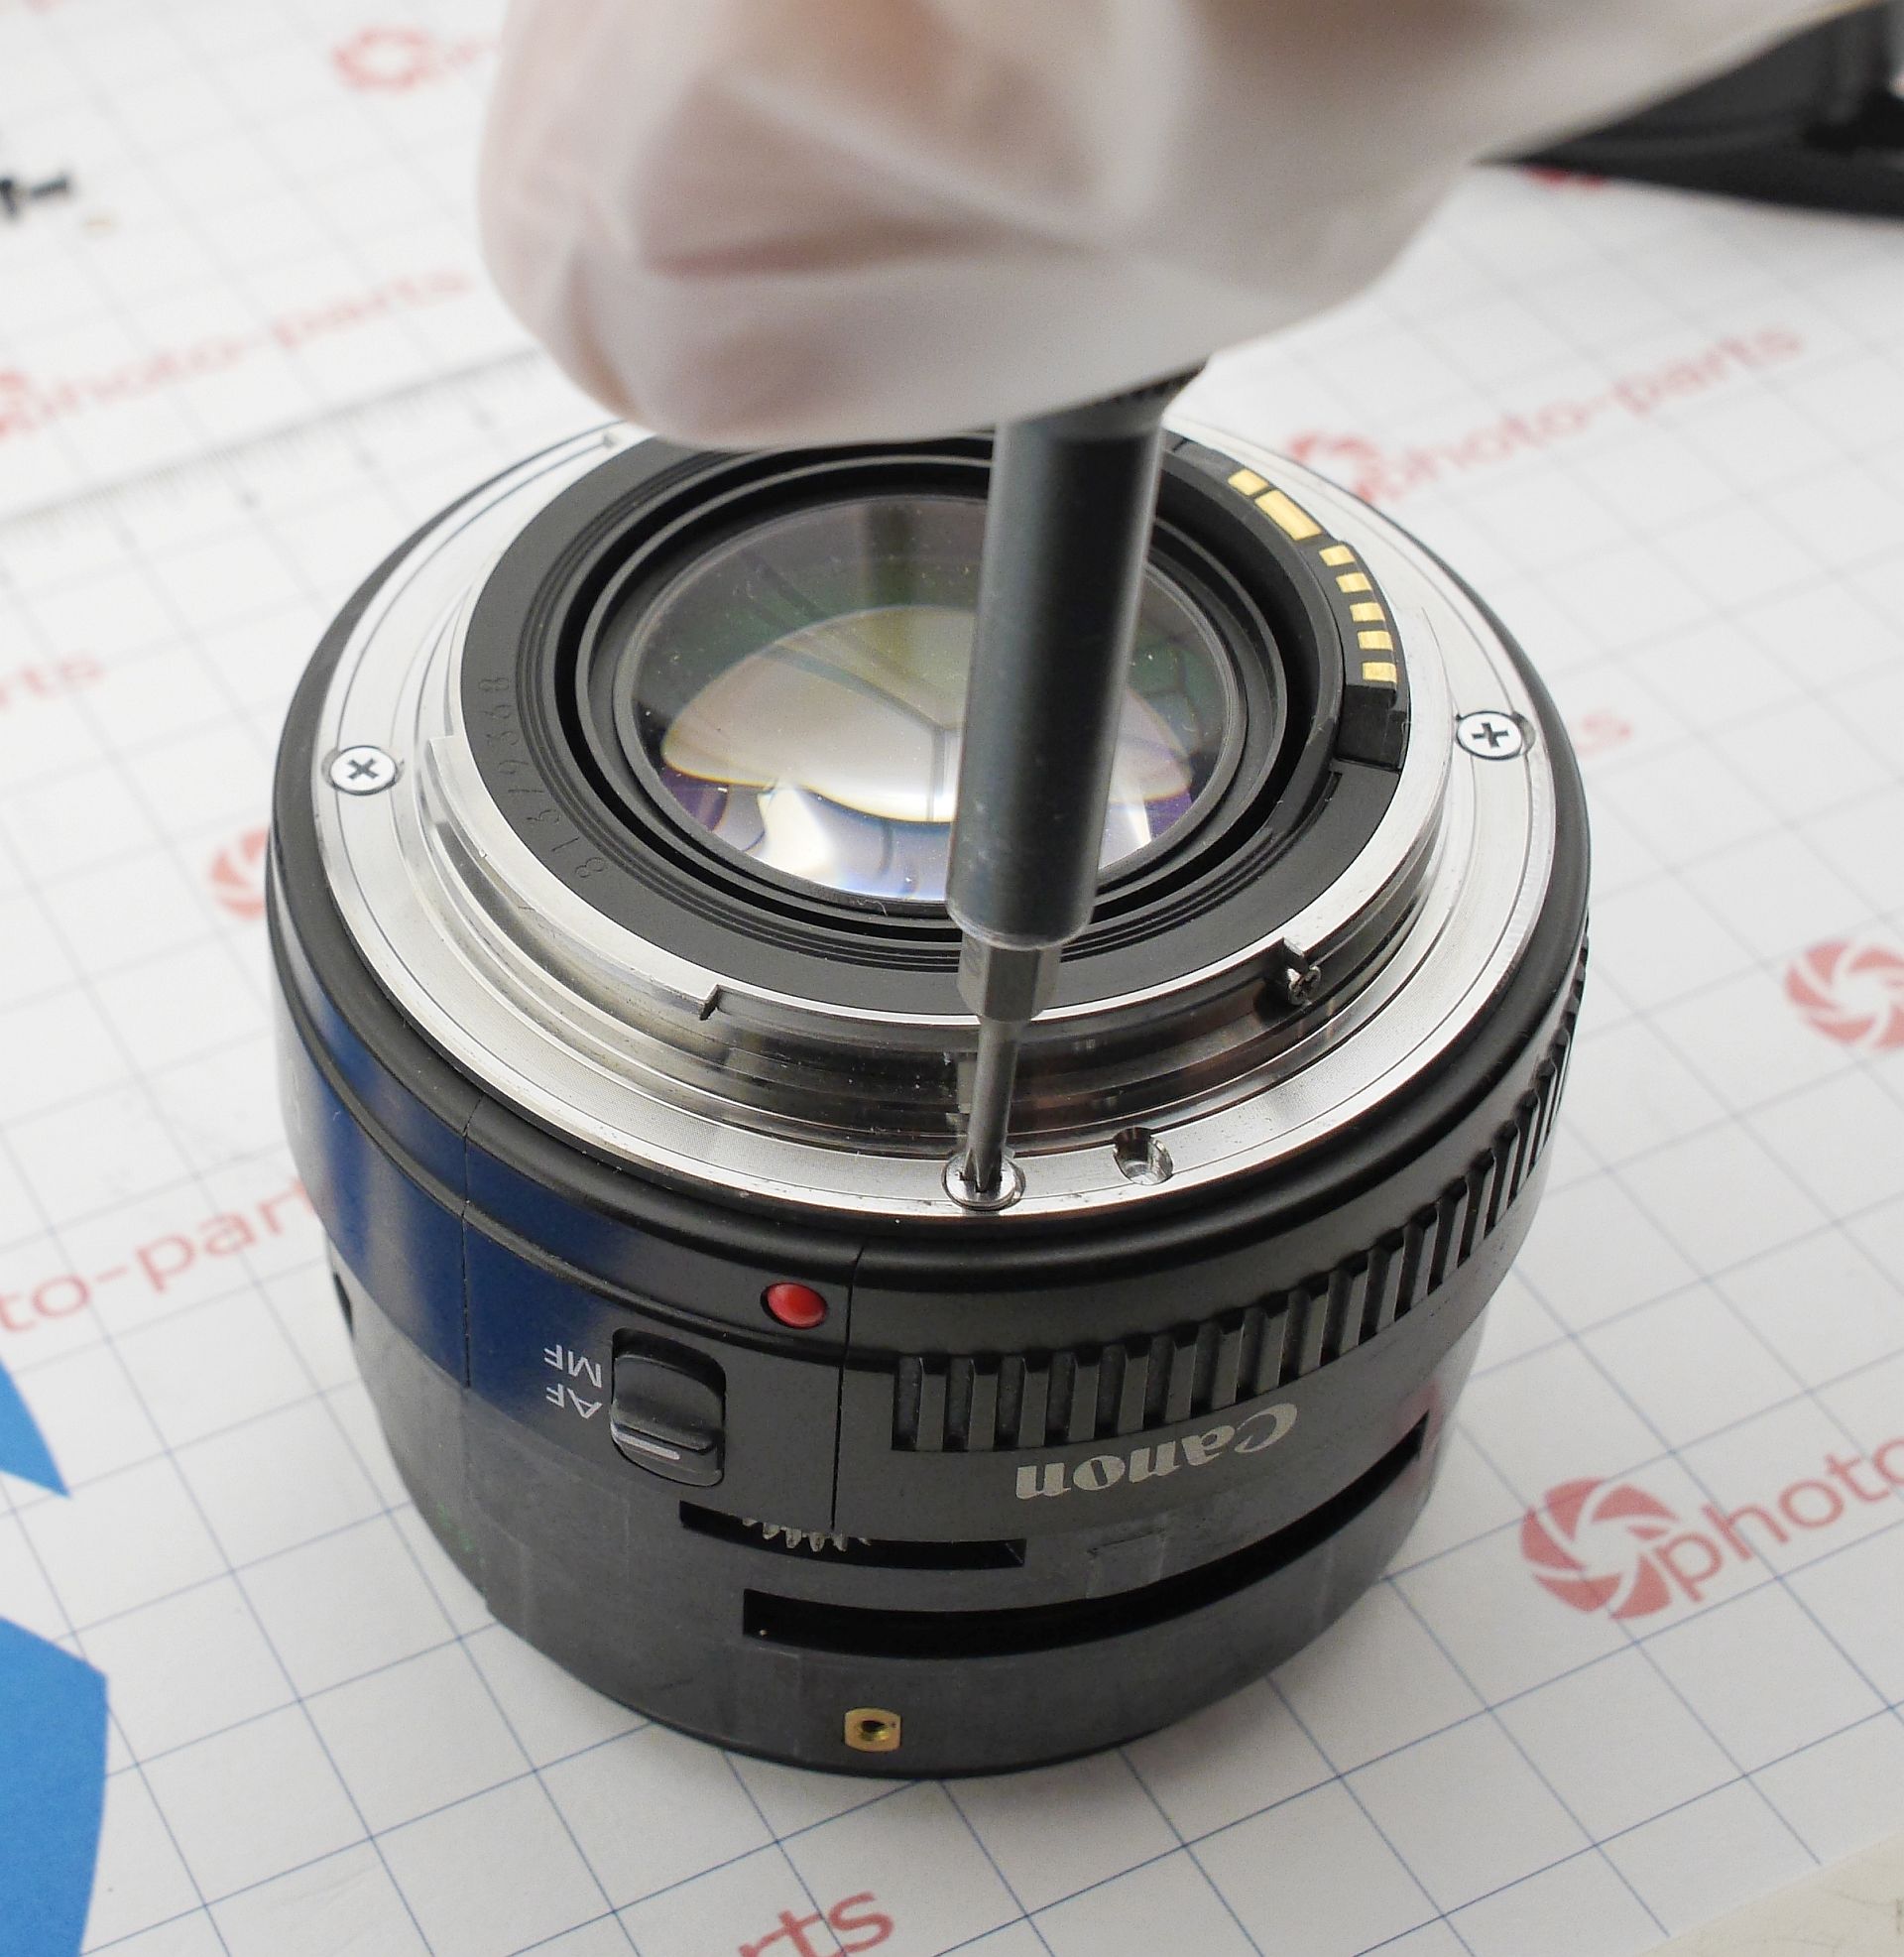
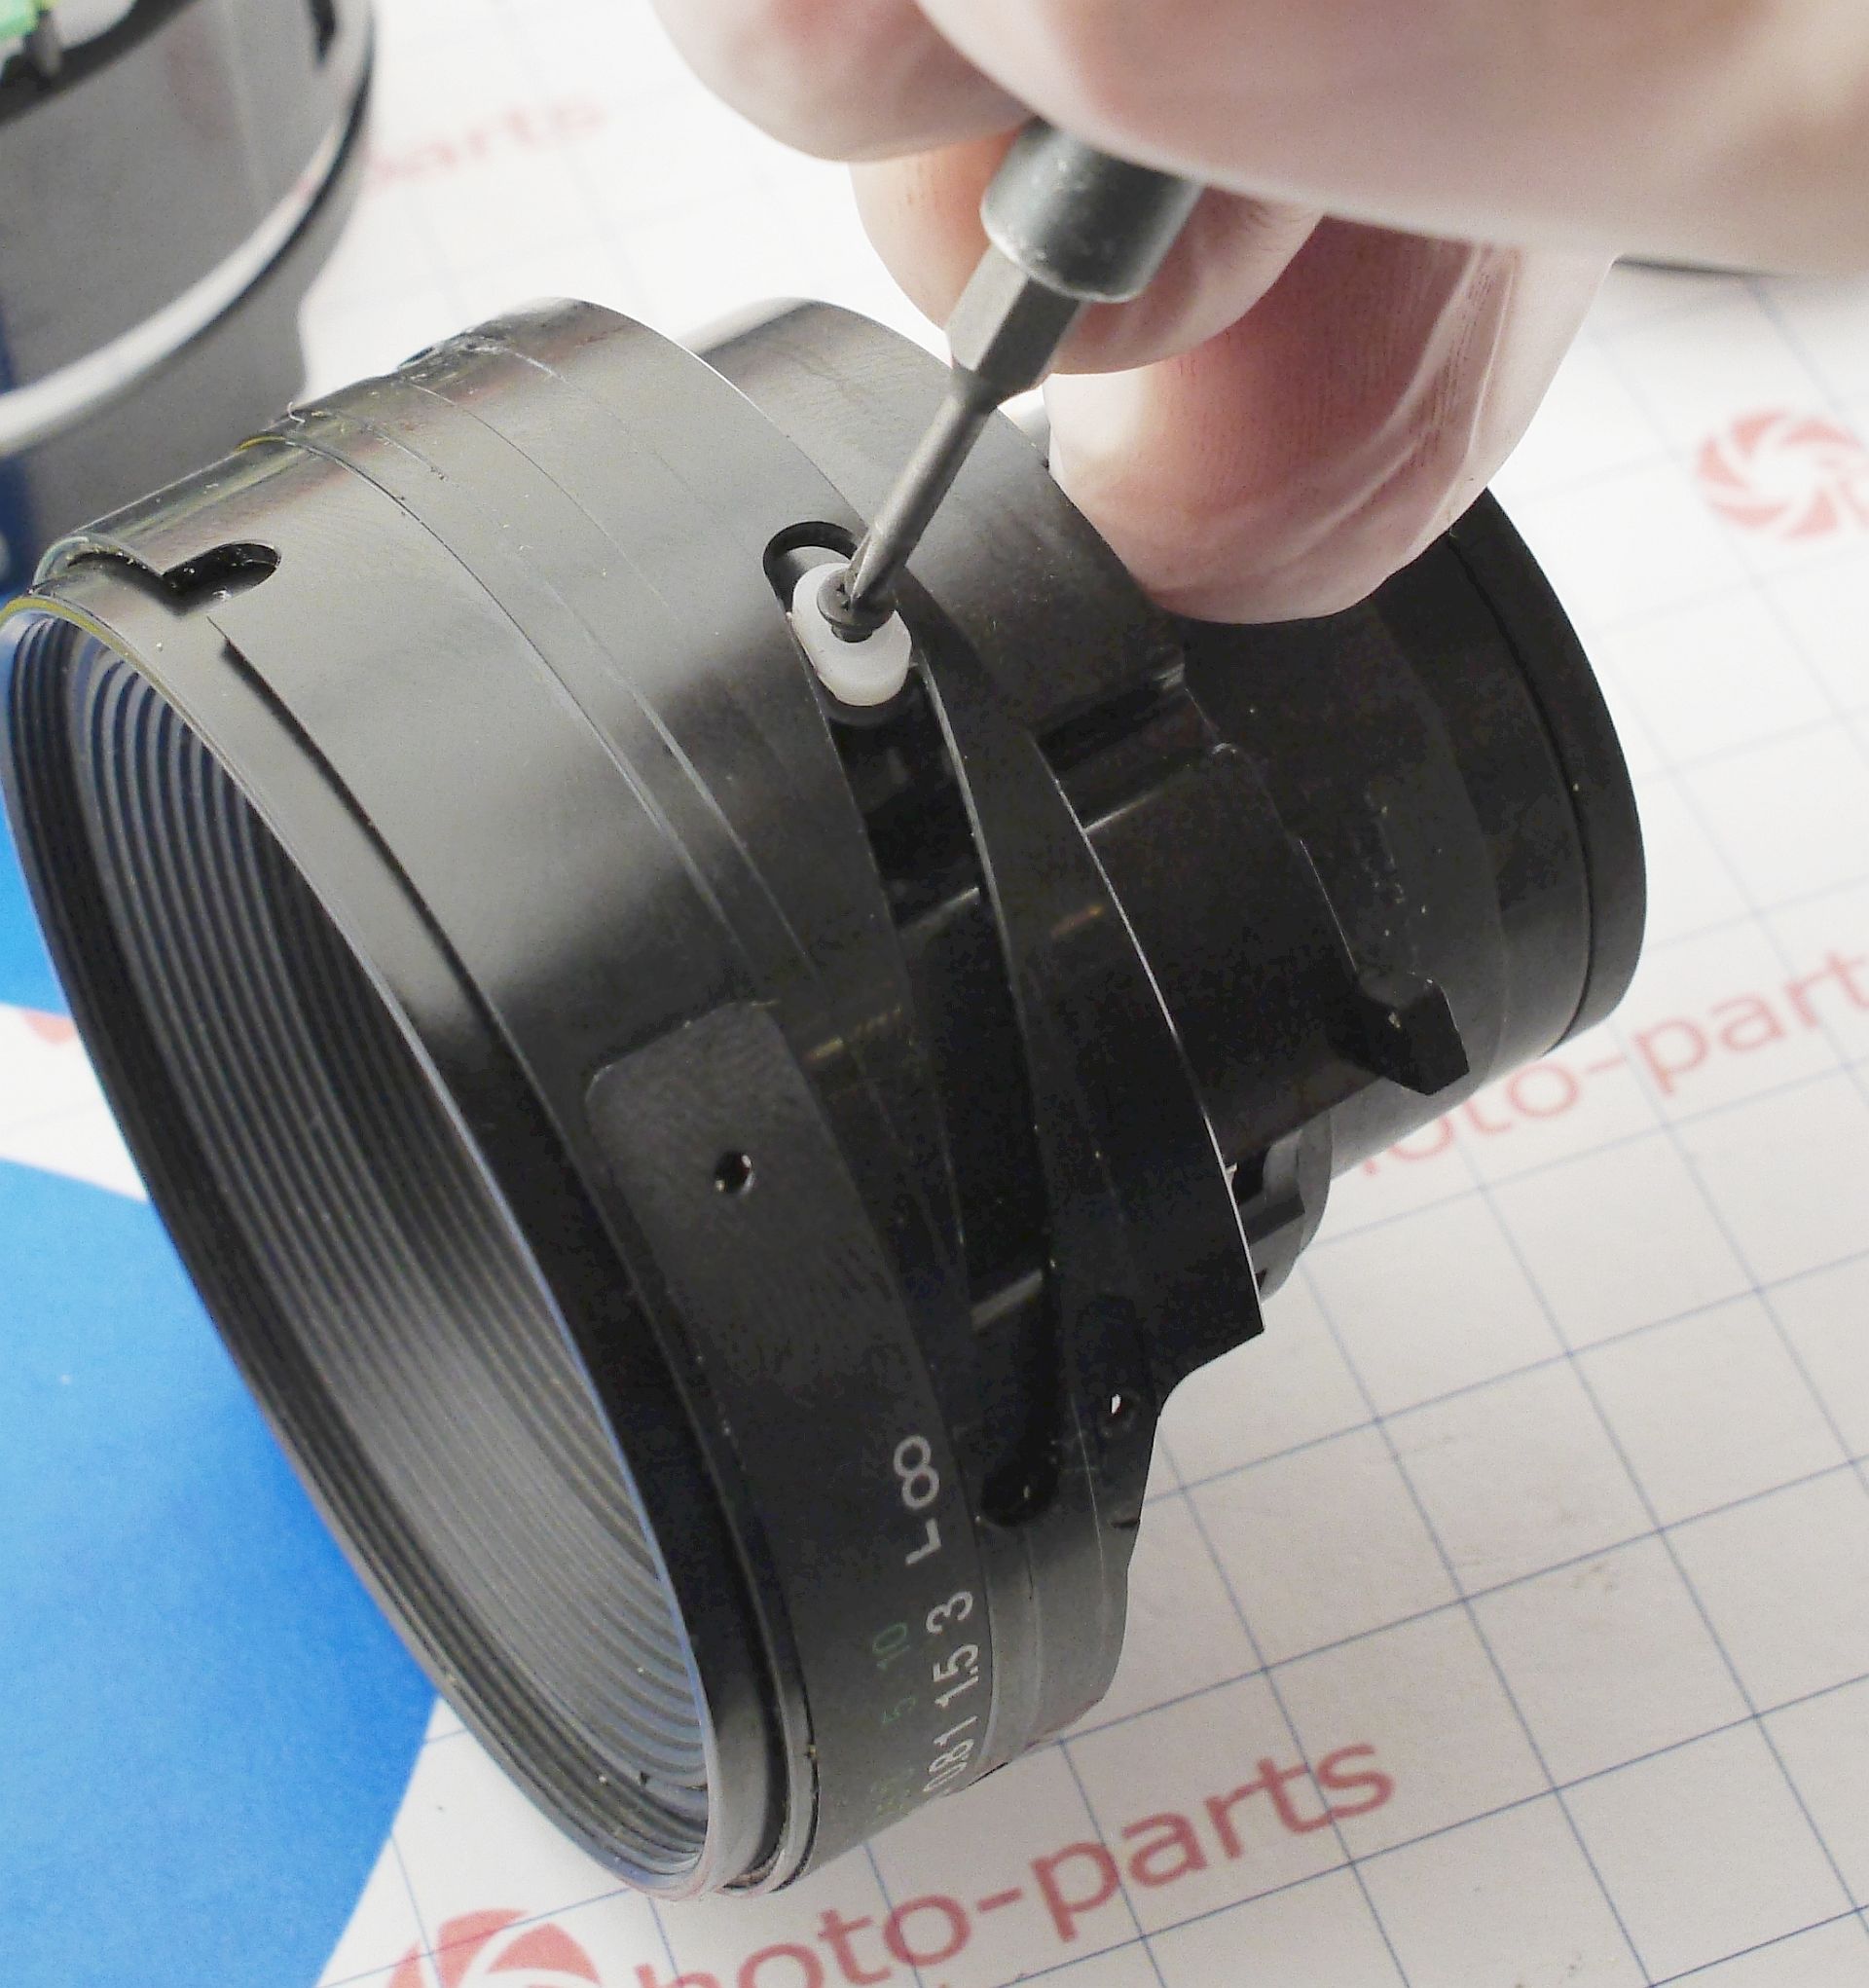
At the top, remove the distance window ring by unscrewing three screws. Beneath it is a “dust seal” and then the manual focus ring.

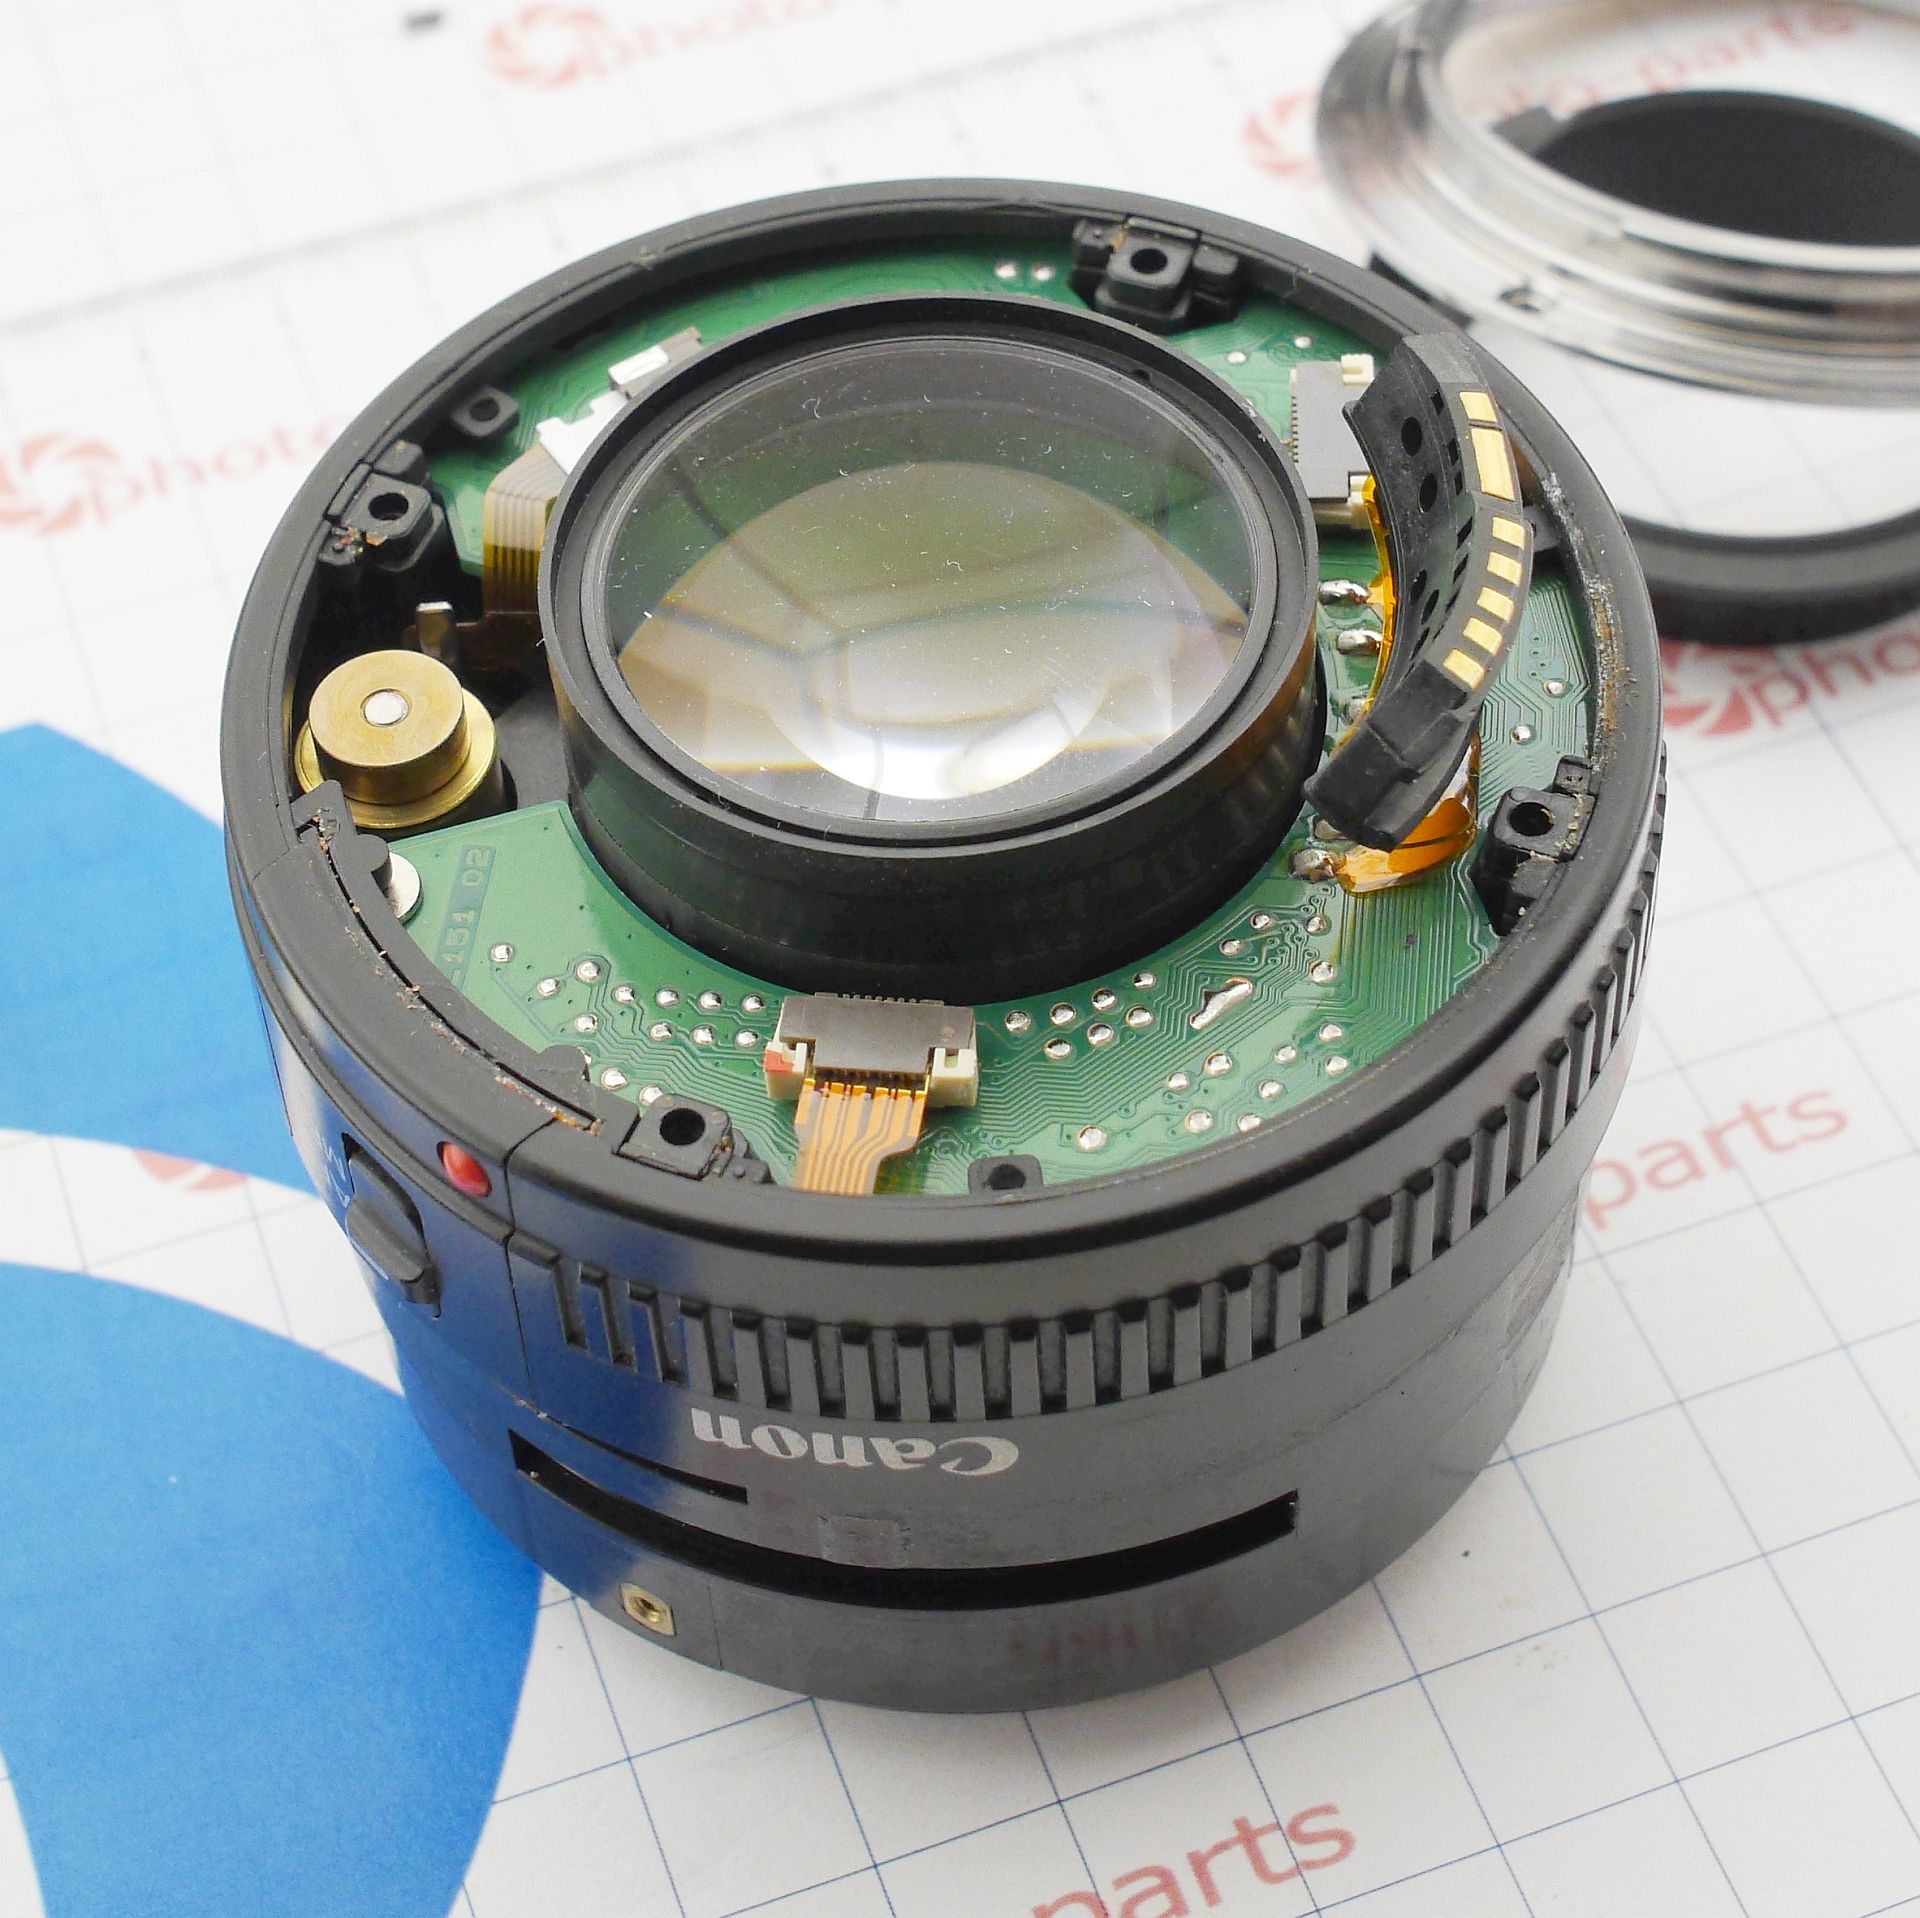
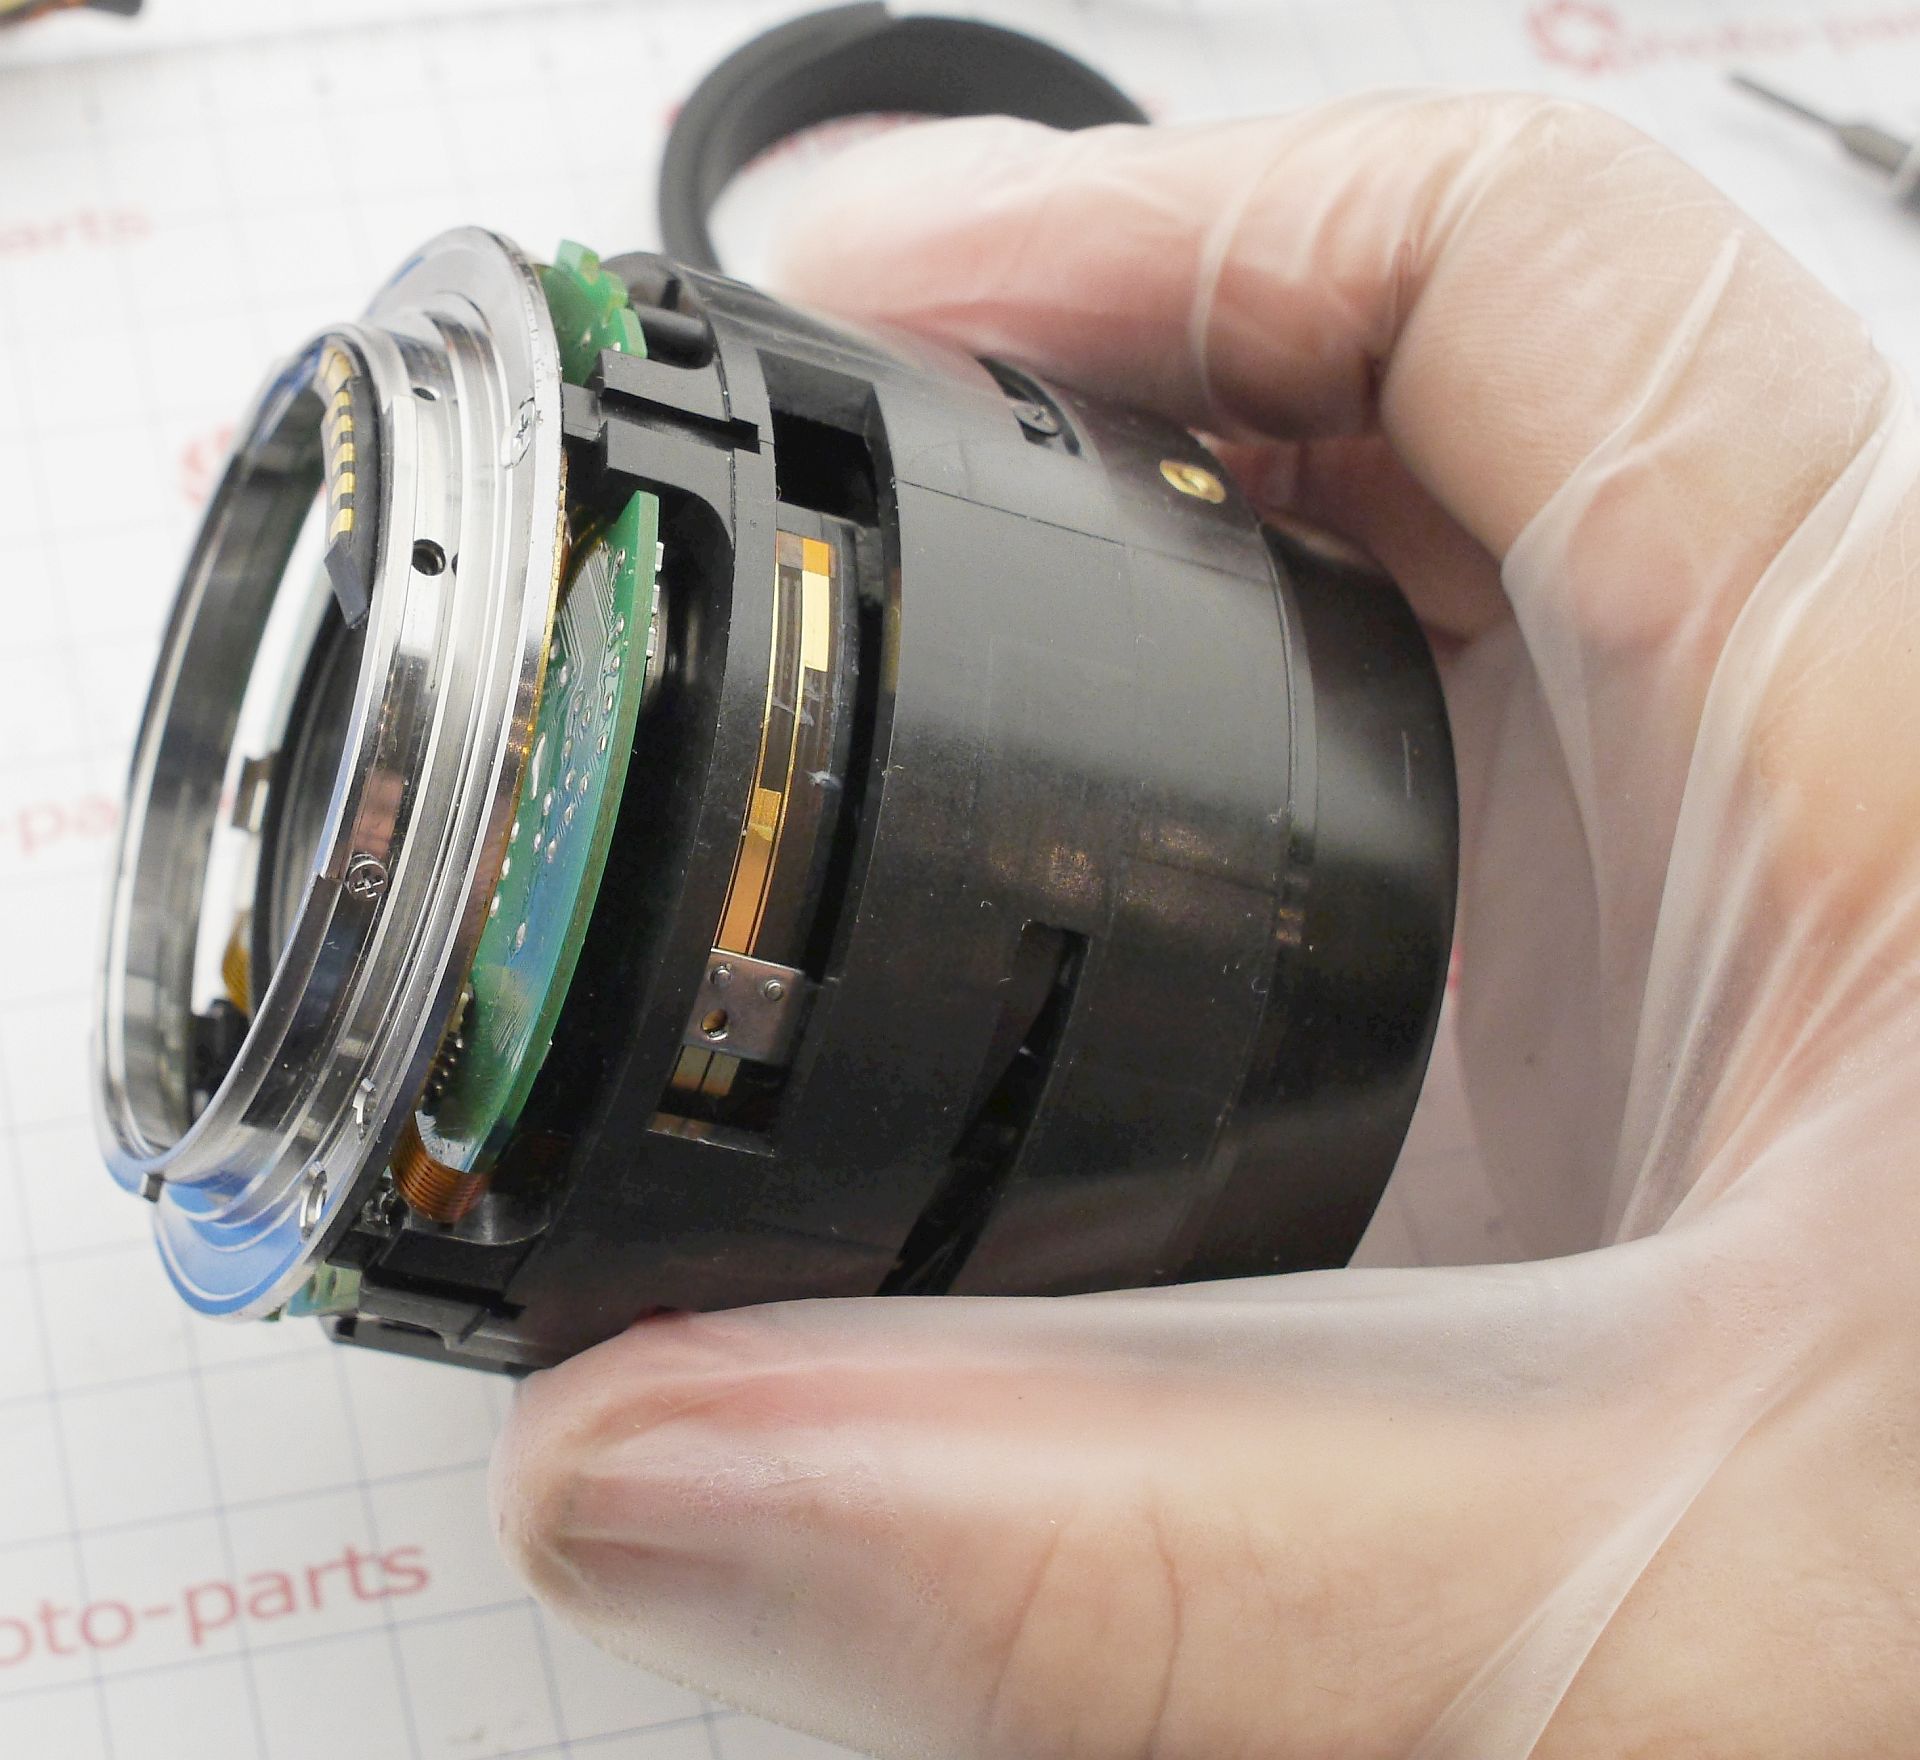
At the rear, remove all the mount screws, plus two screws from the contact block. Pry the bayonet off from the side opposite the contacts — the decorative plug will pop out from inside, as shown below.

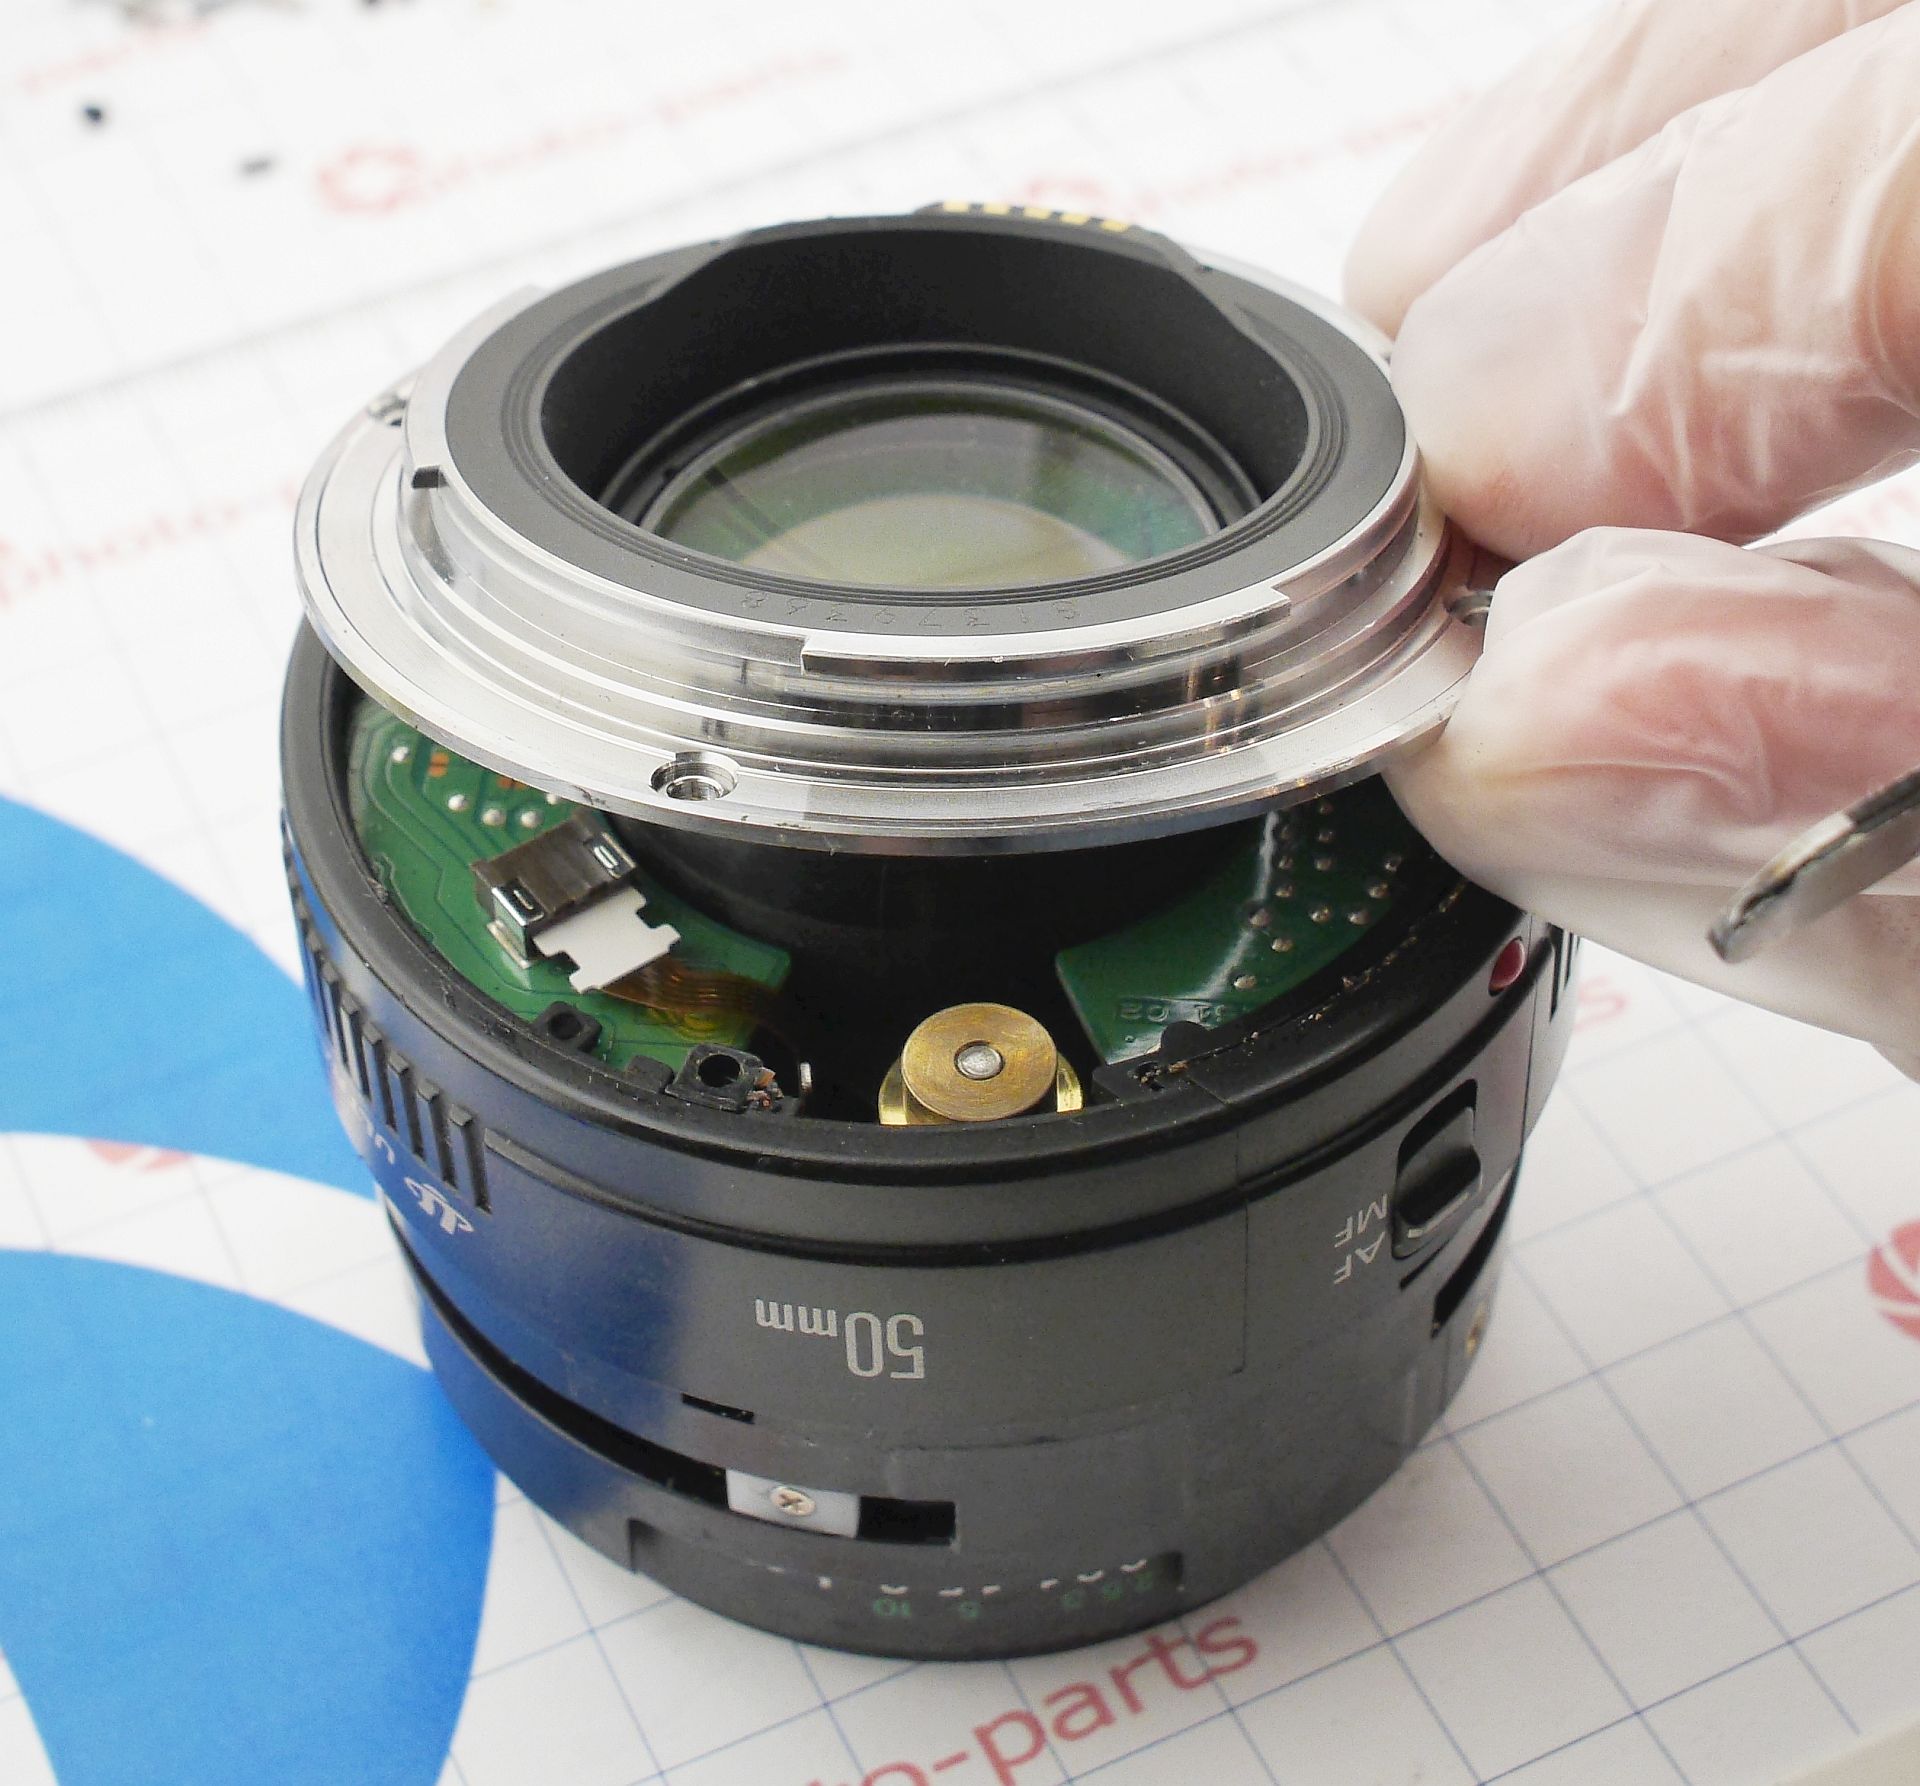
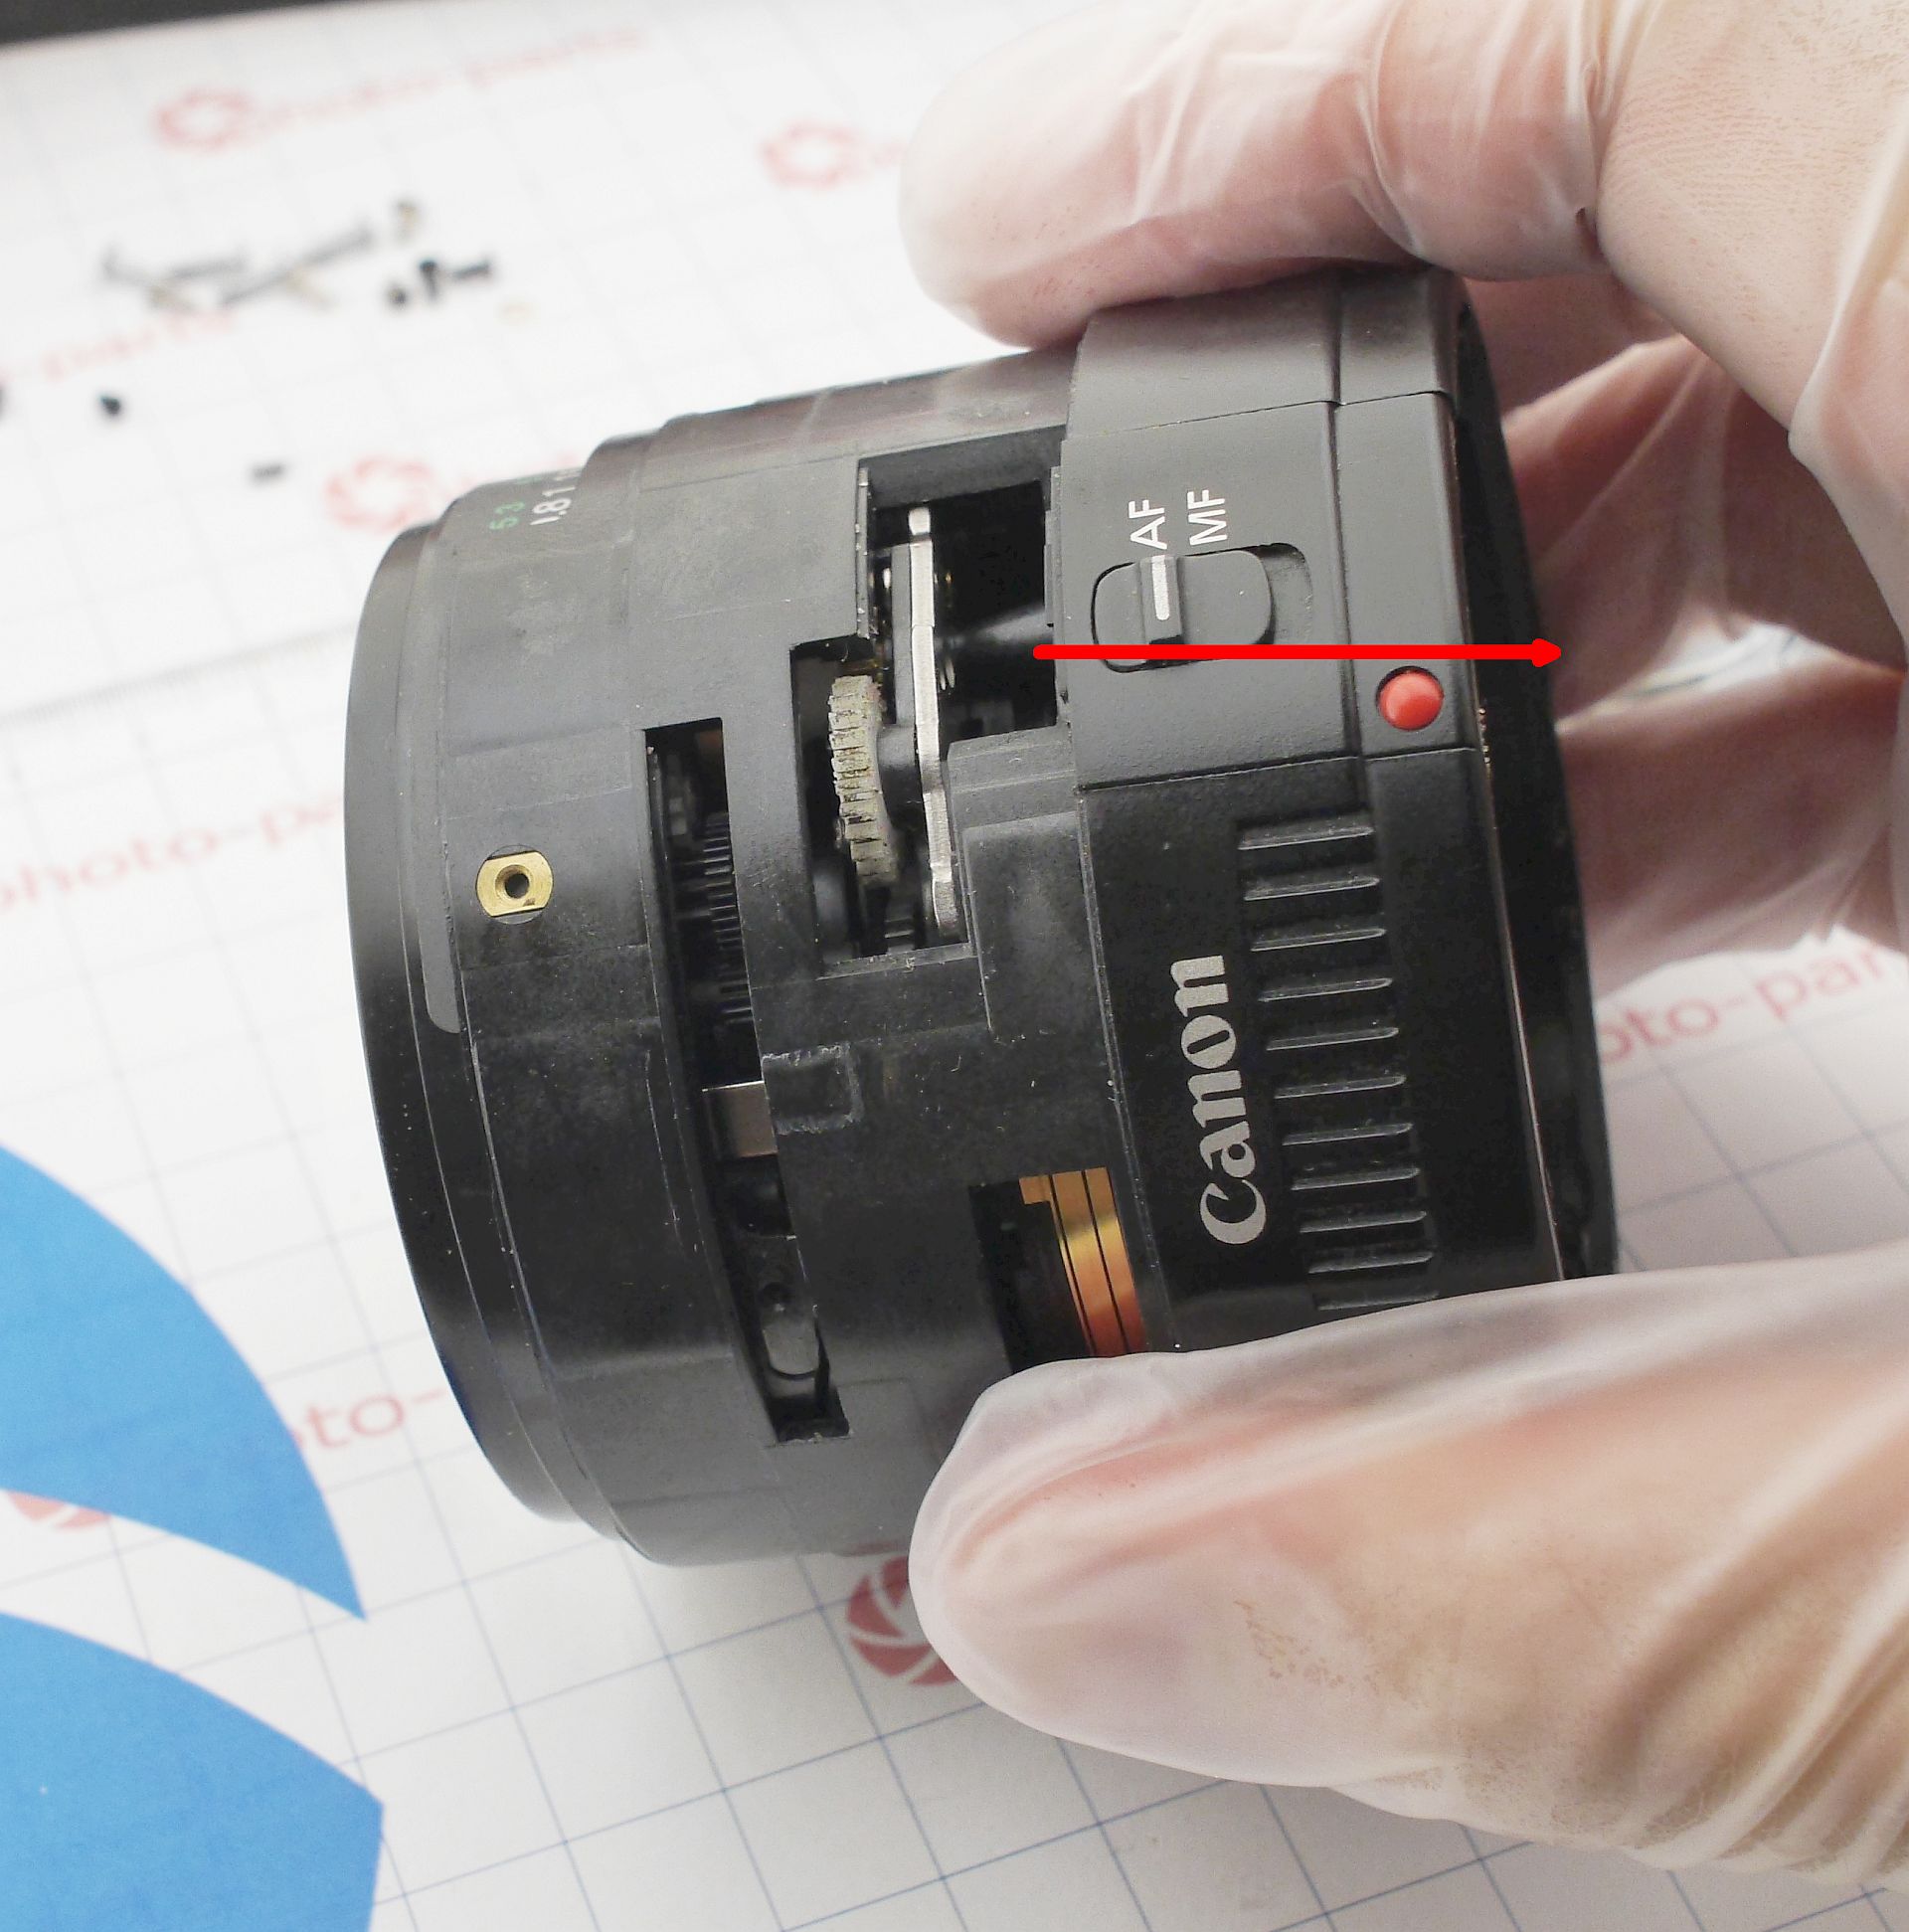
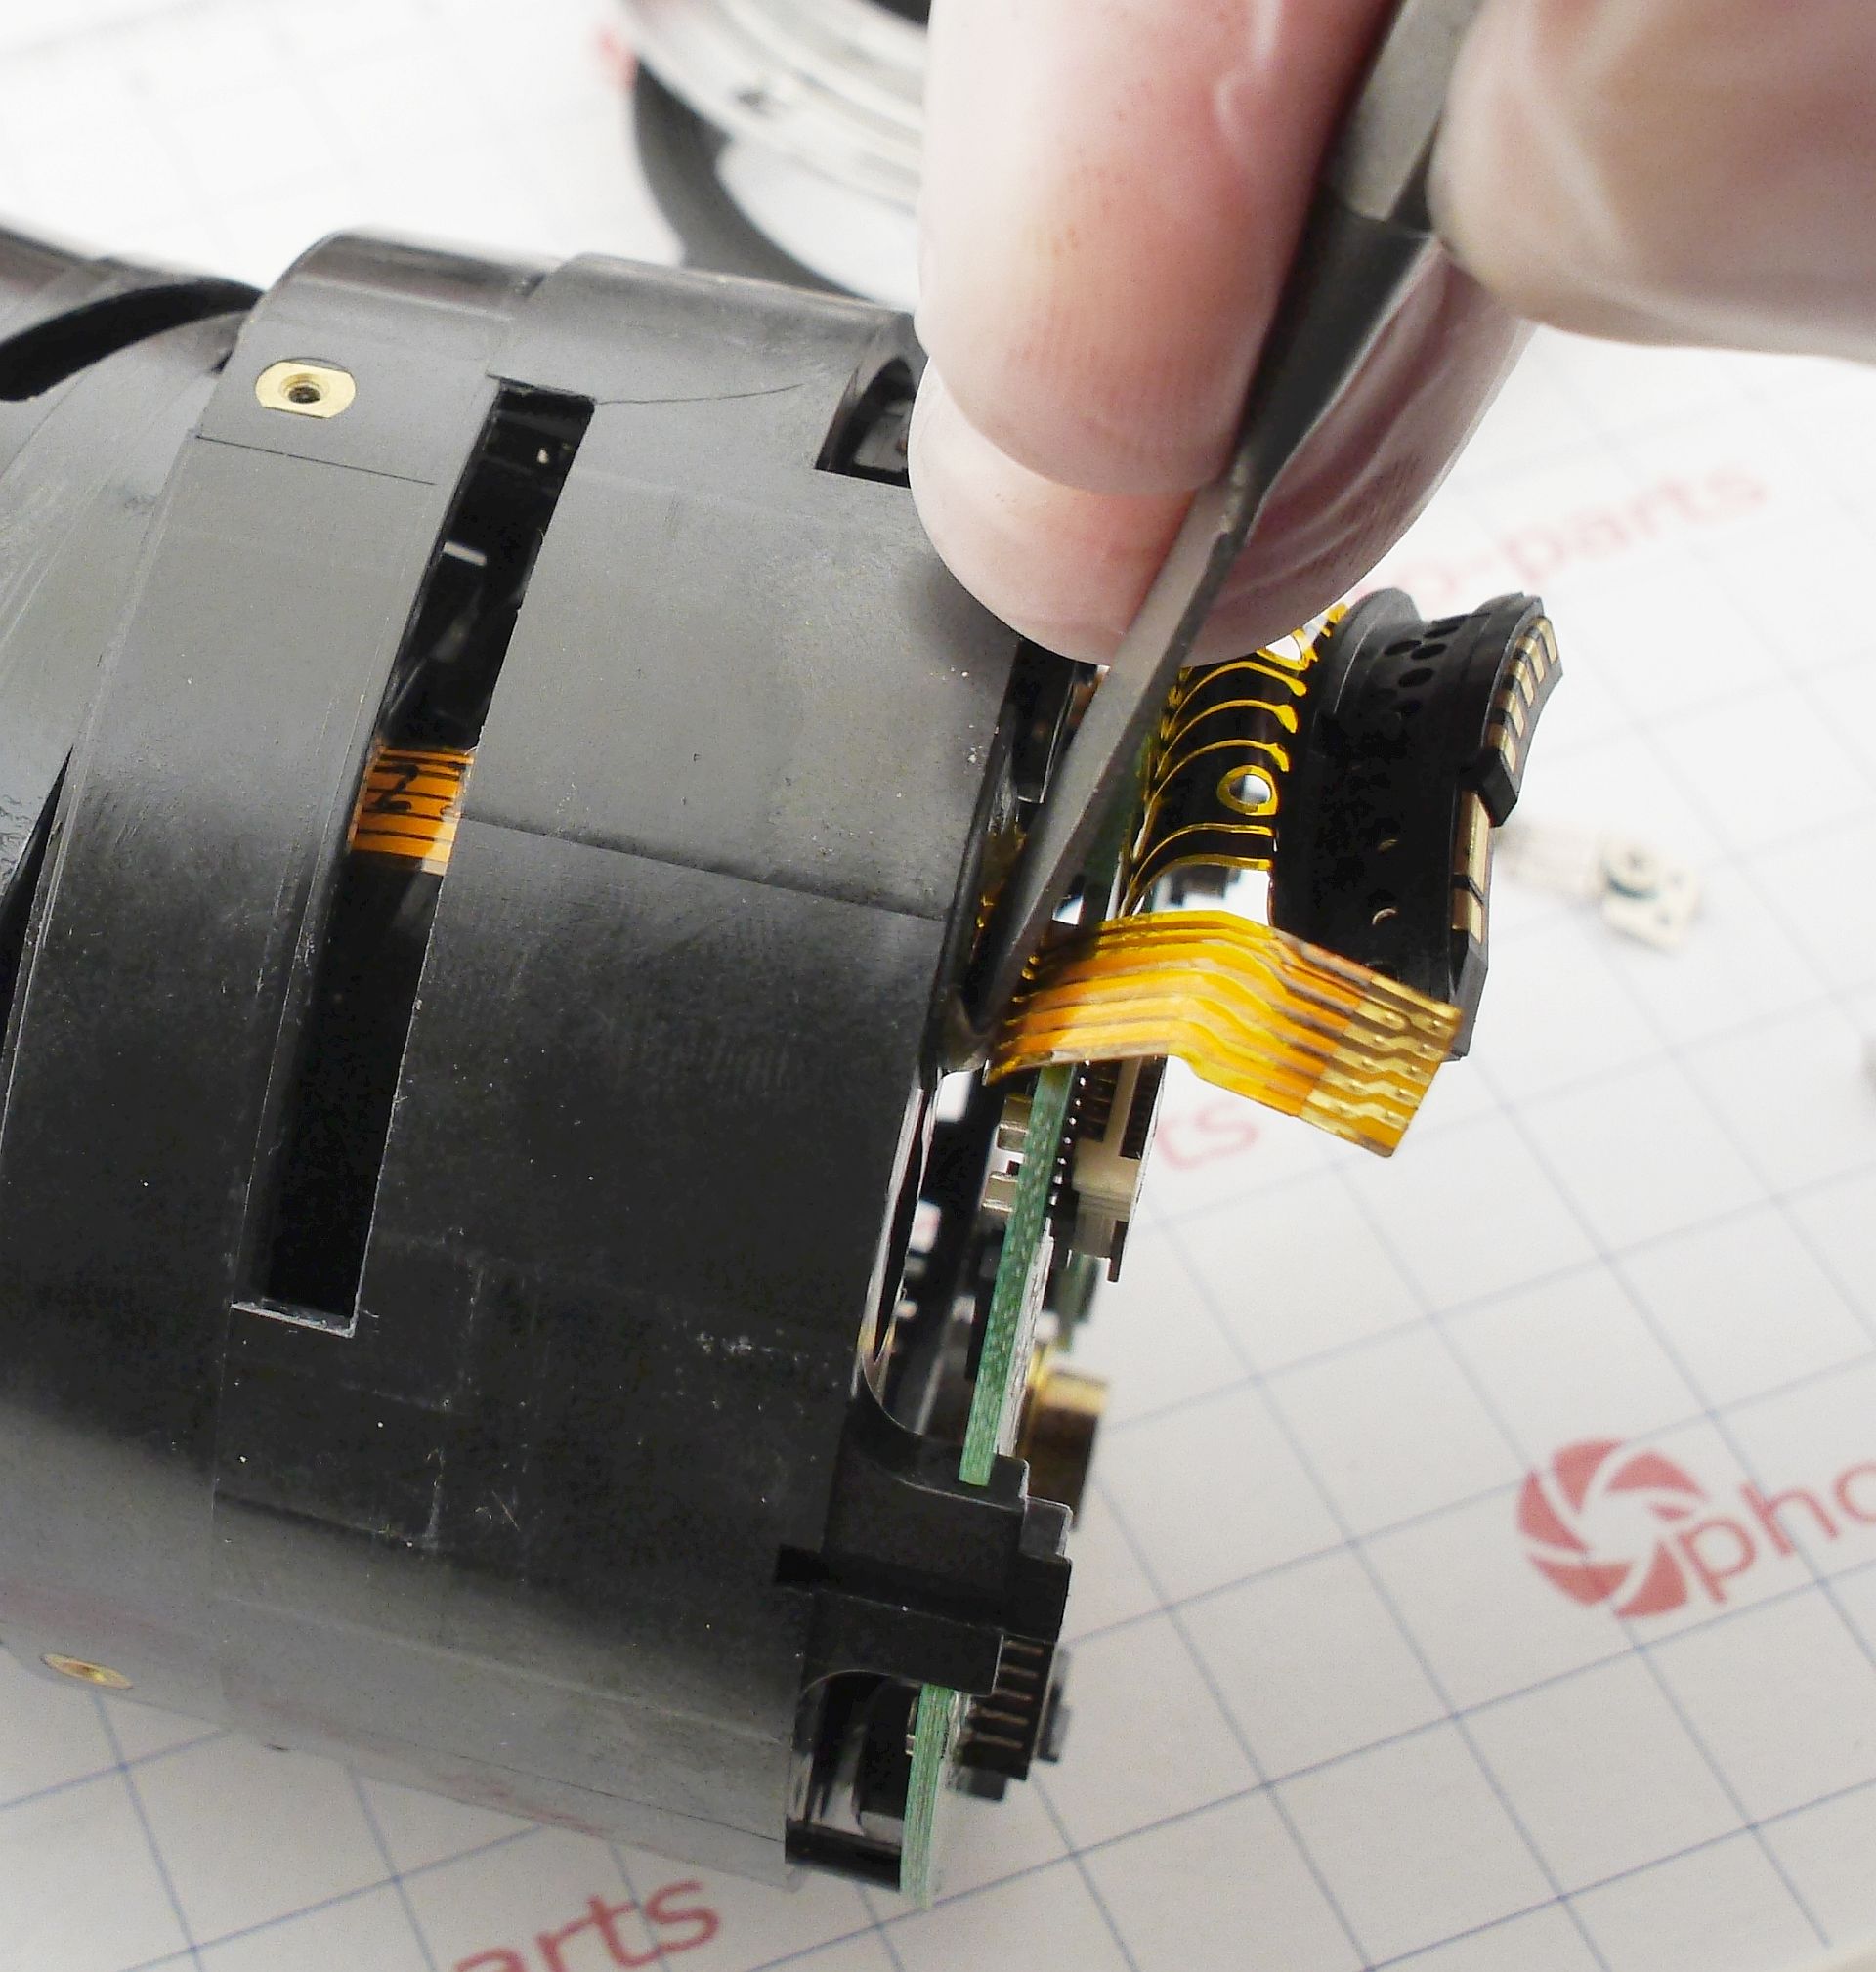
The ring with the AF/MF switch slides off toward the rear, and the aperture flex cable is disconnected at the board.
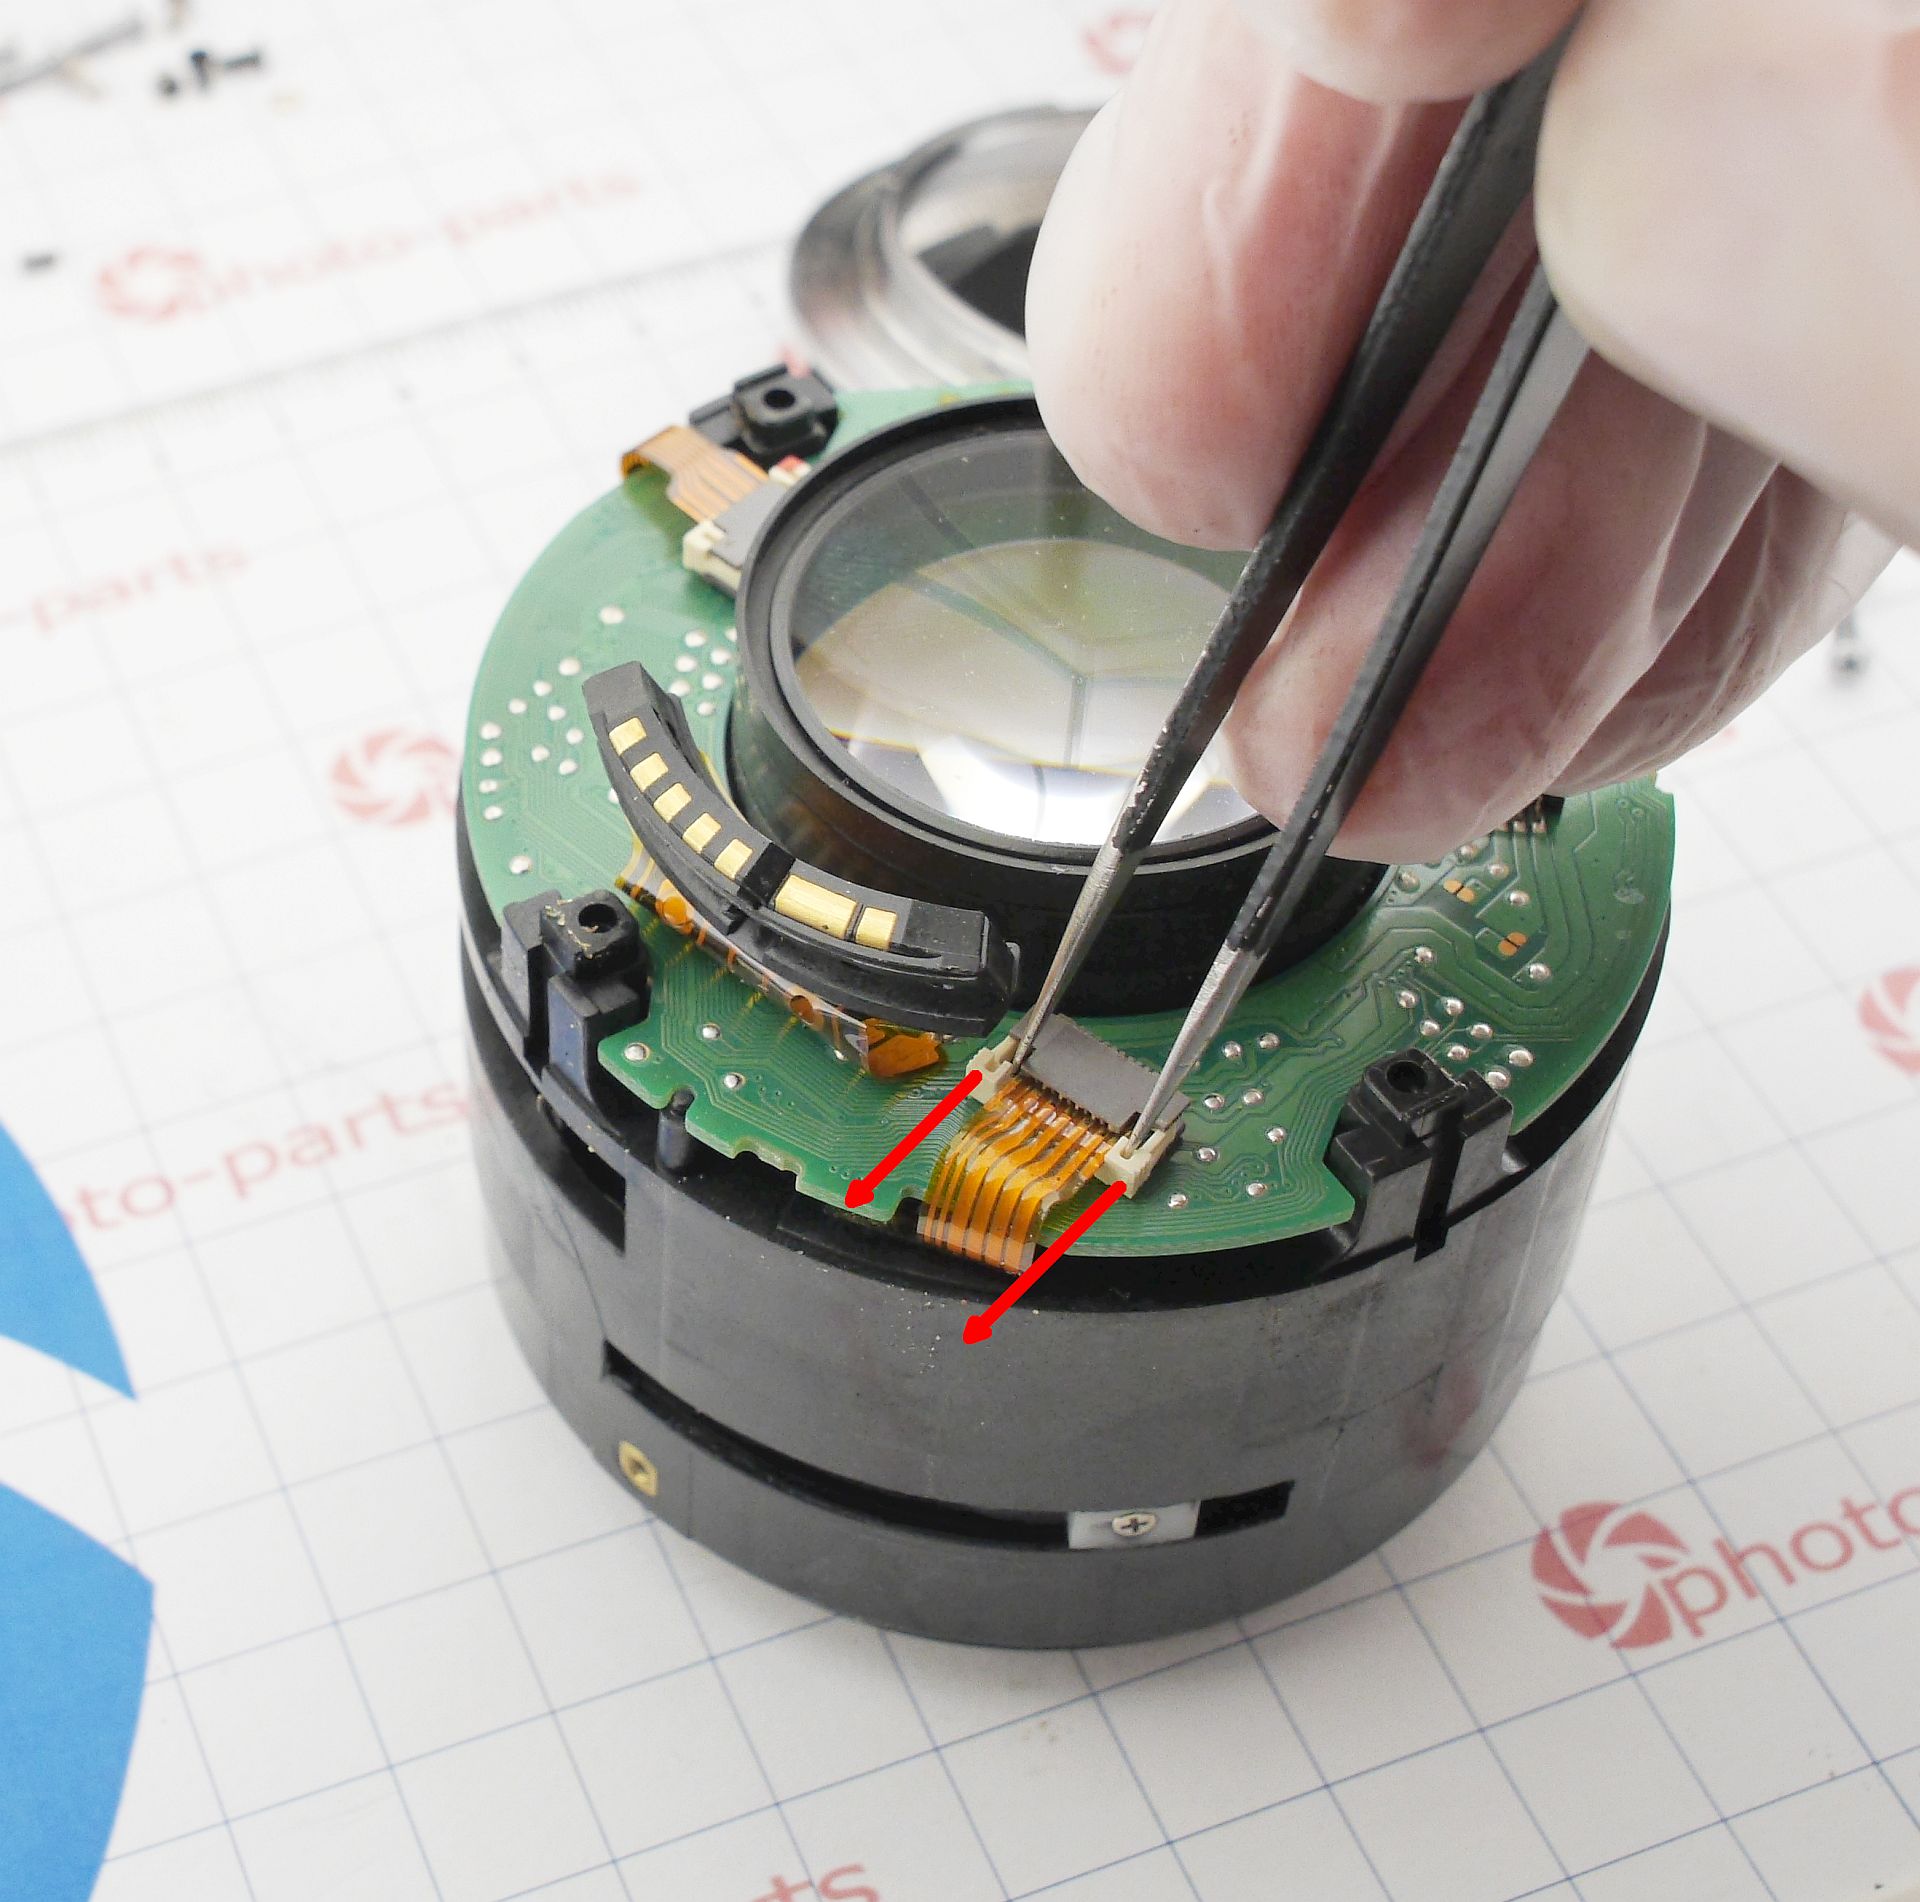
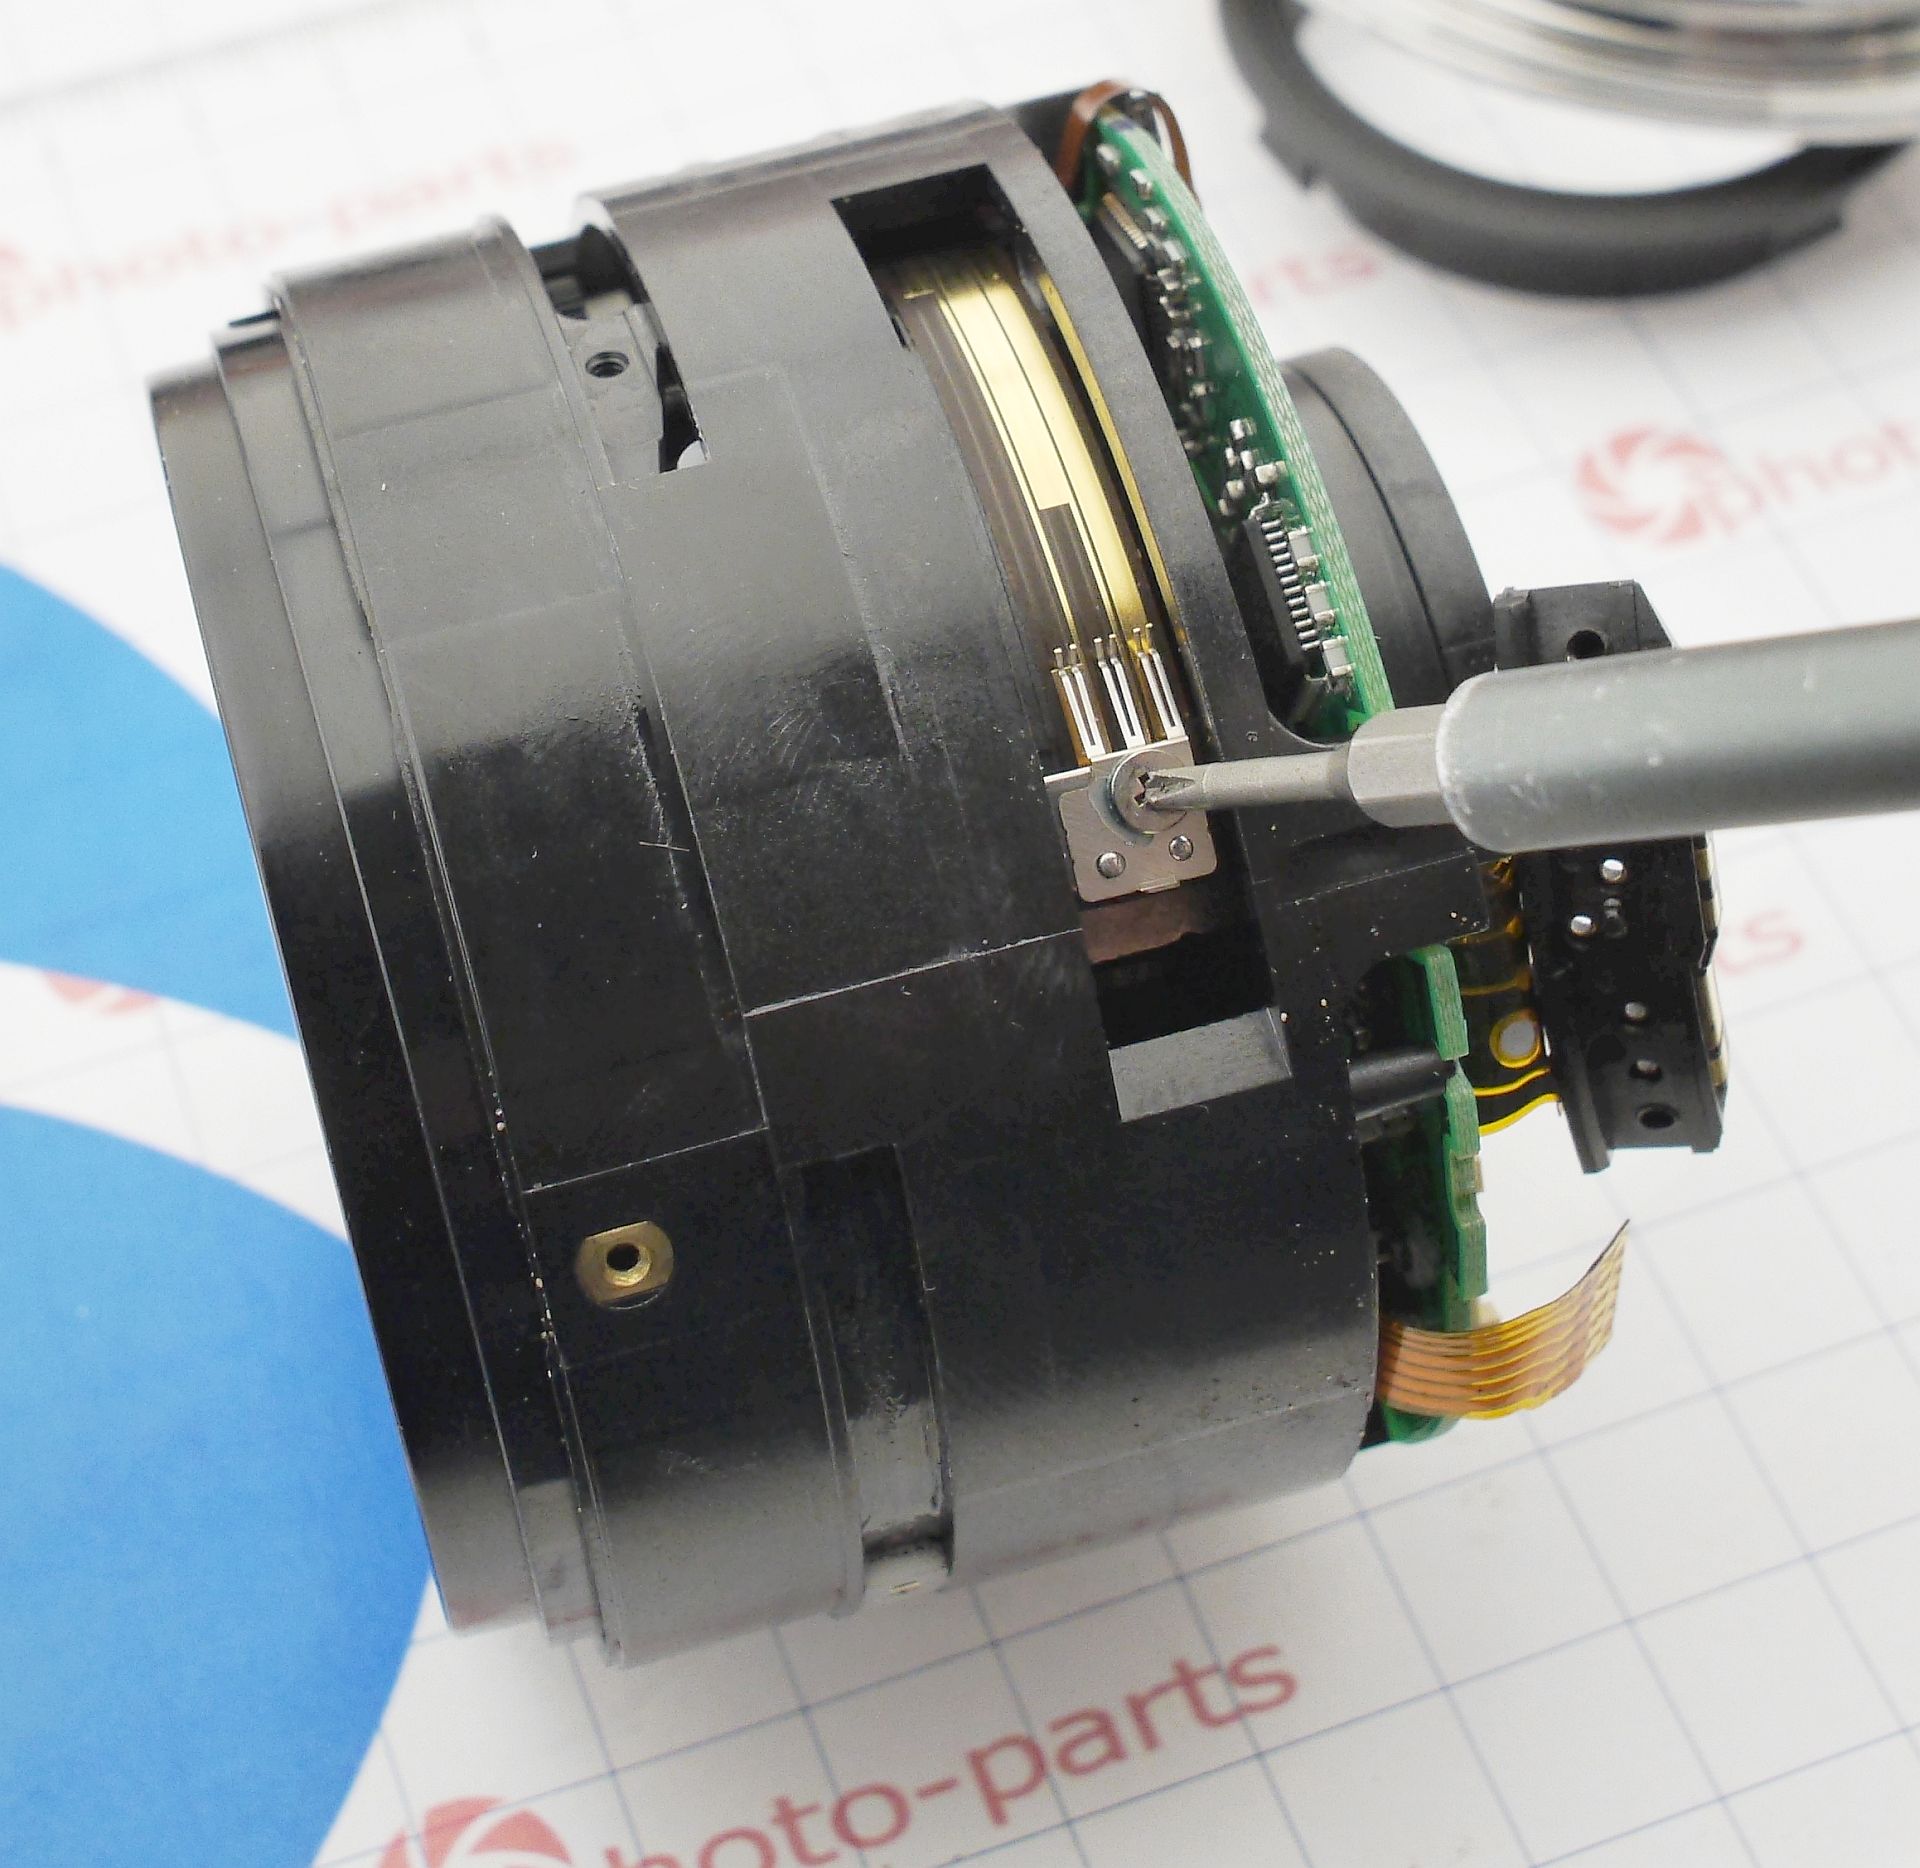
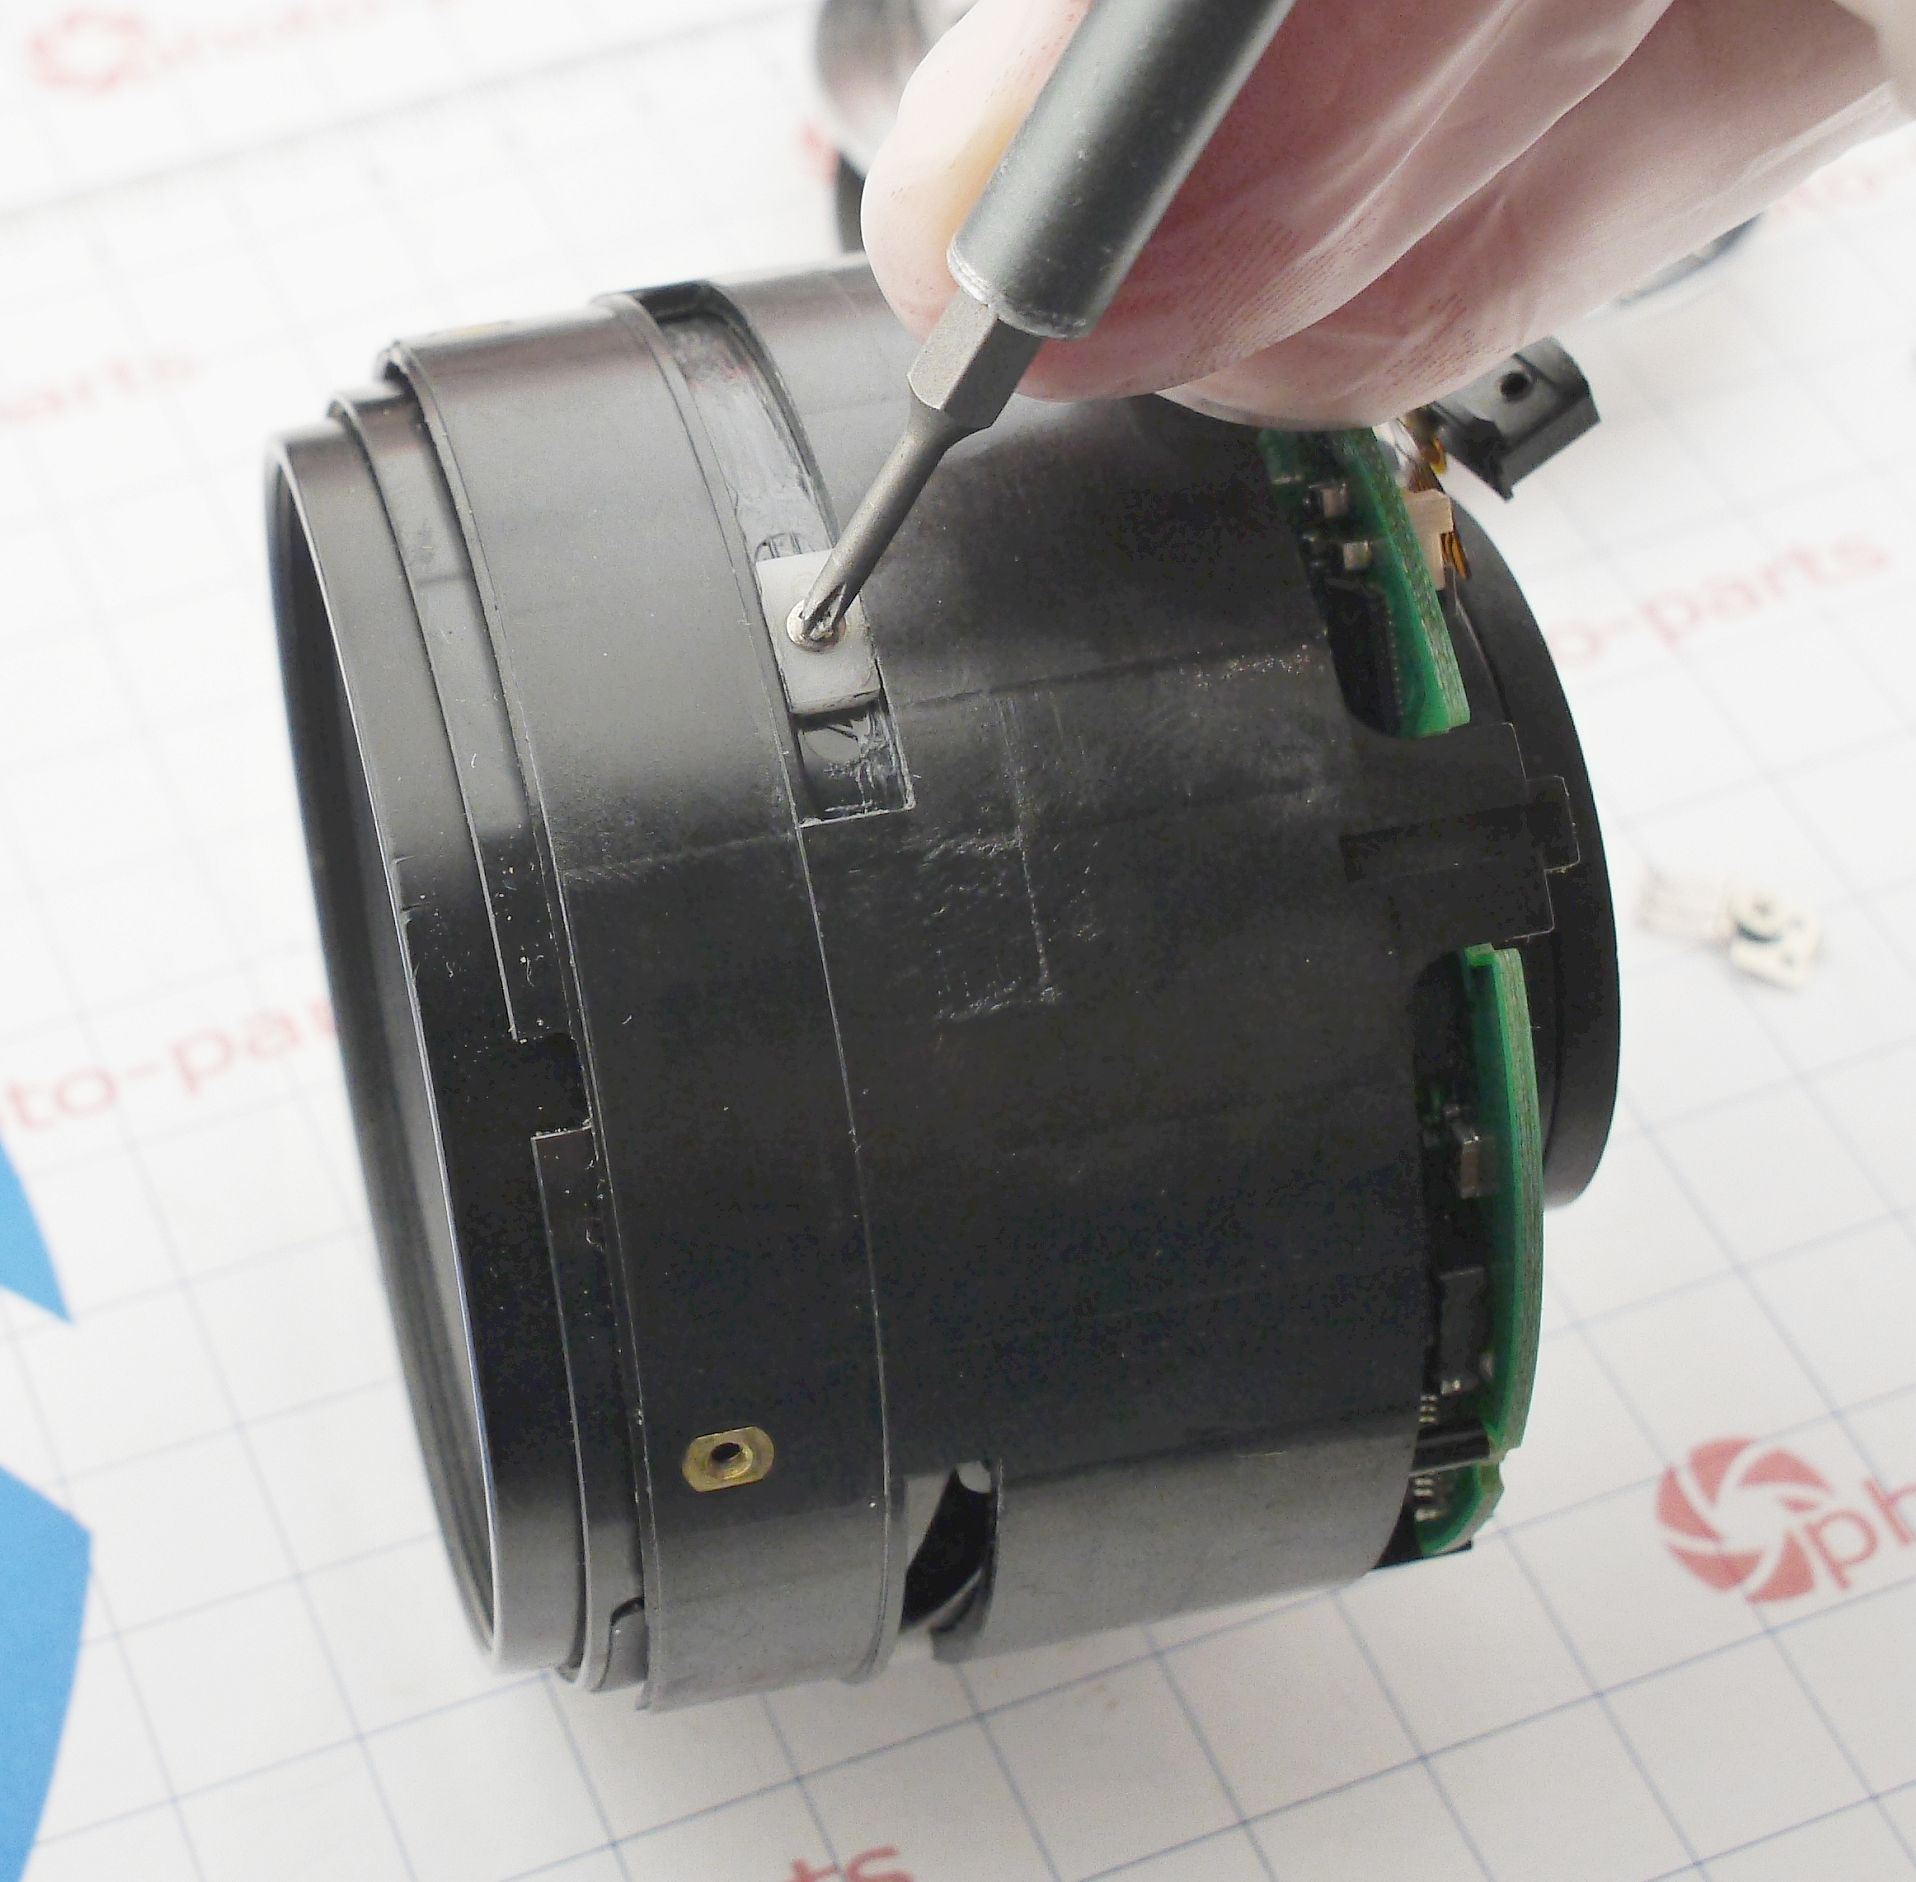
Now remove the encoder brushes for focus distance, unscrew the three outer helicoid collars, and peel the aperture flex from the body at the marked point.
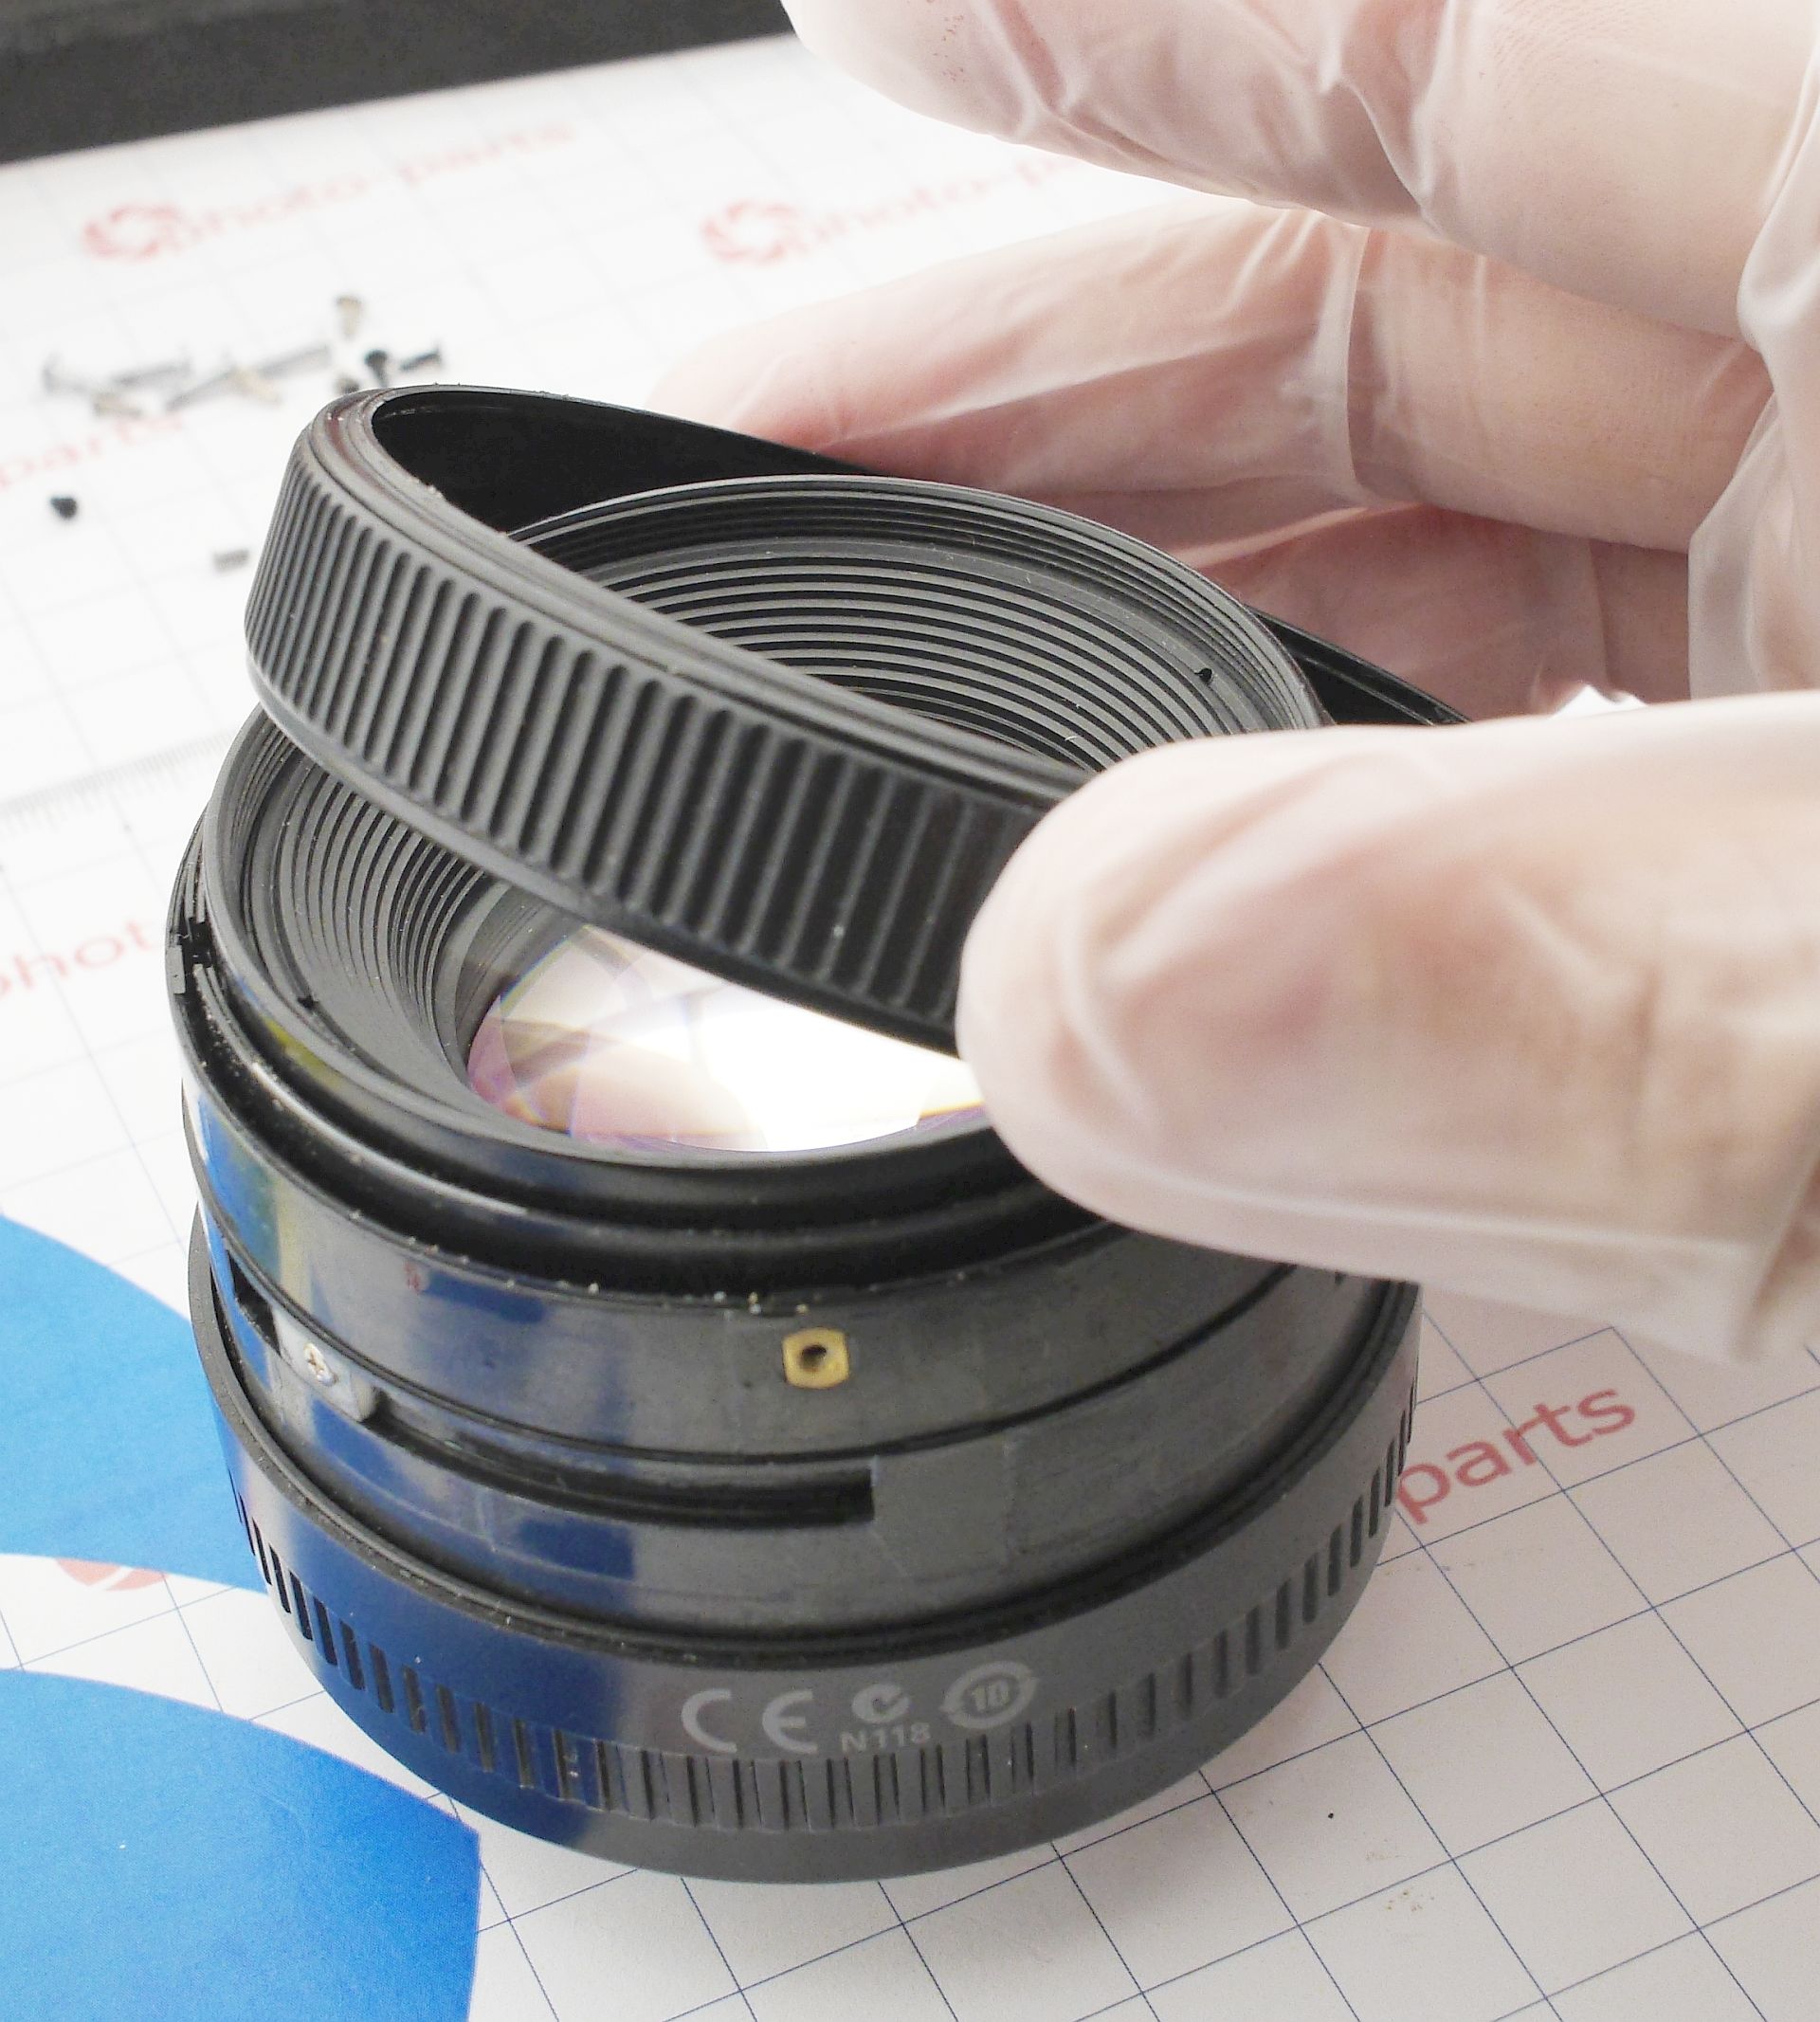
All optics and the helicoid come out from the front — and at this point you can see just how rough a life this poor lens has had...
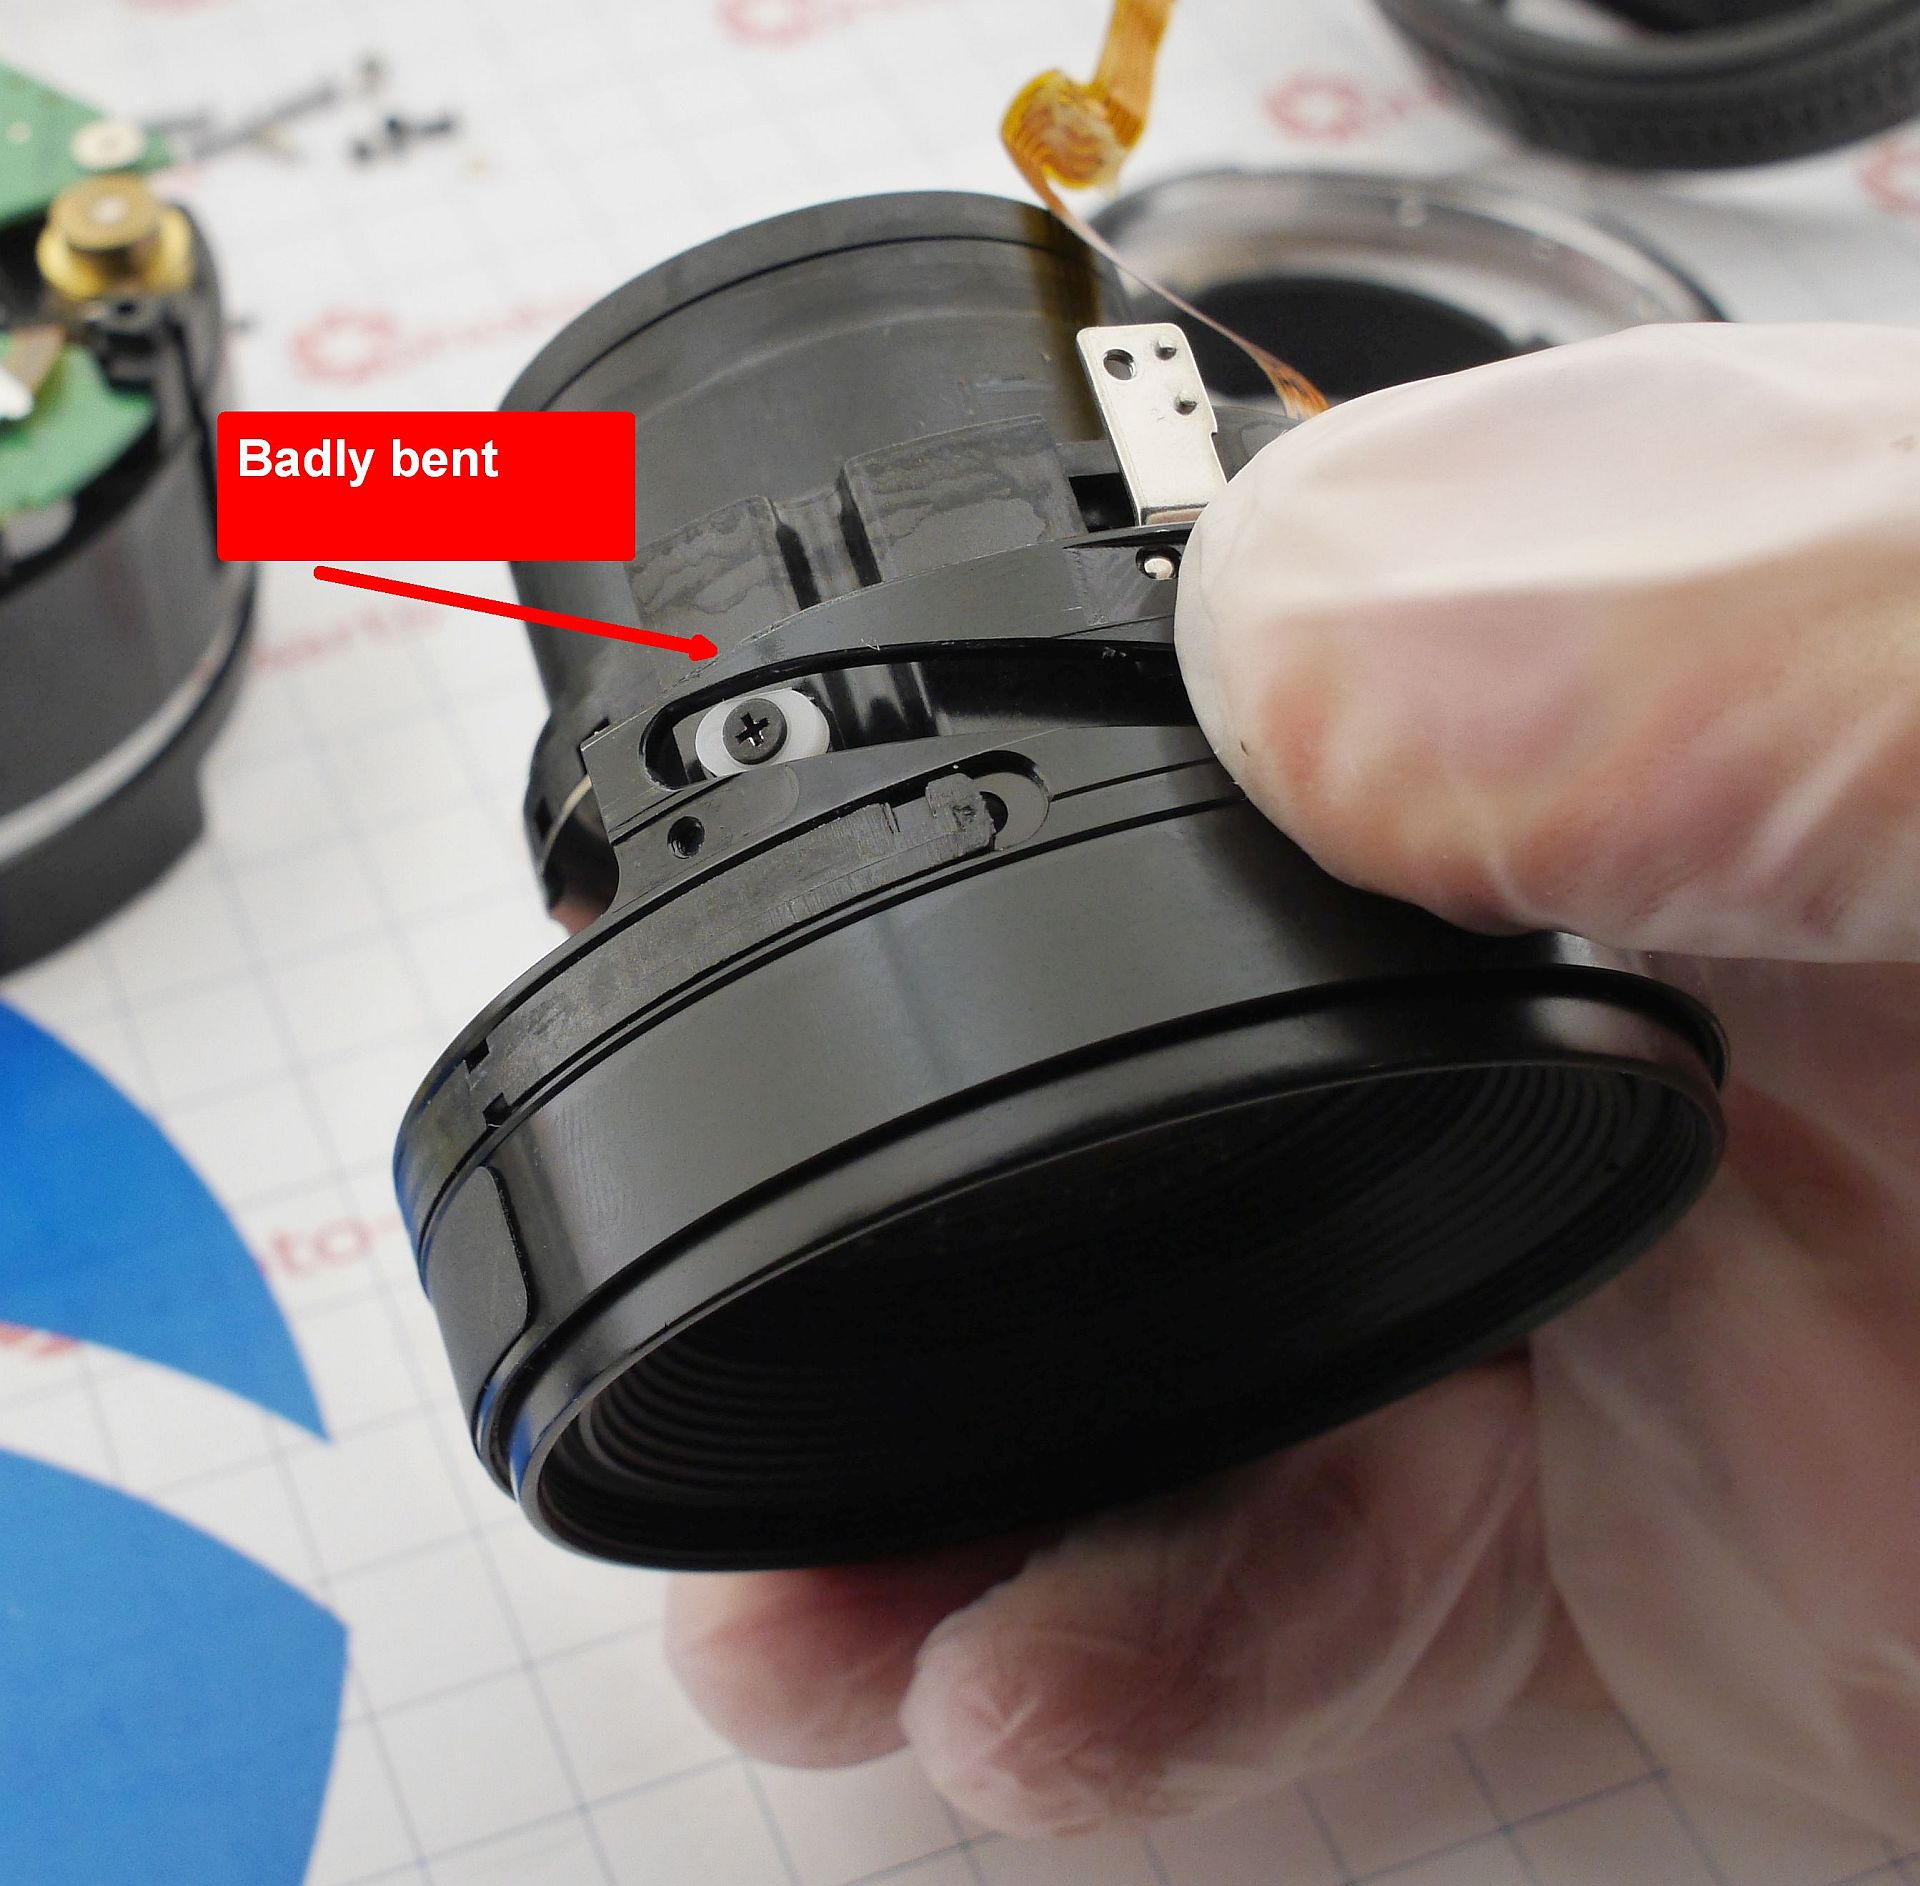
The helicoid is bent. And not just on one side — both sides are deformed so badly that the lens collars are flopping around inside the tracks.
Later versions (the early ones were probably made by the millions) had a metal brace added to the helicoid track. A great fix — just came too late.
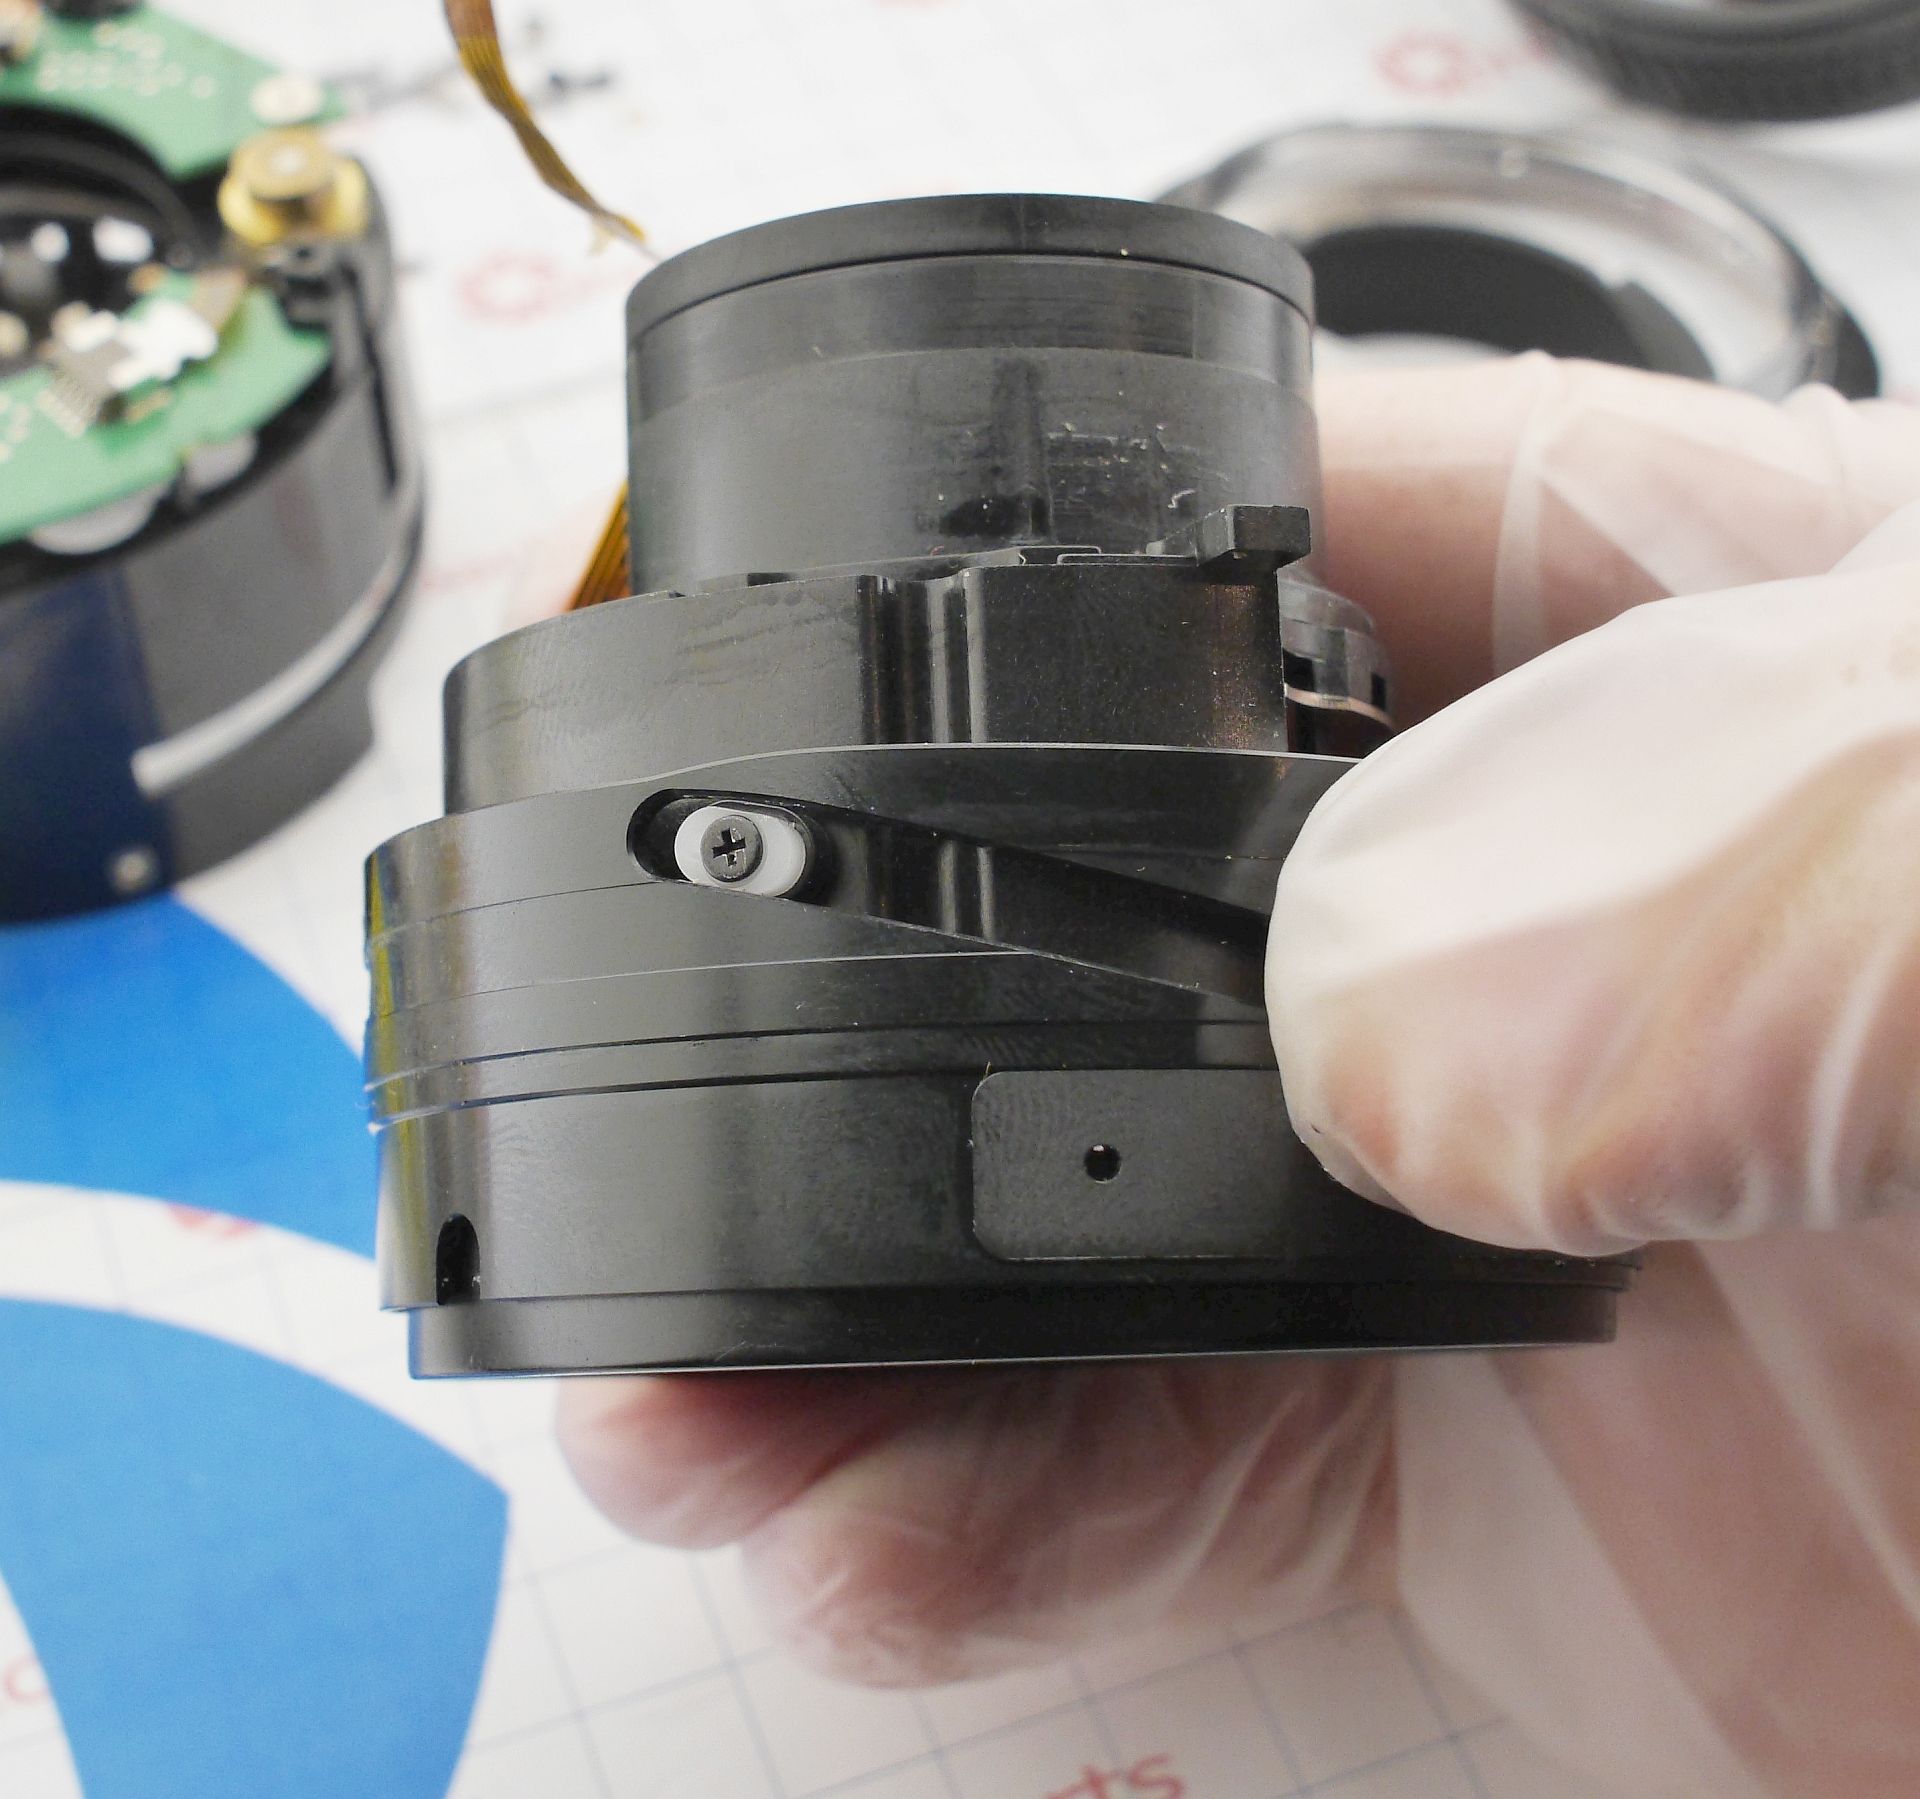
The fix here is careful bench work with a vise.
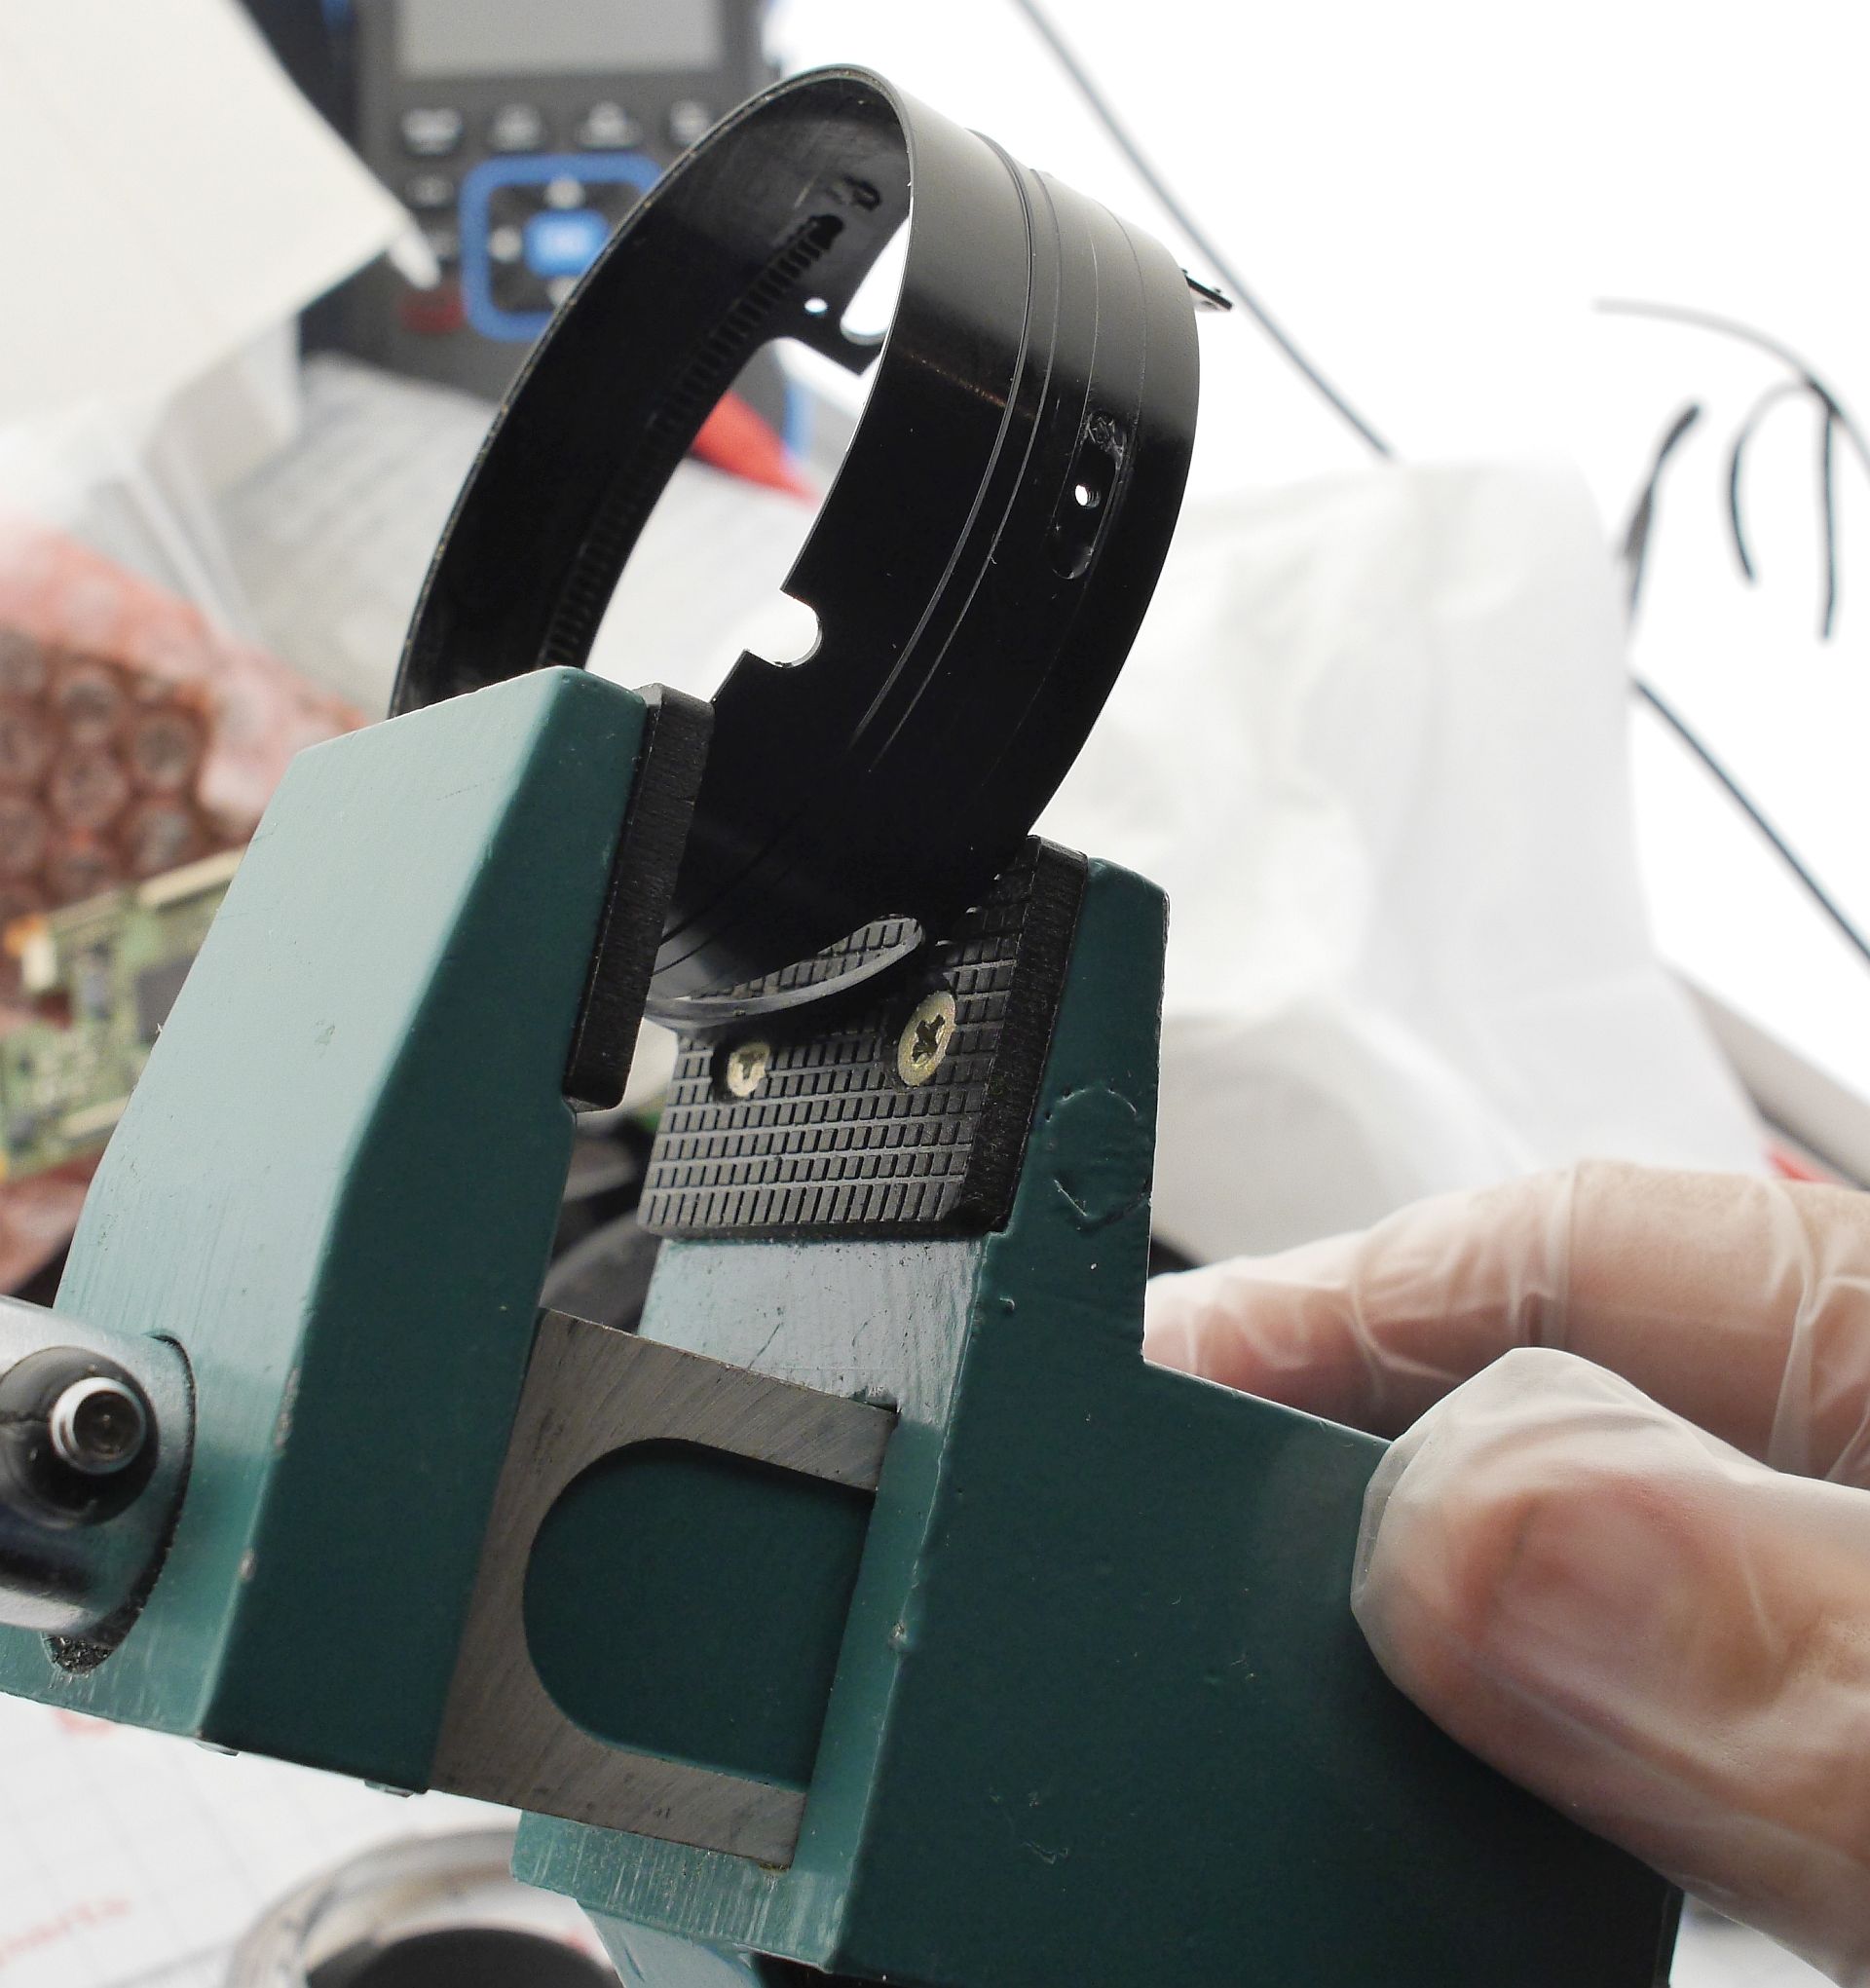
Remove the helicoid and place it in a vise to re-flatten the track. To avoid crushing it entirely, position the lens collar slightly past the damaged area keeping it inside the track.

Success criteria: the collar should move freely and with zero play through the track.
Often (as was the case here), you’ll need to do fine tuning on the collar’s shape to eliminate tight spots. Put helicoid into enclosure with gearbox removed:


Insert the helicoid alone (without the gear assembly) into the lens body to test rotation. If there’s friction, gently press the worst-bent areas inward.
Once it spins freely, reinstall the lens block and check smoothness with the full set of collars. Sometimes you’ll need to adjust again to remove an “egg-shaped” distortion.
When (or if) you get smooth motion, it's time to address issue #2 — the rattling when rotating the focus ring.
The culprit here - especially annoying for videographers - lies in the design of the planetary gear.
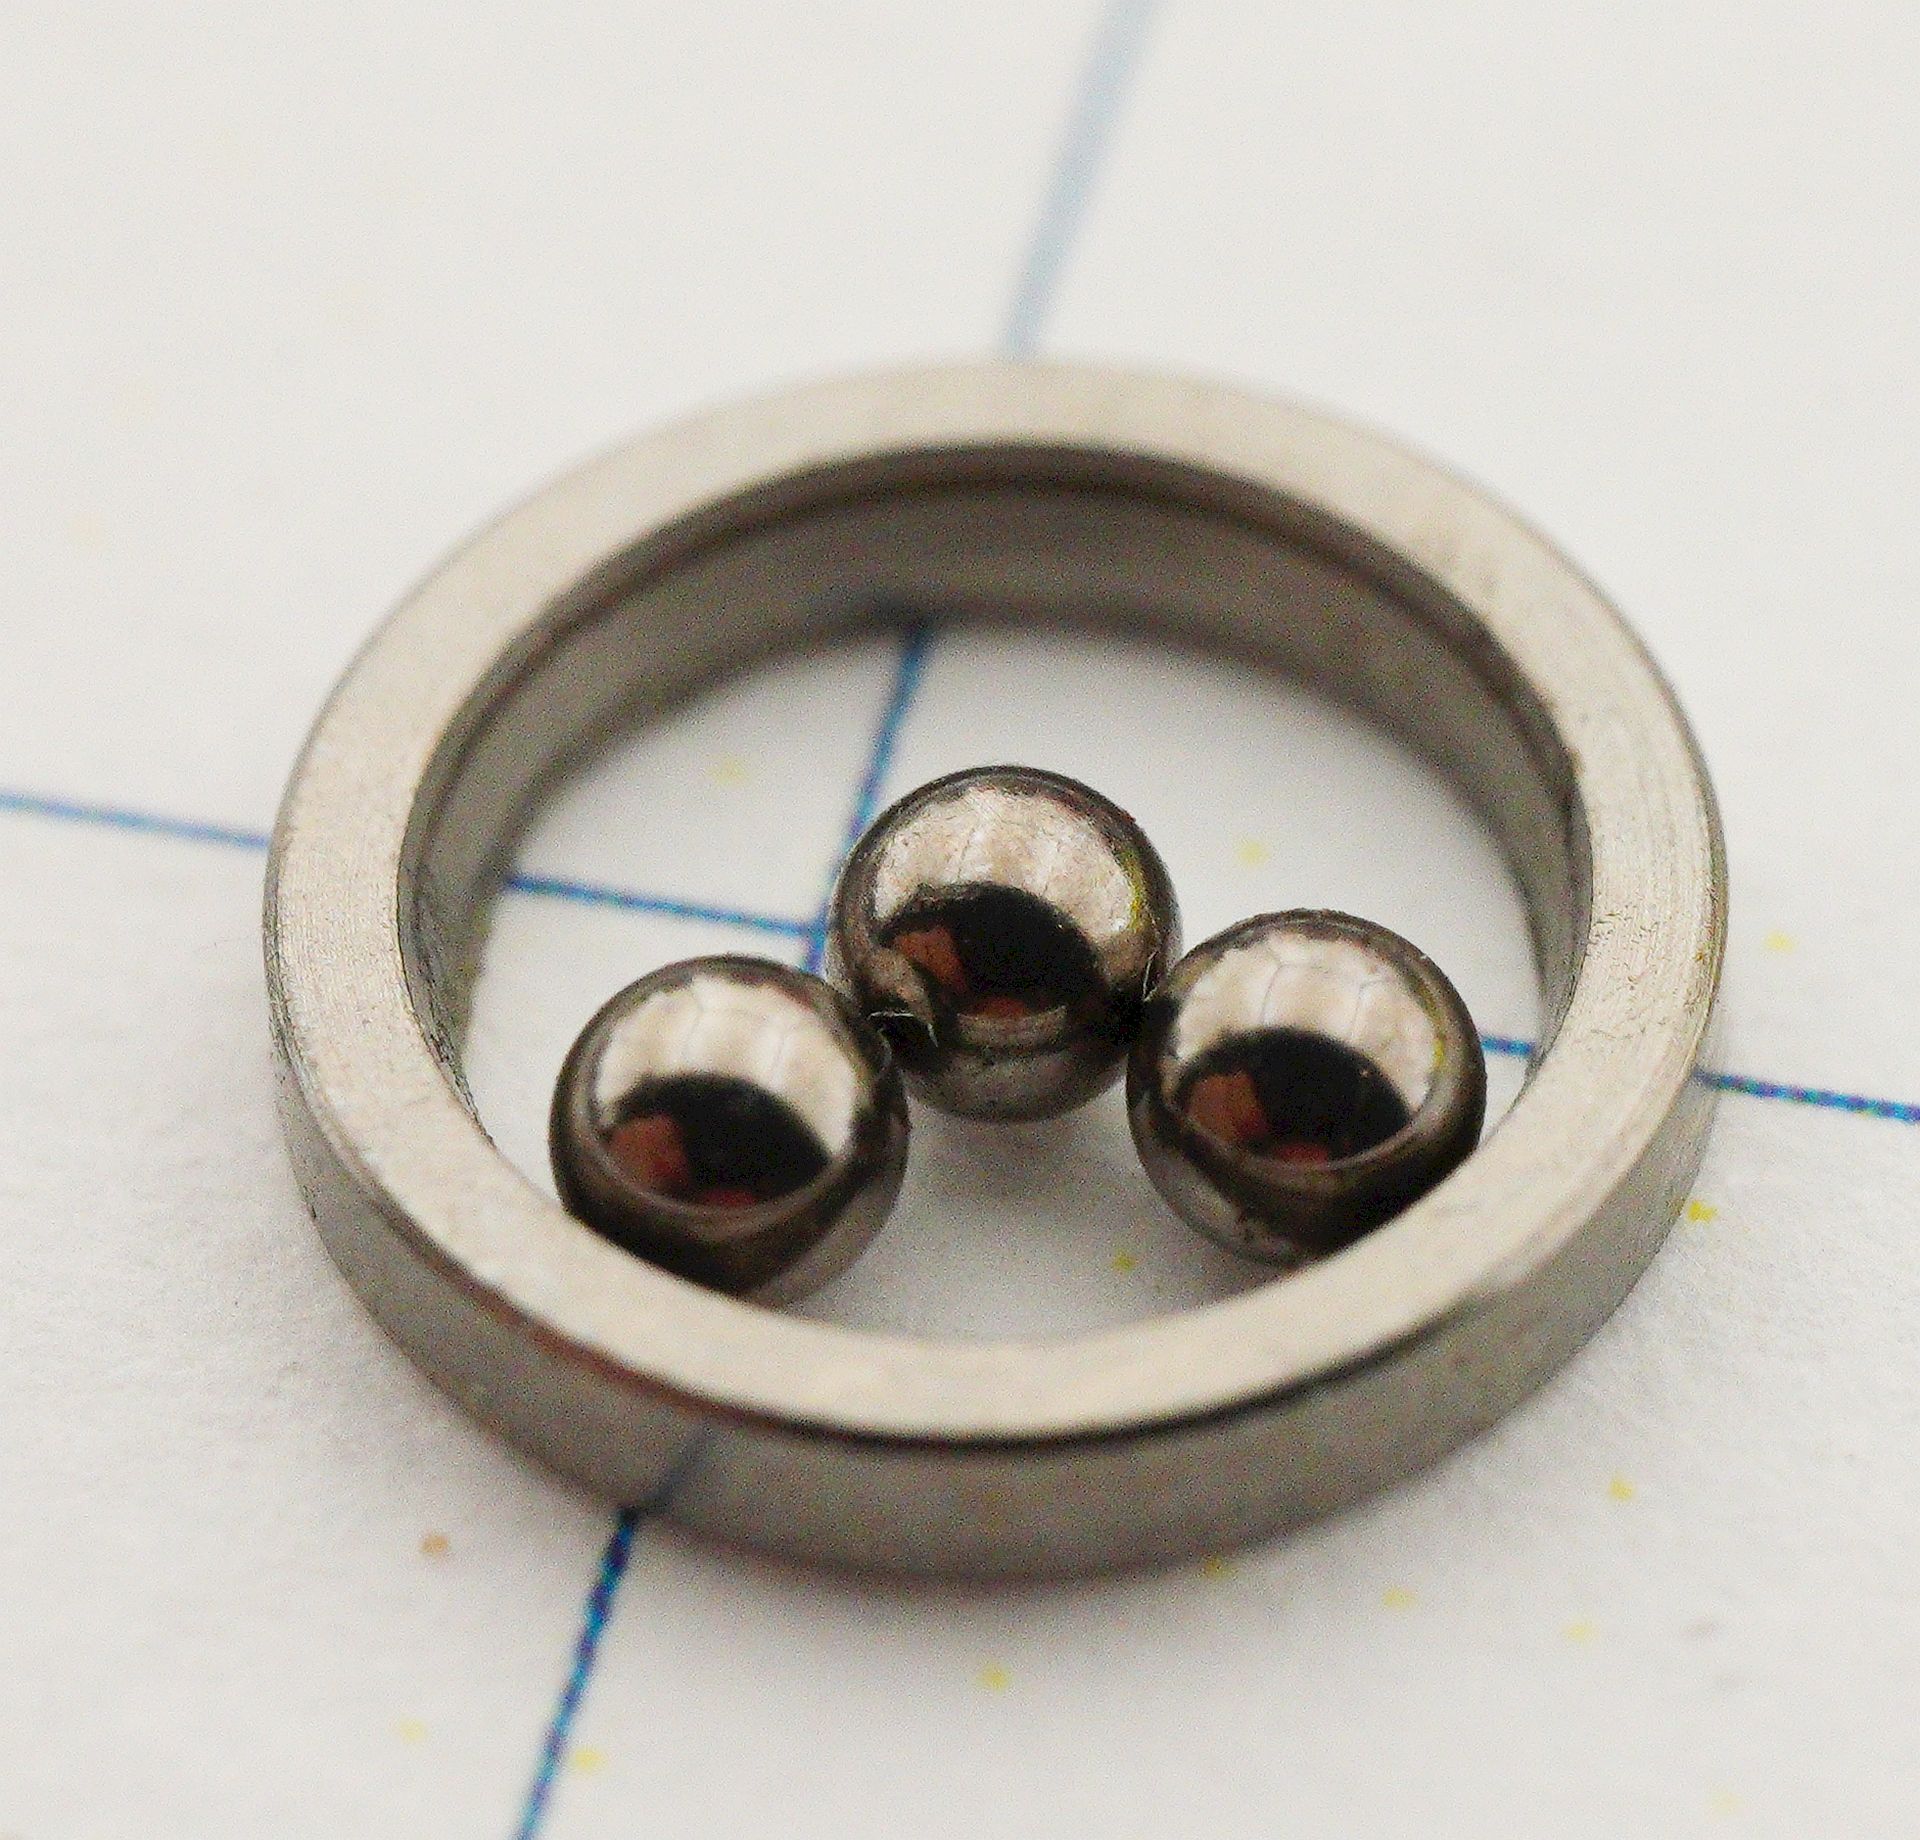
A traditional planetary gear has a carrier with satellites, a sun and a ring gears, all meshing continuously. Canon, however — for the sake of compactness, cost-cutting, or some wicked gods — replaced the gears with ball bearings.
In this design, any axis can slip — eliminating the need for a clutch system, but sacrificing long-term reliability.
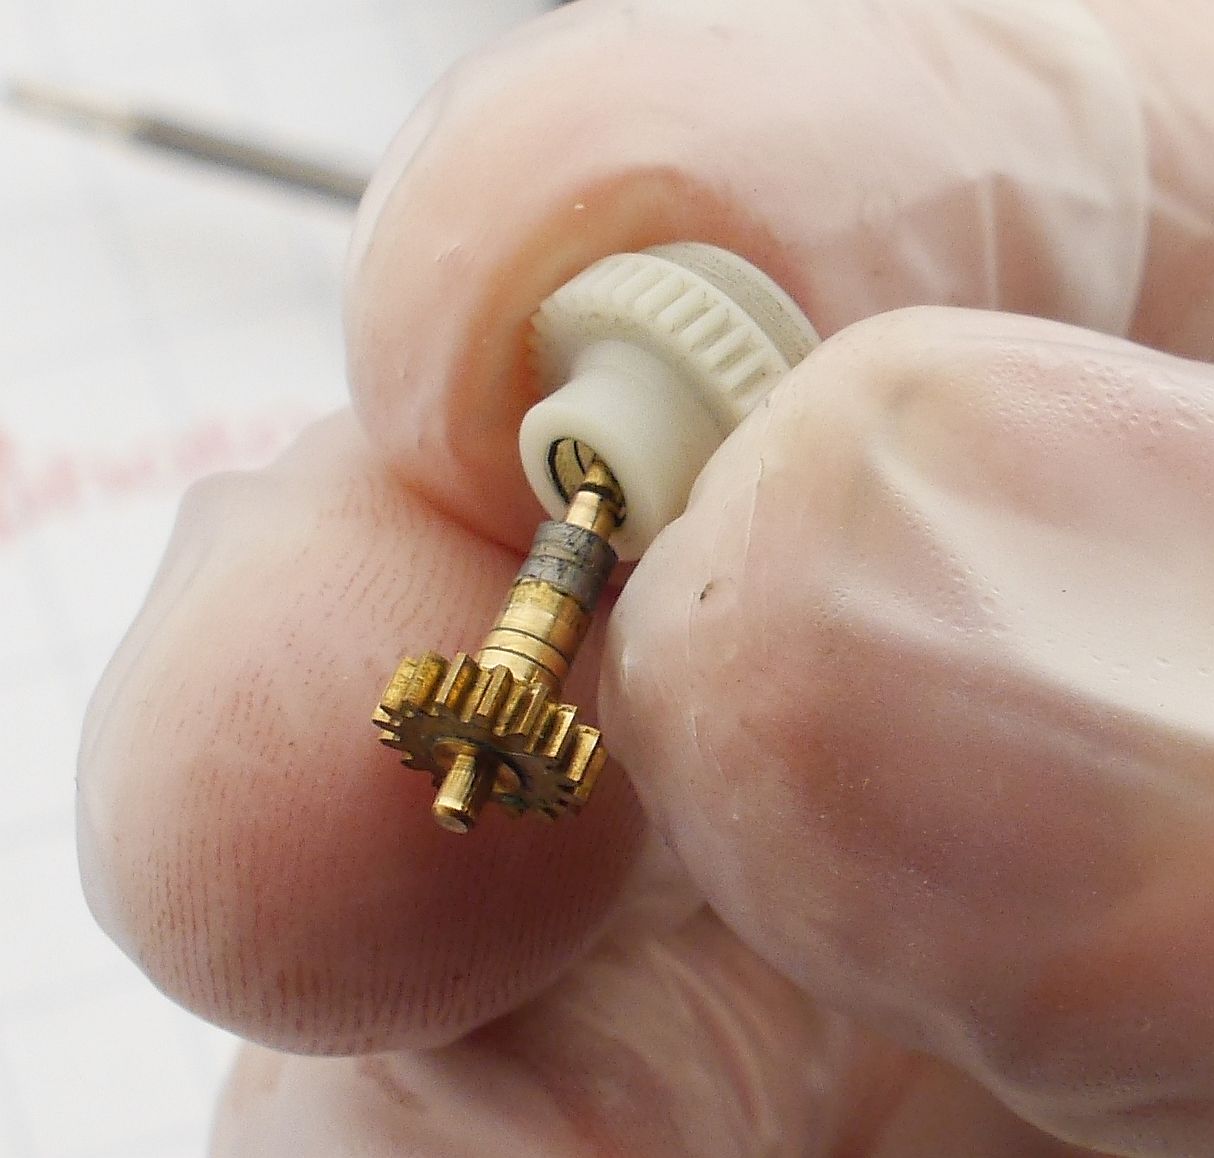
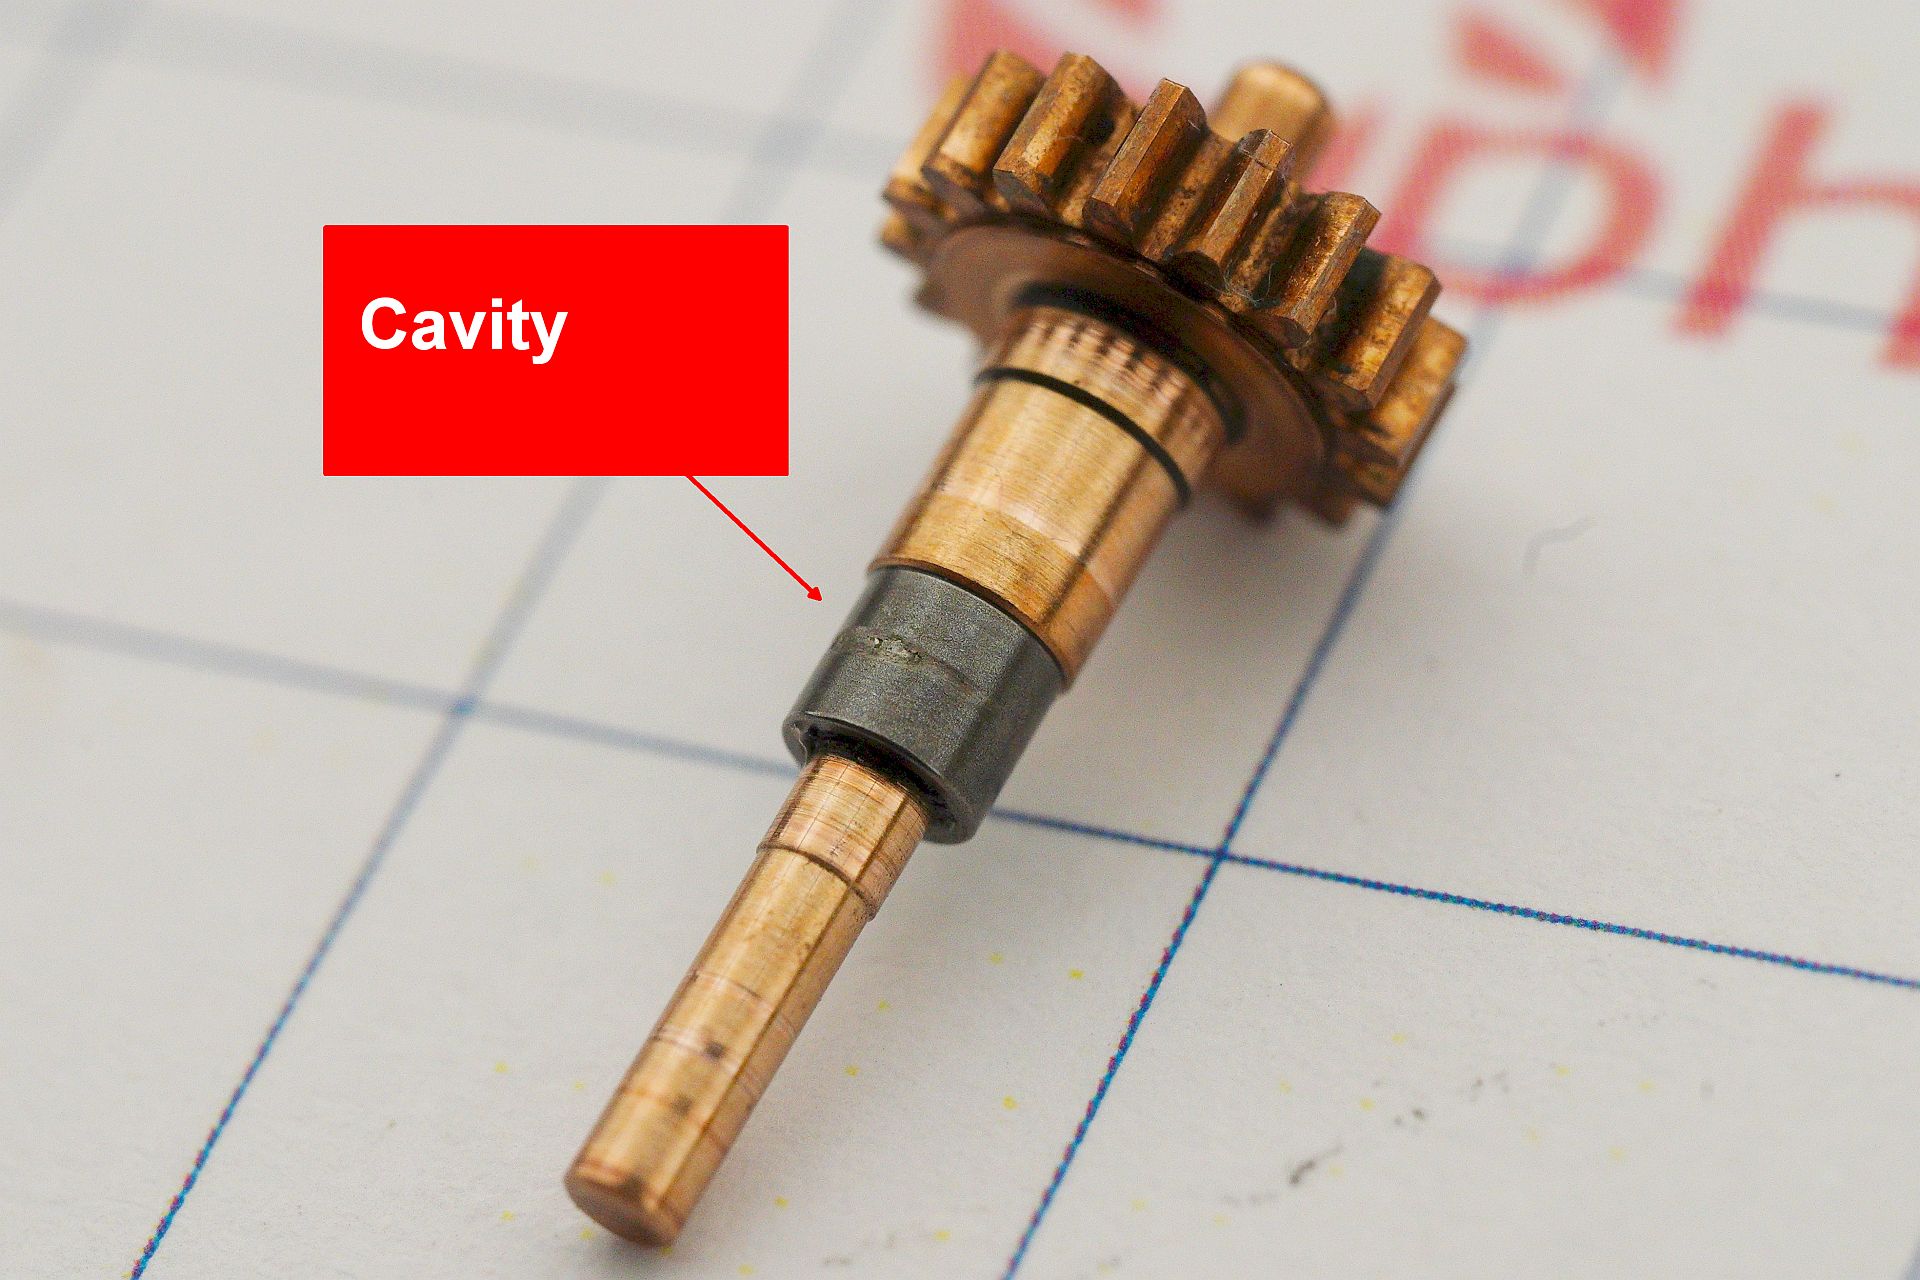
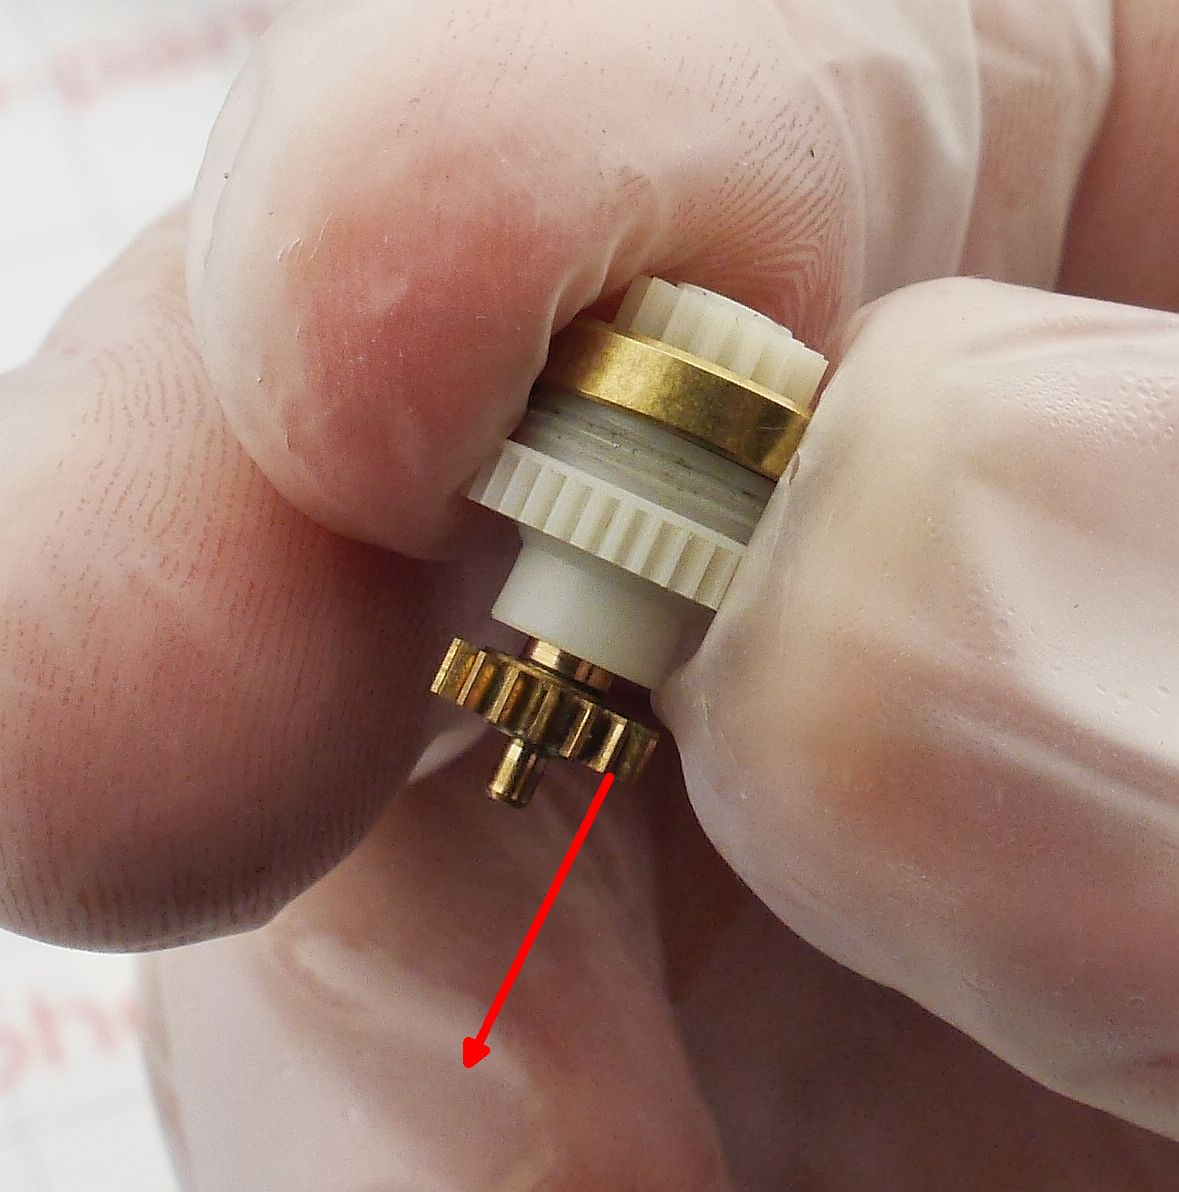
The balls eventually wear a groove in the sun gear shaft — that’s what causes the rattling:
This can be fixed — surprisingly — but first, we need to get to the gear unit.
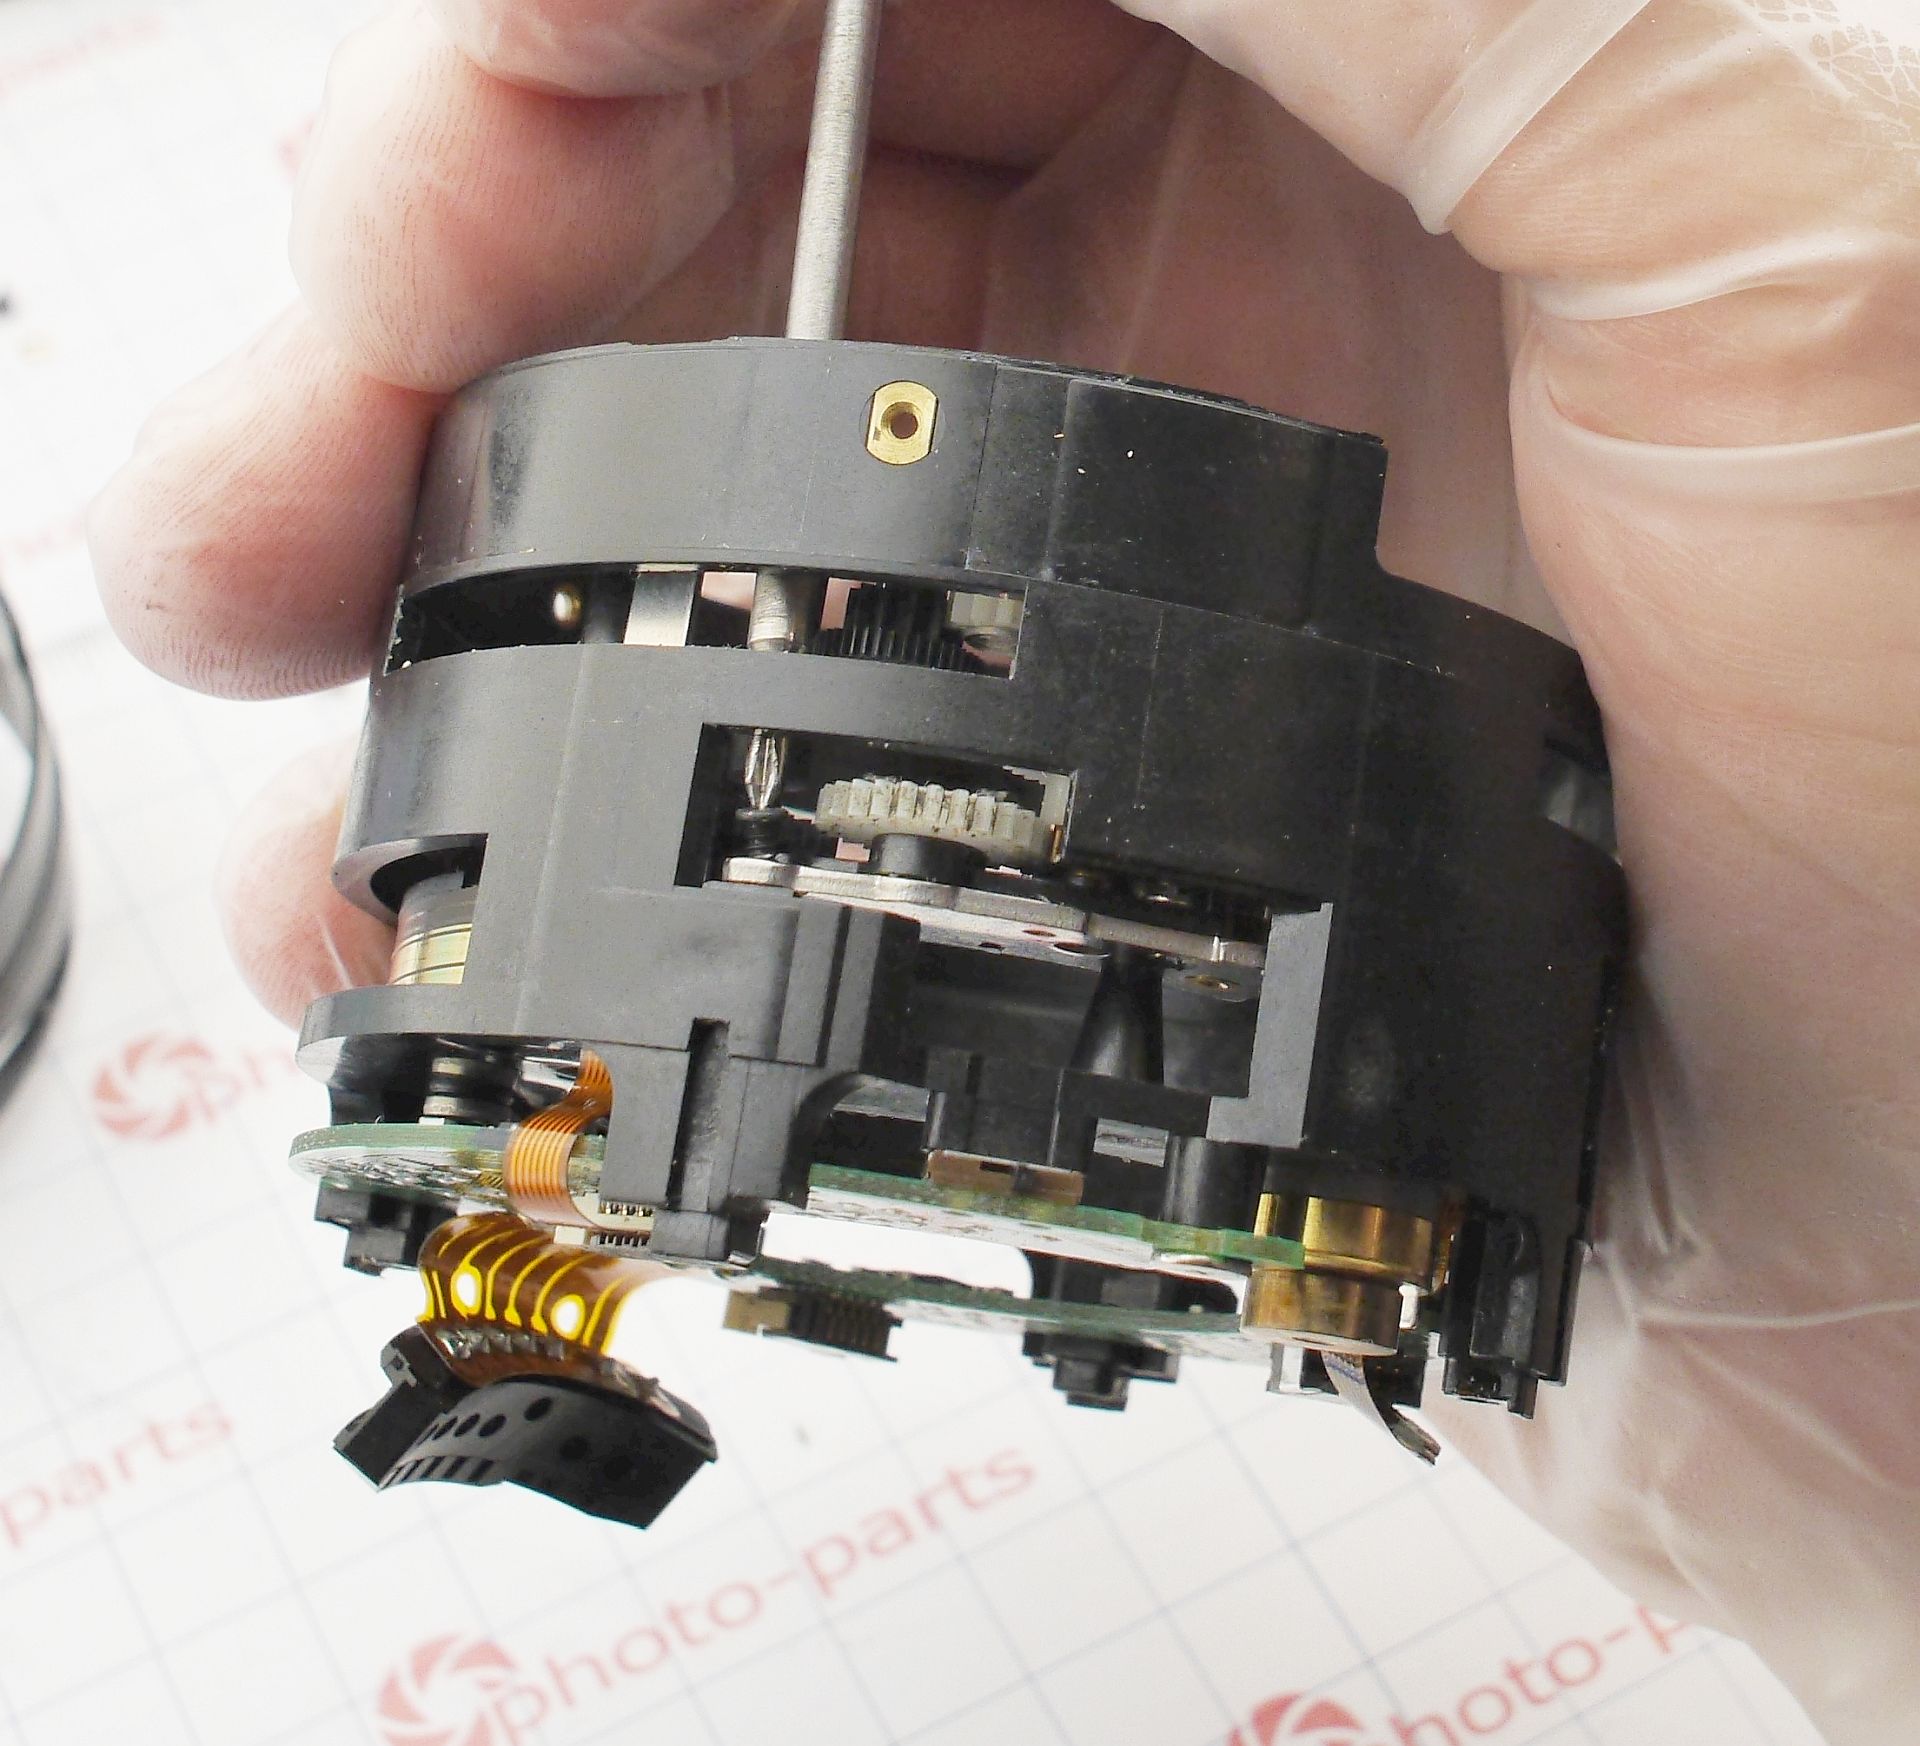
On the gearbox, unscrew all screws on the top face, split the housing, and remove the planetary assembly:

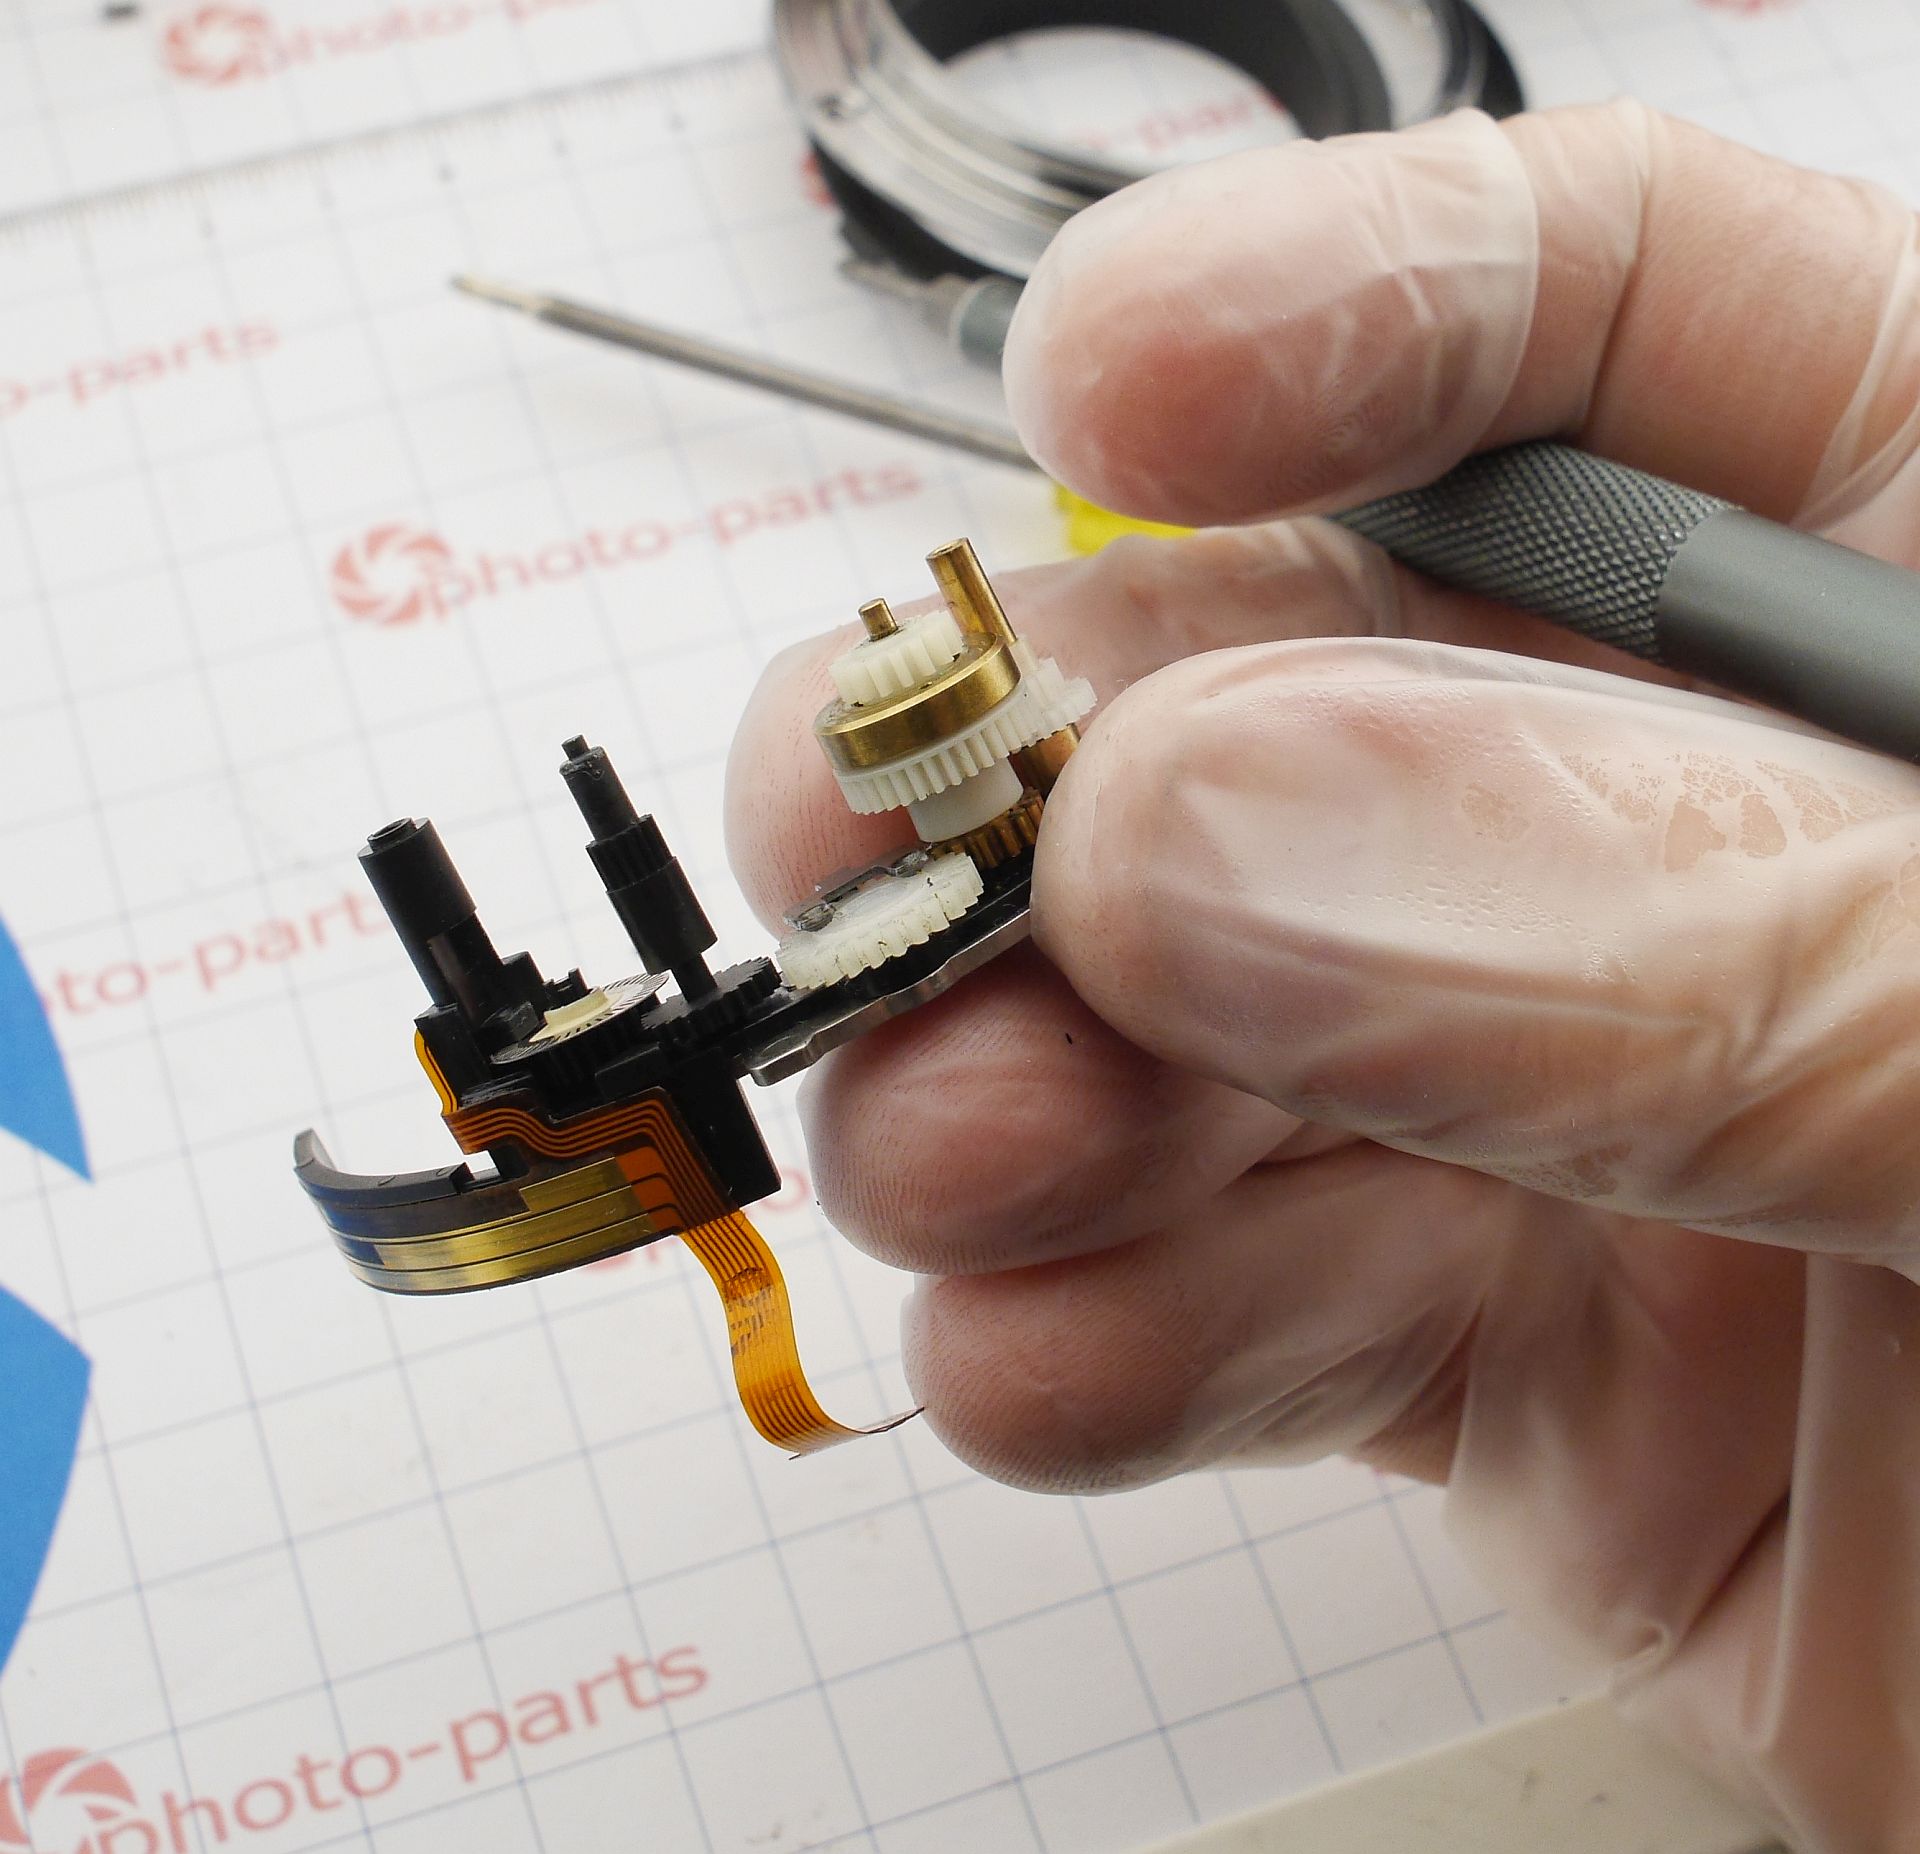
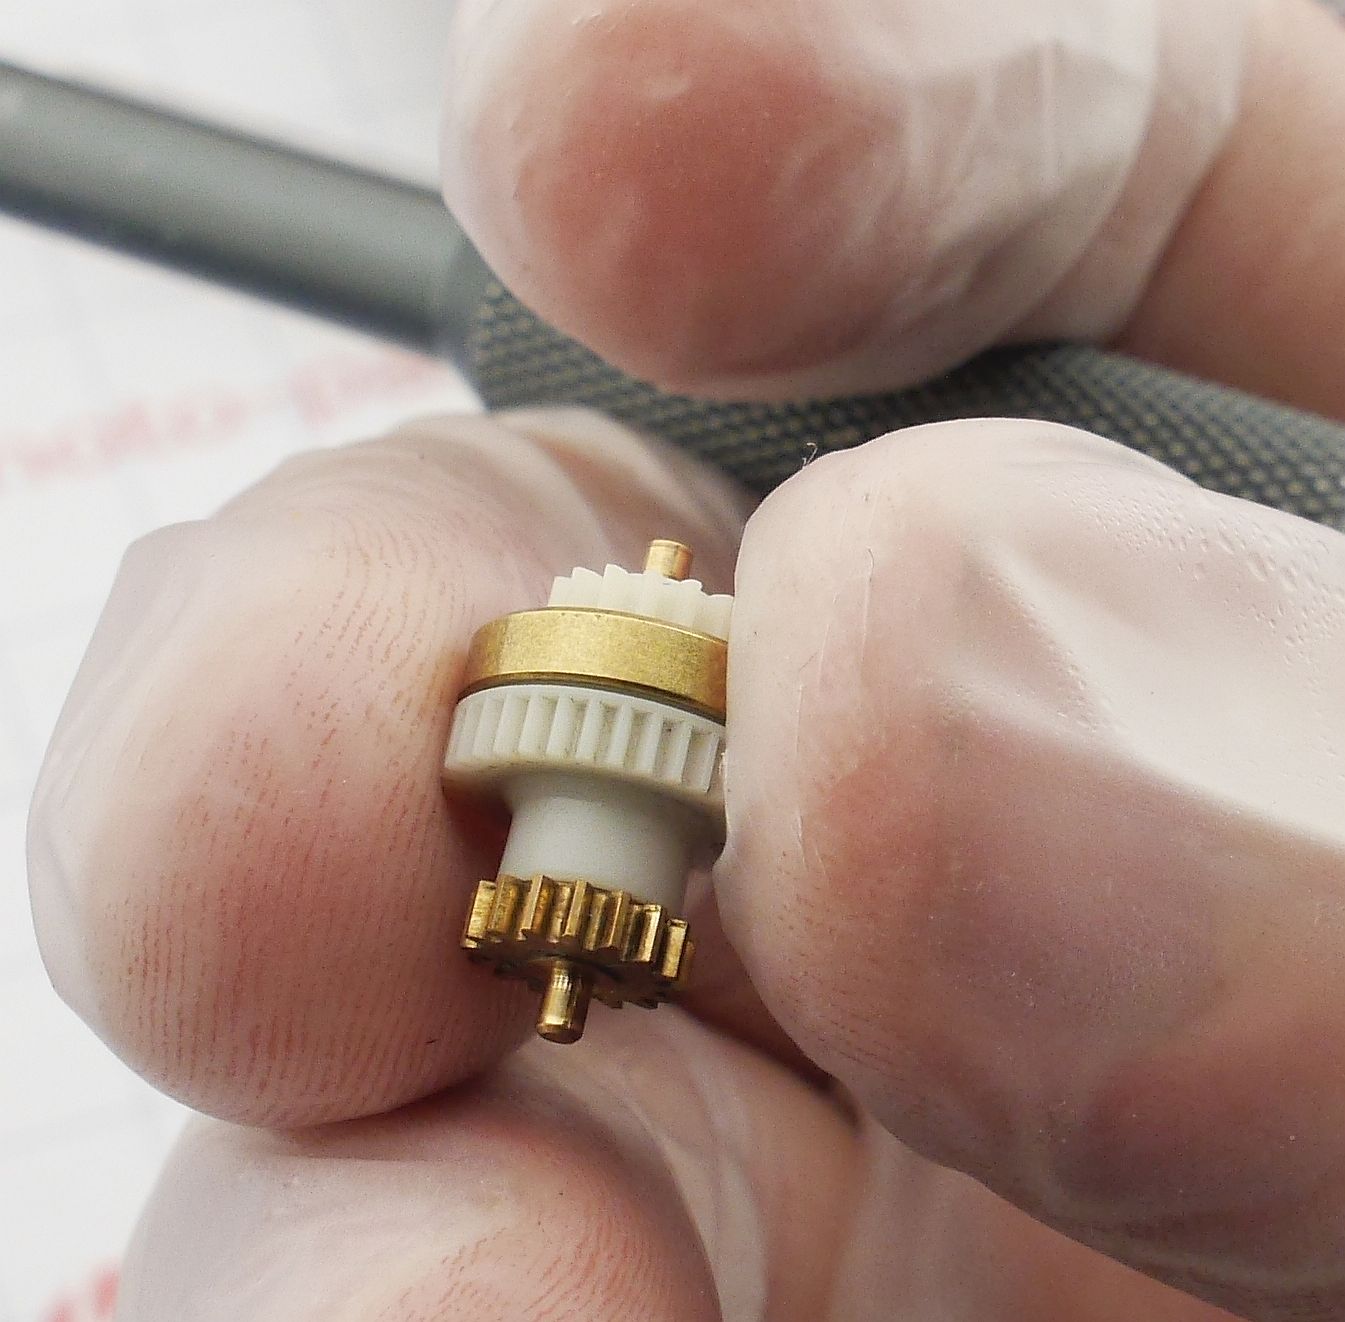
Then, disassemble the planetary unit itself: the bronze ring is a nut — loosen it and pull out the center shaft downward.
Up top you’ll find the ball bearings:
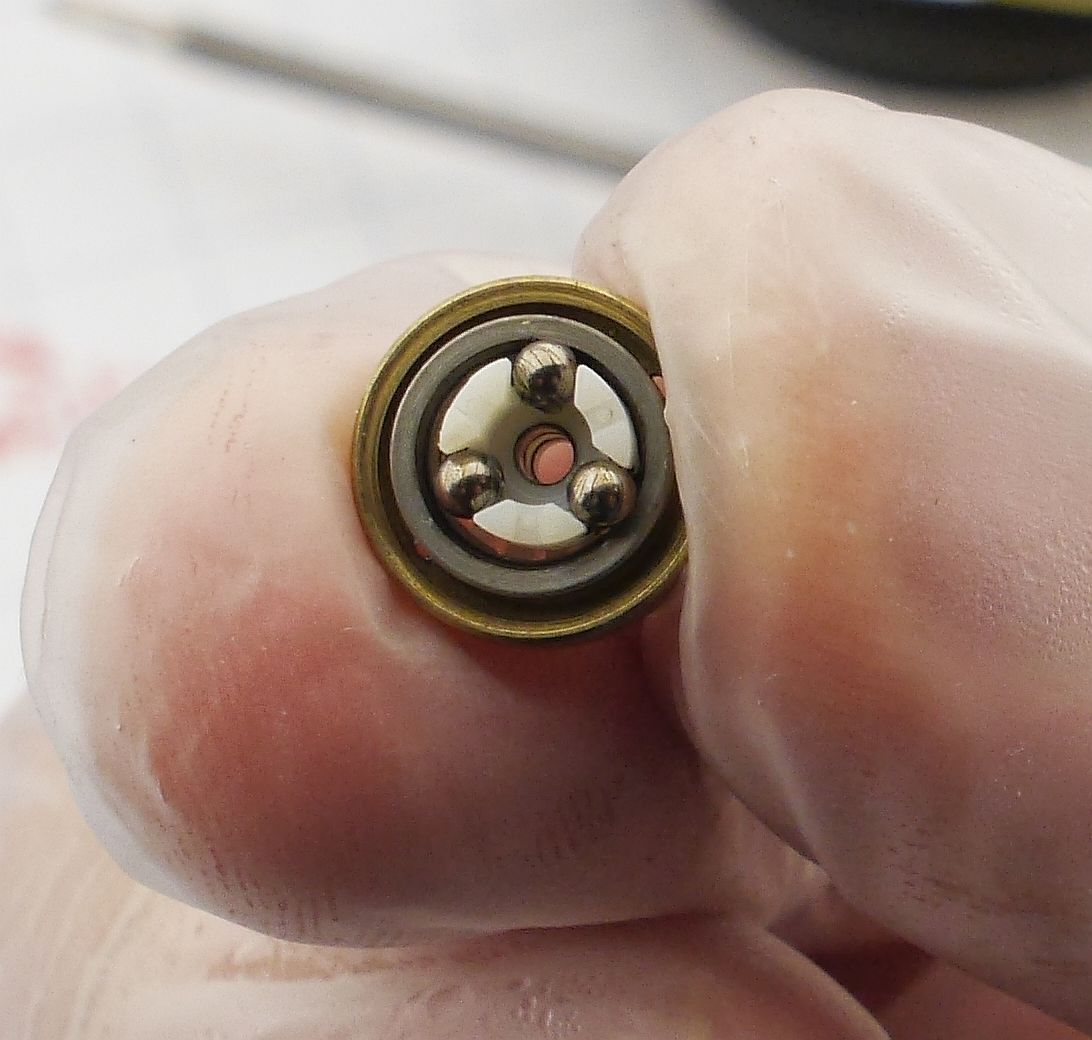
On close inspection, the balls are fine - the issue is the shaft.
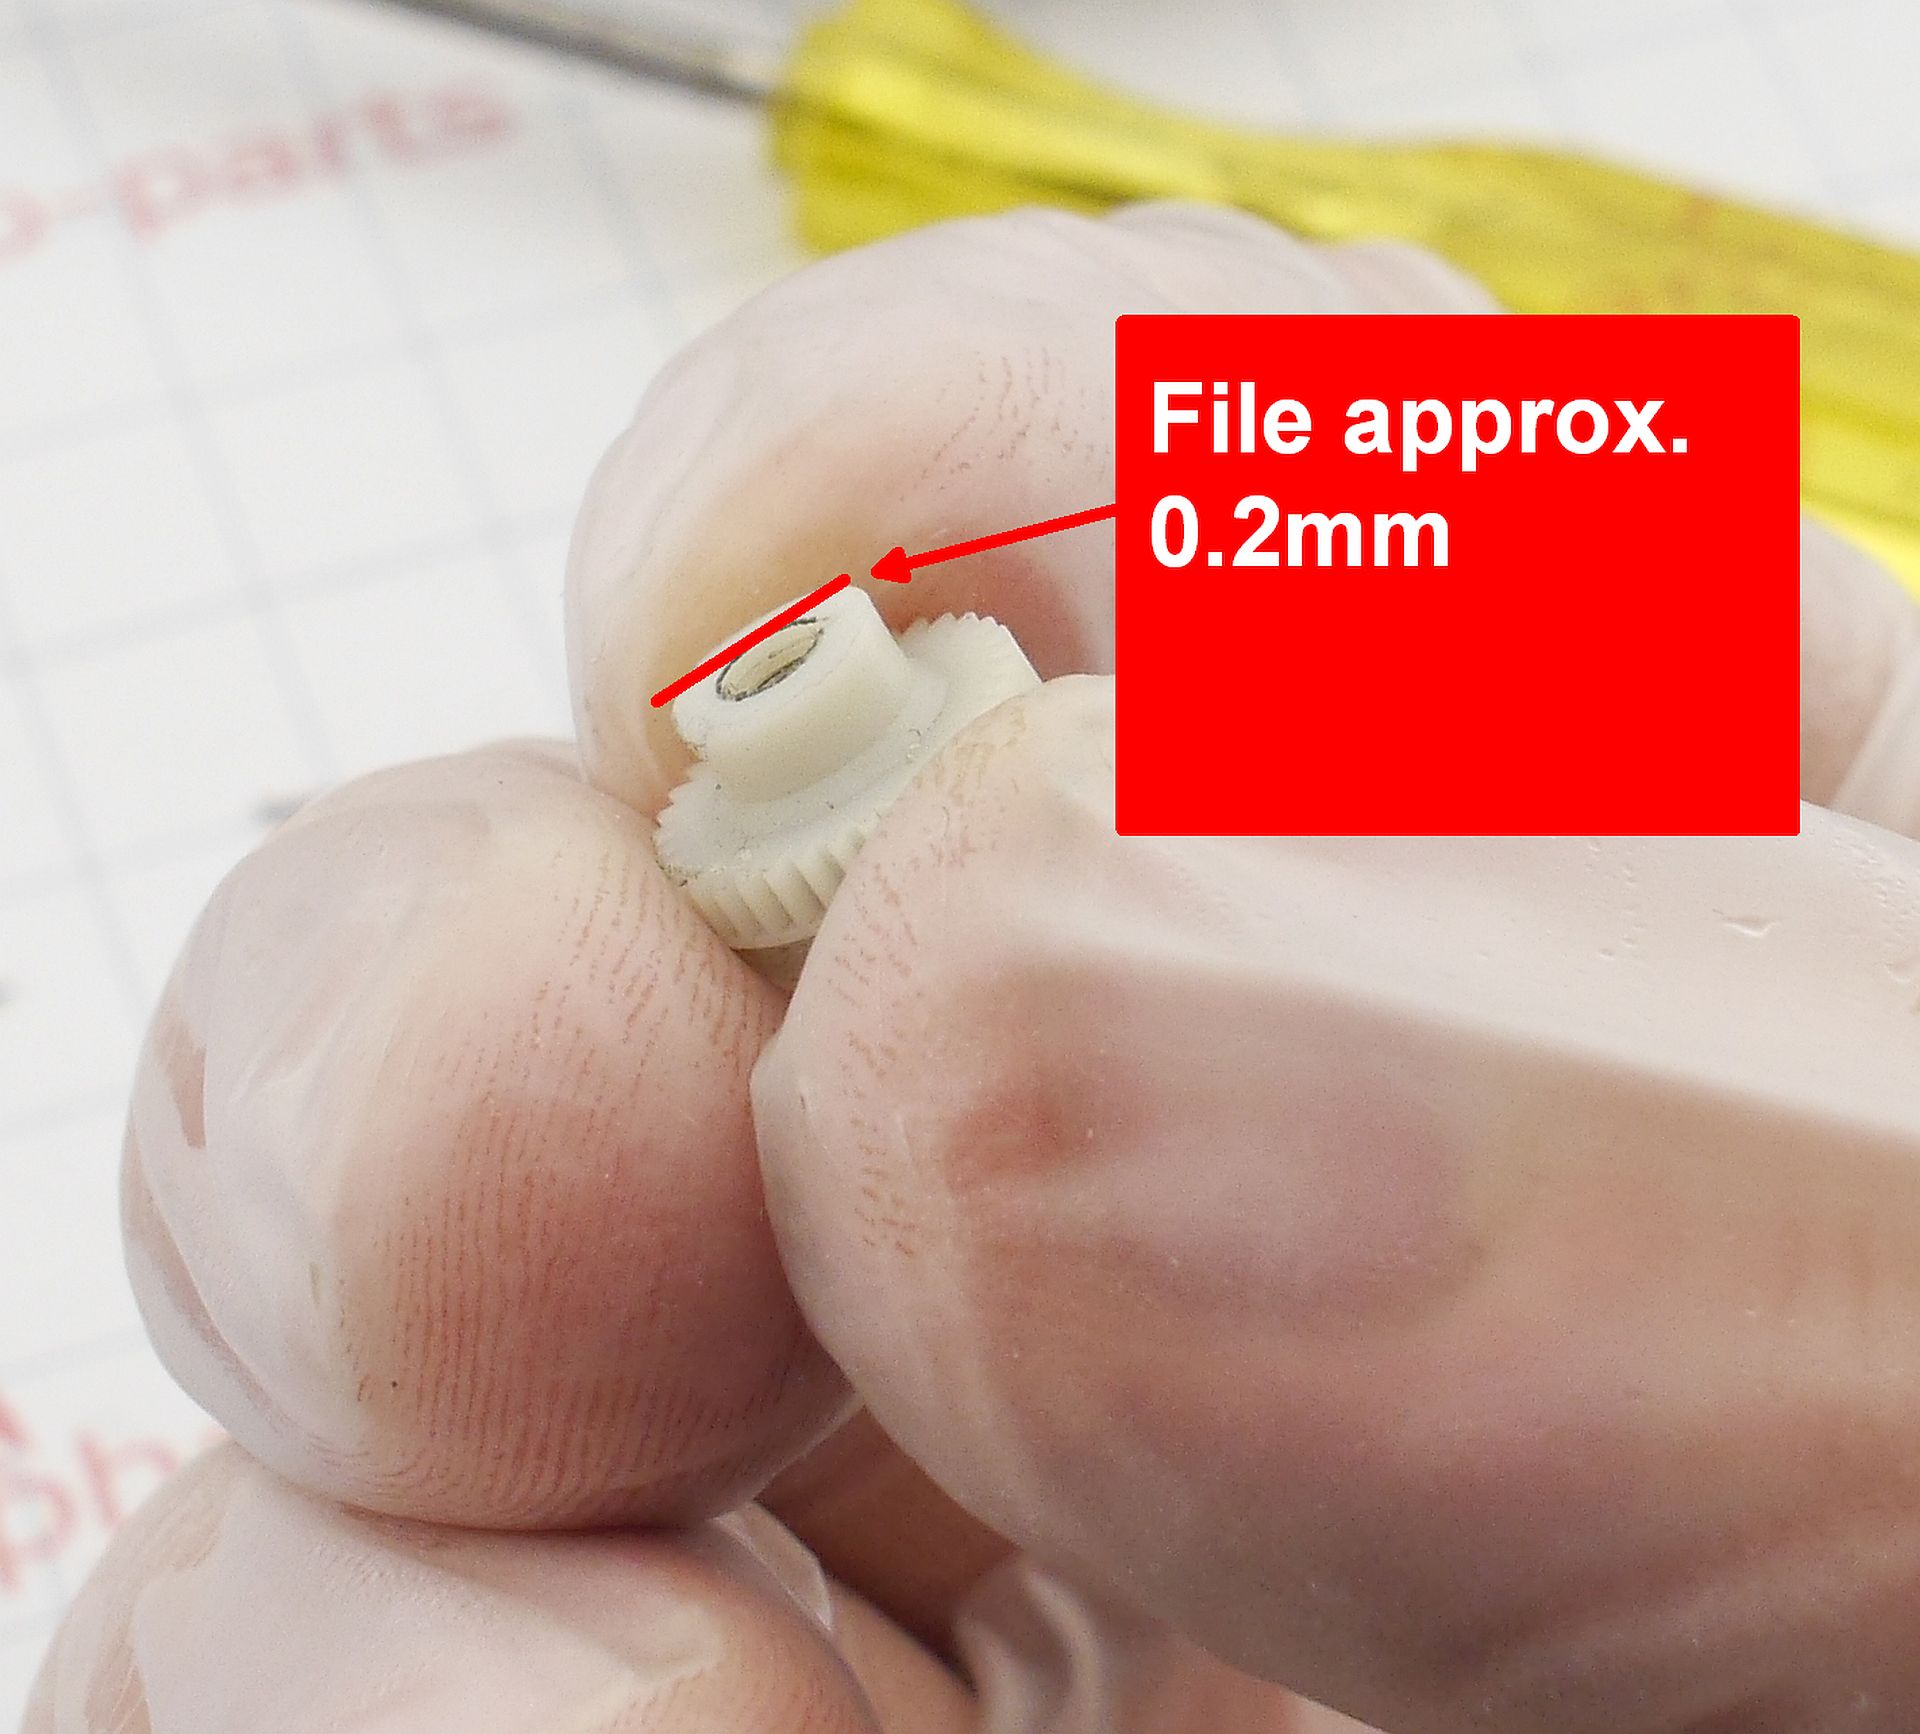
Polishing or repairing the shaft is unfeasable. I have no clue what equipment could do that. But we can cheat — shift the bearing track downward, where the metal is still fresh.
This takes three steps:
- On the large gear, grind down the area facing the bronze ring by approx. 0.2mm — that’s how far we’ll move the balls.
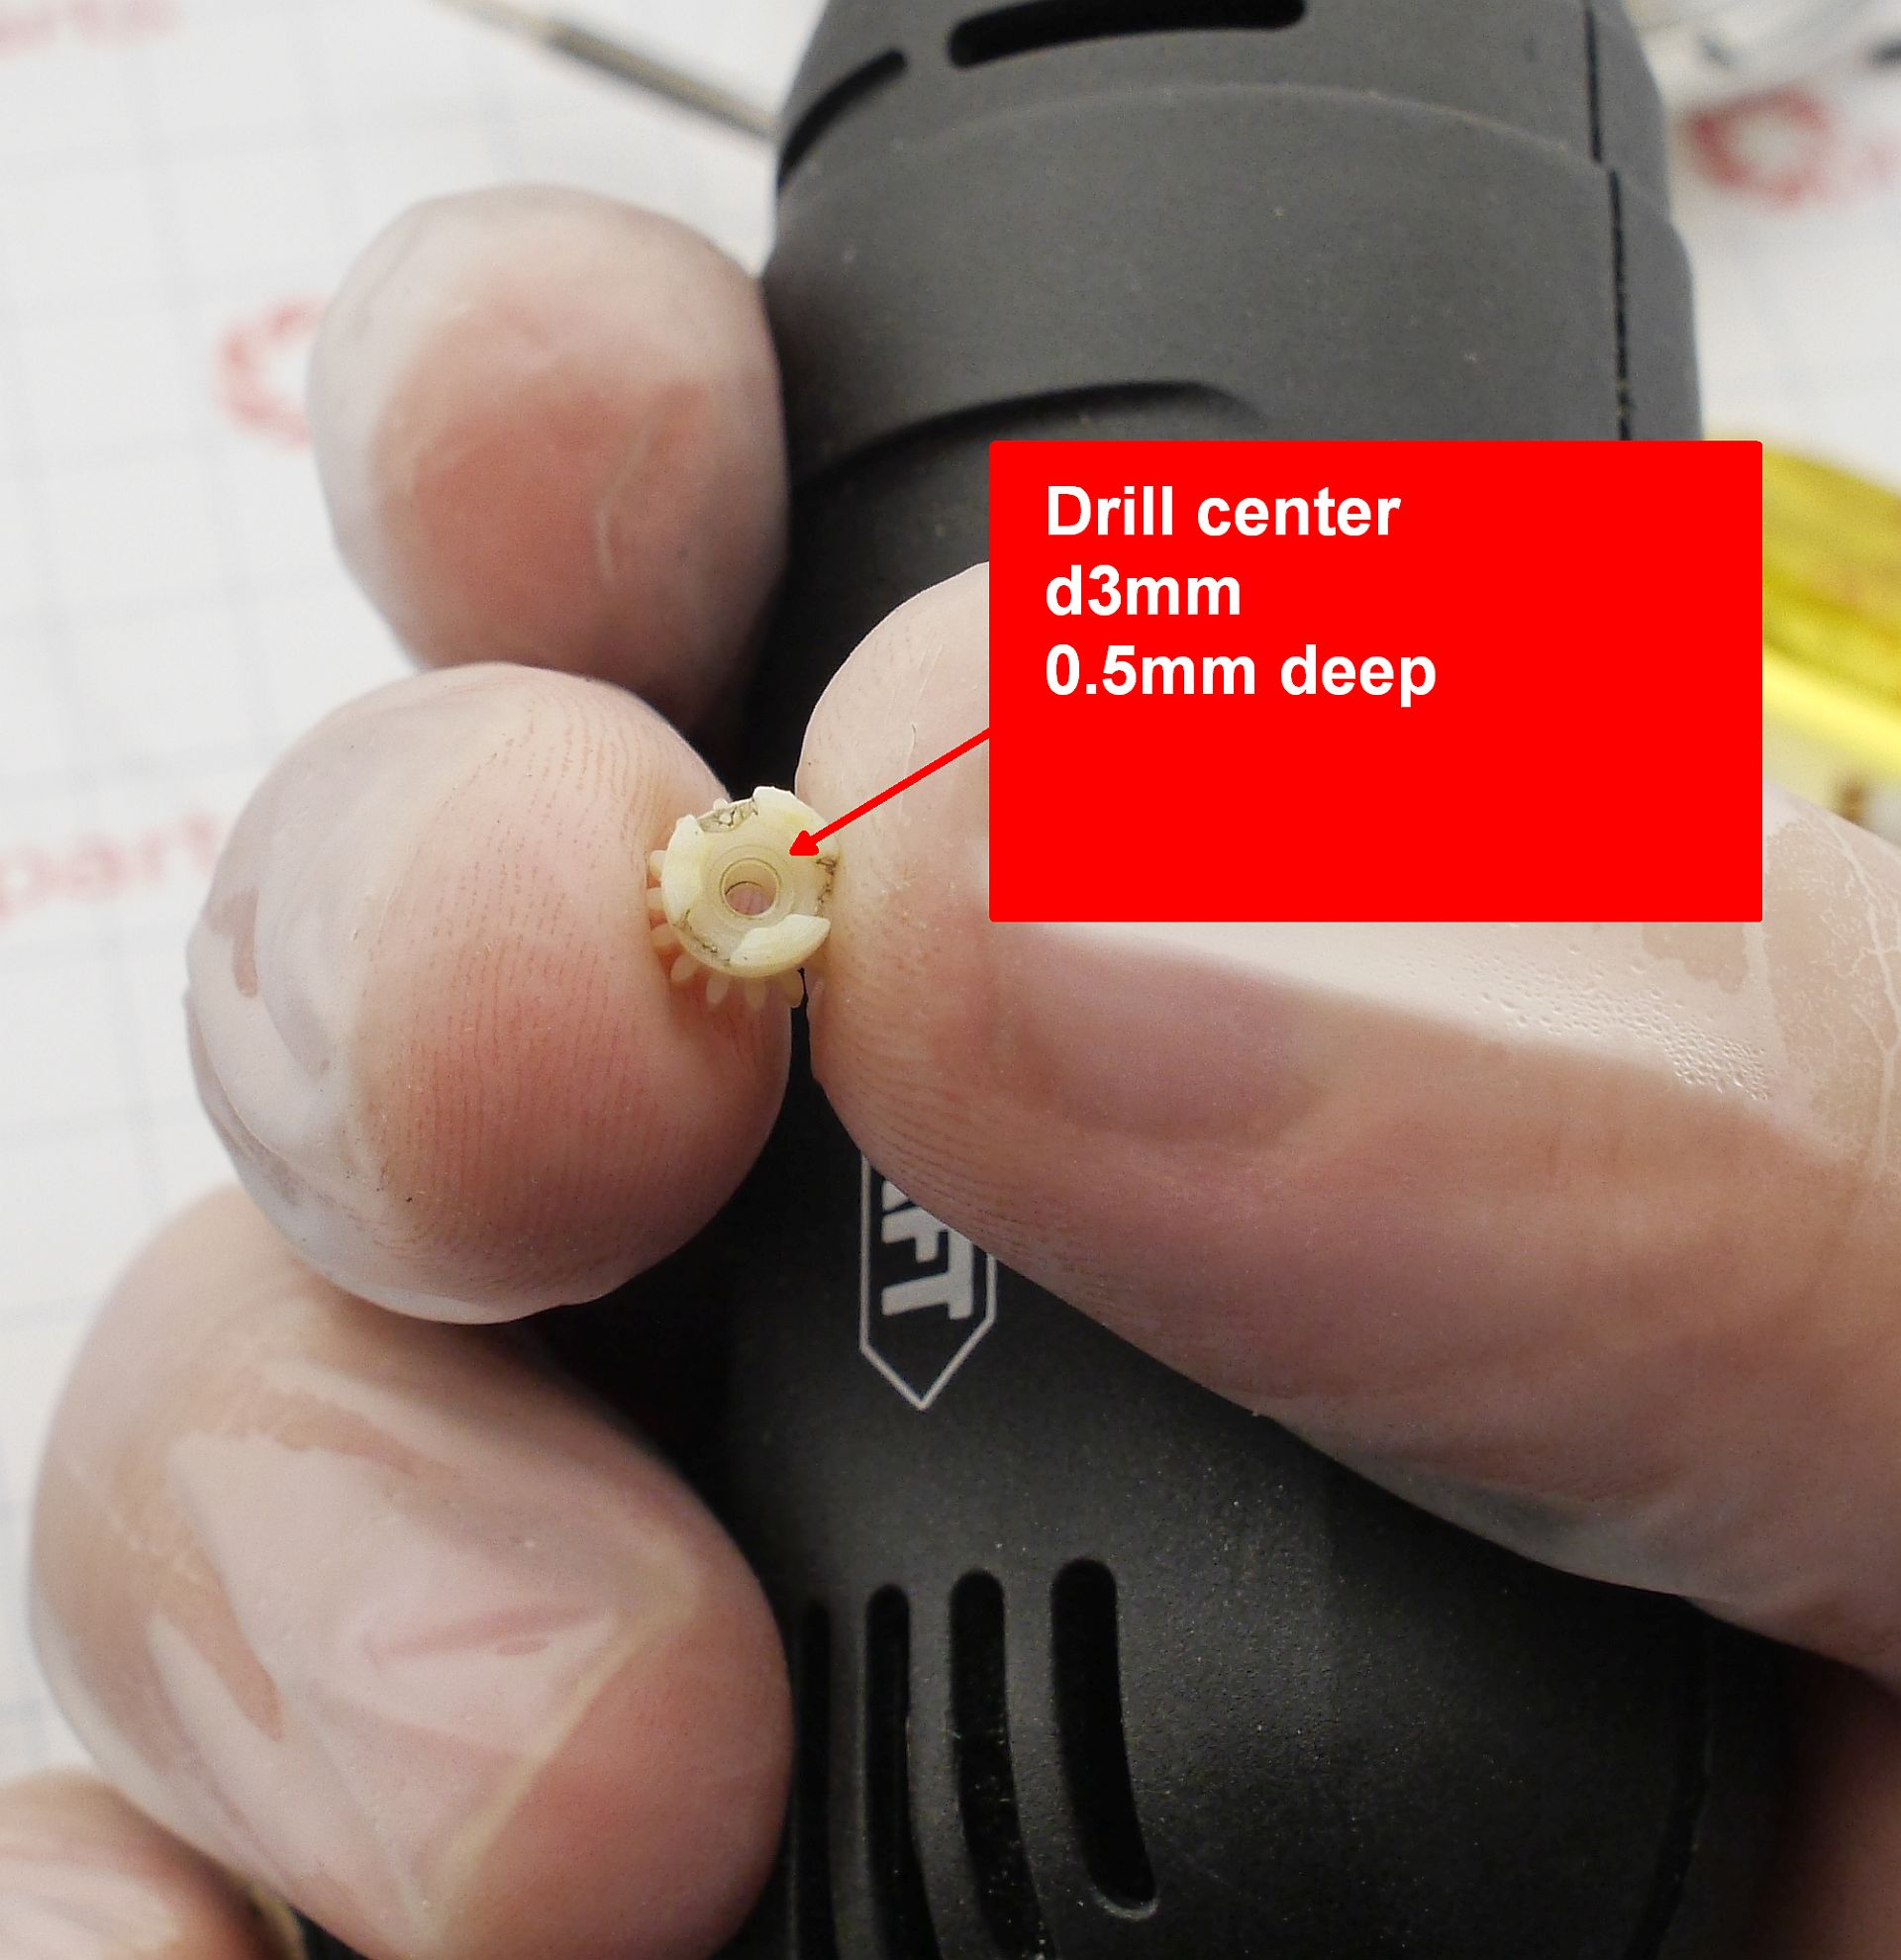
- In the smaller gear, deepen the shaft hole. Use a 3mm bit to drill around 0.5mm deeper.

- Reassemble the gear — and since the unit is now shorter, use a washer equal in thickness to the material removed in step 1.
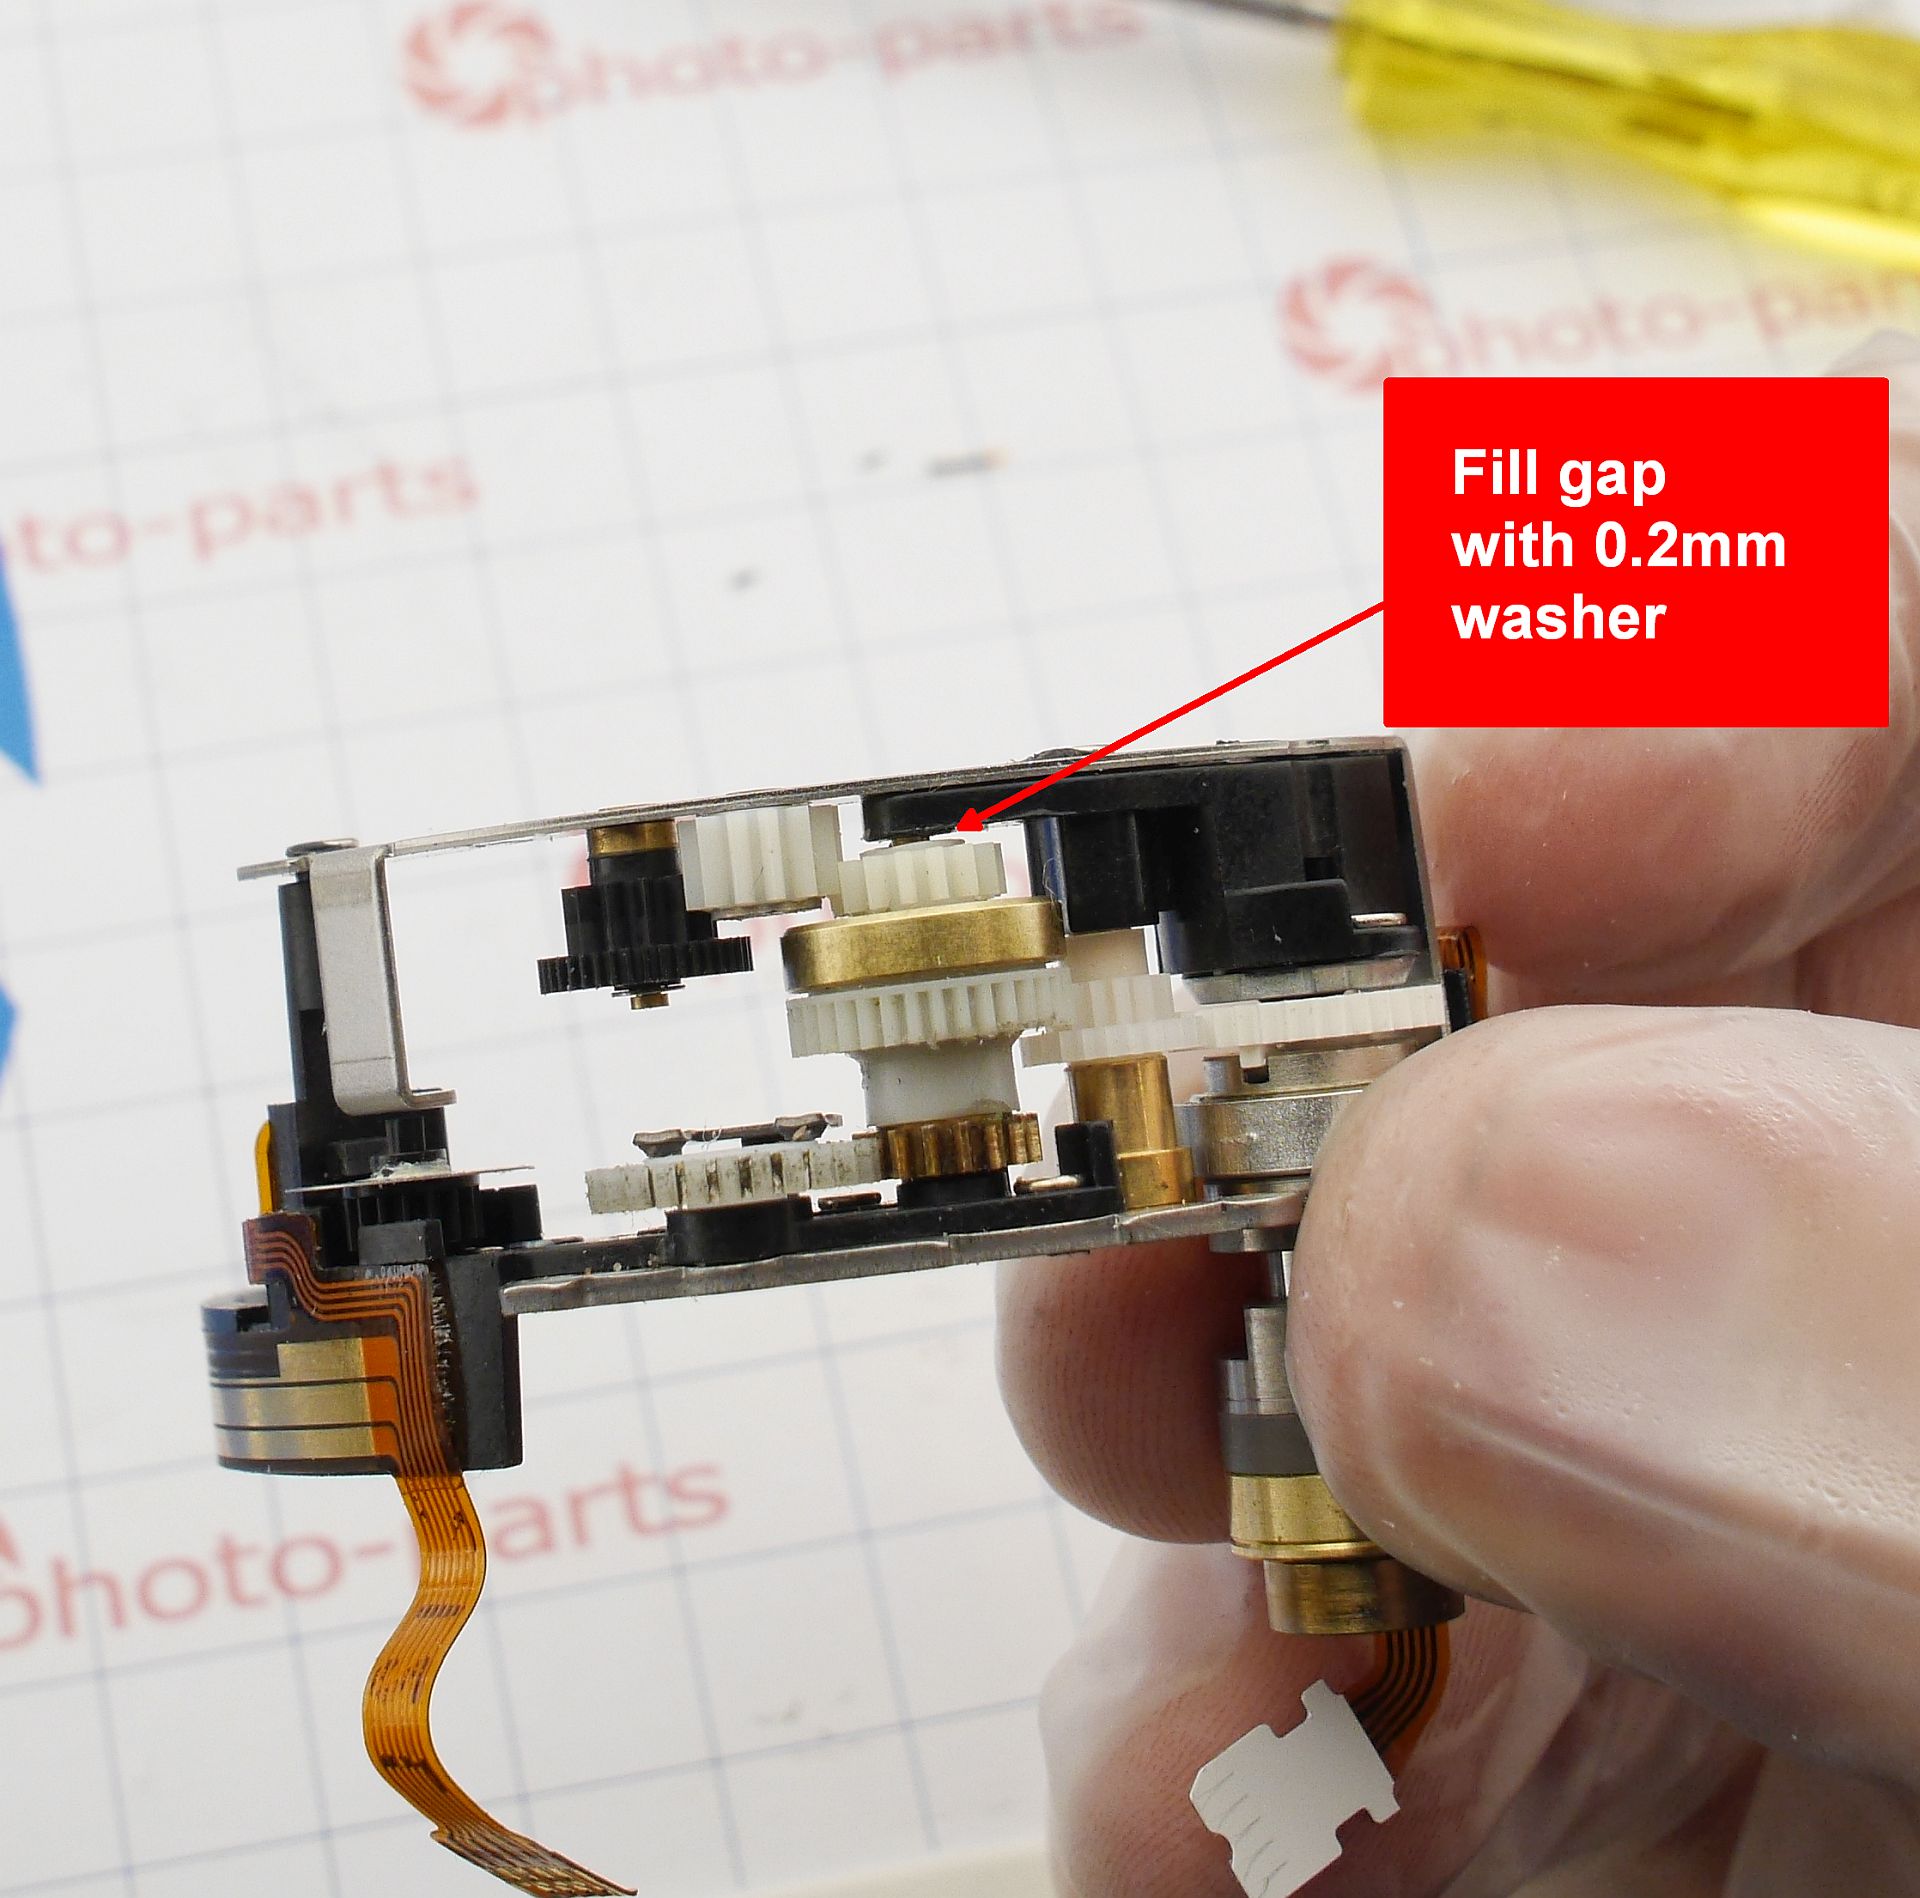
The result is a lens that feels like new - at least when it comes to focusing - with minimal effort.
For final testing, it’s enough to partially reassemble: mount, contact block, helicoid, and lens group. That’s sufficient to verify smooth movement and autofocus function.
Add Comment
This policy contains information about your privacy. By posting, you are declaring that you understand this policy:
- Your name, rating, website address, town, country, state and comment will be publicly displayed if entered.
- Aside from the data entered into these form fields, other stored data about your comment will include:
- Your IP address (not displayed)
- The time/date of your submission (displayed)
- Your email address will not be shared. It is collected for only two reasons:
- Administrative purposes, should a need to contact you arise.
- To inform you of new comments, should you subscribe to receive notifications.
- A cookie may be set on your computer. This is used to remember your inputs. It will expire by itself.
This policy is subject to change at any time and without notice.
These terms and conditions contain rules about posting comments. By submitting a comment, you are declaring that you agree with these rules:
- Although the administrator will attempt to moderate comments, it is impossible for every comment to have been moderated at any given time.
- You acknowledge that all comments express the views and opinions of the original author and not those of the administrator.
- You agree not to post any material which is knowingly false, obscene, hateful, threatening, harassing or invasive of a person's privacy.
- The administrator has the right to edit, move or remove any comment for any reason and without notice.
Failure to comply with these rules may result in being banned from submitting further comments.
These terms and conditions are subject to change at any time and without notice.
Comments