- Posted on
- • Lens repairs
Sony 24-105G OSS - From Drowned to Restored
- Author
-
-

- User
- Photo-parts
- Posts by this author
- Posts by this author
-
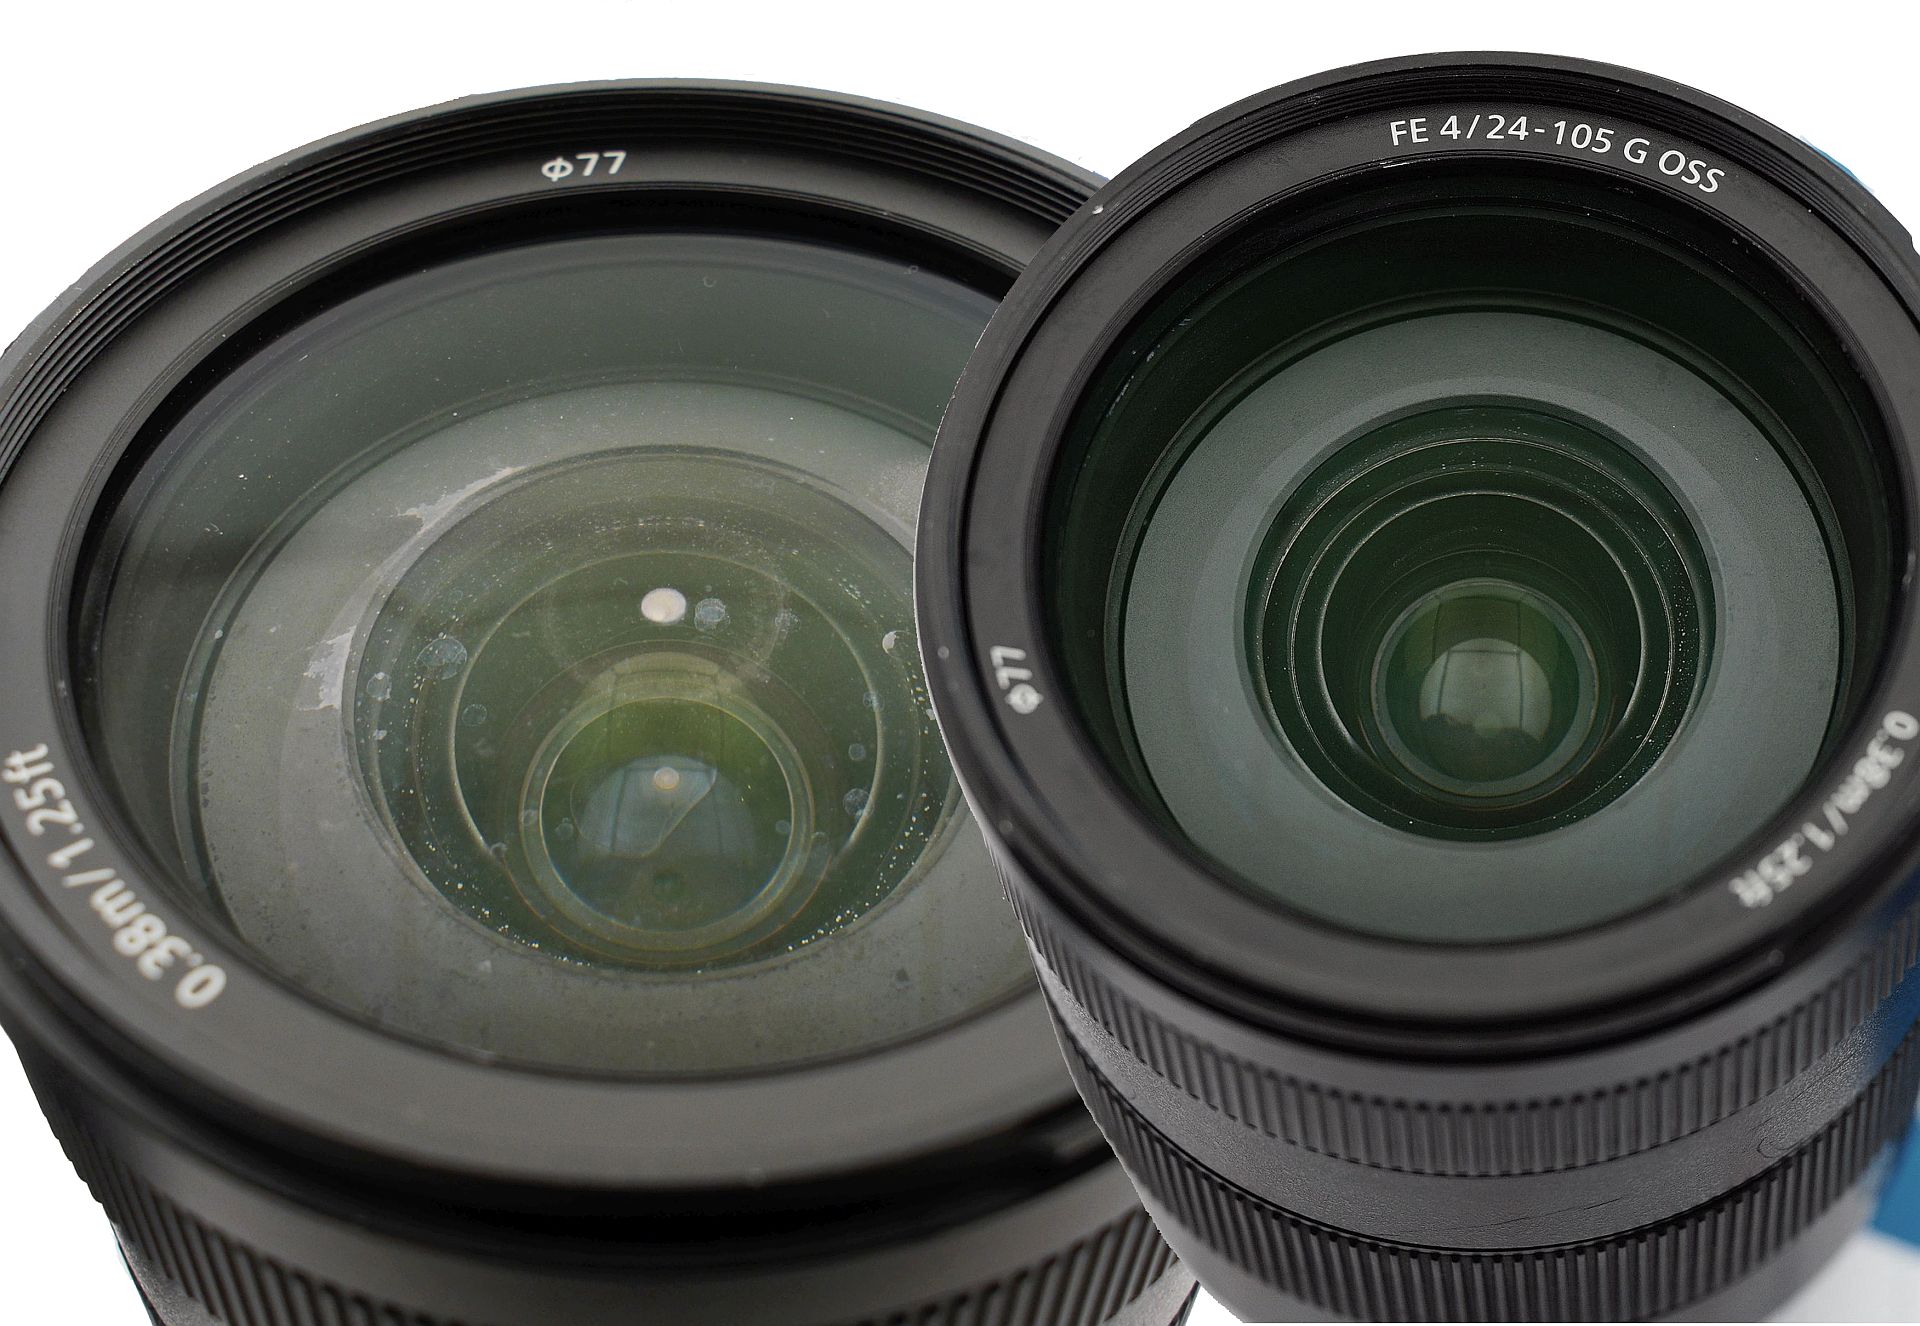
I often see two opposite cases in lens repair: the optics are in perfect condition, but something prevents the lens from working (broken autofocus, falling apart enclosure, and so on), or - everything seems to work, but the optics are in a terrible state. Today - about the second case. The Sony FE 24-105mm G OSS lens was fully submerged in some body of water, dried out, and remained functional (the aperture, stabilizer and focus all still work), but with awful stains everywhere.
I'm facing a complete disassembly, splitting lens groups, massive cleaning, despair and sorrow.
Disclaimer: the result of this repair is not acceptable for a demanding user. A lens that has been in water and received irreparable lens damage requires either replacing all lenses with new ones, or a one-way ticket to the trash bin. However, within the principle of "better a slightly broken high-end piece of gear than nothing at all", such a repair is acceptable.
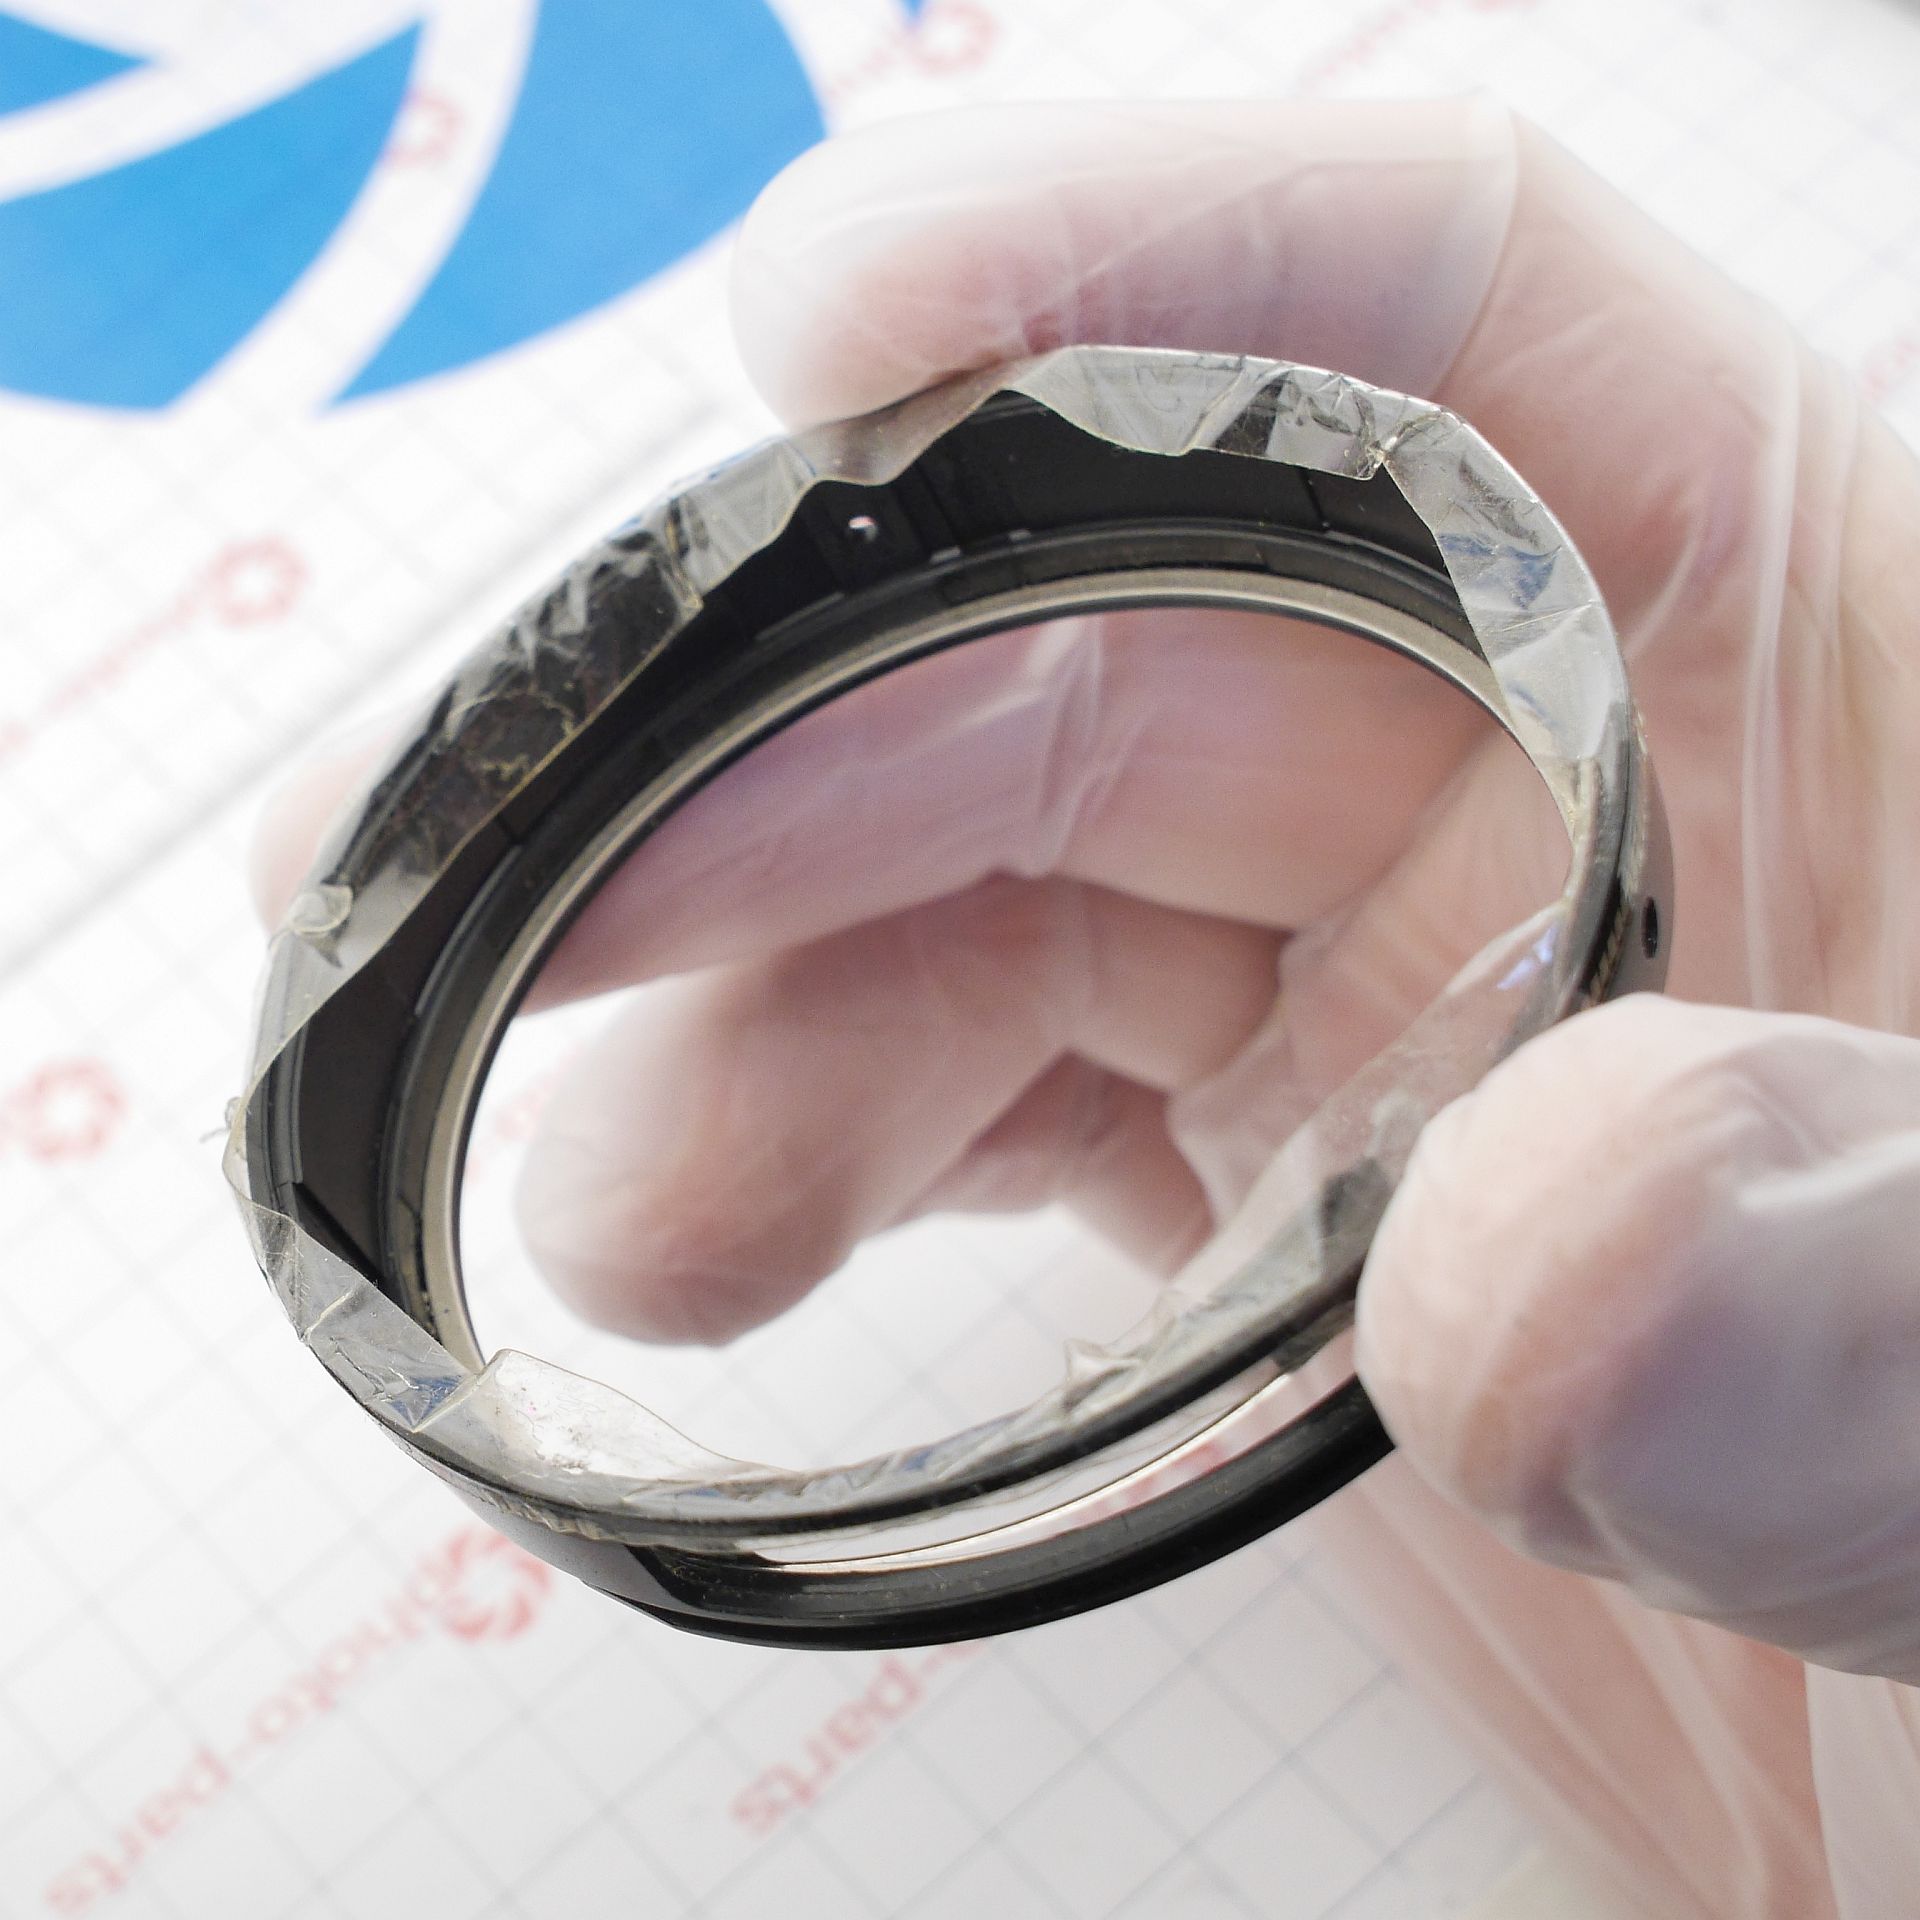
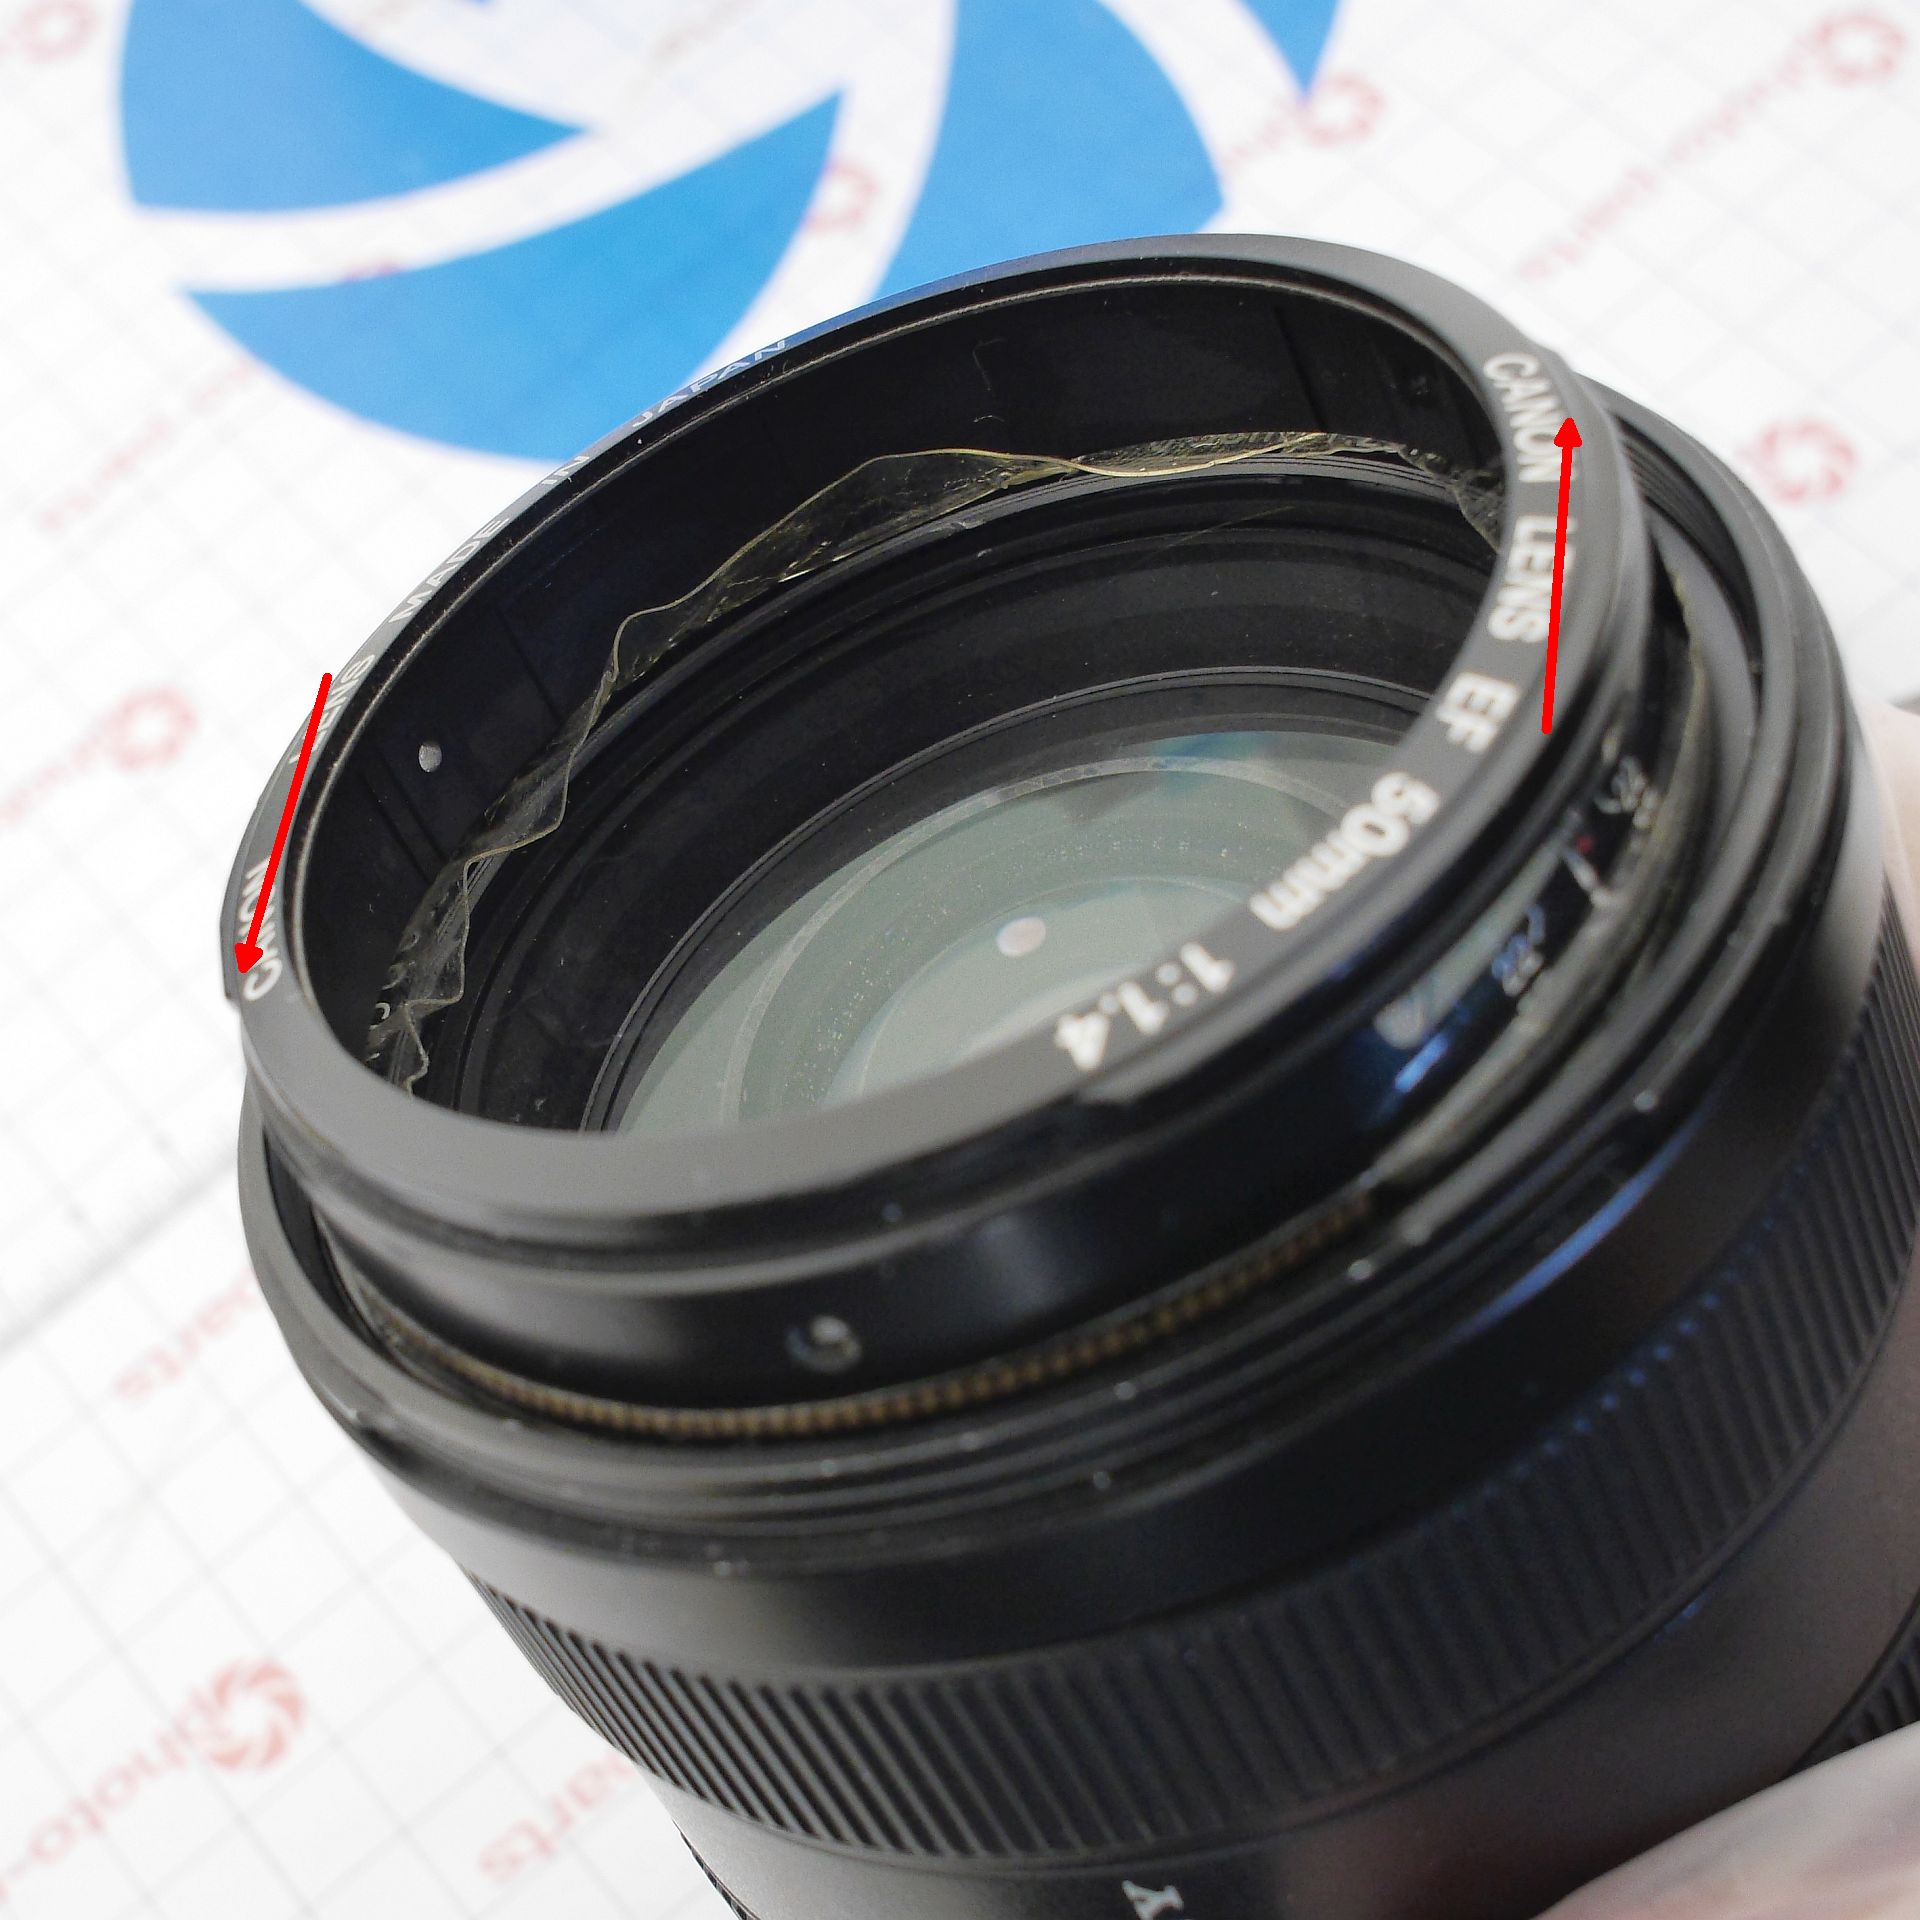
I decided to start disassembly with the front lens element - maybe the cleaning would end there? (naive). To remove it, you need a special tool for unscrewing the decorative ring. In the world of professional repair, that's a set of rubber rings, while in my world it's a ring from a Canon 50mm 1.4 lens, covered with double-sided tape. It matched the diameter of the drowned lens's decorative ring perfectly, and I managed to unscrew it without effort or damage. Under the decorative ring, you need to remove many screws that hold the filter-mounting ring:
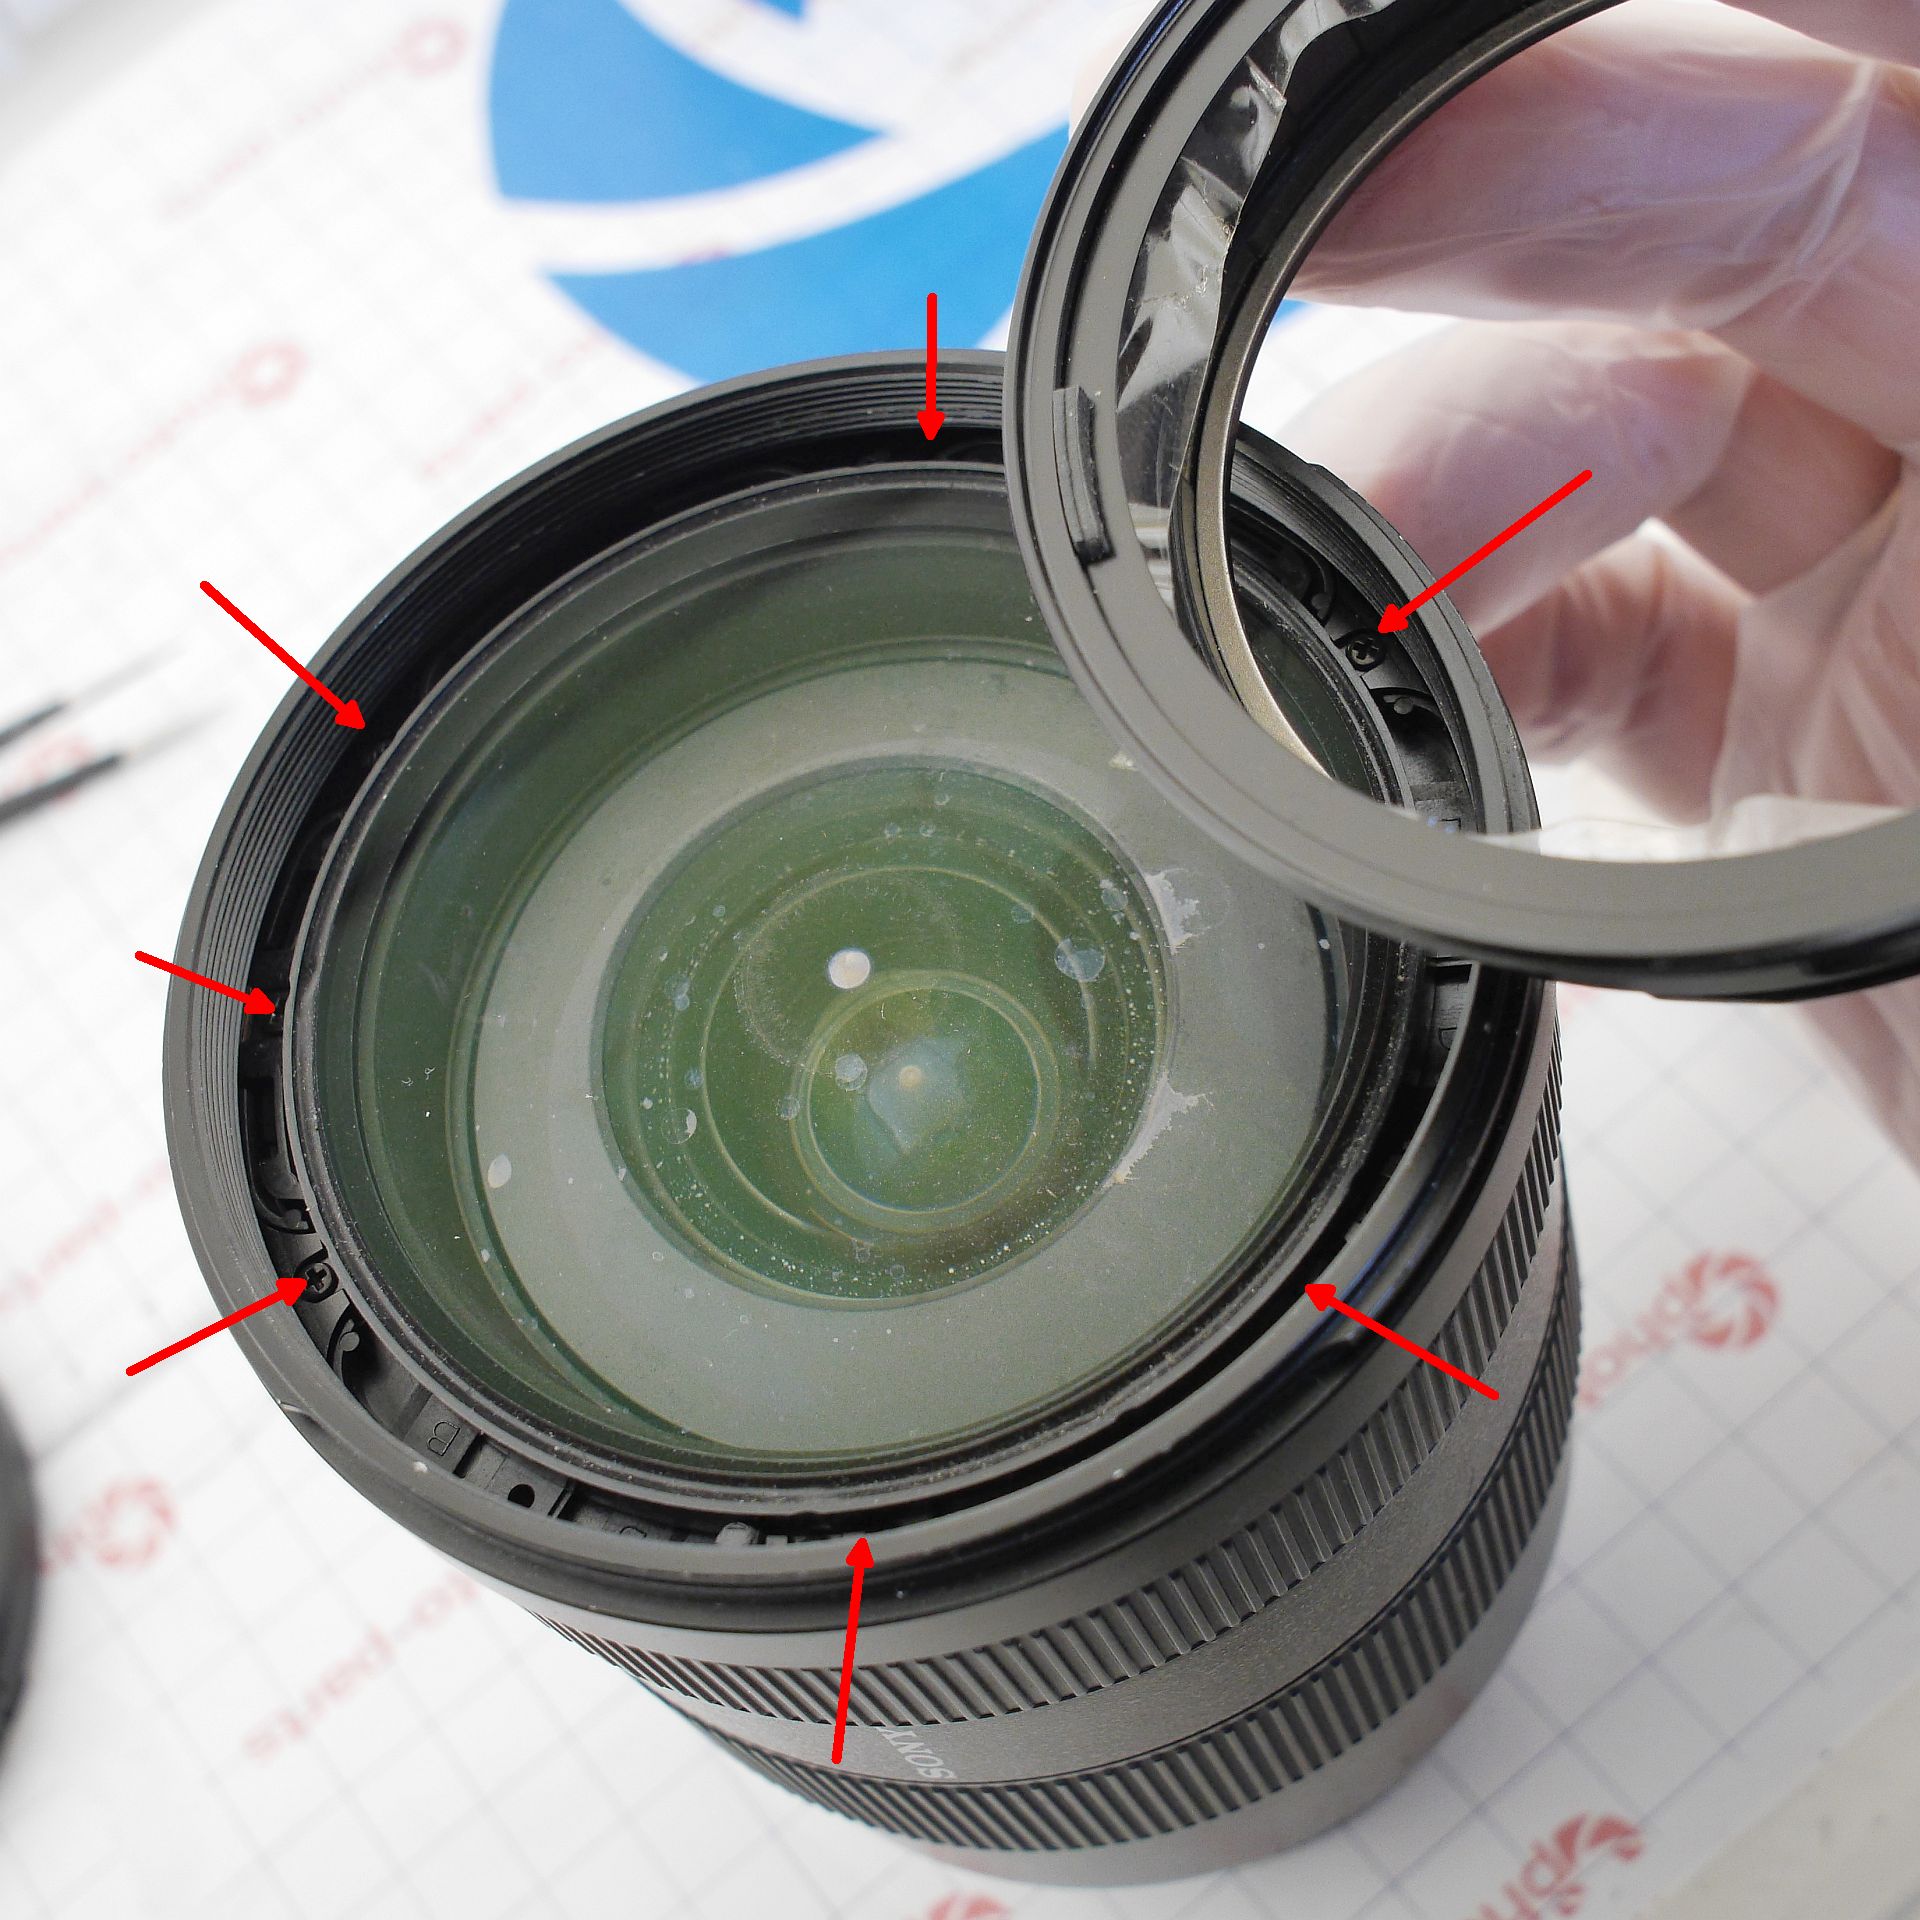
The front lens is installed with shims for adjustment, so they need to be marked or fixed in place:
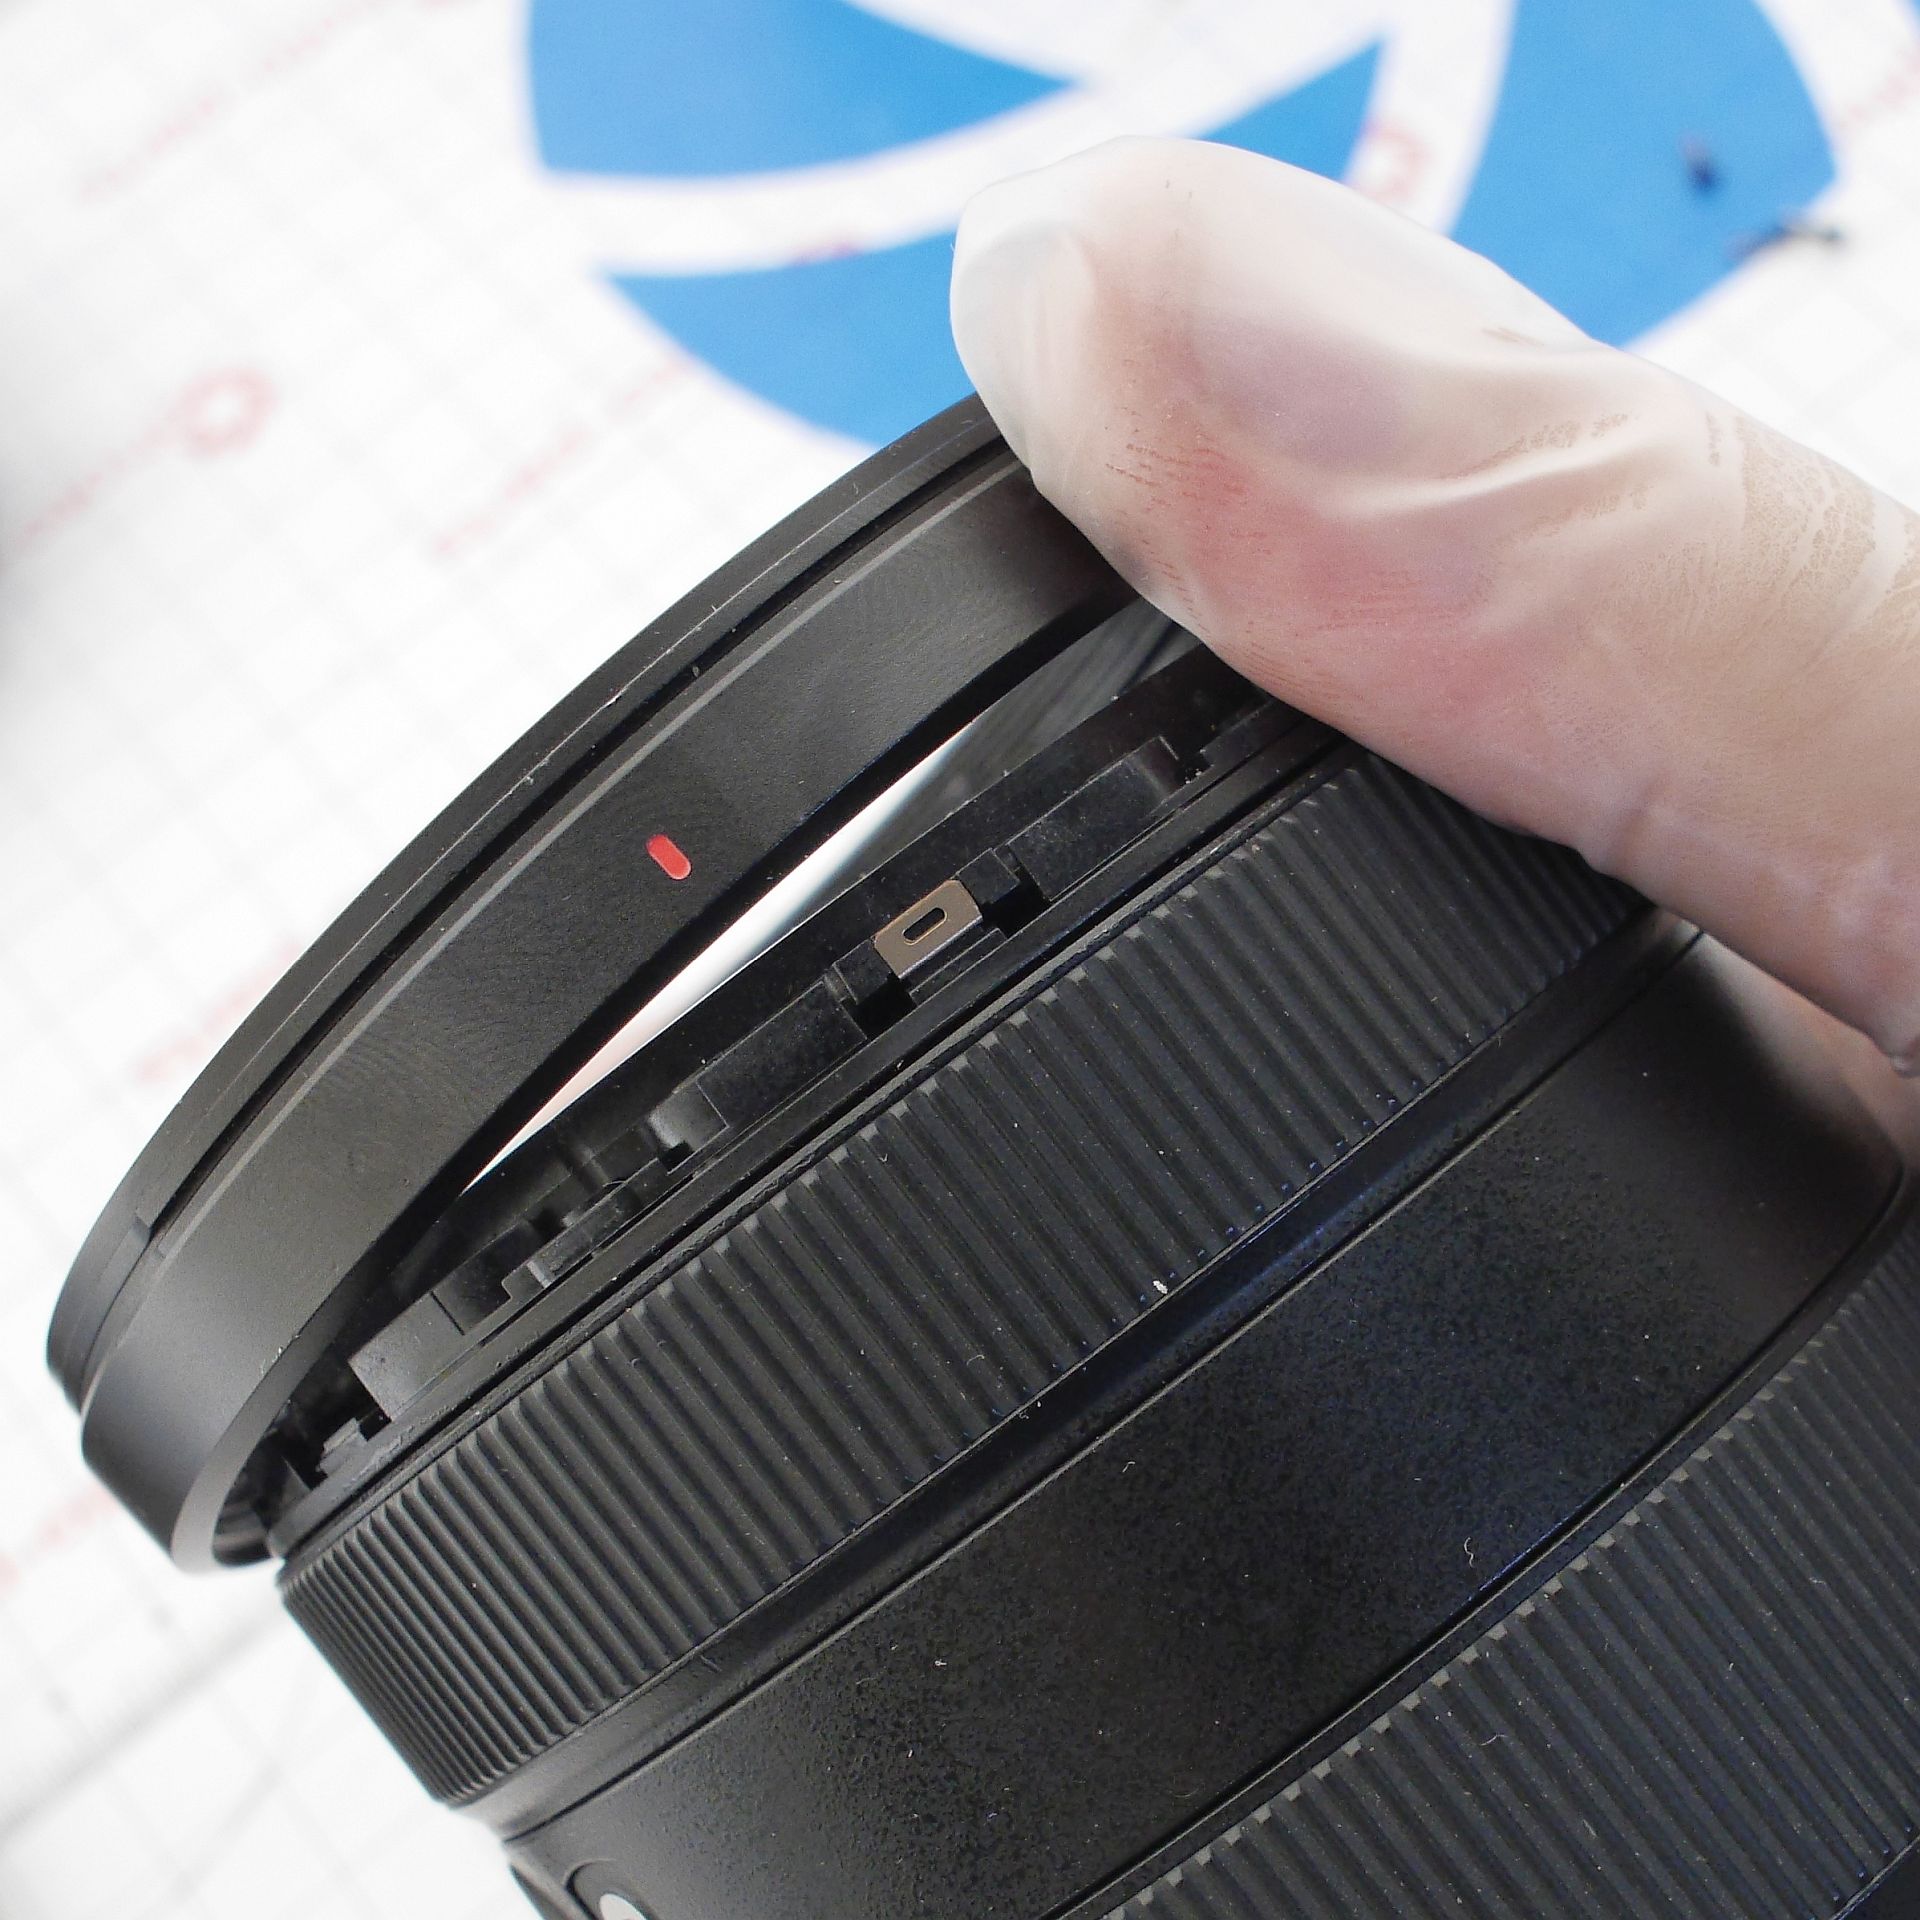
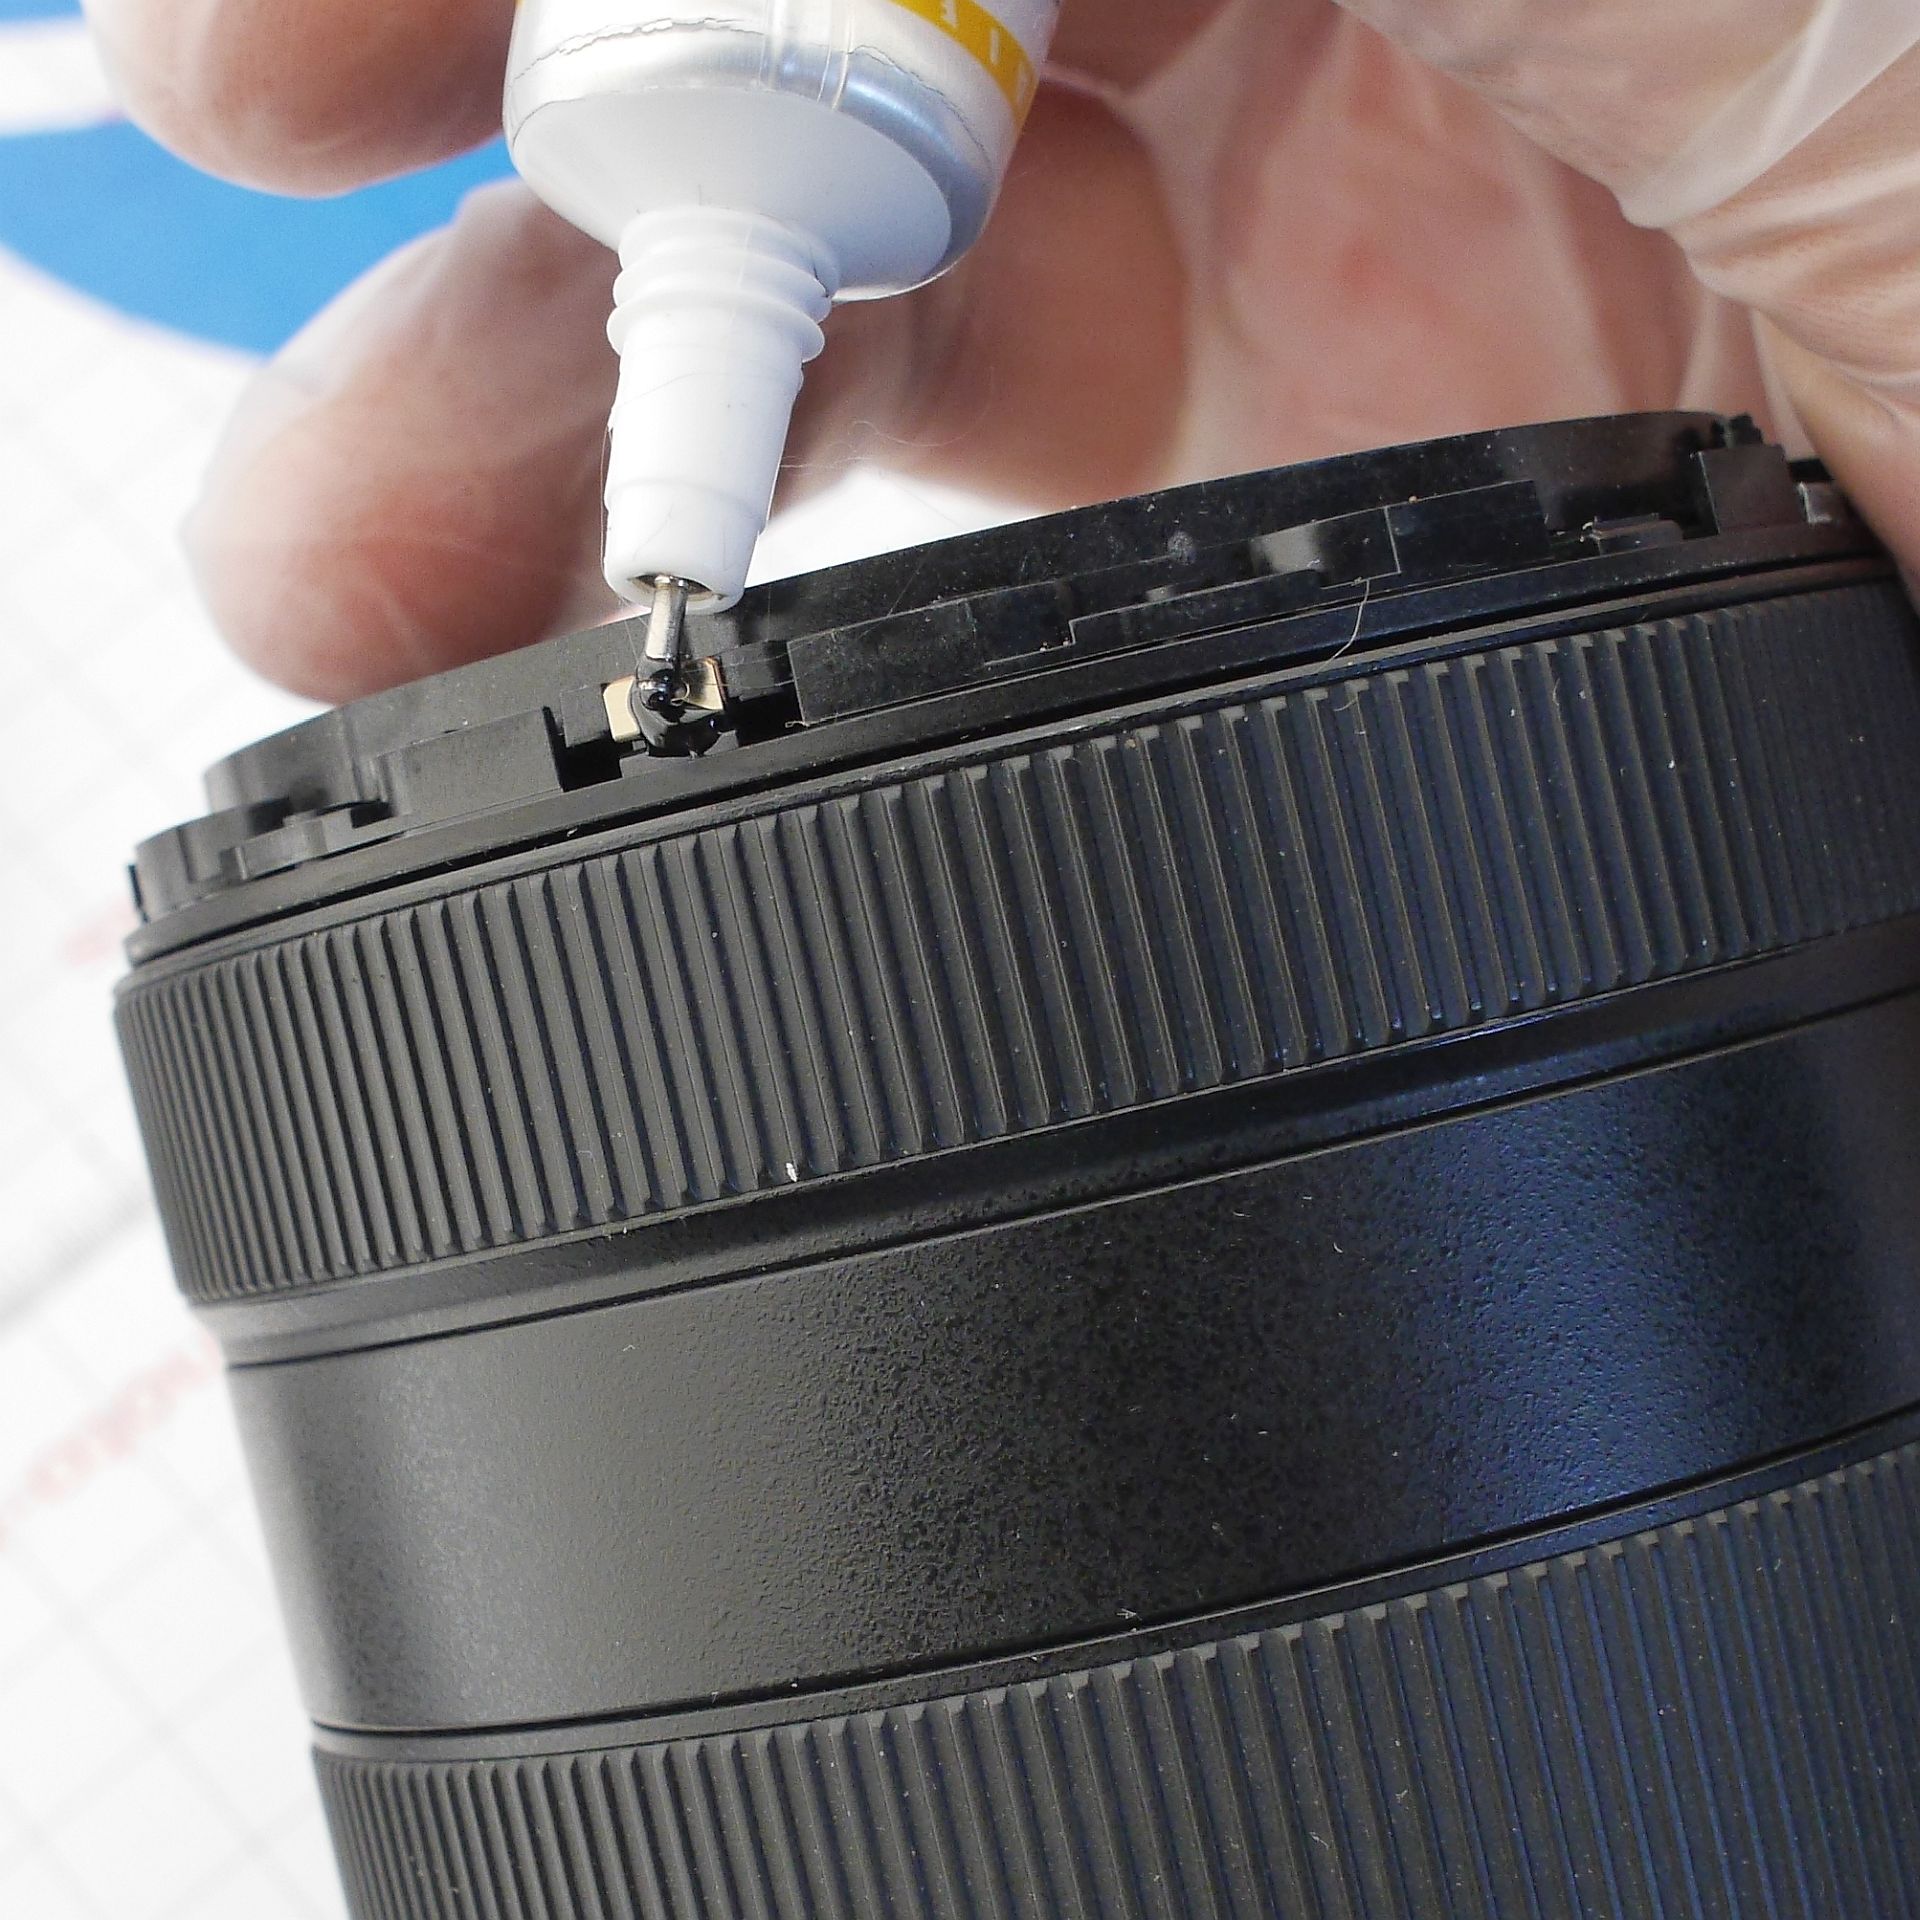
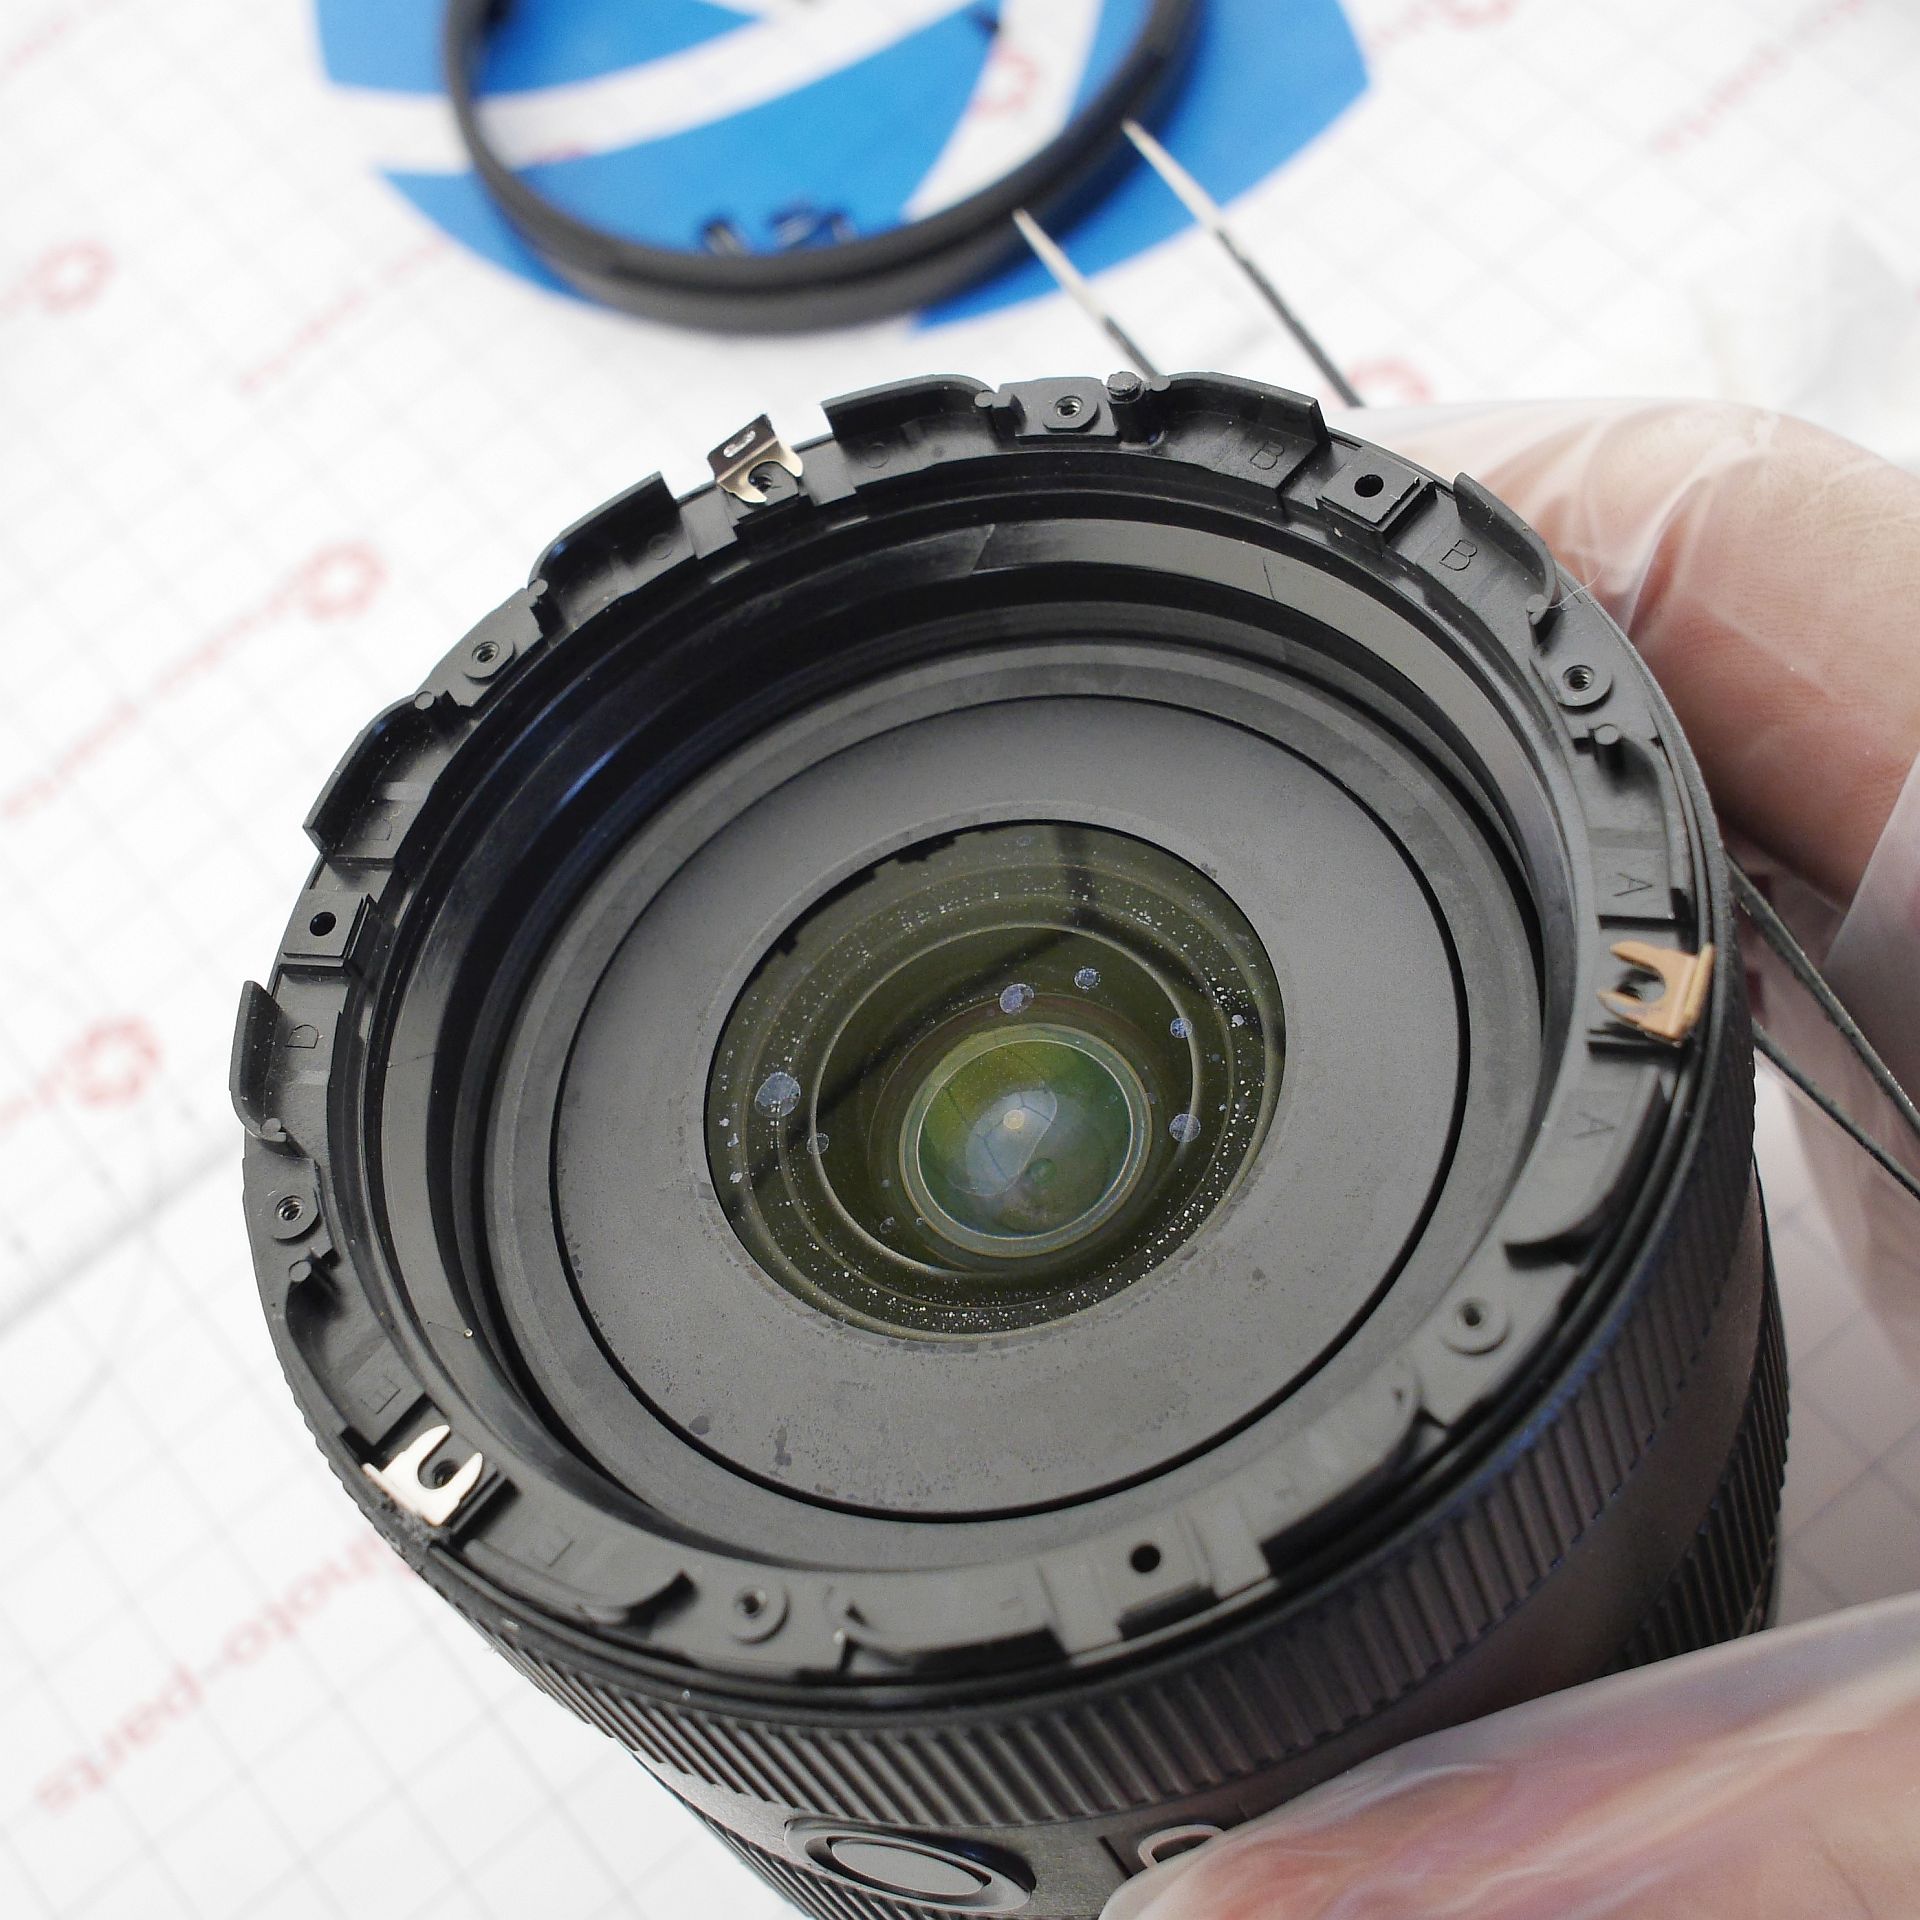
Let's check the traces of liquid on the front lens:
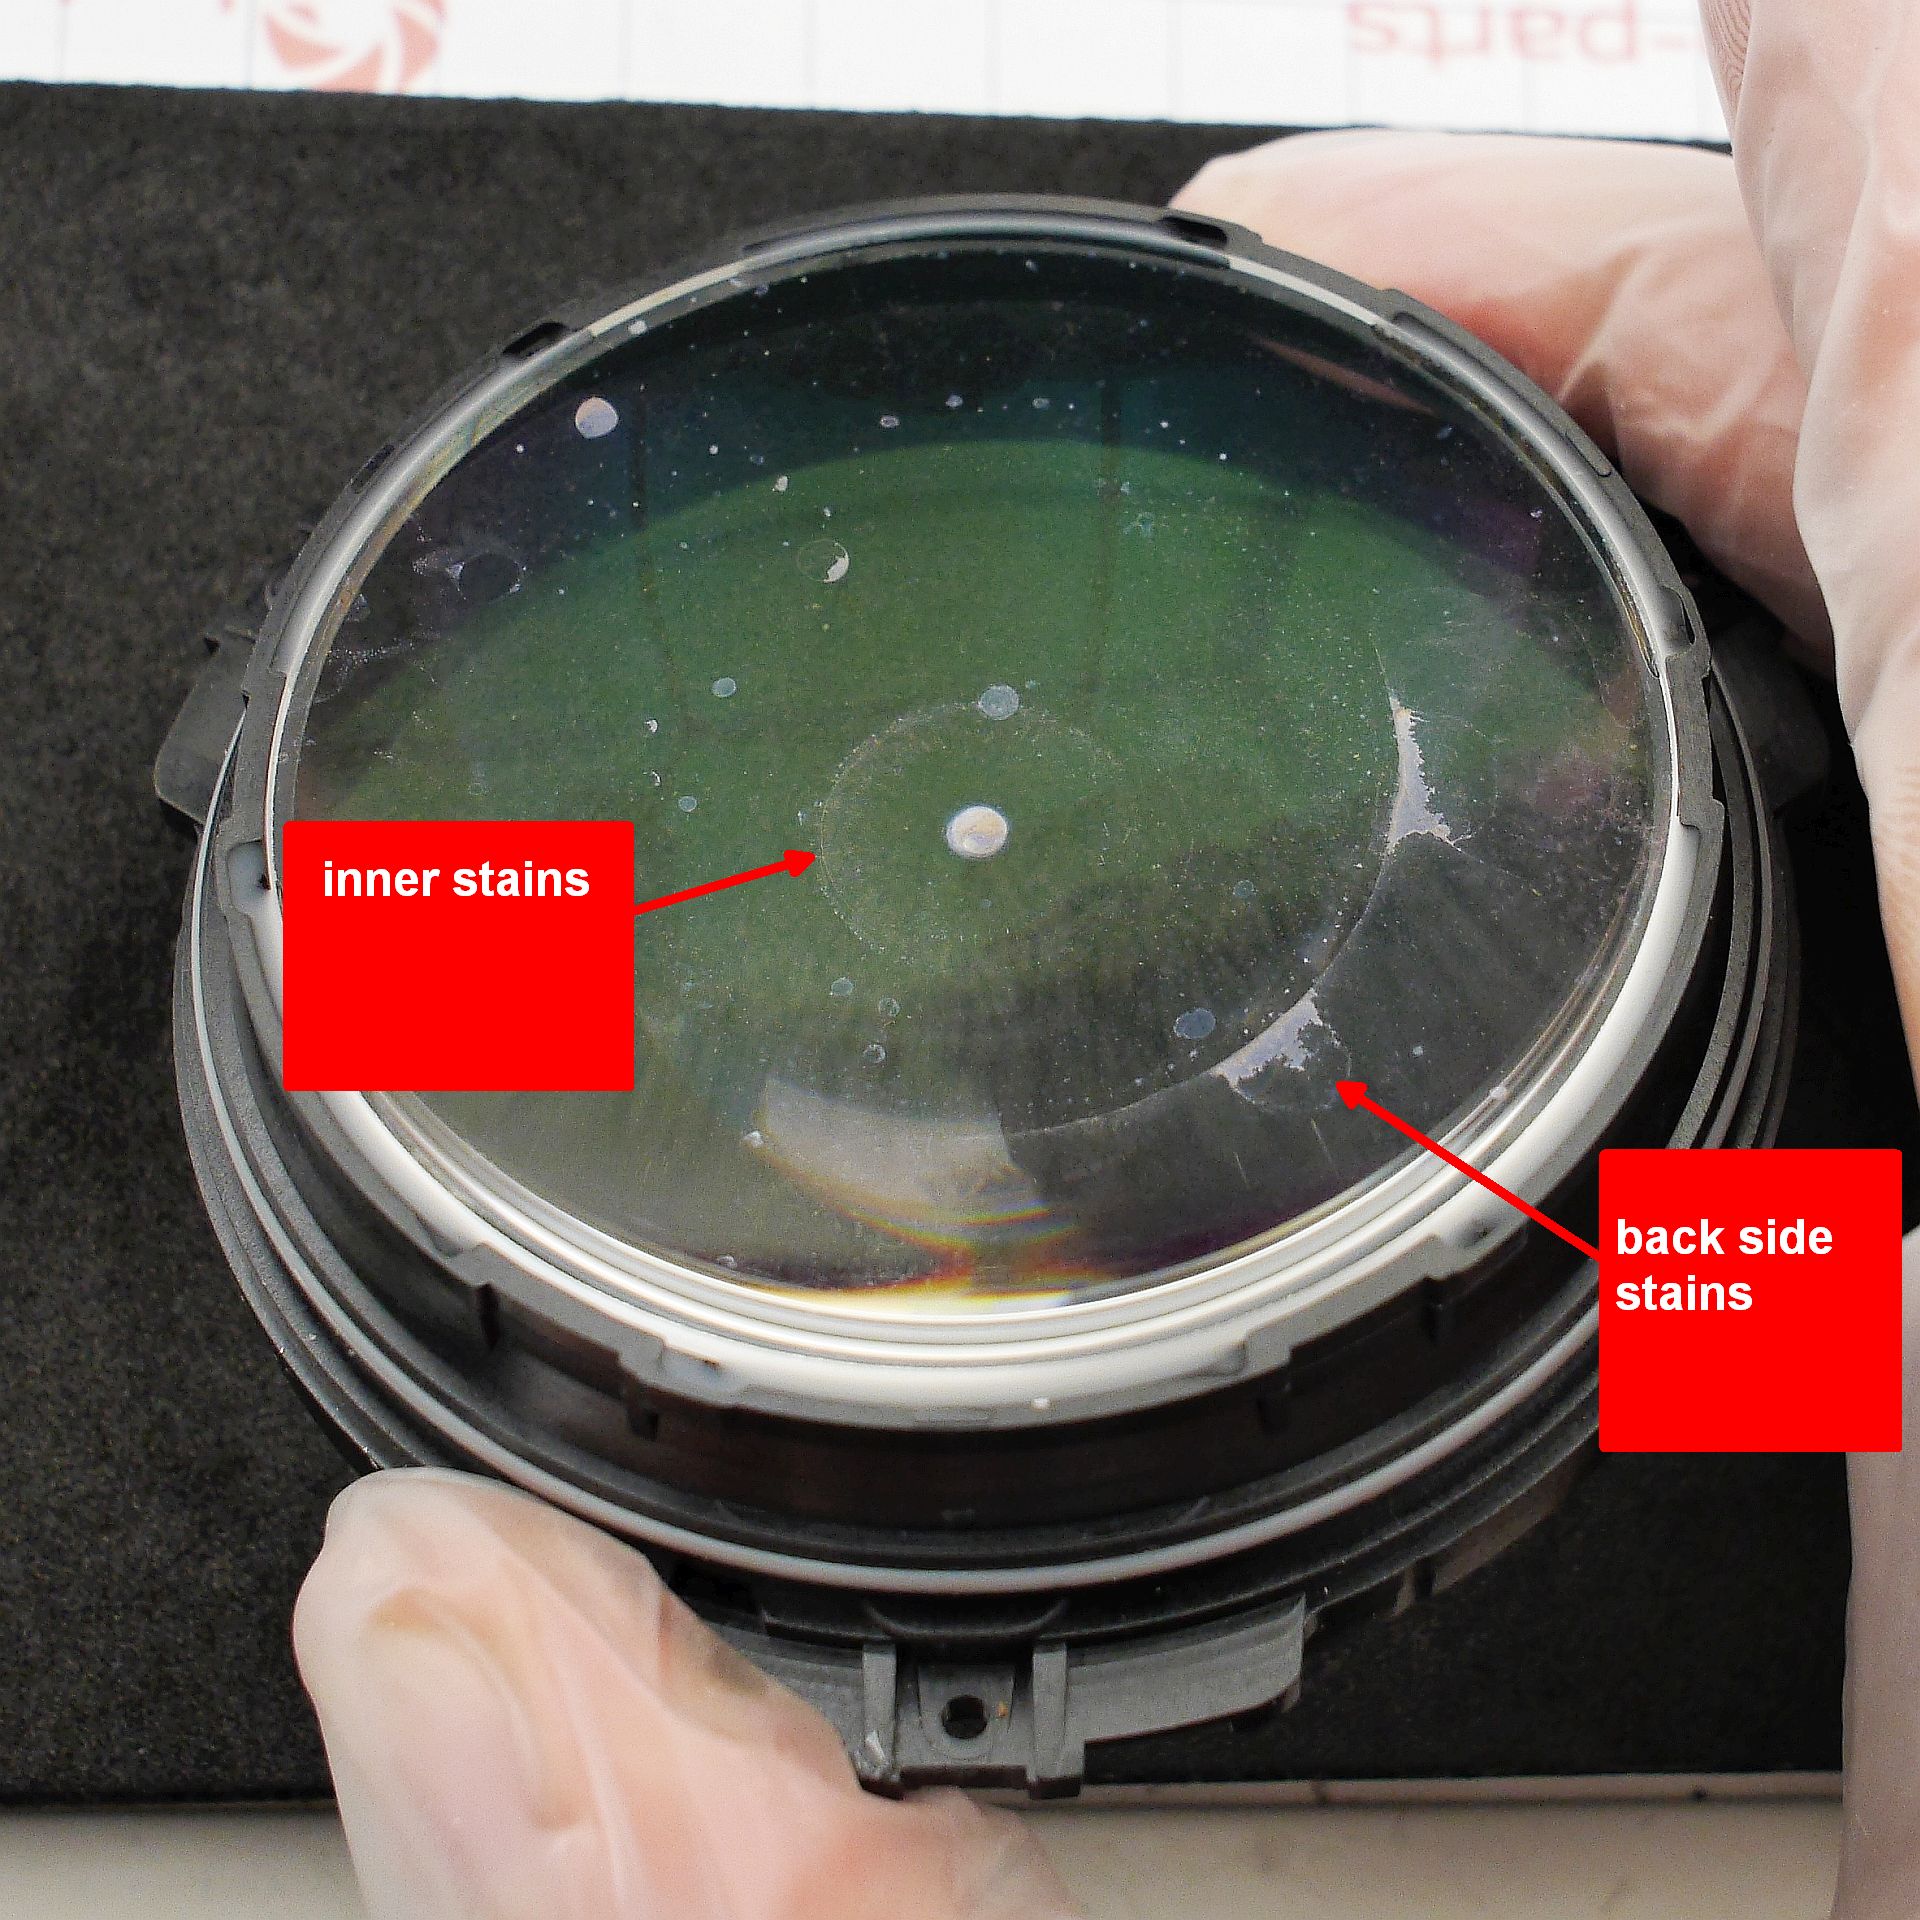
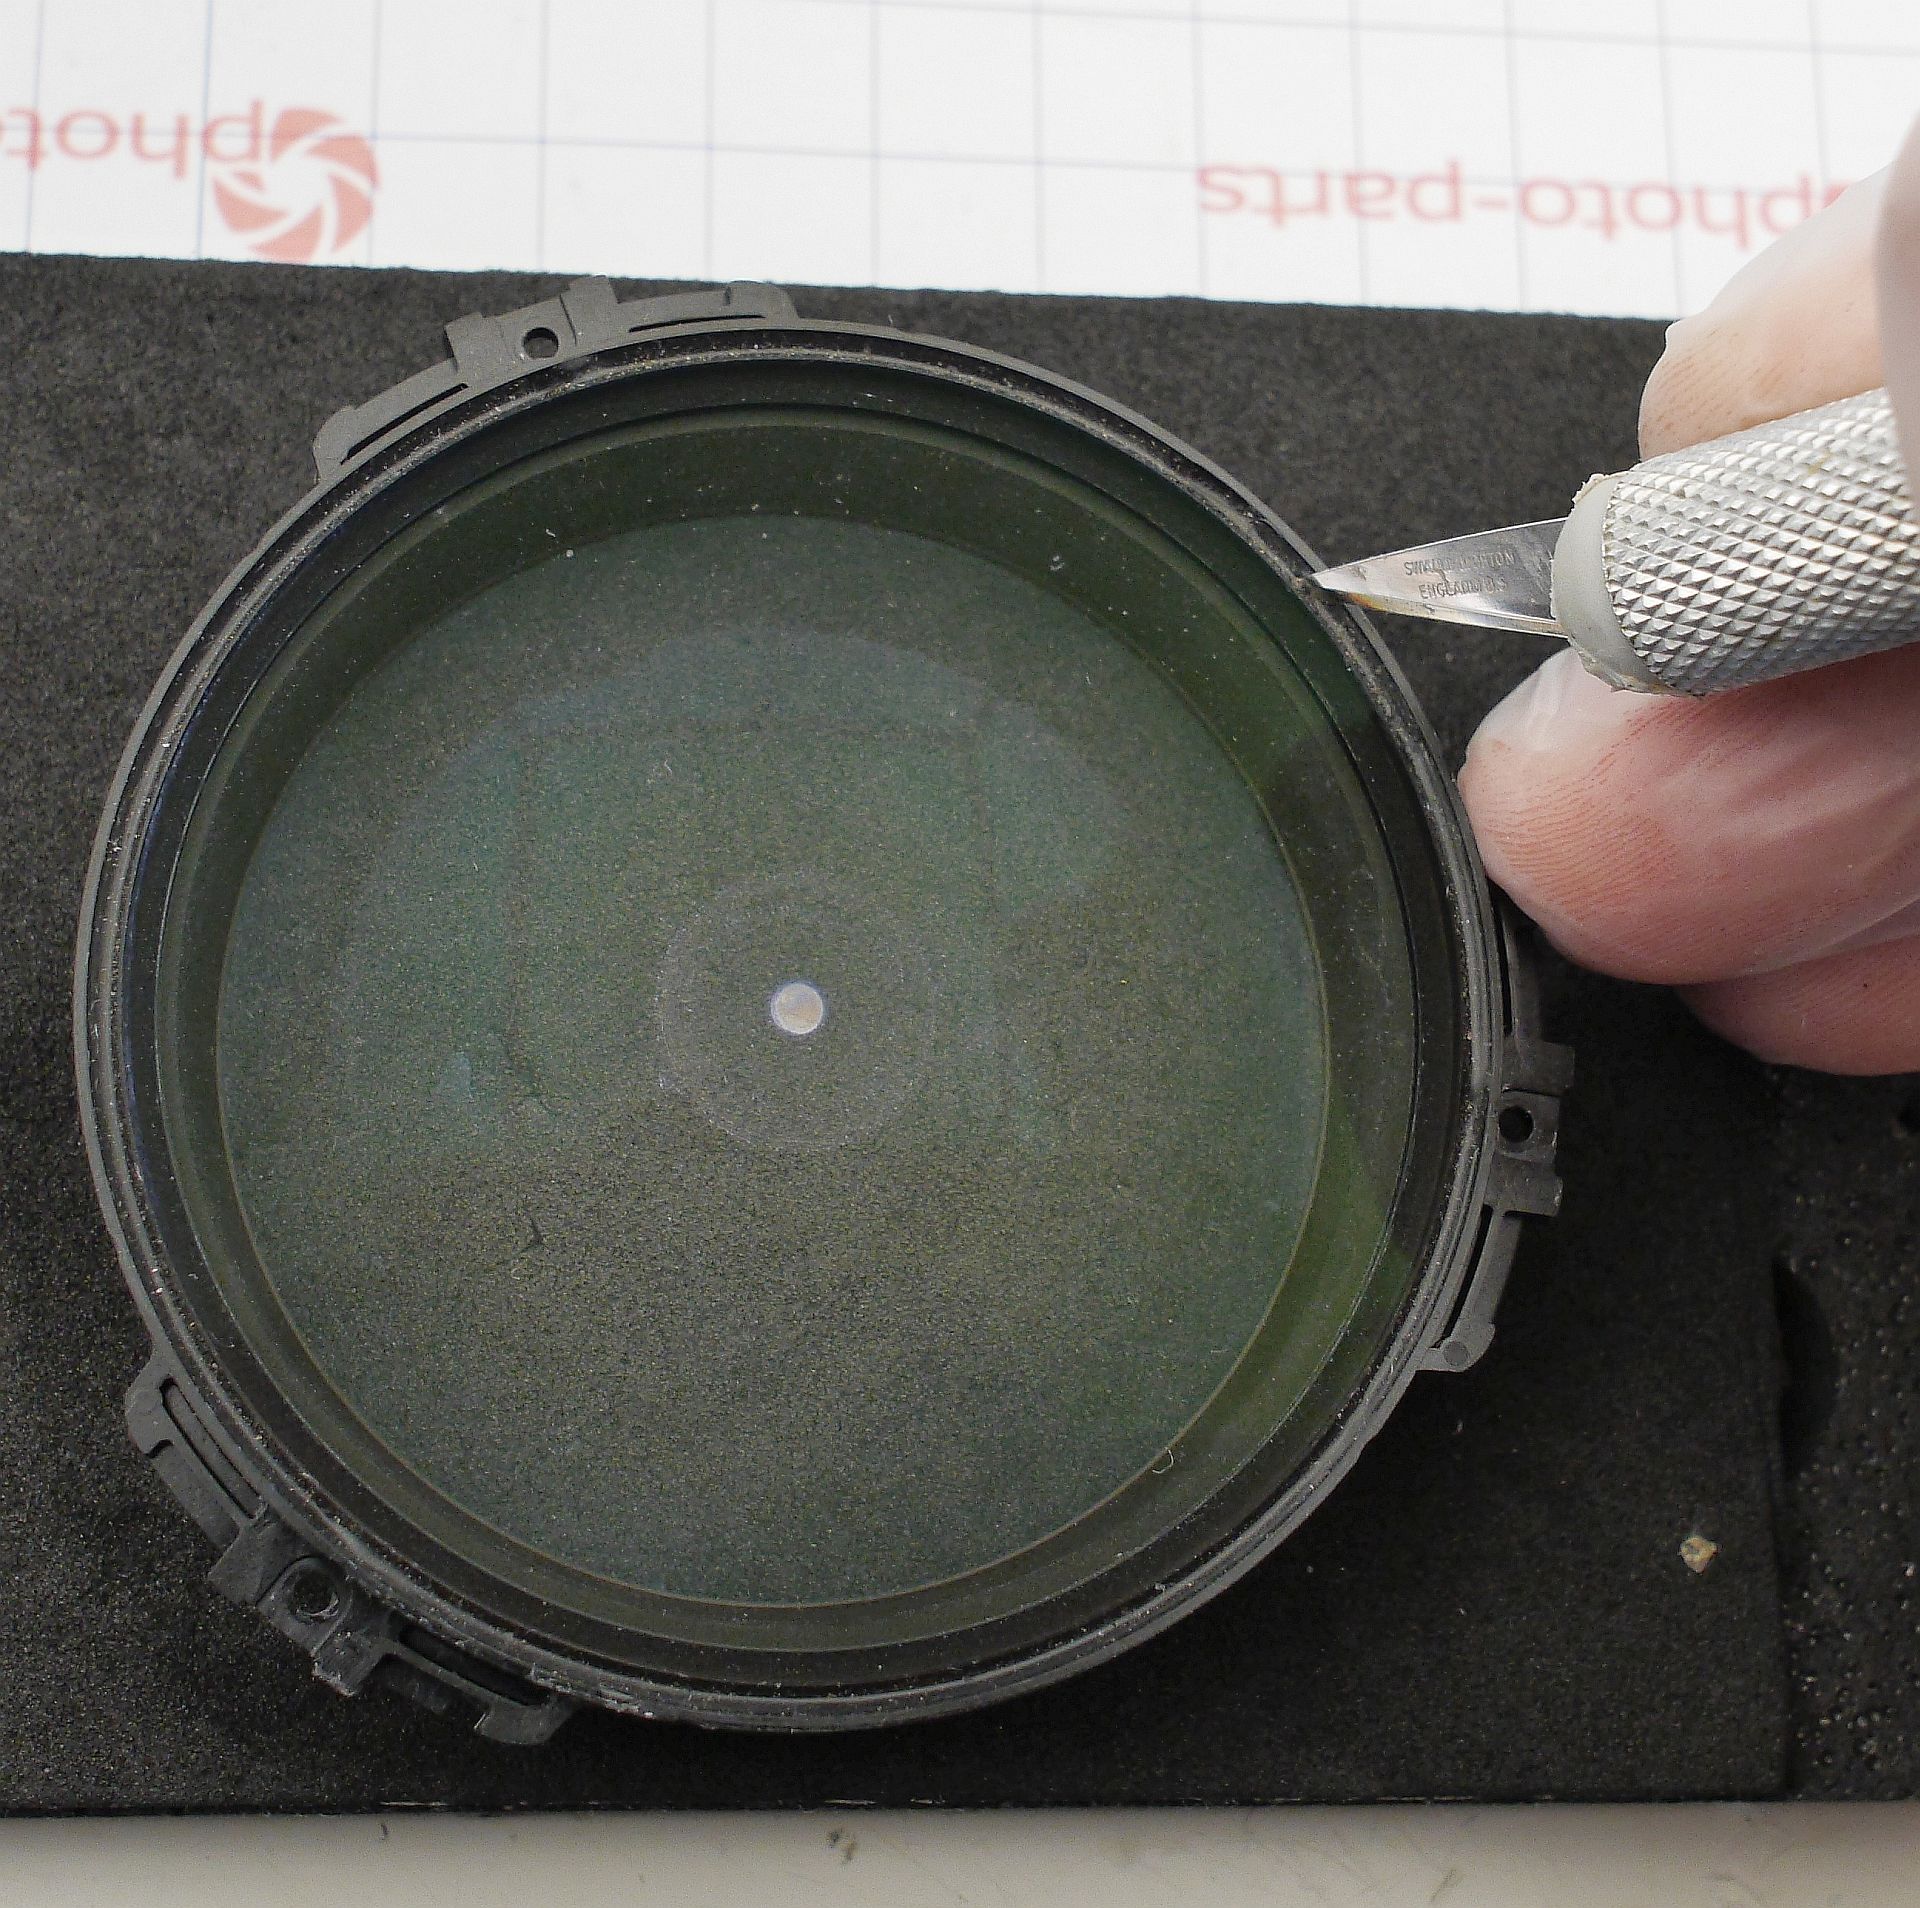
And - nothing good to see. Stains are visible both on the rear surface and inside the first lens group. After wiping the outer surfaces, I proceed to opening the cemented group - my choice was to extract the front lens. For this, I cut and scrape away the sealant, and under it there were three drops of epoxy glue:
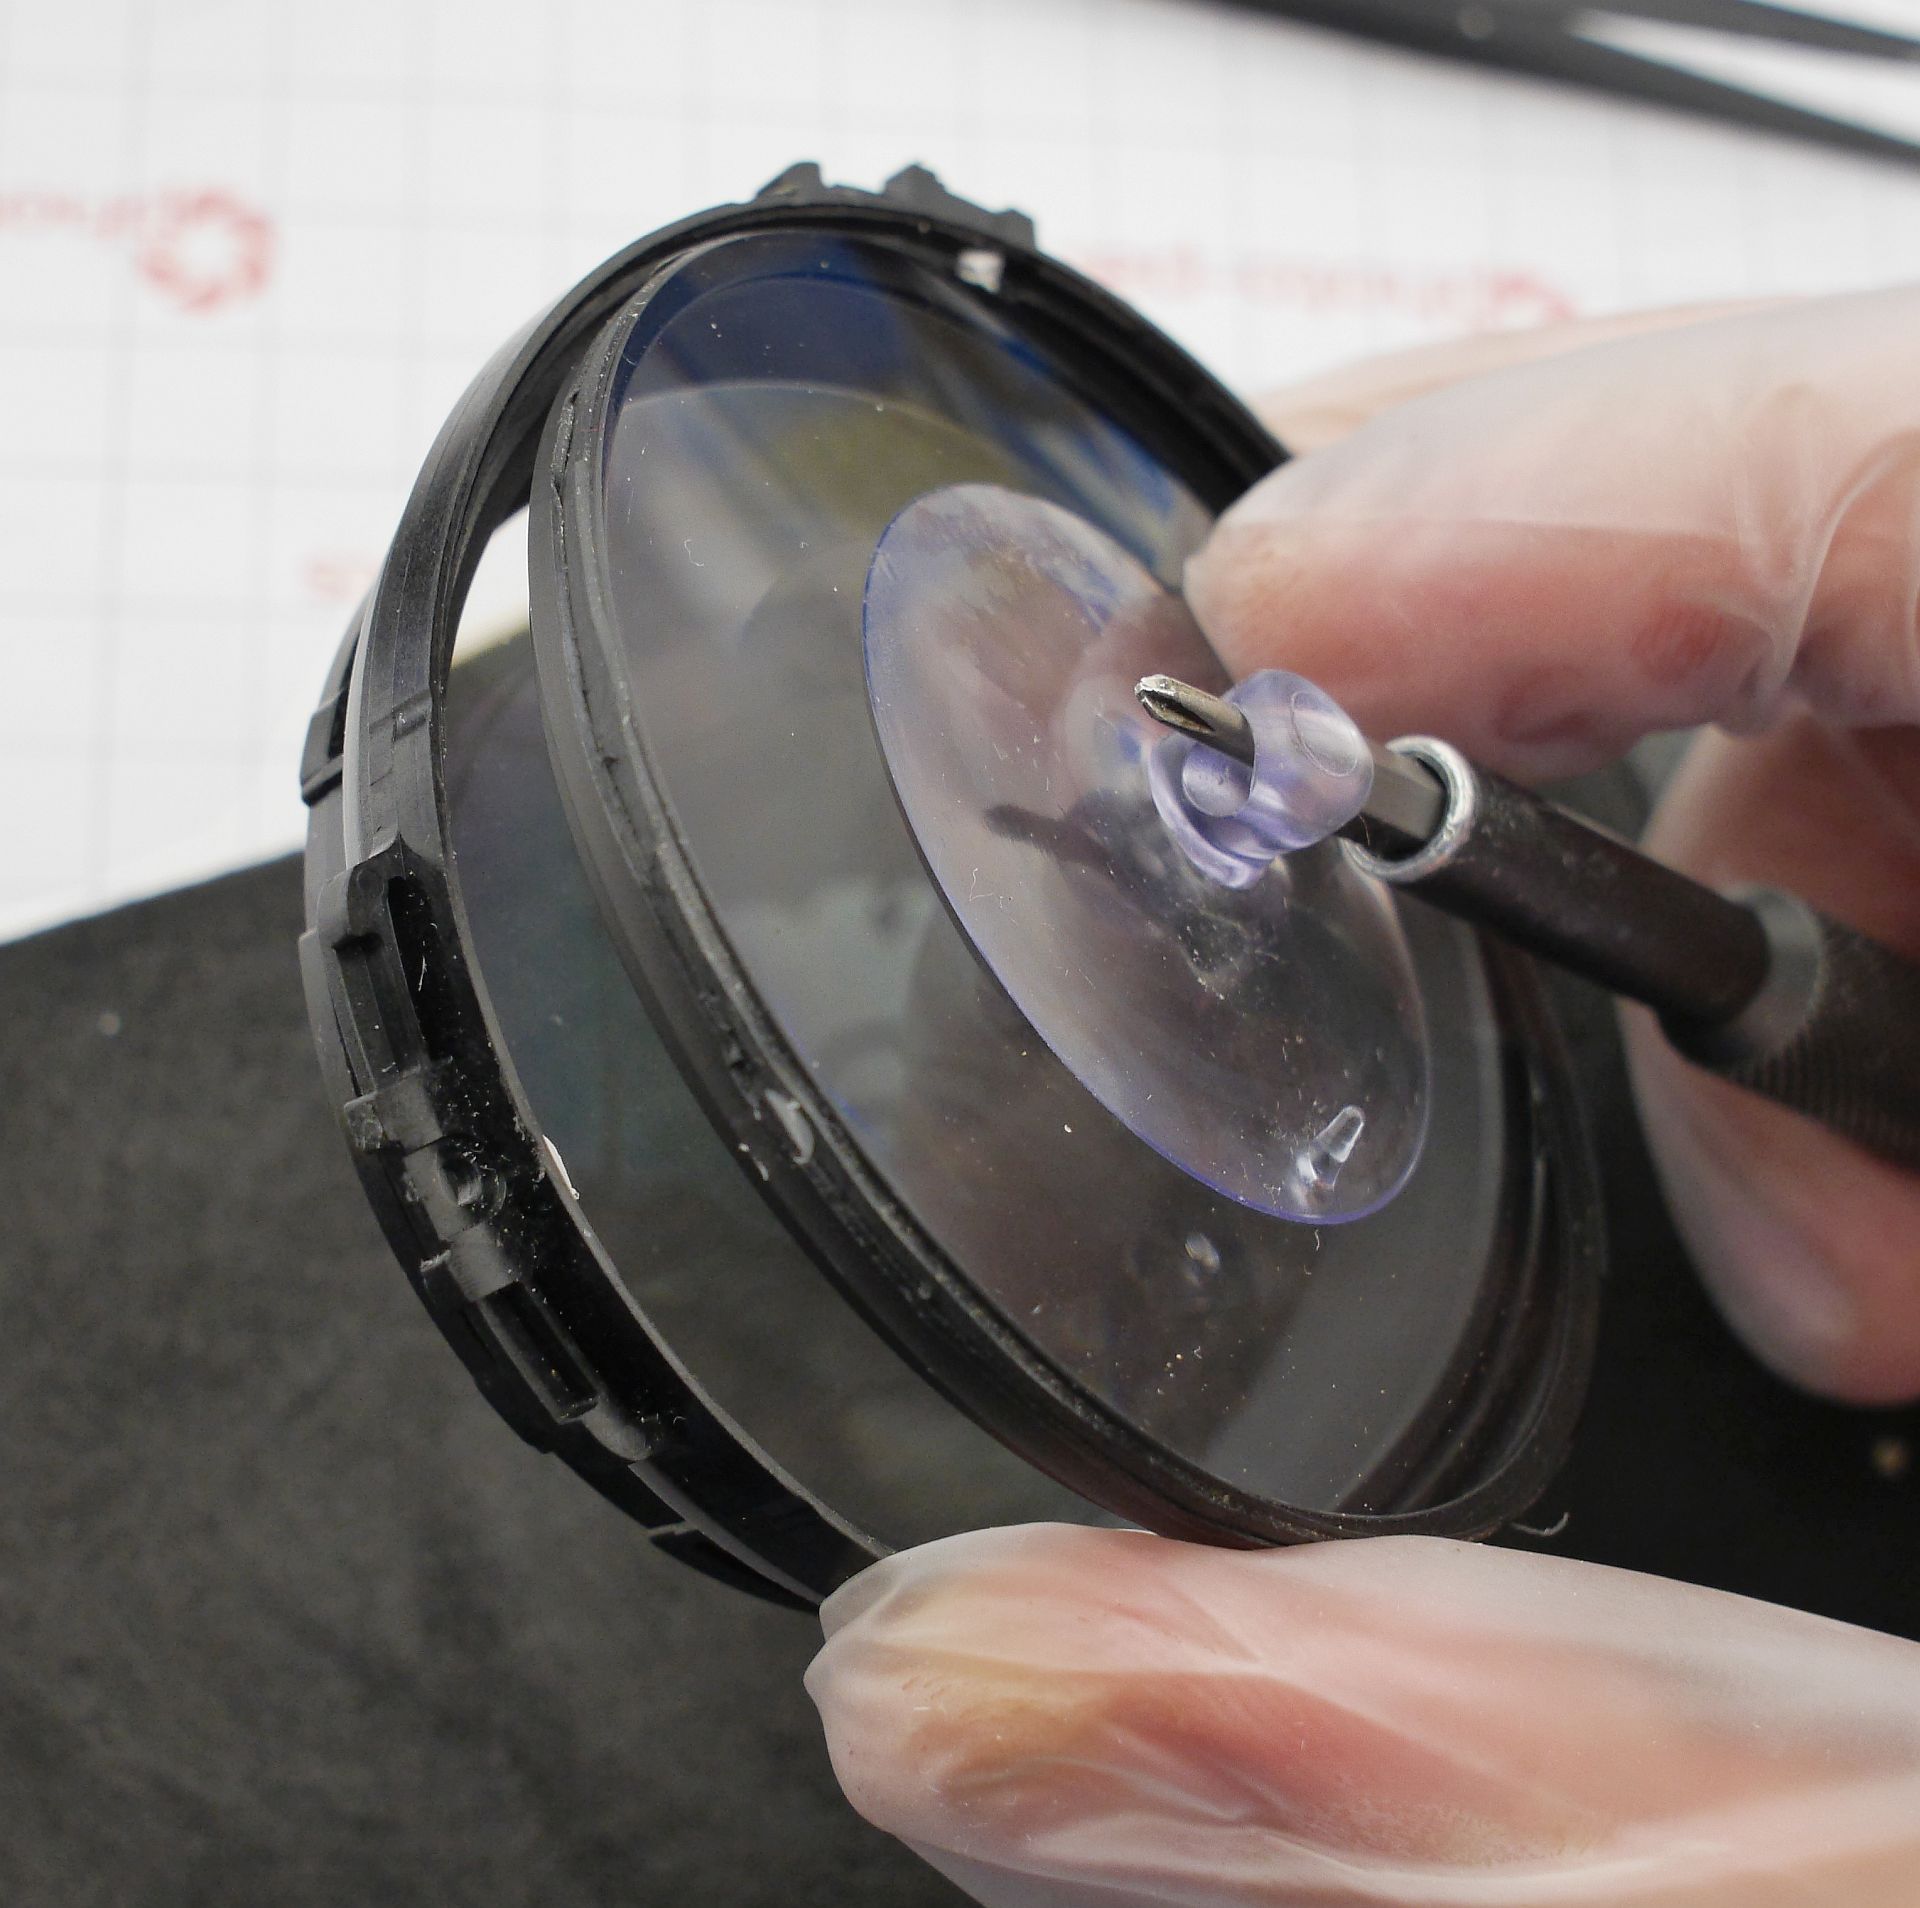
A few words about the cleaning itself. In 90% of cases the following method works: an ordinary paper tissue (without marketing fluff like fragrance, aloe extract, or synthetic fibers) is separated into layers and wrapped around a cotton swab or finger, inner side out.
- The first pass is done with window cleaner (ammonia + surfactant), then wiped dry with a fresh tissue.
- The second pass is done with a new tissue after breathing on the lens, wiping away the condensation. This procedure is repeated as many times as needed until streaks completely disappear even on a fogged lens.
- The third step - blow away all lint with clean compressed air. All of this should be done against a matte black background - only then do streaks become visible on the lens.
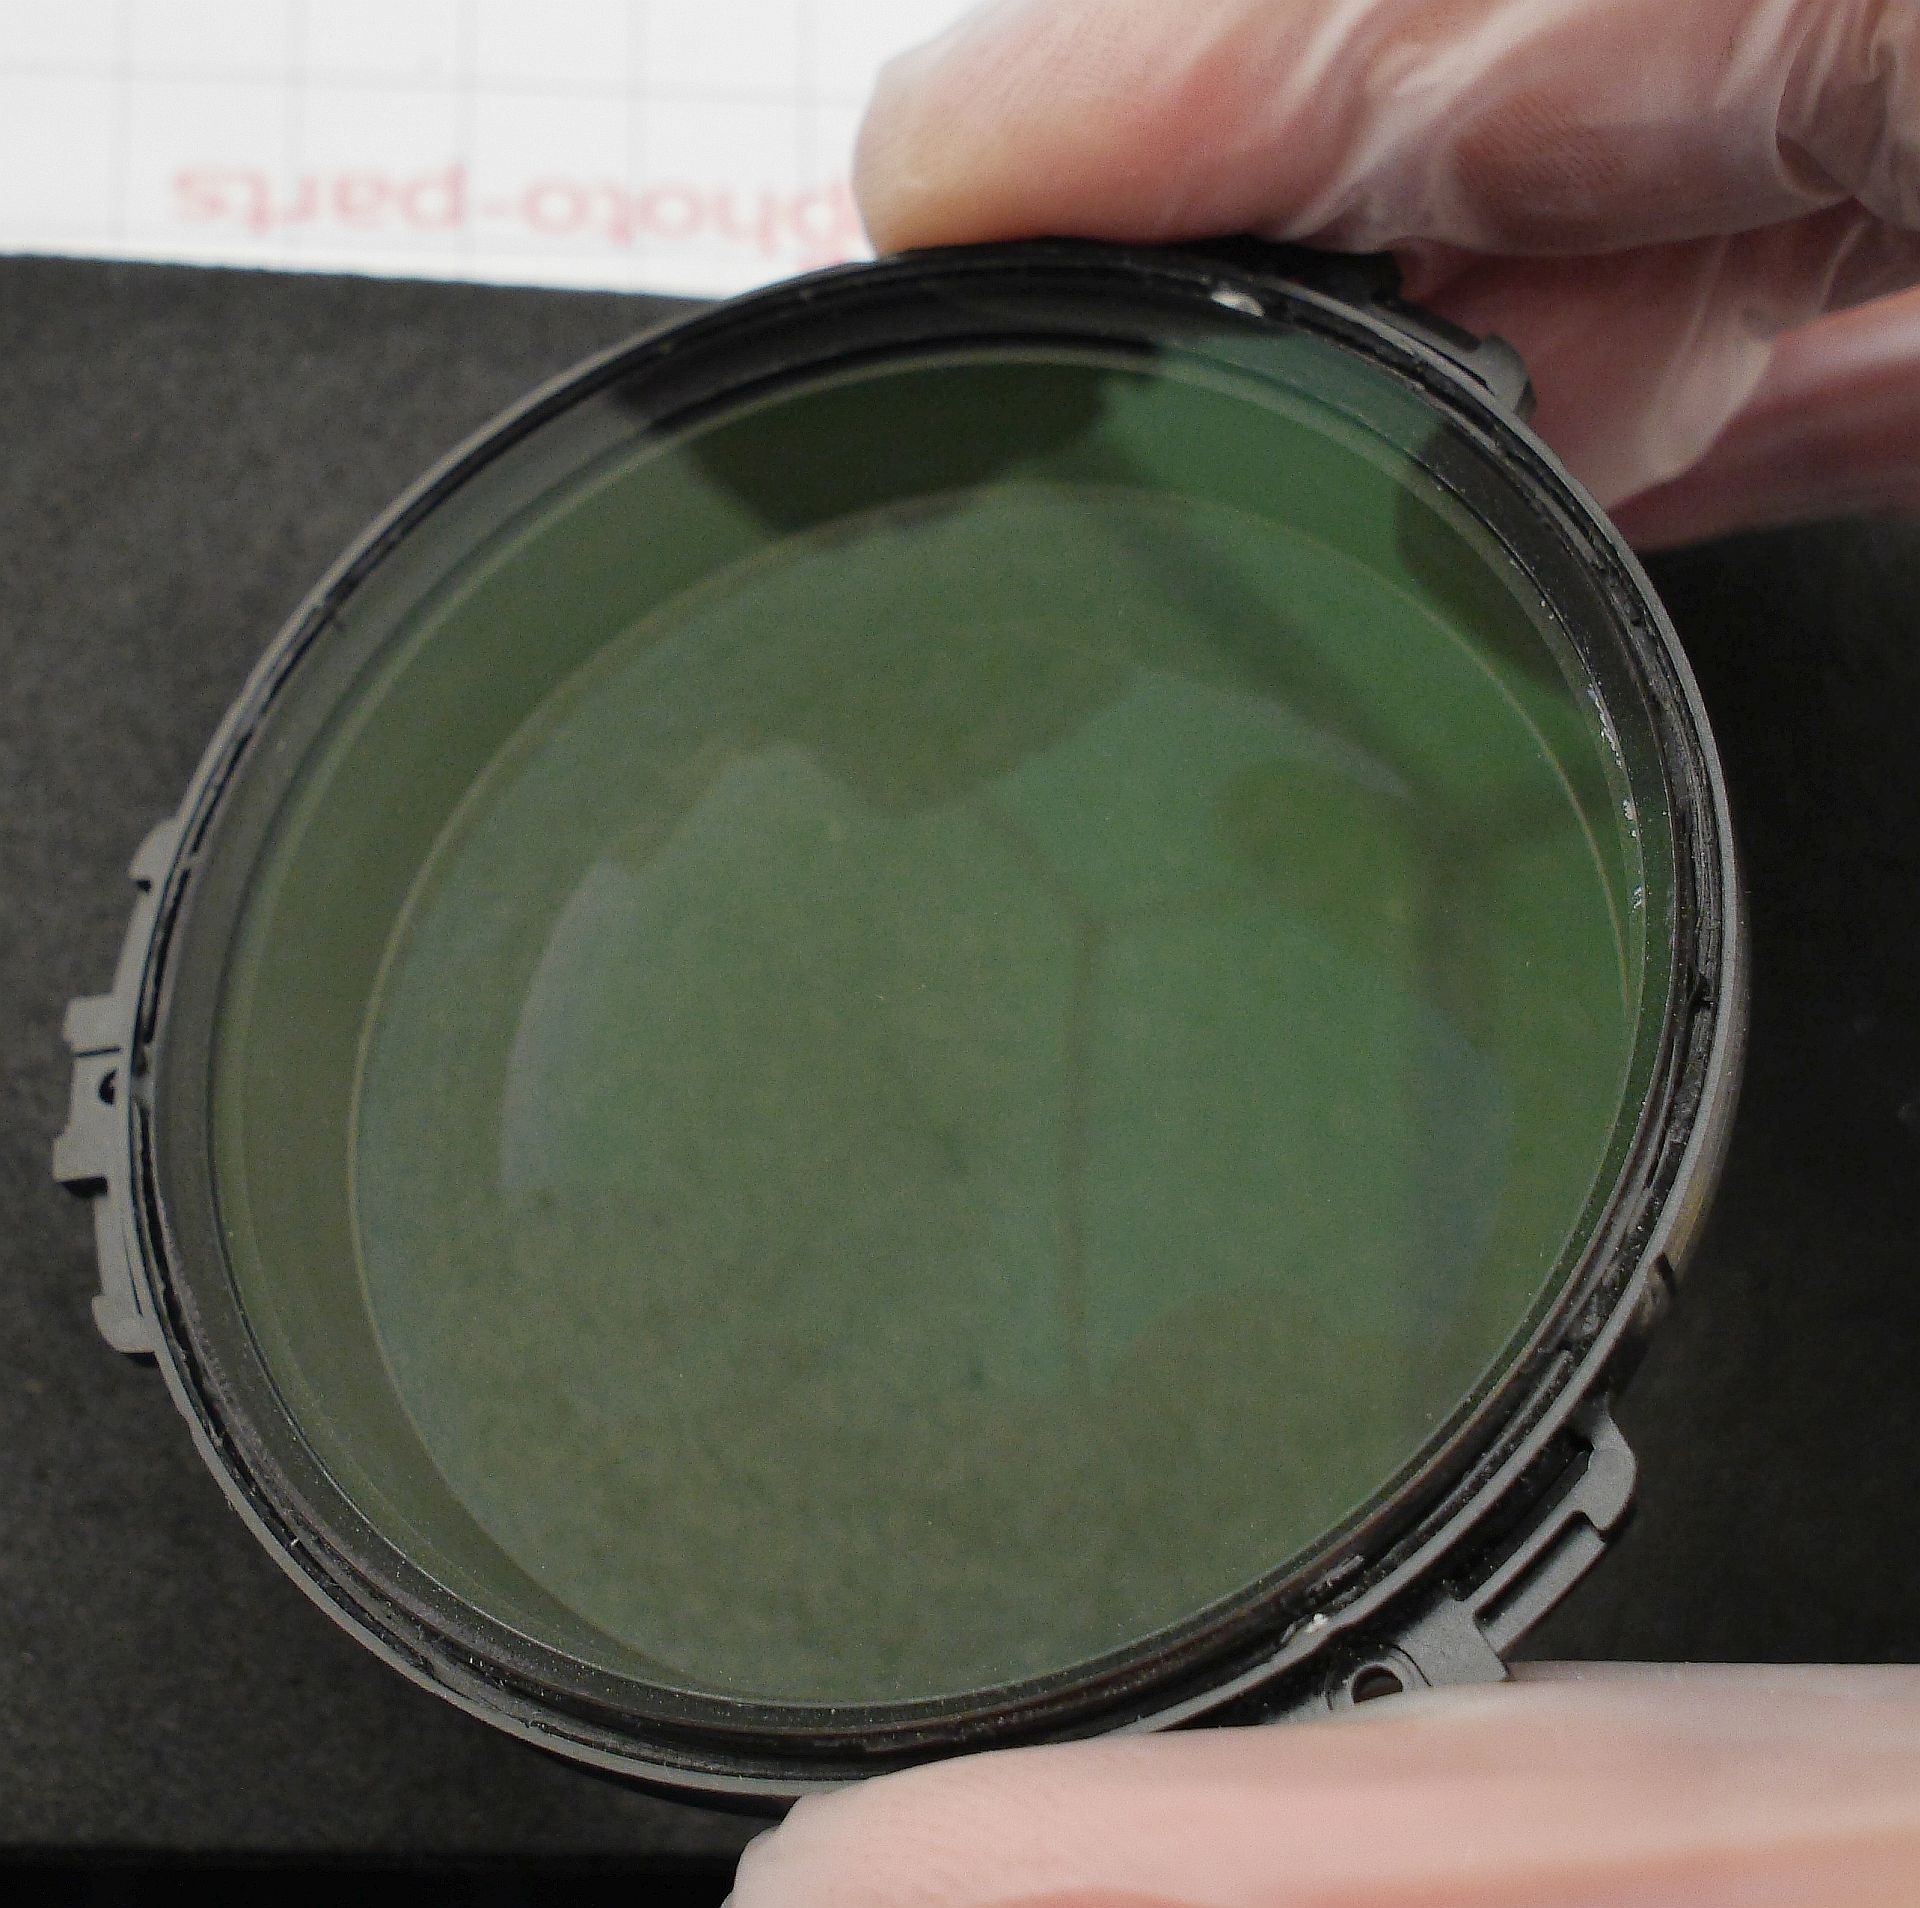
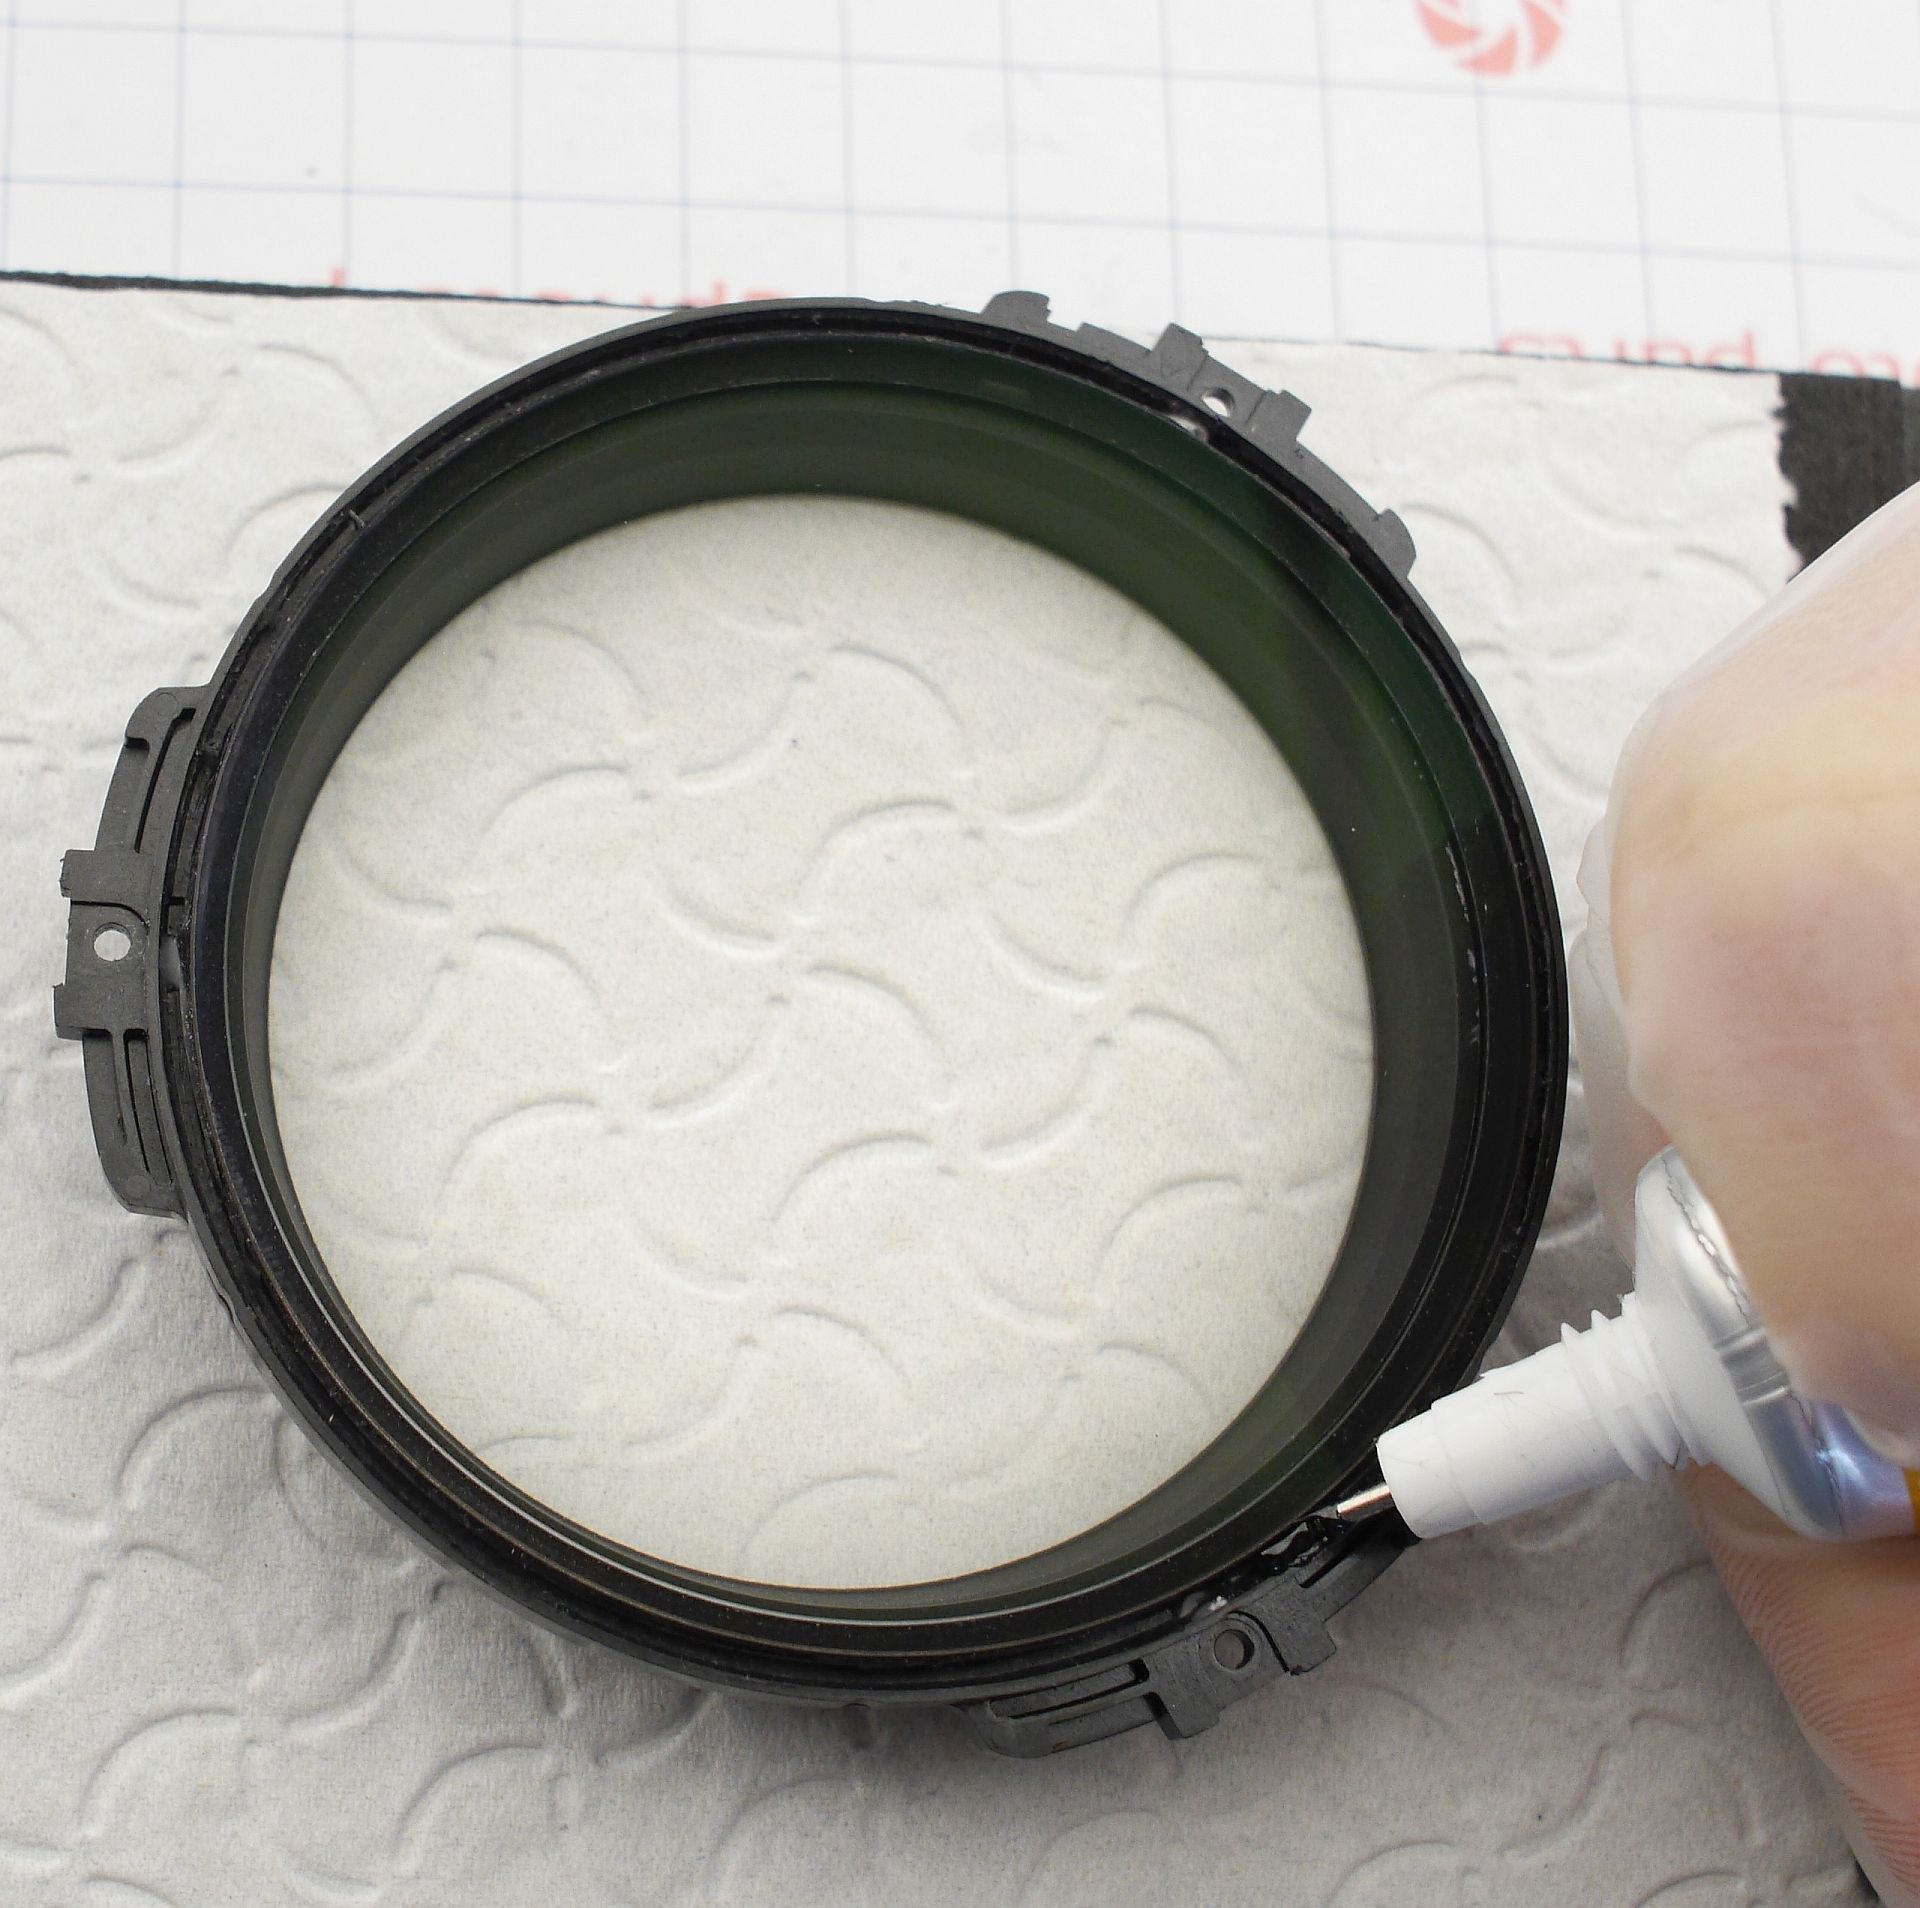
With the front lens, cleaning was fully successful: no water marks visible. Instead of the original sealant, I used the familiar T7000 adhesive.
At this point it became clear that I'd have to disassemble the lens down to the very last element. So we'll do just that - now the disassembly continues from the bayonet side. In general, it's all standard there, except for removing the PCB: first disconnect the narrow flat flex cable, then slide the board a bit out of the housing, and only then disconnect the wide flex. Accordingly, assembly is also done in this unusual order.
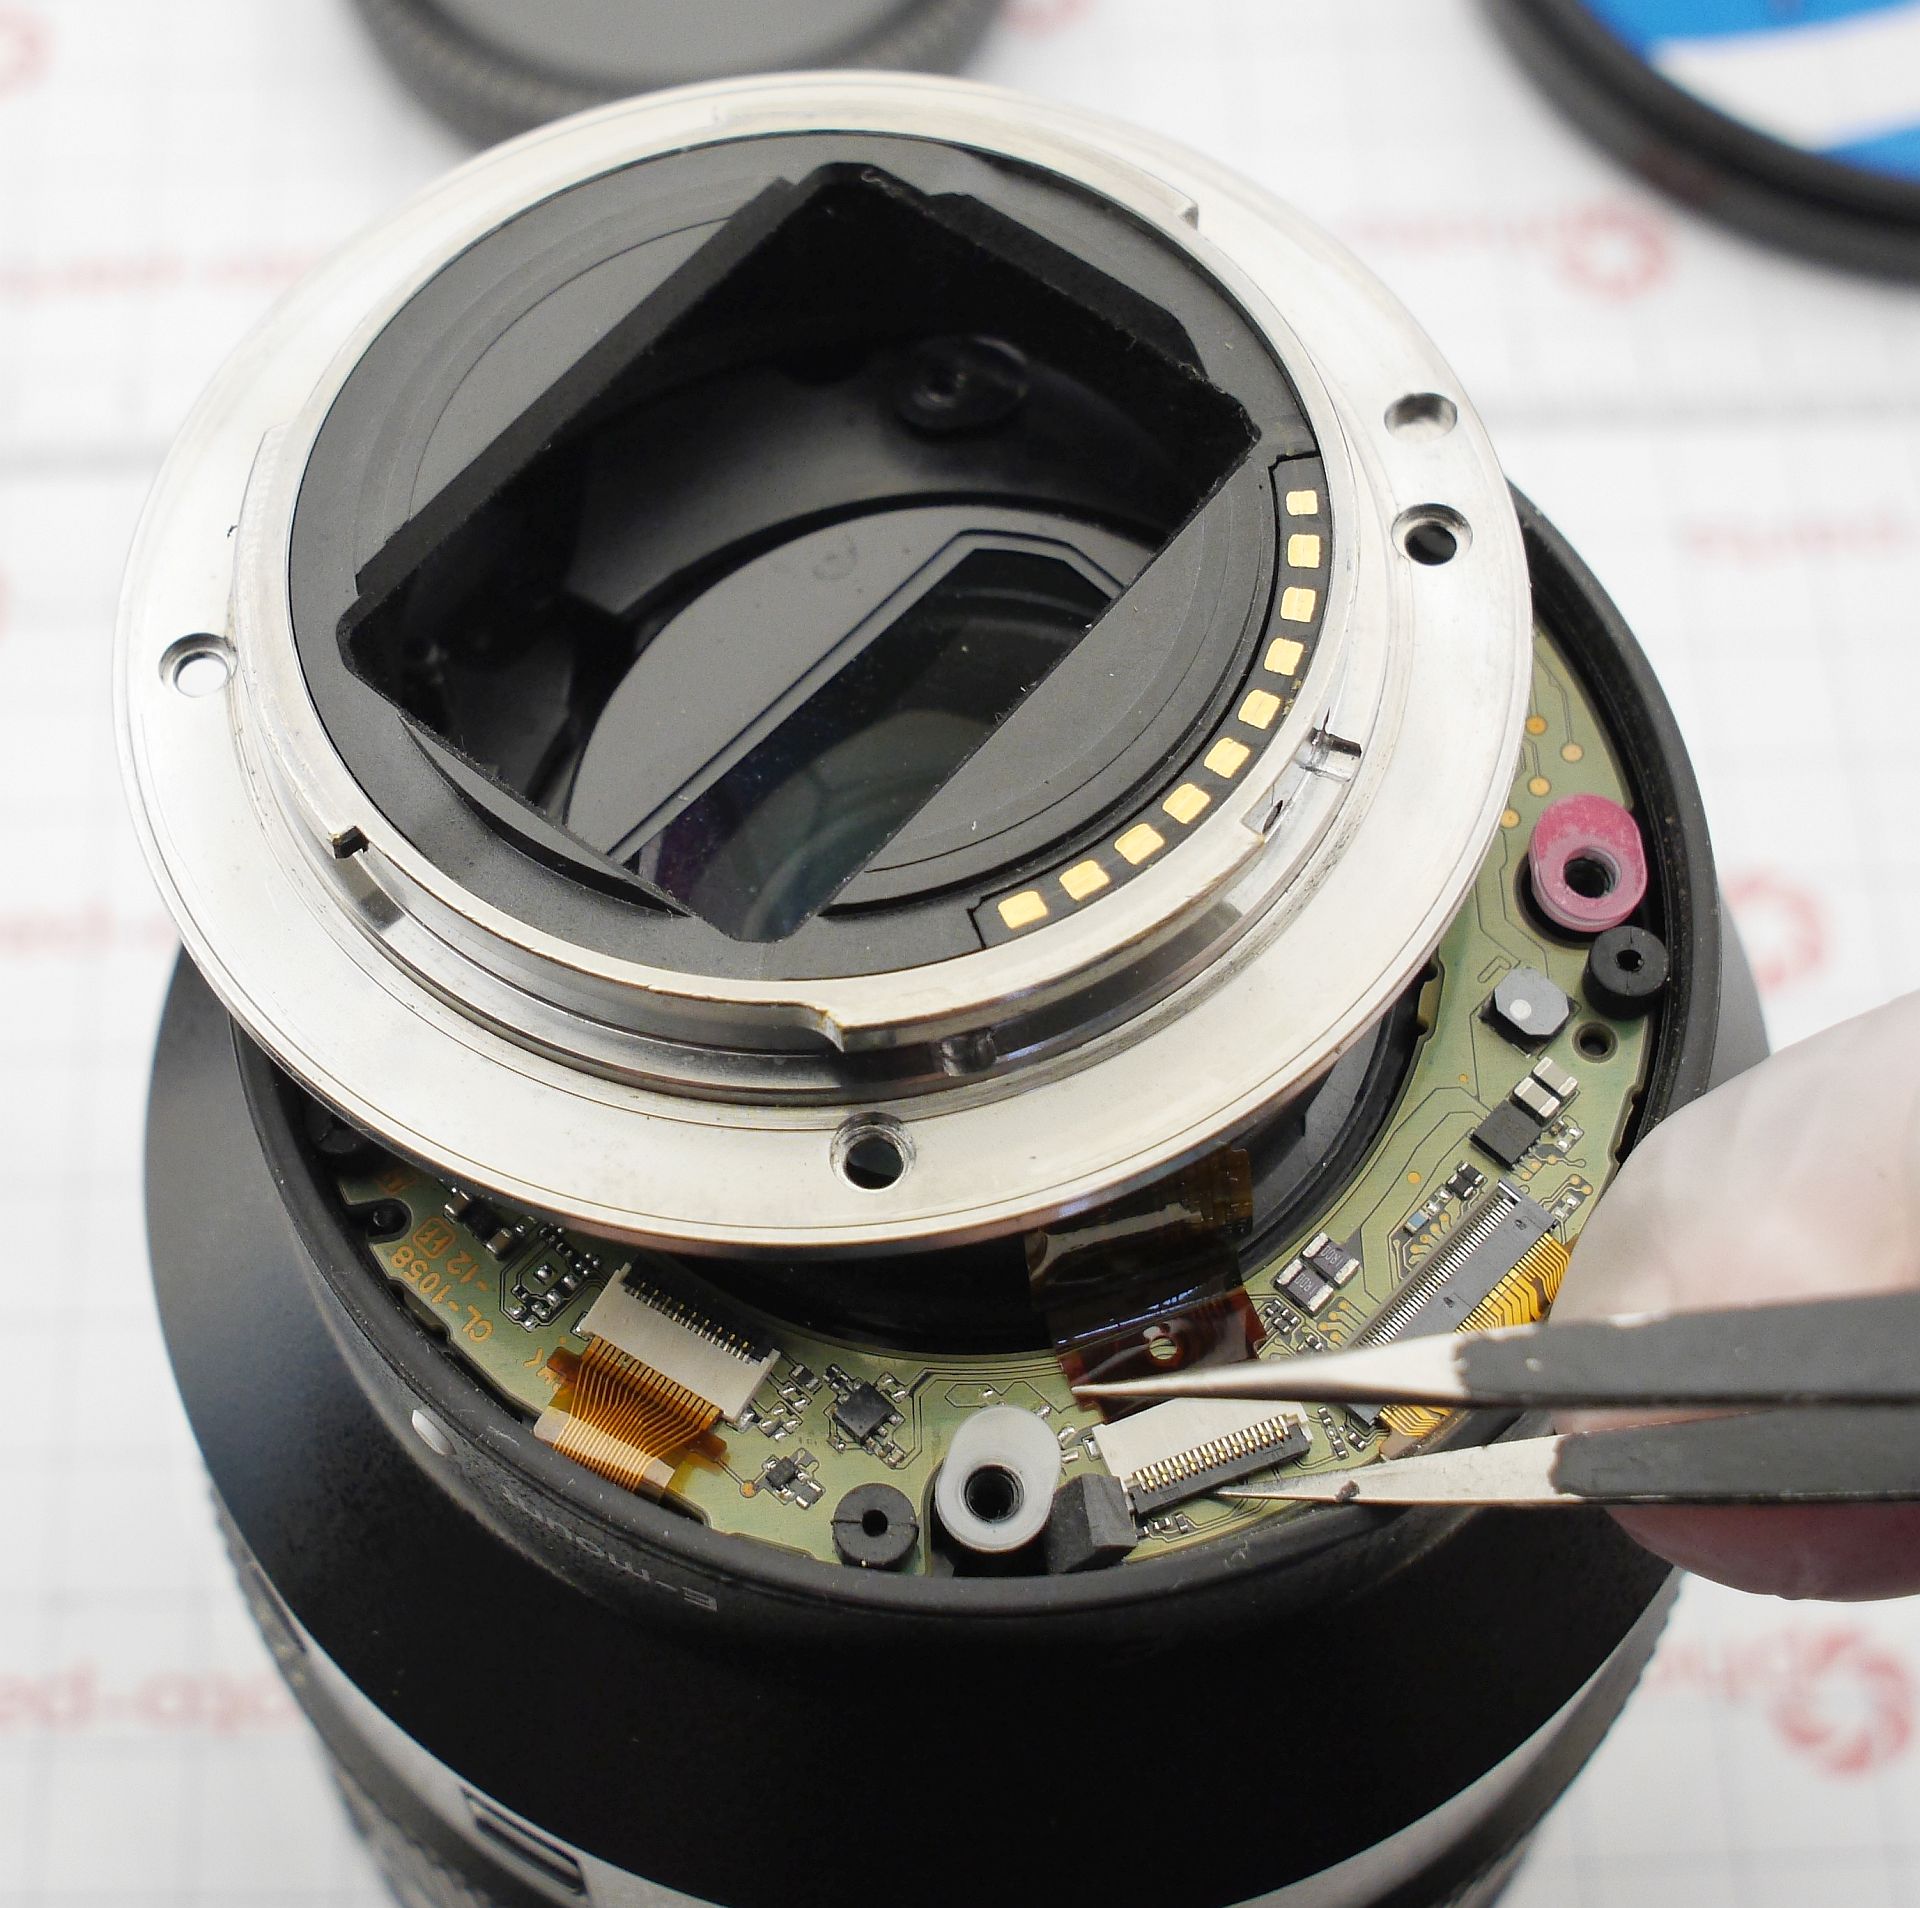
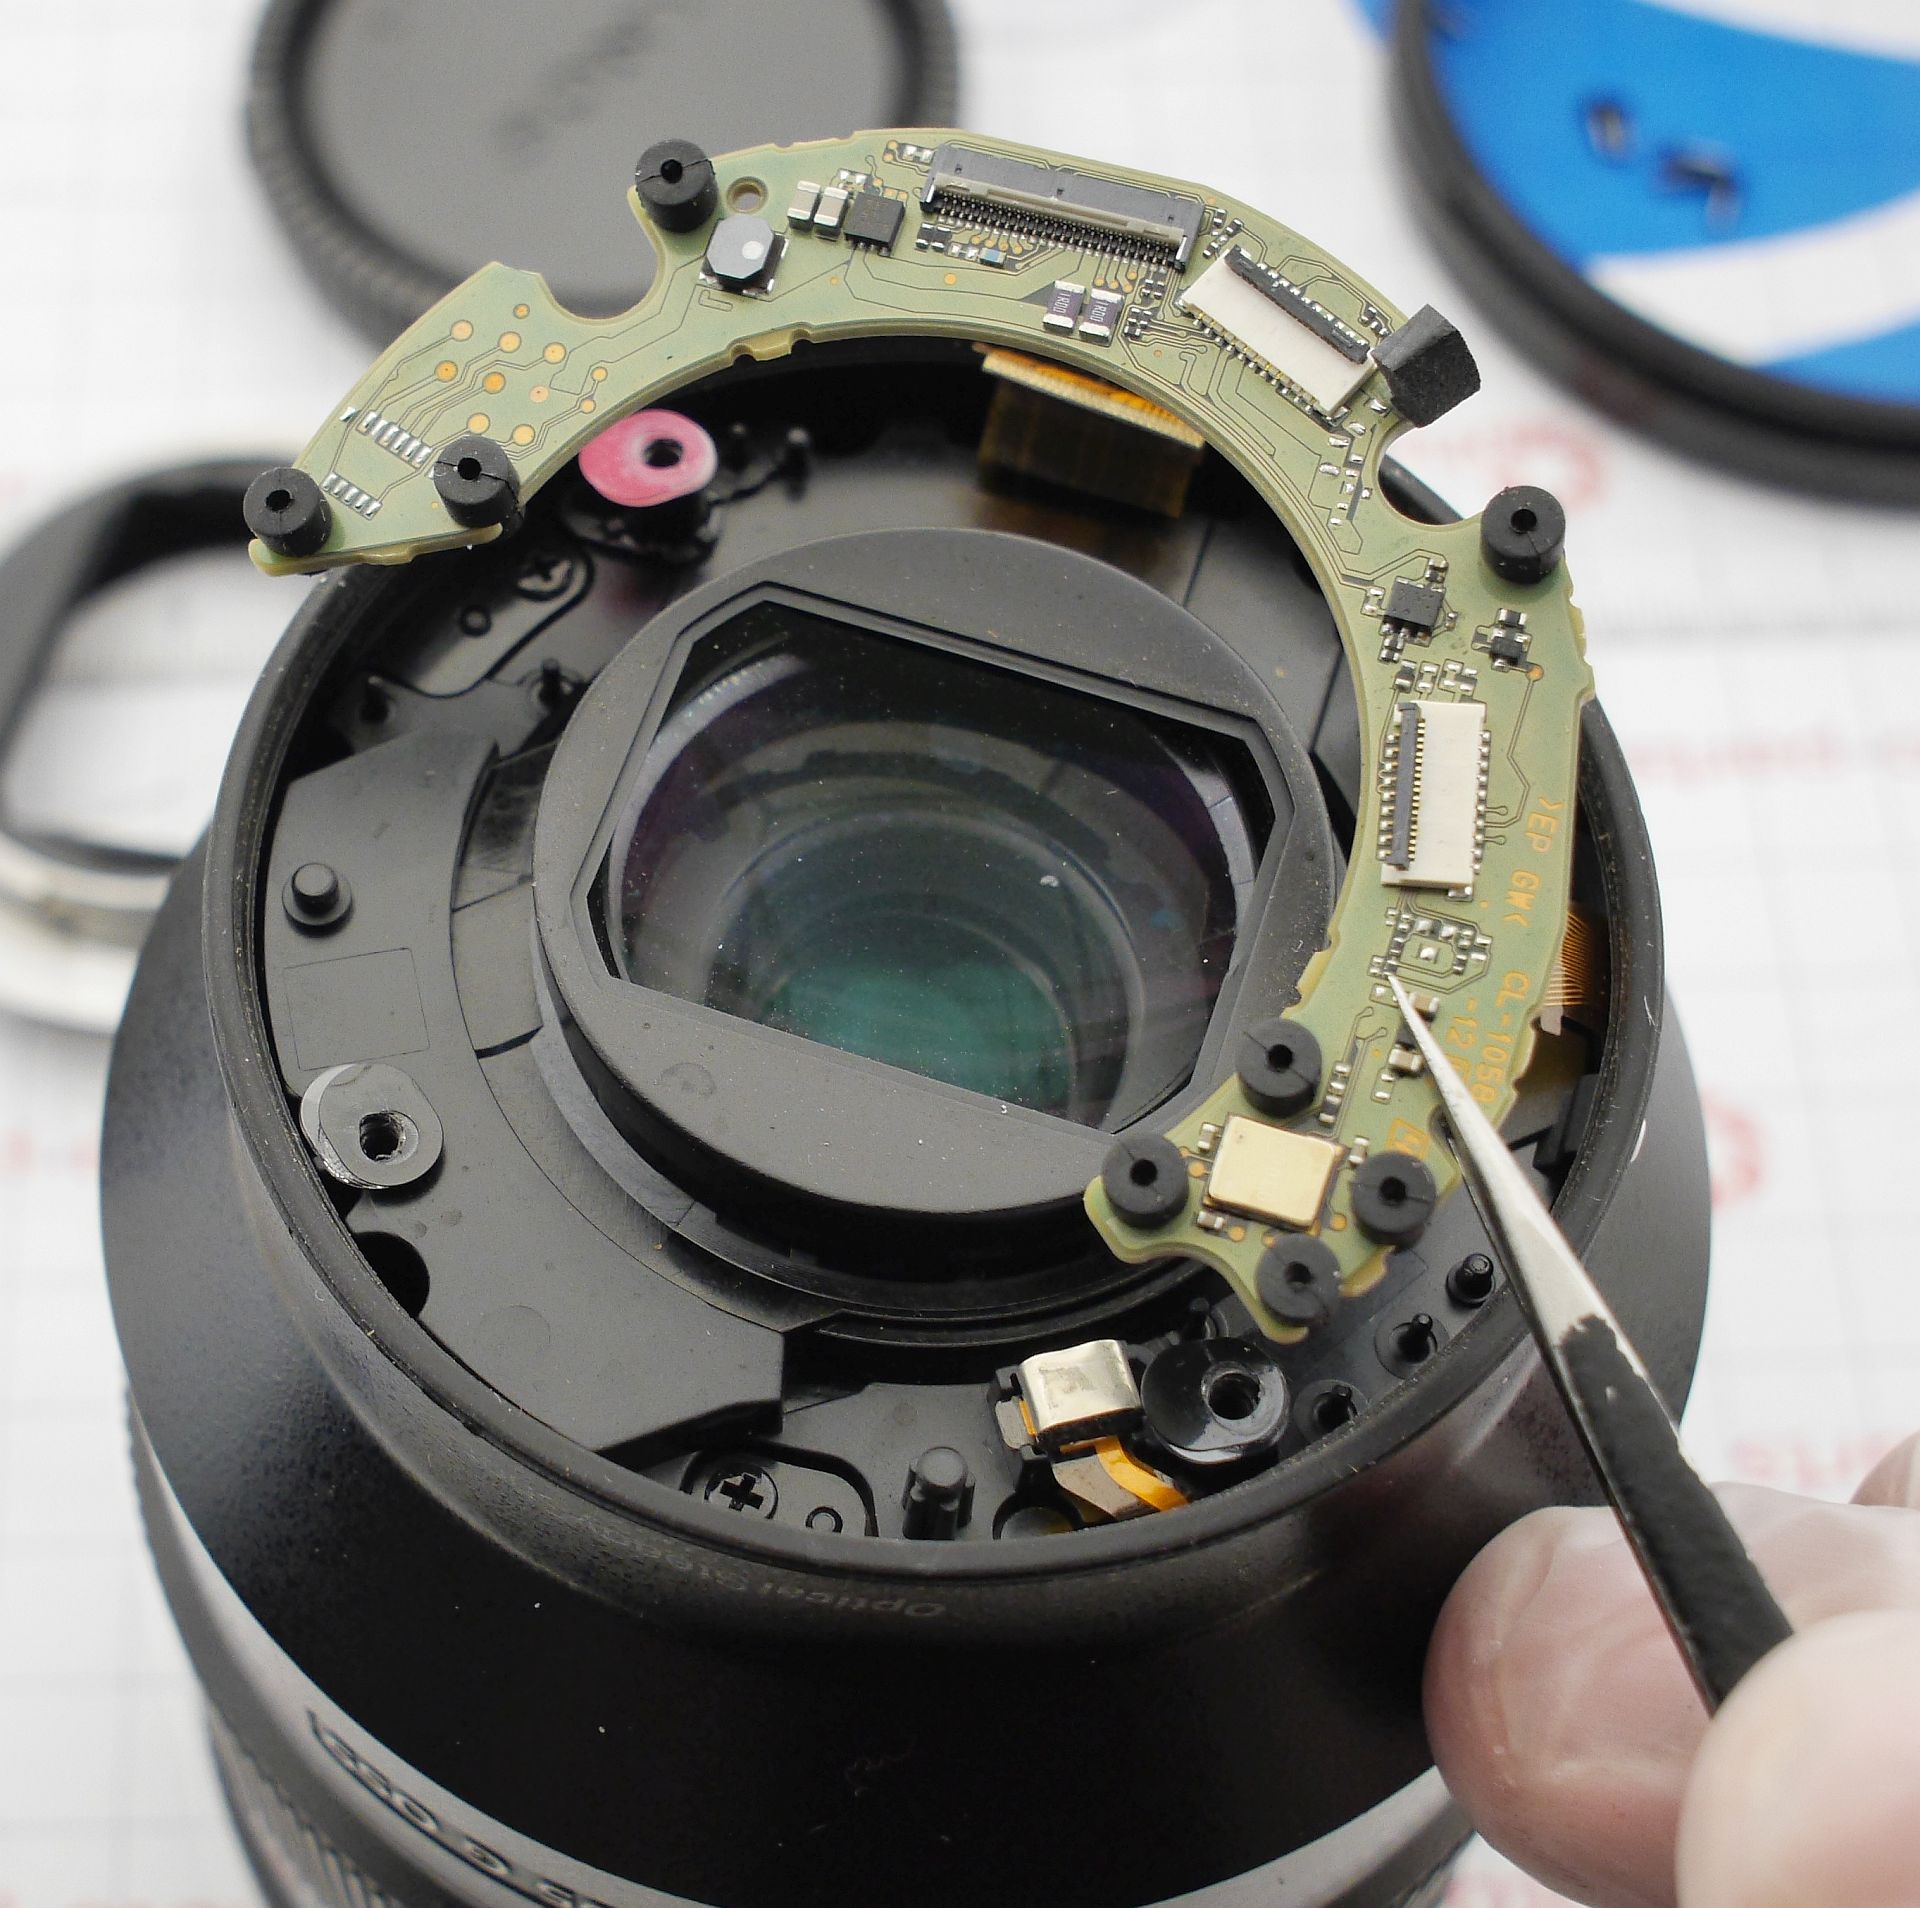
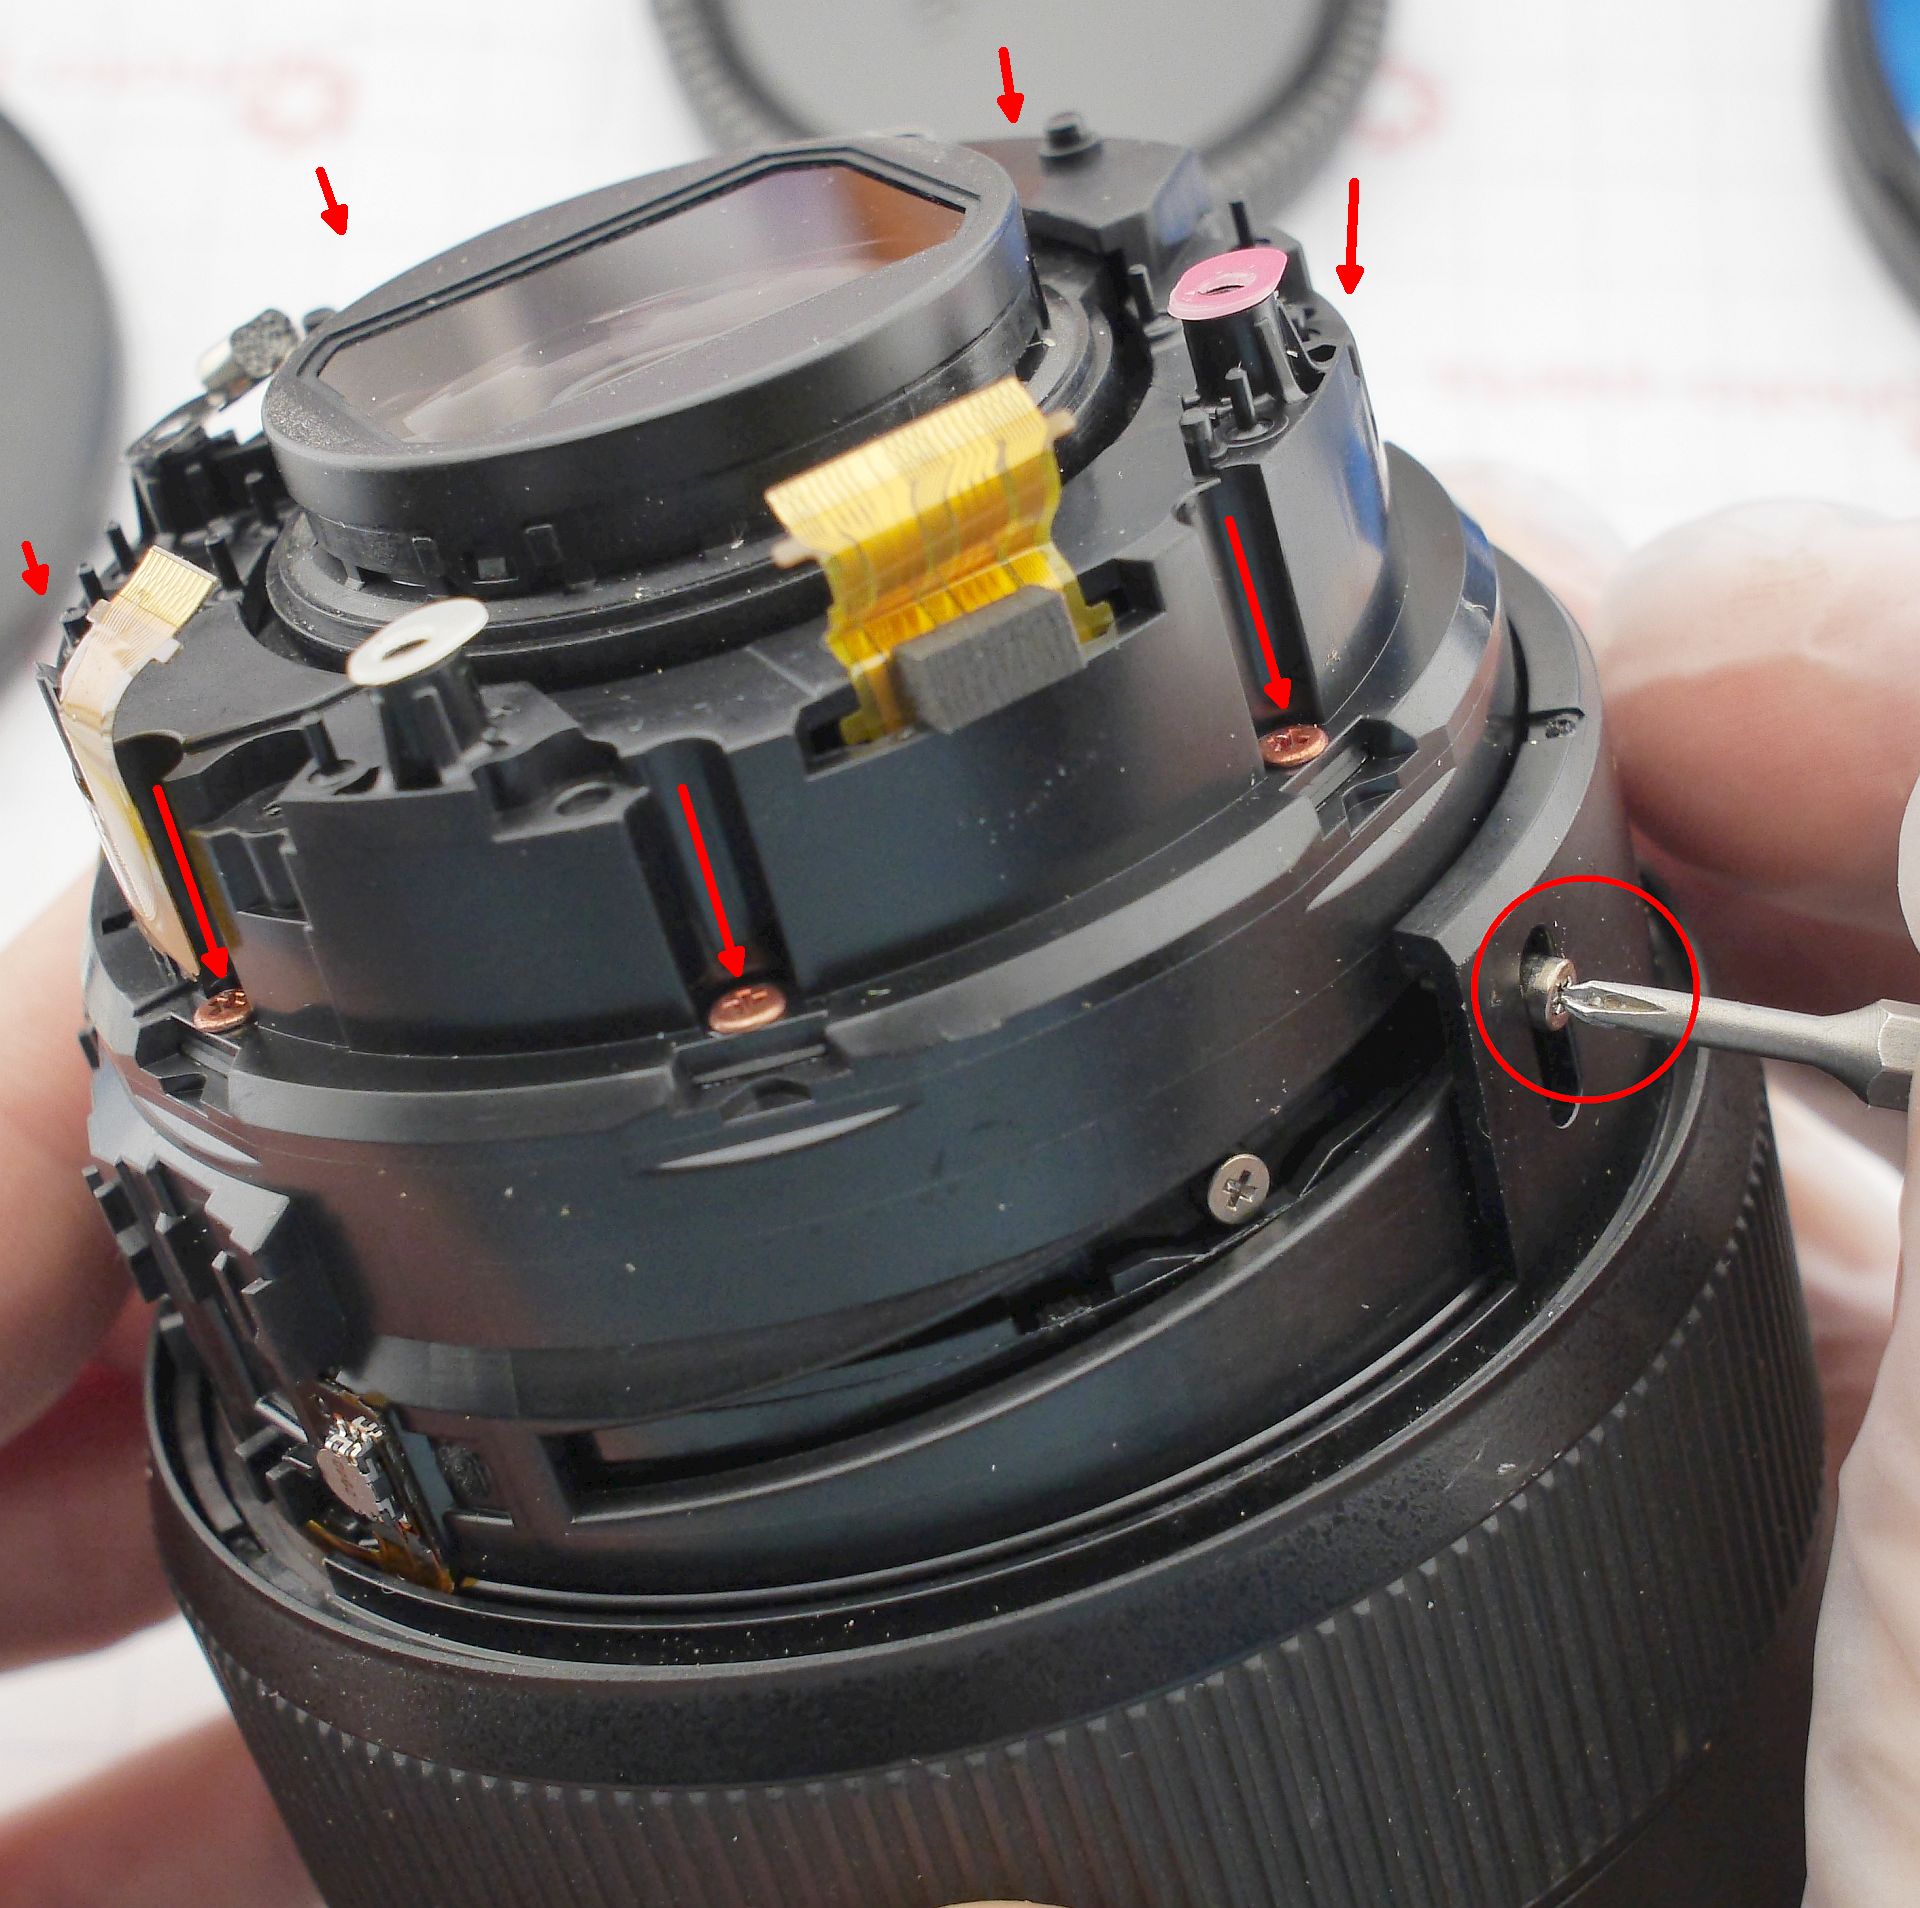
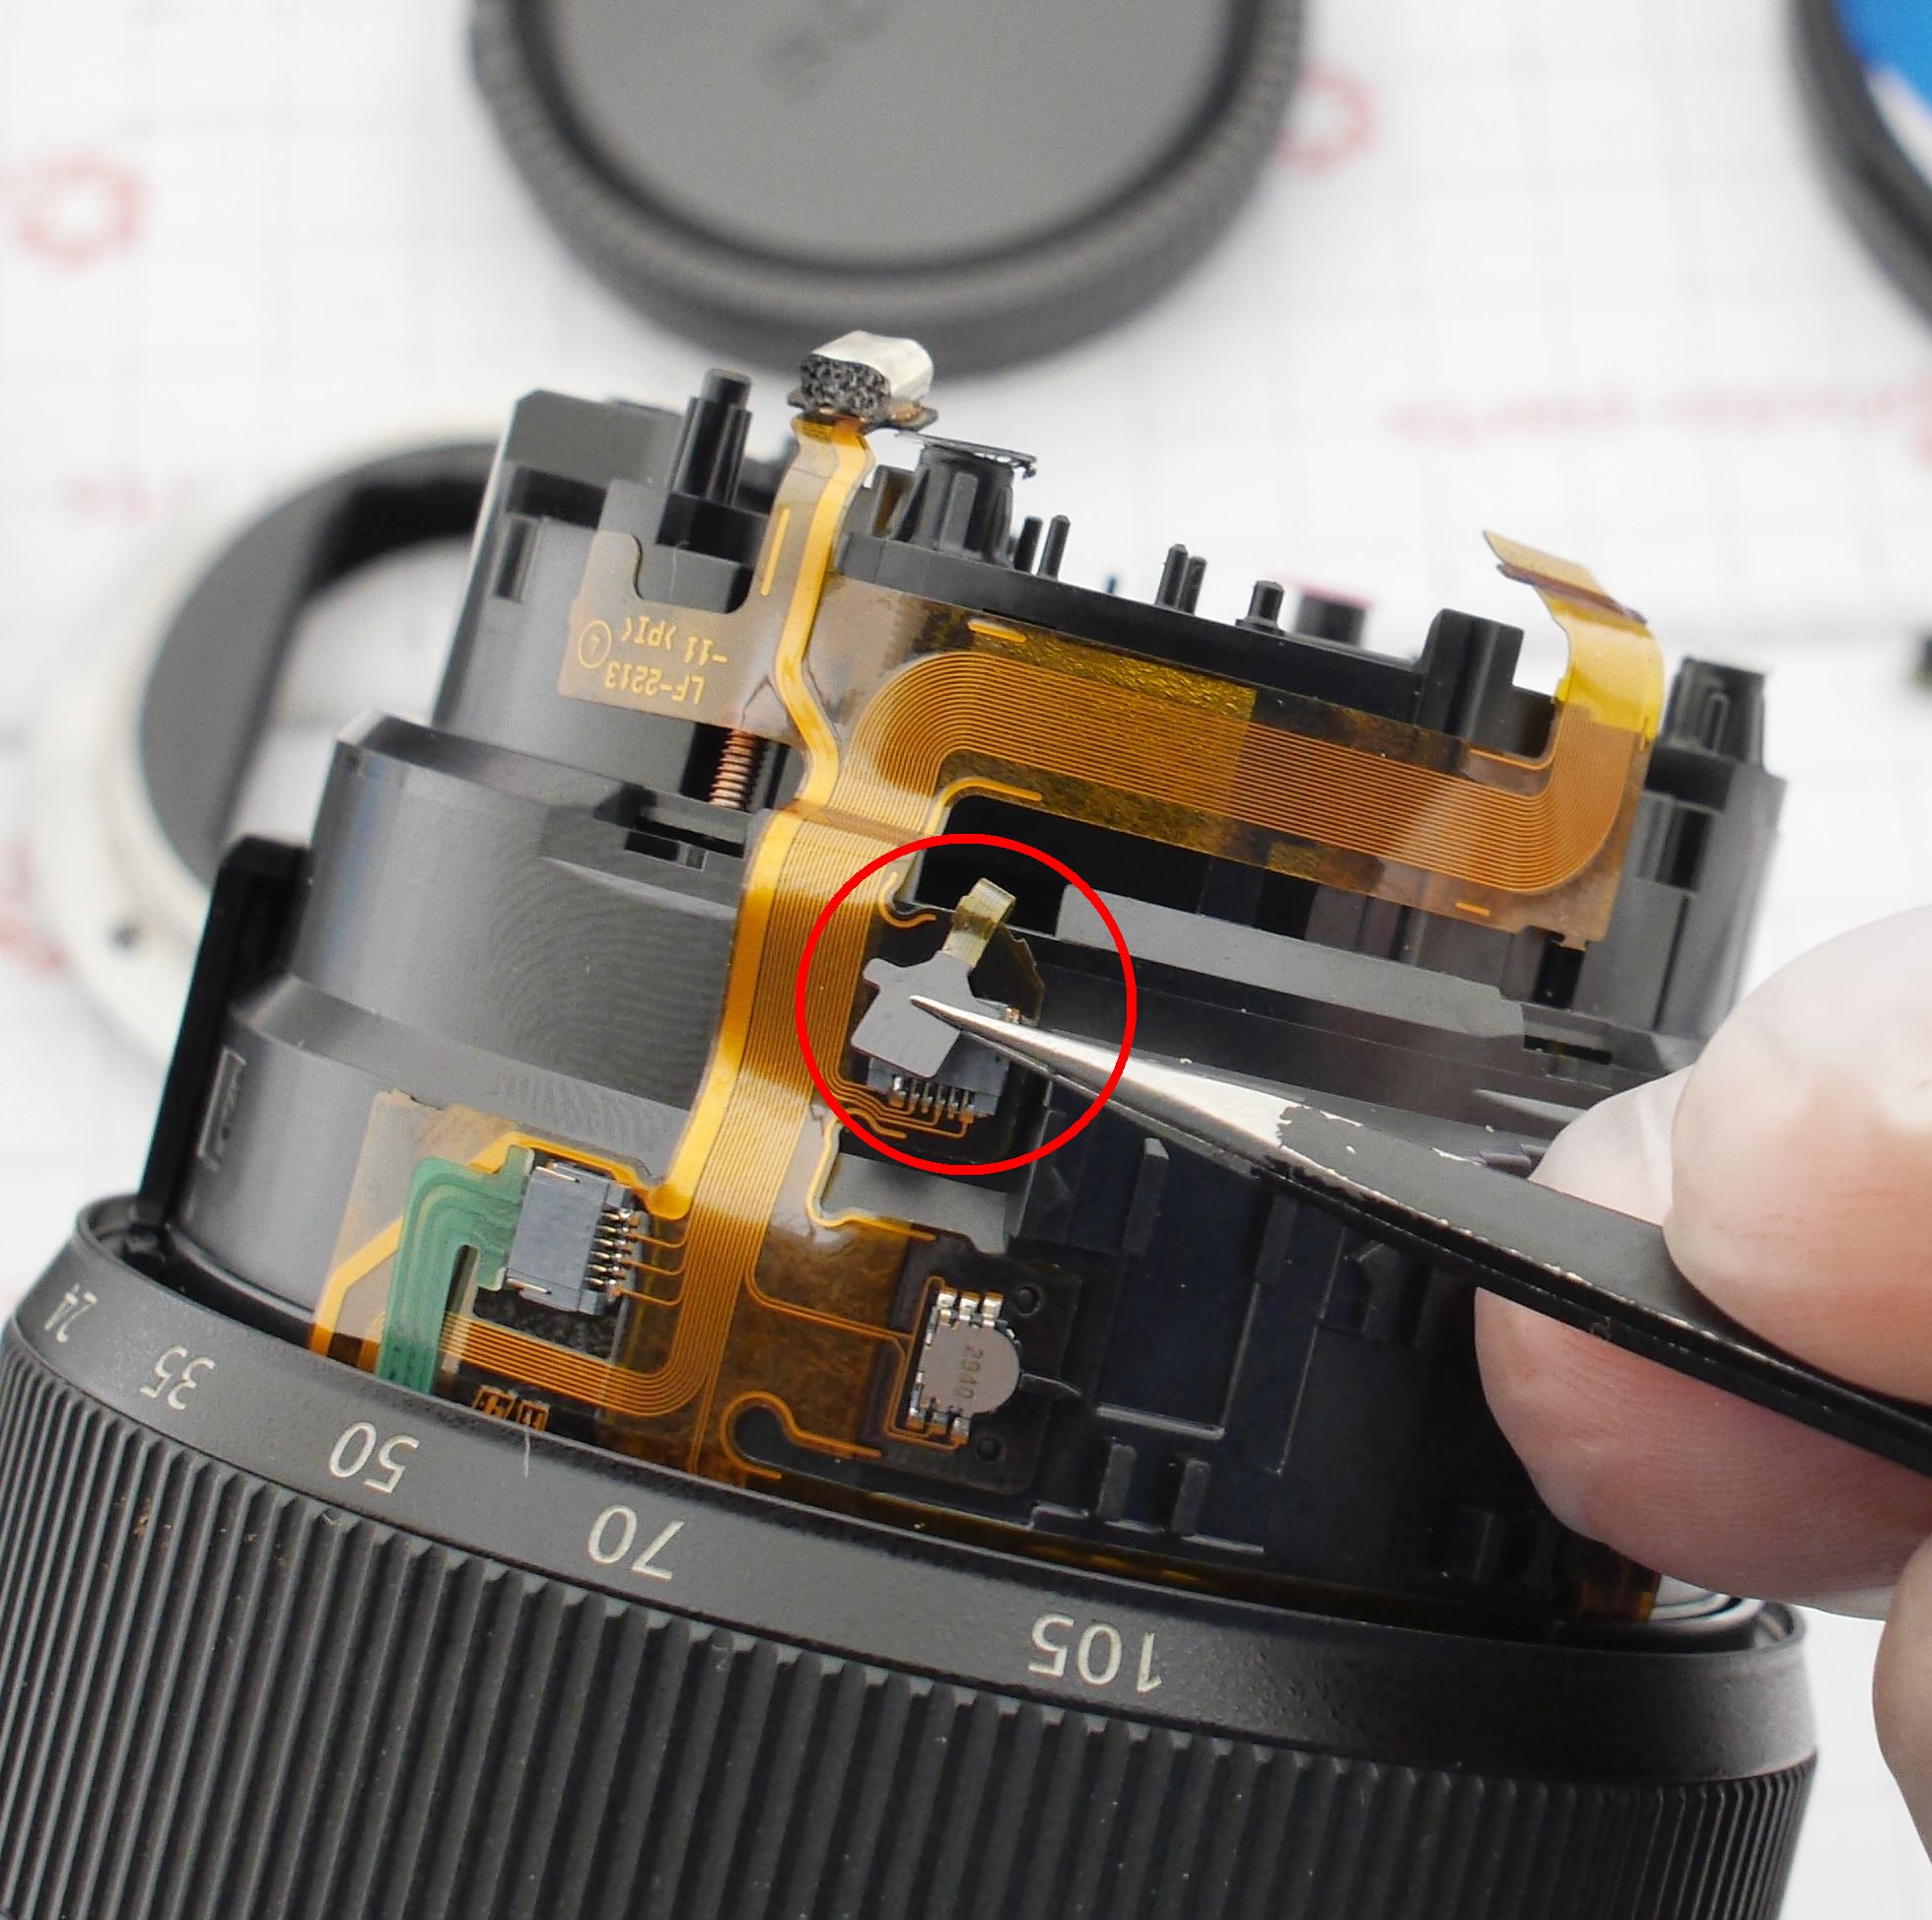
Under the PCB three screws hold a part of the housing, which is removed towards the bayonet. No special tricks here - the switches don't get in the way. Next, you need to unscrew two guide screws of the zoom ring, disconnect a barely noticeable ribbon cable of the zoom position sensor, and undo many pale-pink screws on the lens mount side. The entire lens block then drops out towards the front:
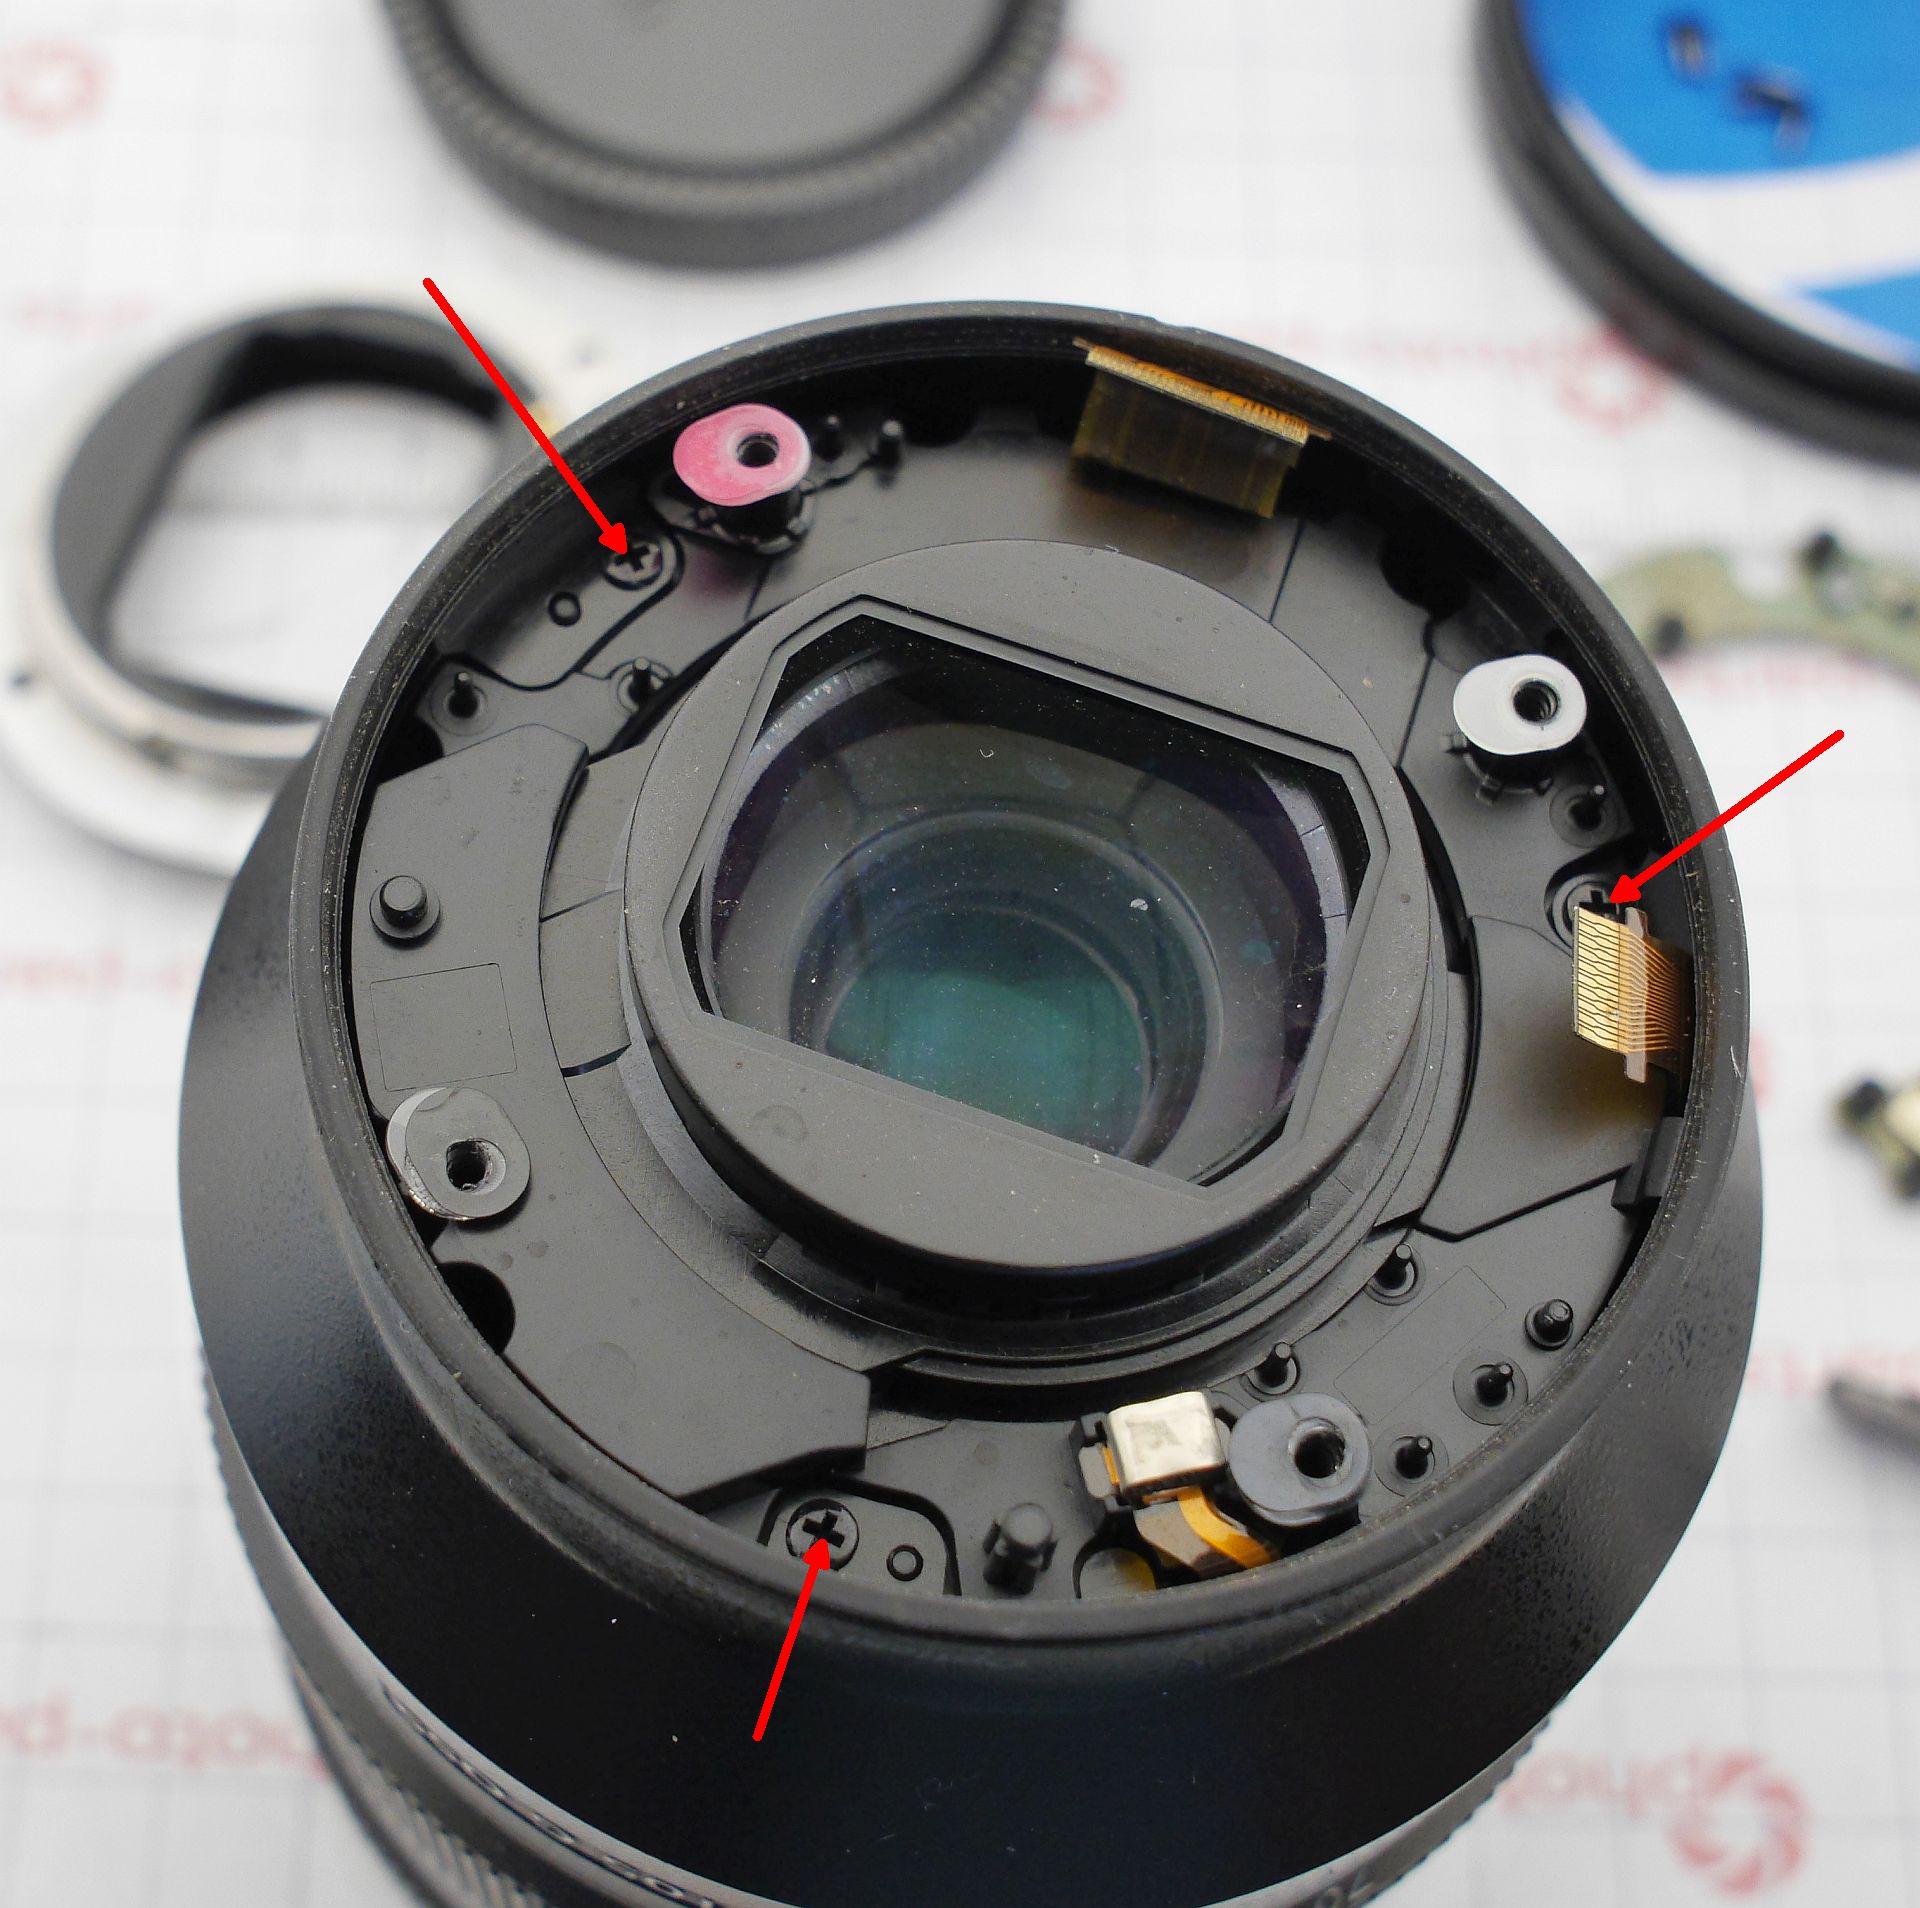
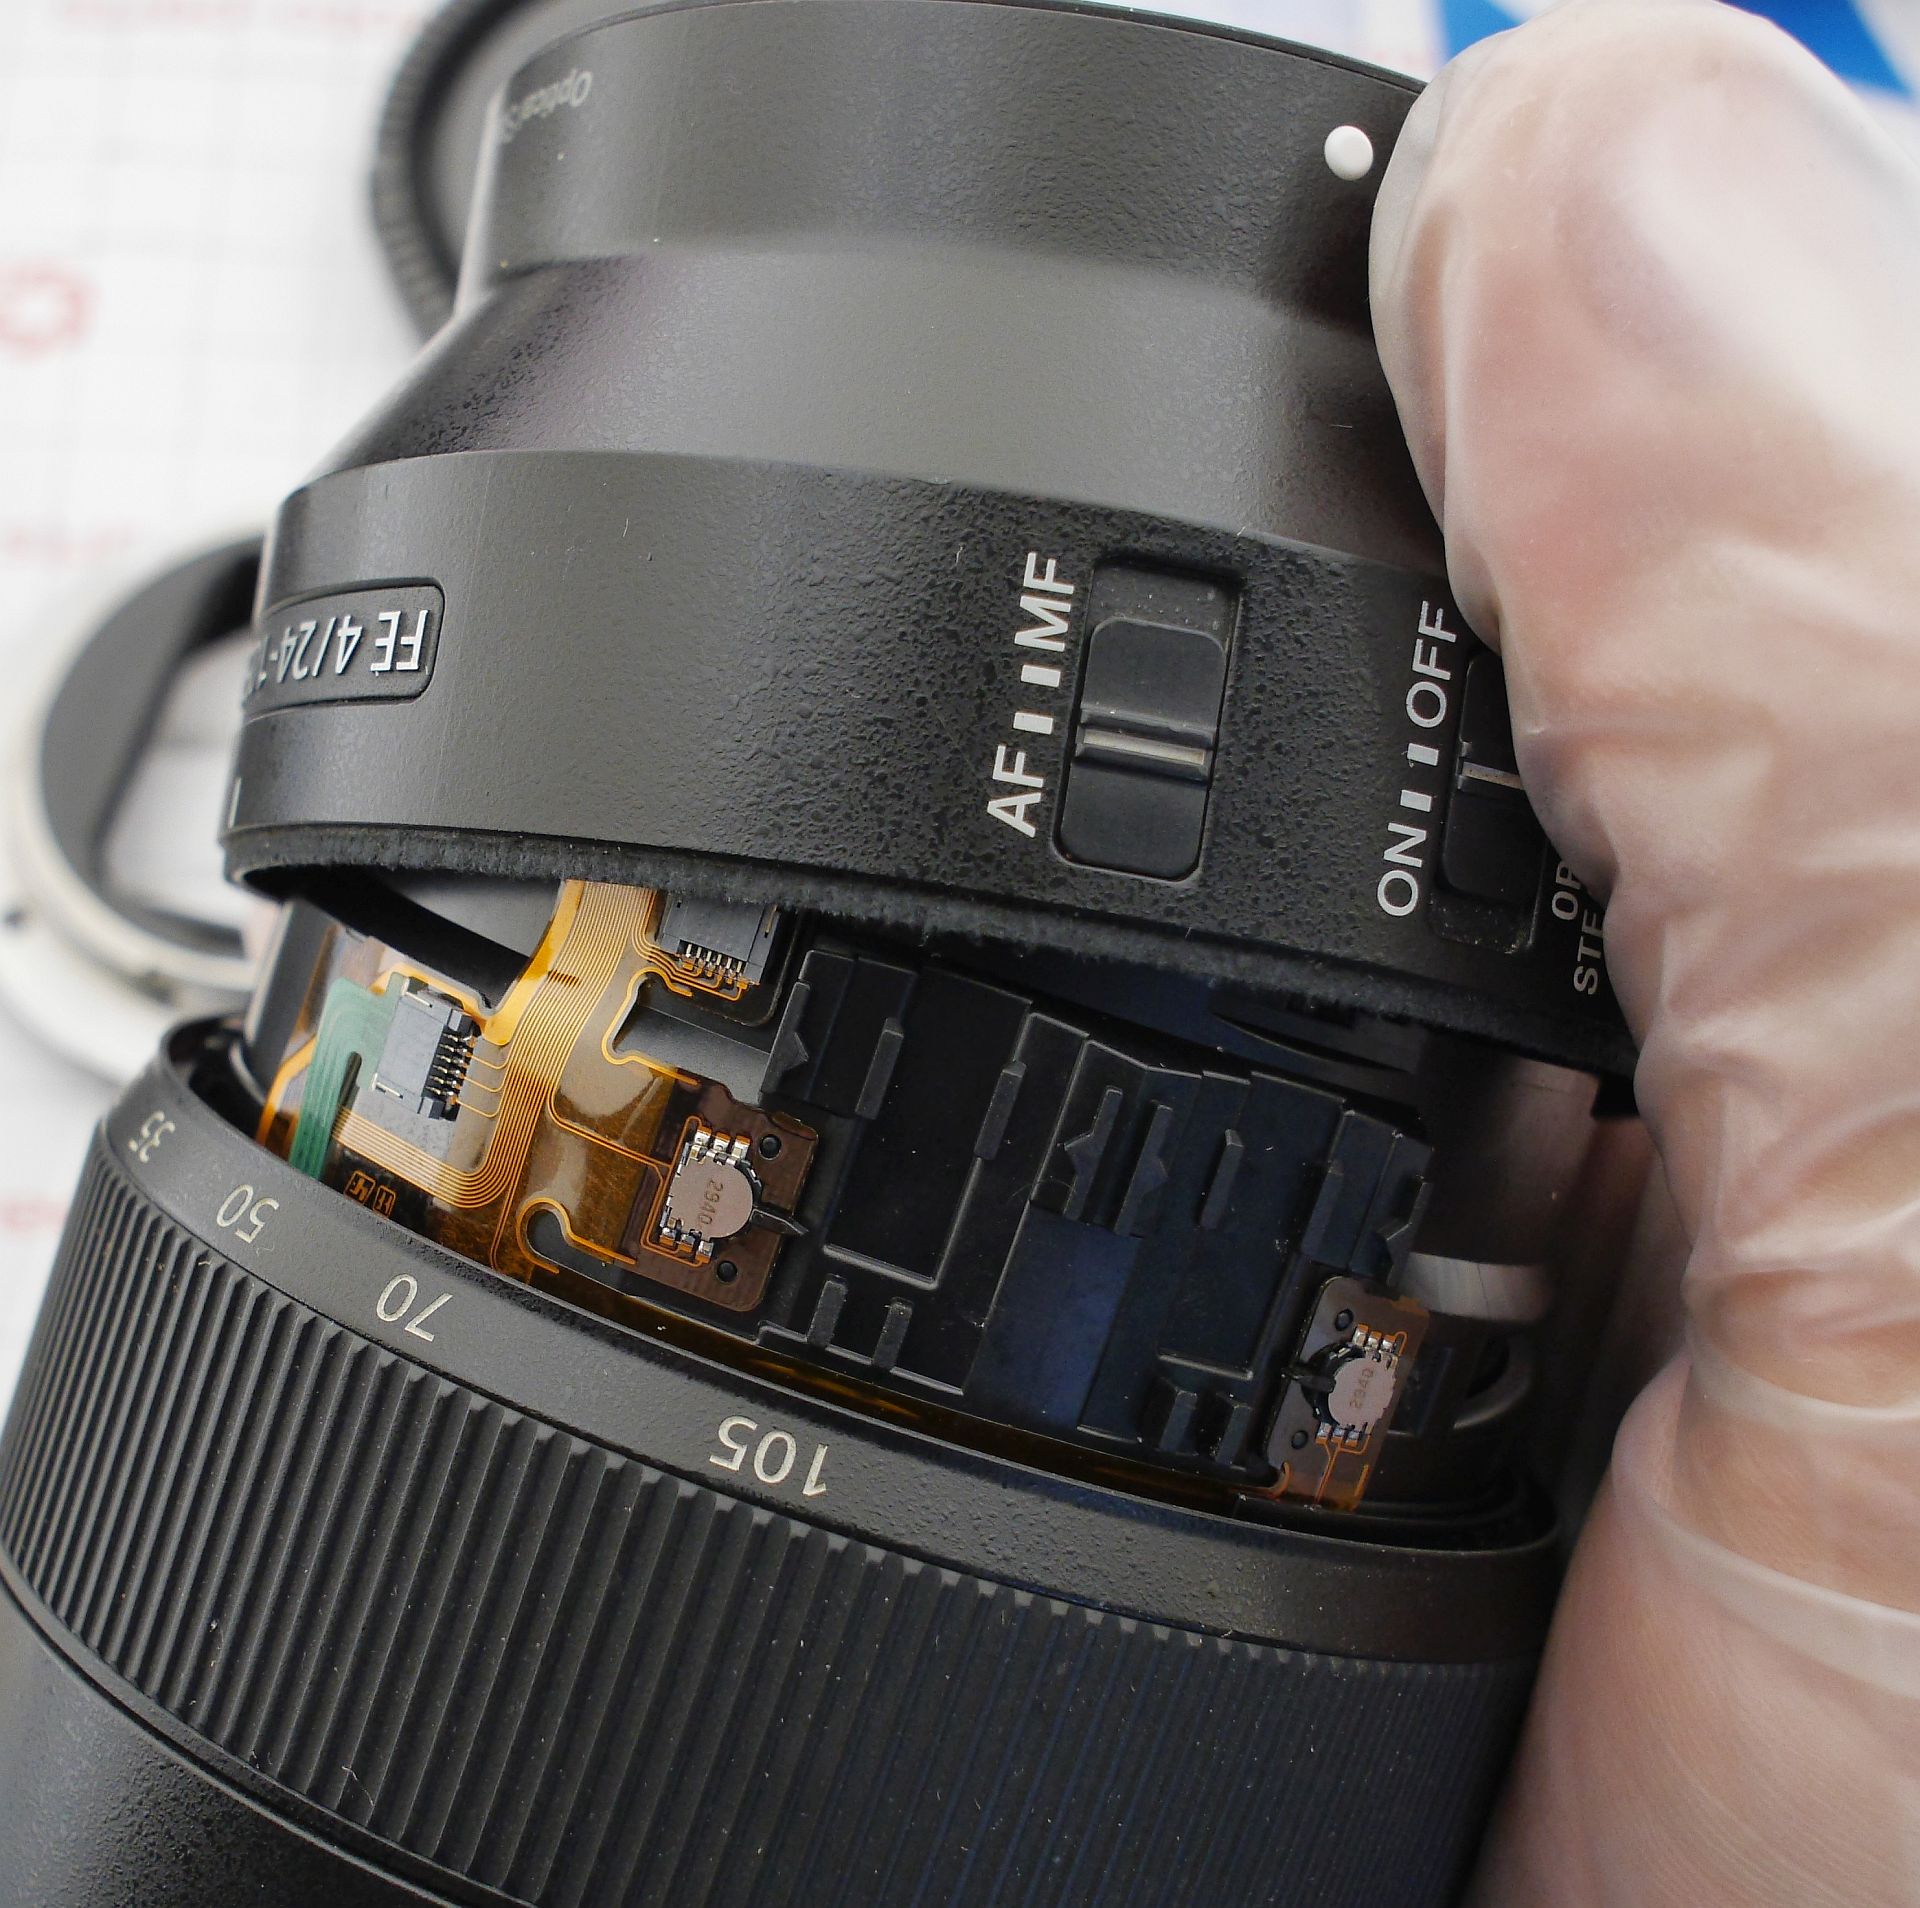
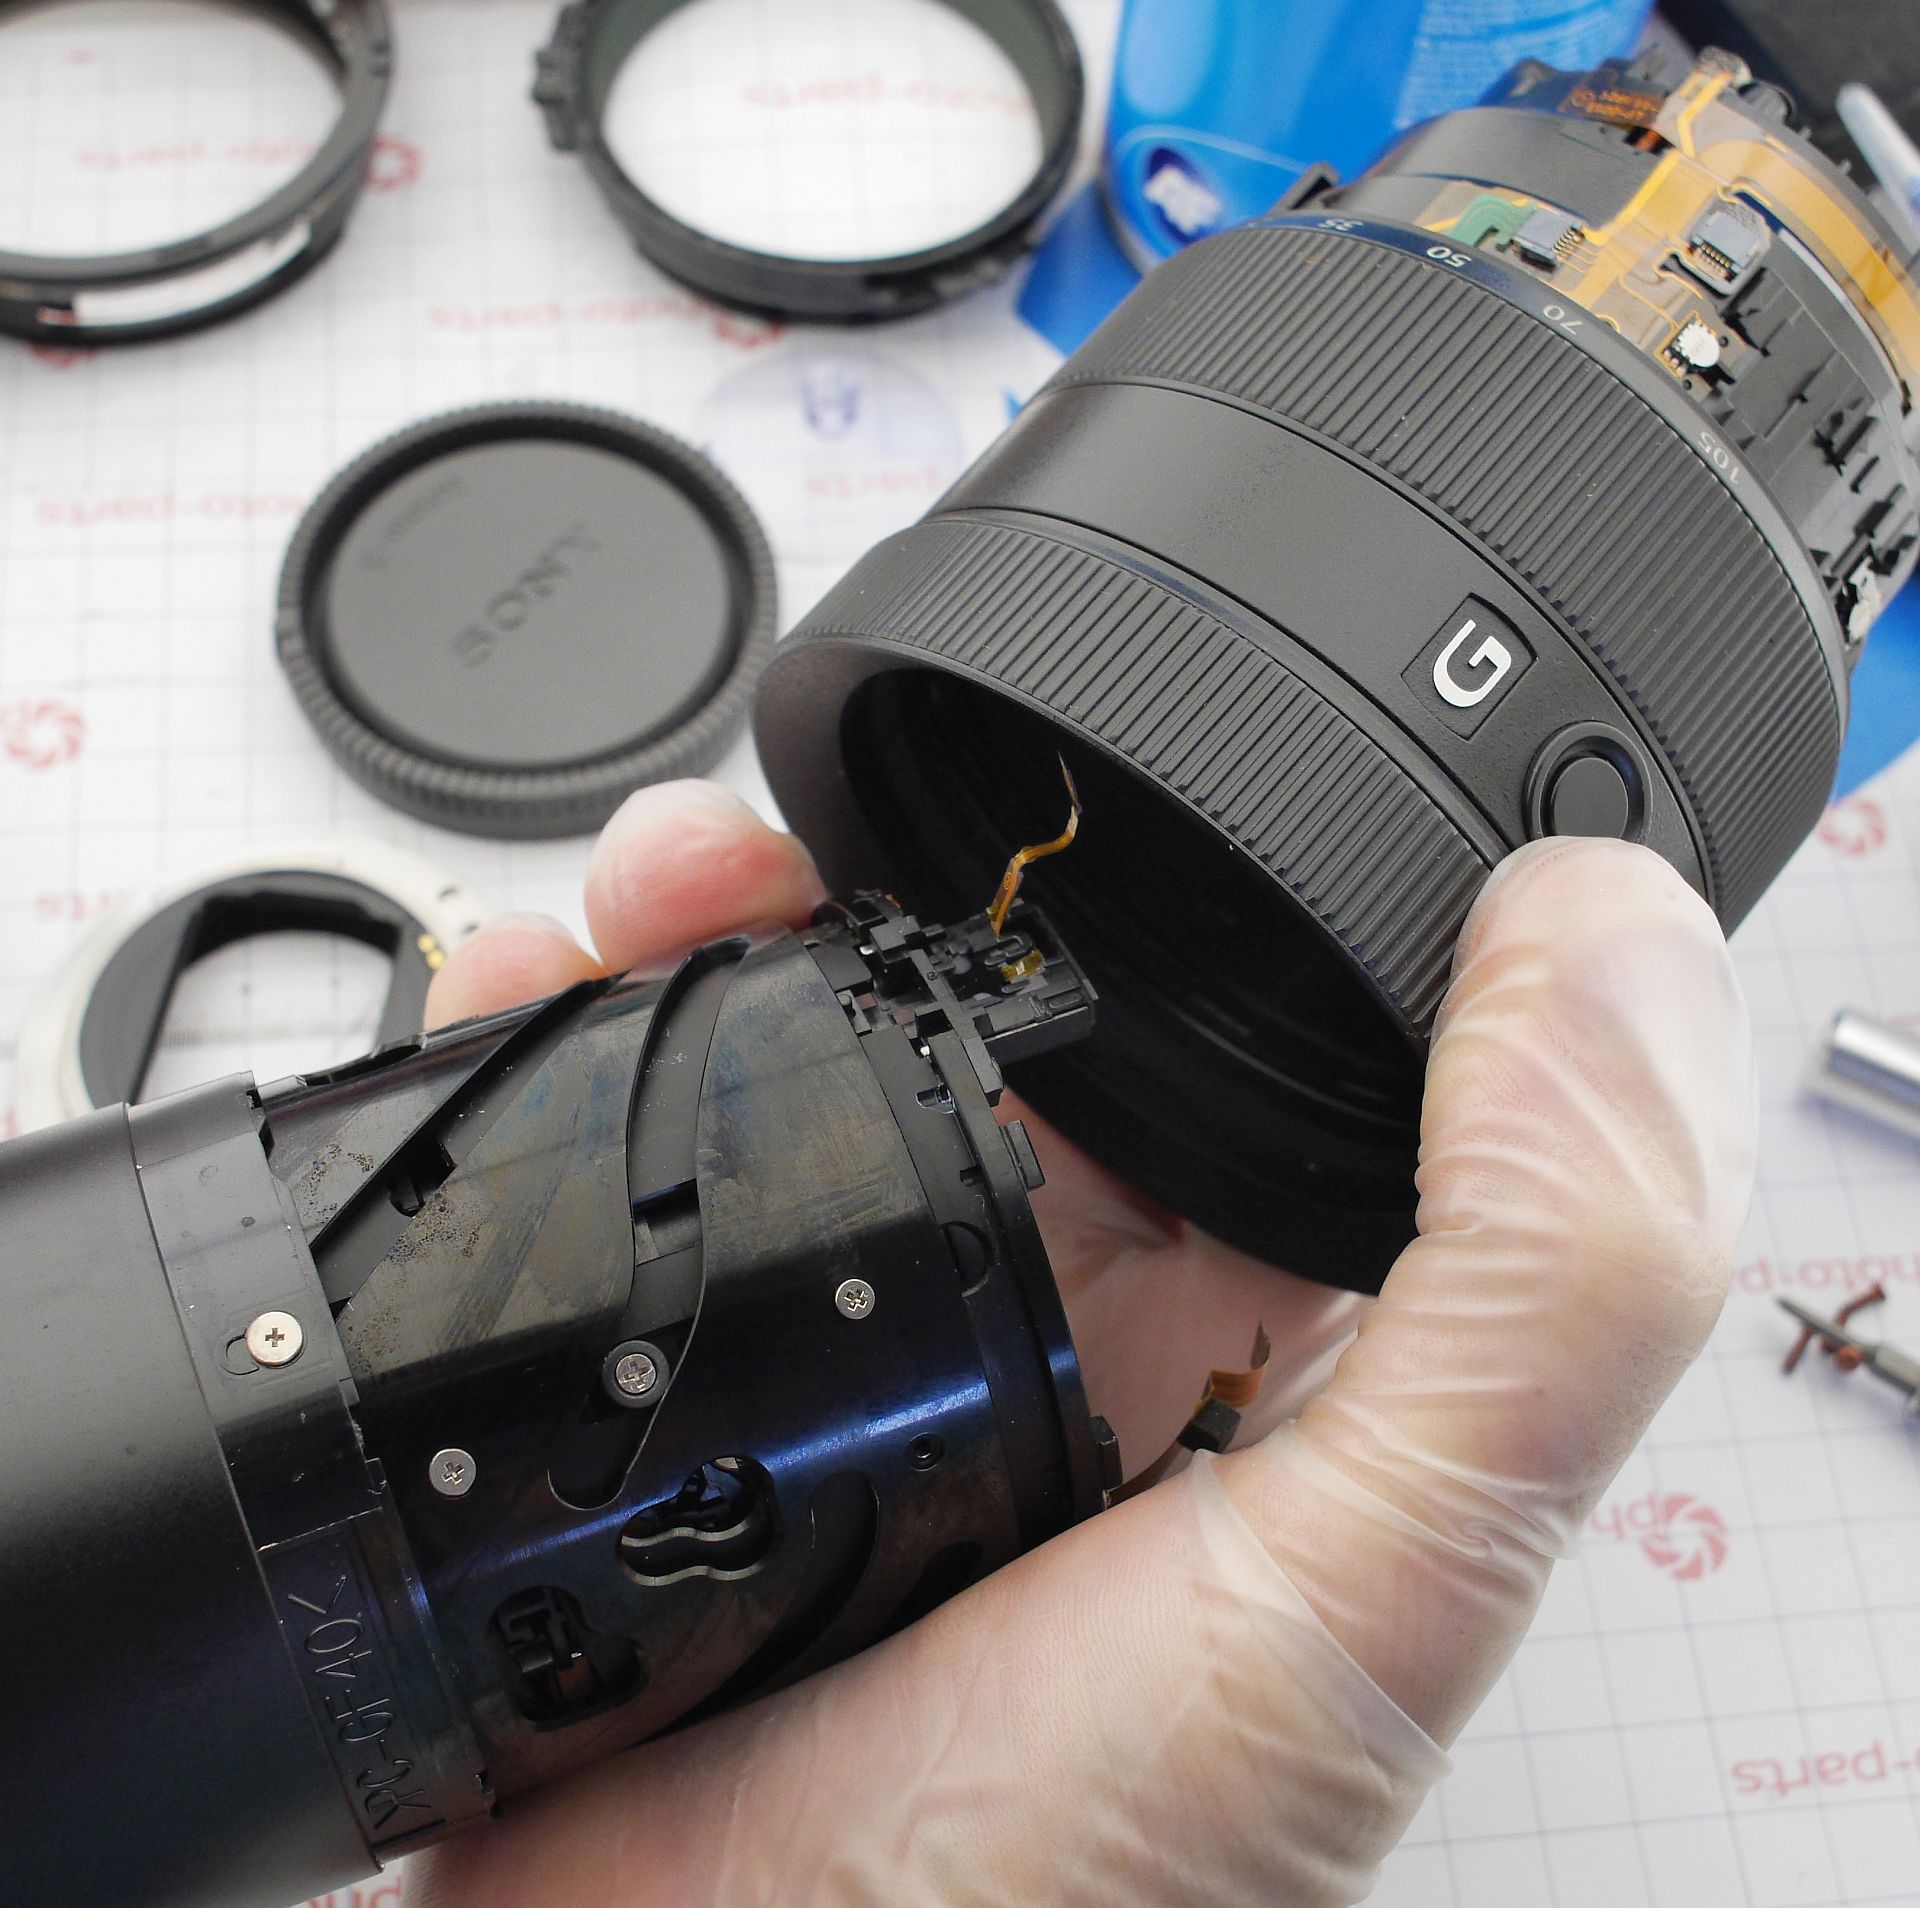
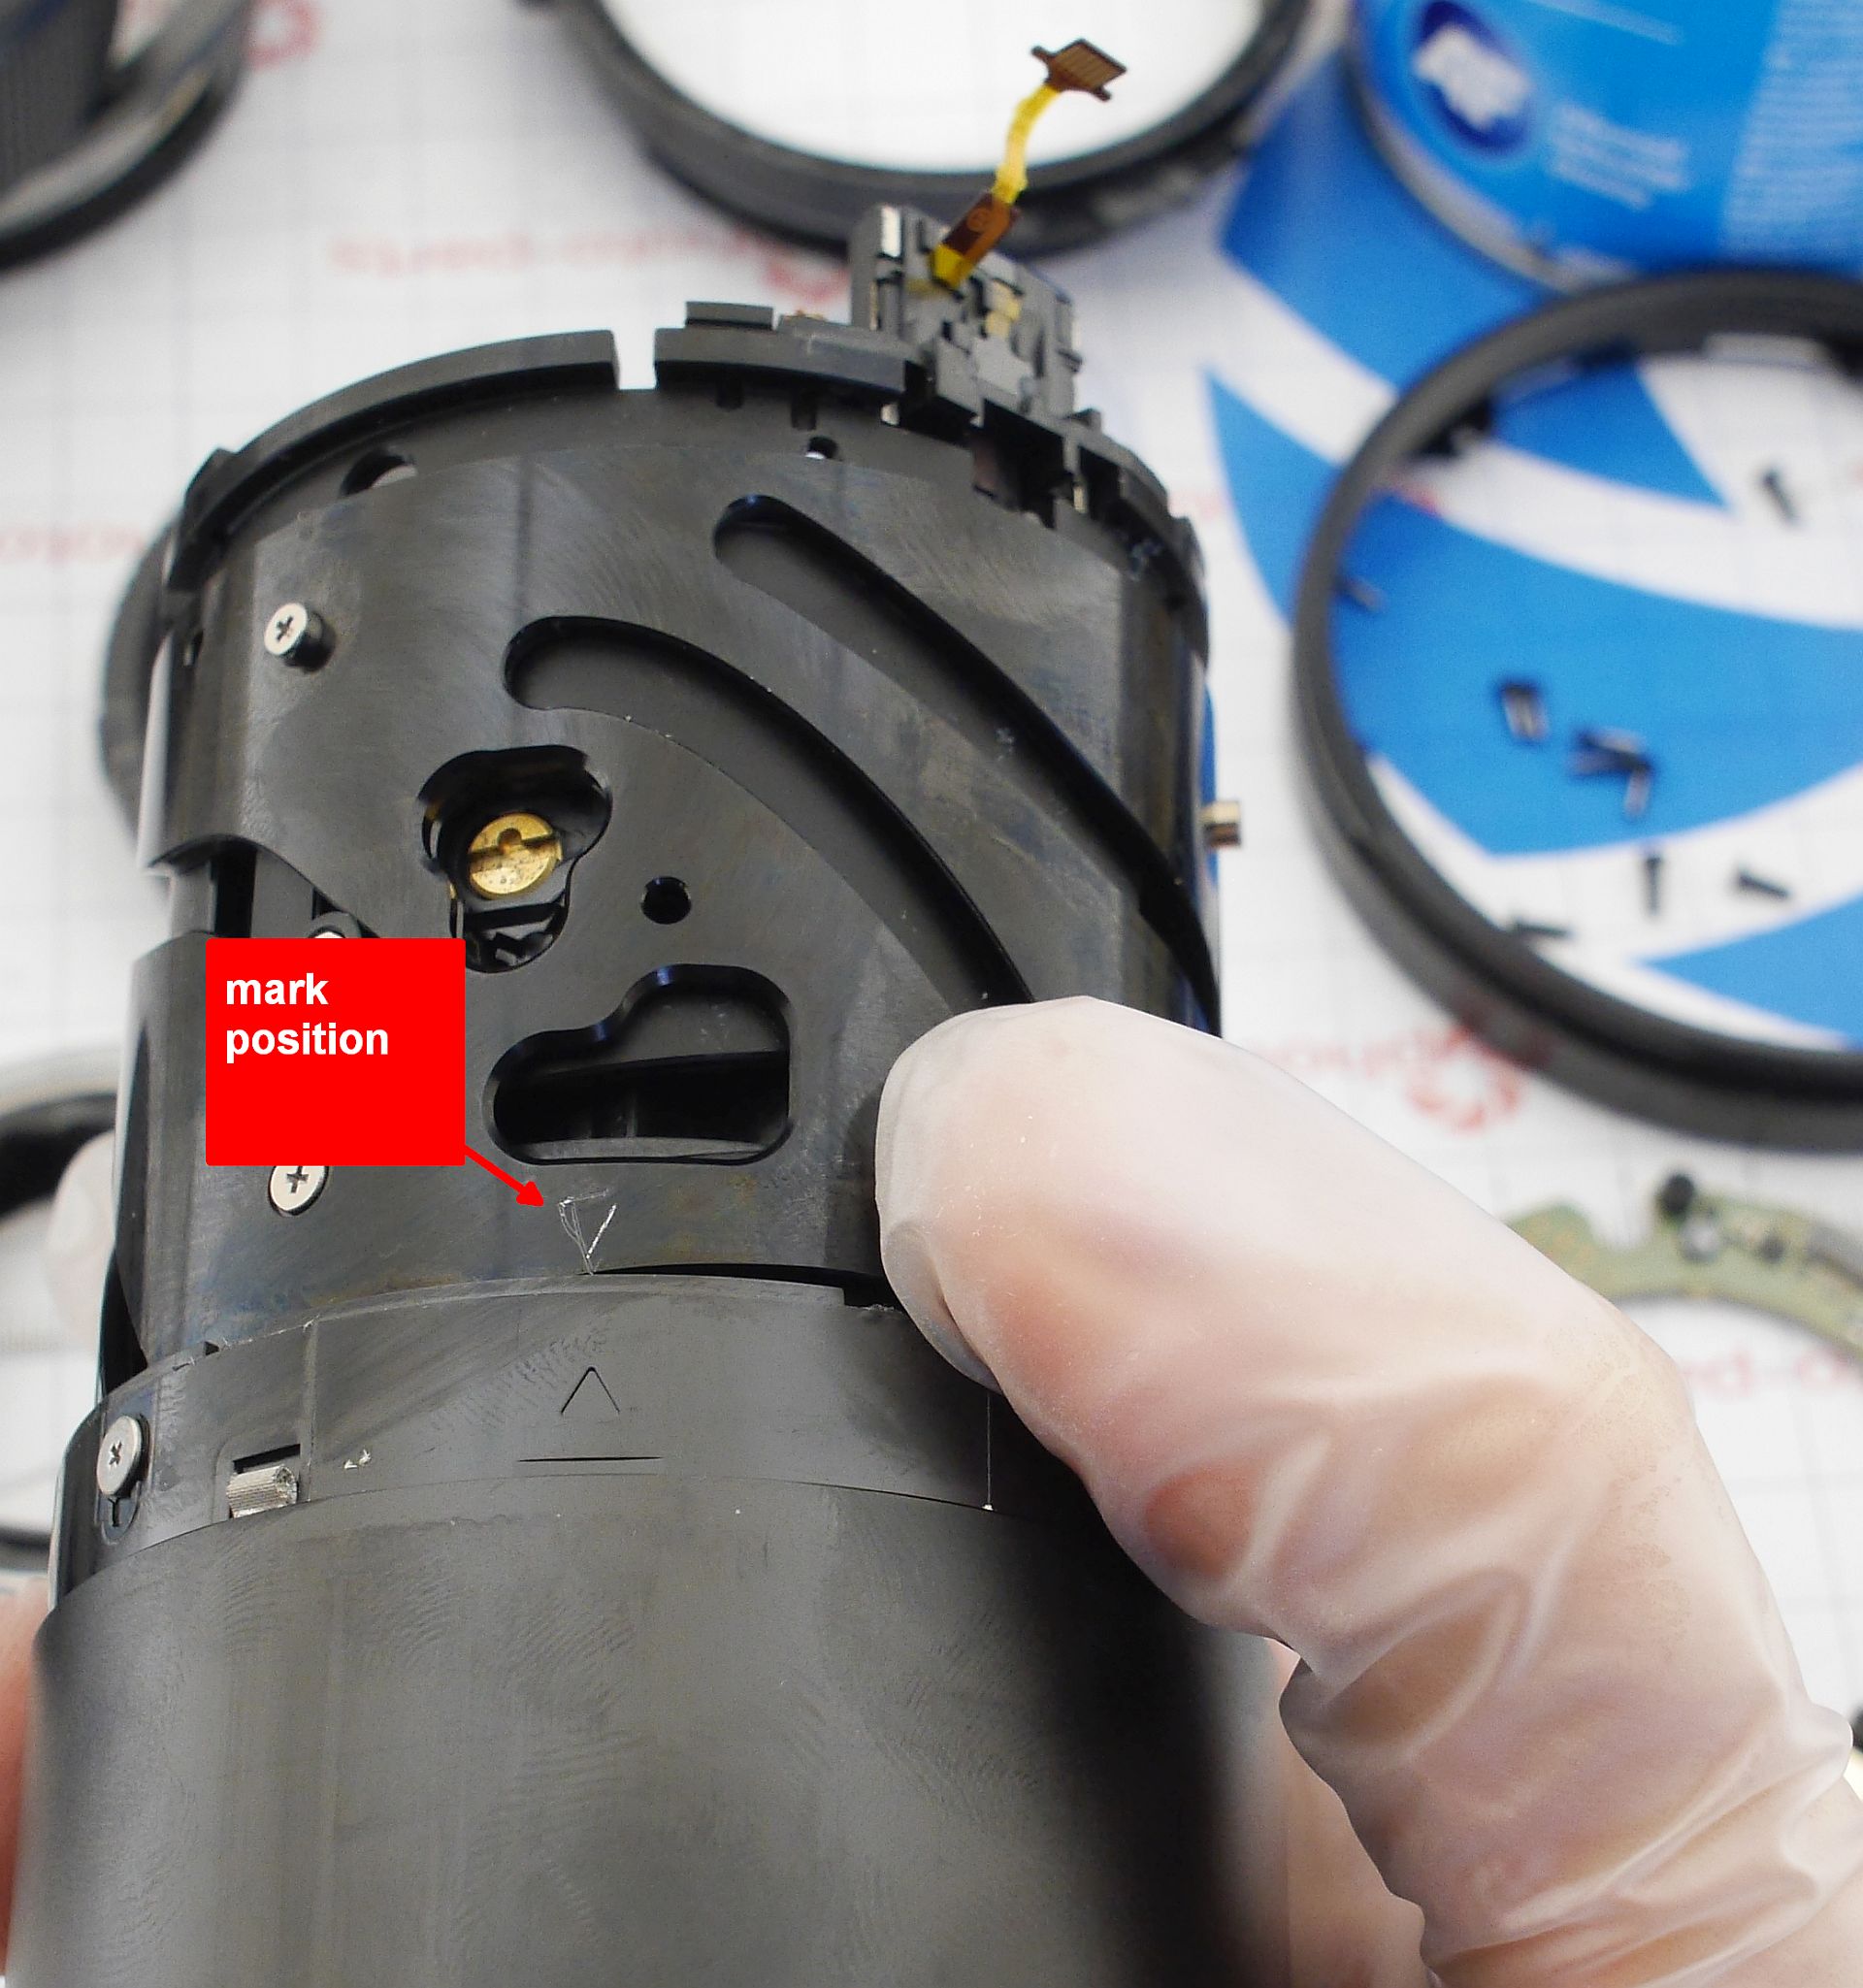
Now the actual lens block comes apart, starting with the front barrel. It's held by three screws on sliding sleeves - collars - and shifts upward after the screws are removed. Be sure to mark its original position somehow, because during assembly it can fit in three symmetrical orientations, and an error becomes apparent only after final reassembly.
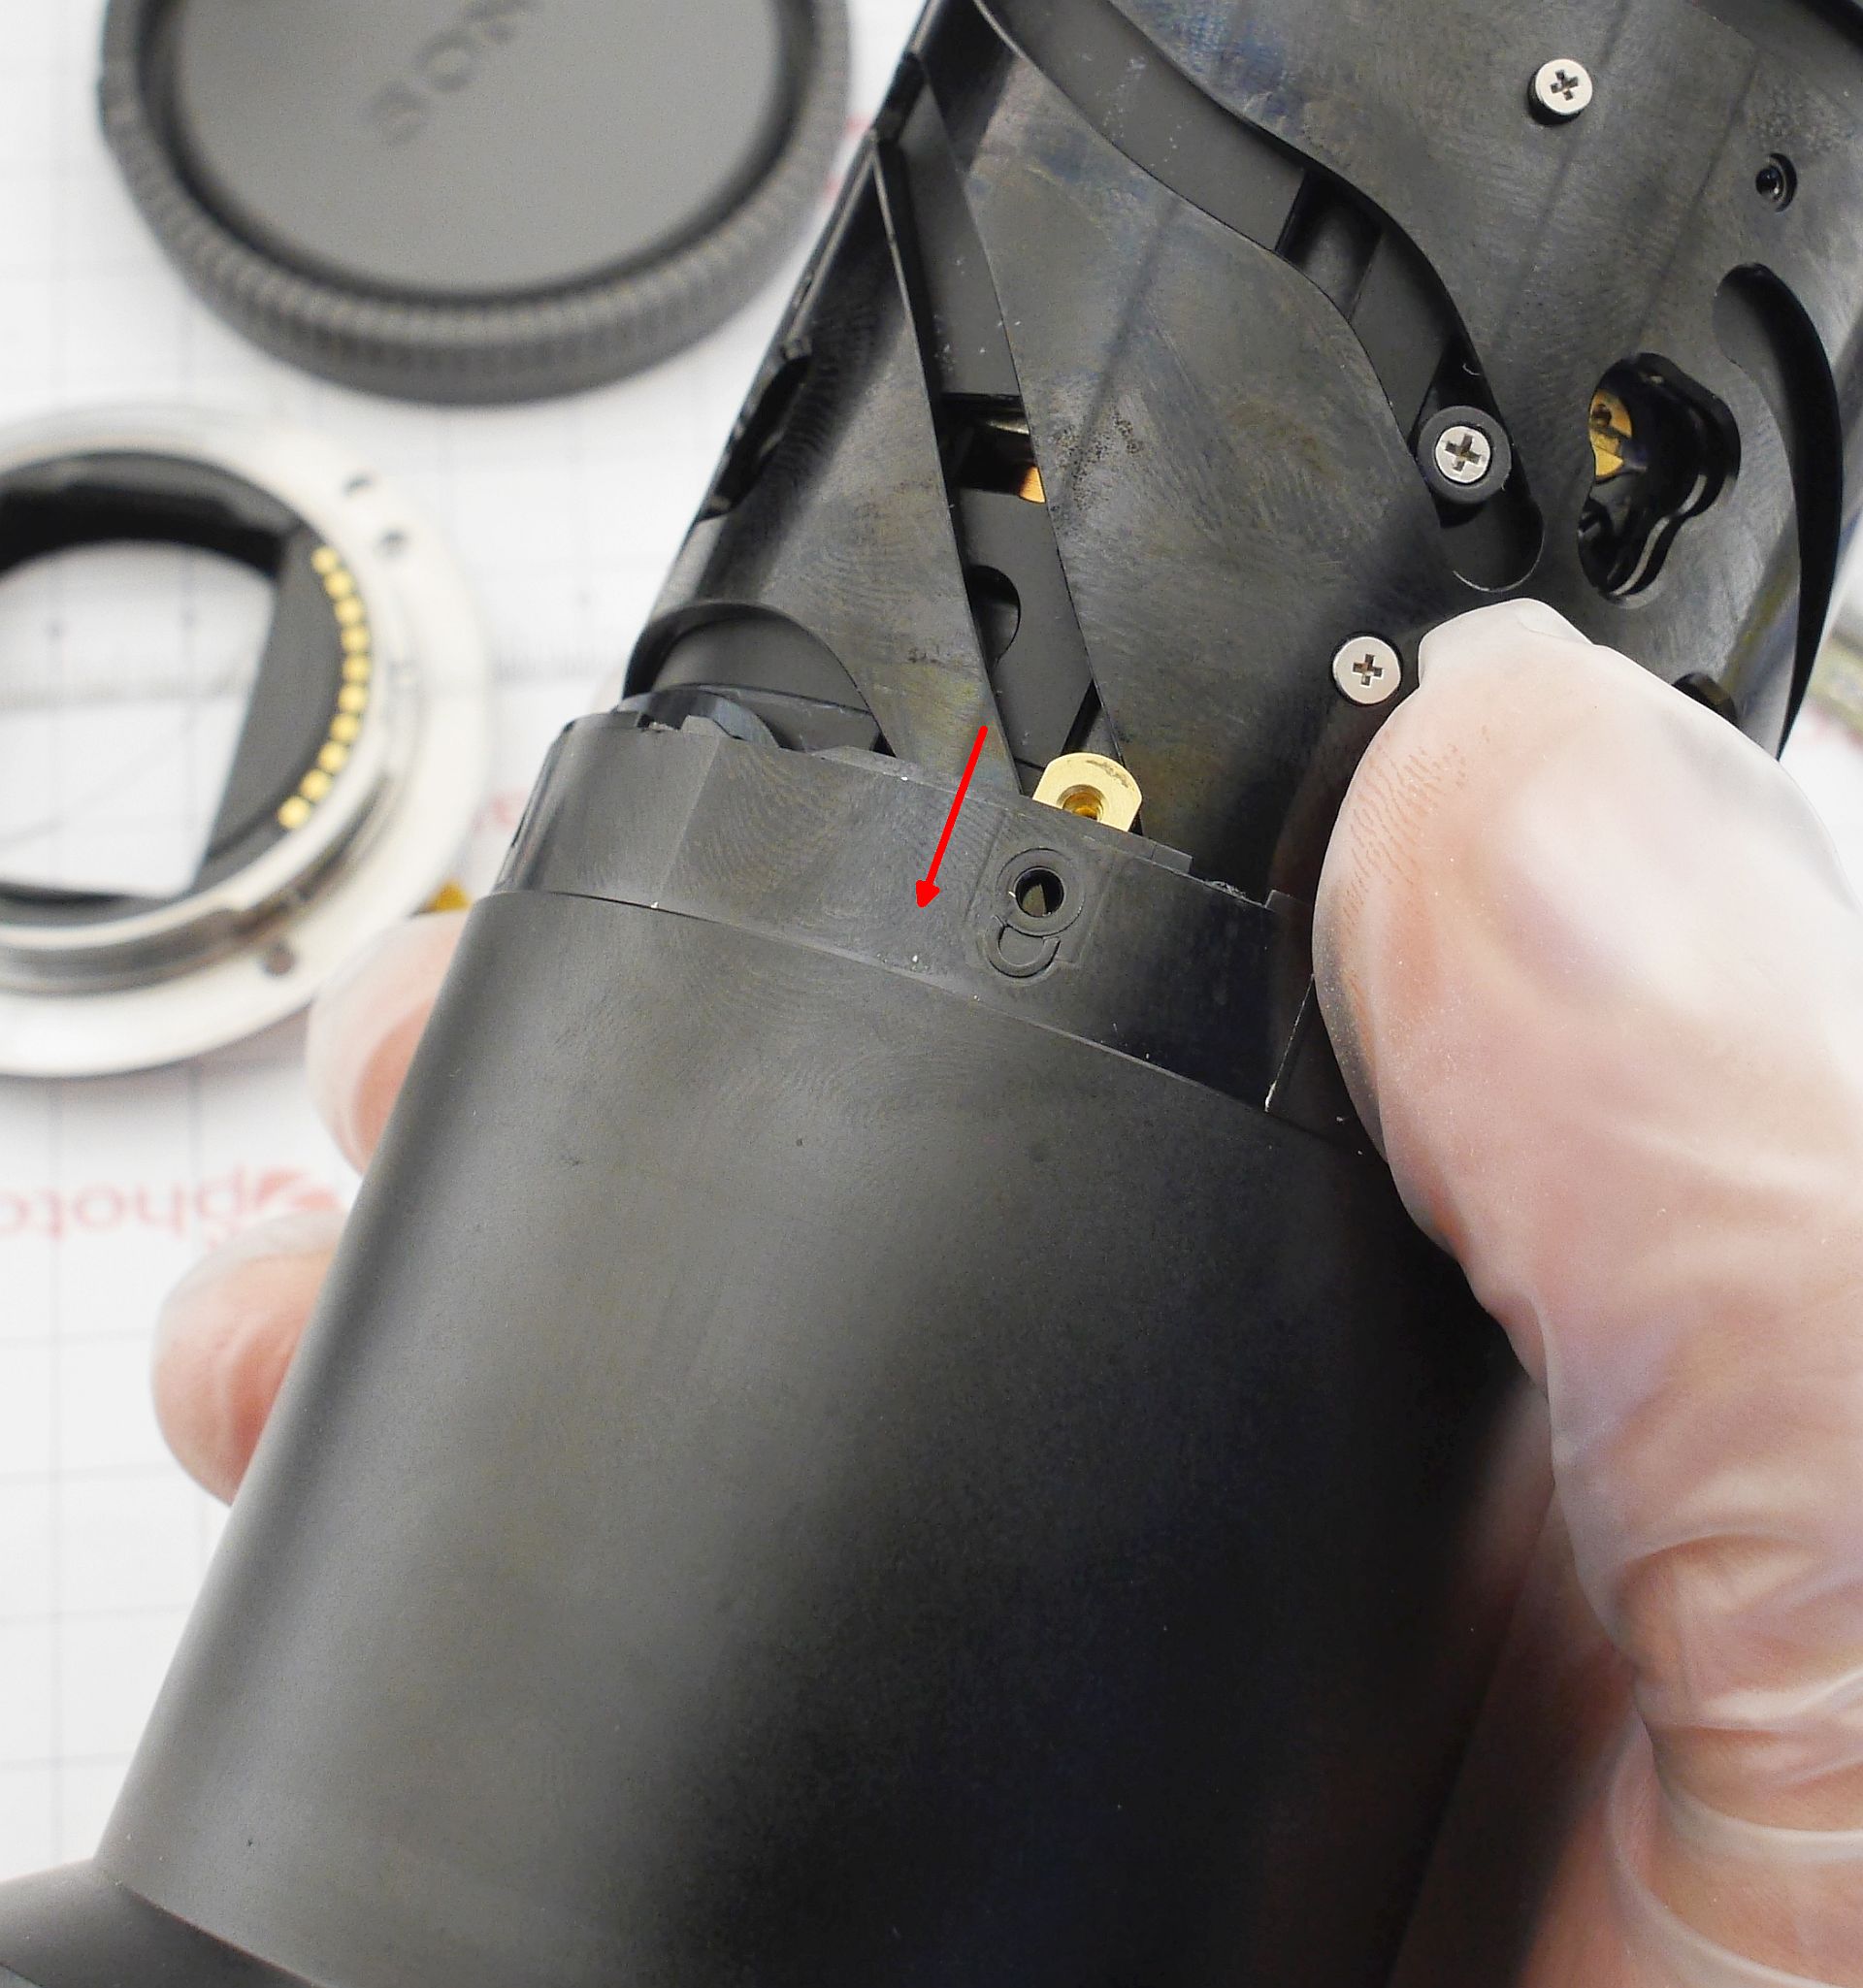
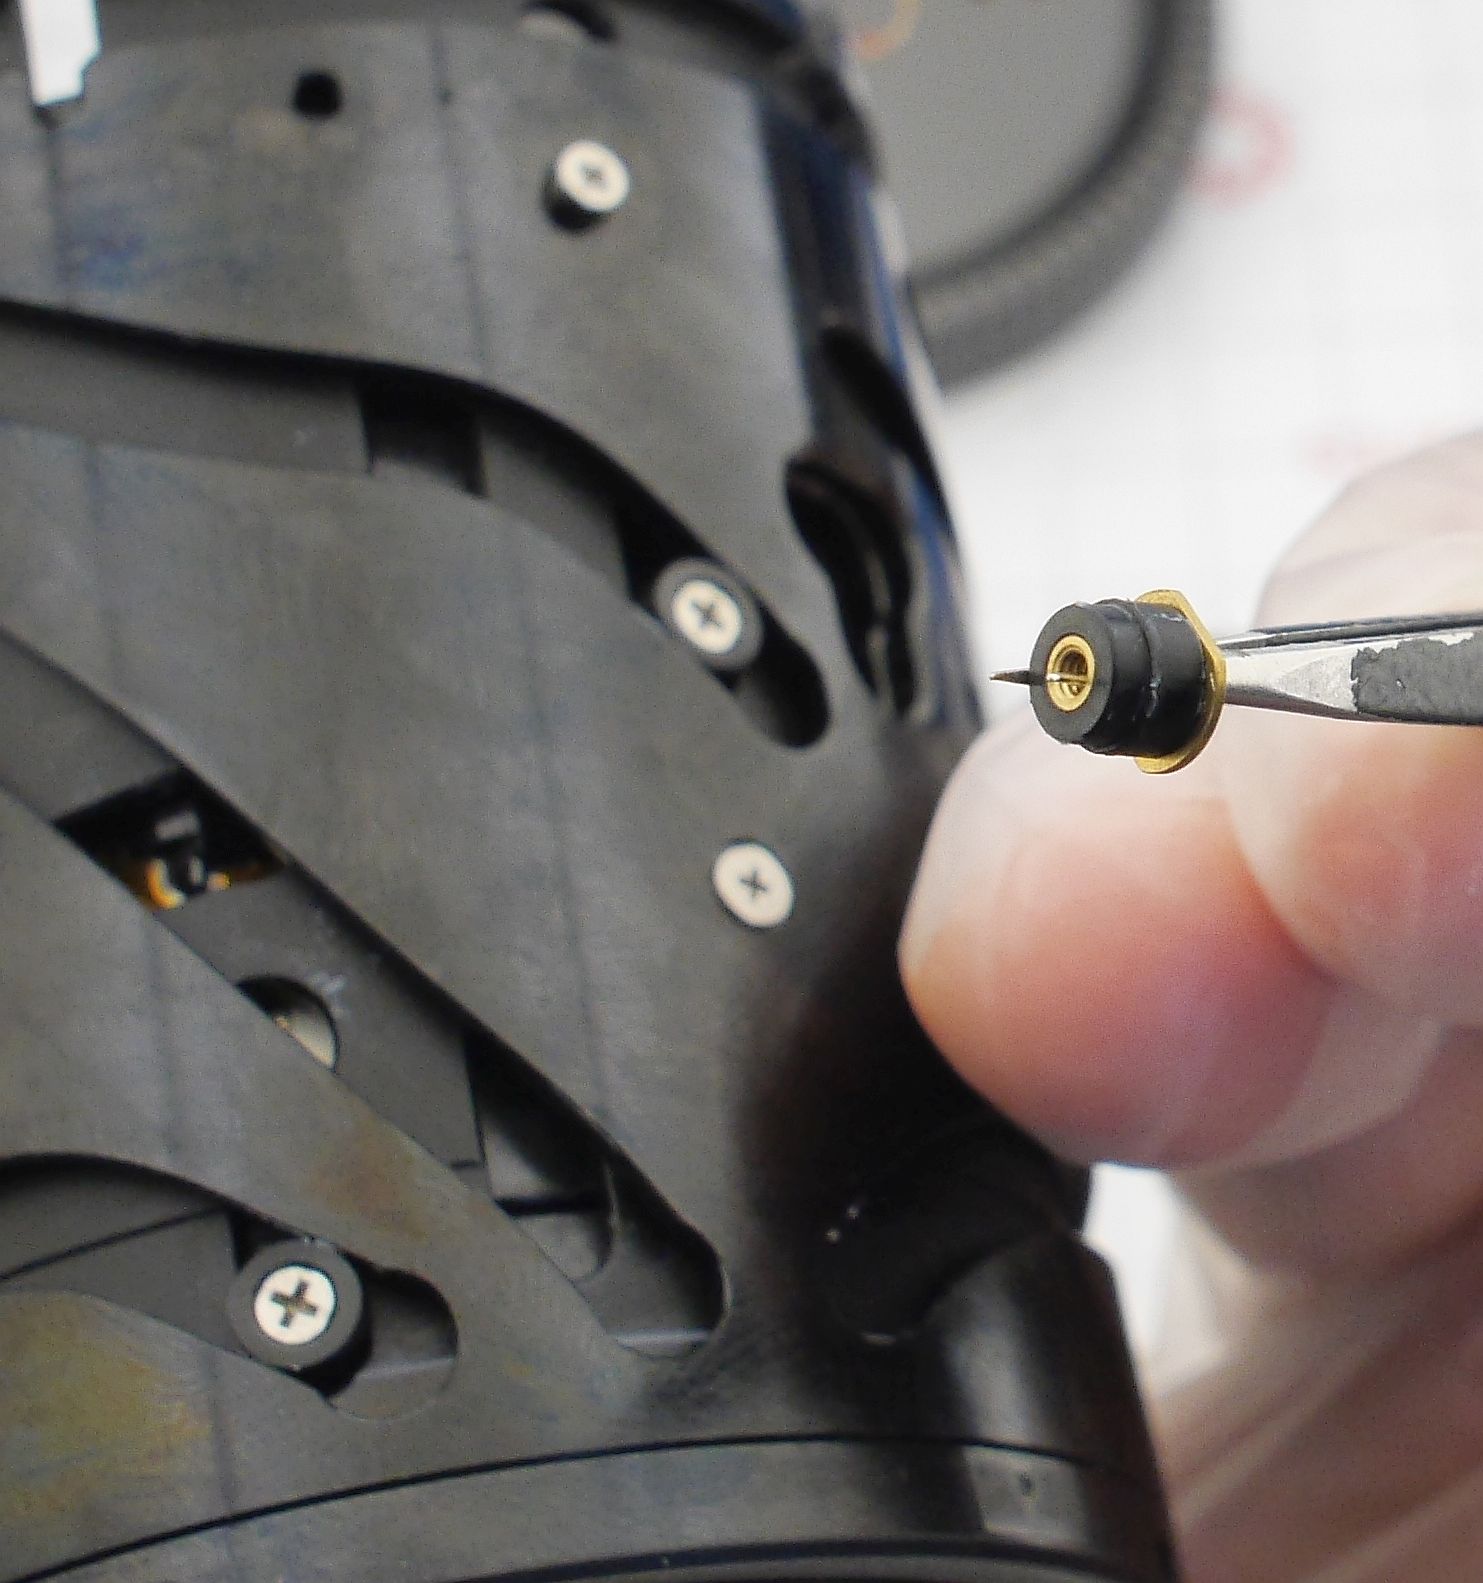
The next step is to extract the second lens group. It too is held by three collars (shown below), but is also locked by a decorative cap, which just needs to be unscrewed counter-clockwise:
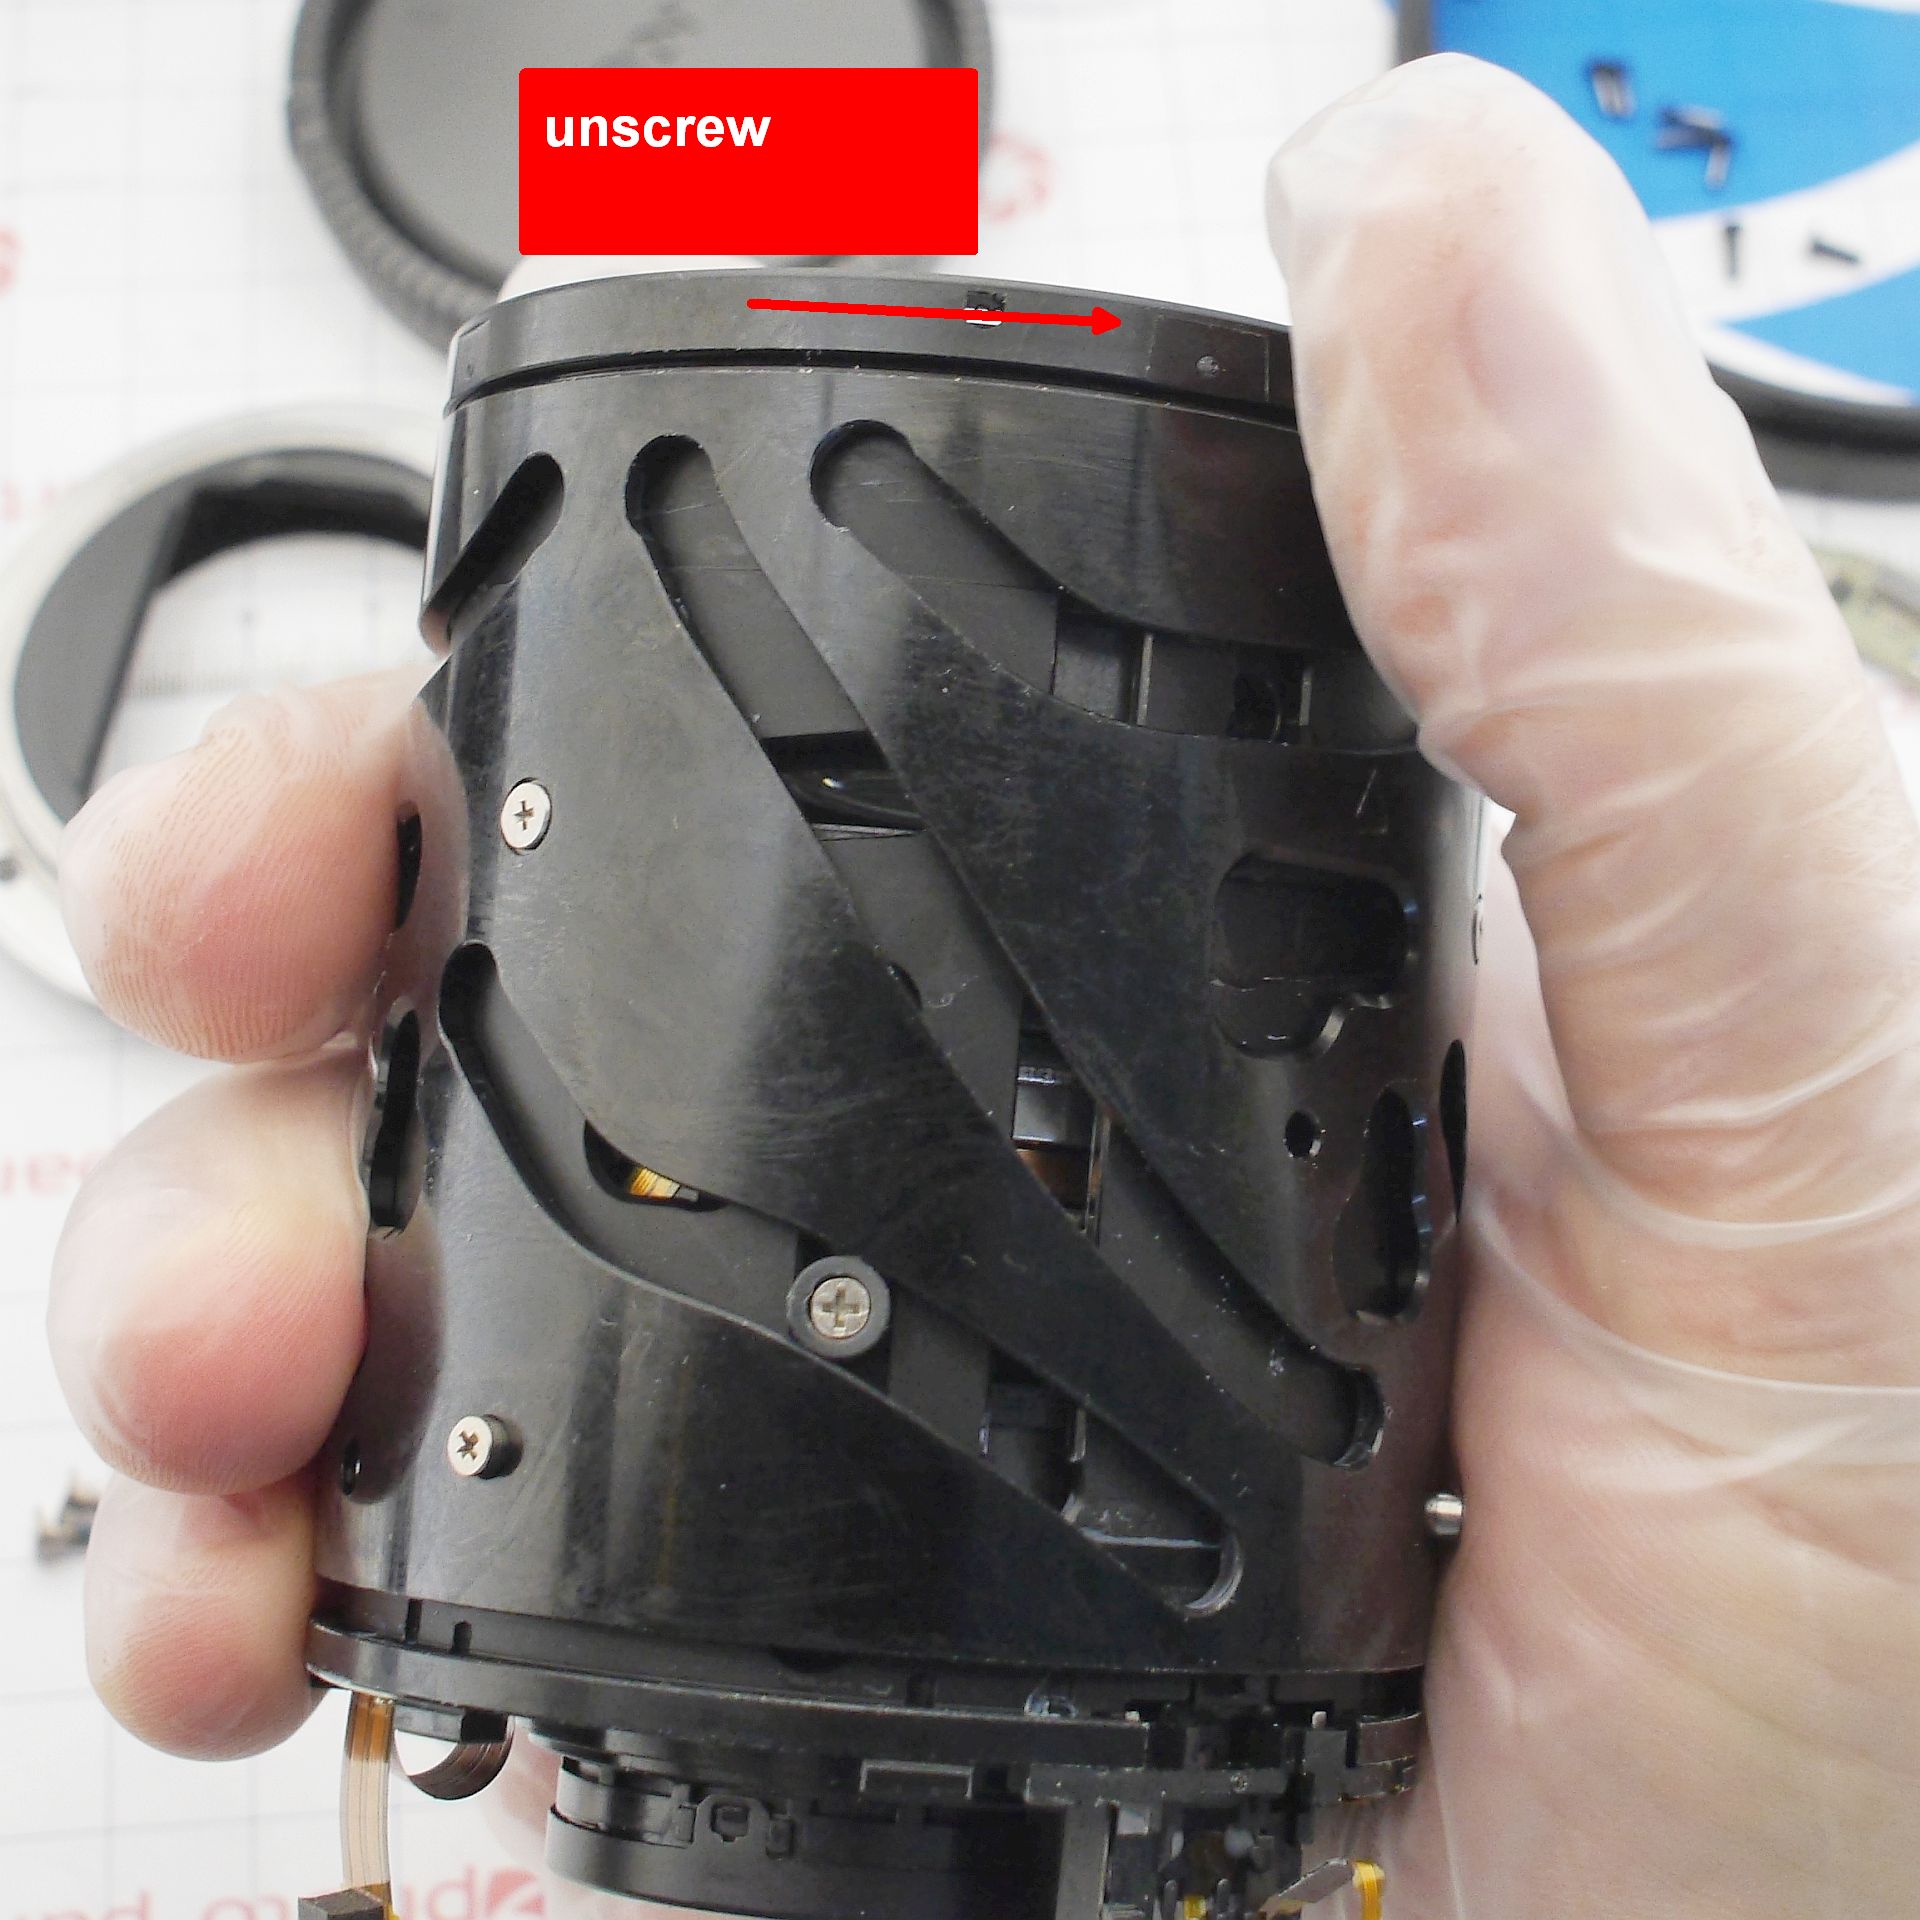
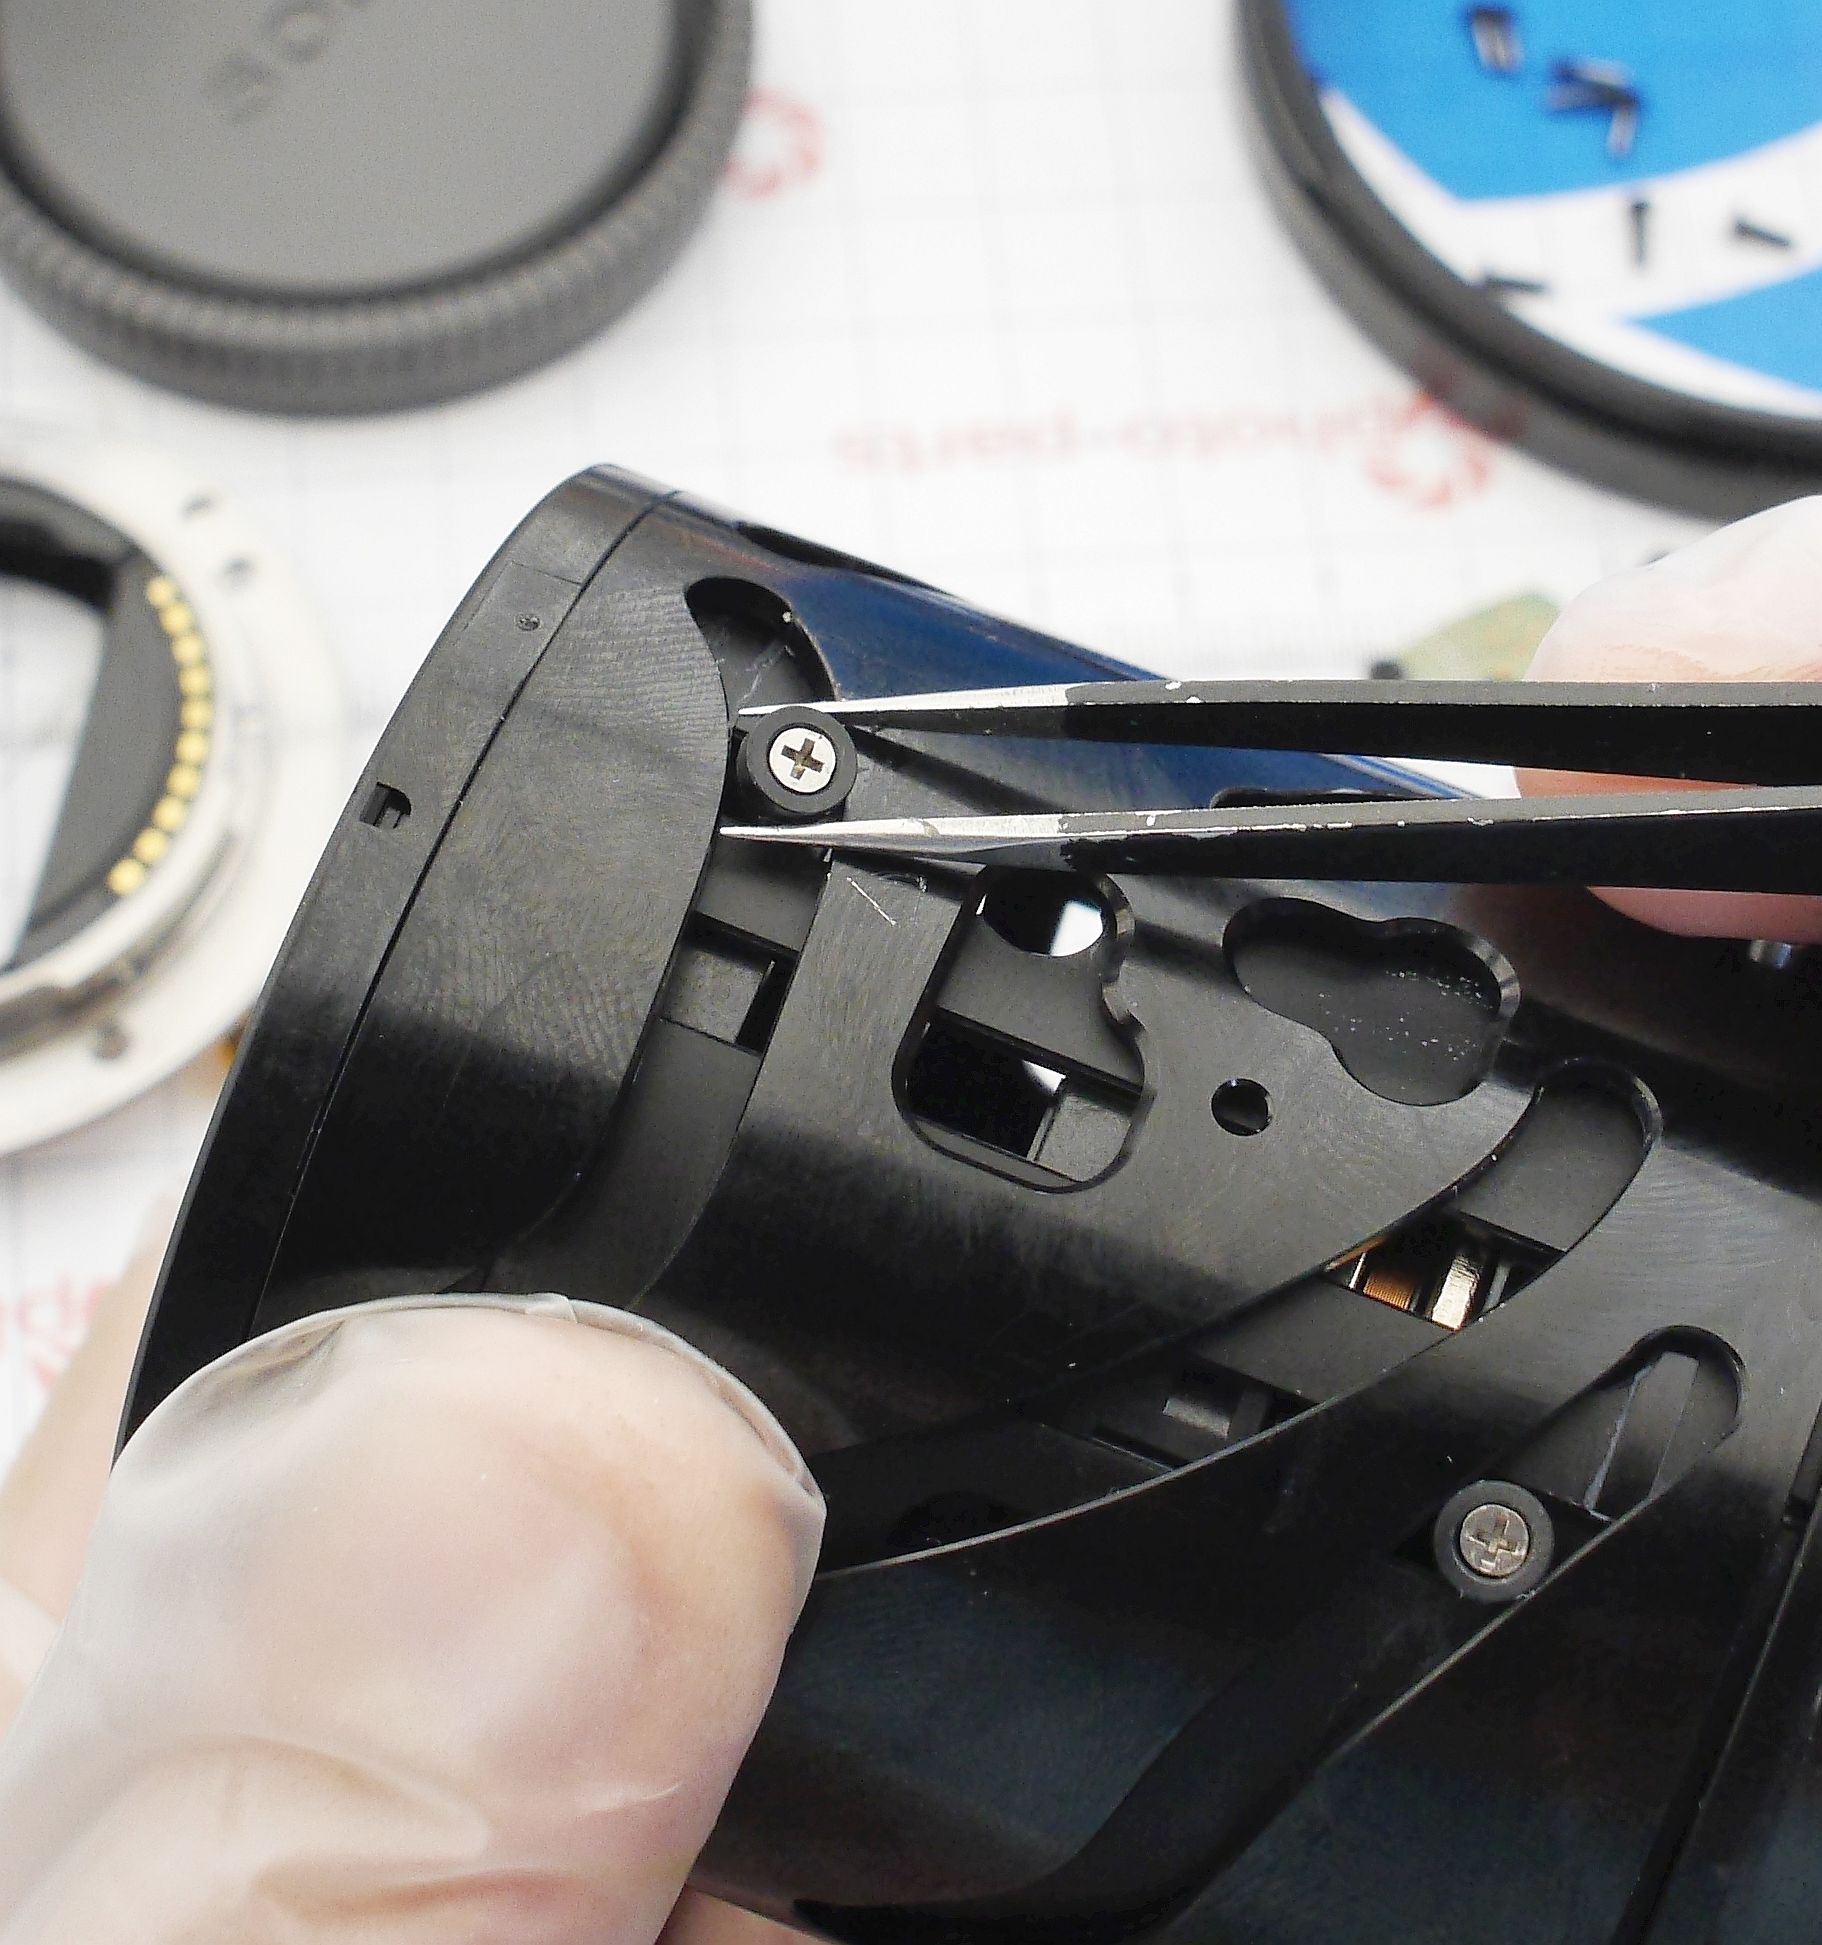
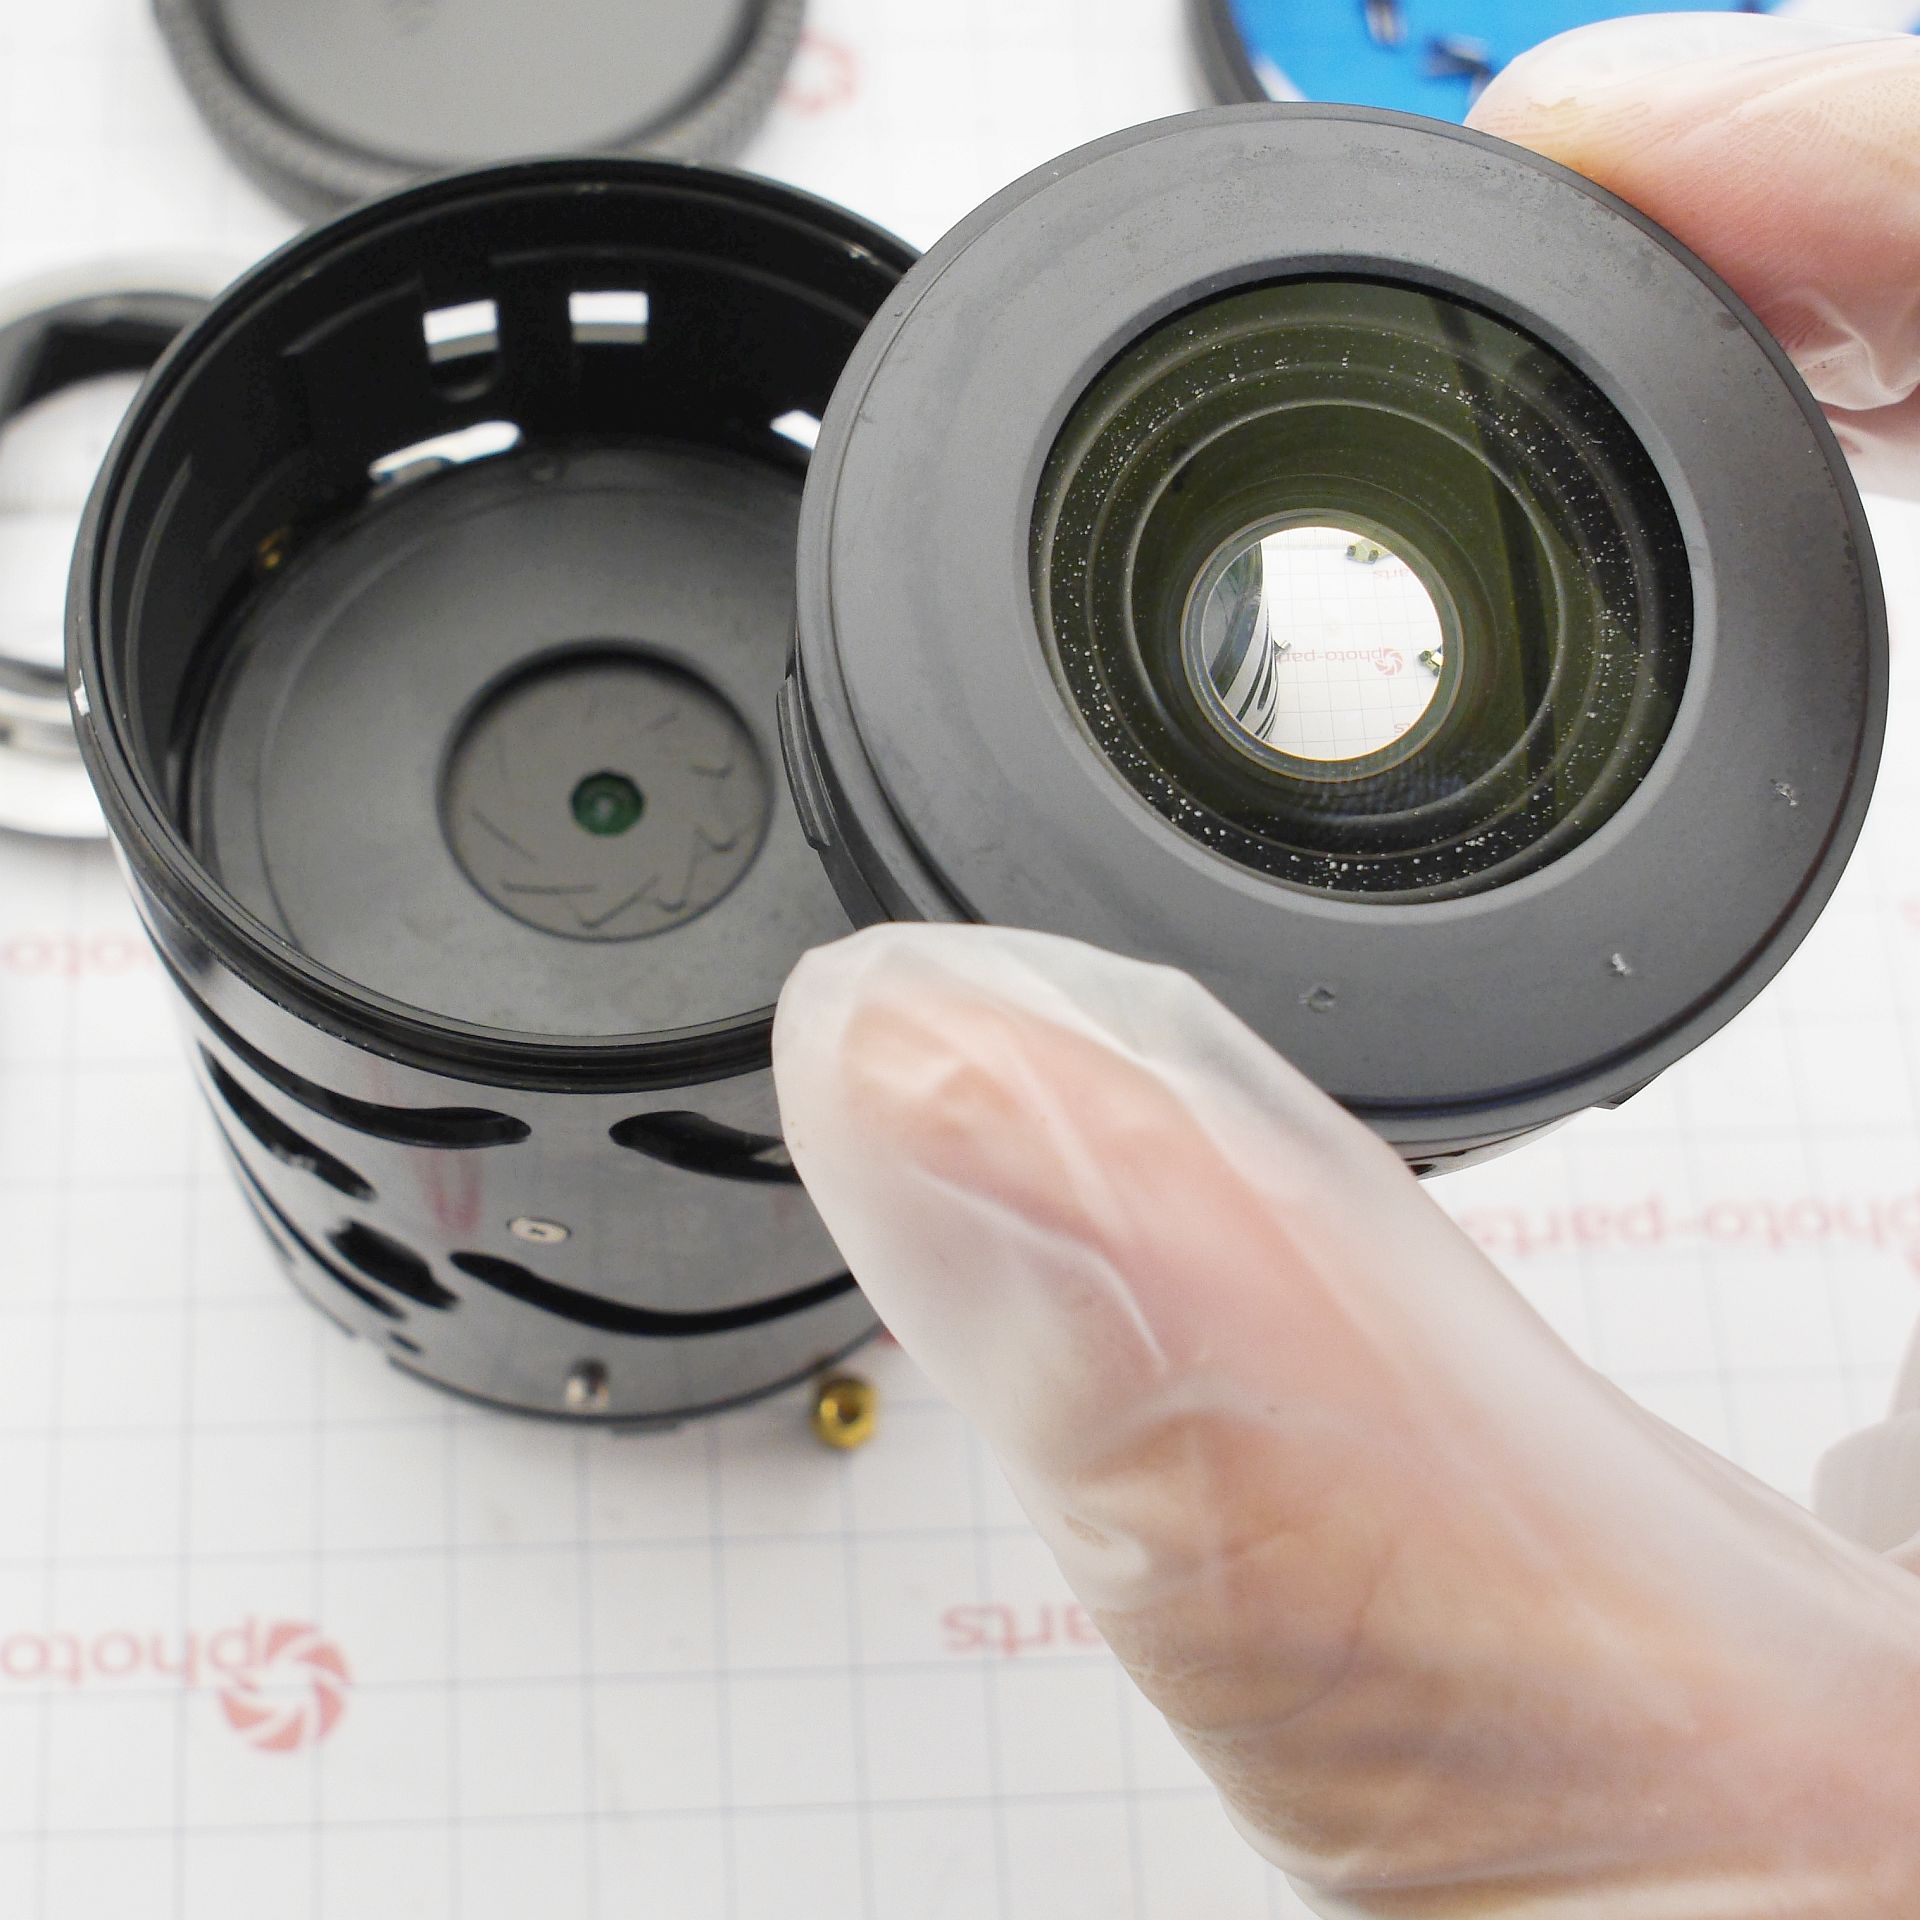
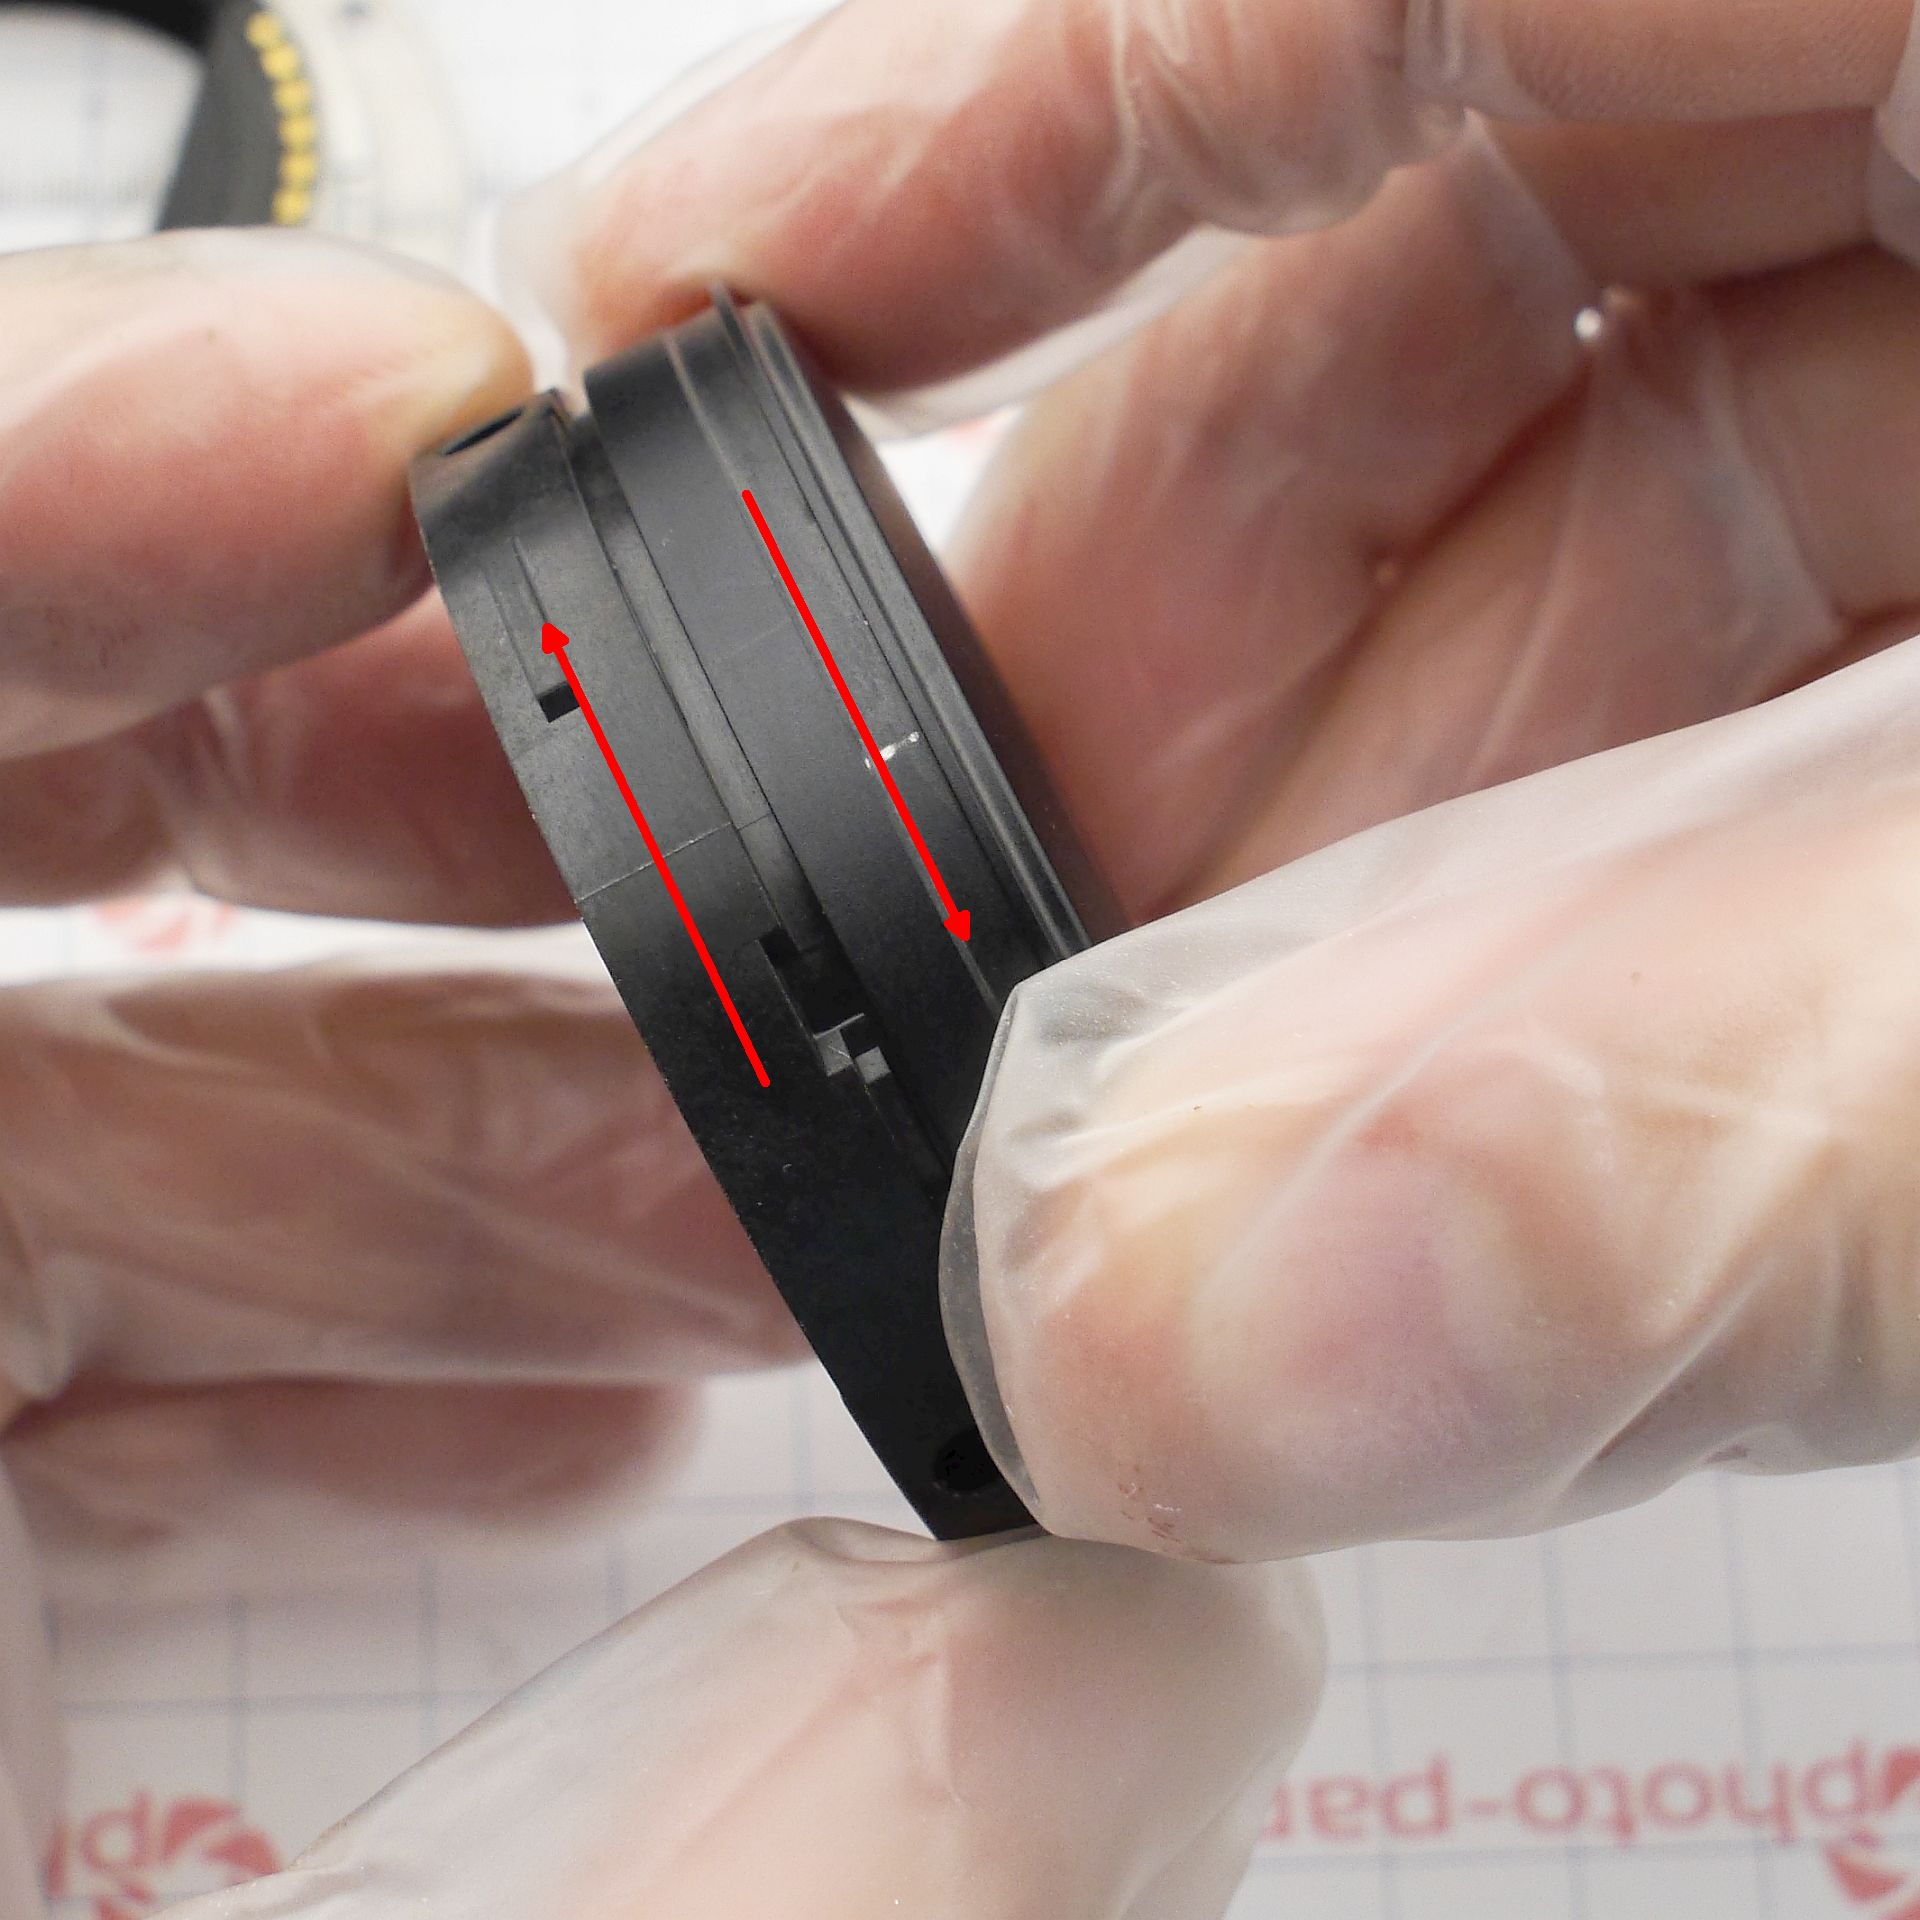
The second lens group also comes apart in a funny way - the decorative cap is threaded onto the housing.
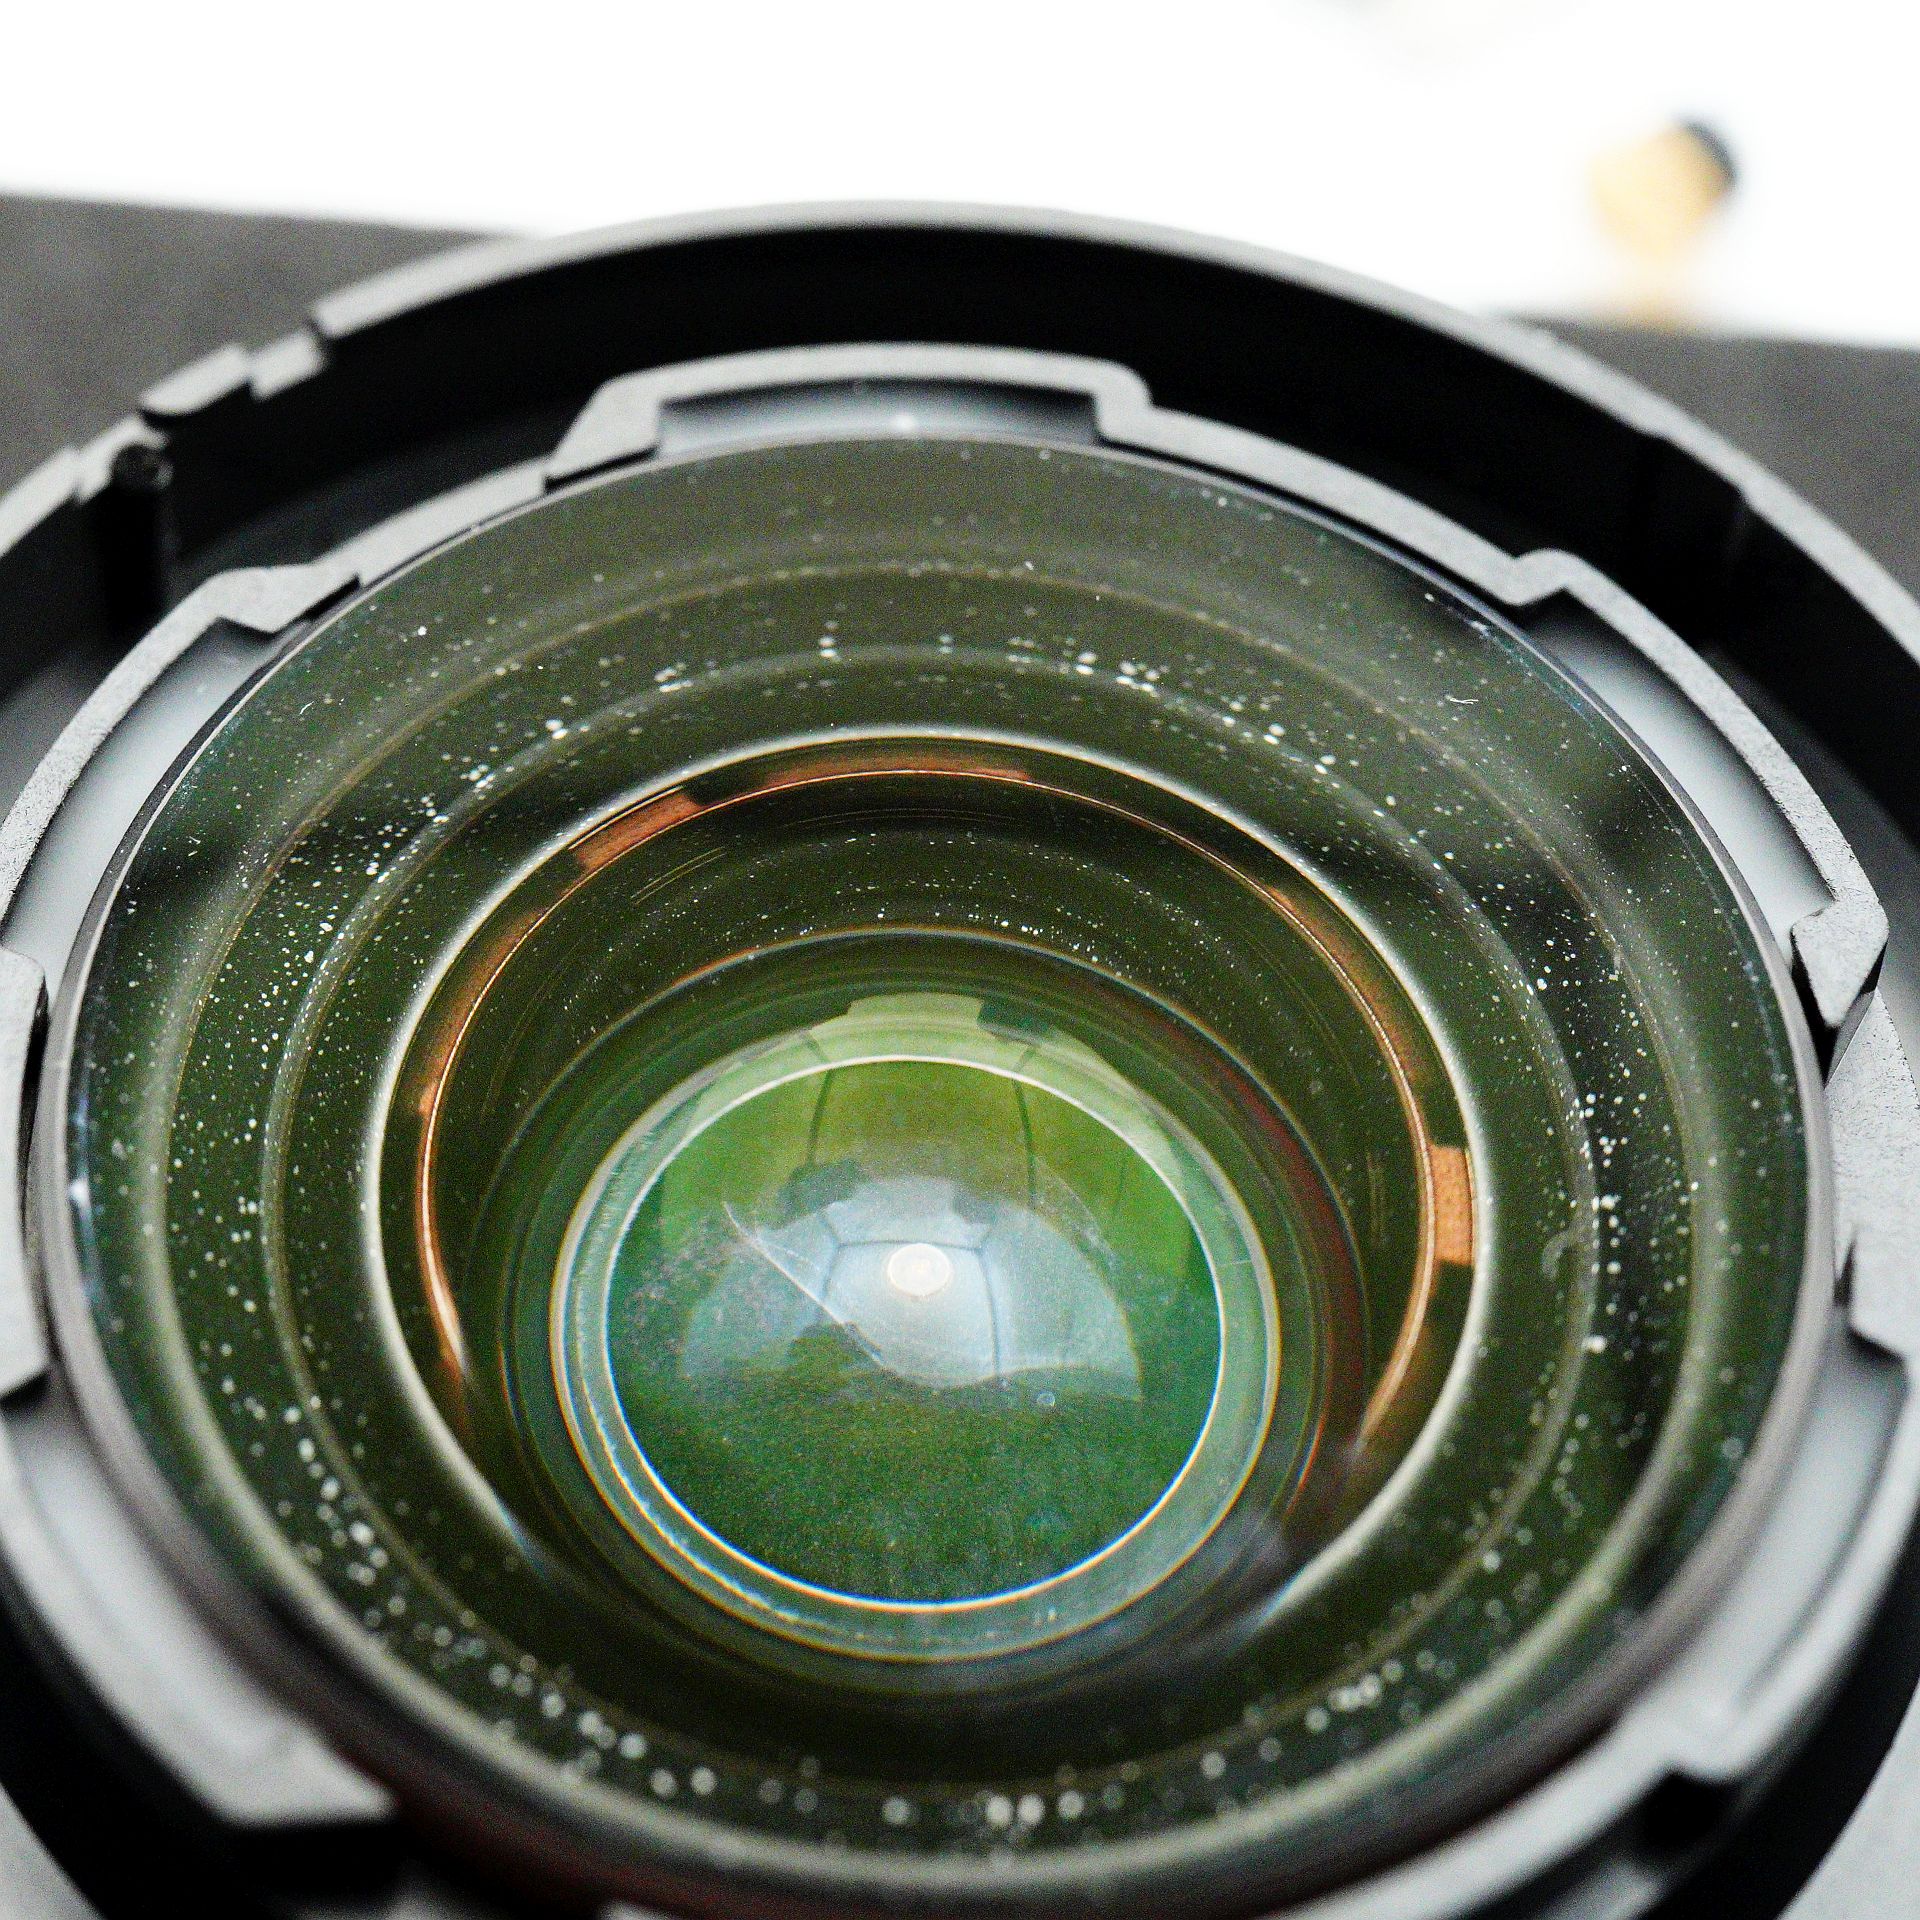
The state of this group is terrible. In addition to stains inside the group, there are nasty white dots on the blackened coating. And unfortunately, this is the "face" of the lens - ignoring such a defect is not possible.
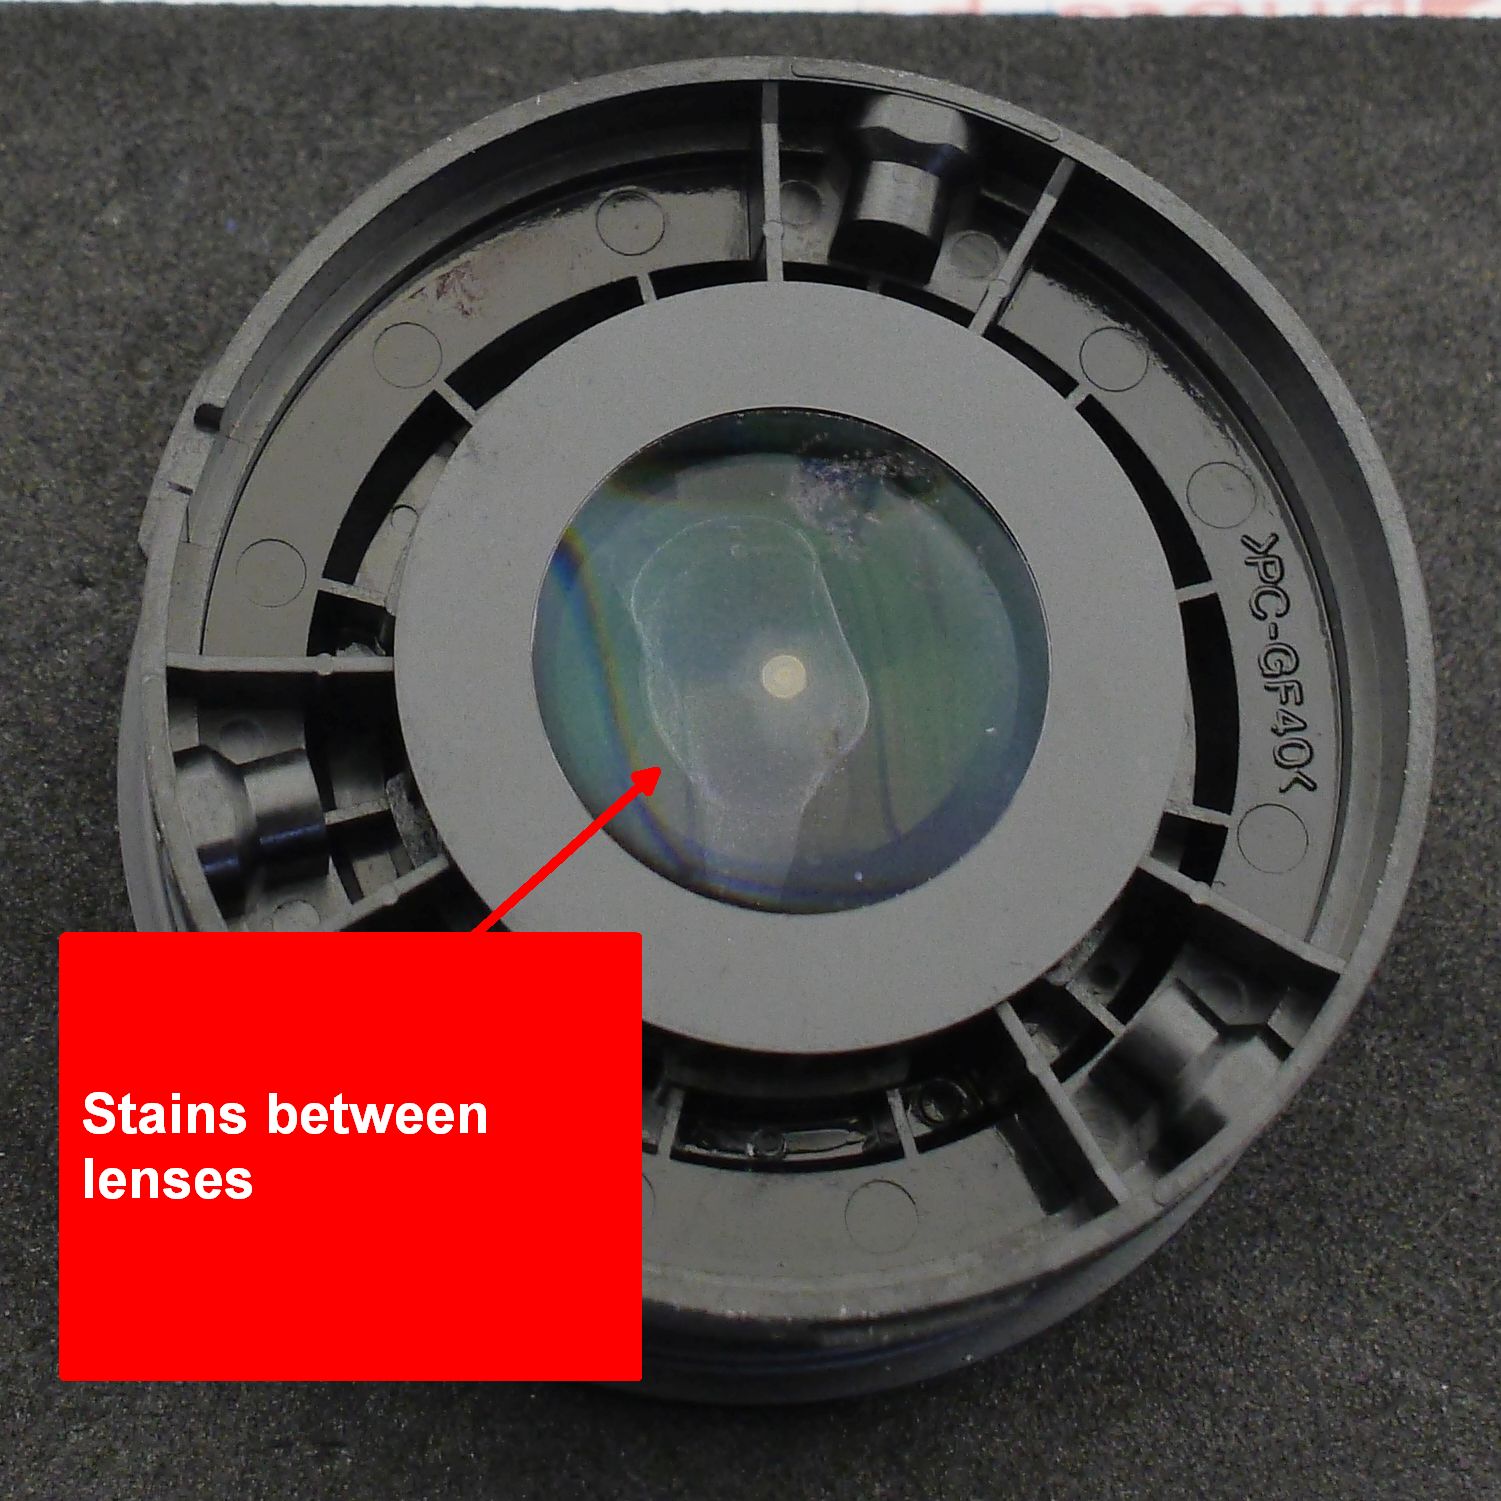
So once again, the group has to be disassembled for cleaning. The front element of the second group is carefully pried off, the glue breaks away, the element isn't centered, so the glue can be safely scraped. It turned out that the second group consists of four lenses, and in the same way I had to cut away the glue and dig out the rear element and the one behind it. By Murphy's law, the water had damaged the innermost cavity :(
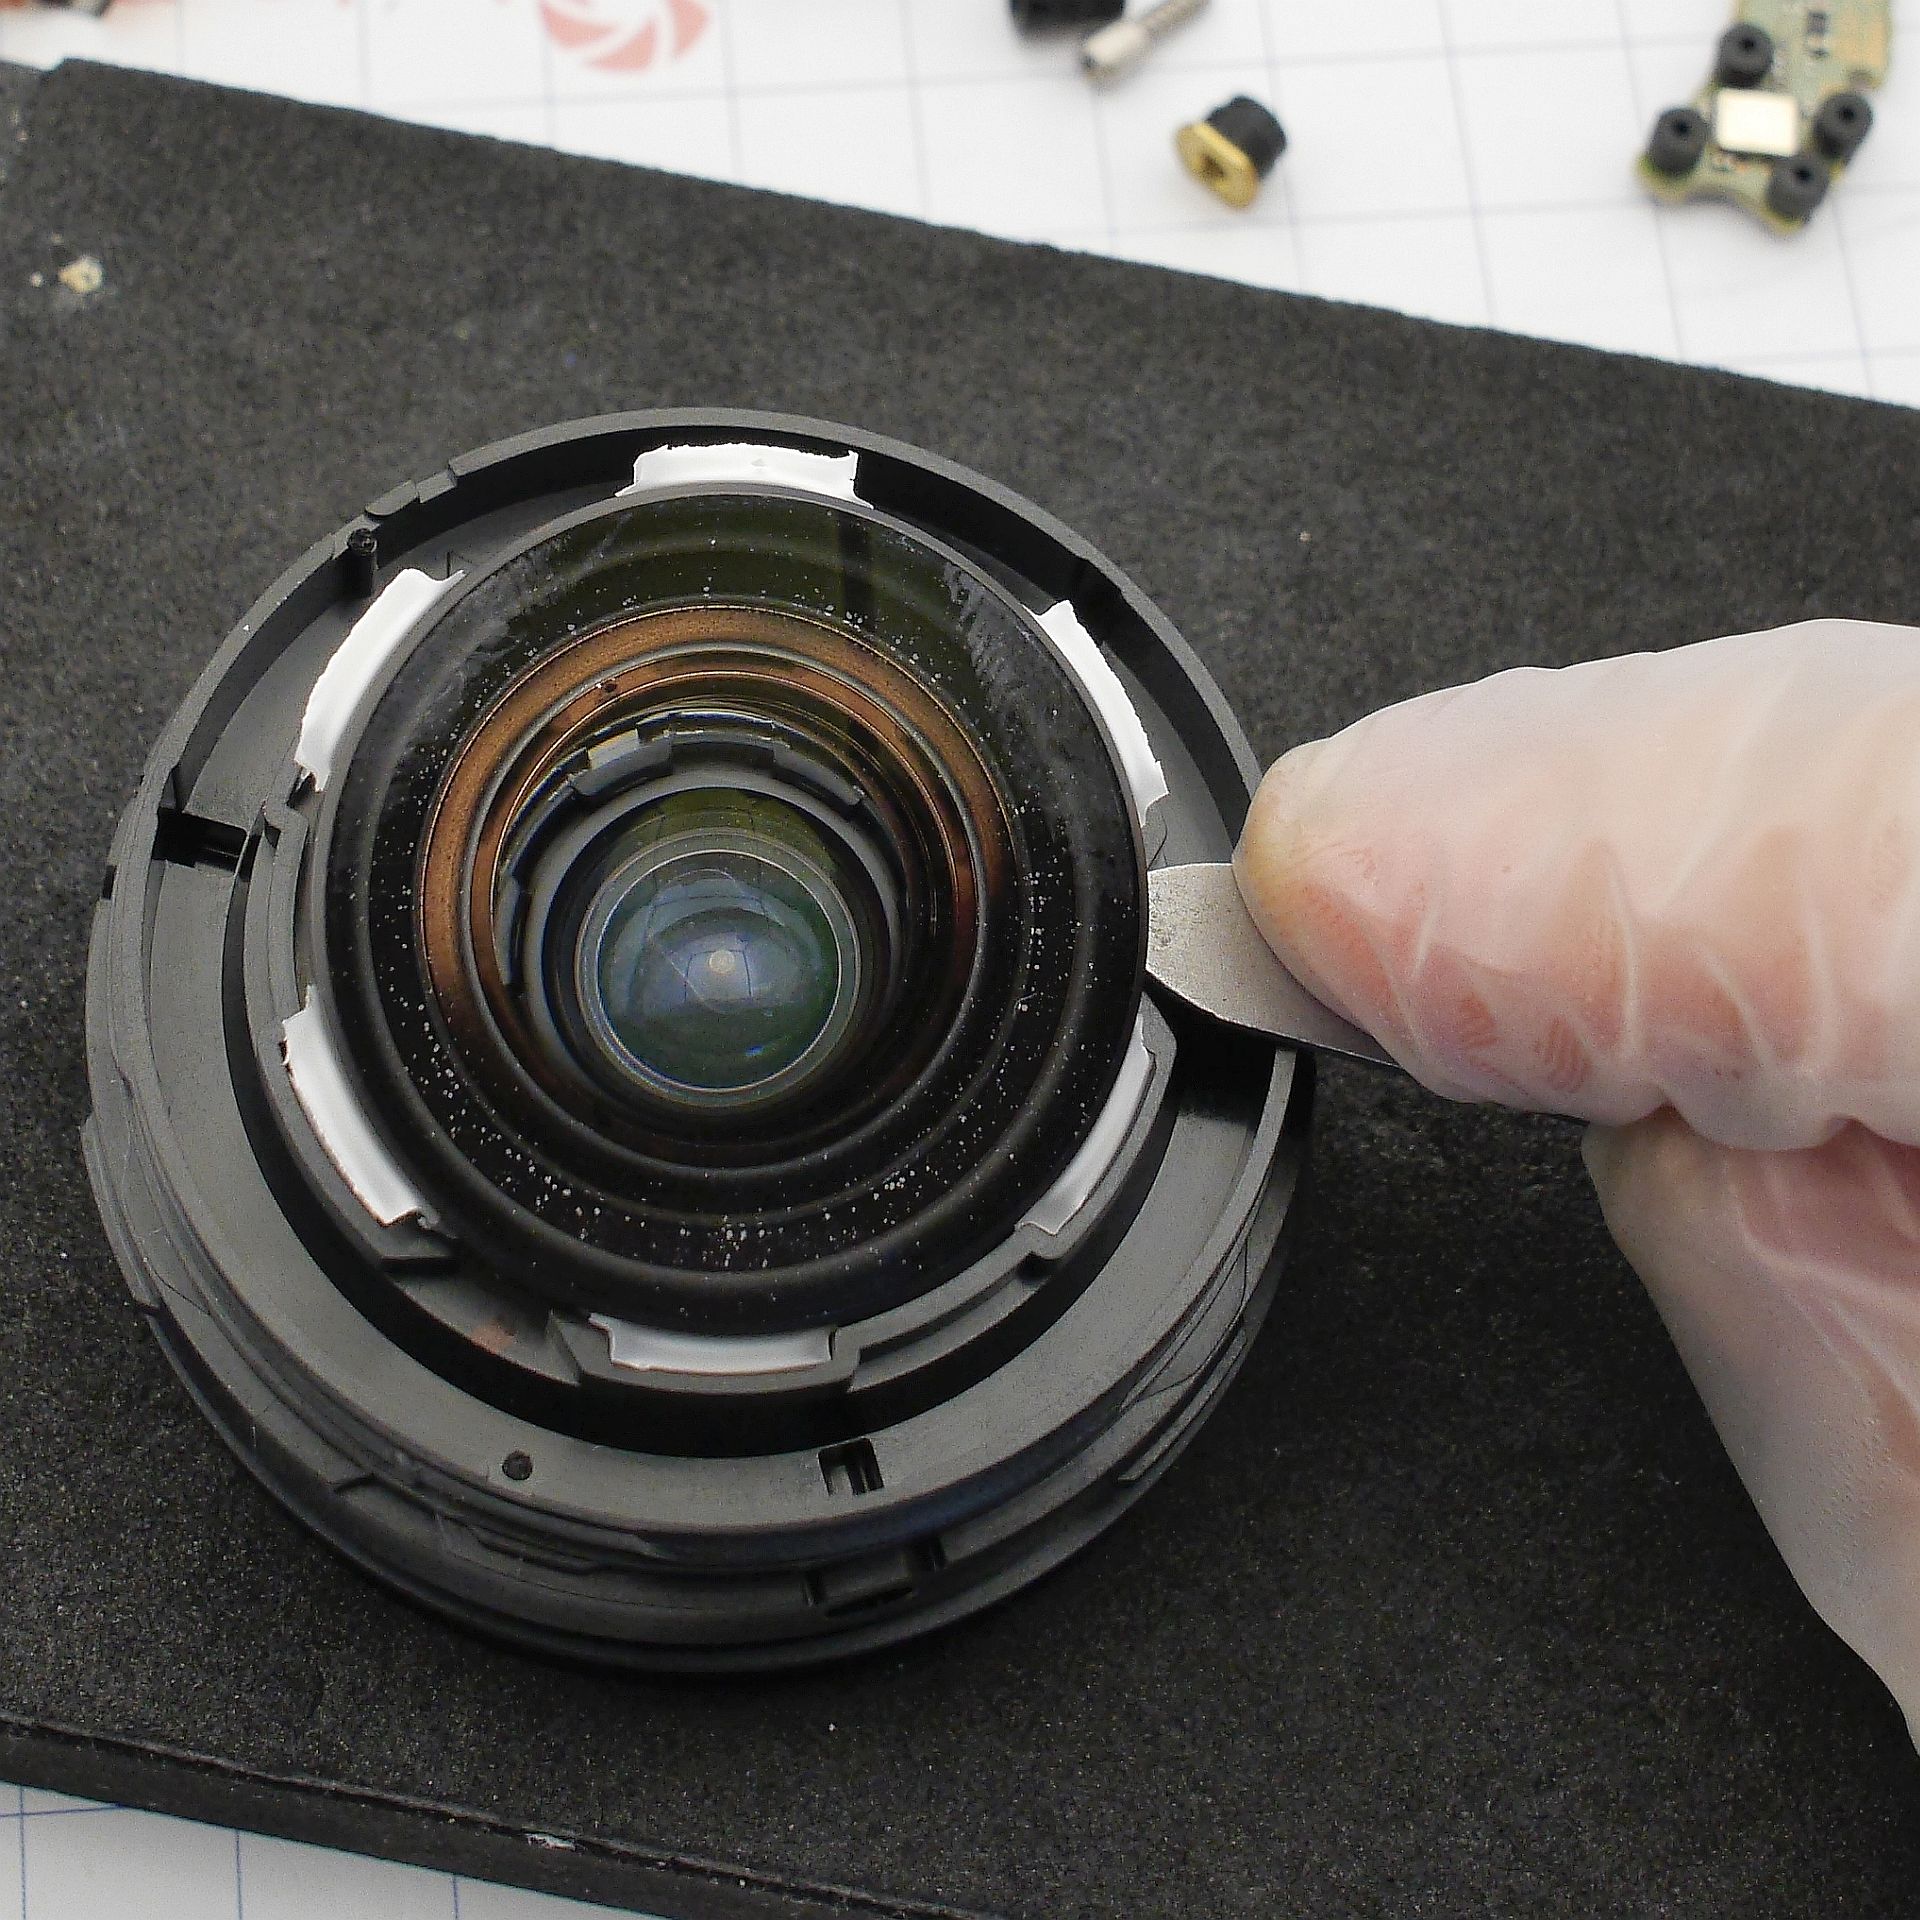
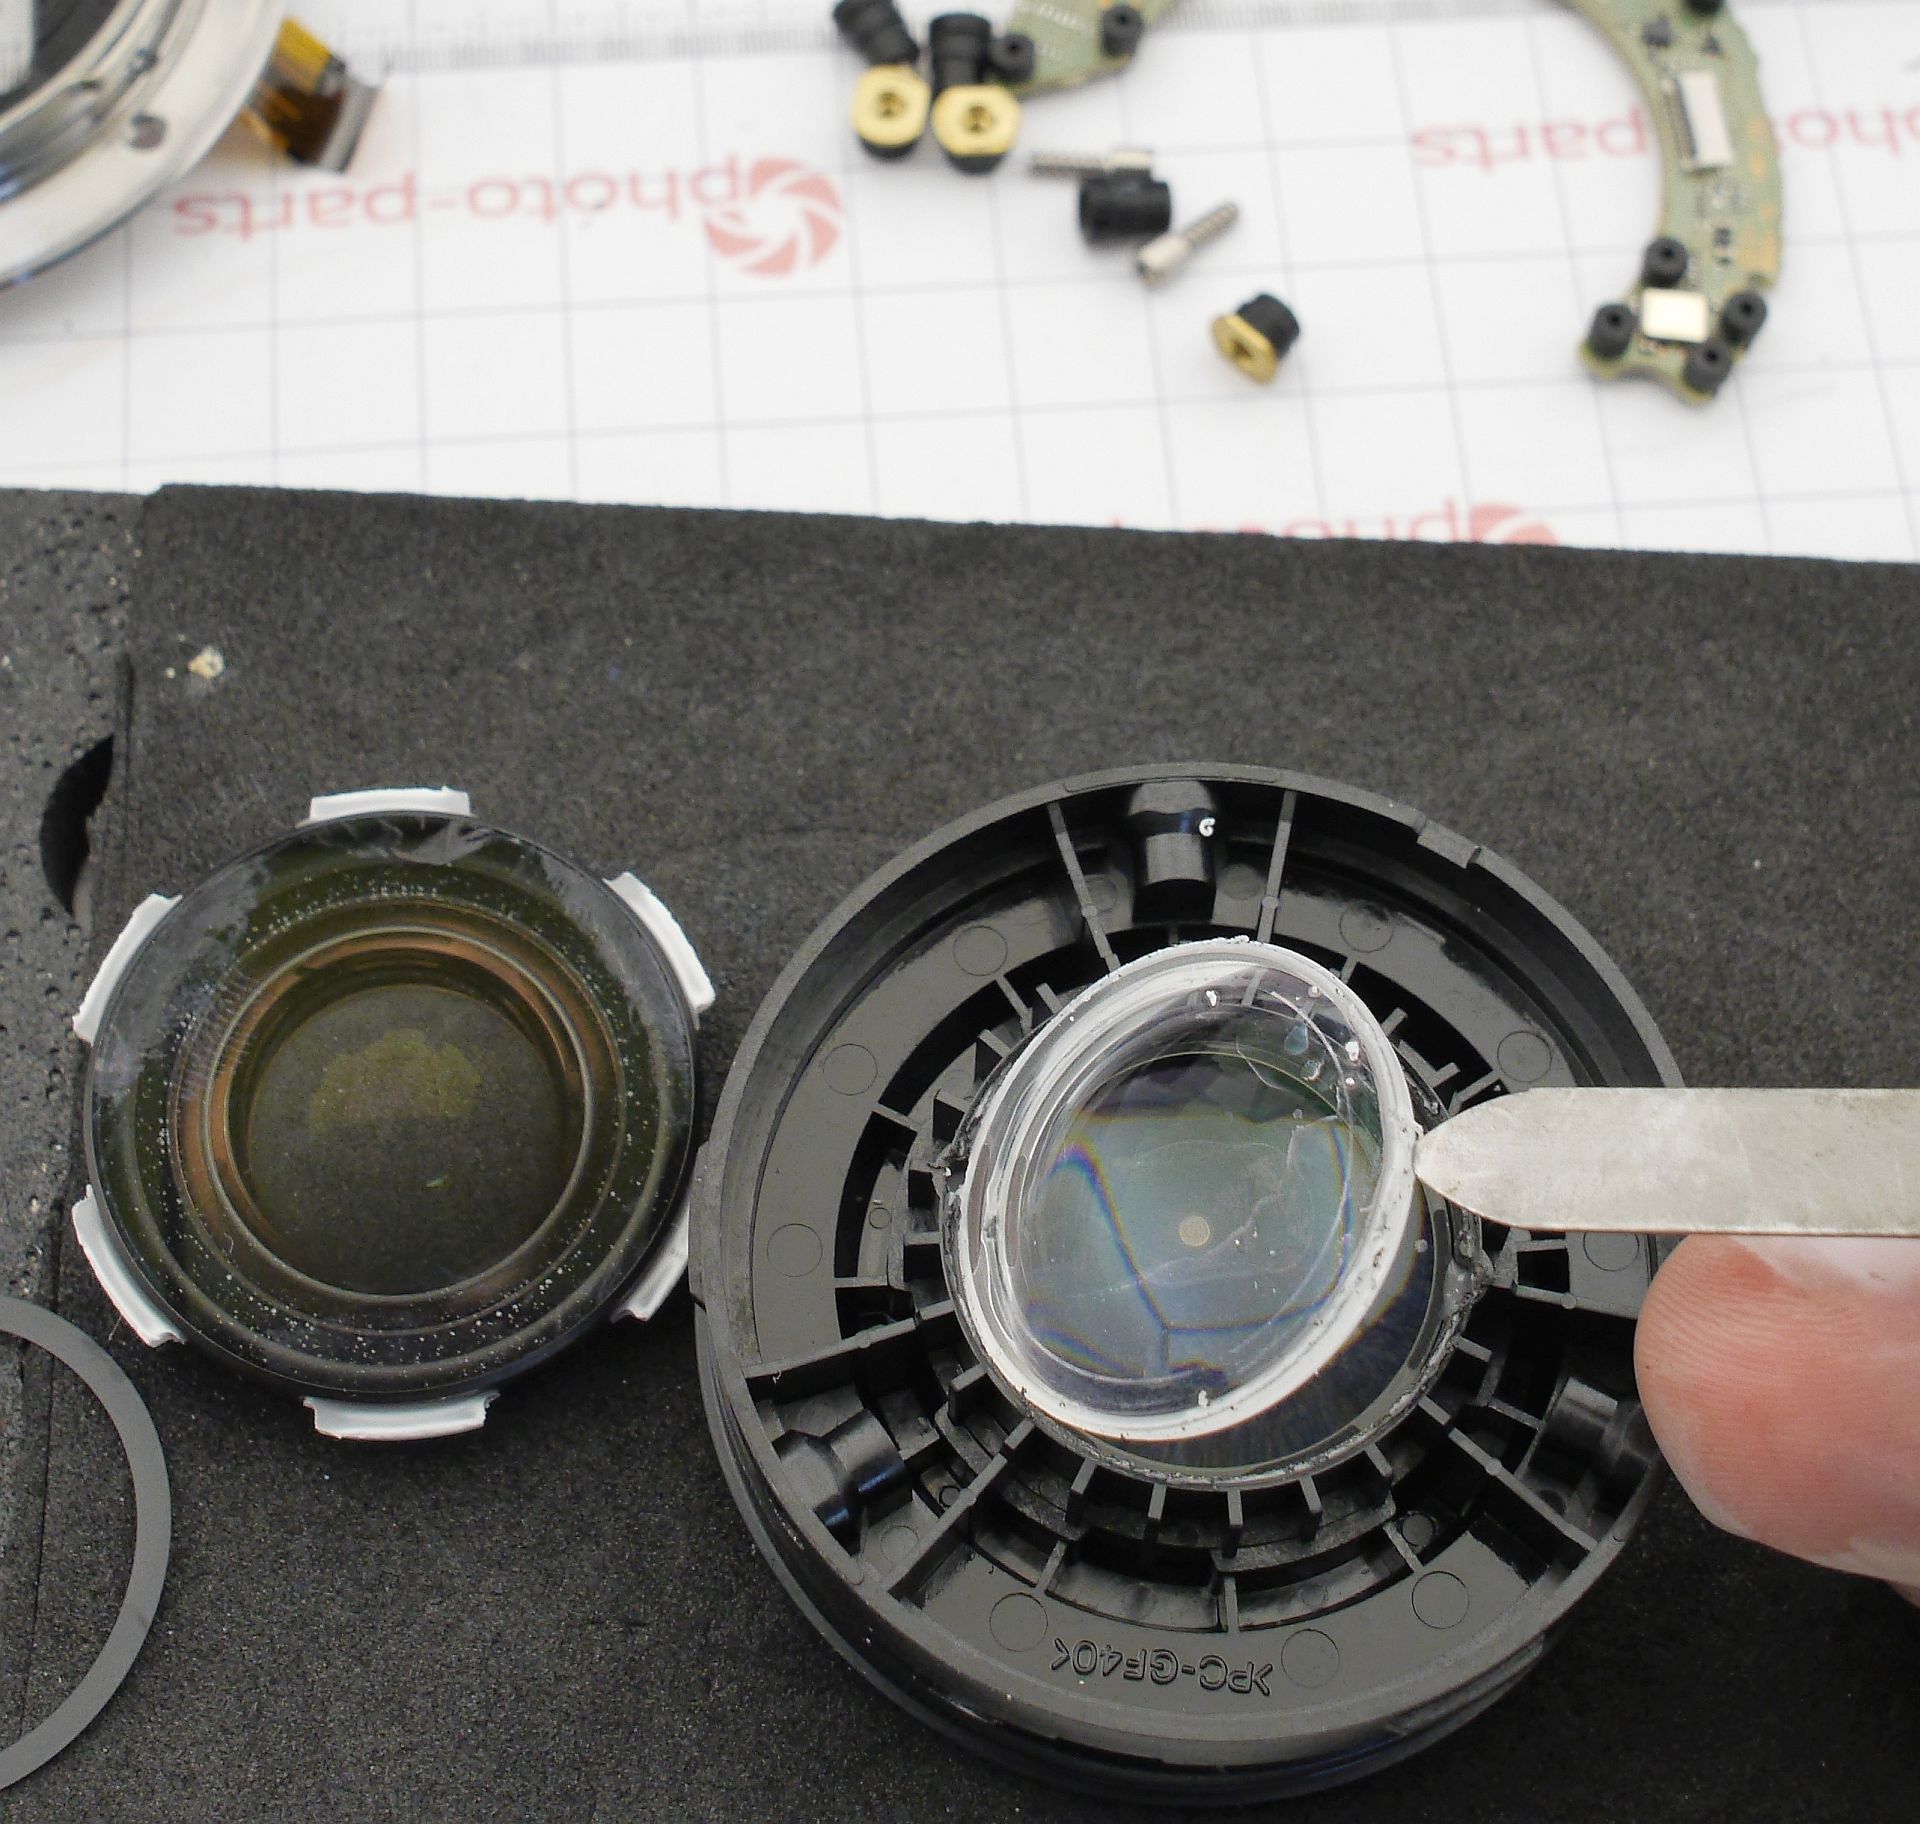
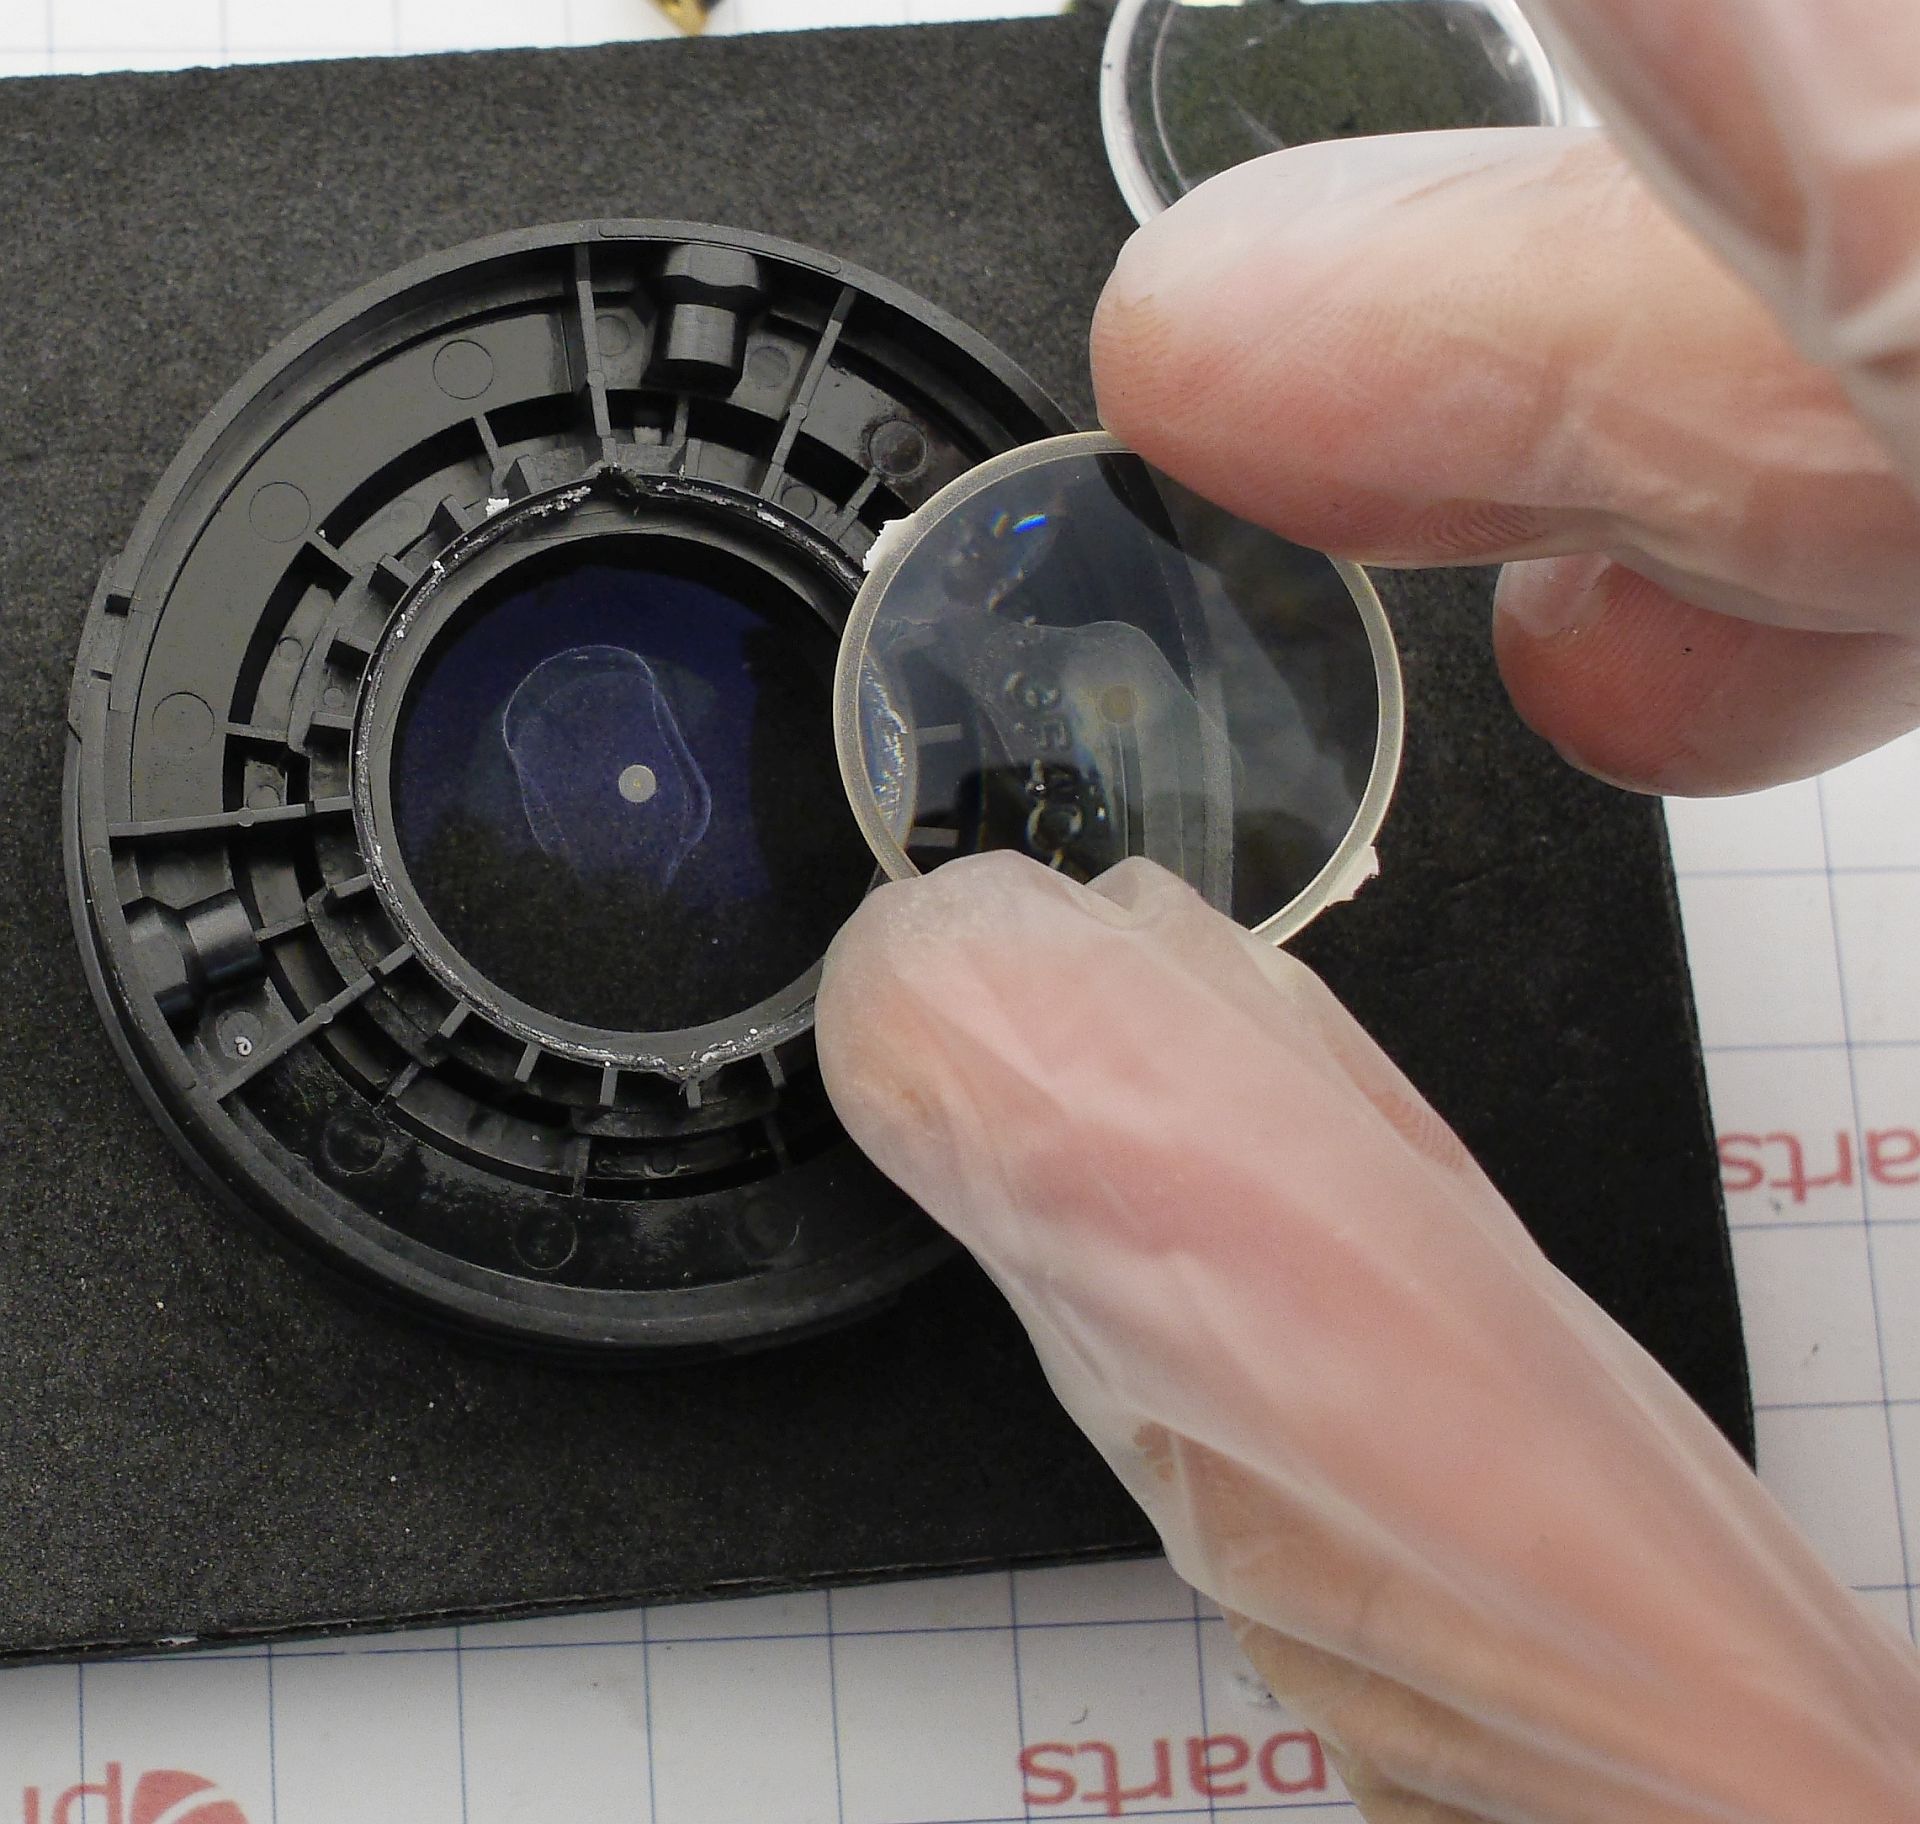
And here's where my adventure really began. Circumstances didn't favor this poor lens or me, because the greatest water damage was to the lens with the nano-coating. In an ideal world, this is the end of the repair, or at least the reason to order a new lens element - it is fundamentally impossible to restore a destroyed coating.
Here's what the coated lens looked like after long contact with water:
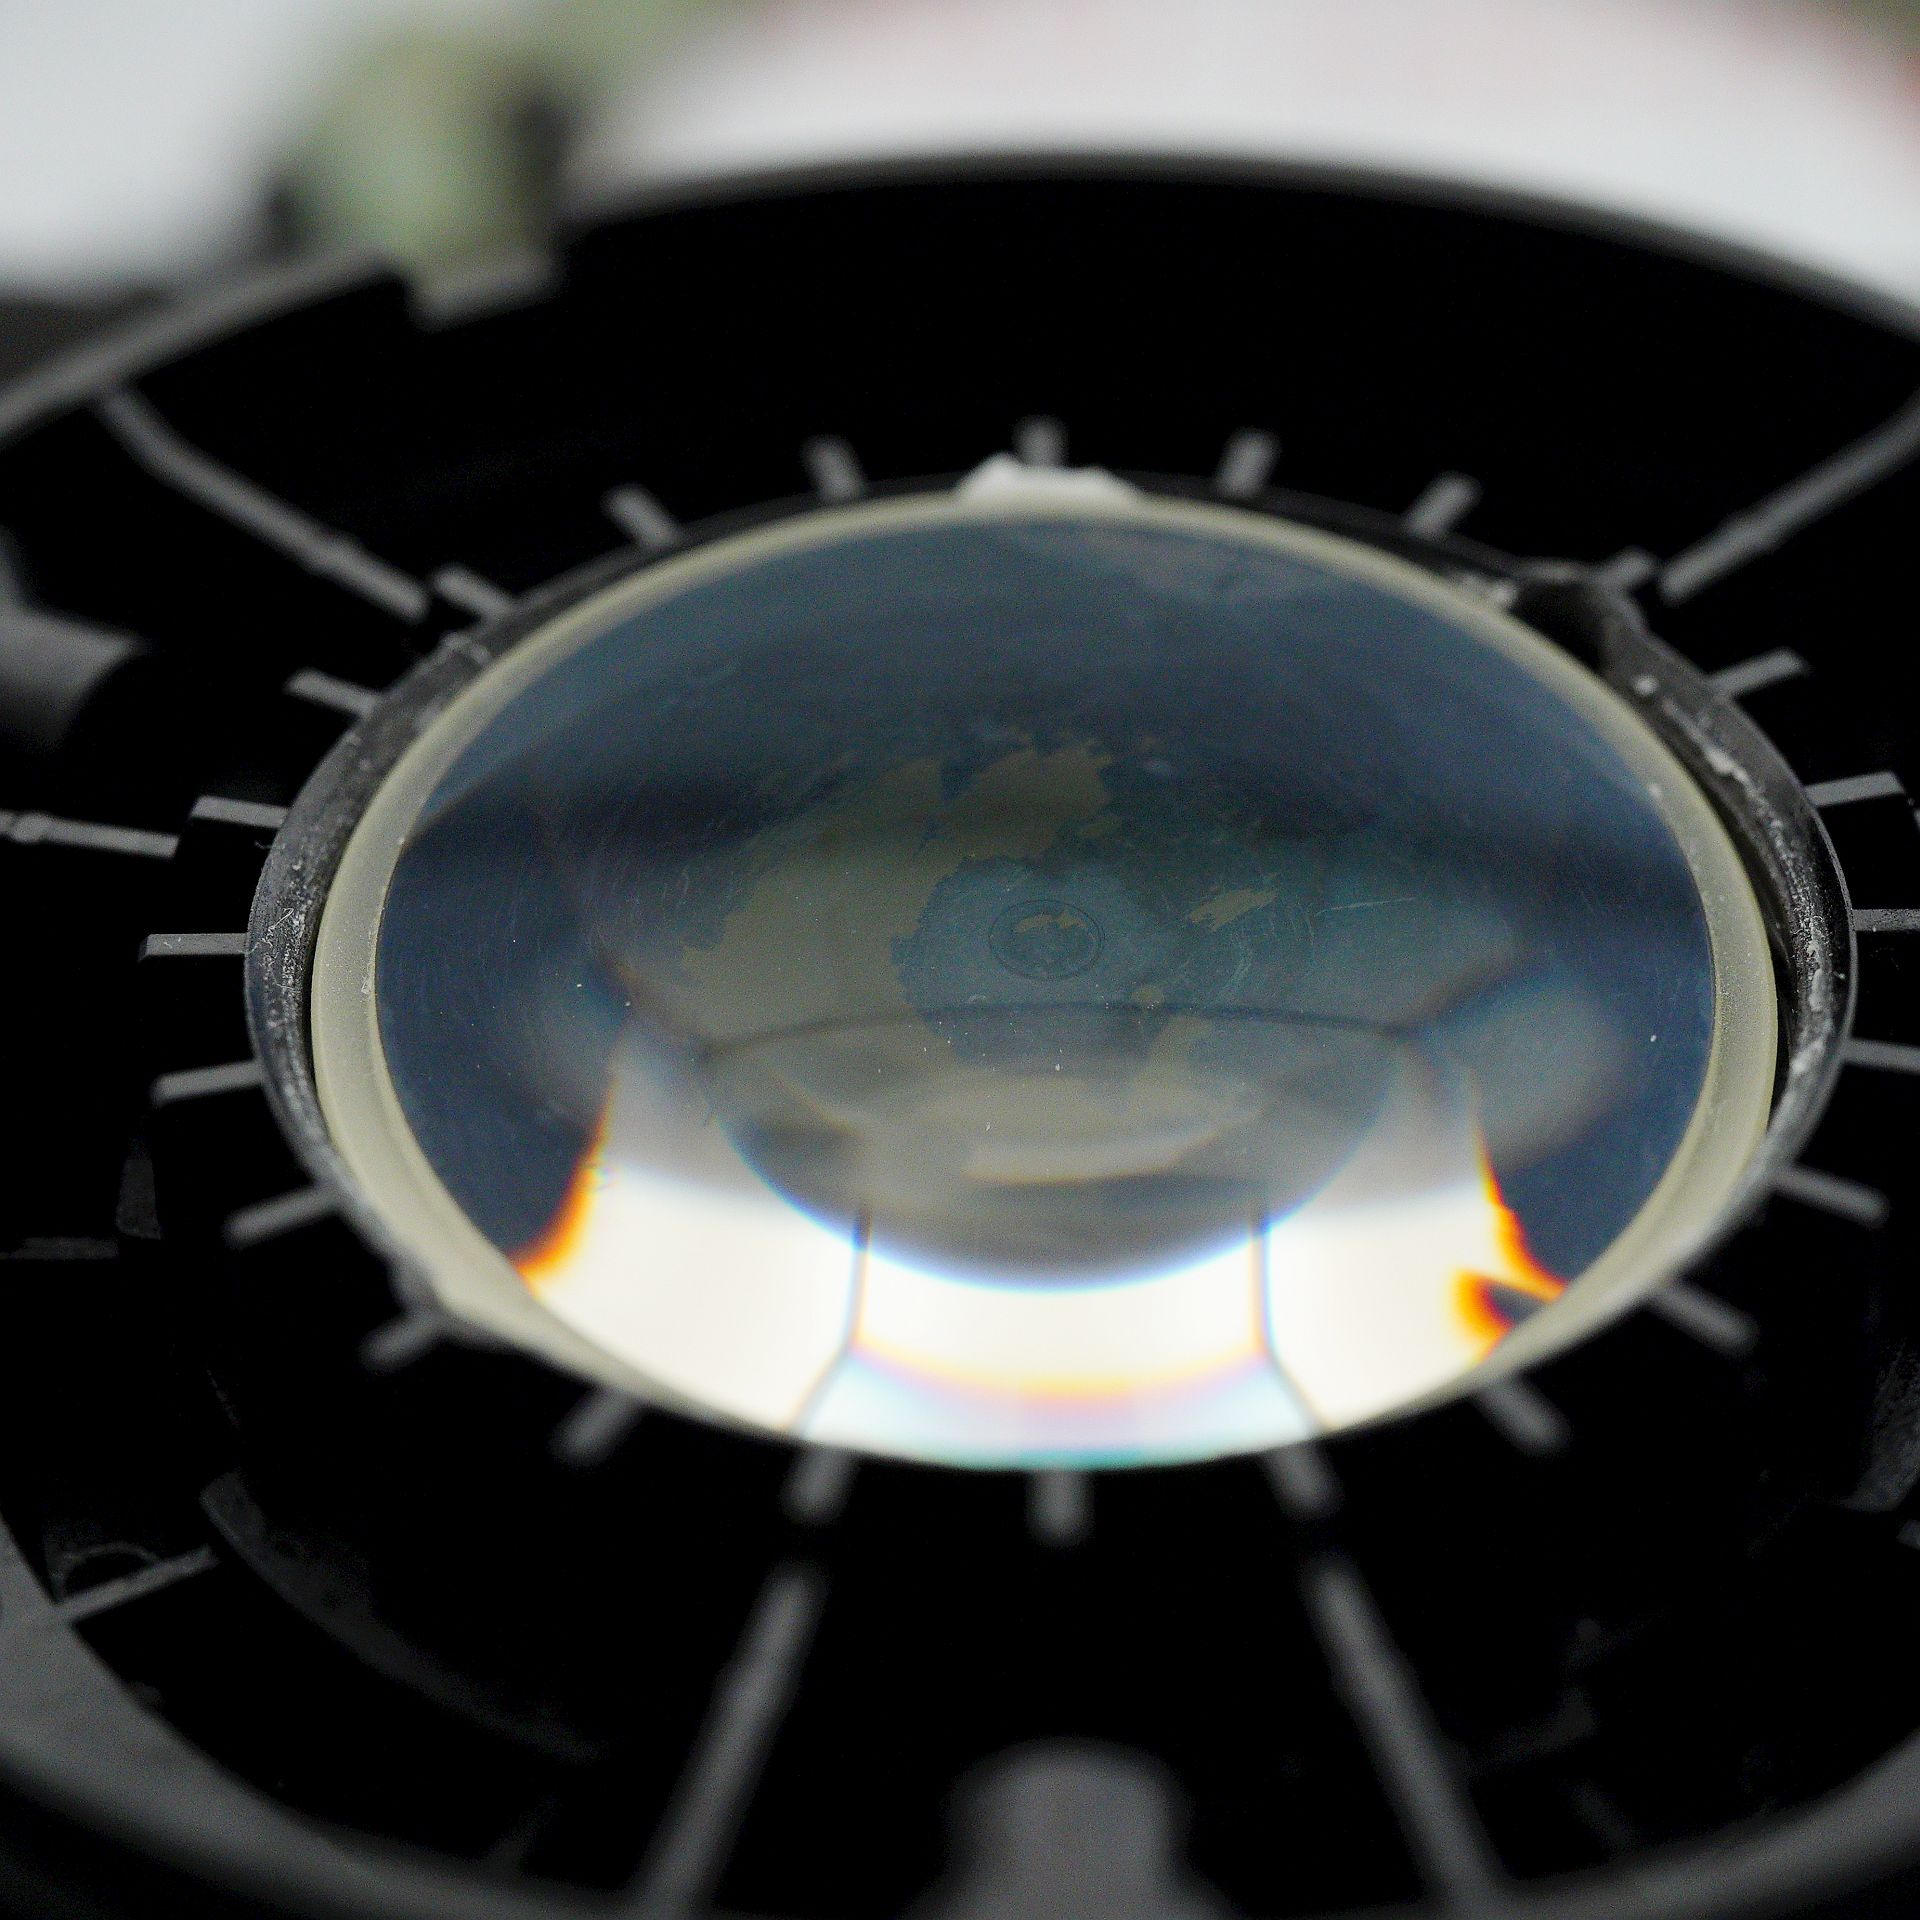
However, since I am restoring this lens for my personal use, I decided that complete removal of the coating would be acceptable. This carries noticeable, though not fatal, consequences: more flare and ghosting against backlight, slightly reduced contrast. But for hobby use, the difference is negligible. Ironically, the coating at the point of water contact came off by itself, while in other places nothing would touch it - neither alcohols, nor solvents, nor light polishing. The solution was a felt wheel with the finest polishing paste.
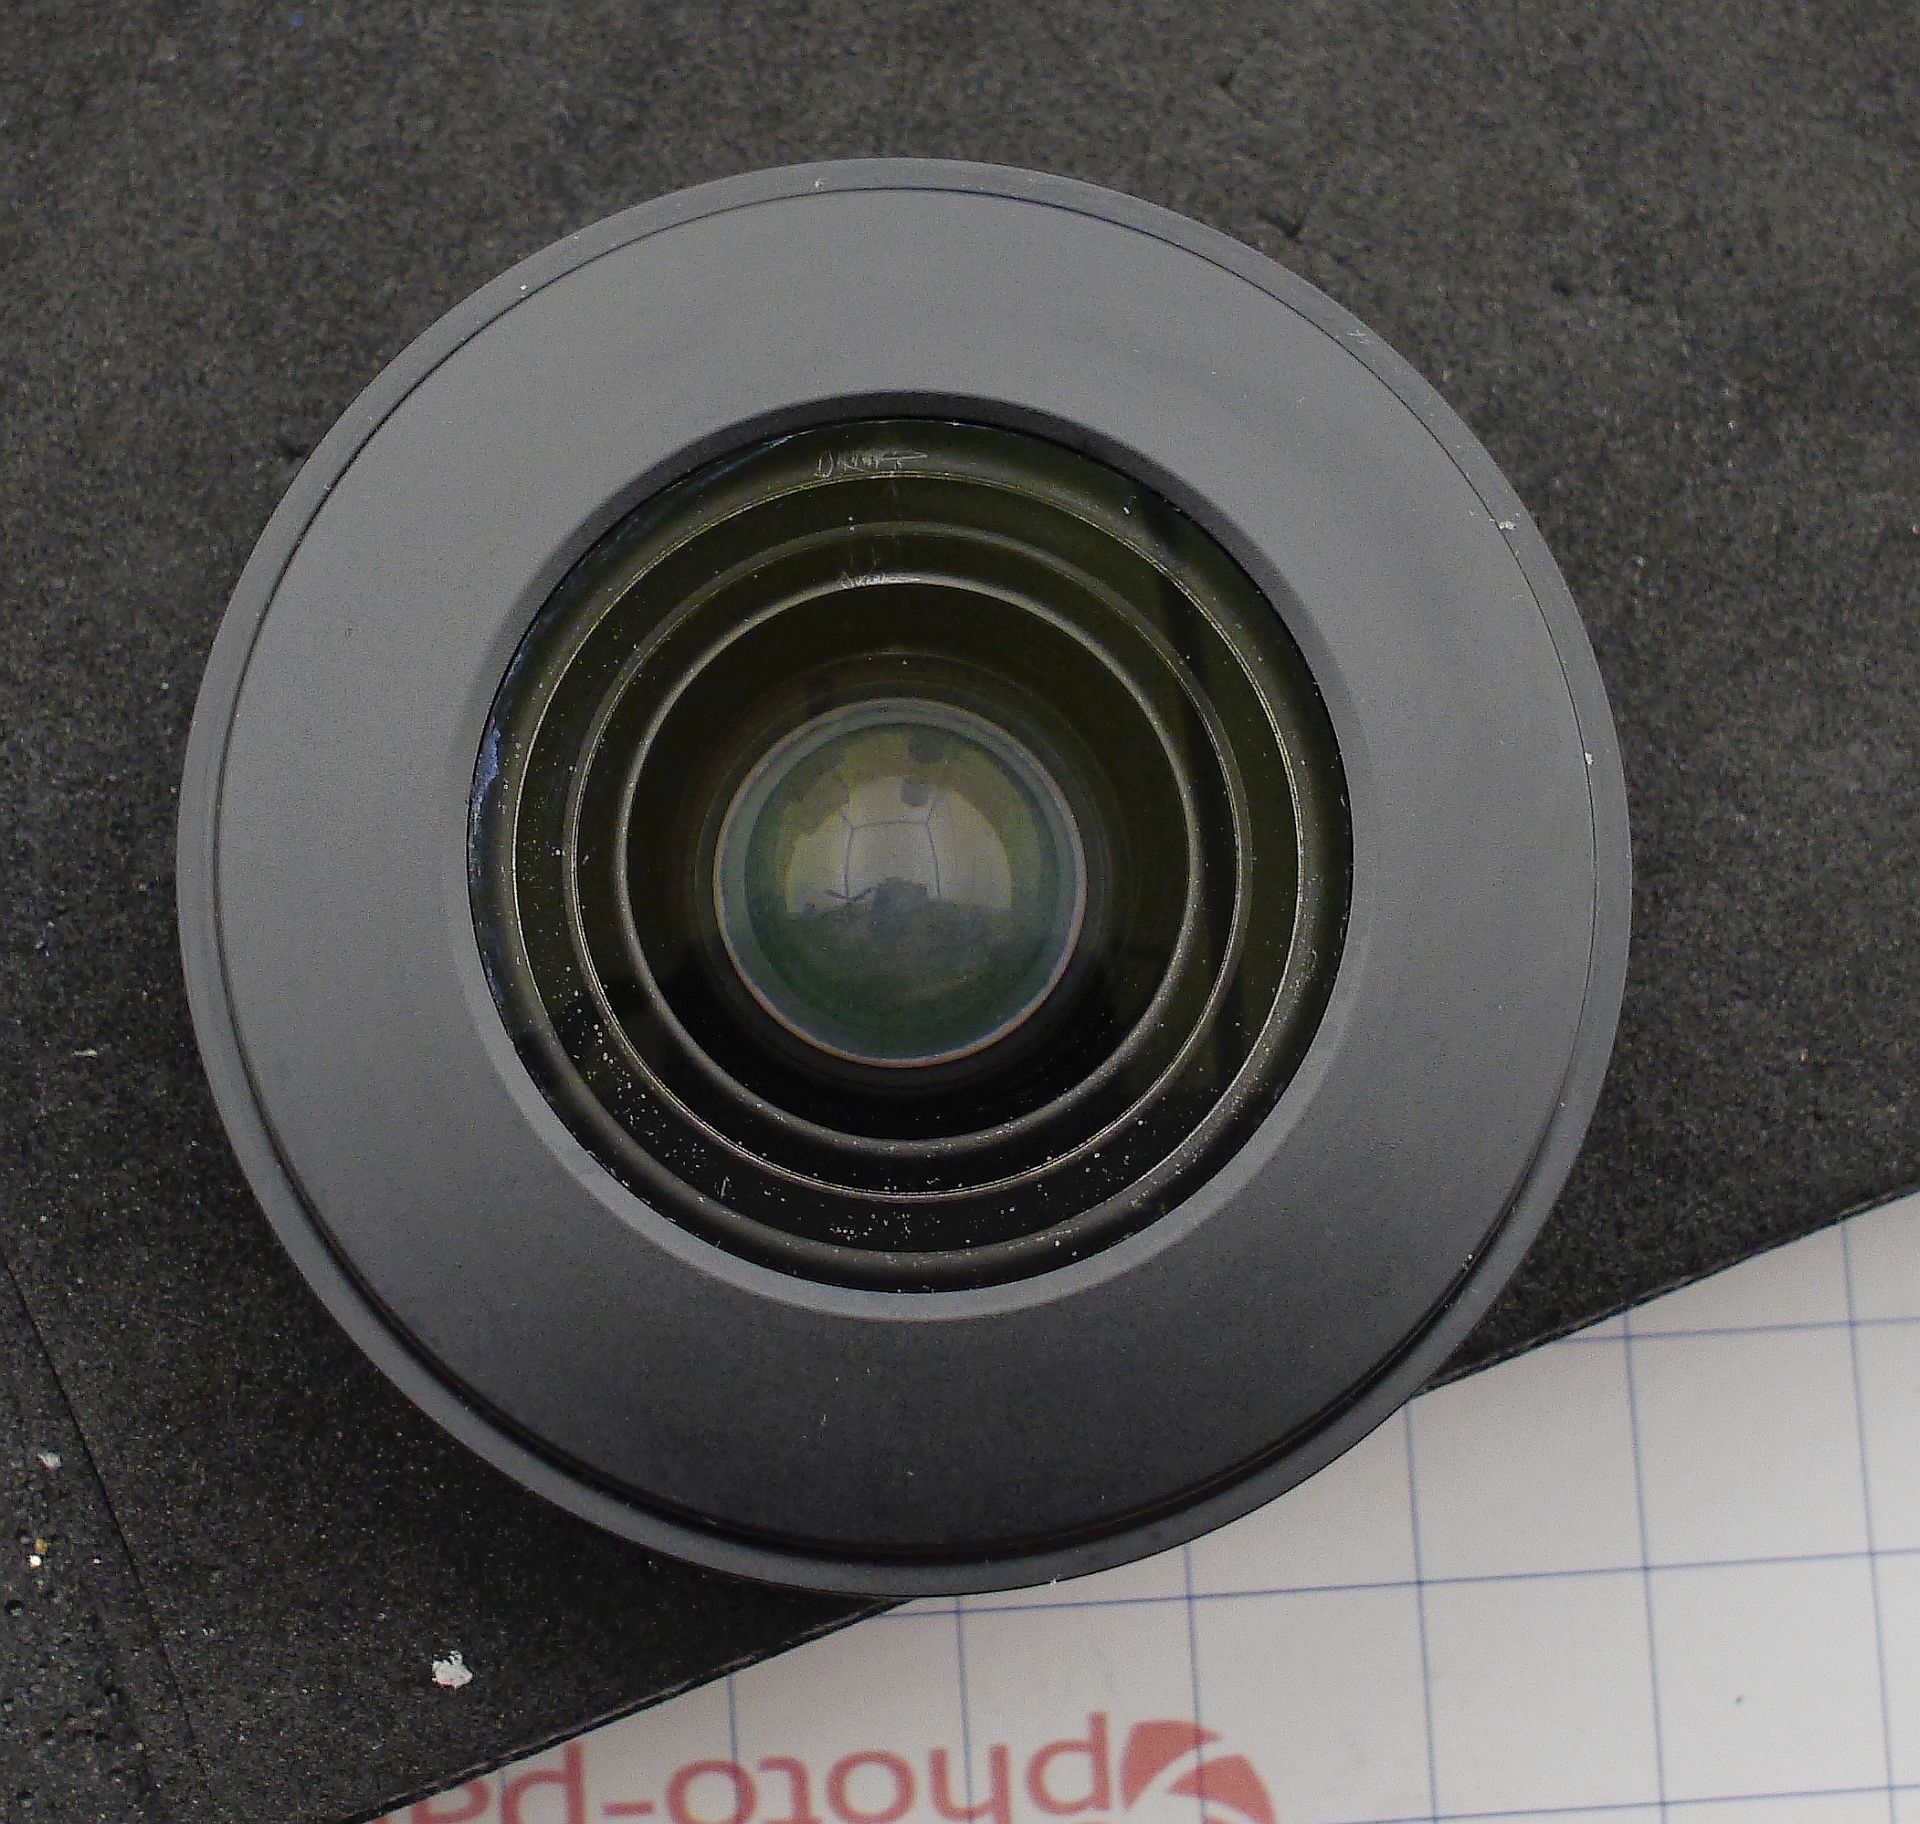
That's the kind of happy ending the second lens group got. The blackening, by the way, was partly restored by soaking the edge element in acetone - it slightly dissolved the blackening coating and removed many of the spots. Larger defects were painted over with a special black paint ("for mobile phone camera rims").
However, I had cleaned less than half of the lens! Ahead were the aperture group, the optical stabilizer lens, the focusing lens, and quite a few more elements - all with water stains.
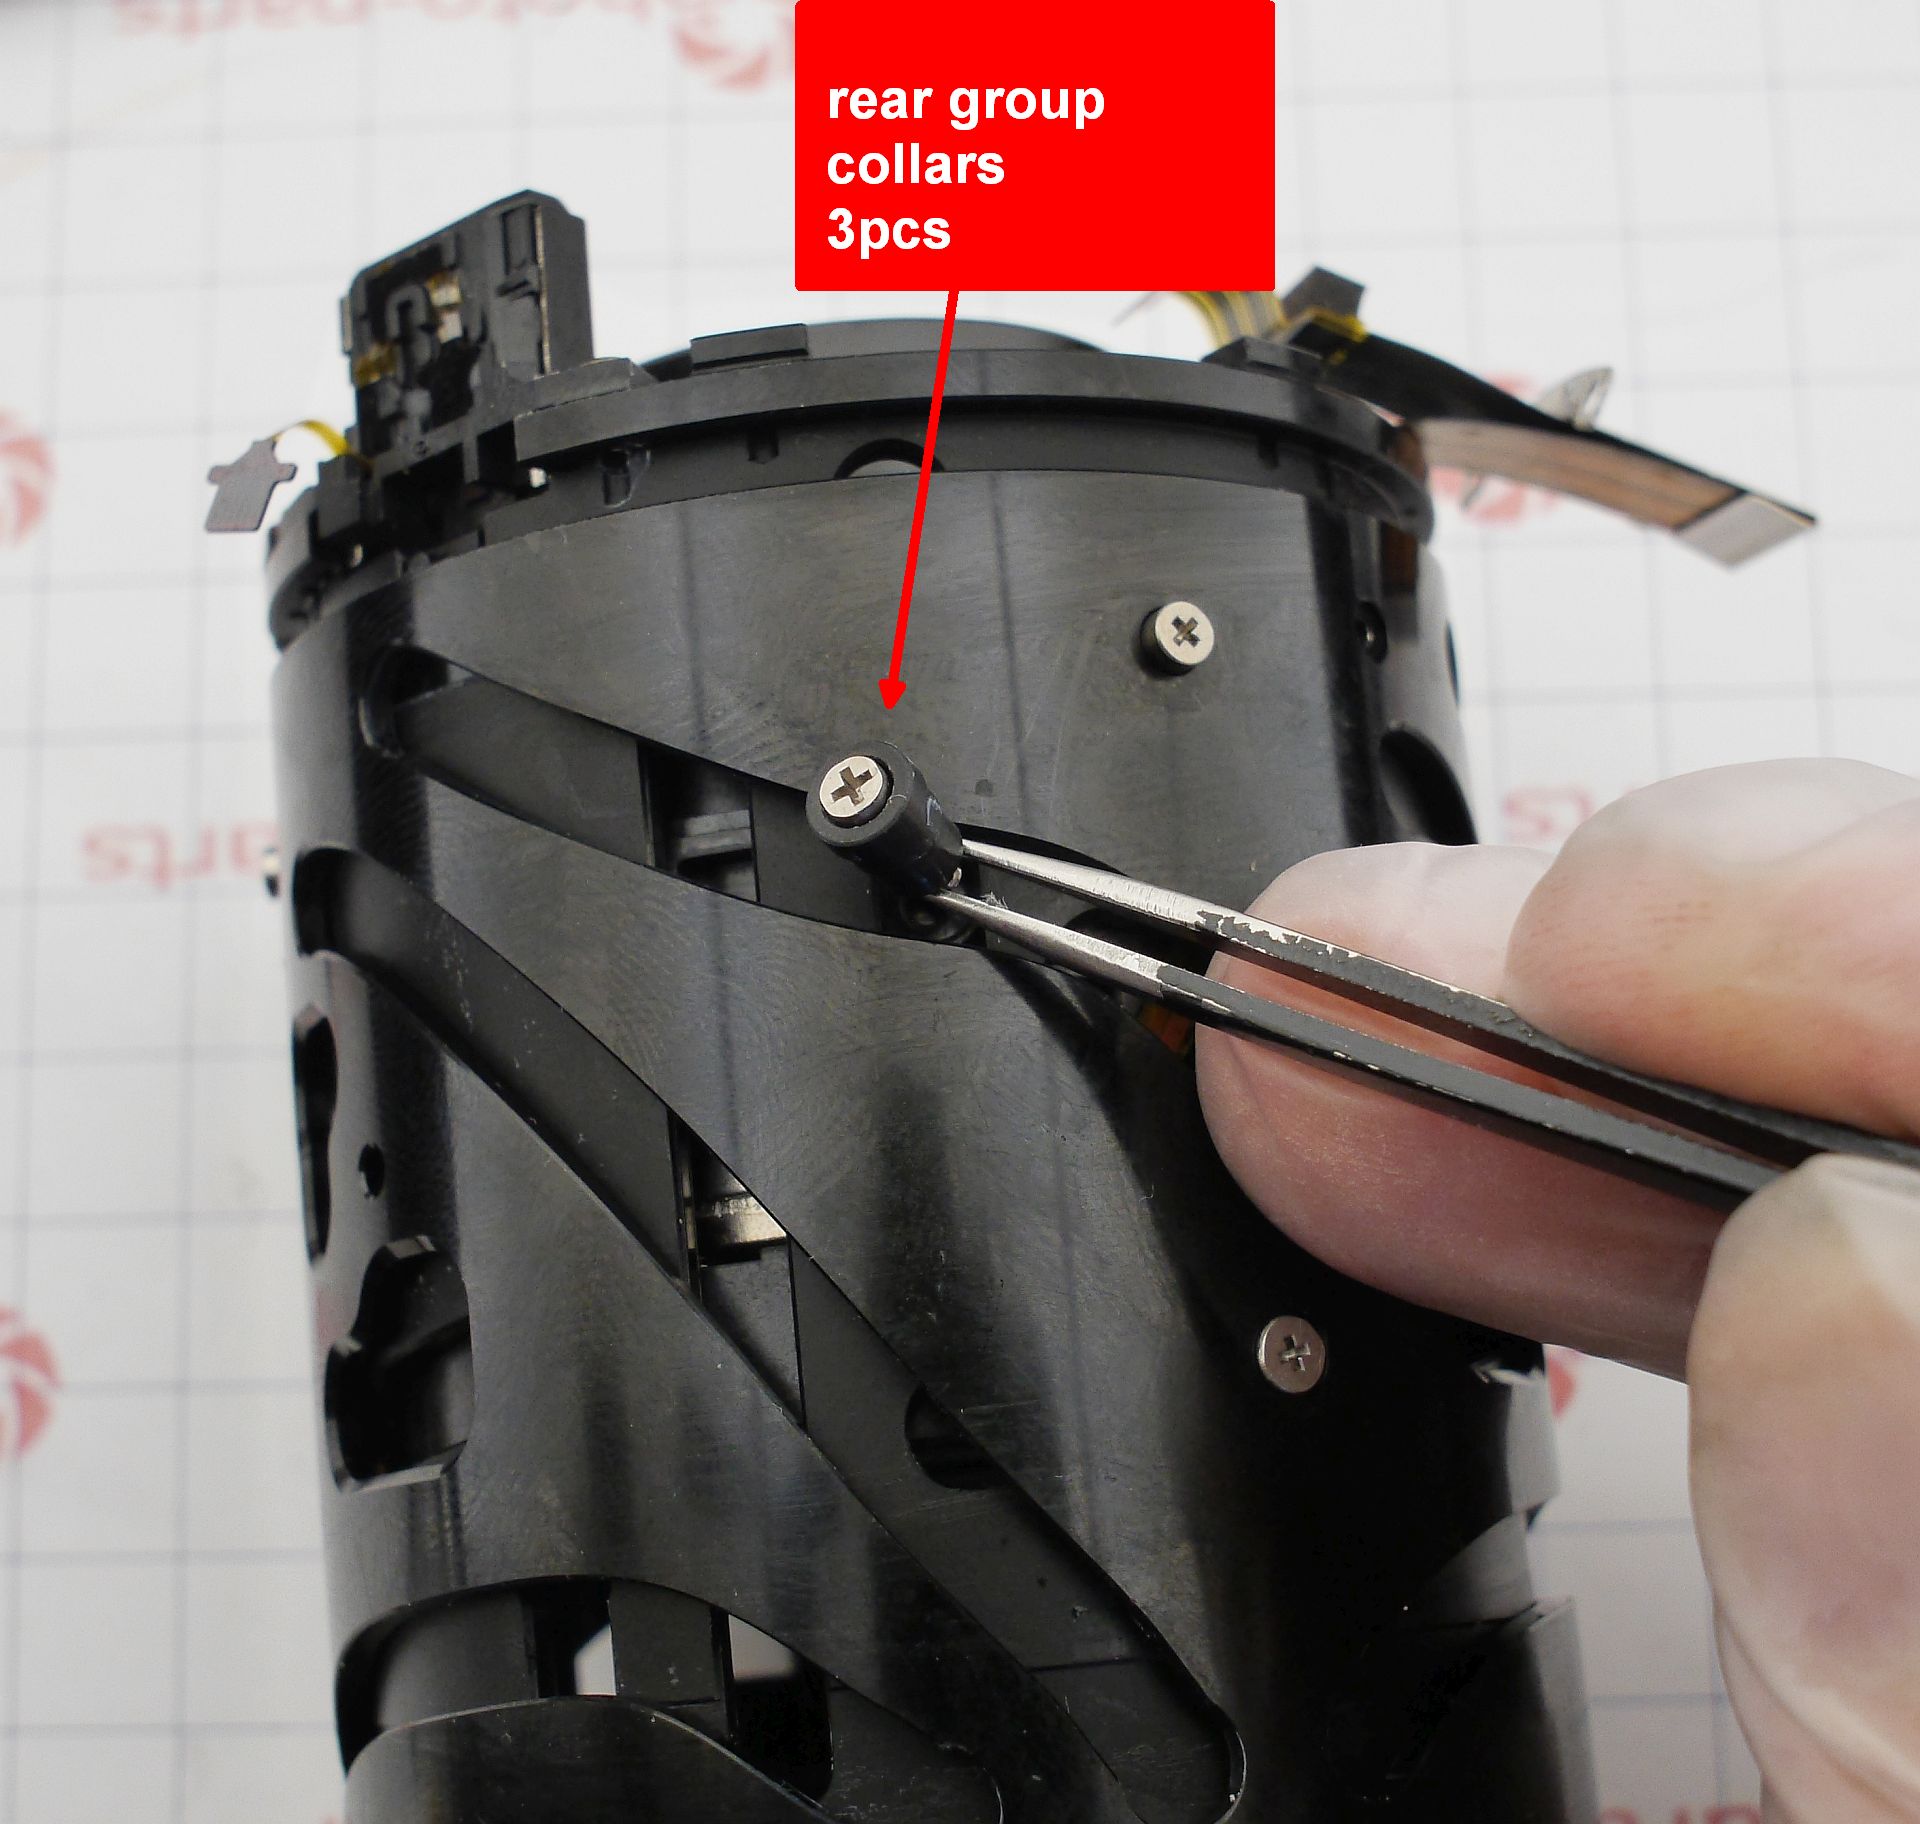
The rear lens group is removed entirely from the moving barrels - to do this, the electronic ribbon has to be released and three collars unscrewed. No ambiguity during reassembly here, nothing needs to be marked.
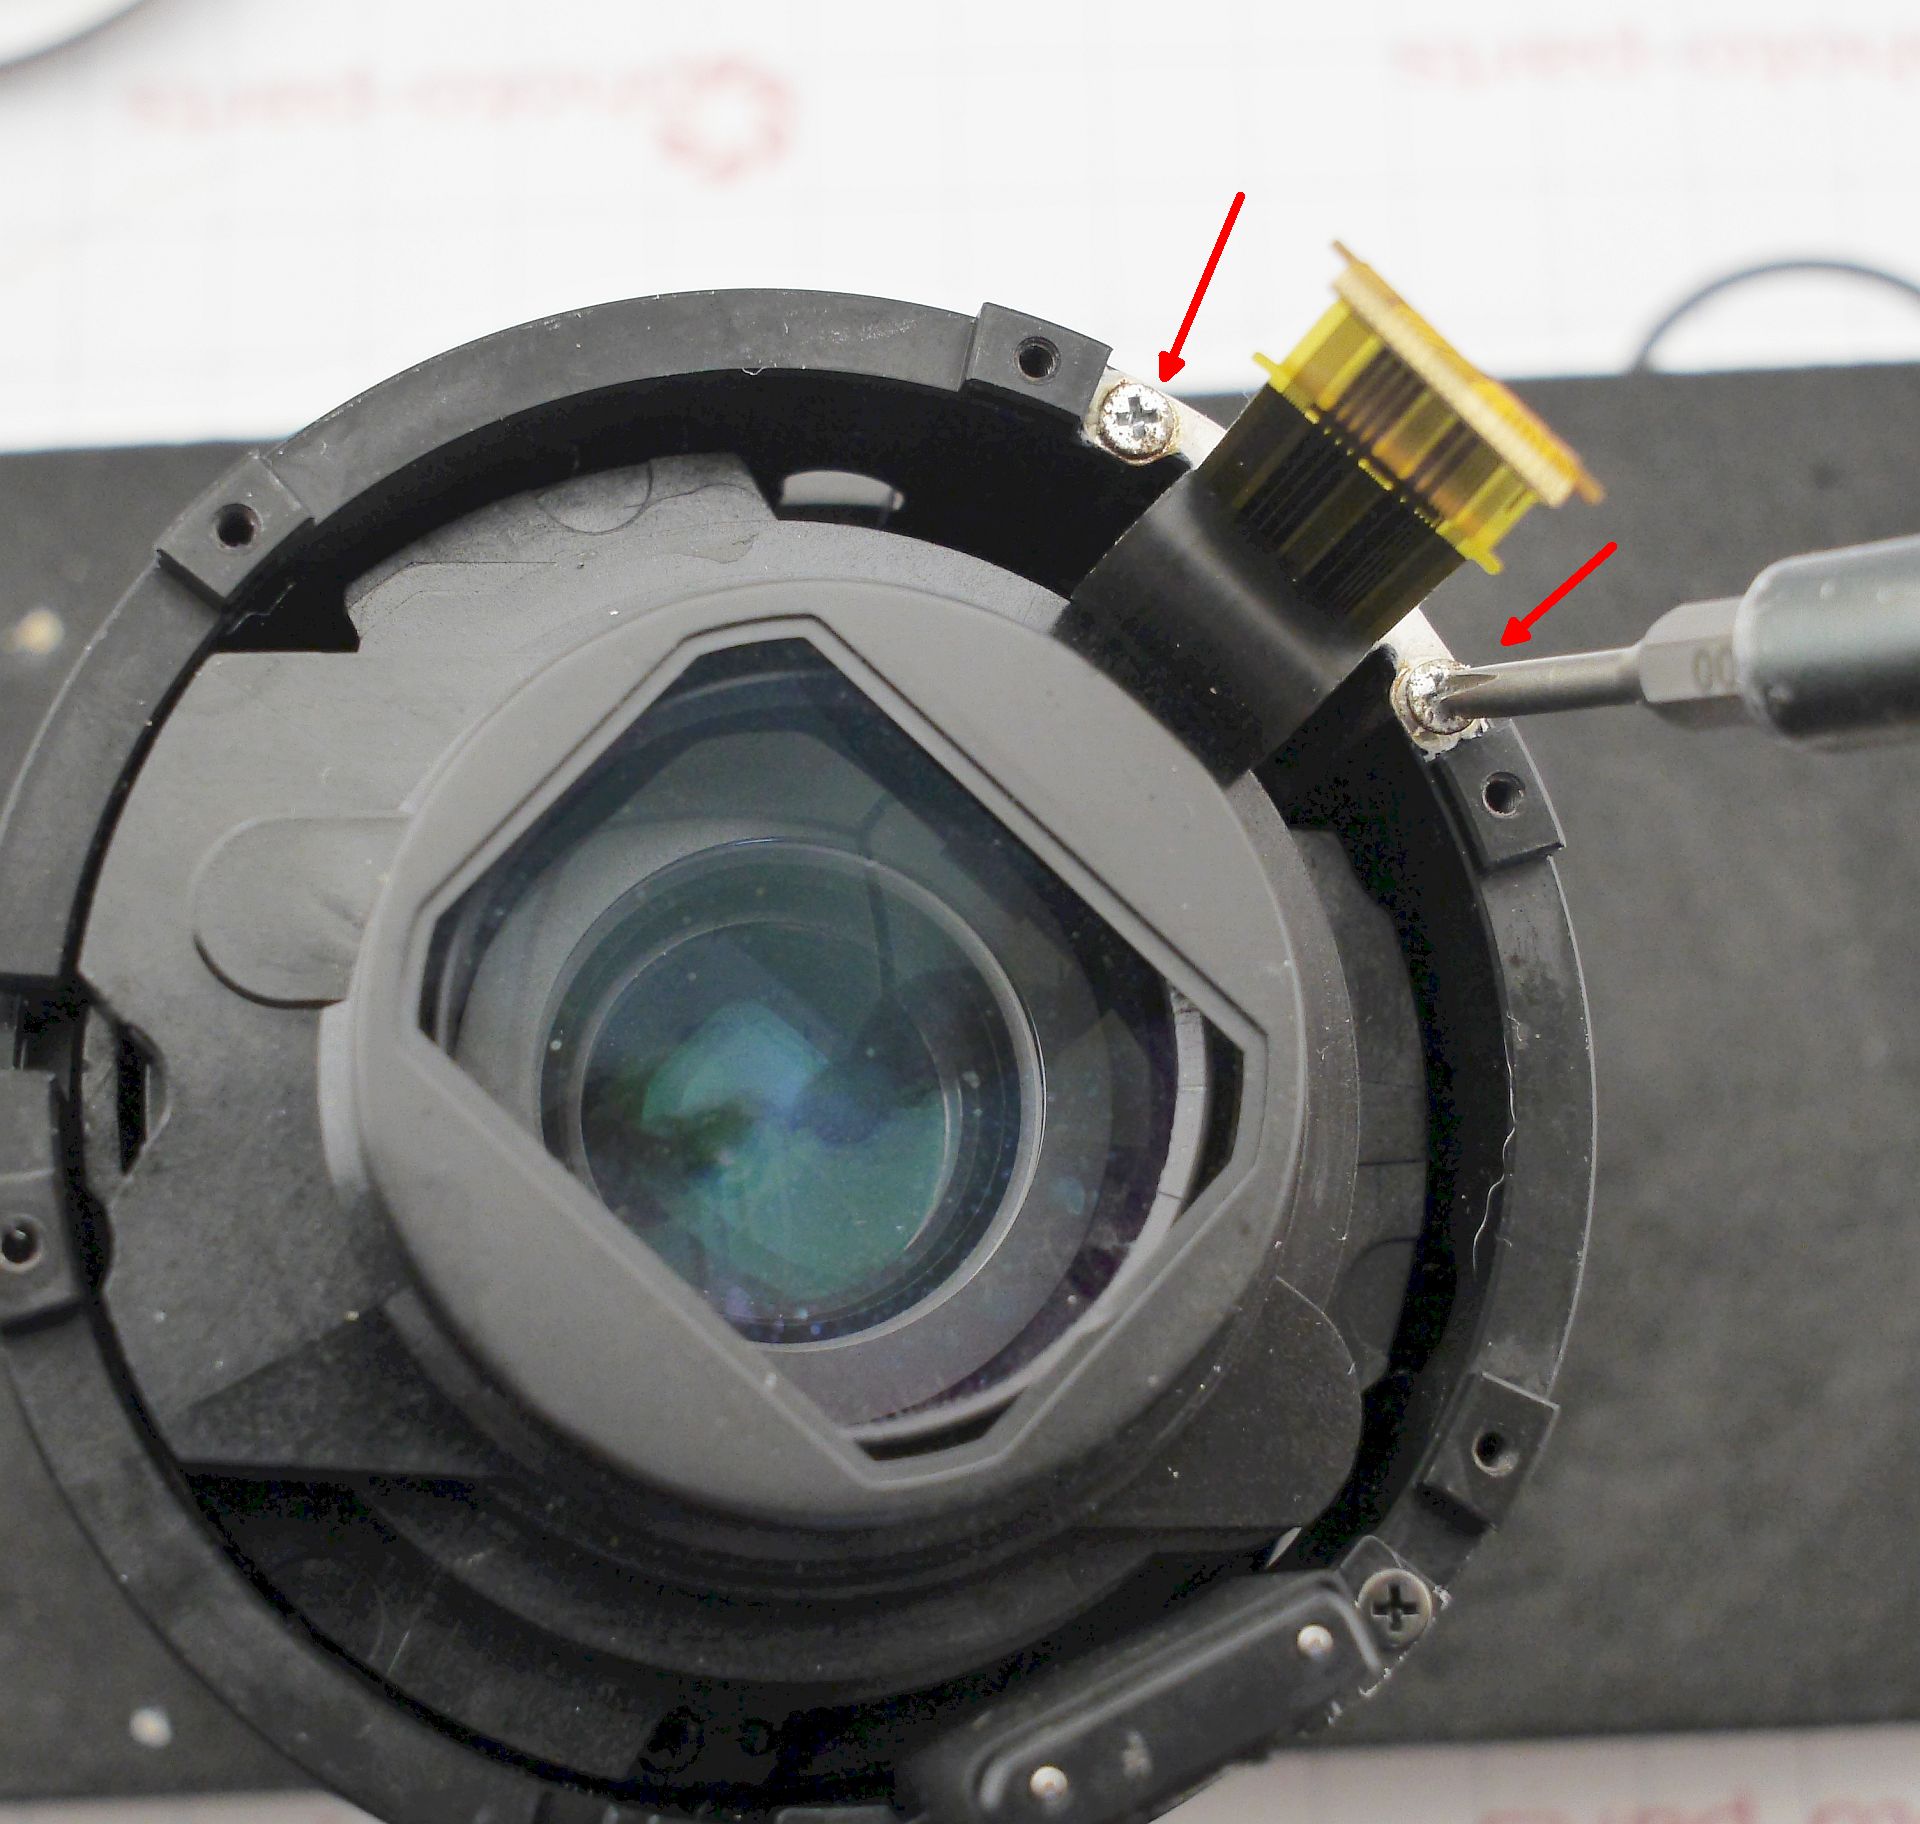
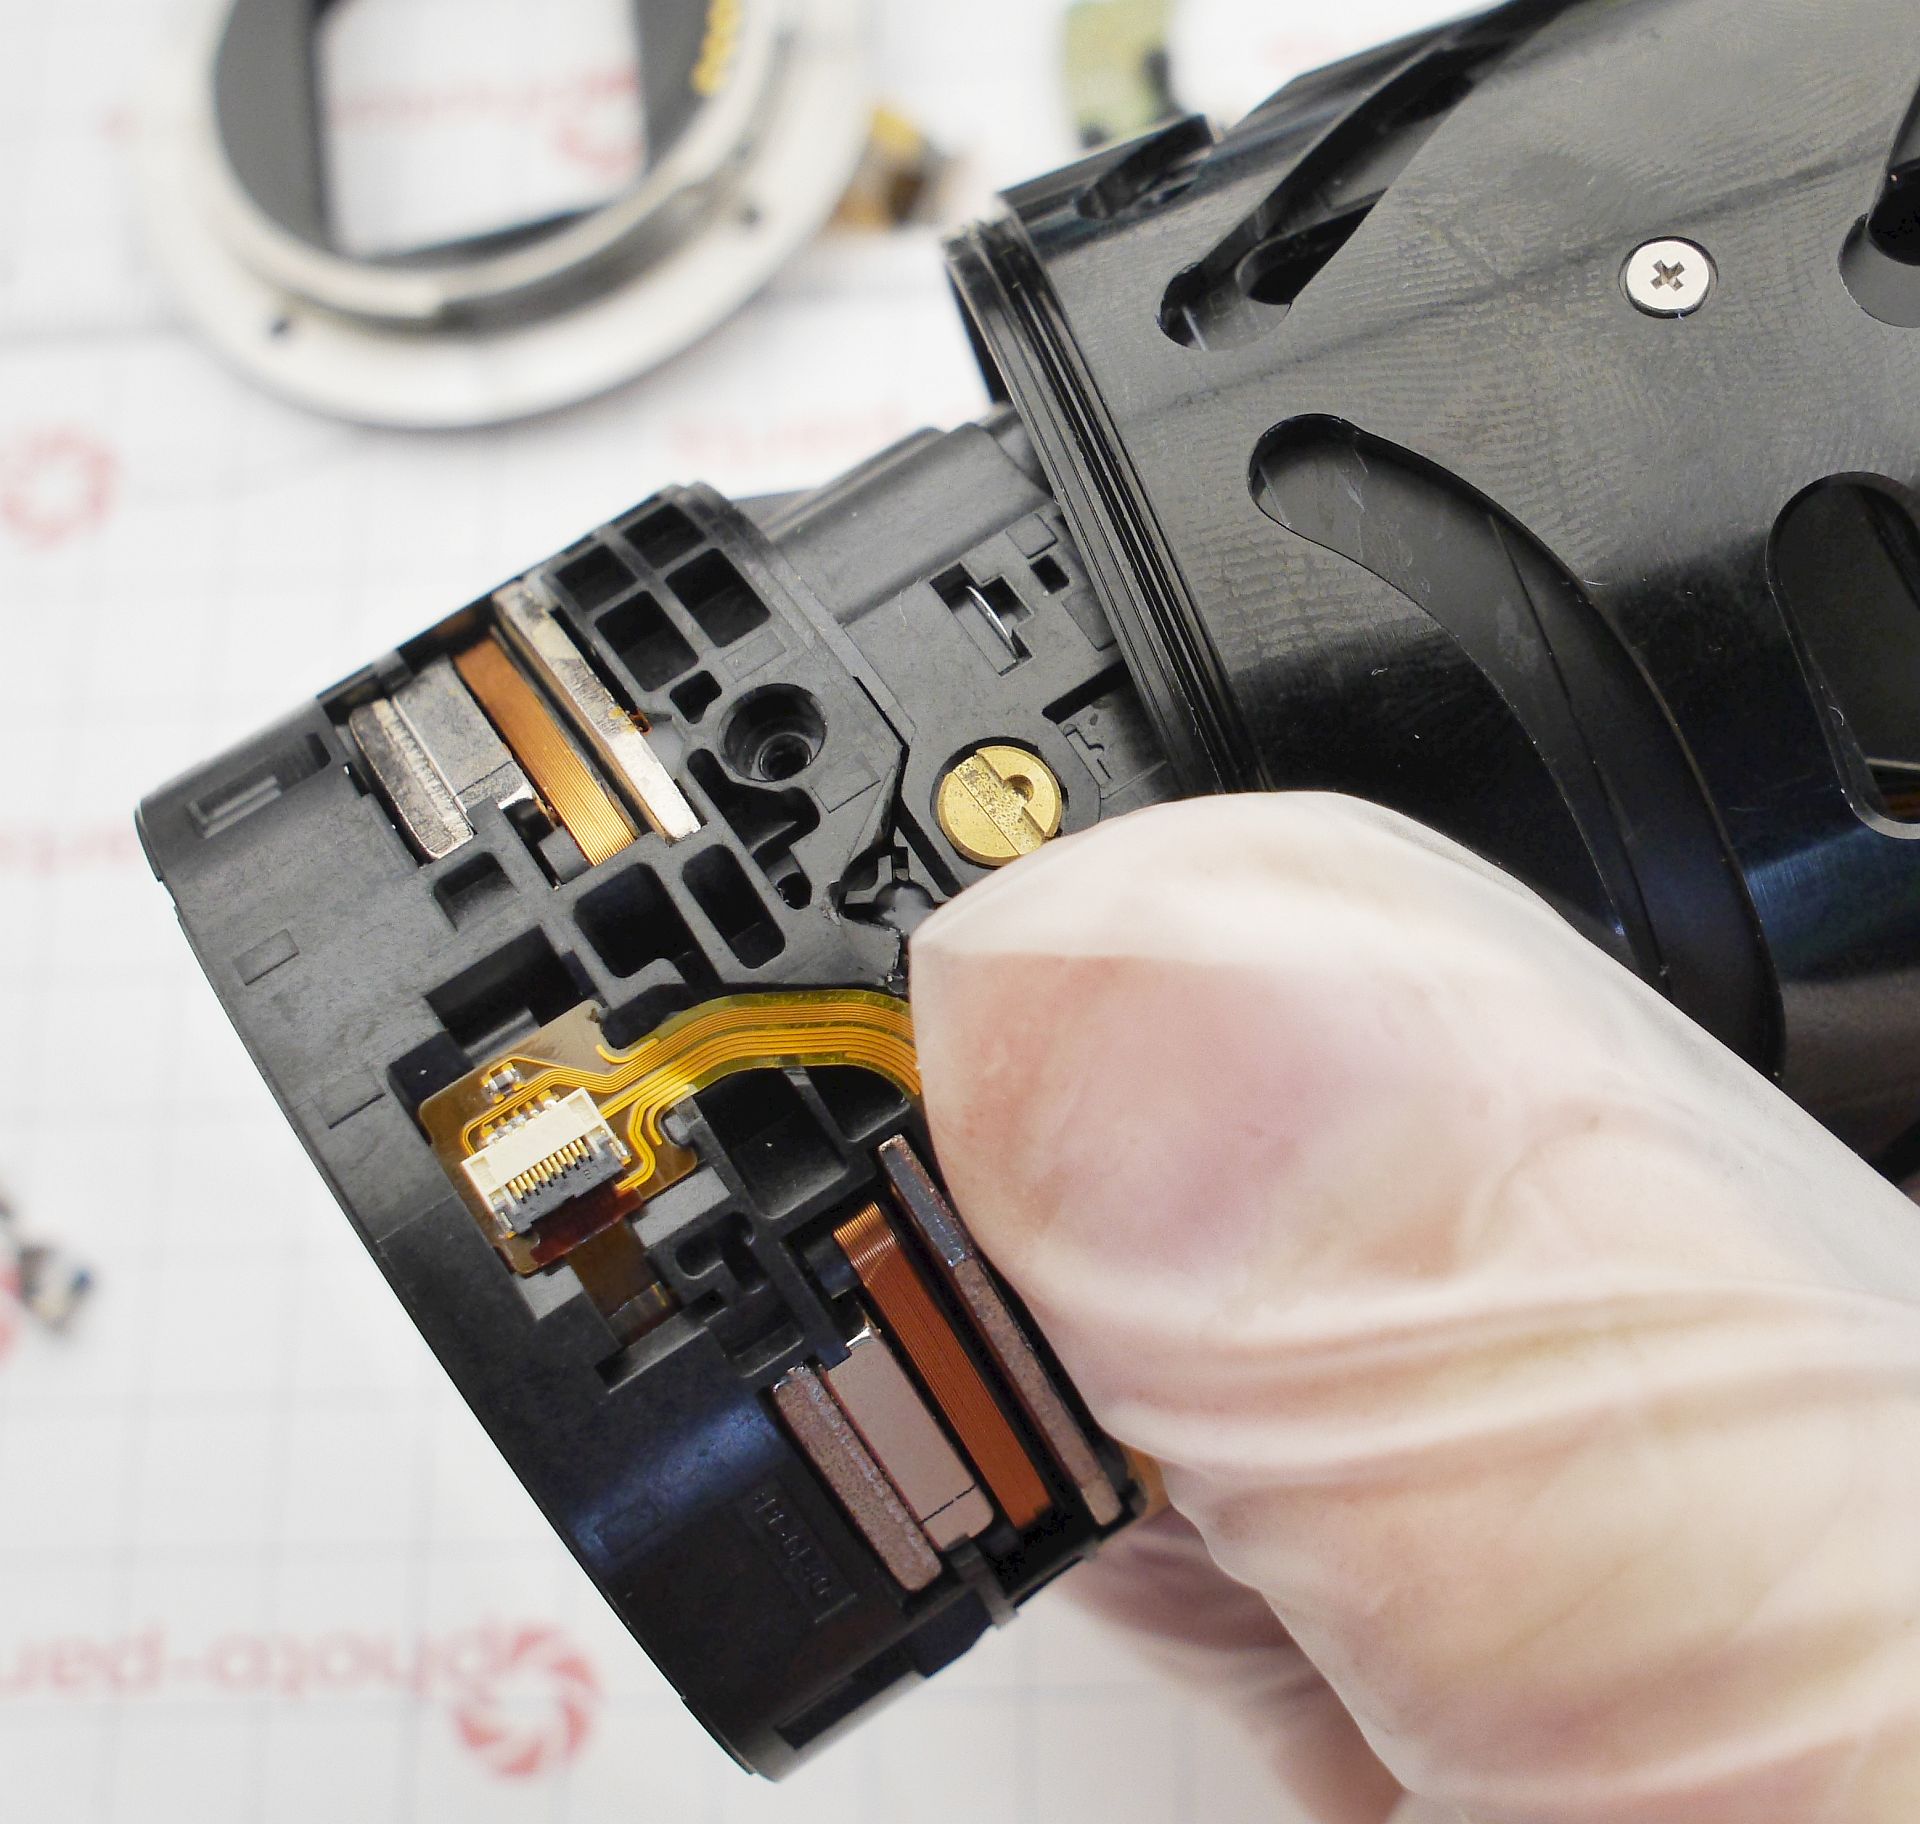
After removing the whole module of actuators, I had to get to the aperture and lens. To do this, the decorative plate and the diaphragm itself are removed. I cleaned the top surface of the lens immediately, hoping it was the last contamination. Wrong again, as it turned out.
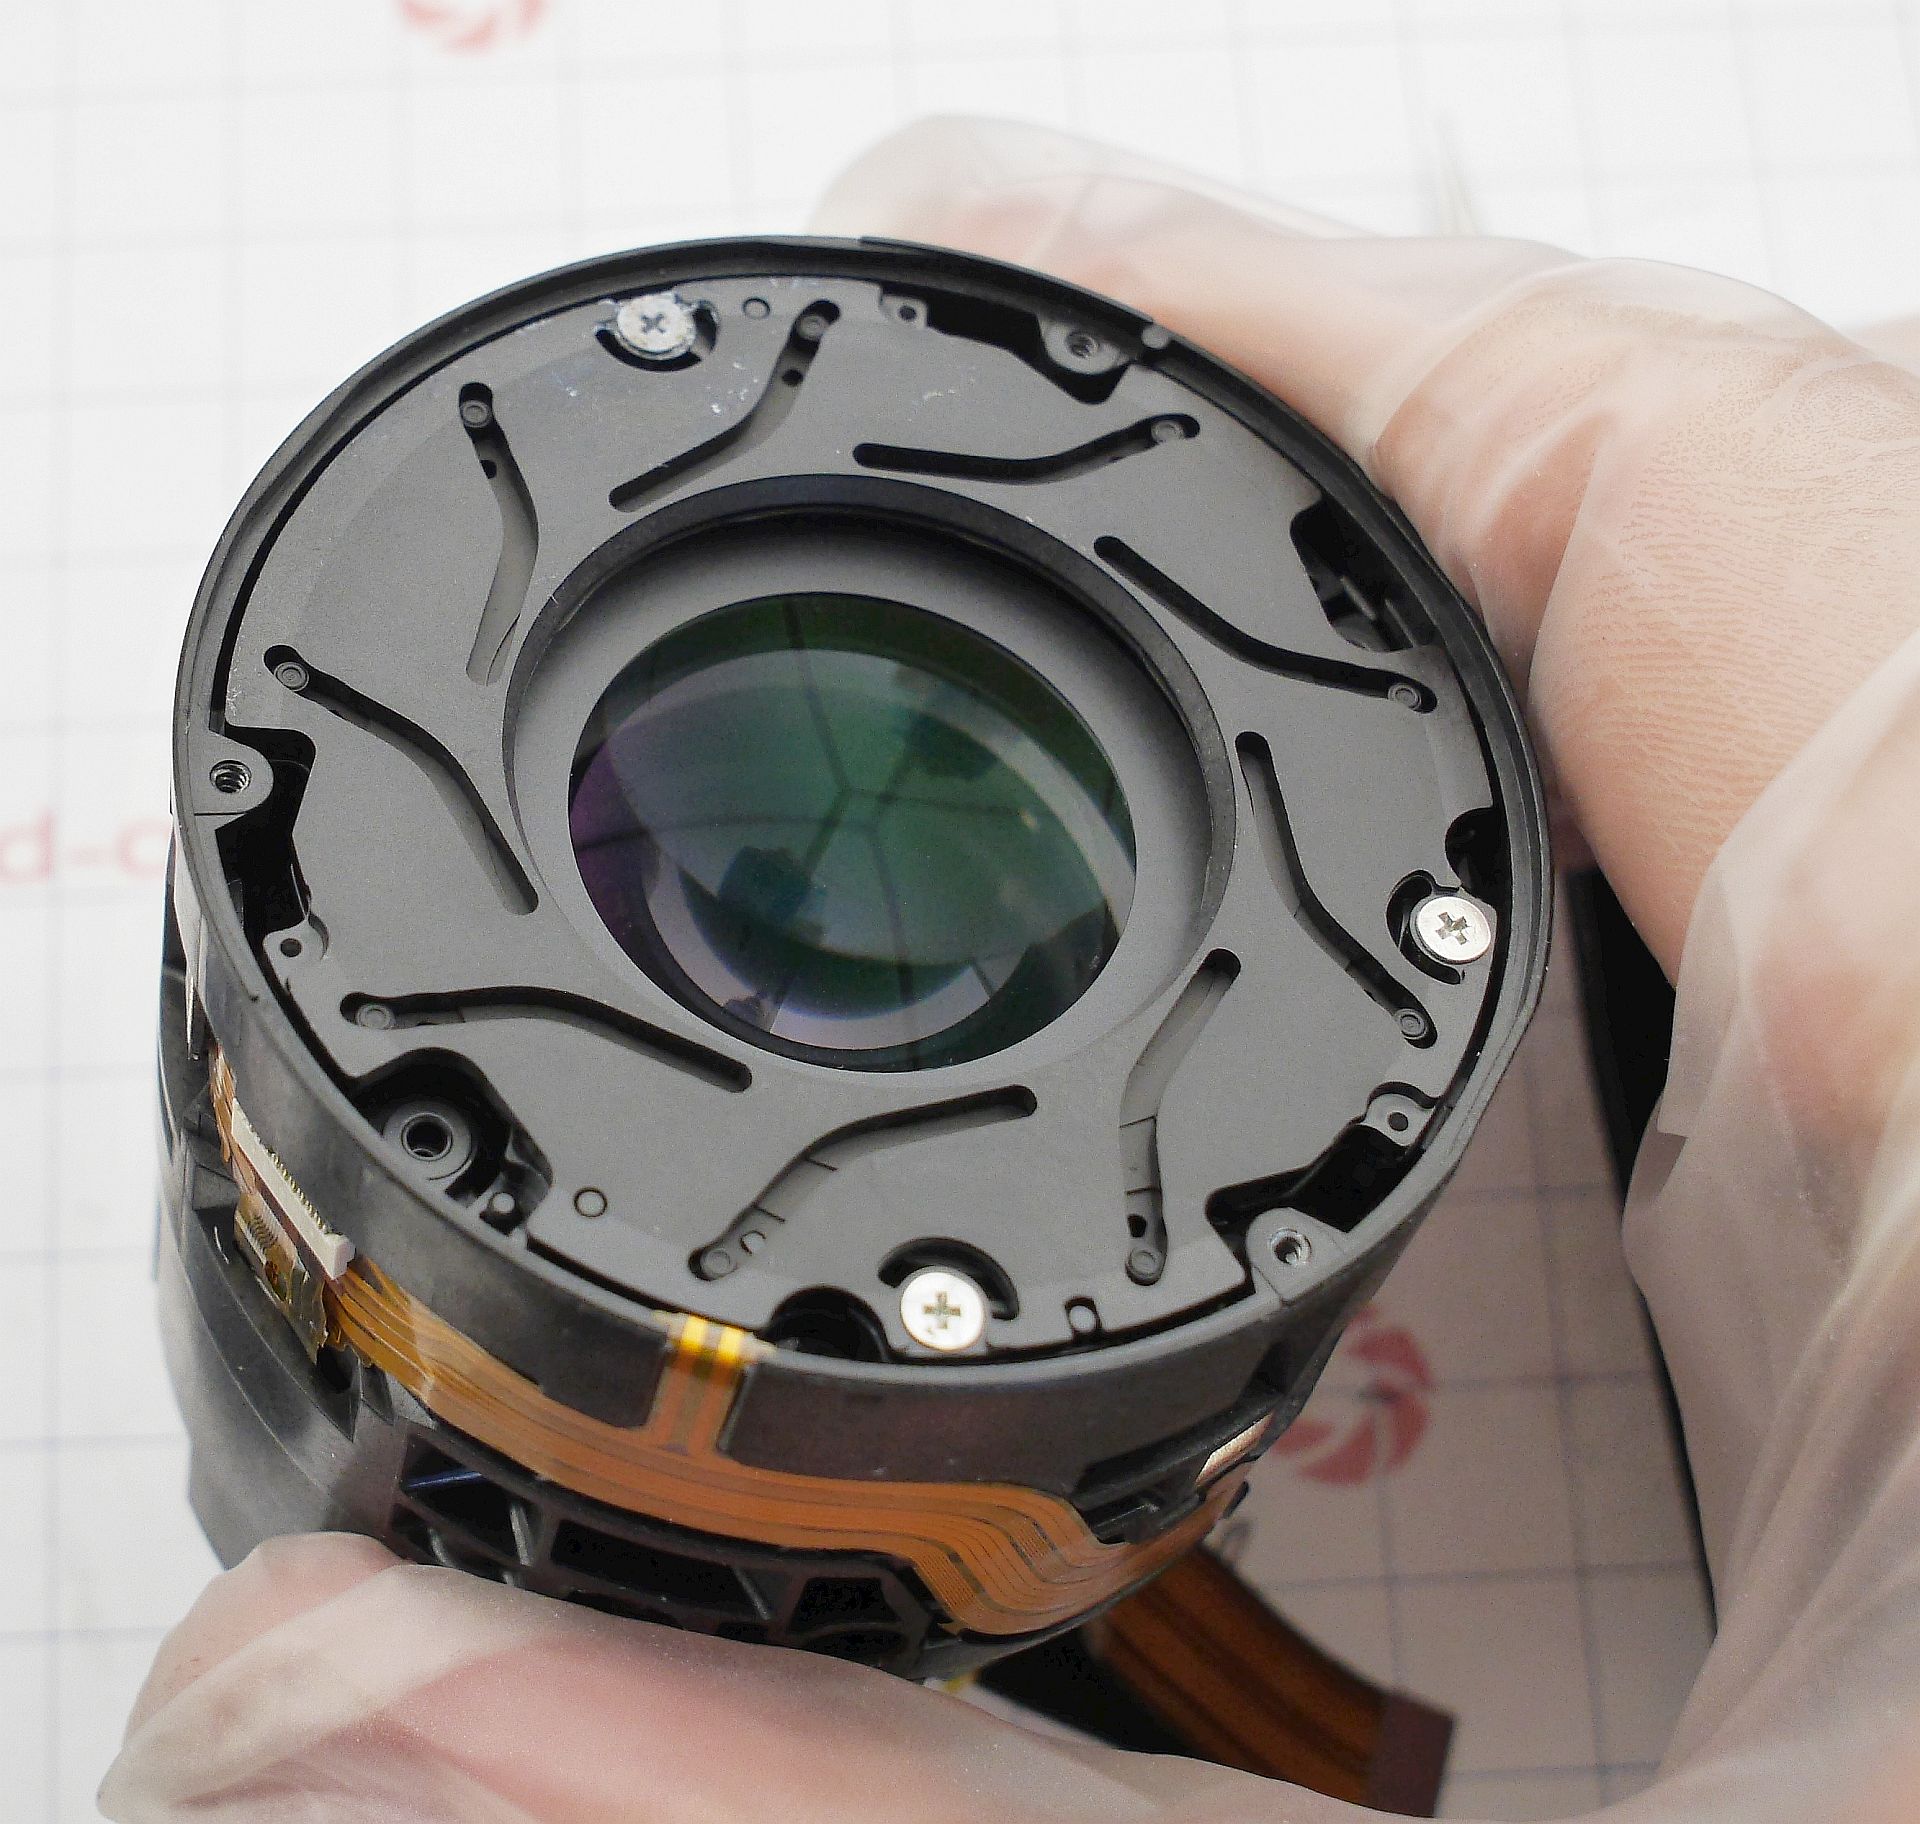
Dirt was still inside, and I had reached the point where a lens sensitive to adjustment was fixed with epoxy, making further disassembly impossible without disturbing alignment. But - nothing to do - adjustment can be redone later, after cleaning and reassembly. The glue is scraped from the marked points, and the module splits in half. Important: don't forget to disconnect the focus motor ribbon.
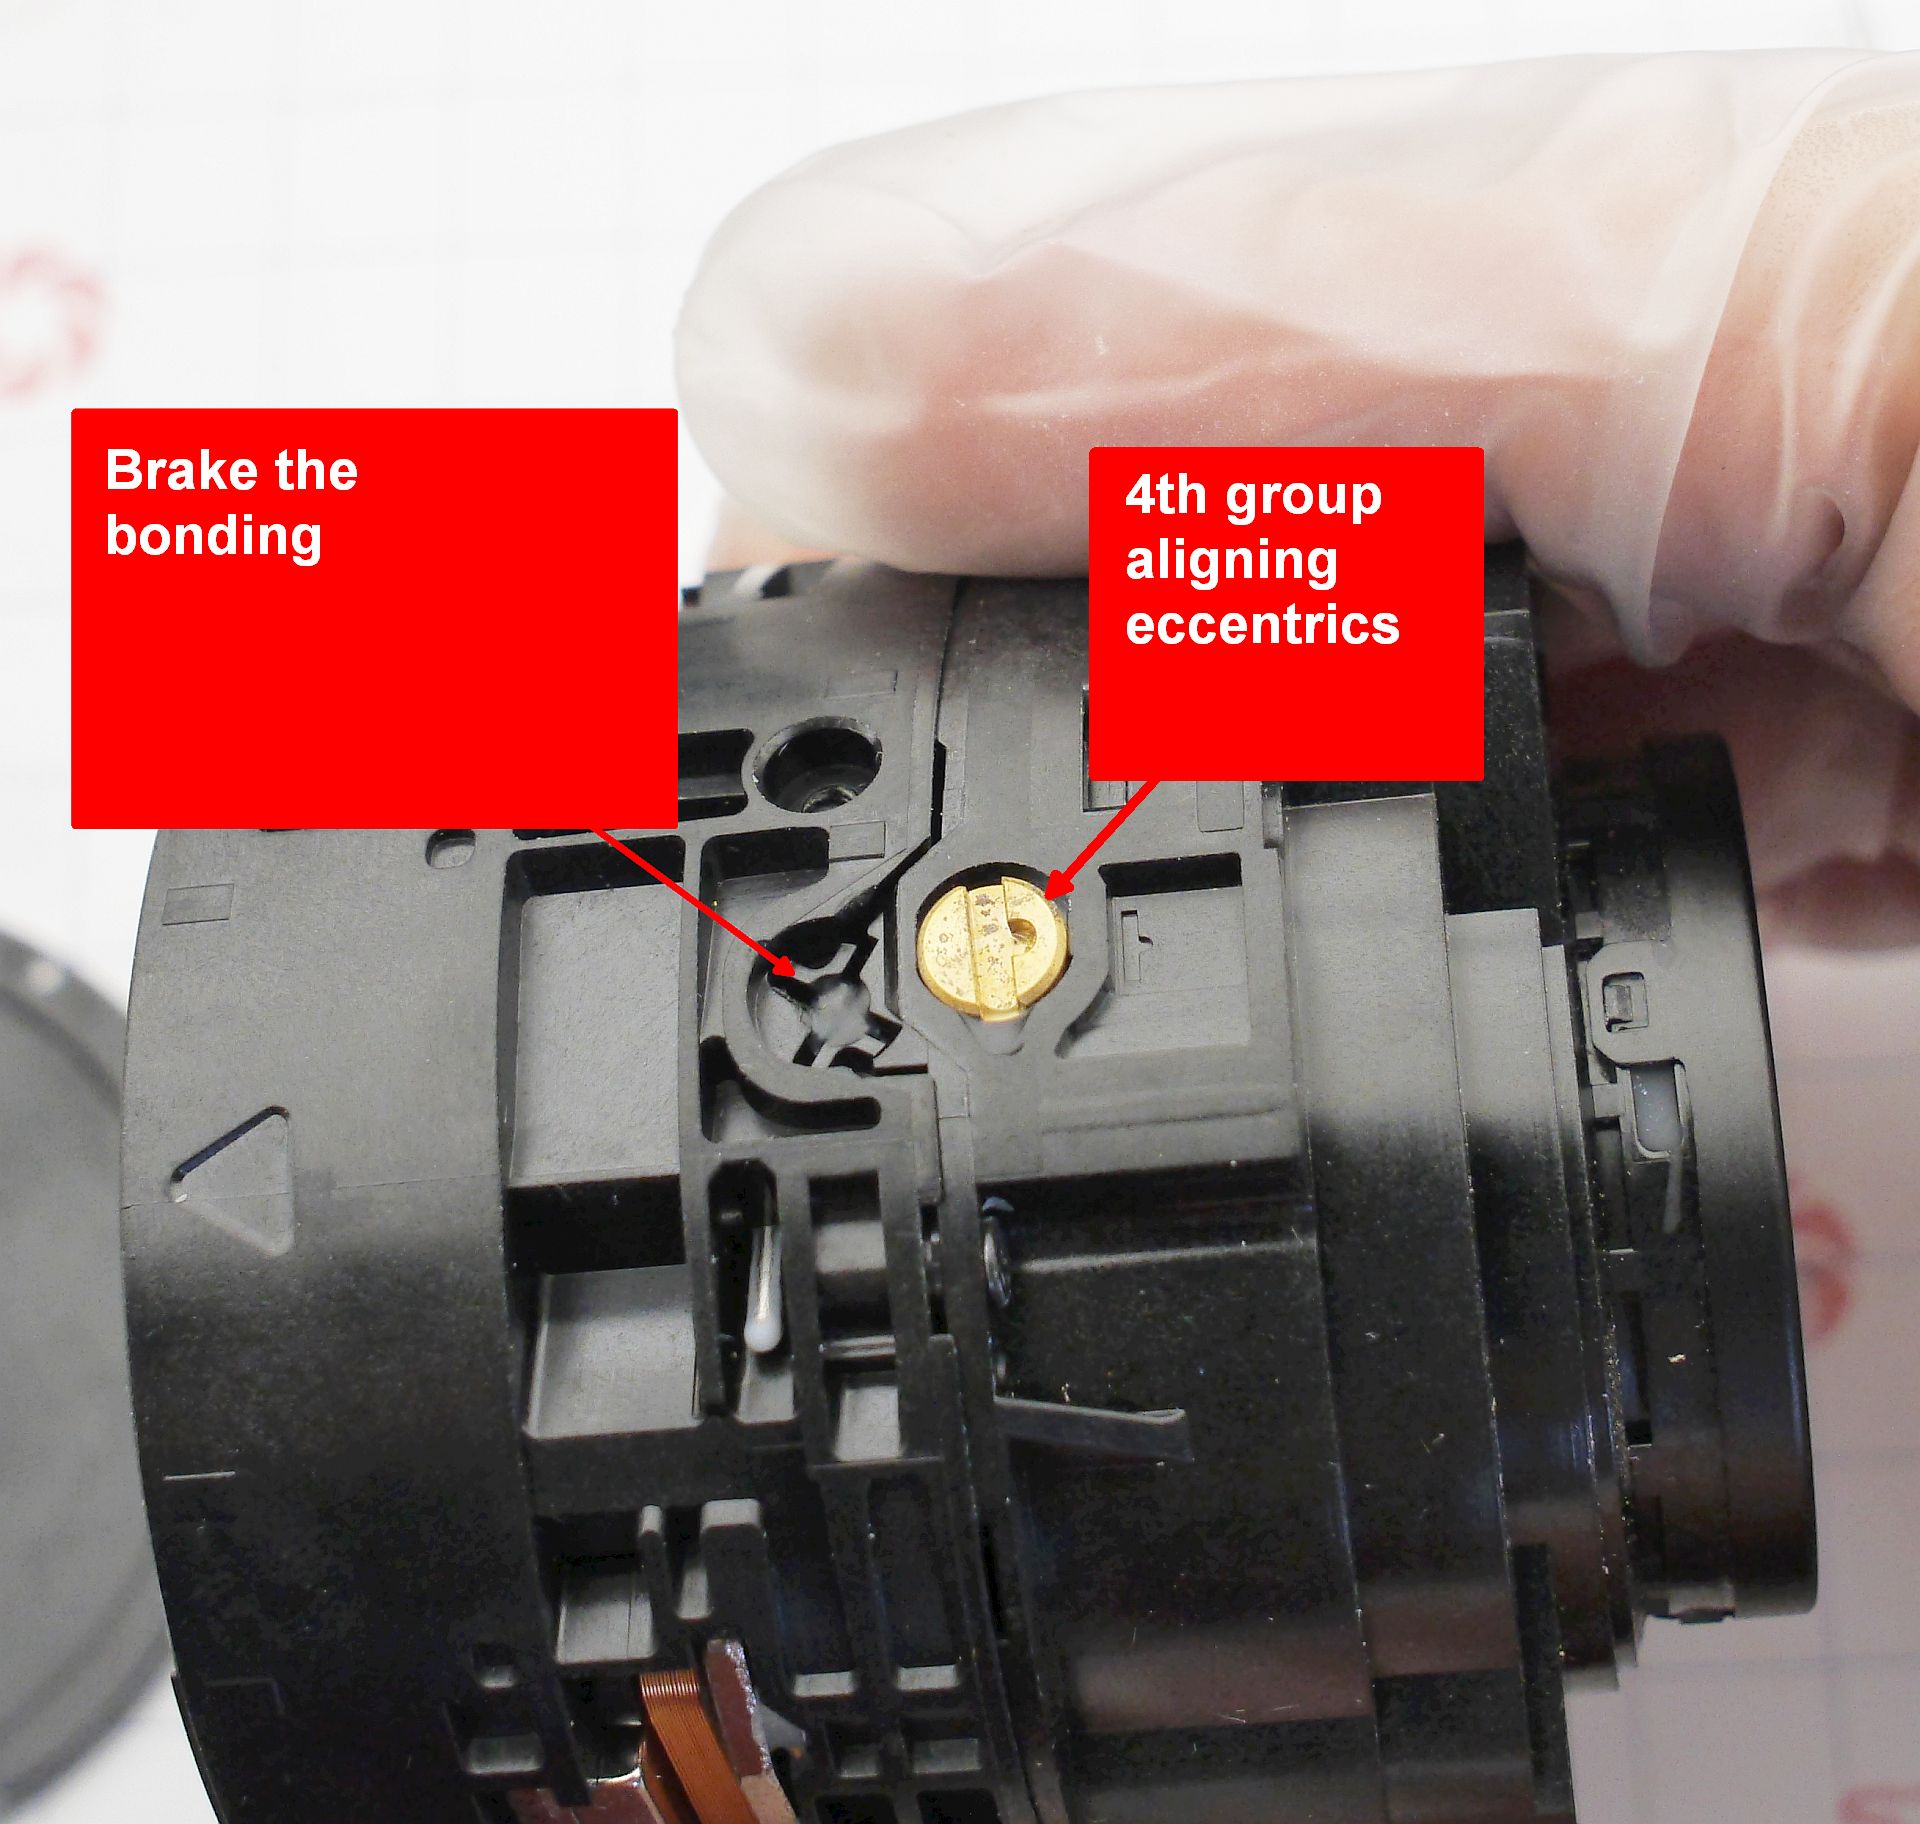
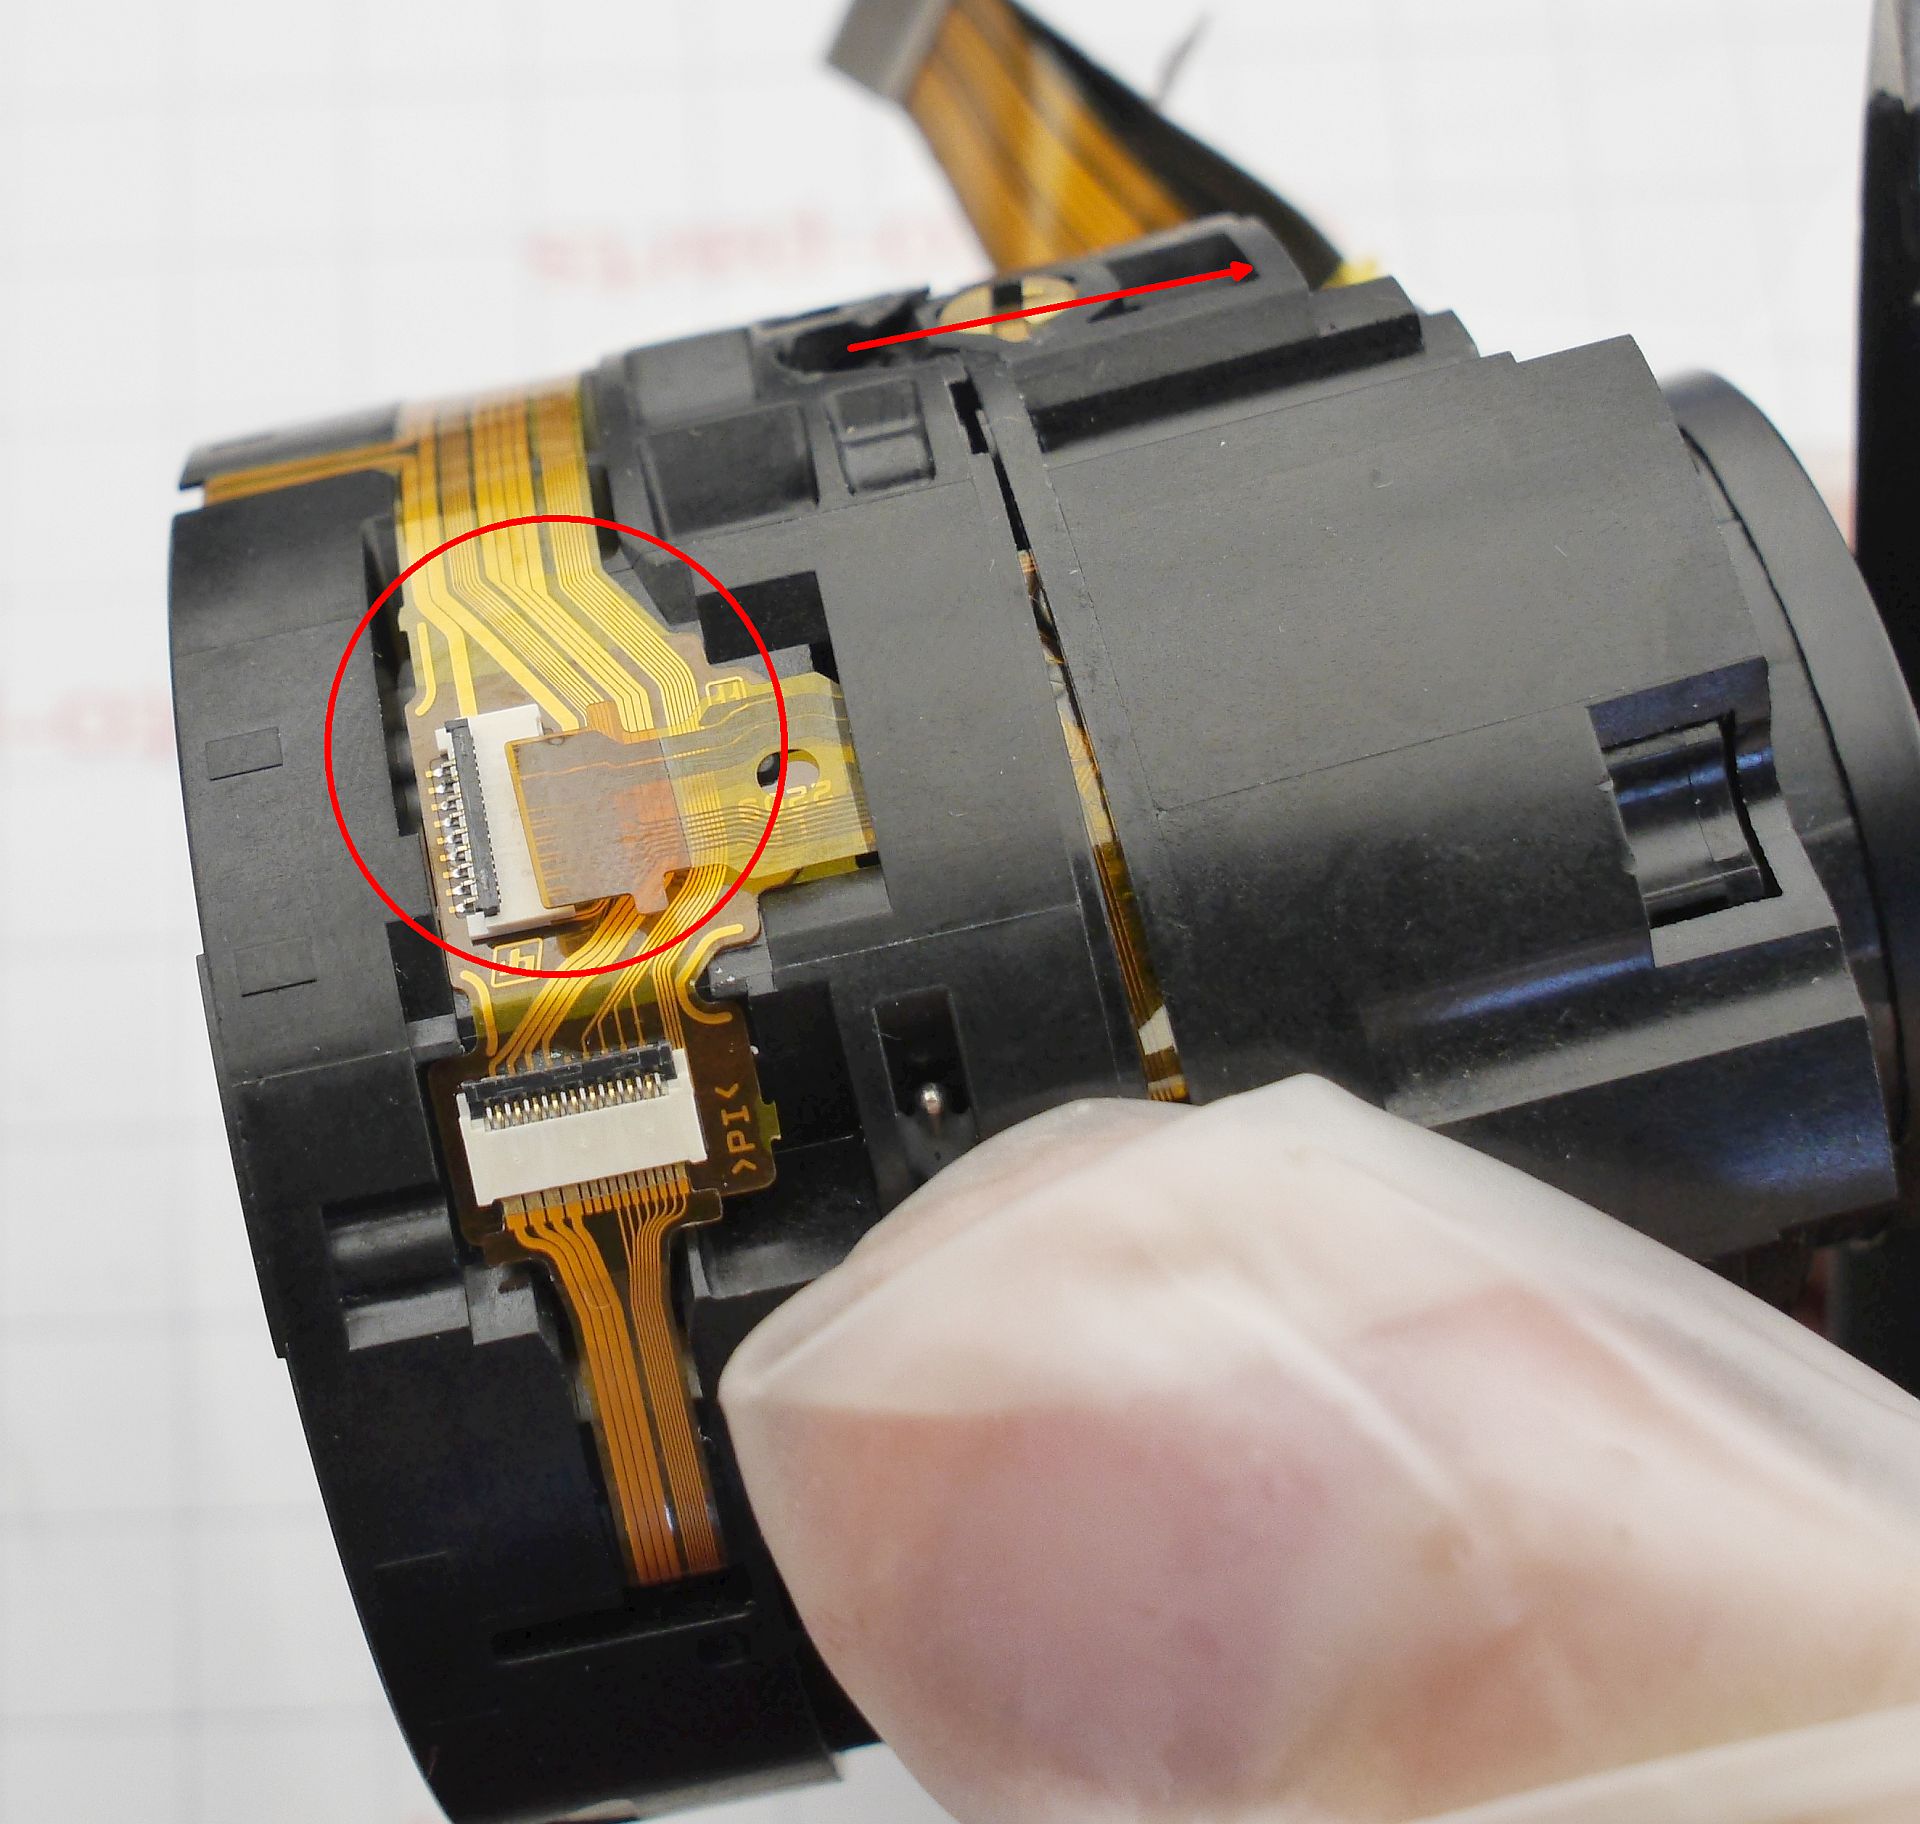
The module splits into two halves: the upper part - stabilizer module and diaphragm module with their respective lenses; the lower part - the adjustment lens I had broken free earlier, the focusing module, and the rear lens group. Both halves will have to be disassembled - water found its way everywhere.
To access all lens surfaces of the "upper half," the moving stabilizer lens has to be extracted, along with the diaphragm block and ribbon. Start with the diaphragm module - it's held by two screws, and underneath is a ribbon extension with an inductor coil:
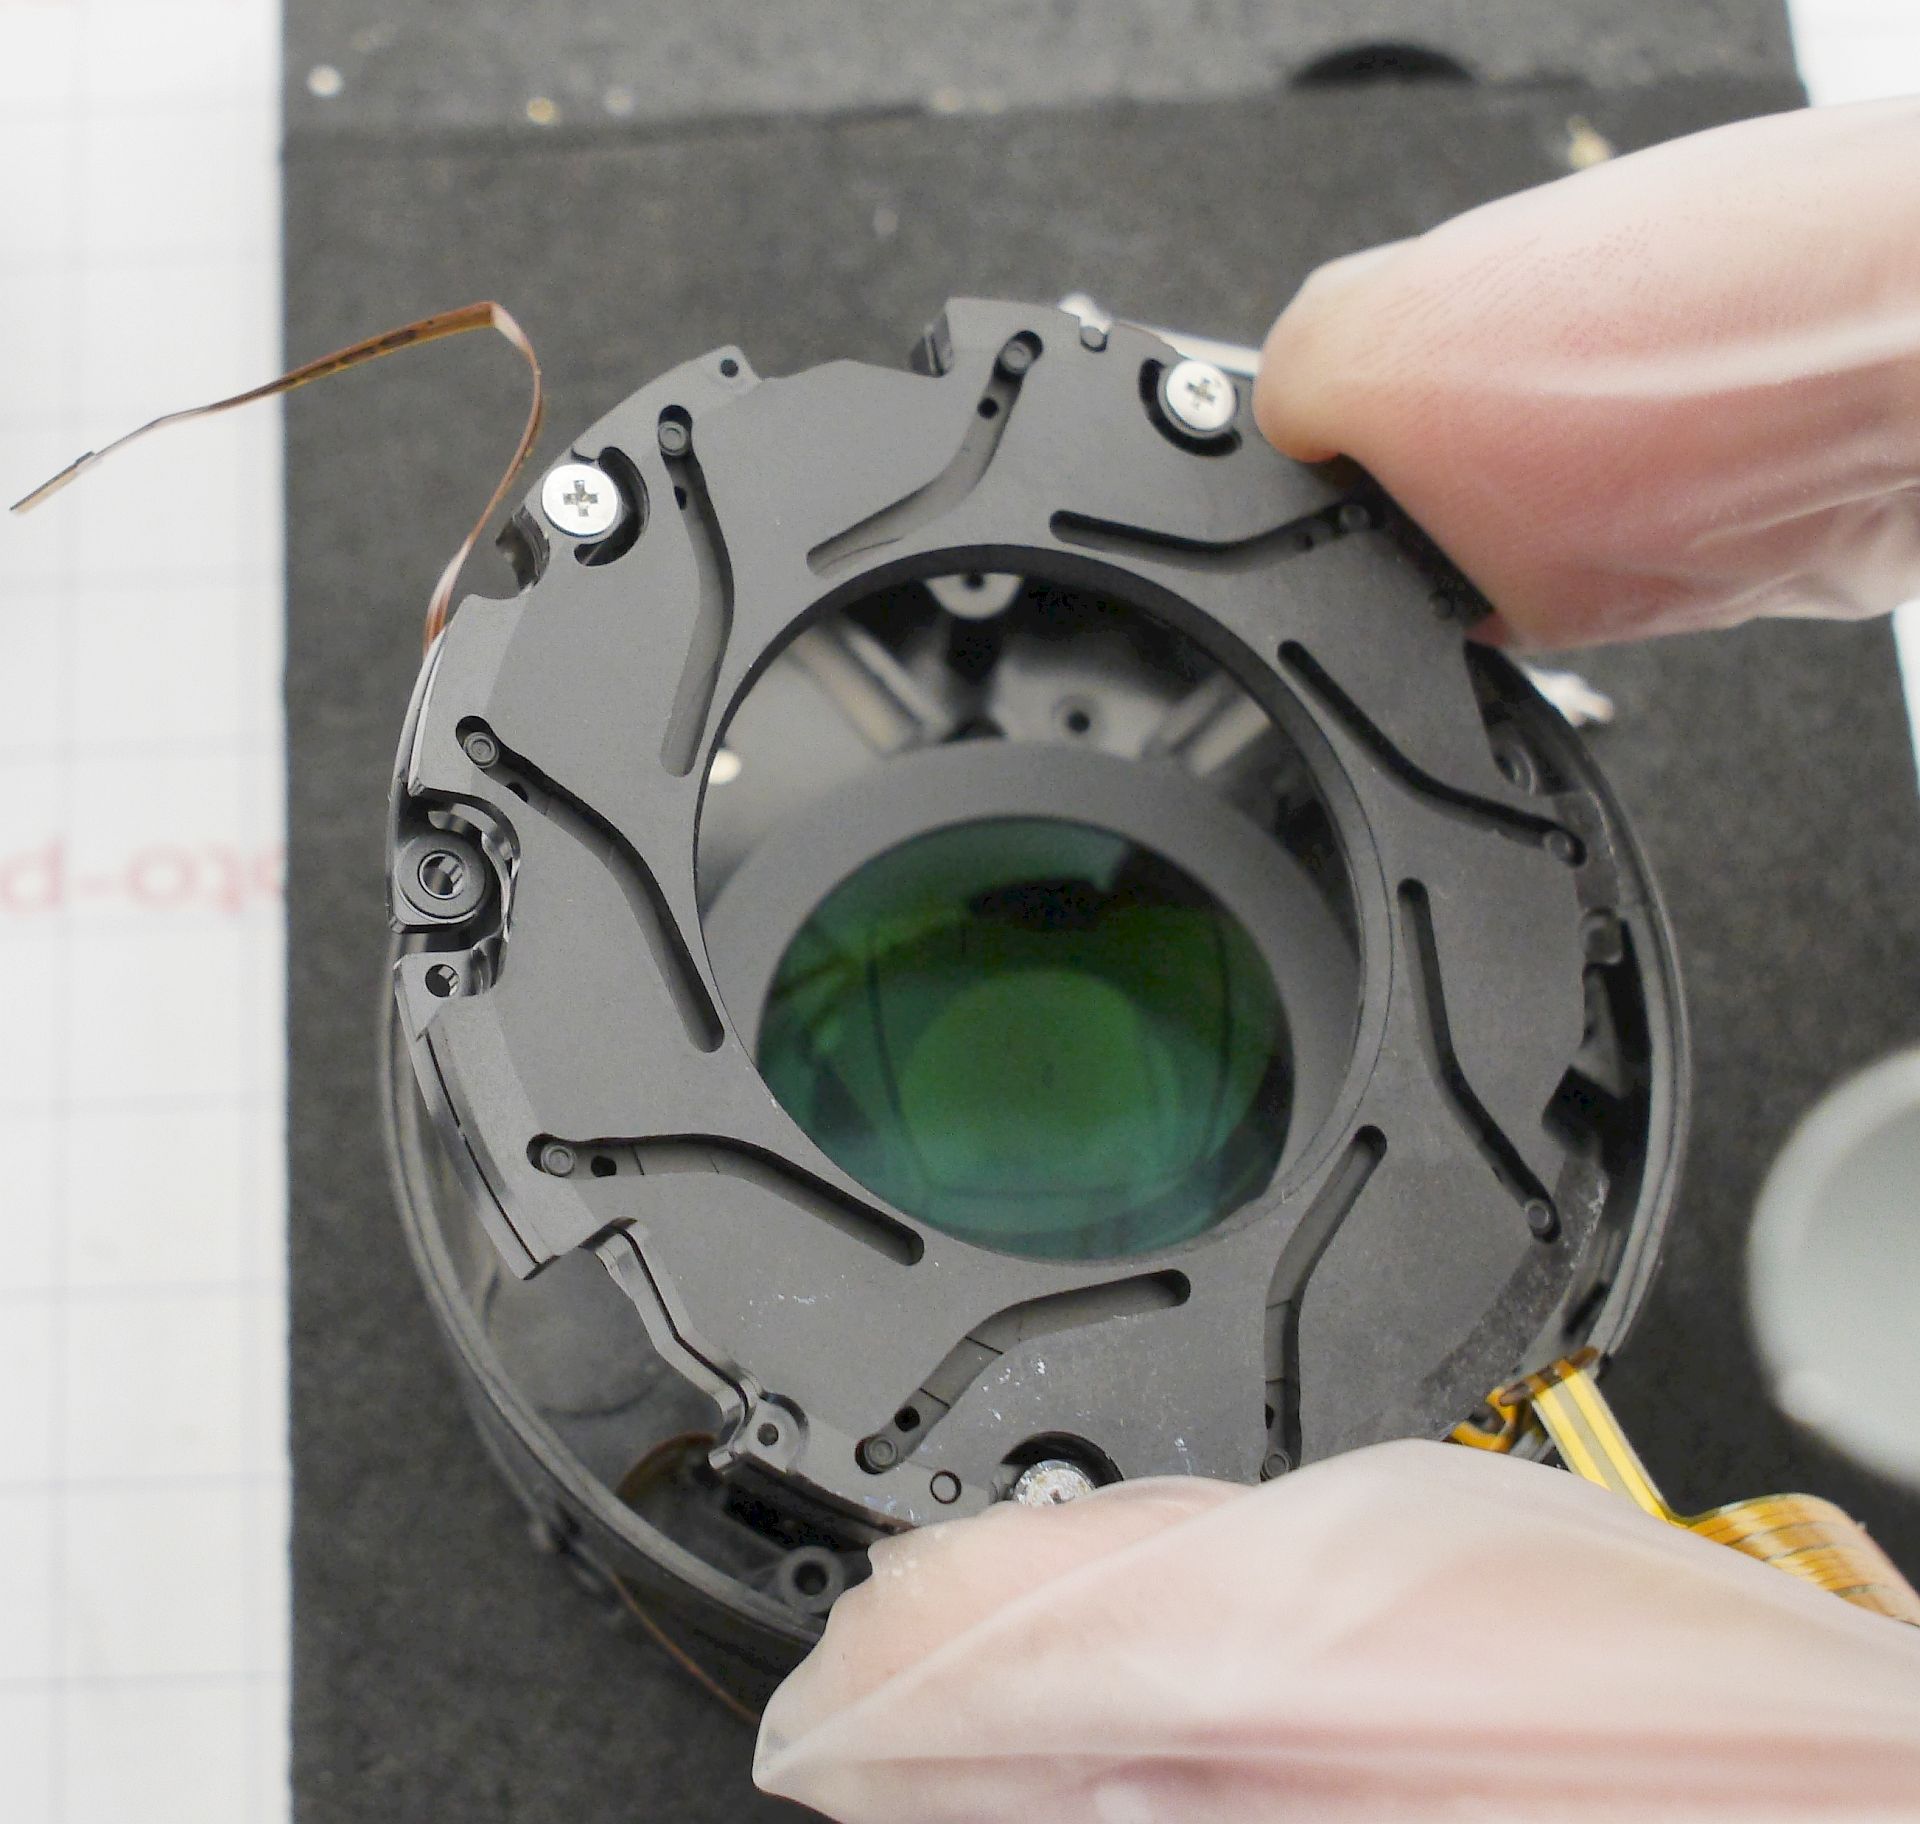
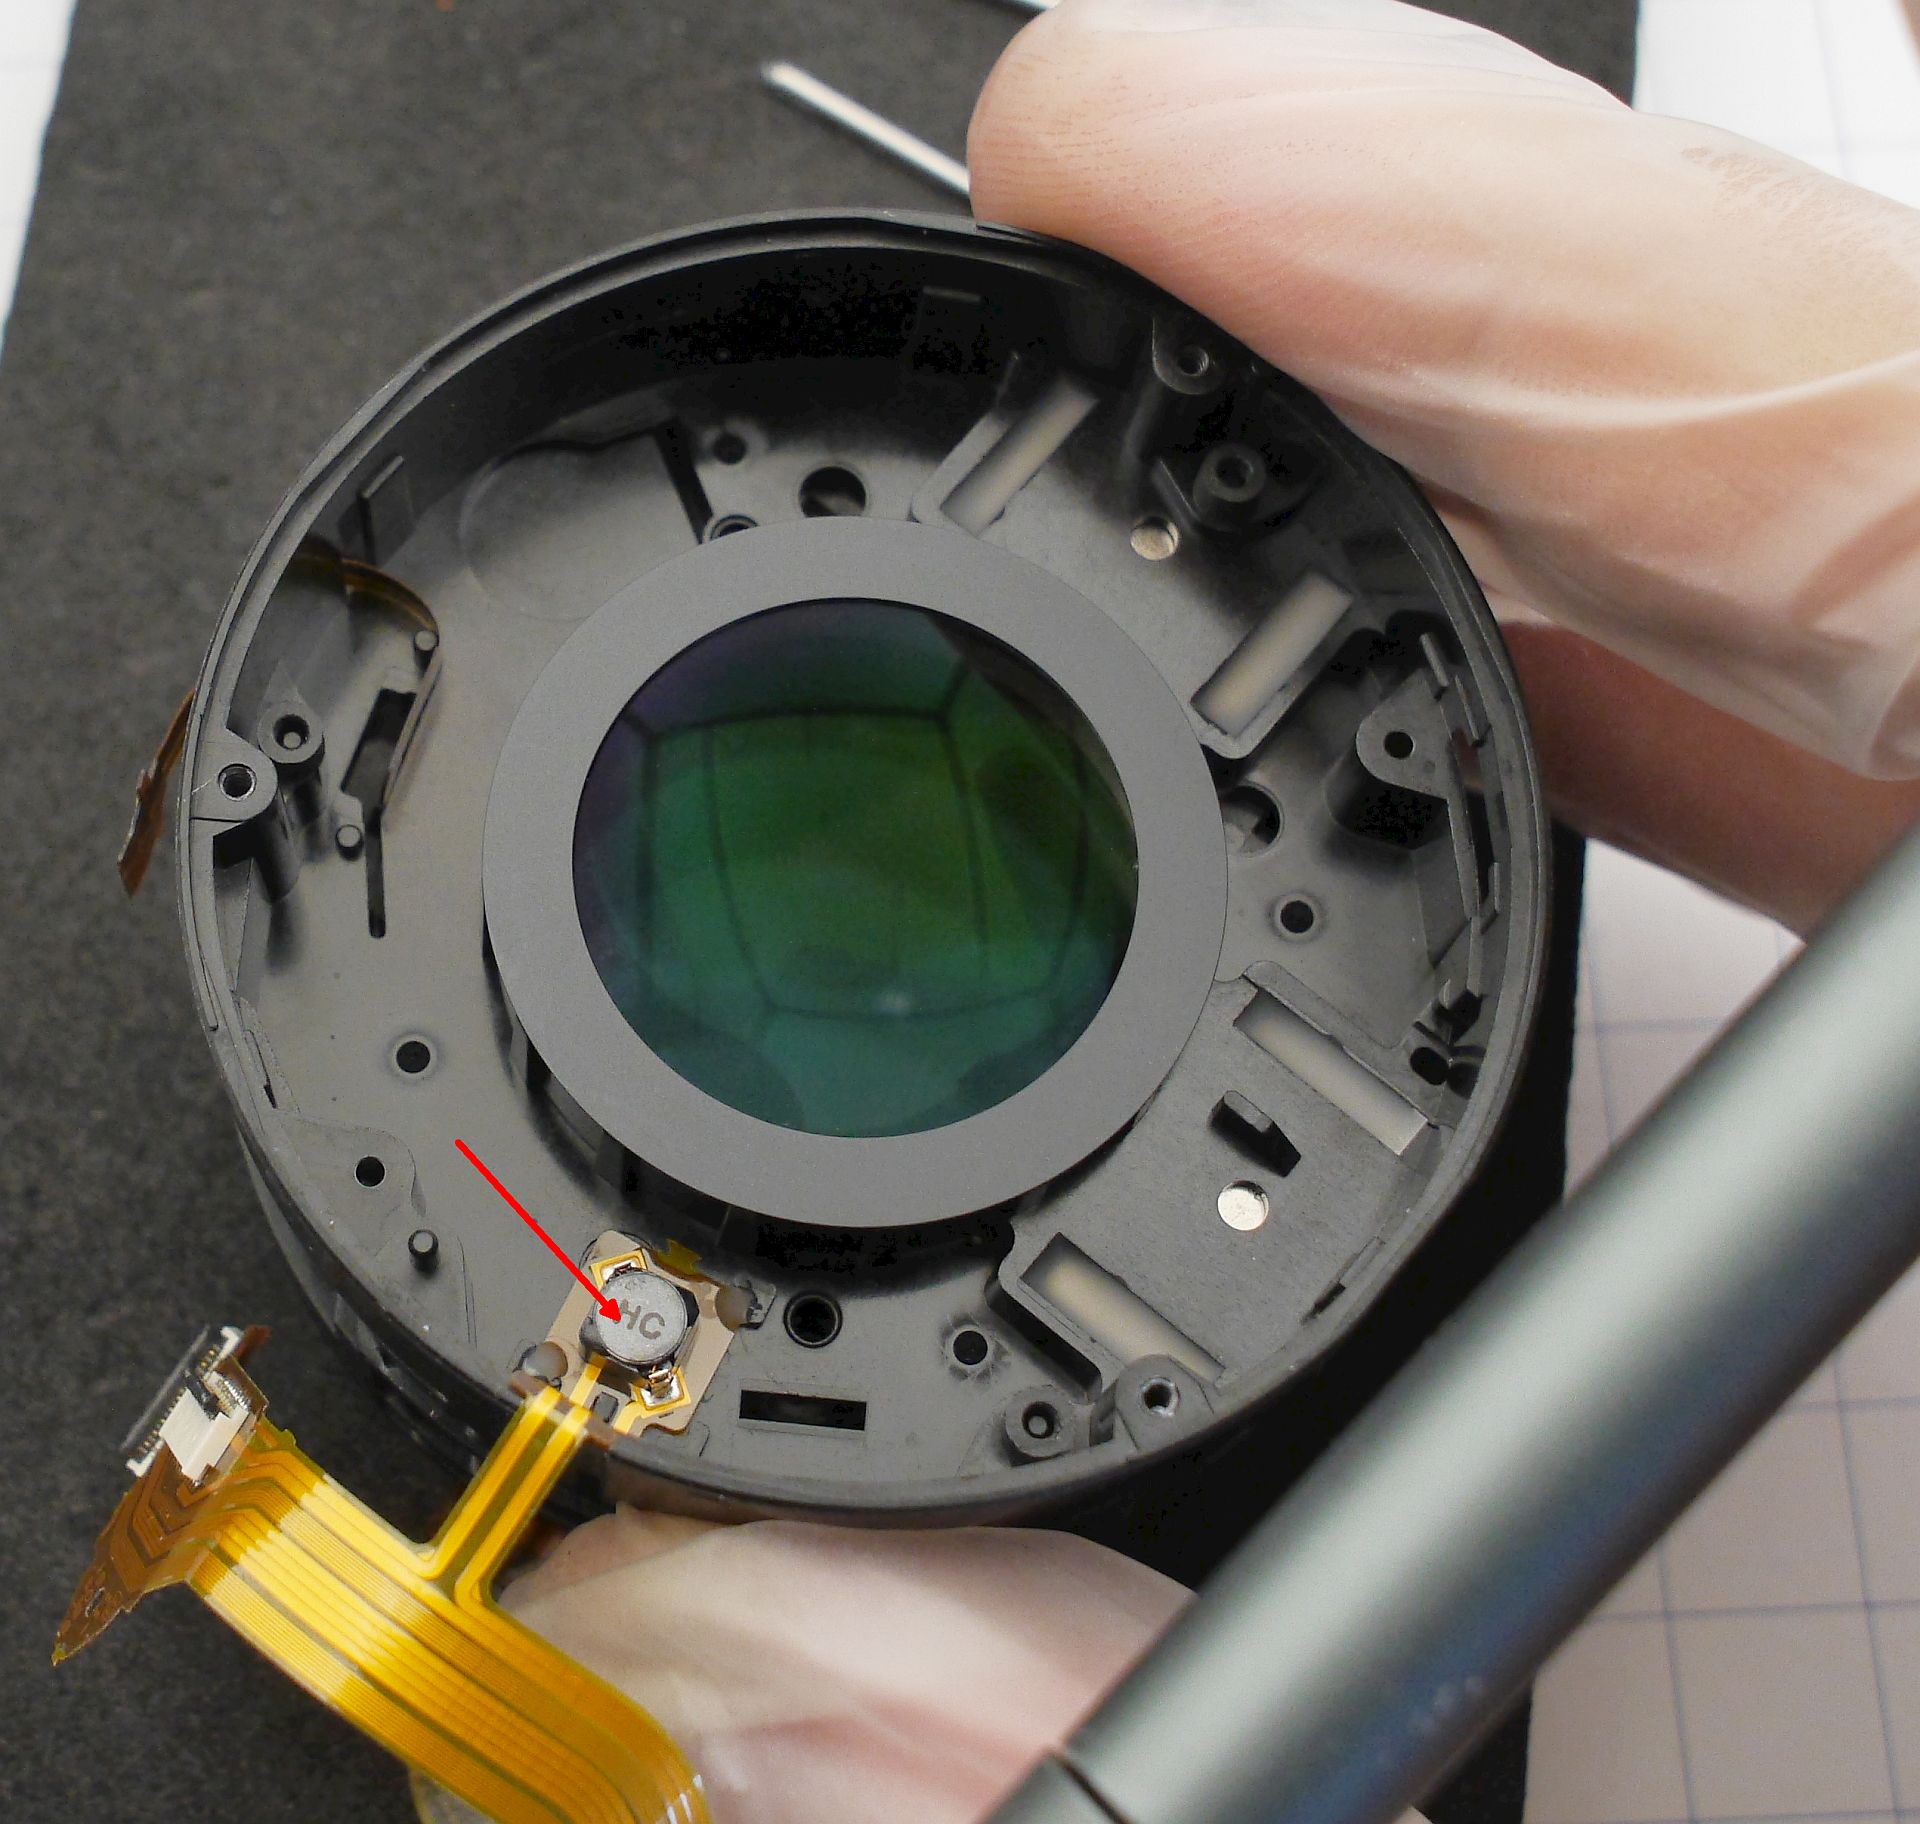
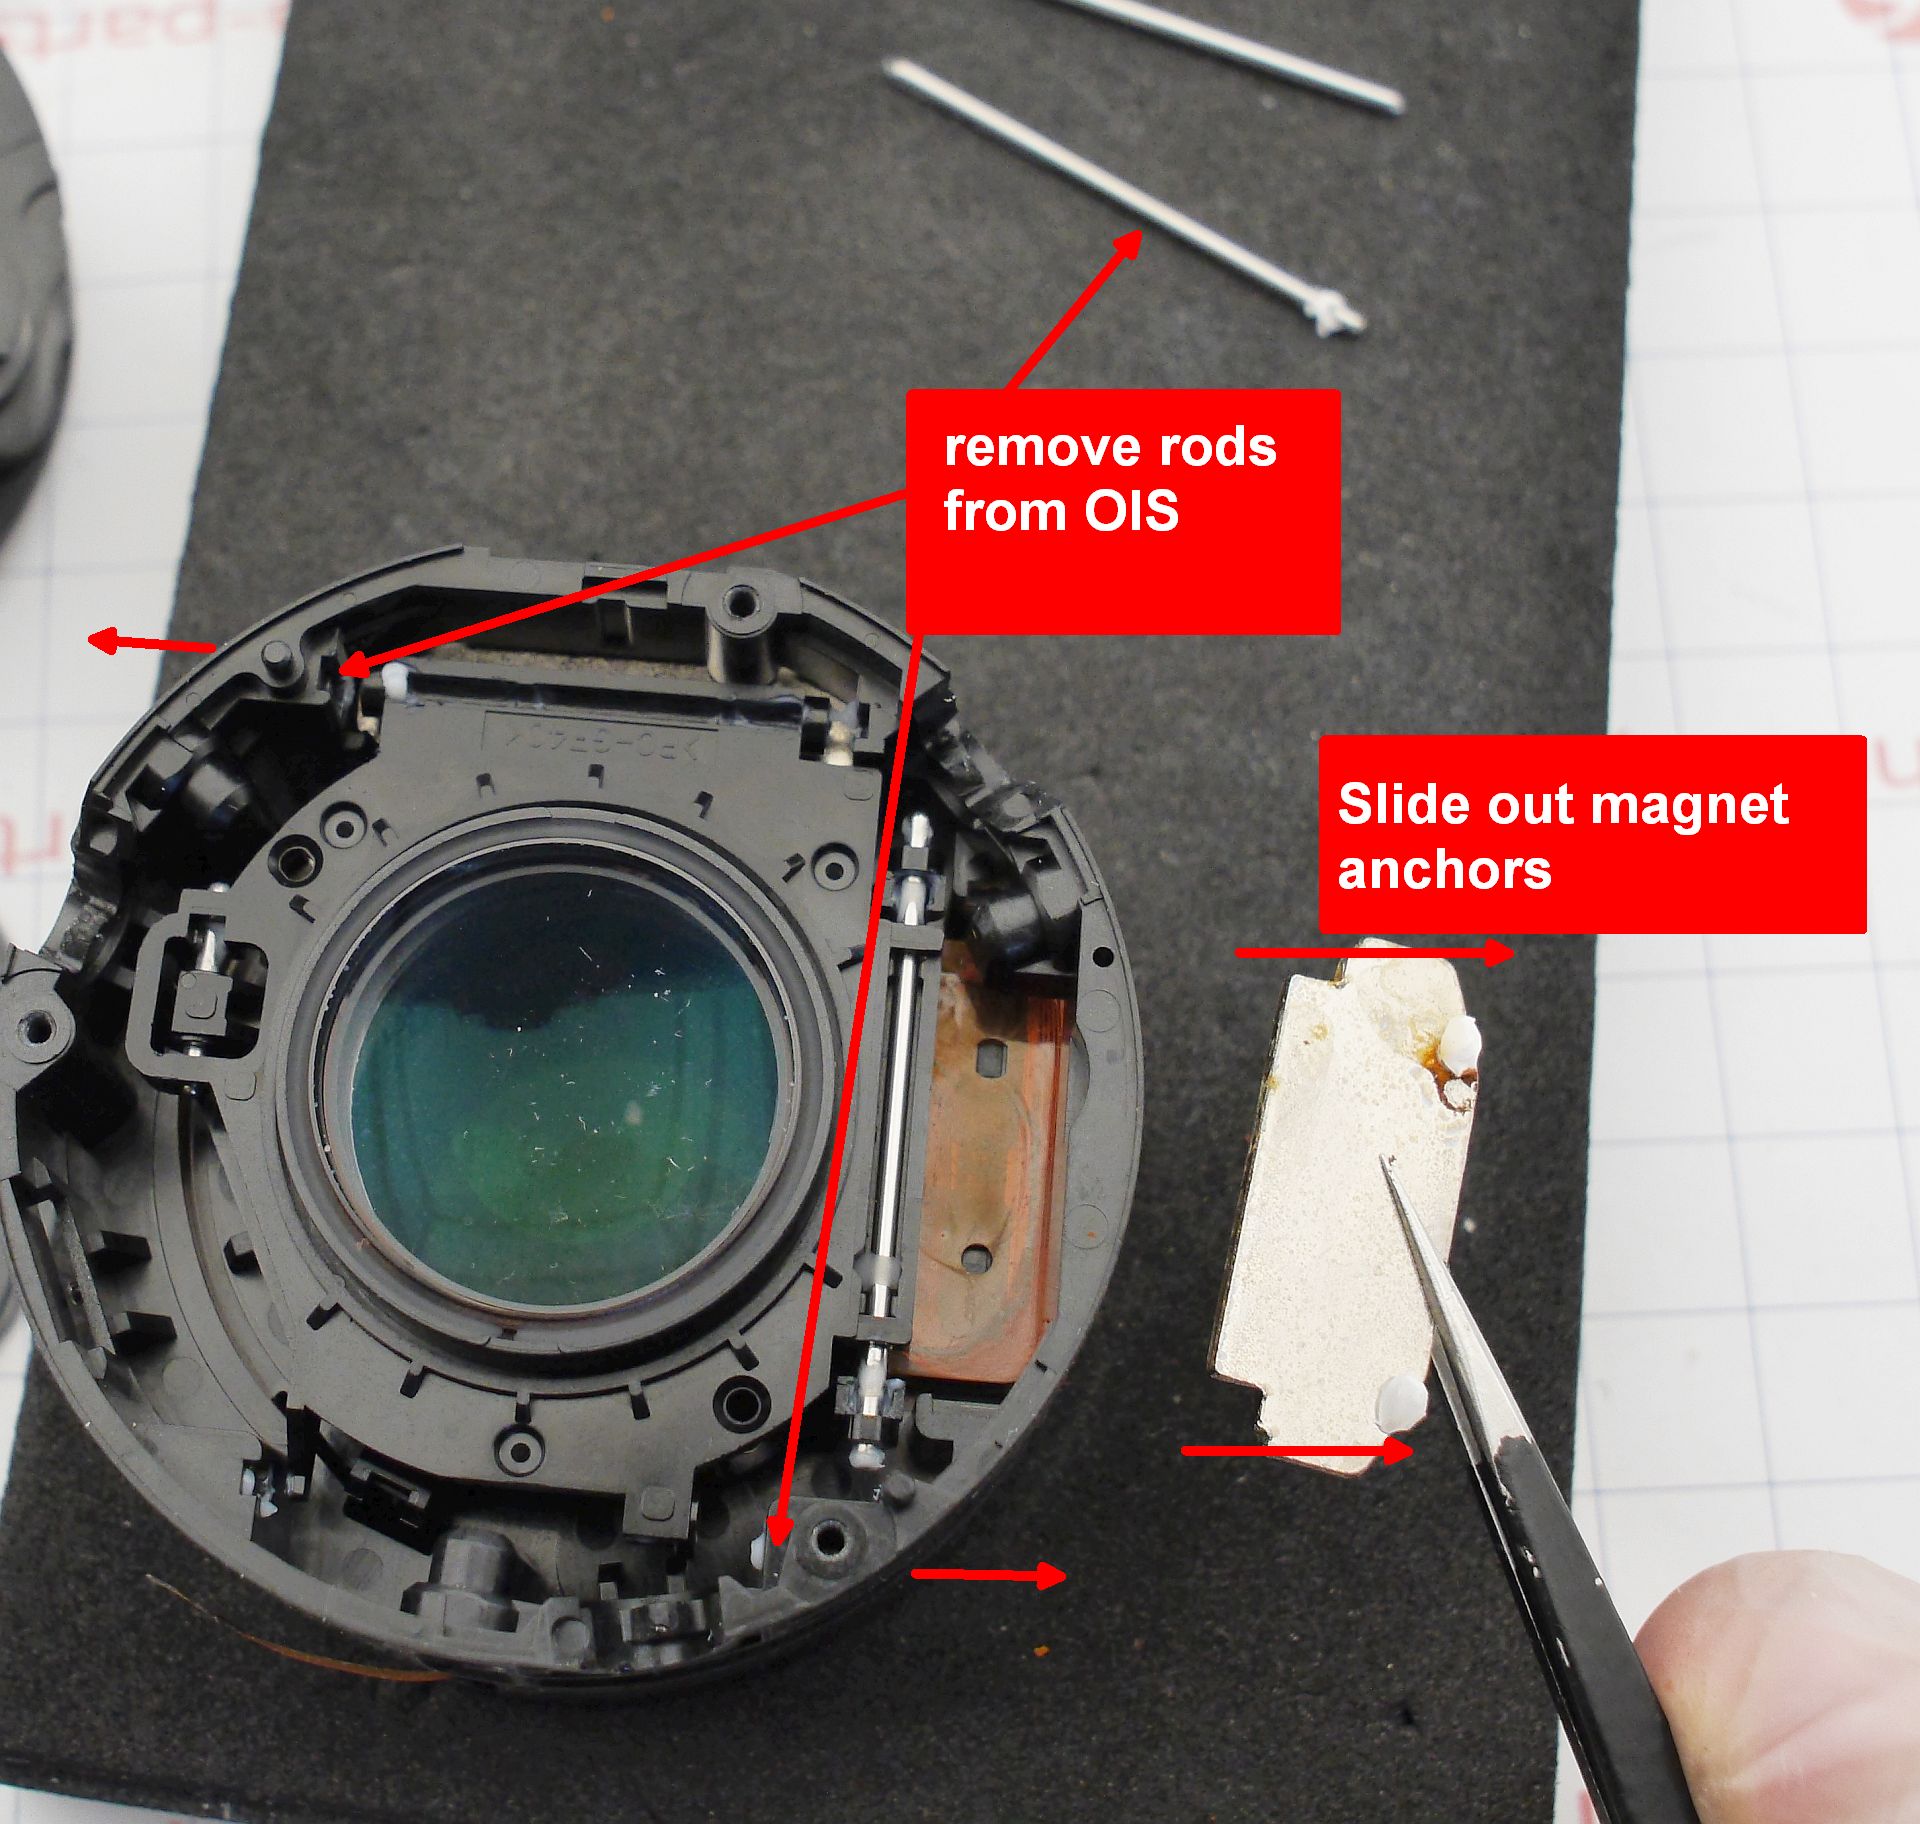
To remove the stabilizer lens itself, two rods holding it in the frame must be pushed out (they're already absent in the photo below), and both magnetic return anchors slid aside. The stabilizer lens ribbon needs to be extracted very carefully - it's routed in a tricky way, with the latch on the diaphragm side. After cleaning, the magnets and rods need to be secured with glue.
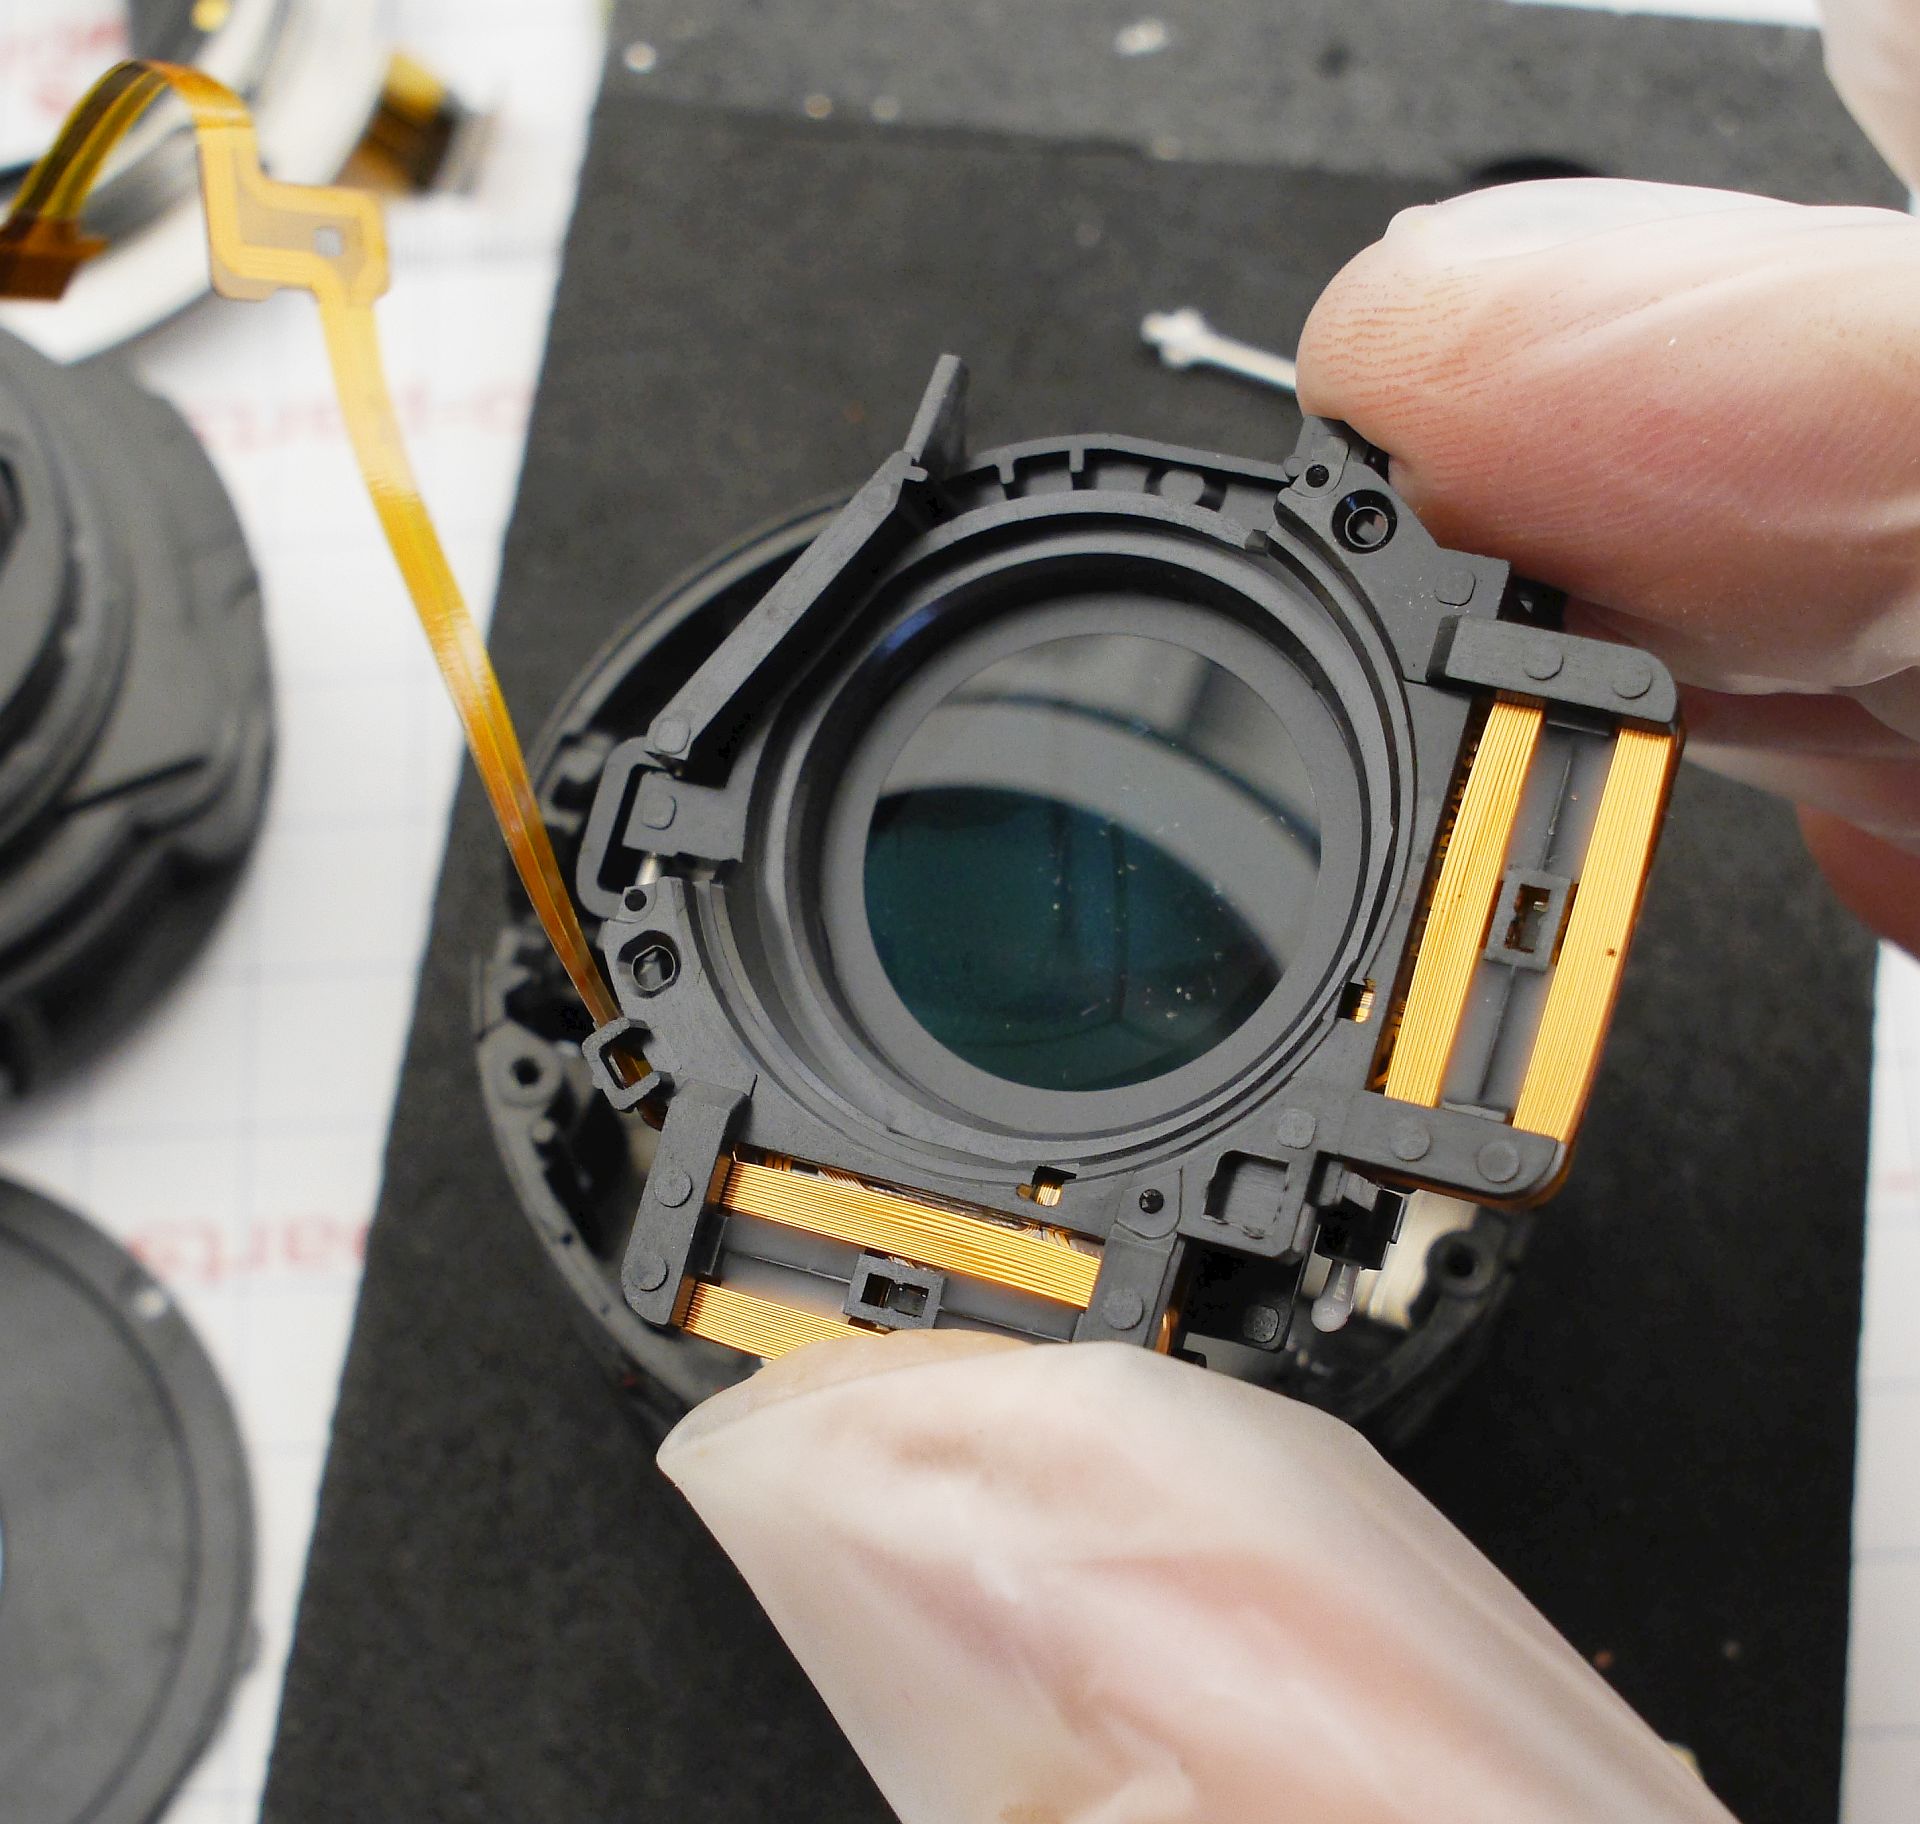
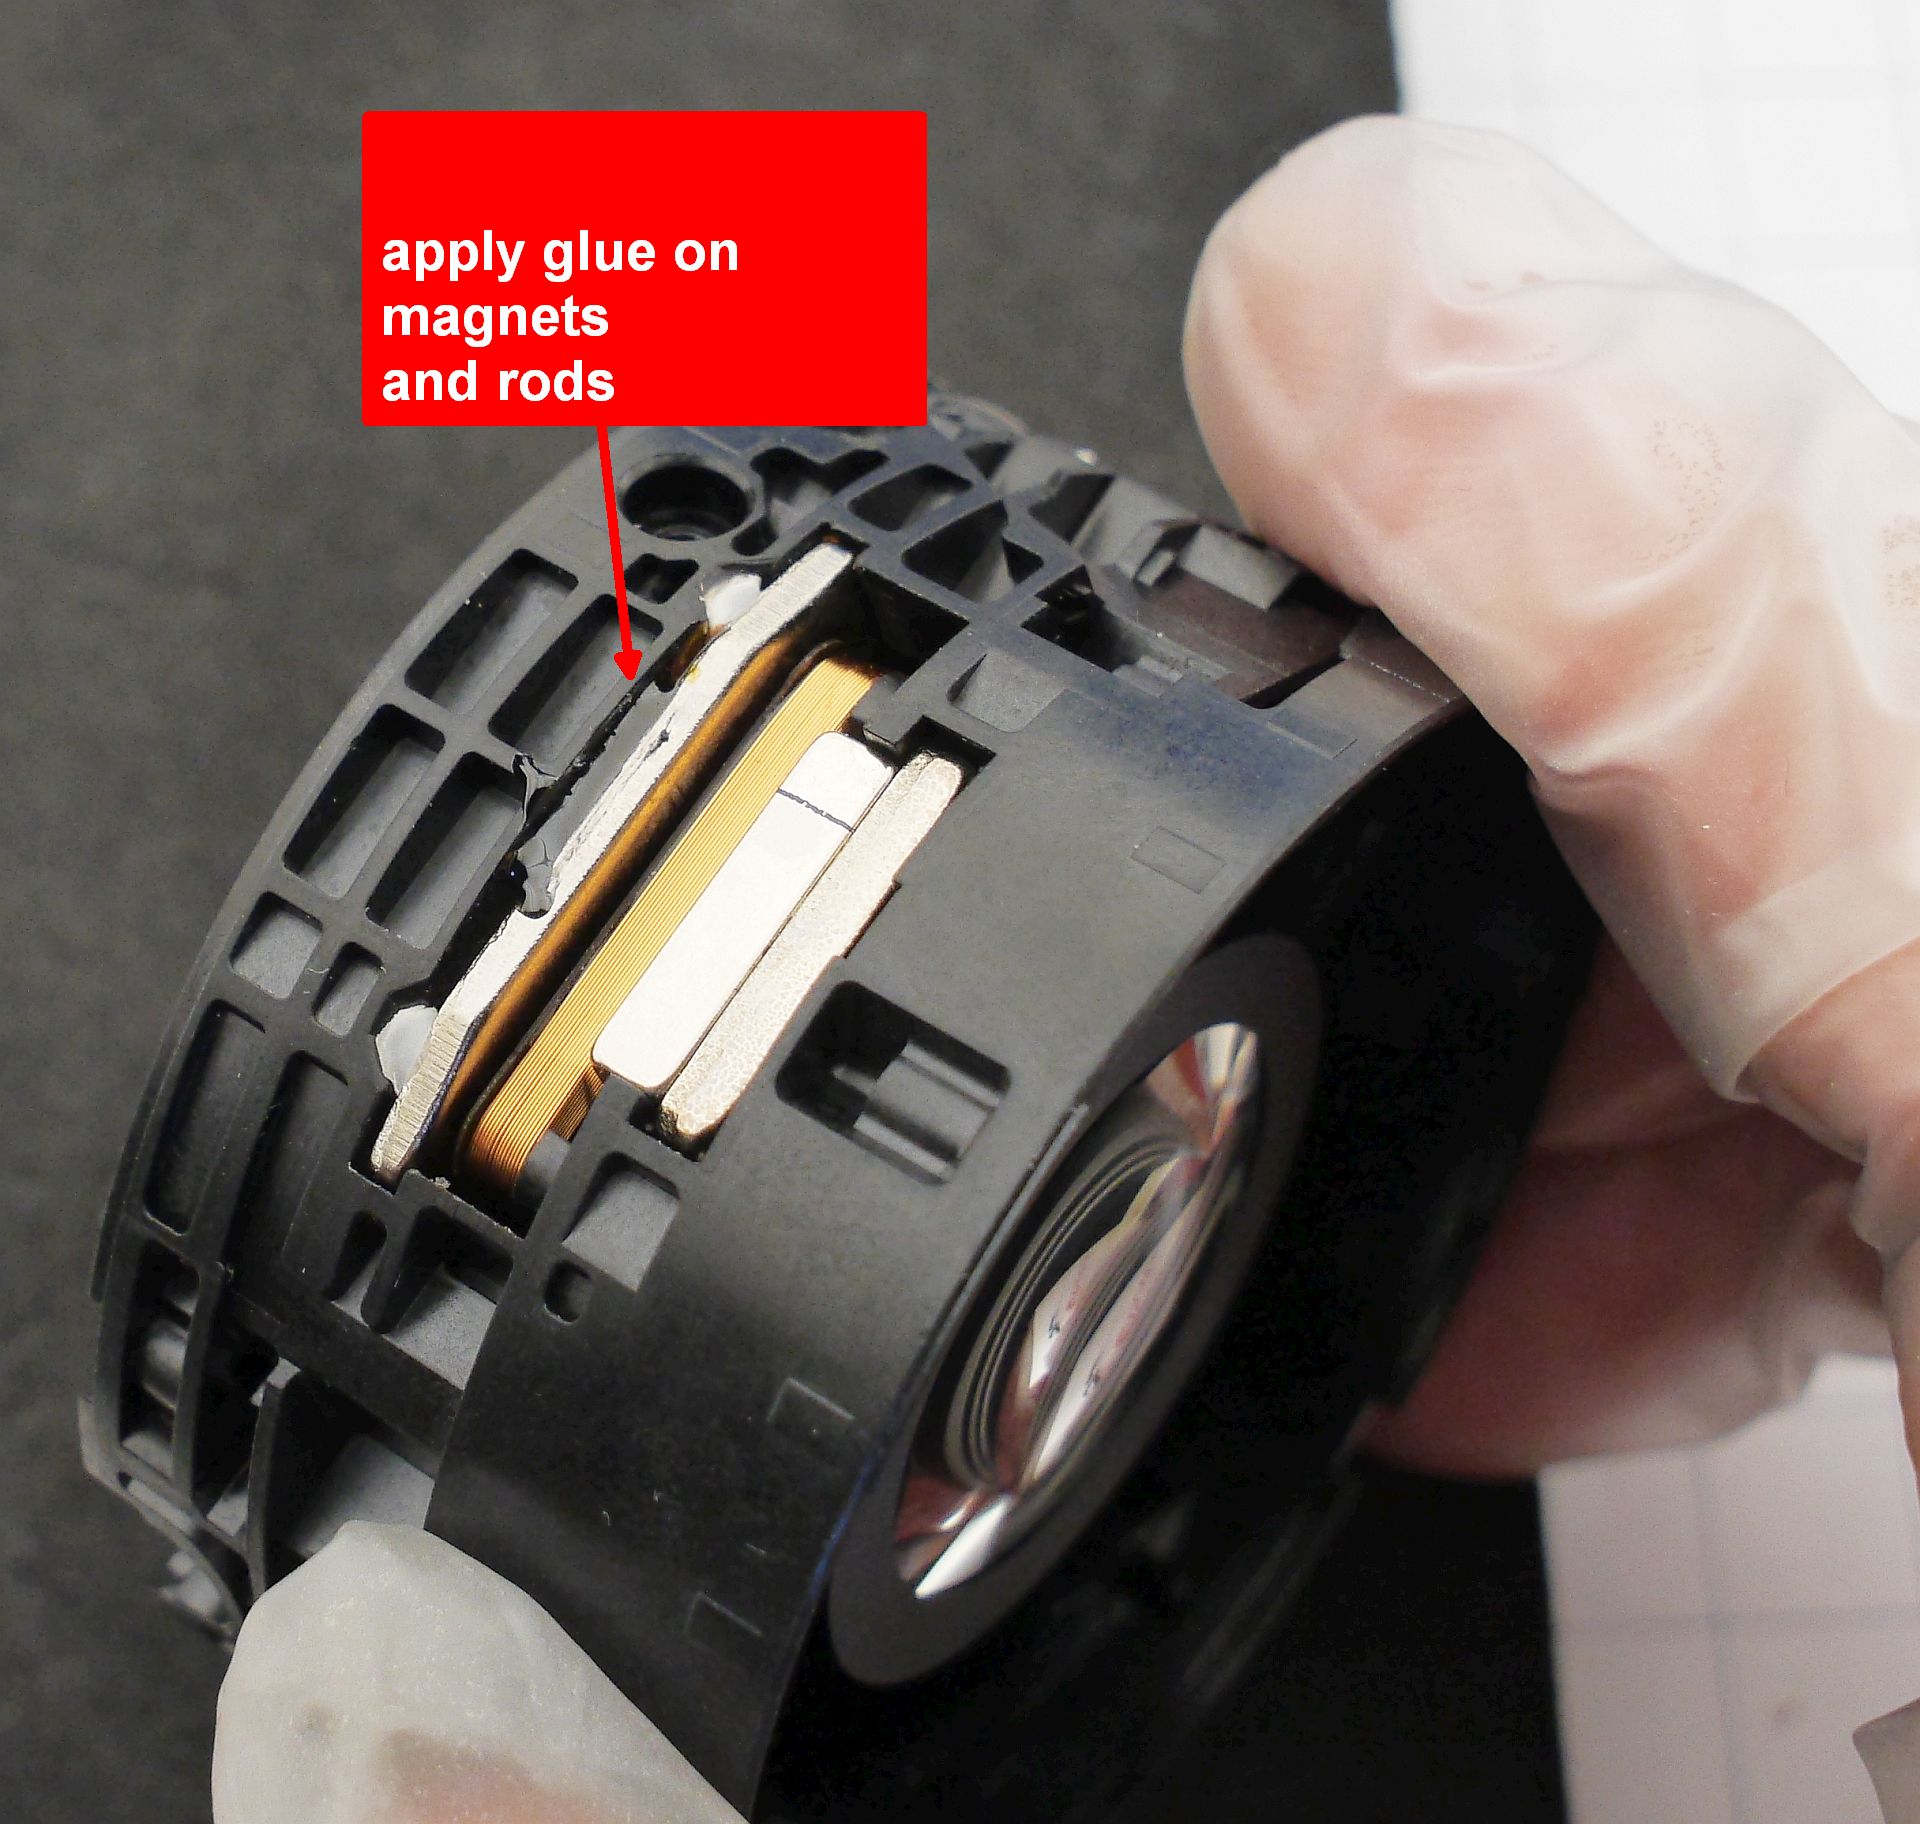
Now it's the turn of the lower half of the lower third of the lens :)
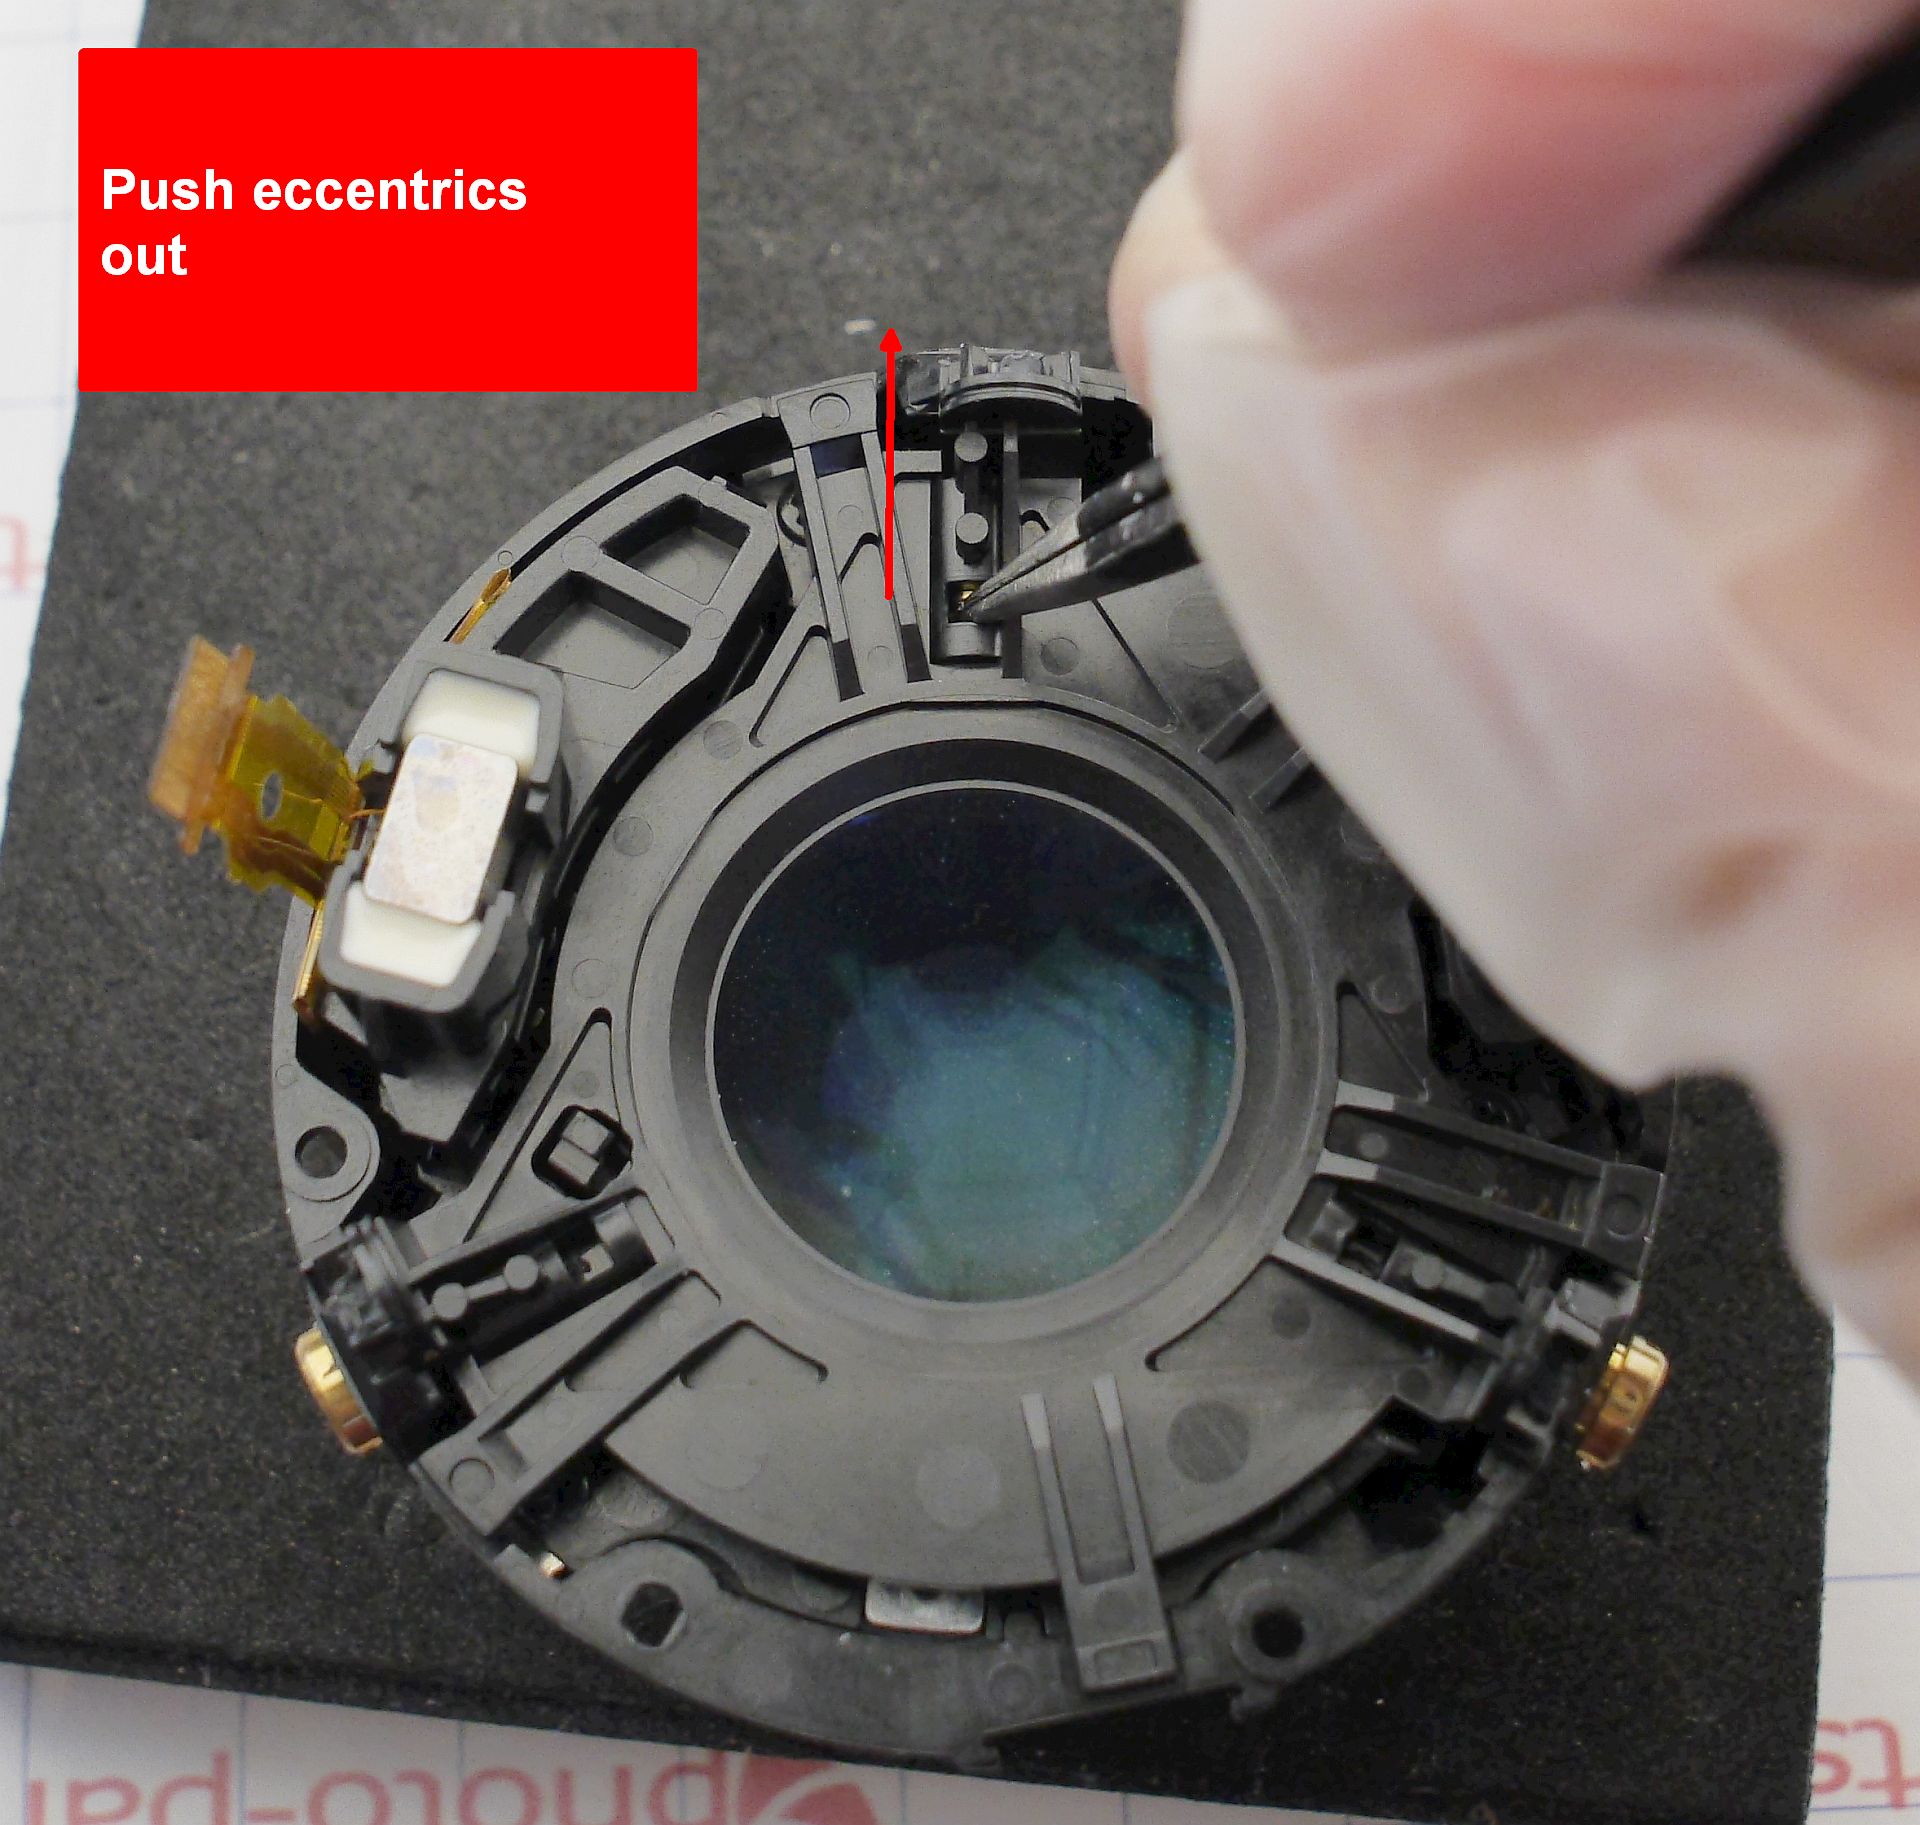
First, the eccentrics must be pushed out to release the adjustment lens:
Then remove the focusing module, under which there are shims again - carefully.
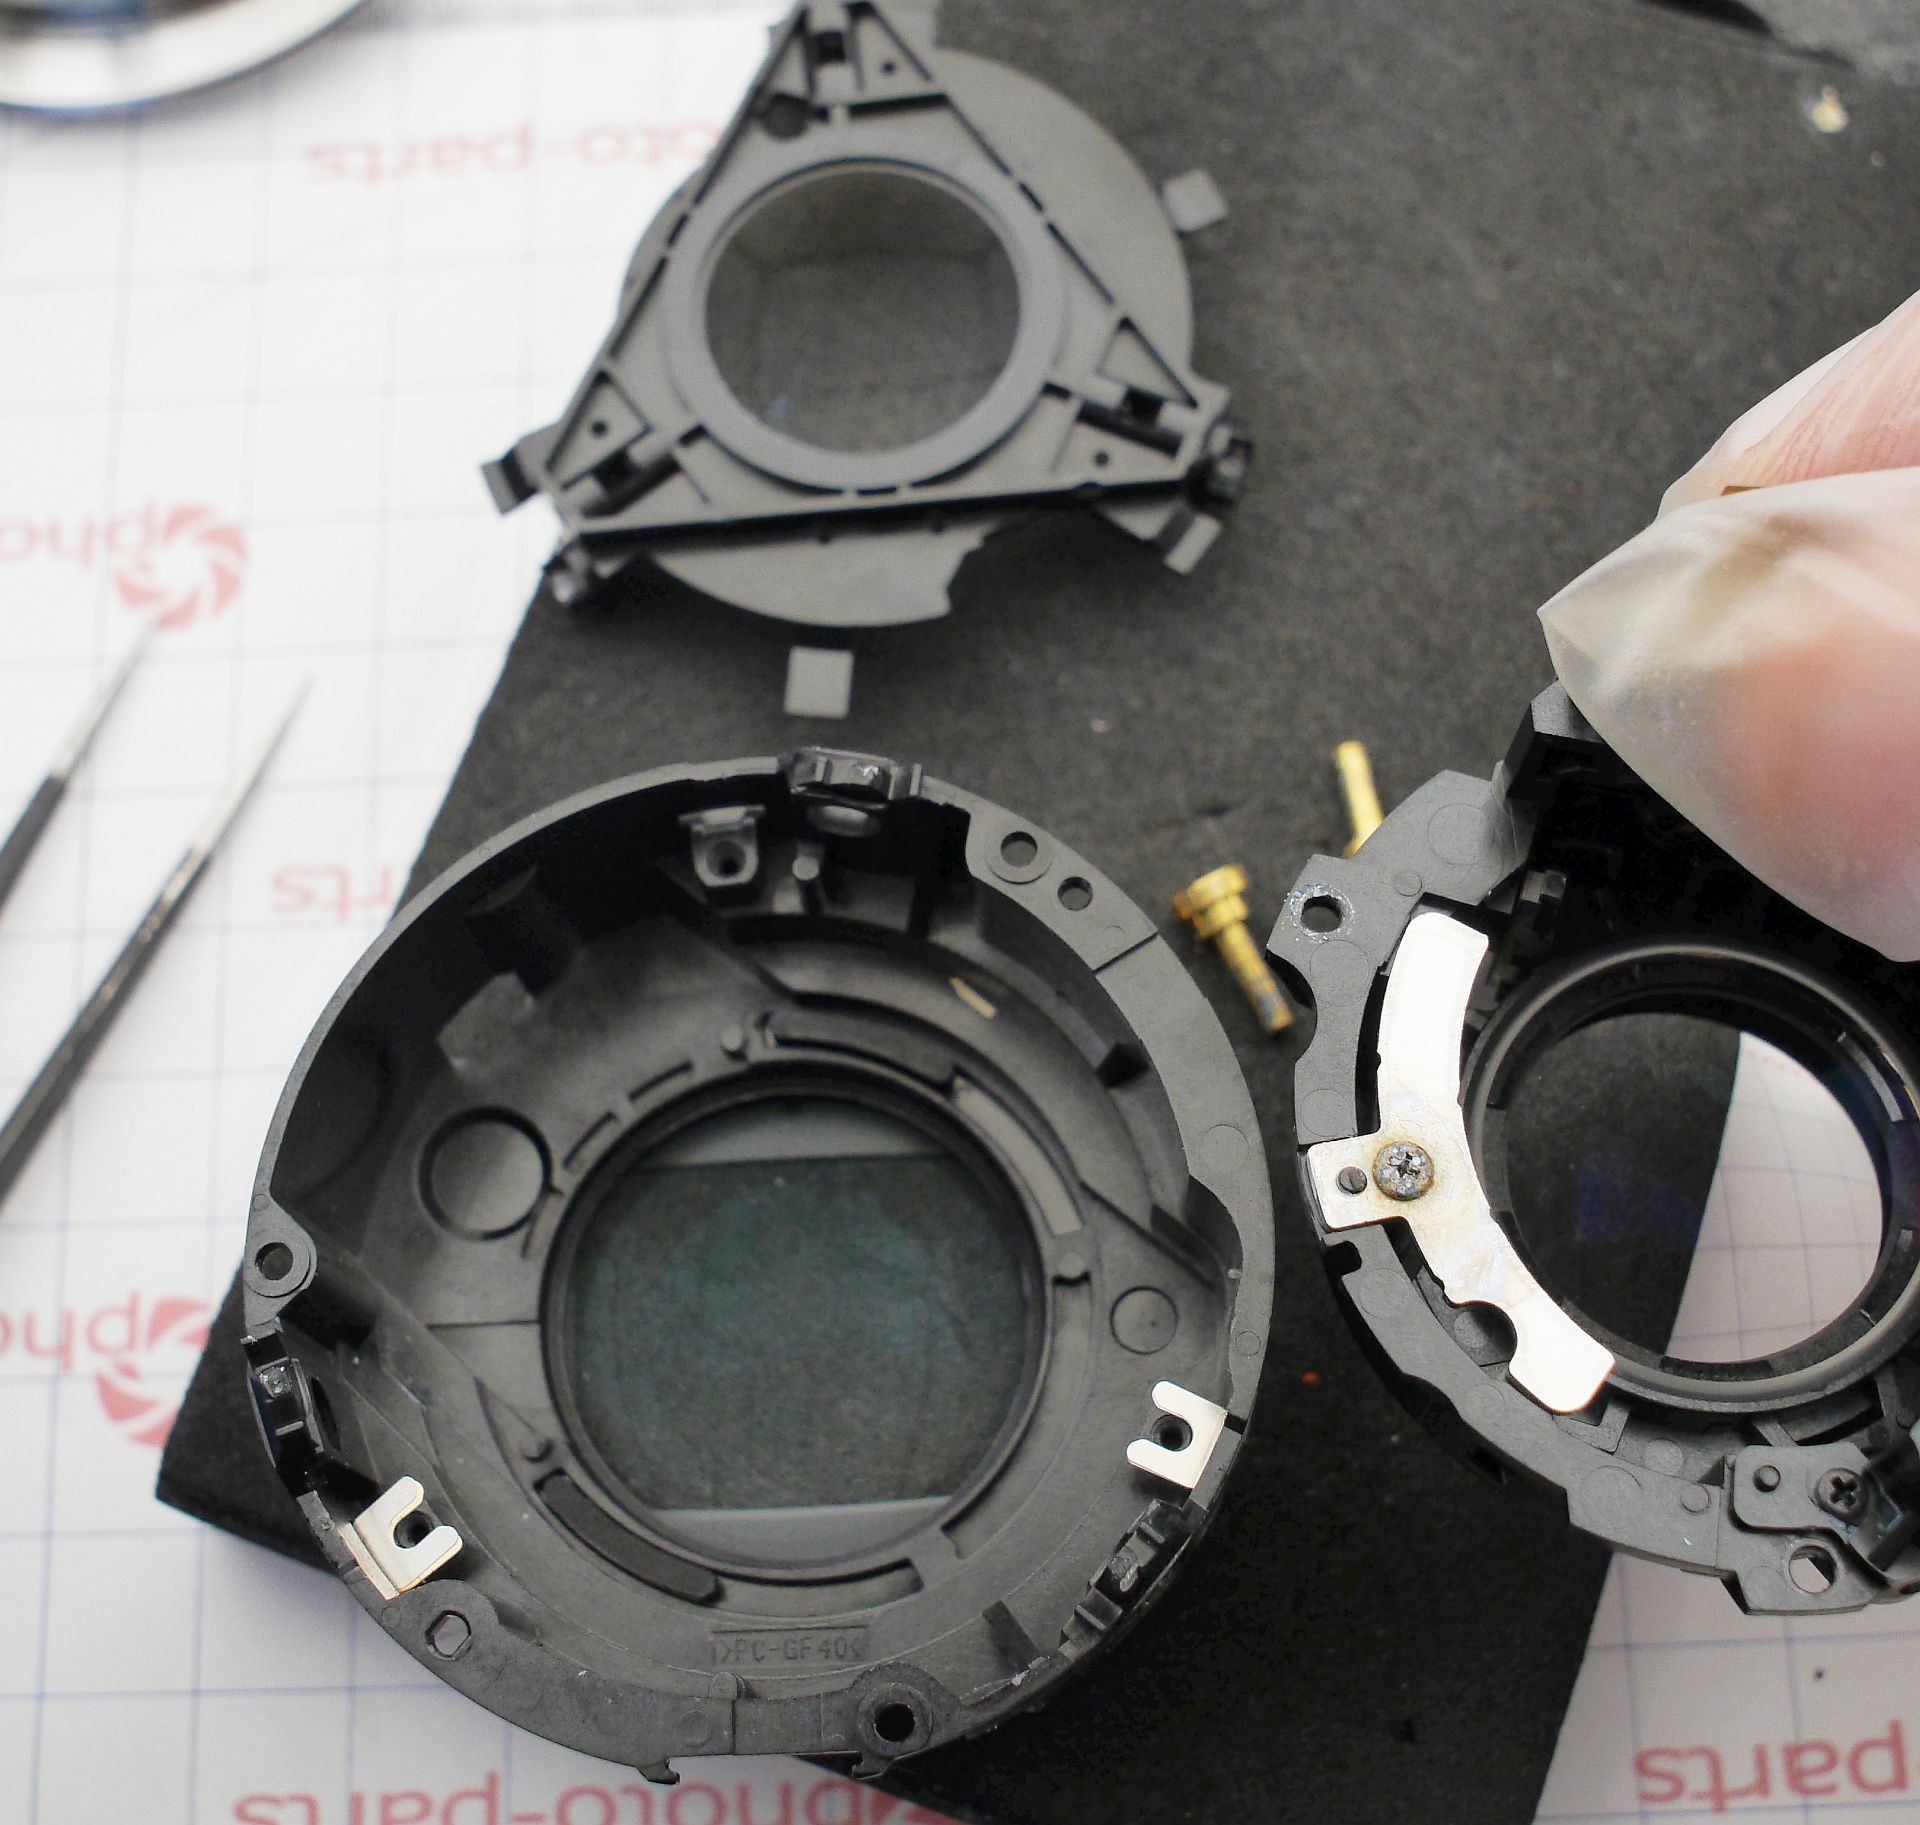
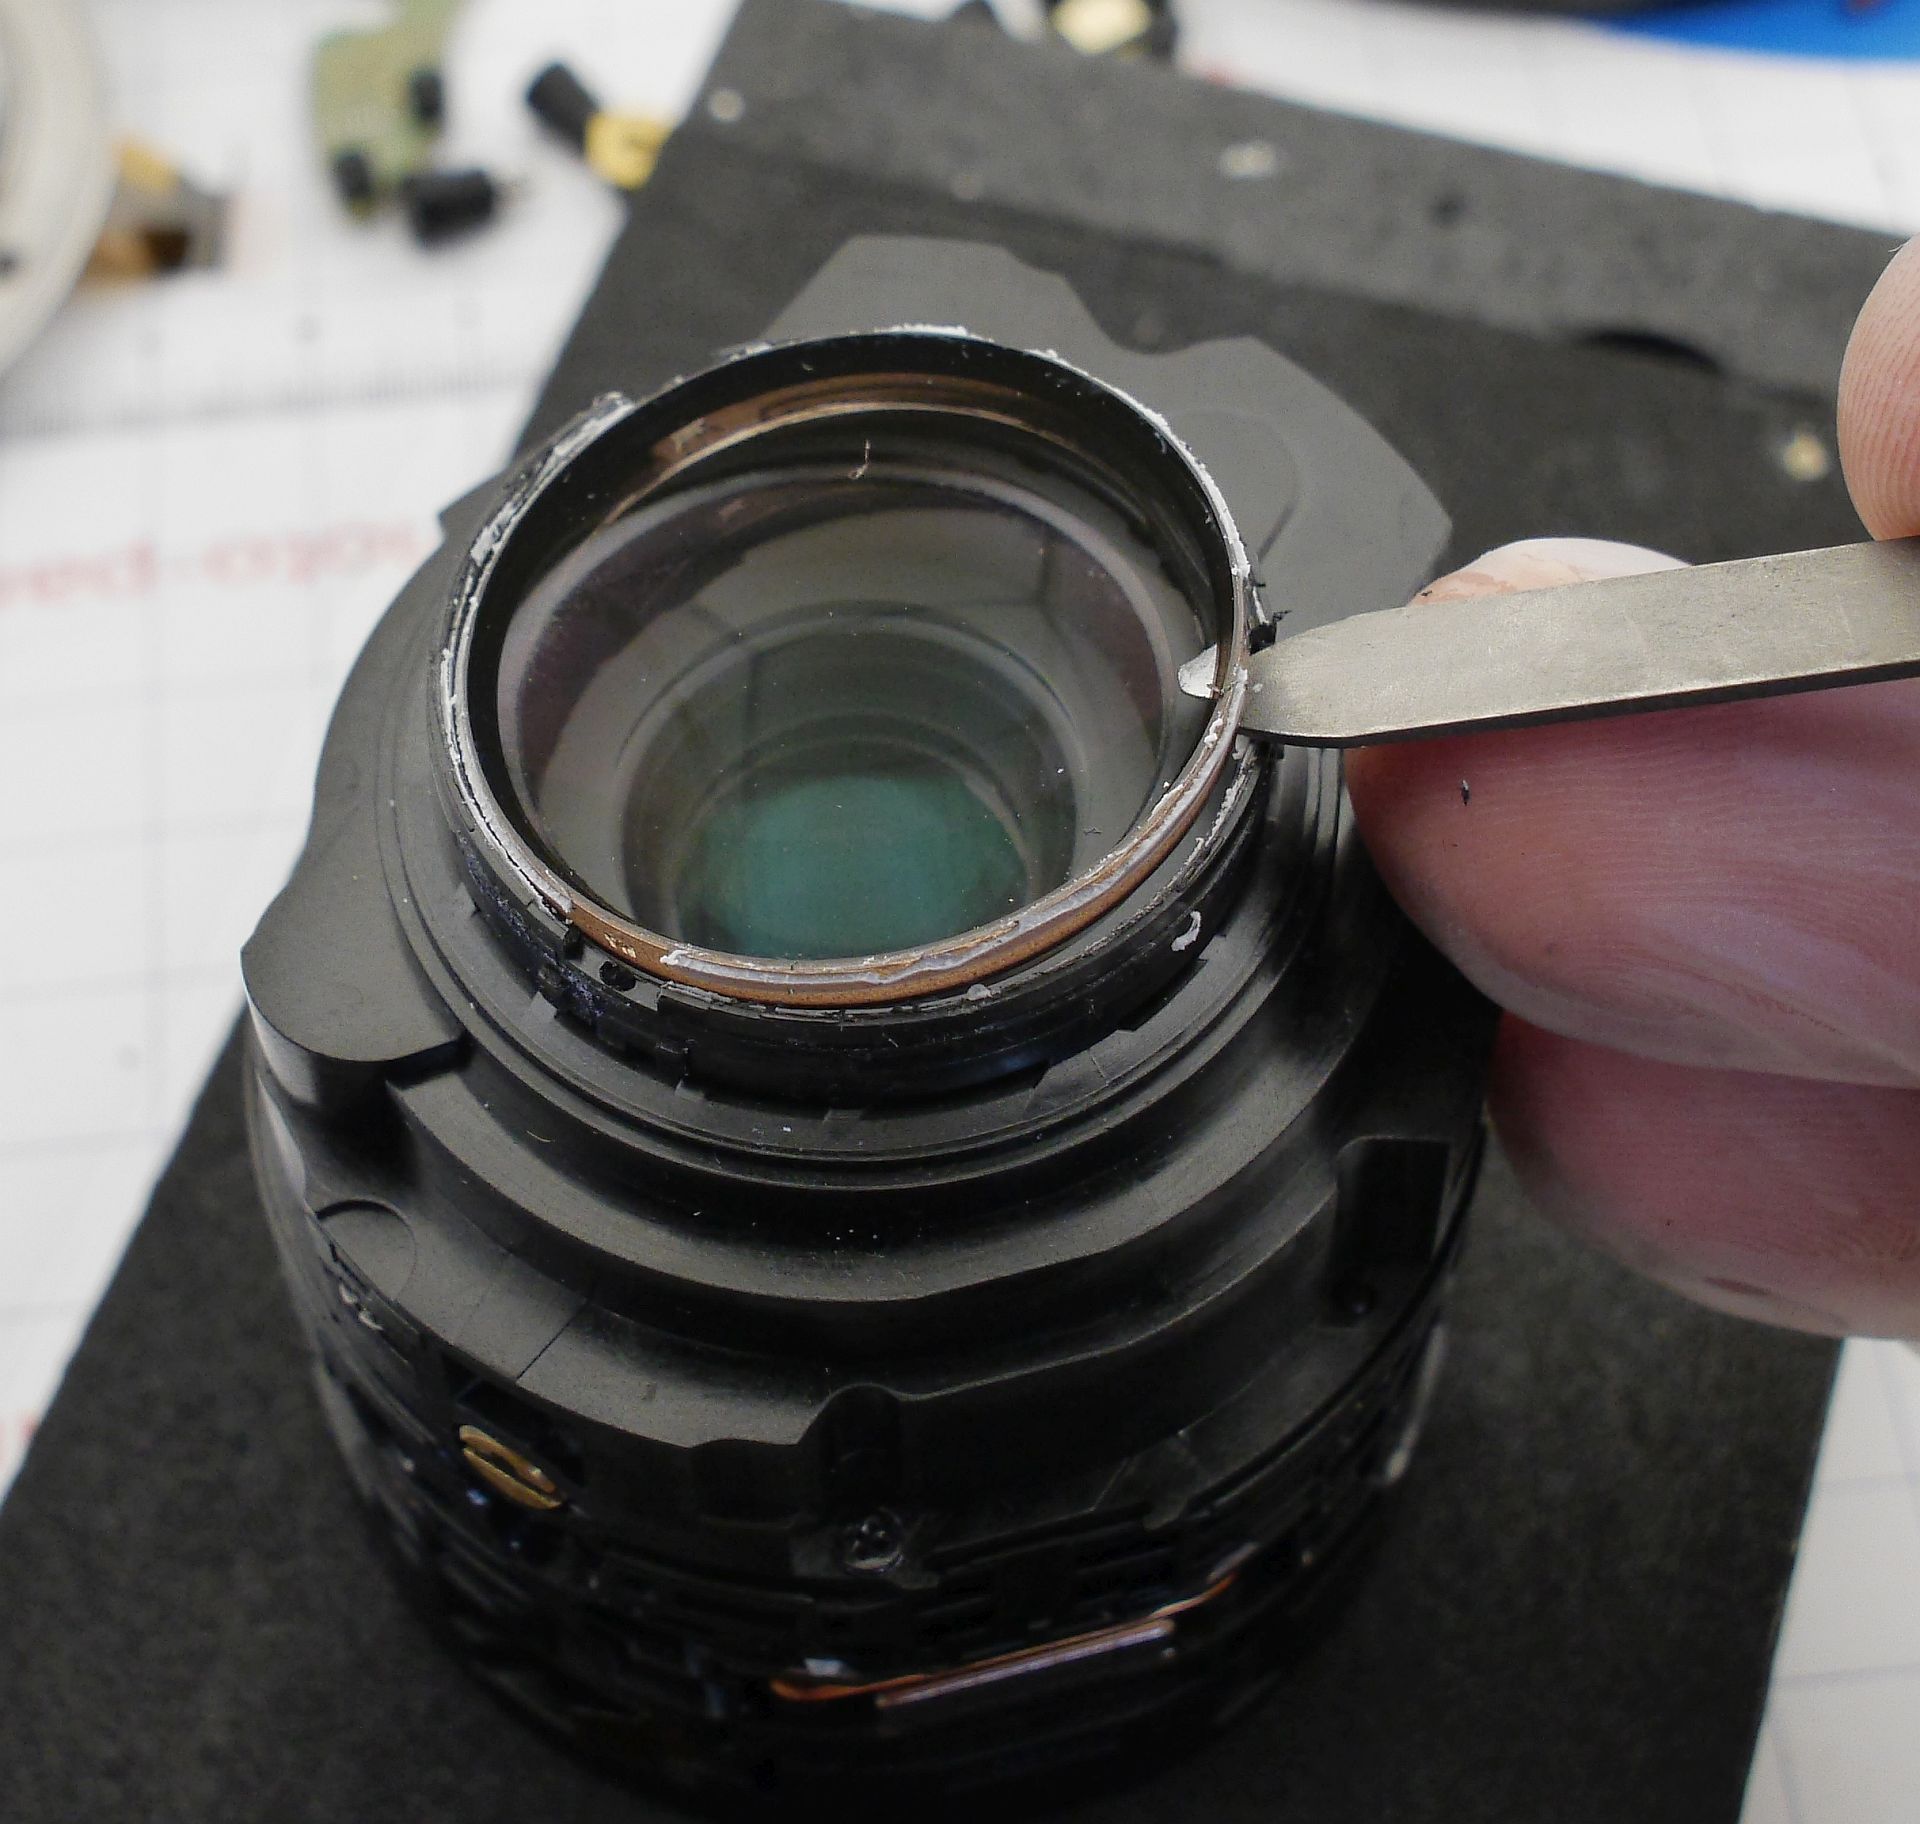
This opens access to all the lens surfaces (adjustment, focusing, rear group). That could have been the end of the story, but water also seeped into the rear group. Time to split it apart:
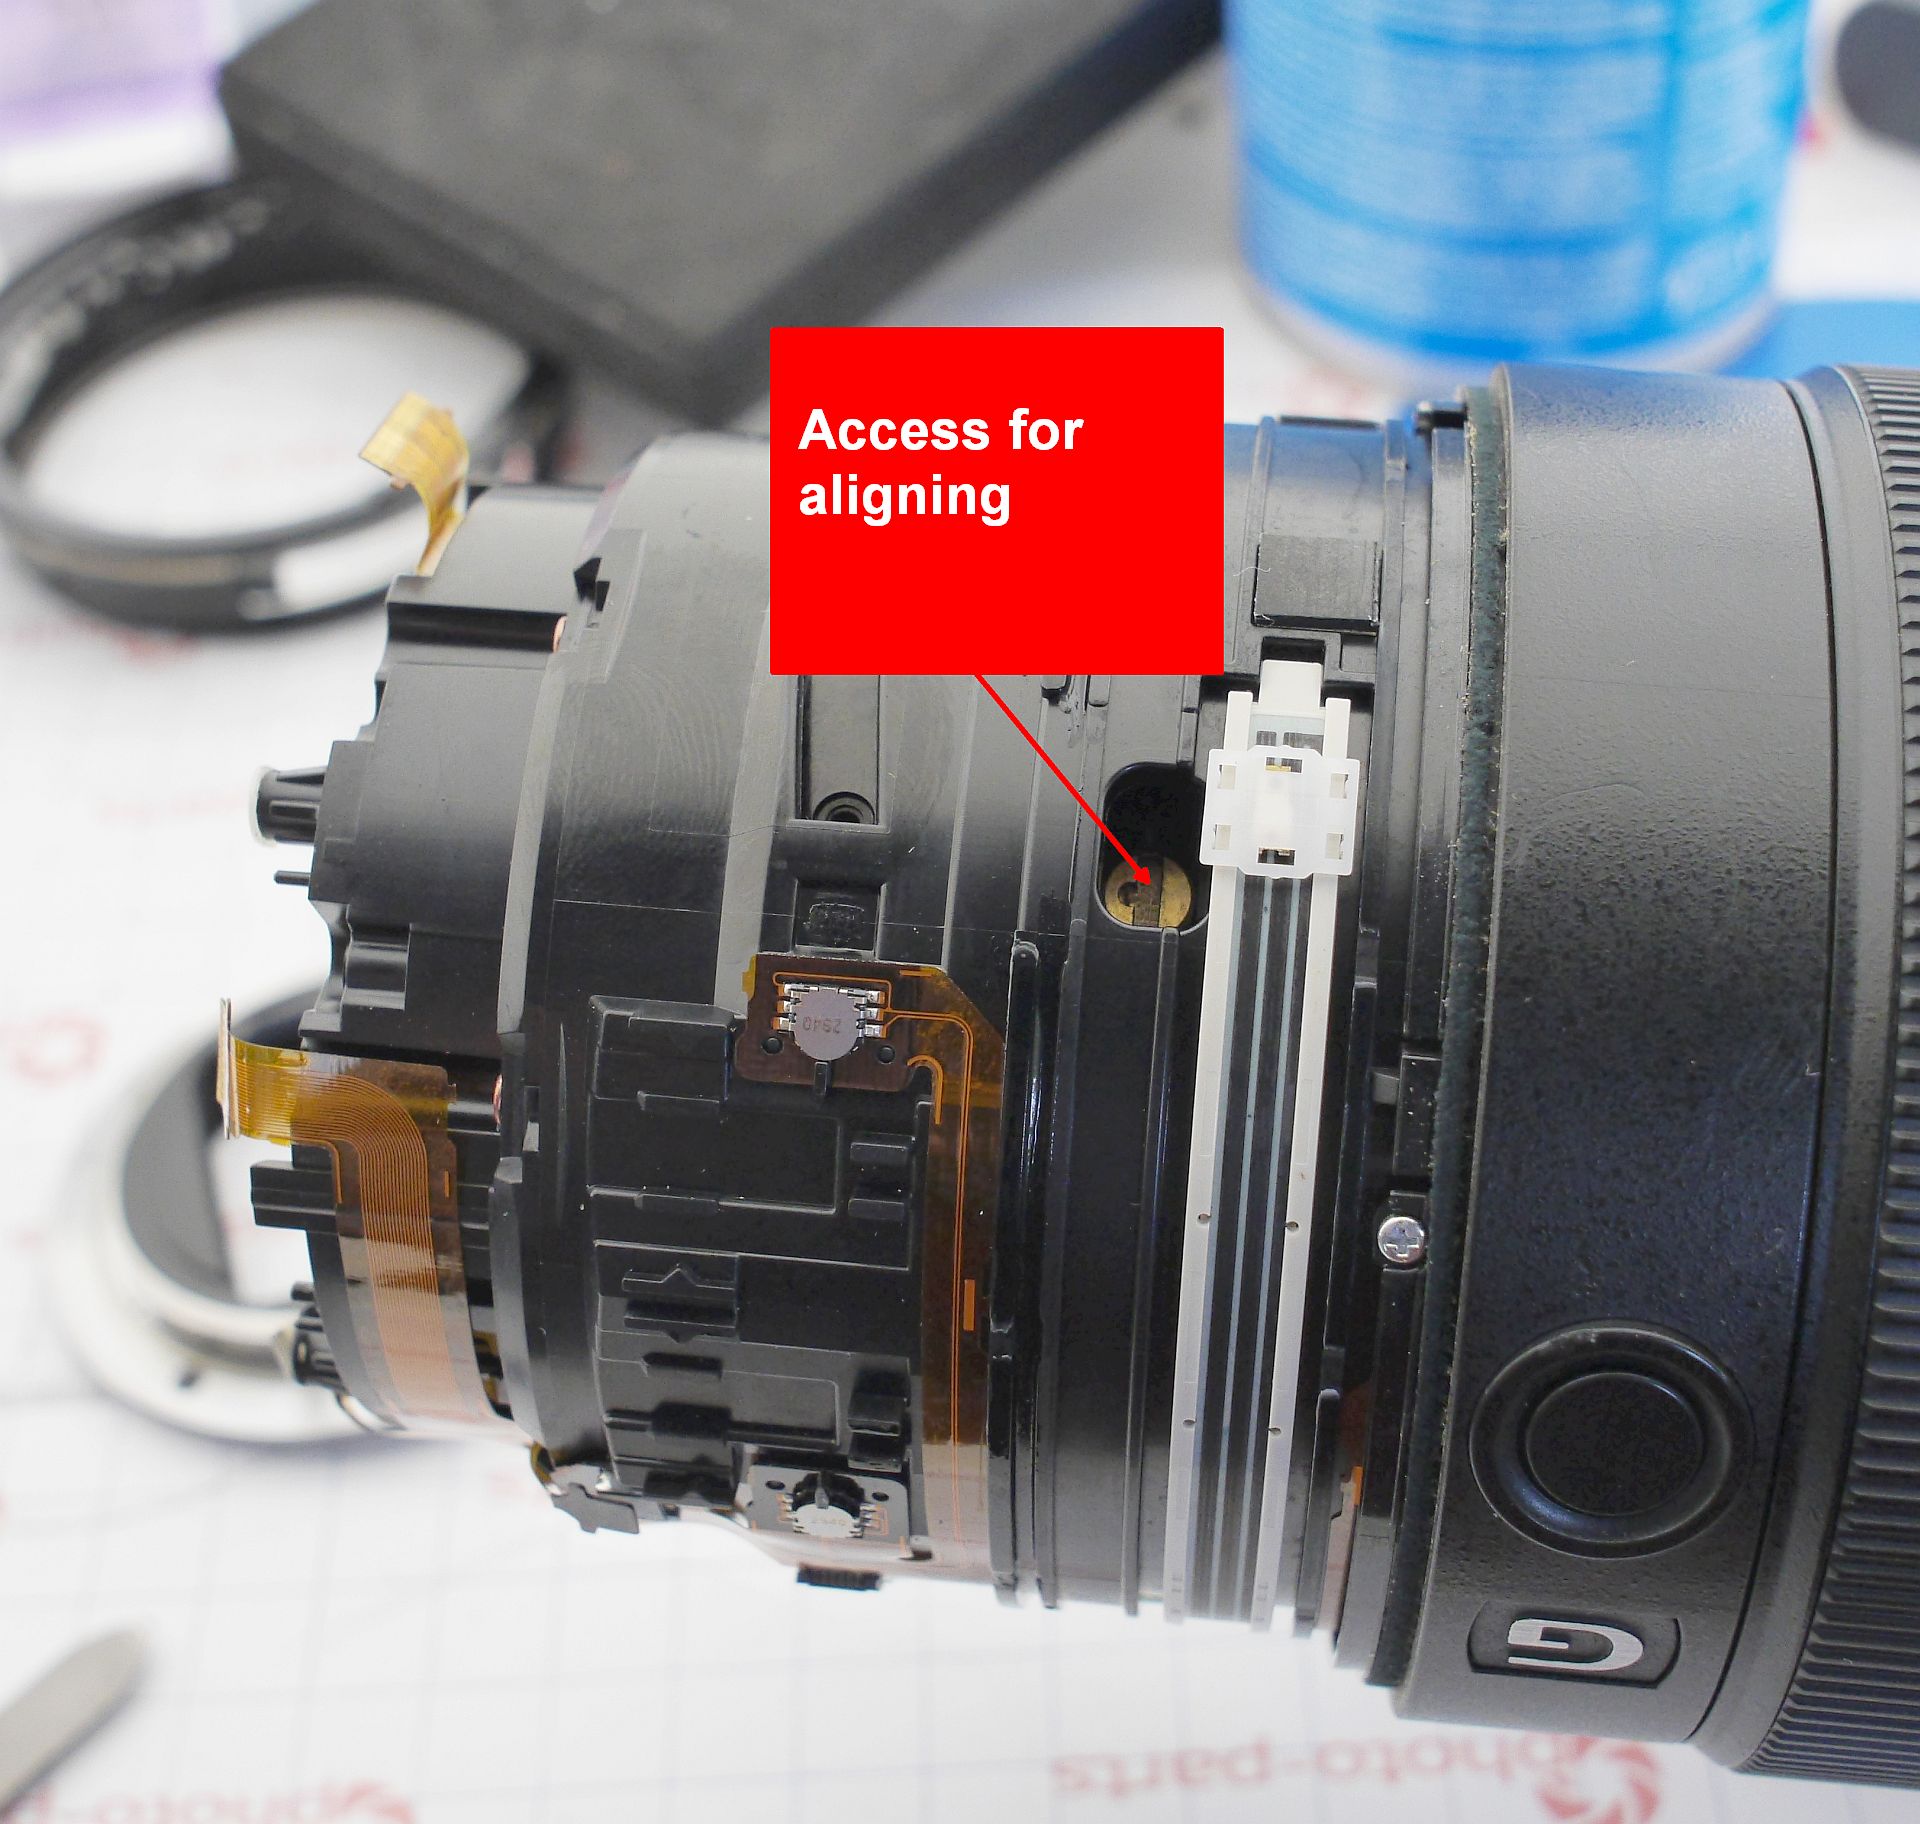
After cleaning each element and reassembly, the lens will have to be adjusted - I warned you. The design actually allows this without too much headache: access to the eccentrics opens through the zoom ring at the 105mm position. After bringing the optical center to perfection, epoxy can be poured in to keep the adjustment from drifting with vibration or shocks.
Finally, a couple of "before/after" shots:
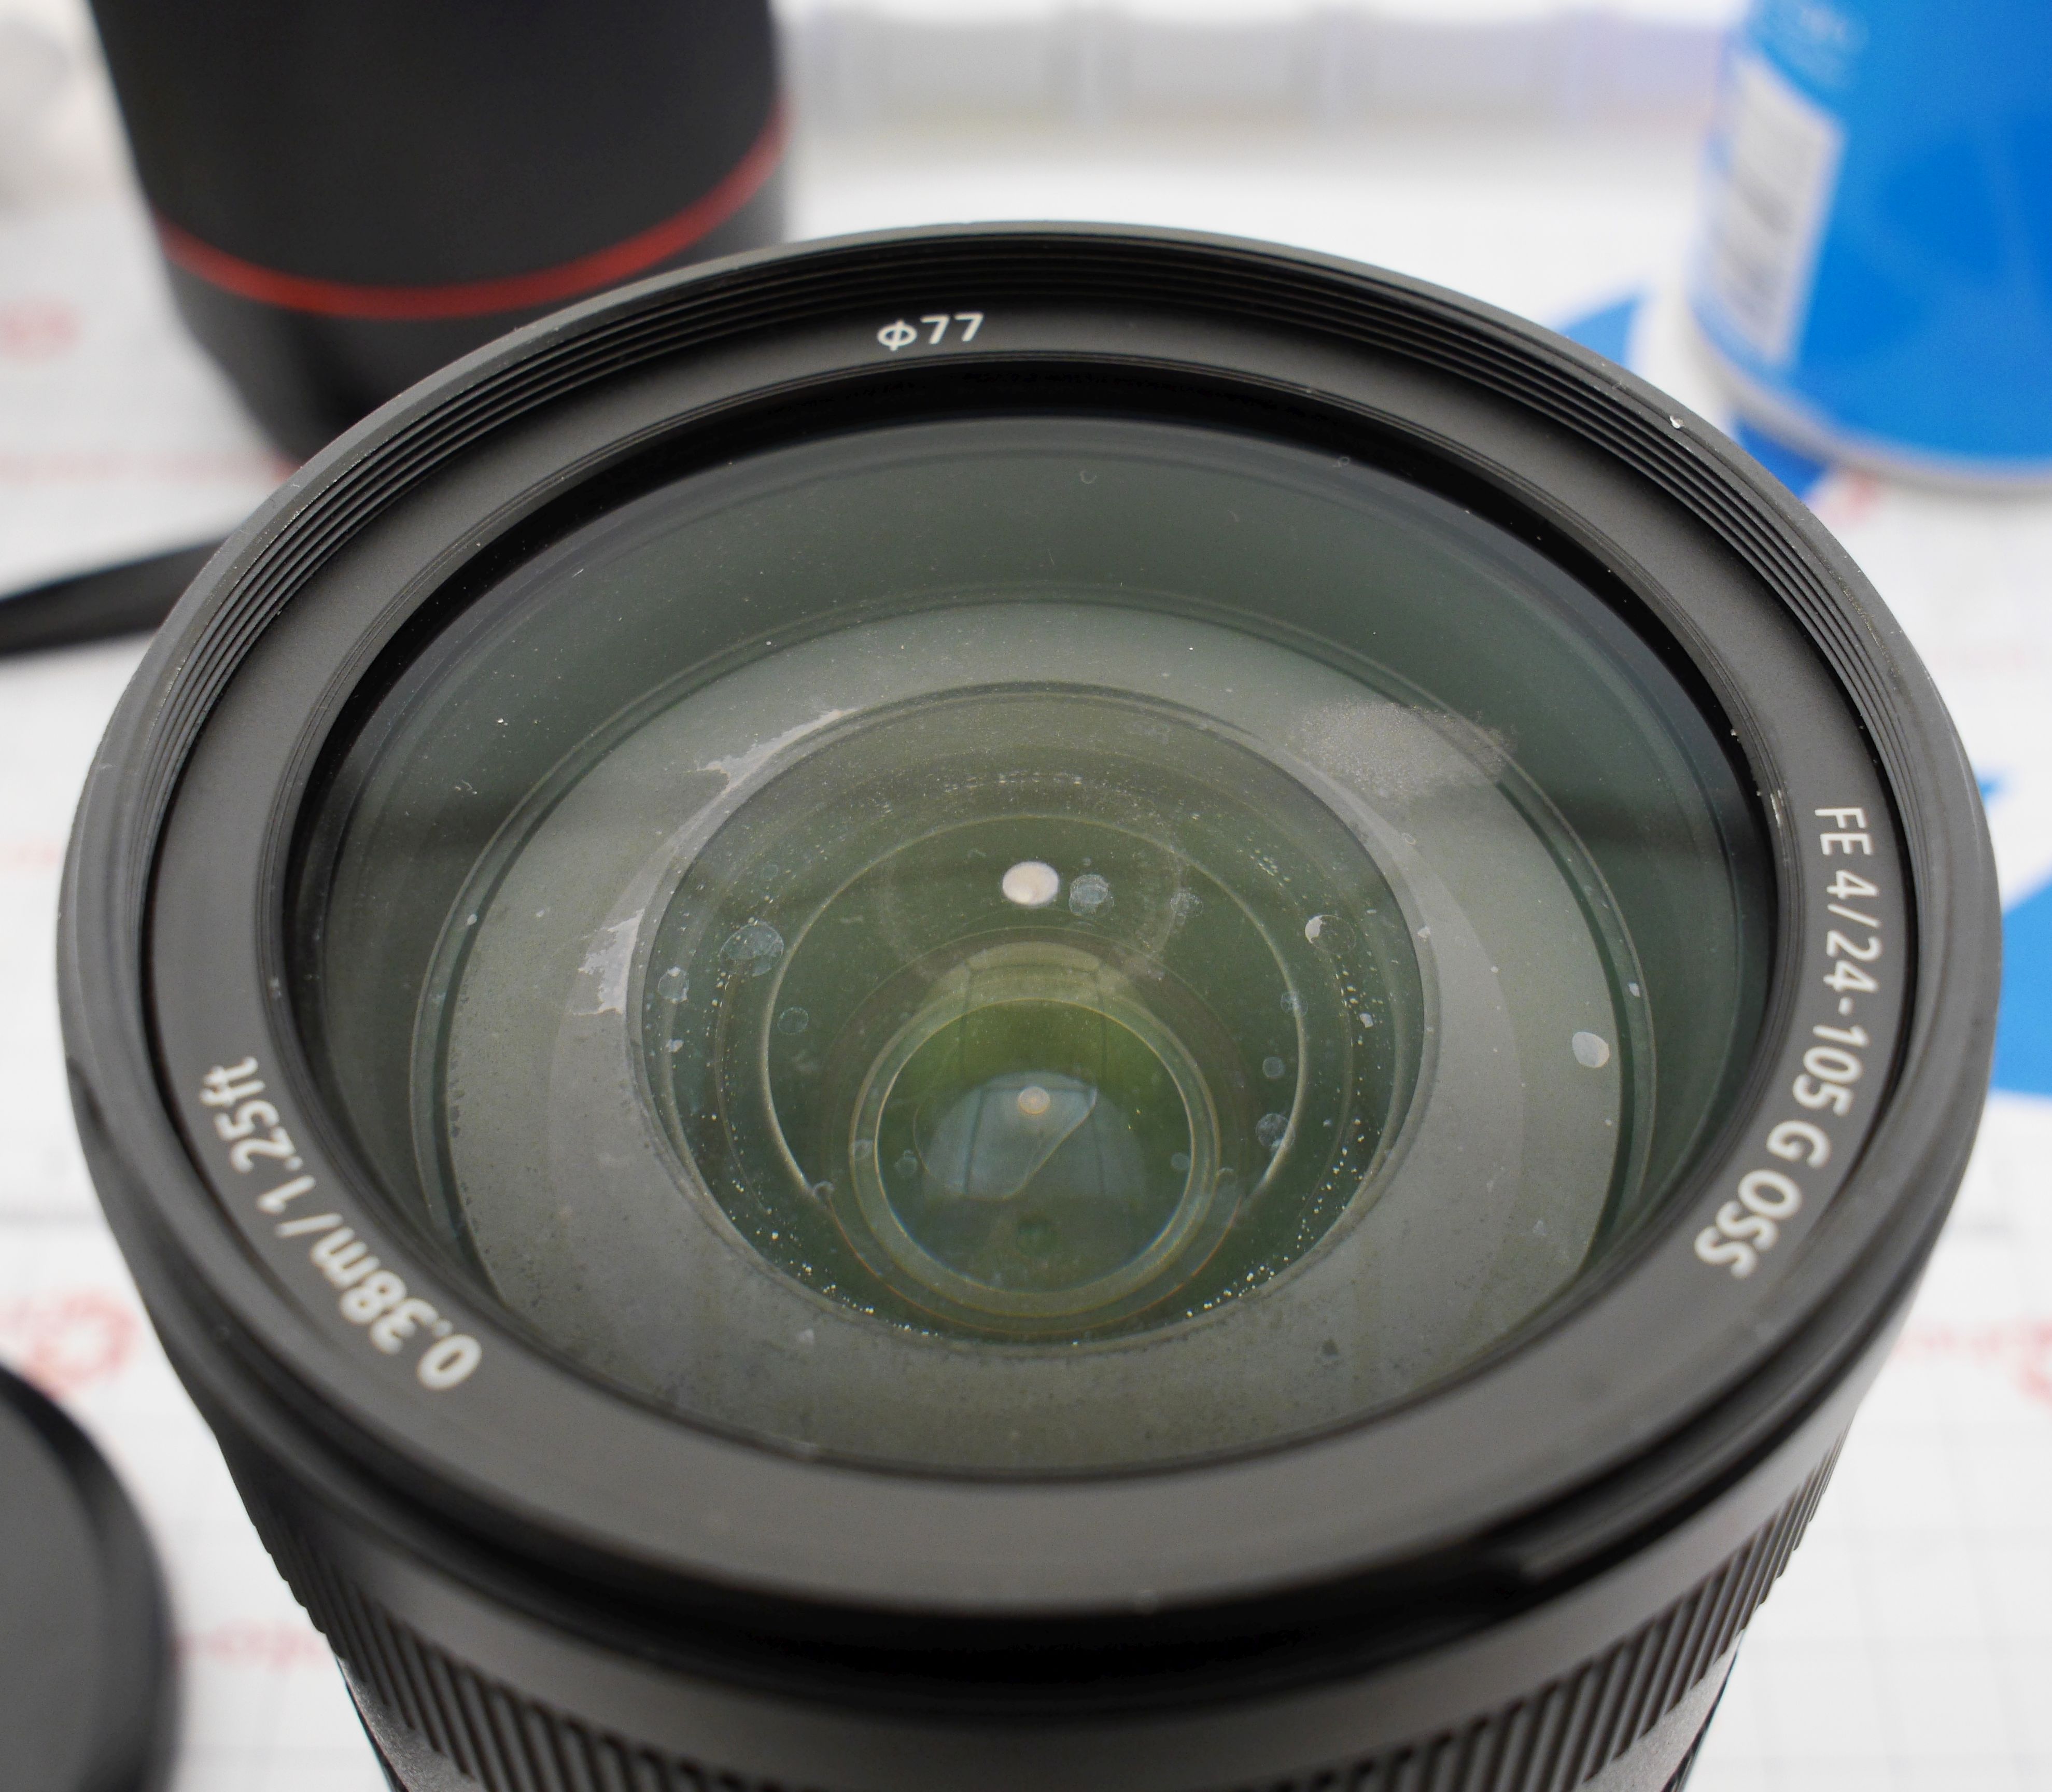
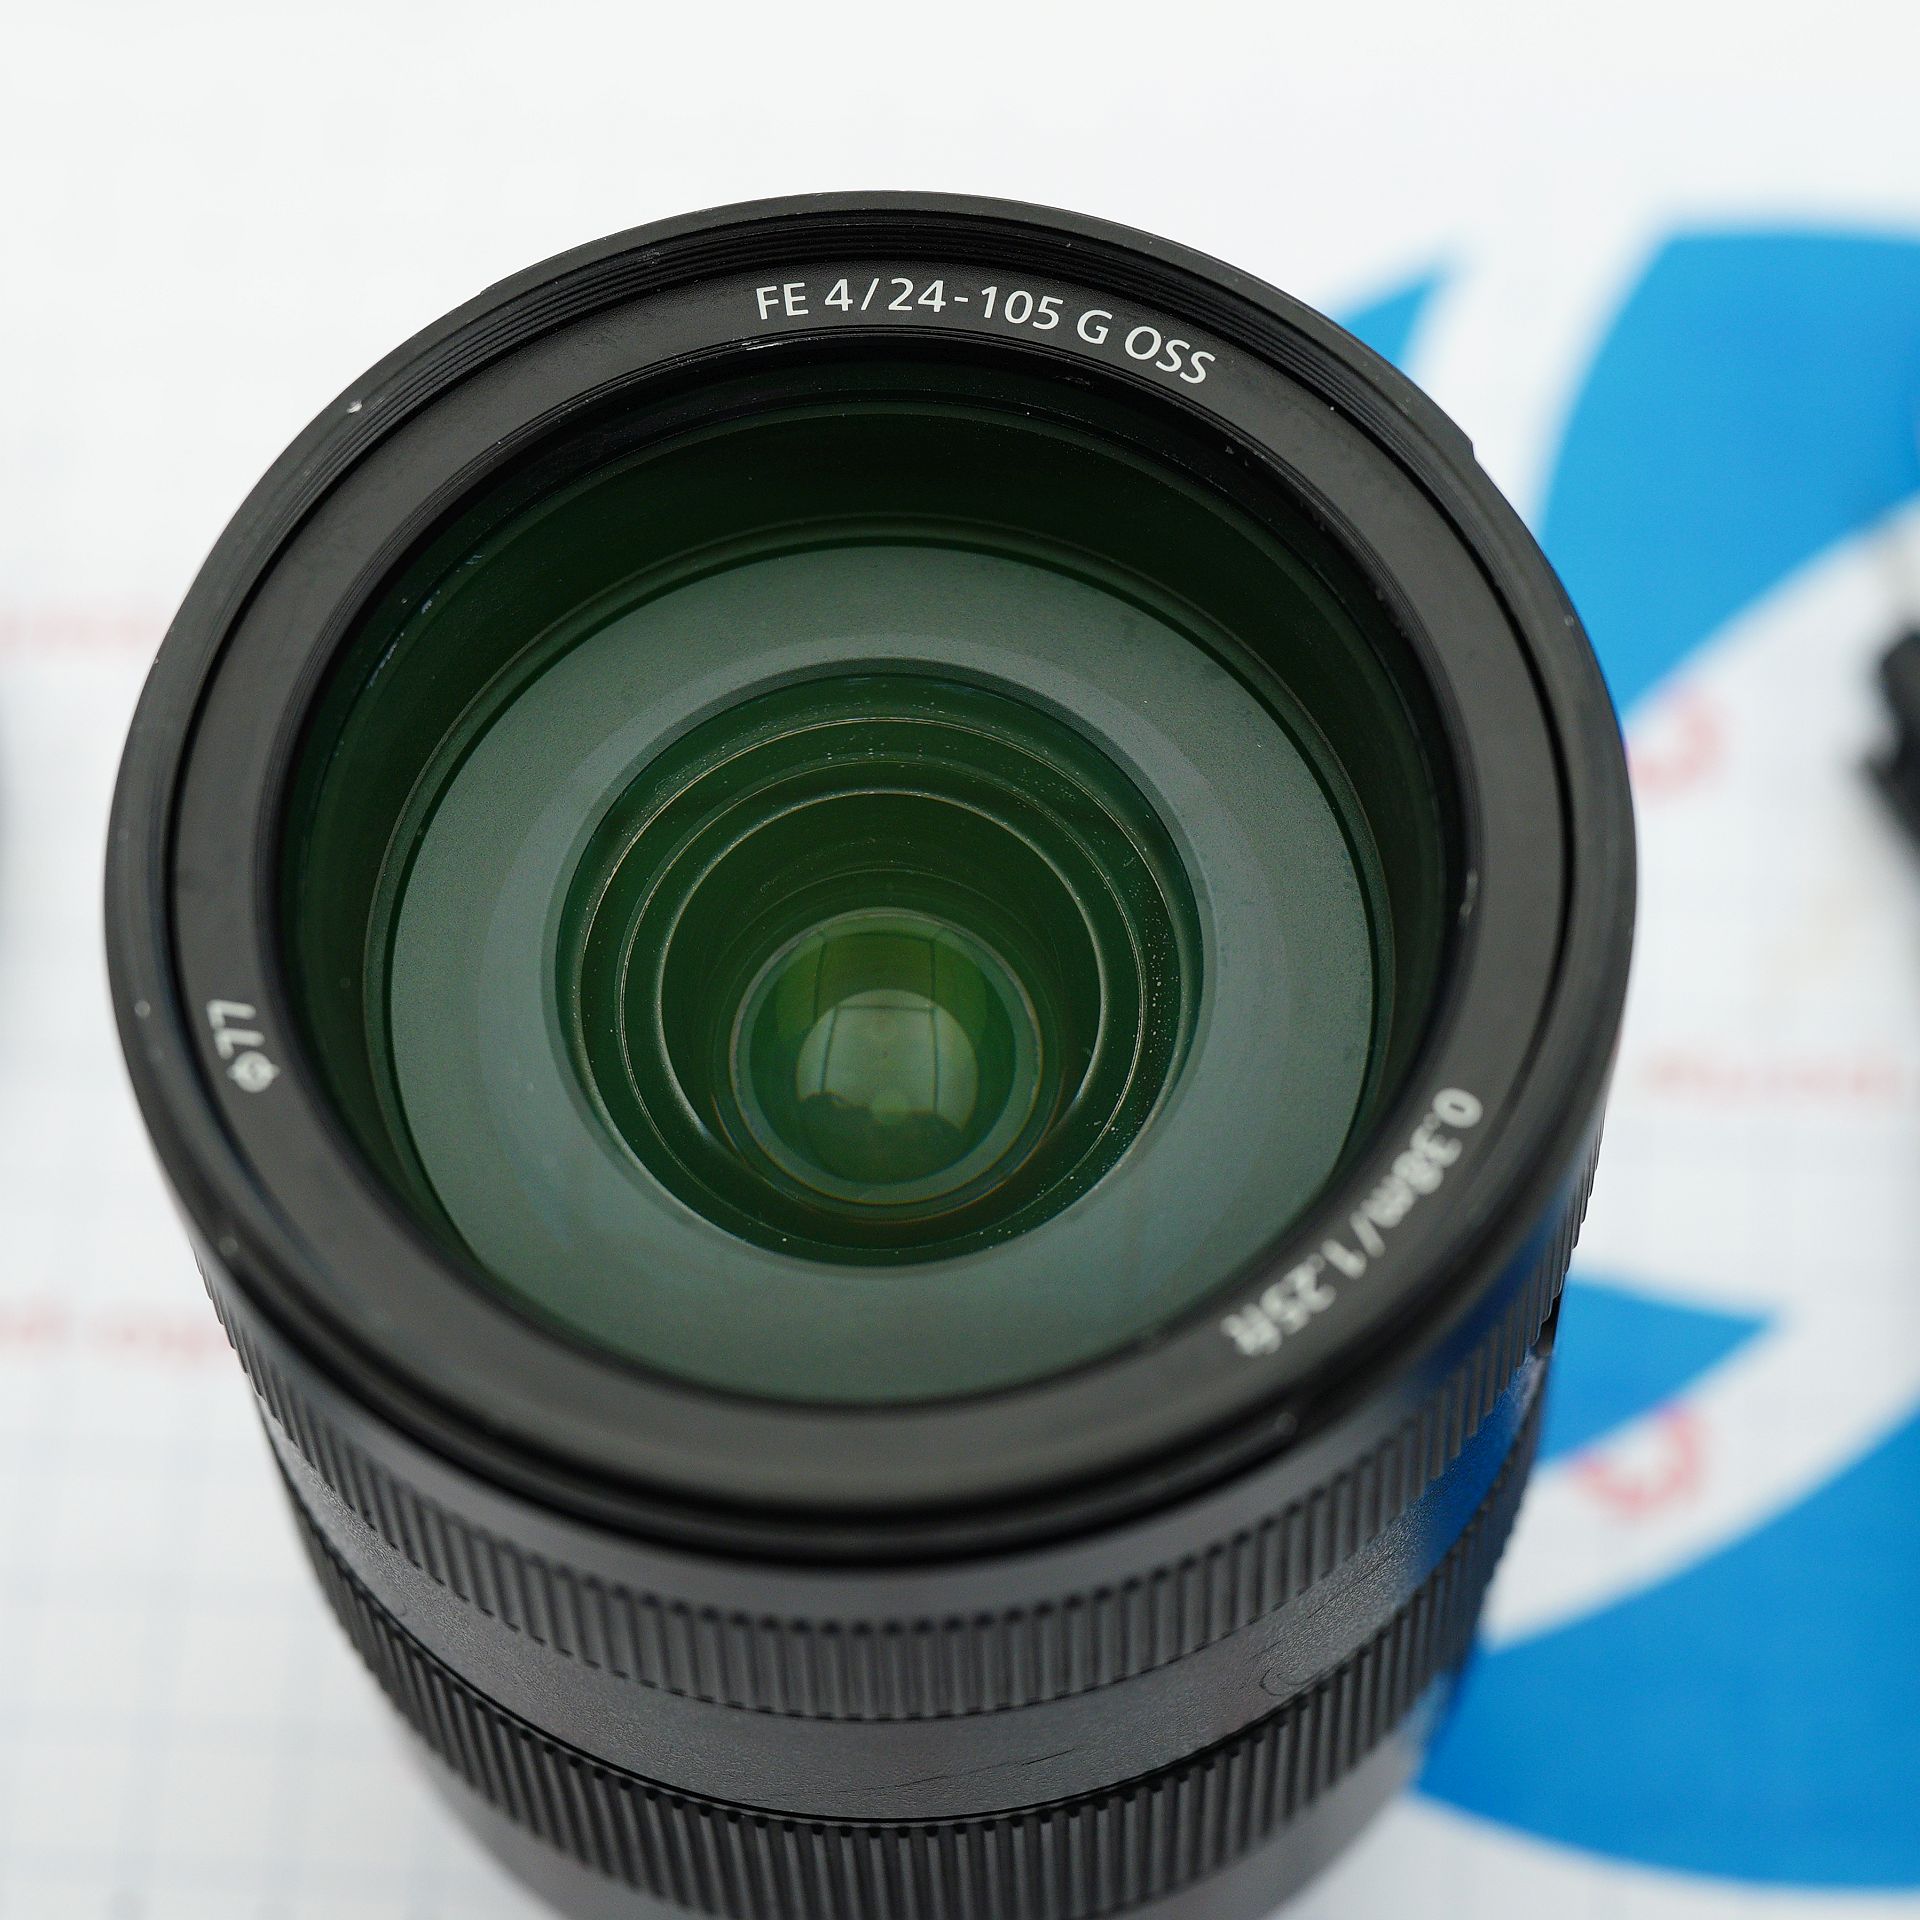
Happy shooting!
Add Comment
This policy contains information about your privacy. By posting, you are declaring that you understand this policy:
- Your name, rating, website address, town, country, state and comment will be publicly displayed if entered.
- Aside from the data entered into these form fields, other stored data about your comment will include:
- Your IP address (not displayed)
- The time/date of your submission (displayed)
- Your email address will not be shared. It is collected for only two reasons:
- Administrative purposes, should a need to contact you arise.
- To inform you of new comments, should you subscribe to receive notifications.
- A cookie may be set on your computer. This is used to remember your inputs. It will expire by itself.
This policy is subject to change at any time and without notice.
These terms and conditions contain rules about posting comments. By submitting a comment, you are declaring that you agree with these rules:
- Although the administrator will attempt to moderate comments, it is impossible for every comment to have been moderated at any given time.
- You acknowledge that all comments express the views and opinions of the original author and not those of the administrator.
- You agree not to post any material which is knowingly false, obscene, hateful, threatening, harassing or invasive of a person's privacy.
- The administrator has the right to edit, move or remove any comment for any reason and without notice.
Failure to comply with these rules may result in being banned from submitting further comments.
These terms and conditions are subject to change at any time and without notice.
Comments