- Posted on
- • Lens repairs
Sony FE 85mm f/1.8 - a simple fix for a sophisticated lens
- Author
-
-

- User
- Photo-parts
- Posts by this author
- Posts by this author
-

The first number that comes to mind when someone says "portrait lens" is undeniably 85mm. If you’ve got deep pockets and strong arms, you go for the f/1.4 (or even f/1.2); for less demanding photographers, there's f/1.8. Every major manufacturer offers a mass-market 85/1.8, and for example, the Canon 85mm f/1.8 USM is a true repair classic - often seen with worn optical encoders or a finicky aperture.
This is our first time opening up the Sony FE 85mm f/1.8 - and we're excited to share it. So, what's wrong with it? Externally, the lens looks flawless. But it isn't always detected by the camera - the aperture value appears and disappears - and even when it is detected, it can't focus to infinity.
Sounds like a simple fix, I thought. And in the end, it was. But let's do a full teardown - the inside is well worth a look.
You can start disassembly from either the bayonet mount or the front element, but you'll need to go in from both directions eventually. Once the front lens and filter mount are removed, the lens can't be placed face-down on a surface without damaging the internal lens group. So it's probably better to start from the rear.
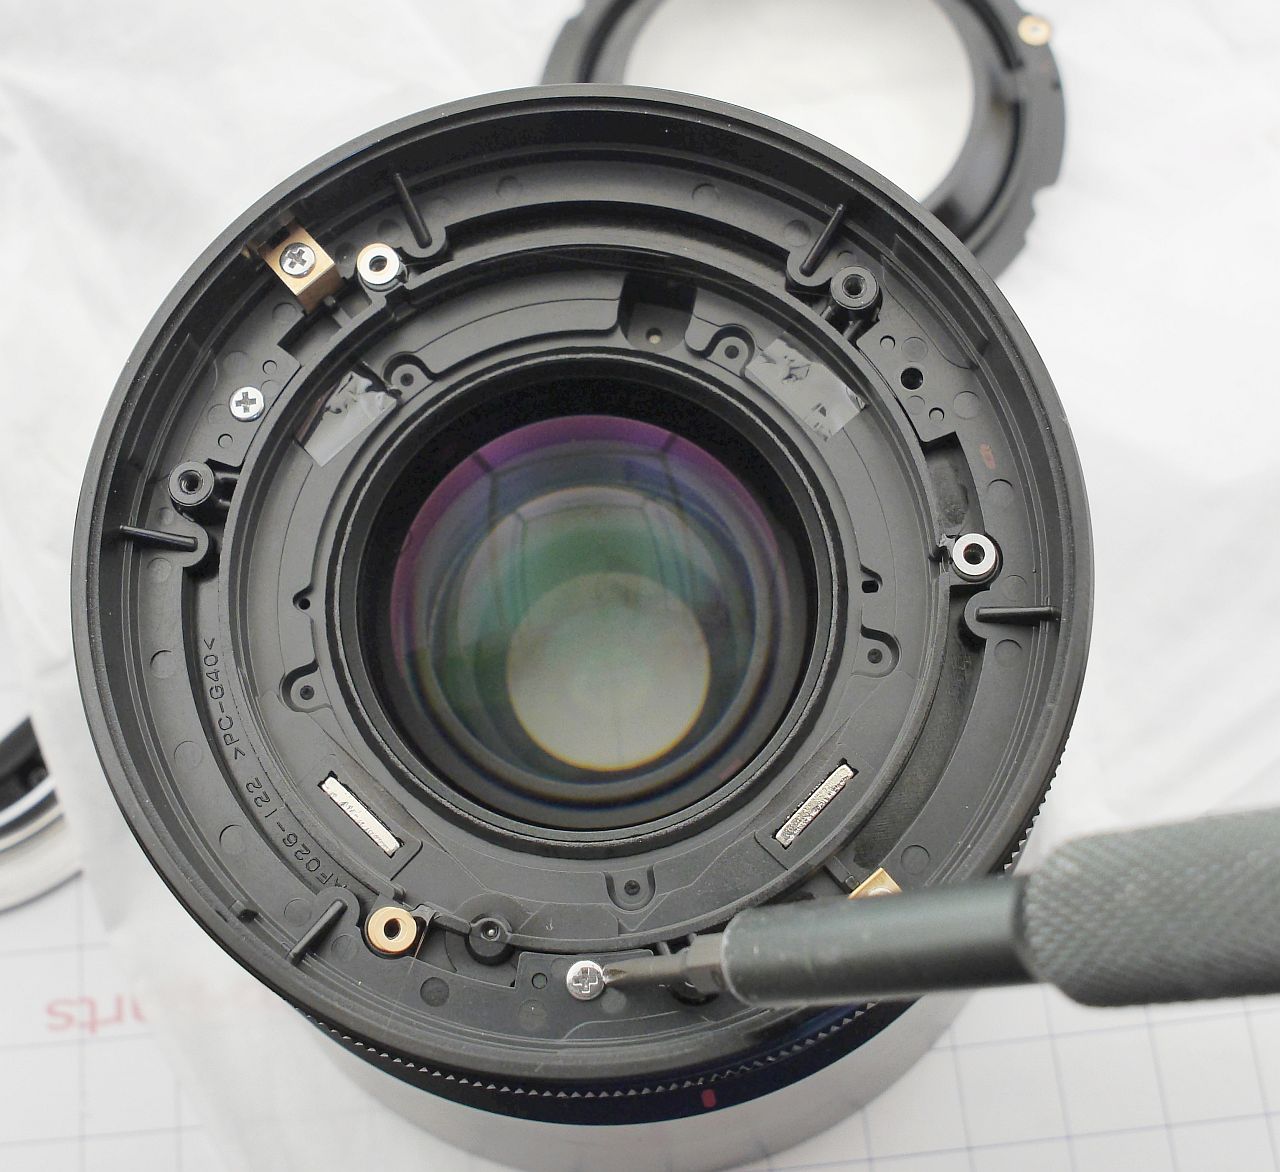
That part's easy - just remove the 4 screws holding the bayonet, lift the mount, disconnect the flex connector, and mark or secure the adjustment shims.
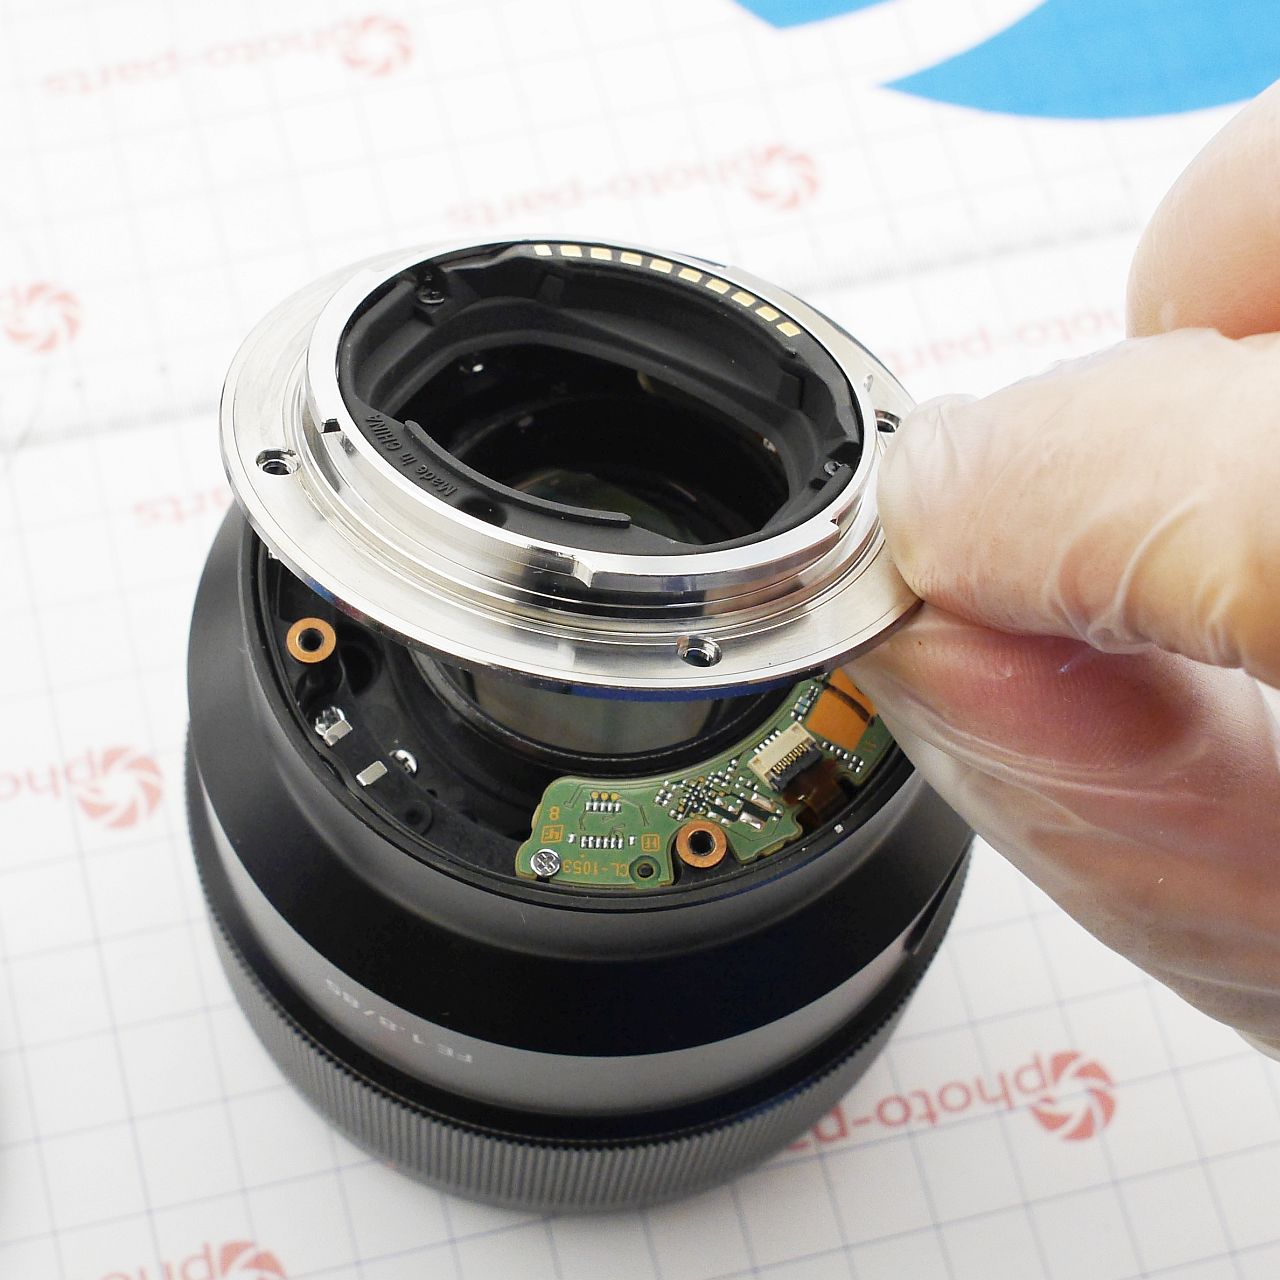
In my case, there were three shims. I searched for a fourth one, but judging by the impressions, there never was one - three were used to compensate for field tilt. Pro tip: either immediately screw the bayonet screws back to hold the shims in place, or secure them with tiny drops of safe adhesive (cyanoacrylate/super glue is not safe for optics!).
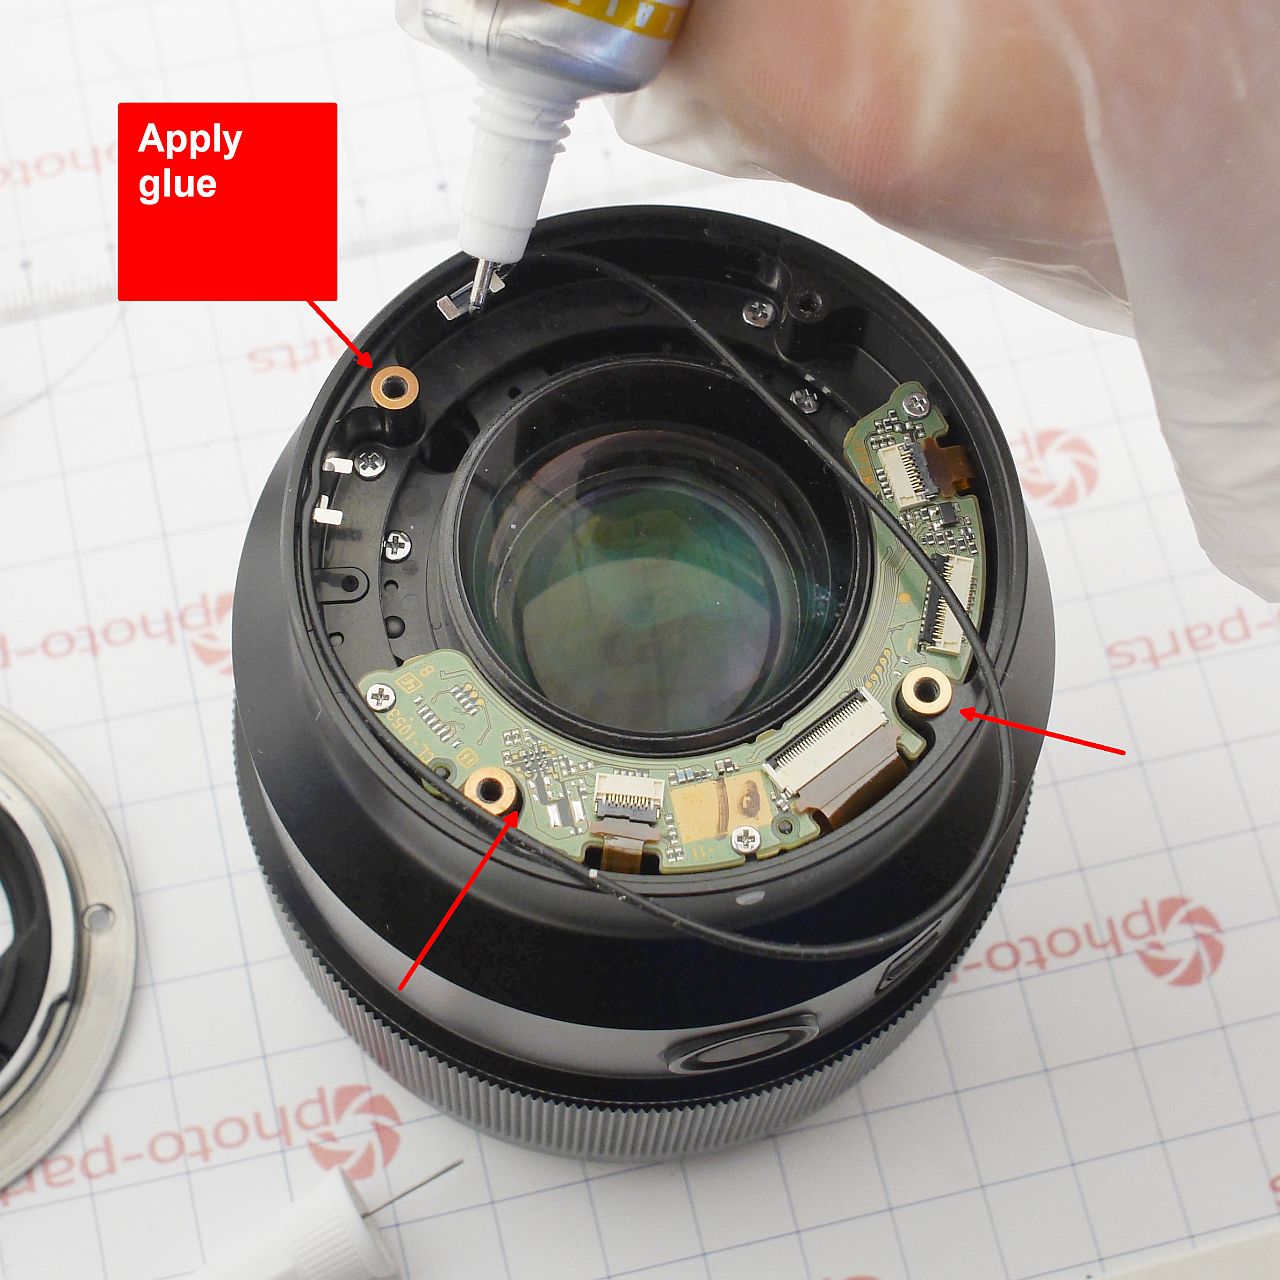
With the shims fixed, connectors unclipped, flexes disconnected, and the main board removed, you can unscrew four more screws holding the outer shell and remove it:
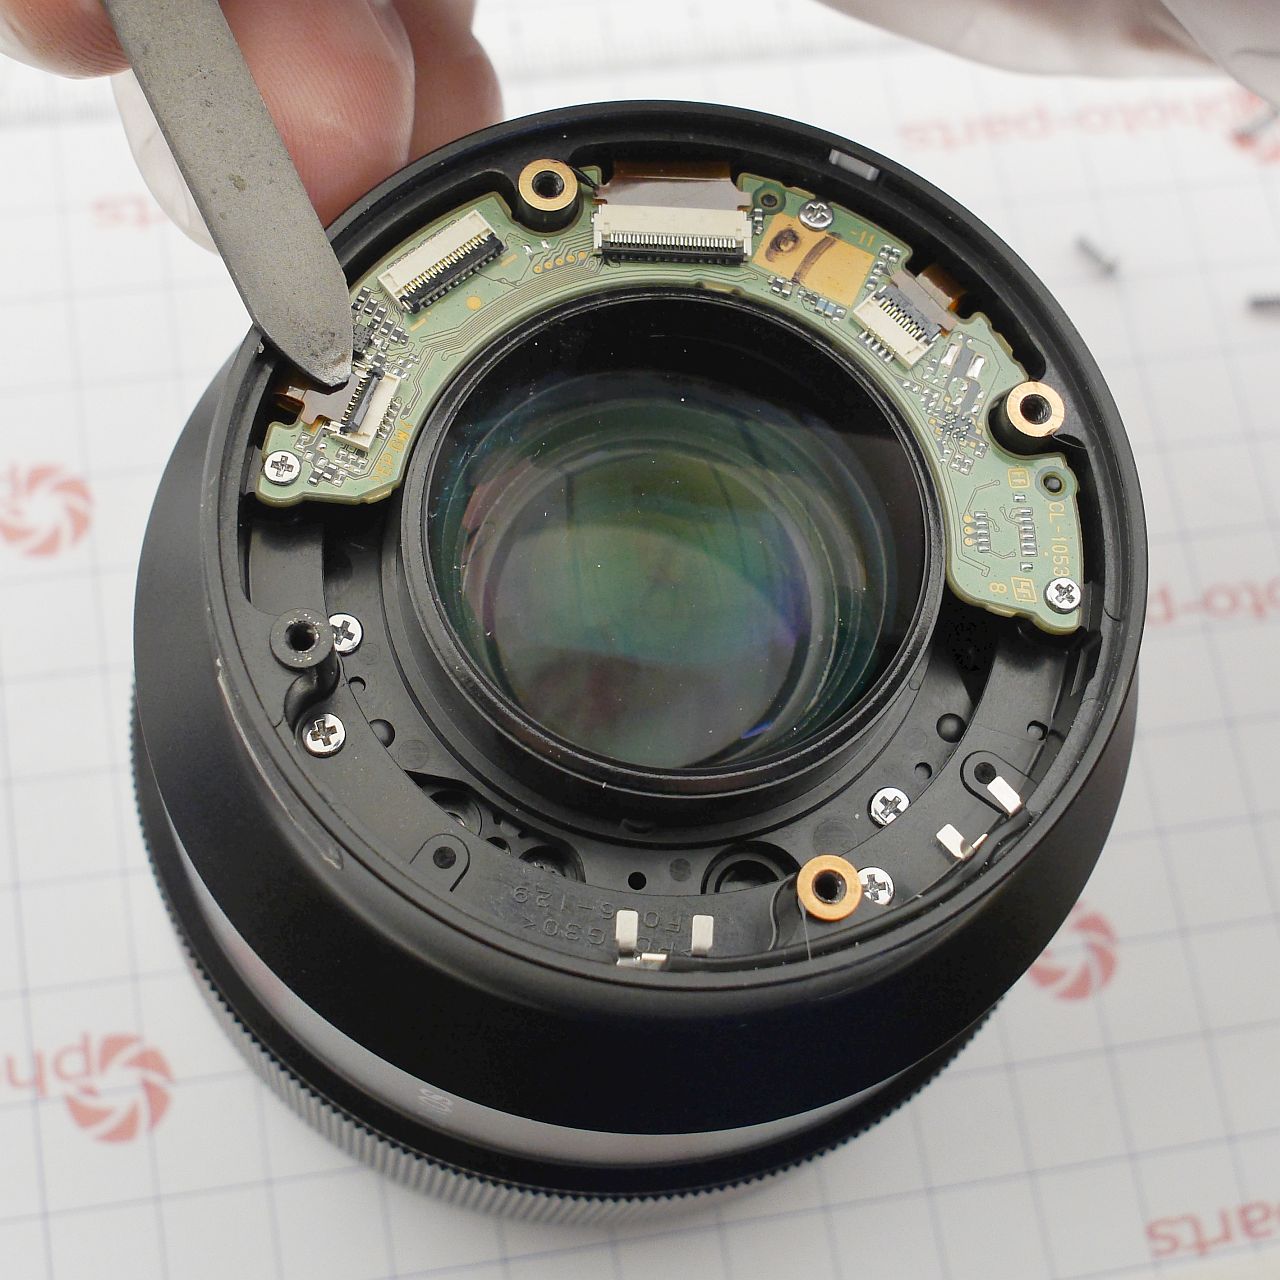
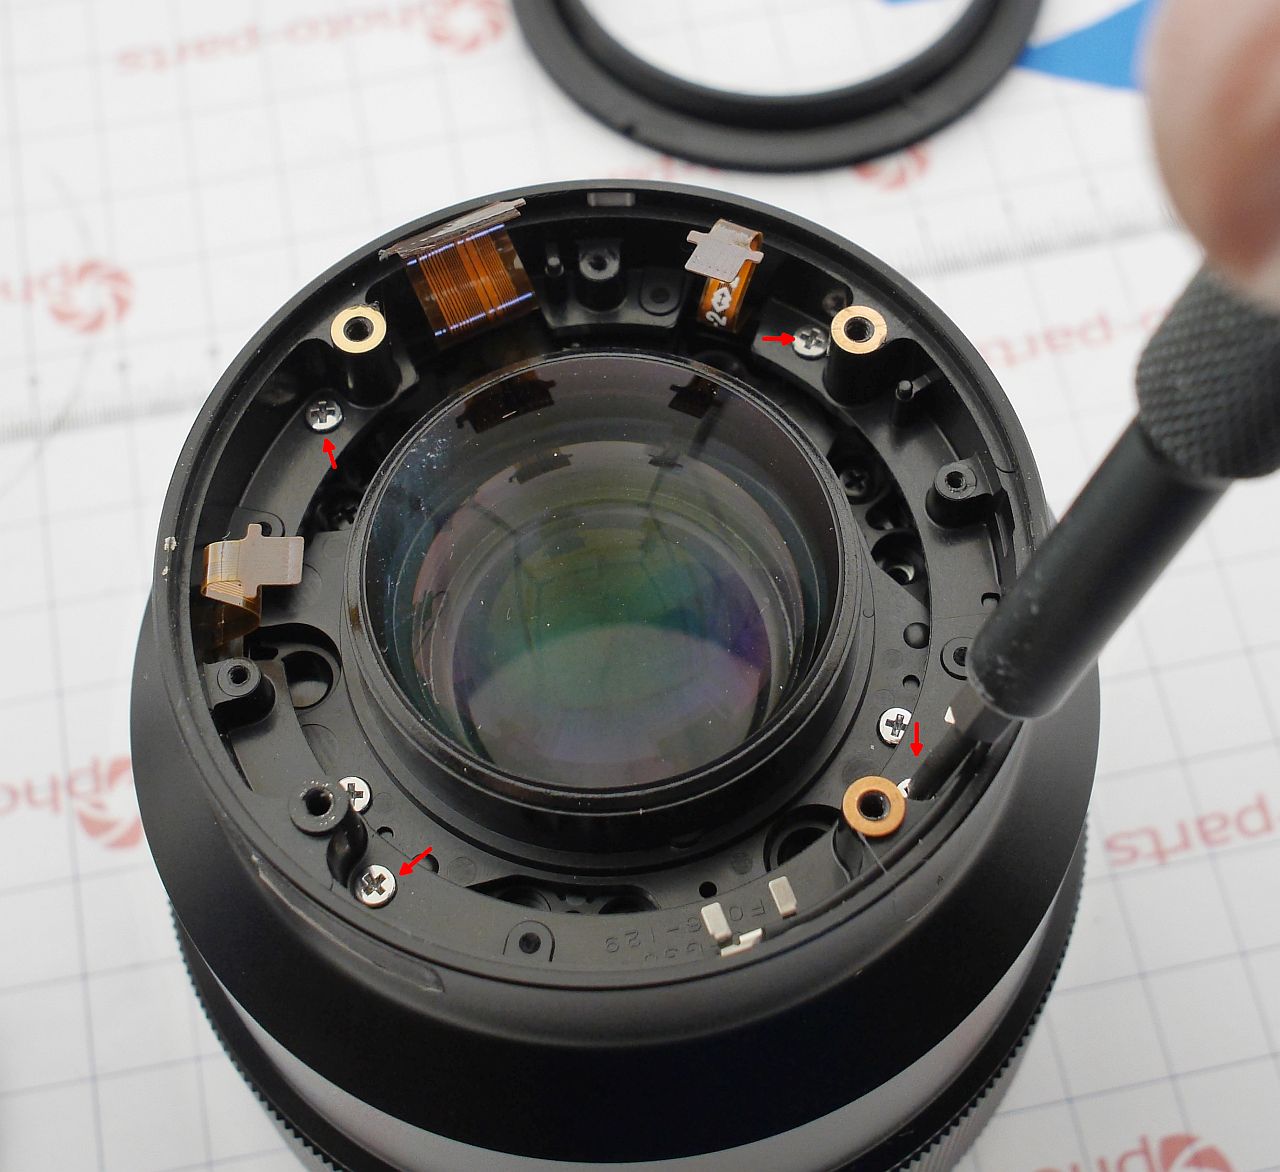
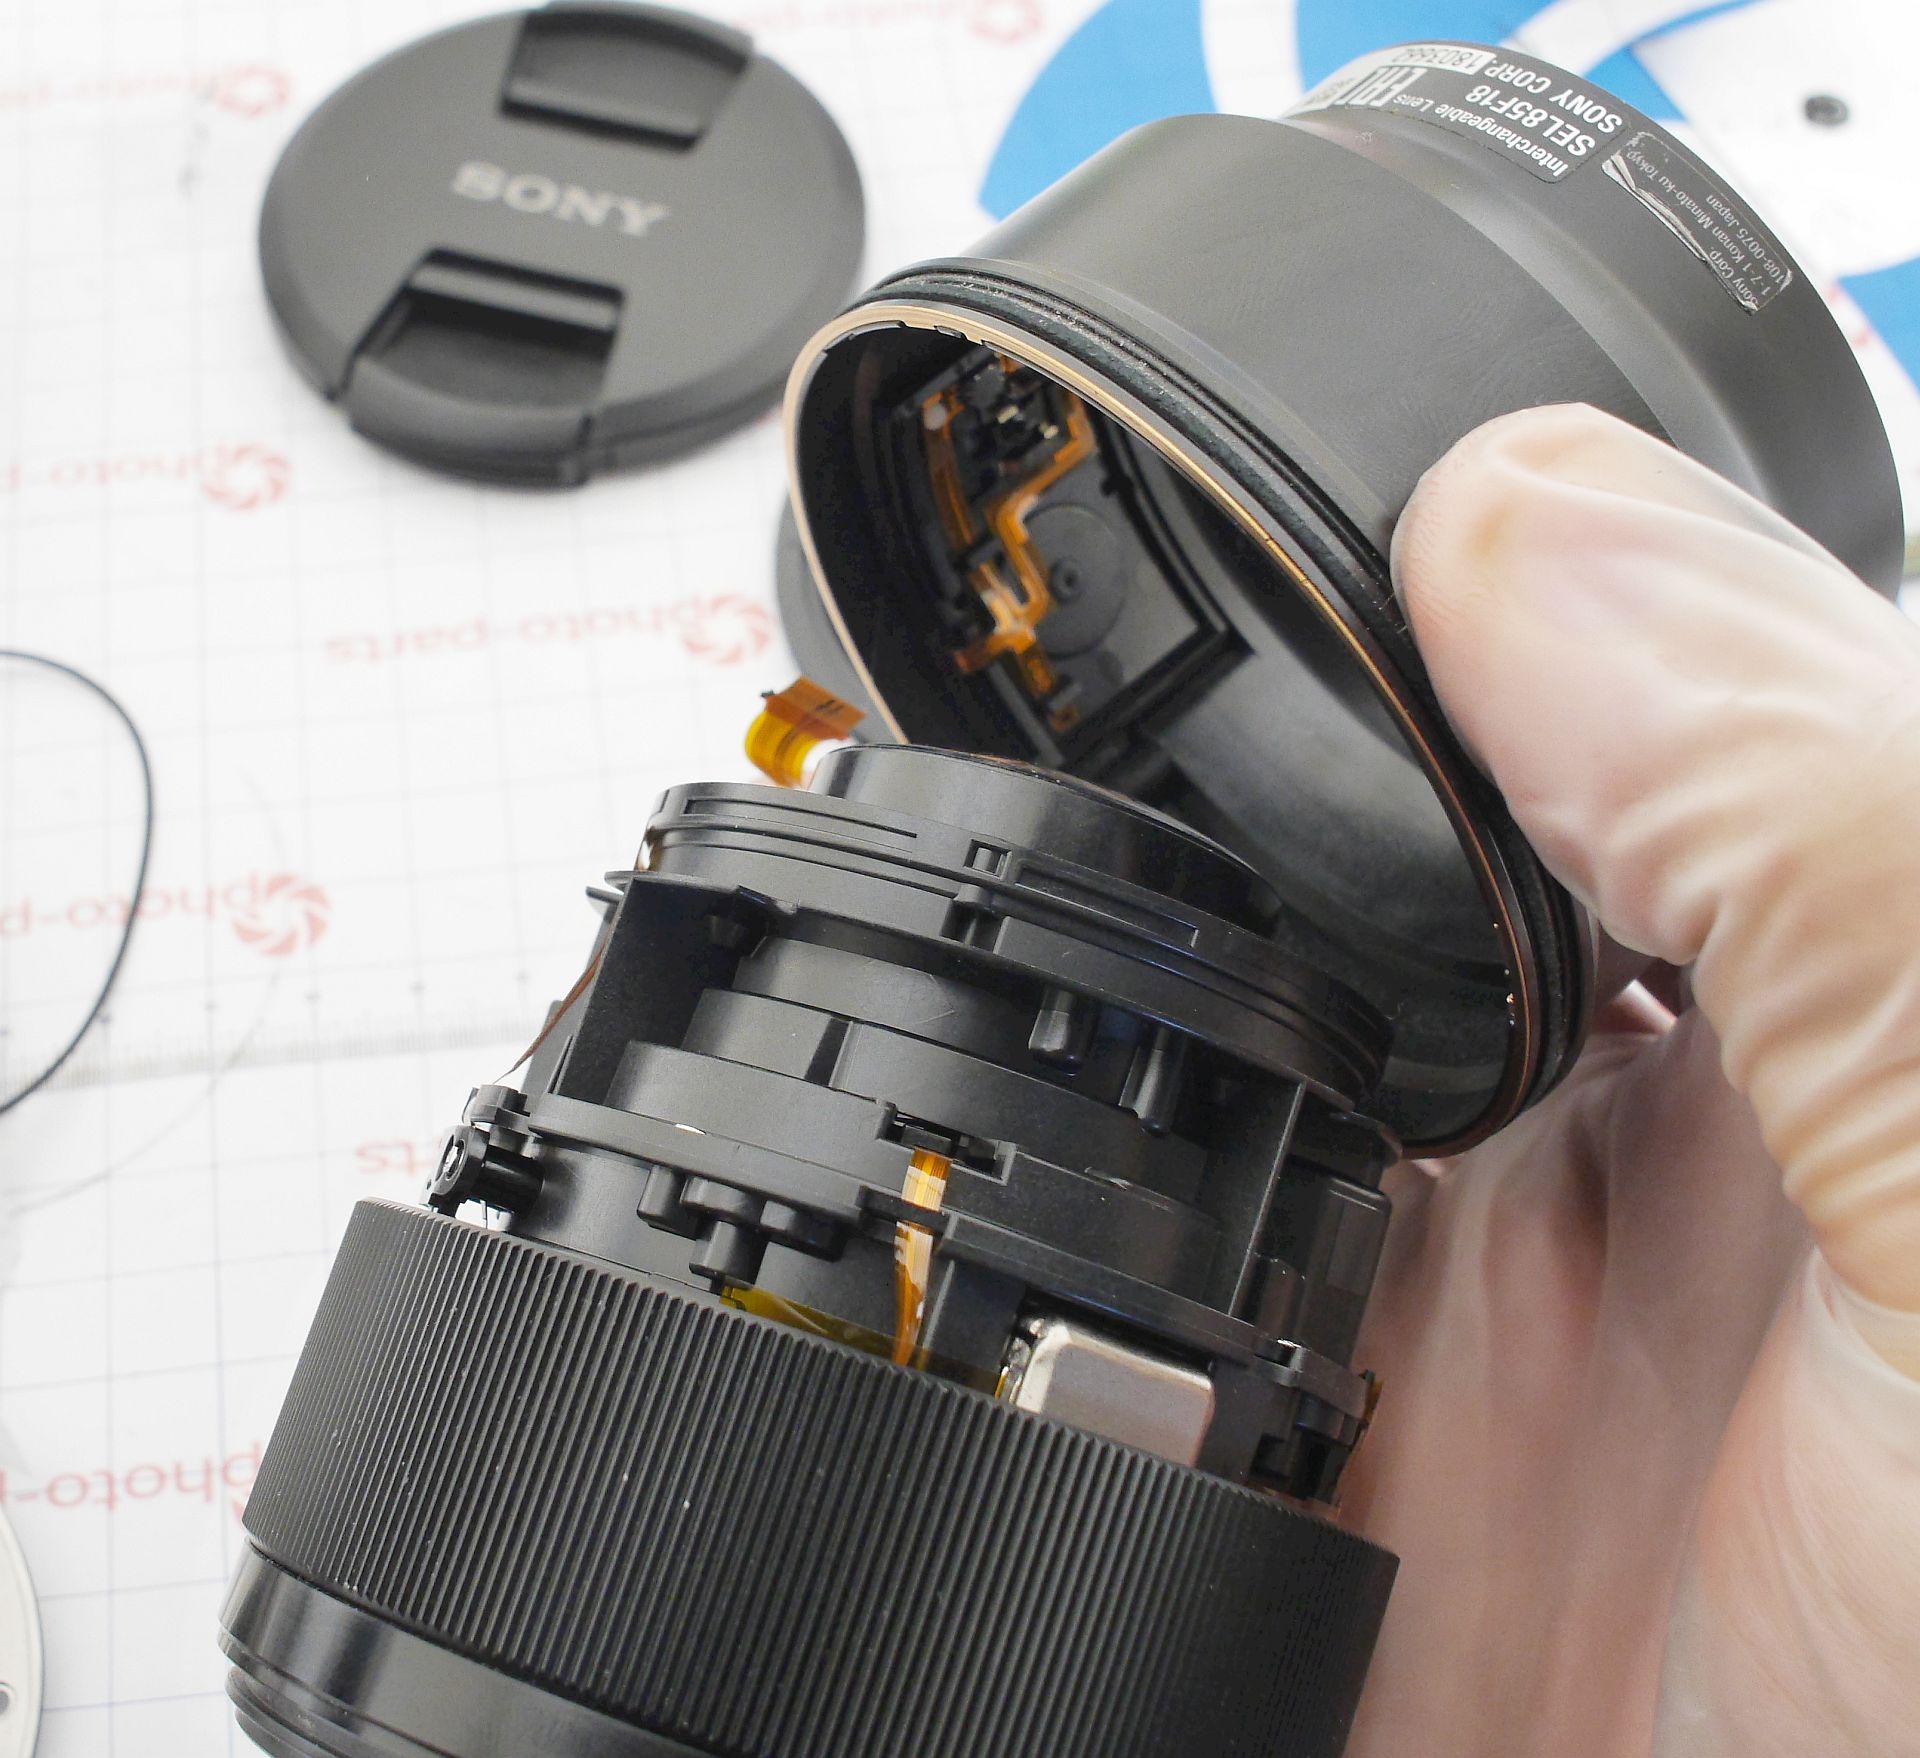
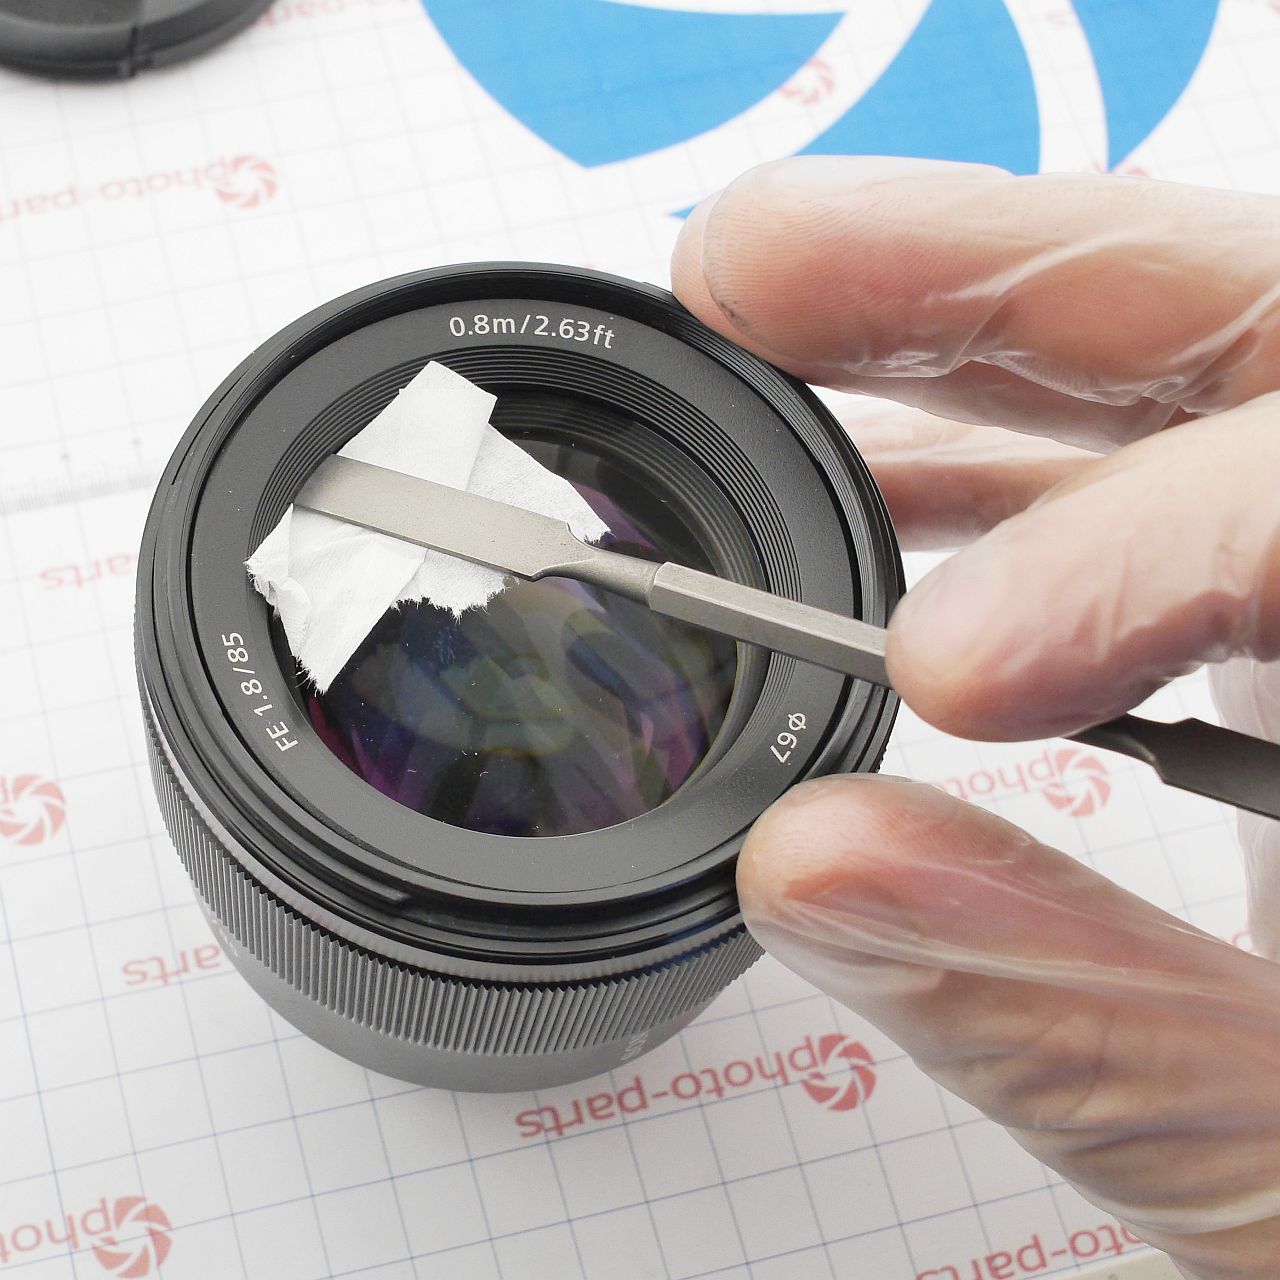
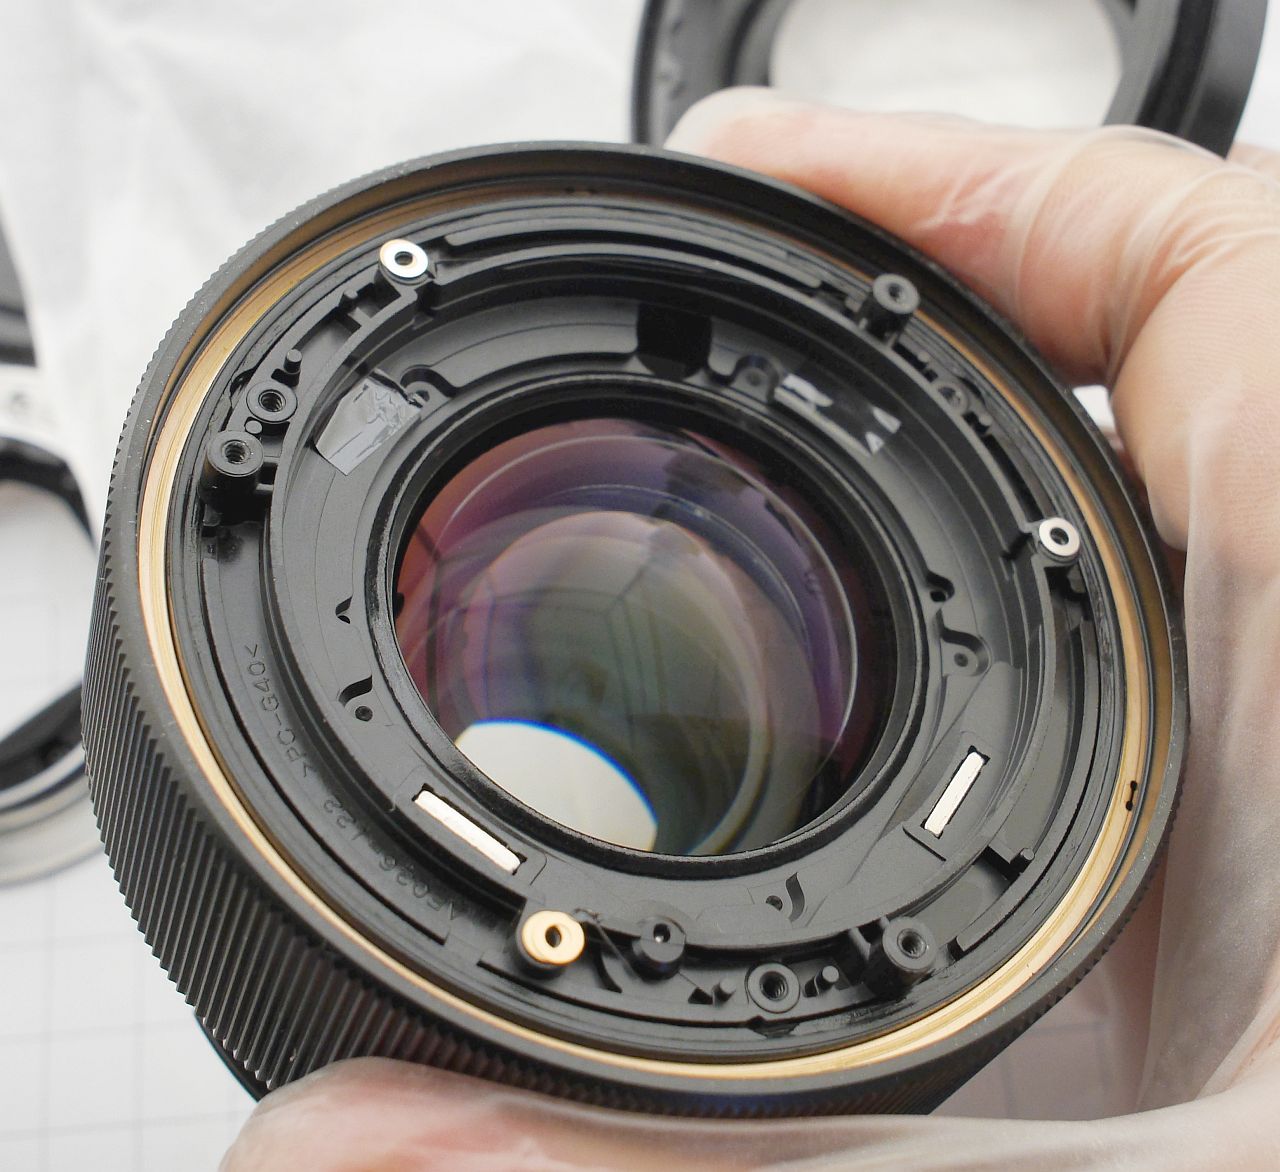
Now for the front section. Under the decorative nameplate ring are four screws. The ring isn't threaded, just glued - so gently pry it off using a thin tool with a tissue underneath to protect the housing:
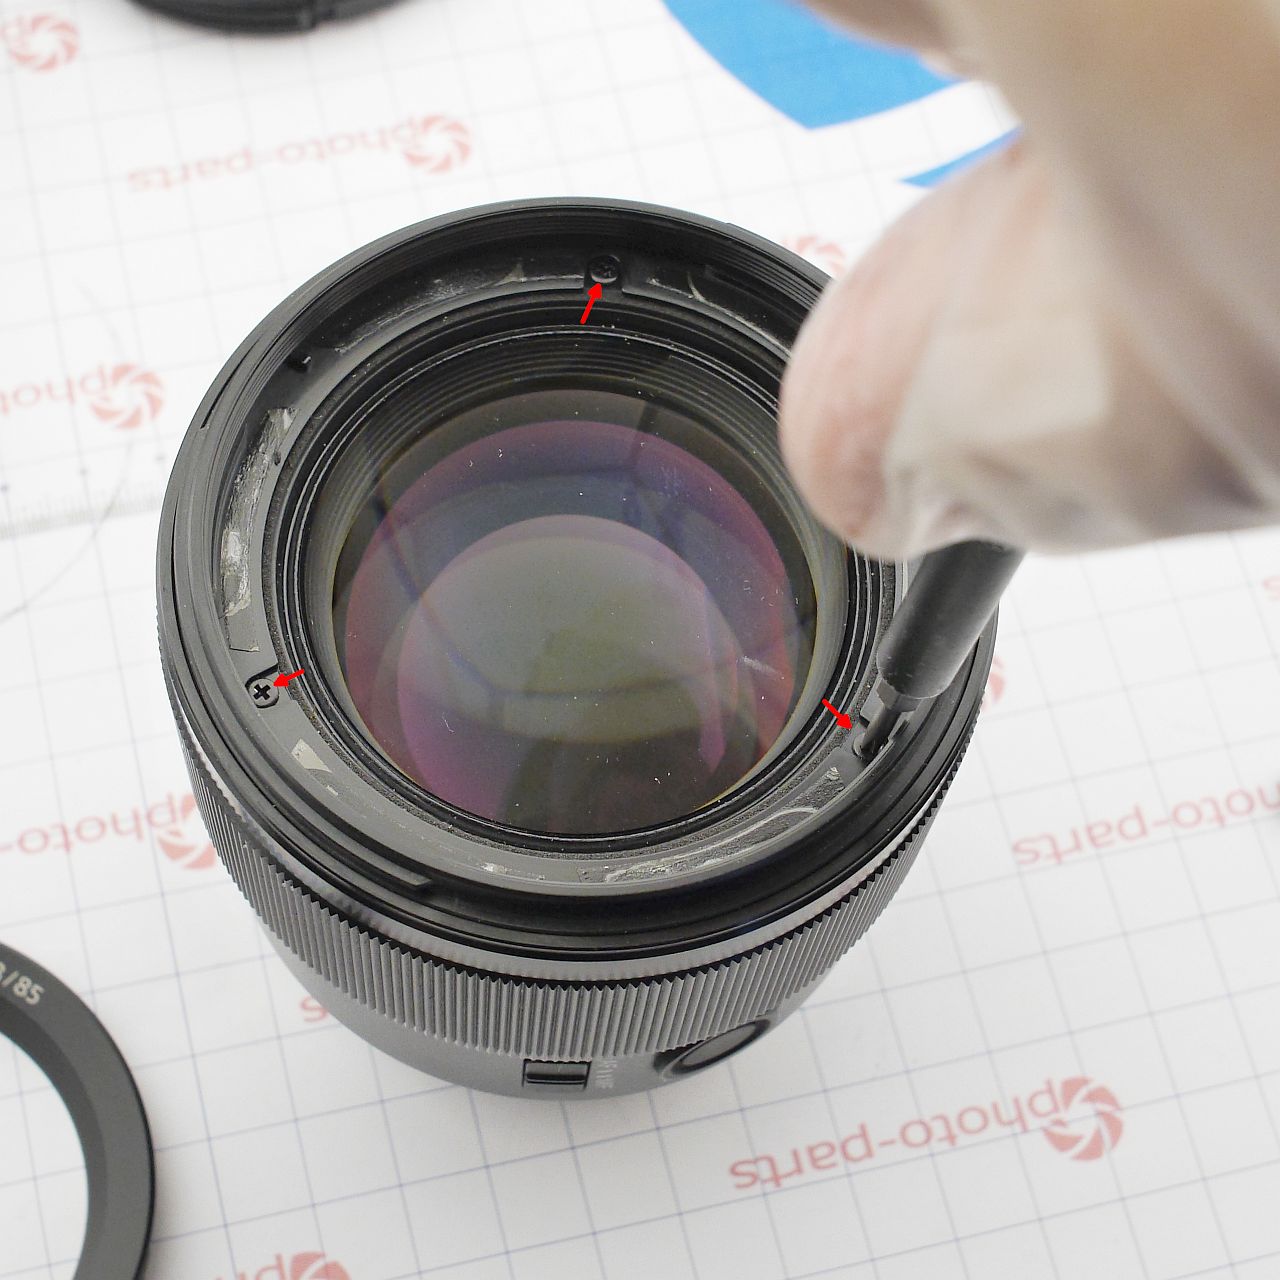
Next comes the front lens element. Good news: there's no centering adjustment, so removing it won't ruin alignment. Bad news: there are shims under it, and each one is actually a stack of thinner shims. They're unsecured and tend to scatter like confetti. Let's treat them like the bayonet shims:
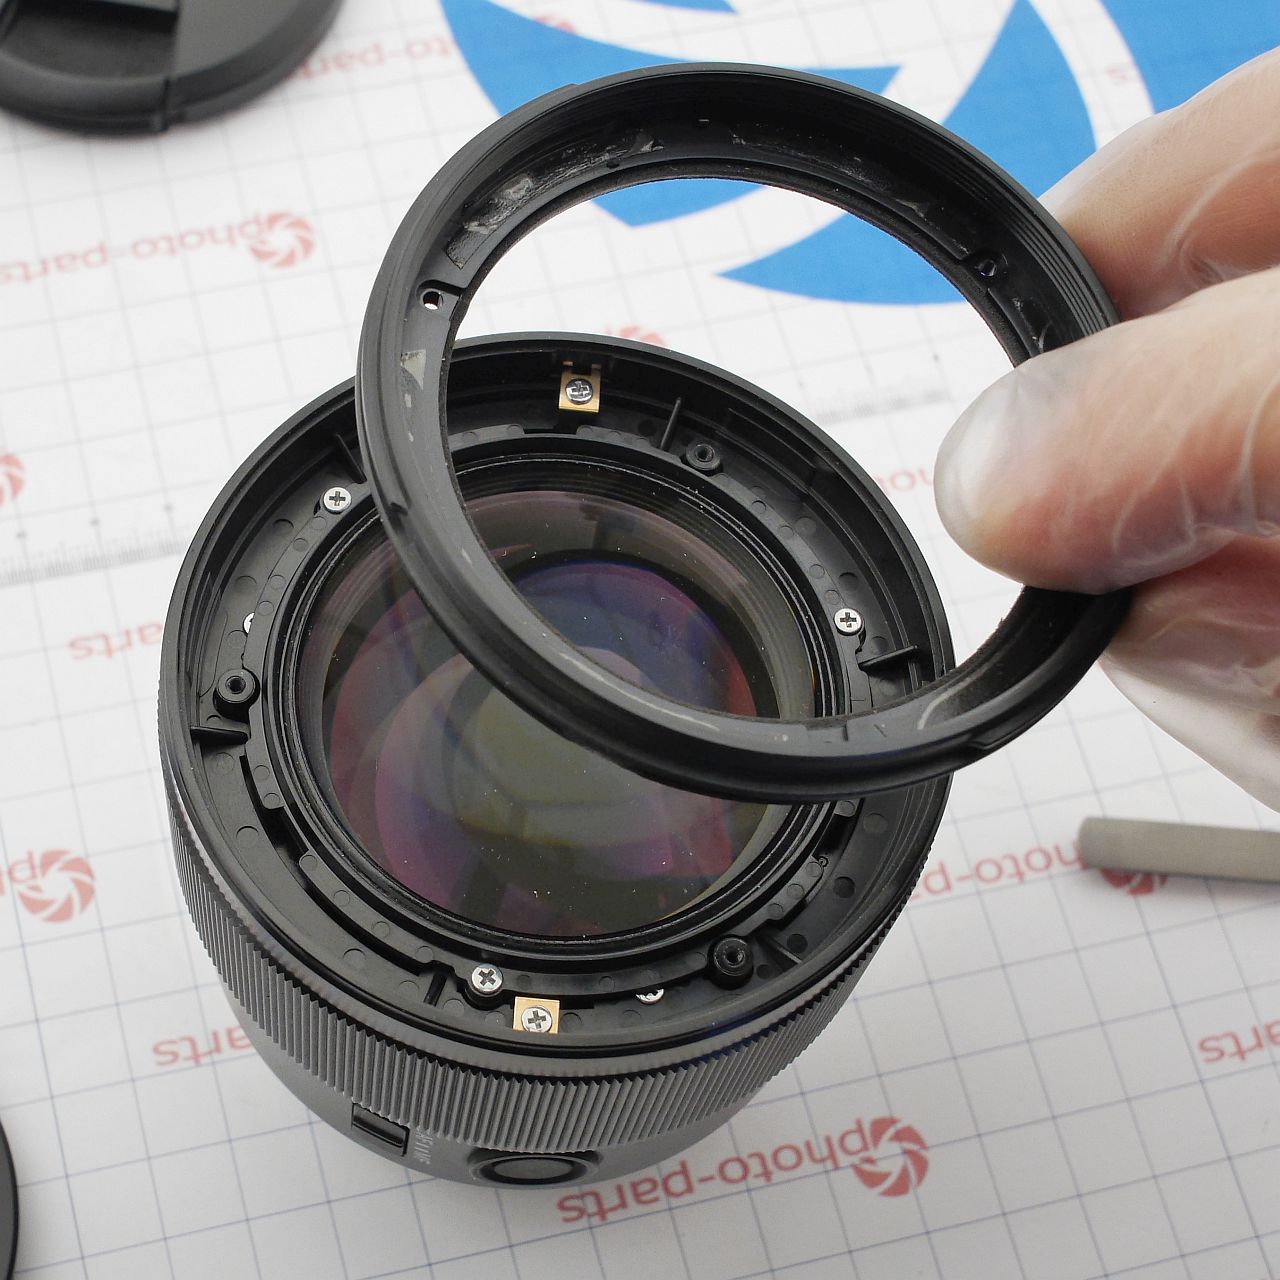
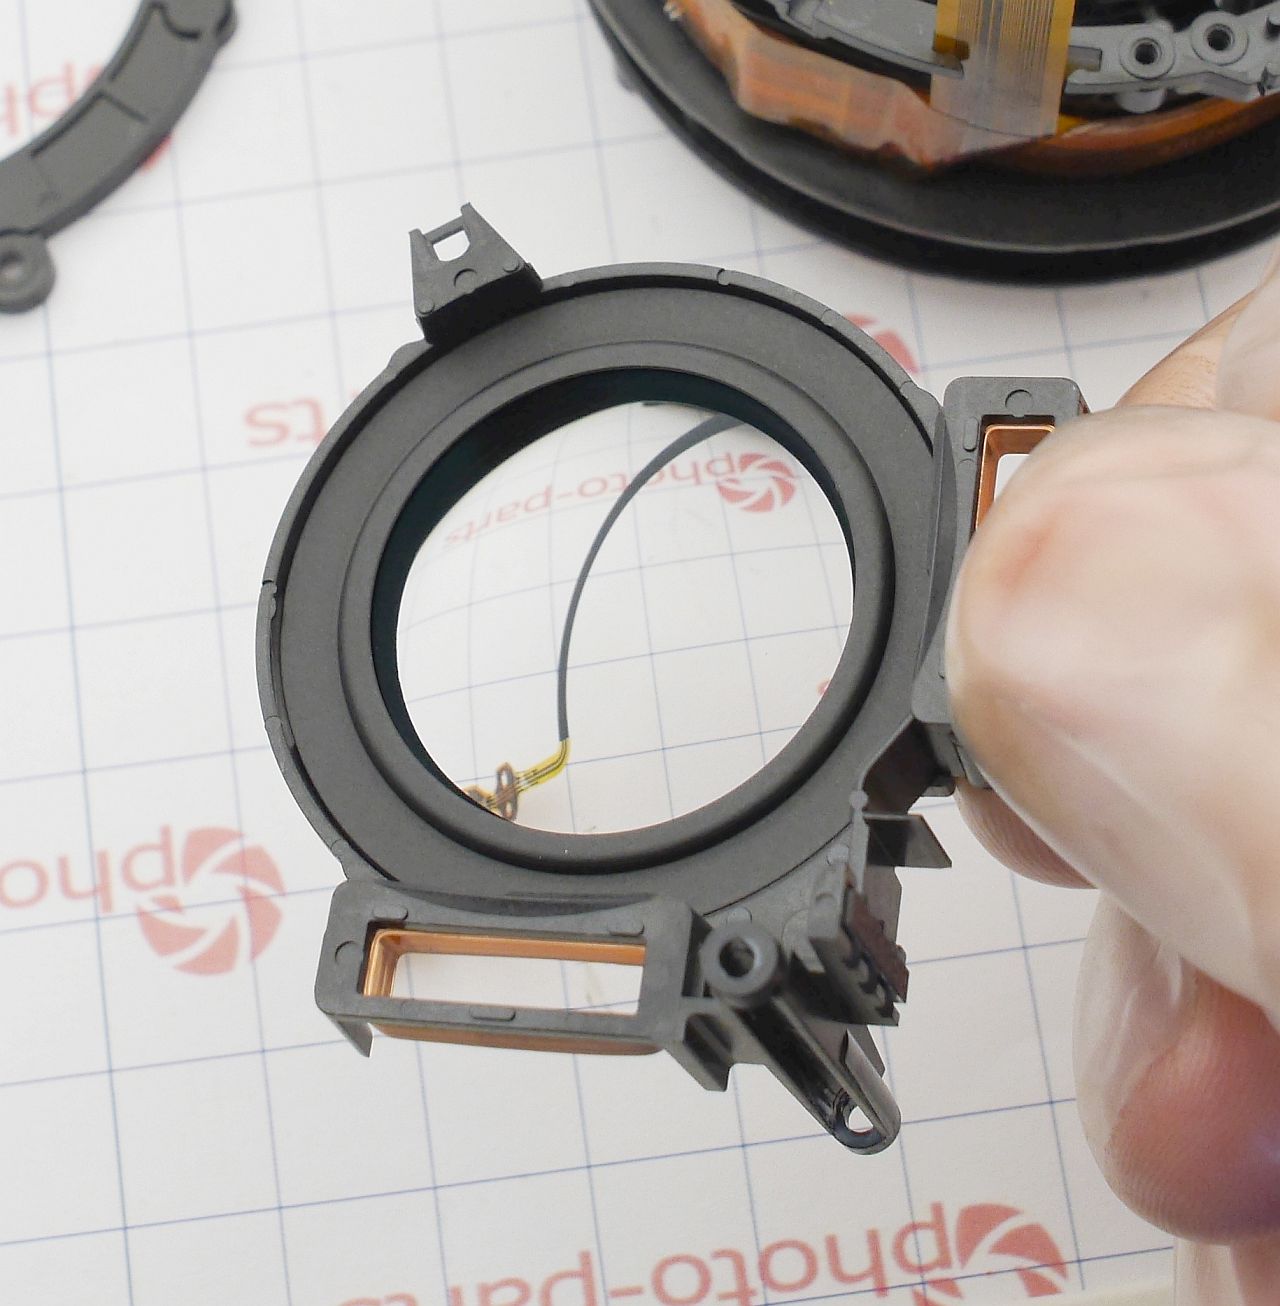
Once the front shims are secured (all three of mine were made of identical shim stacks), you can unscrew the filter mount and remove the filter ring and focus ring in order:
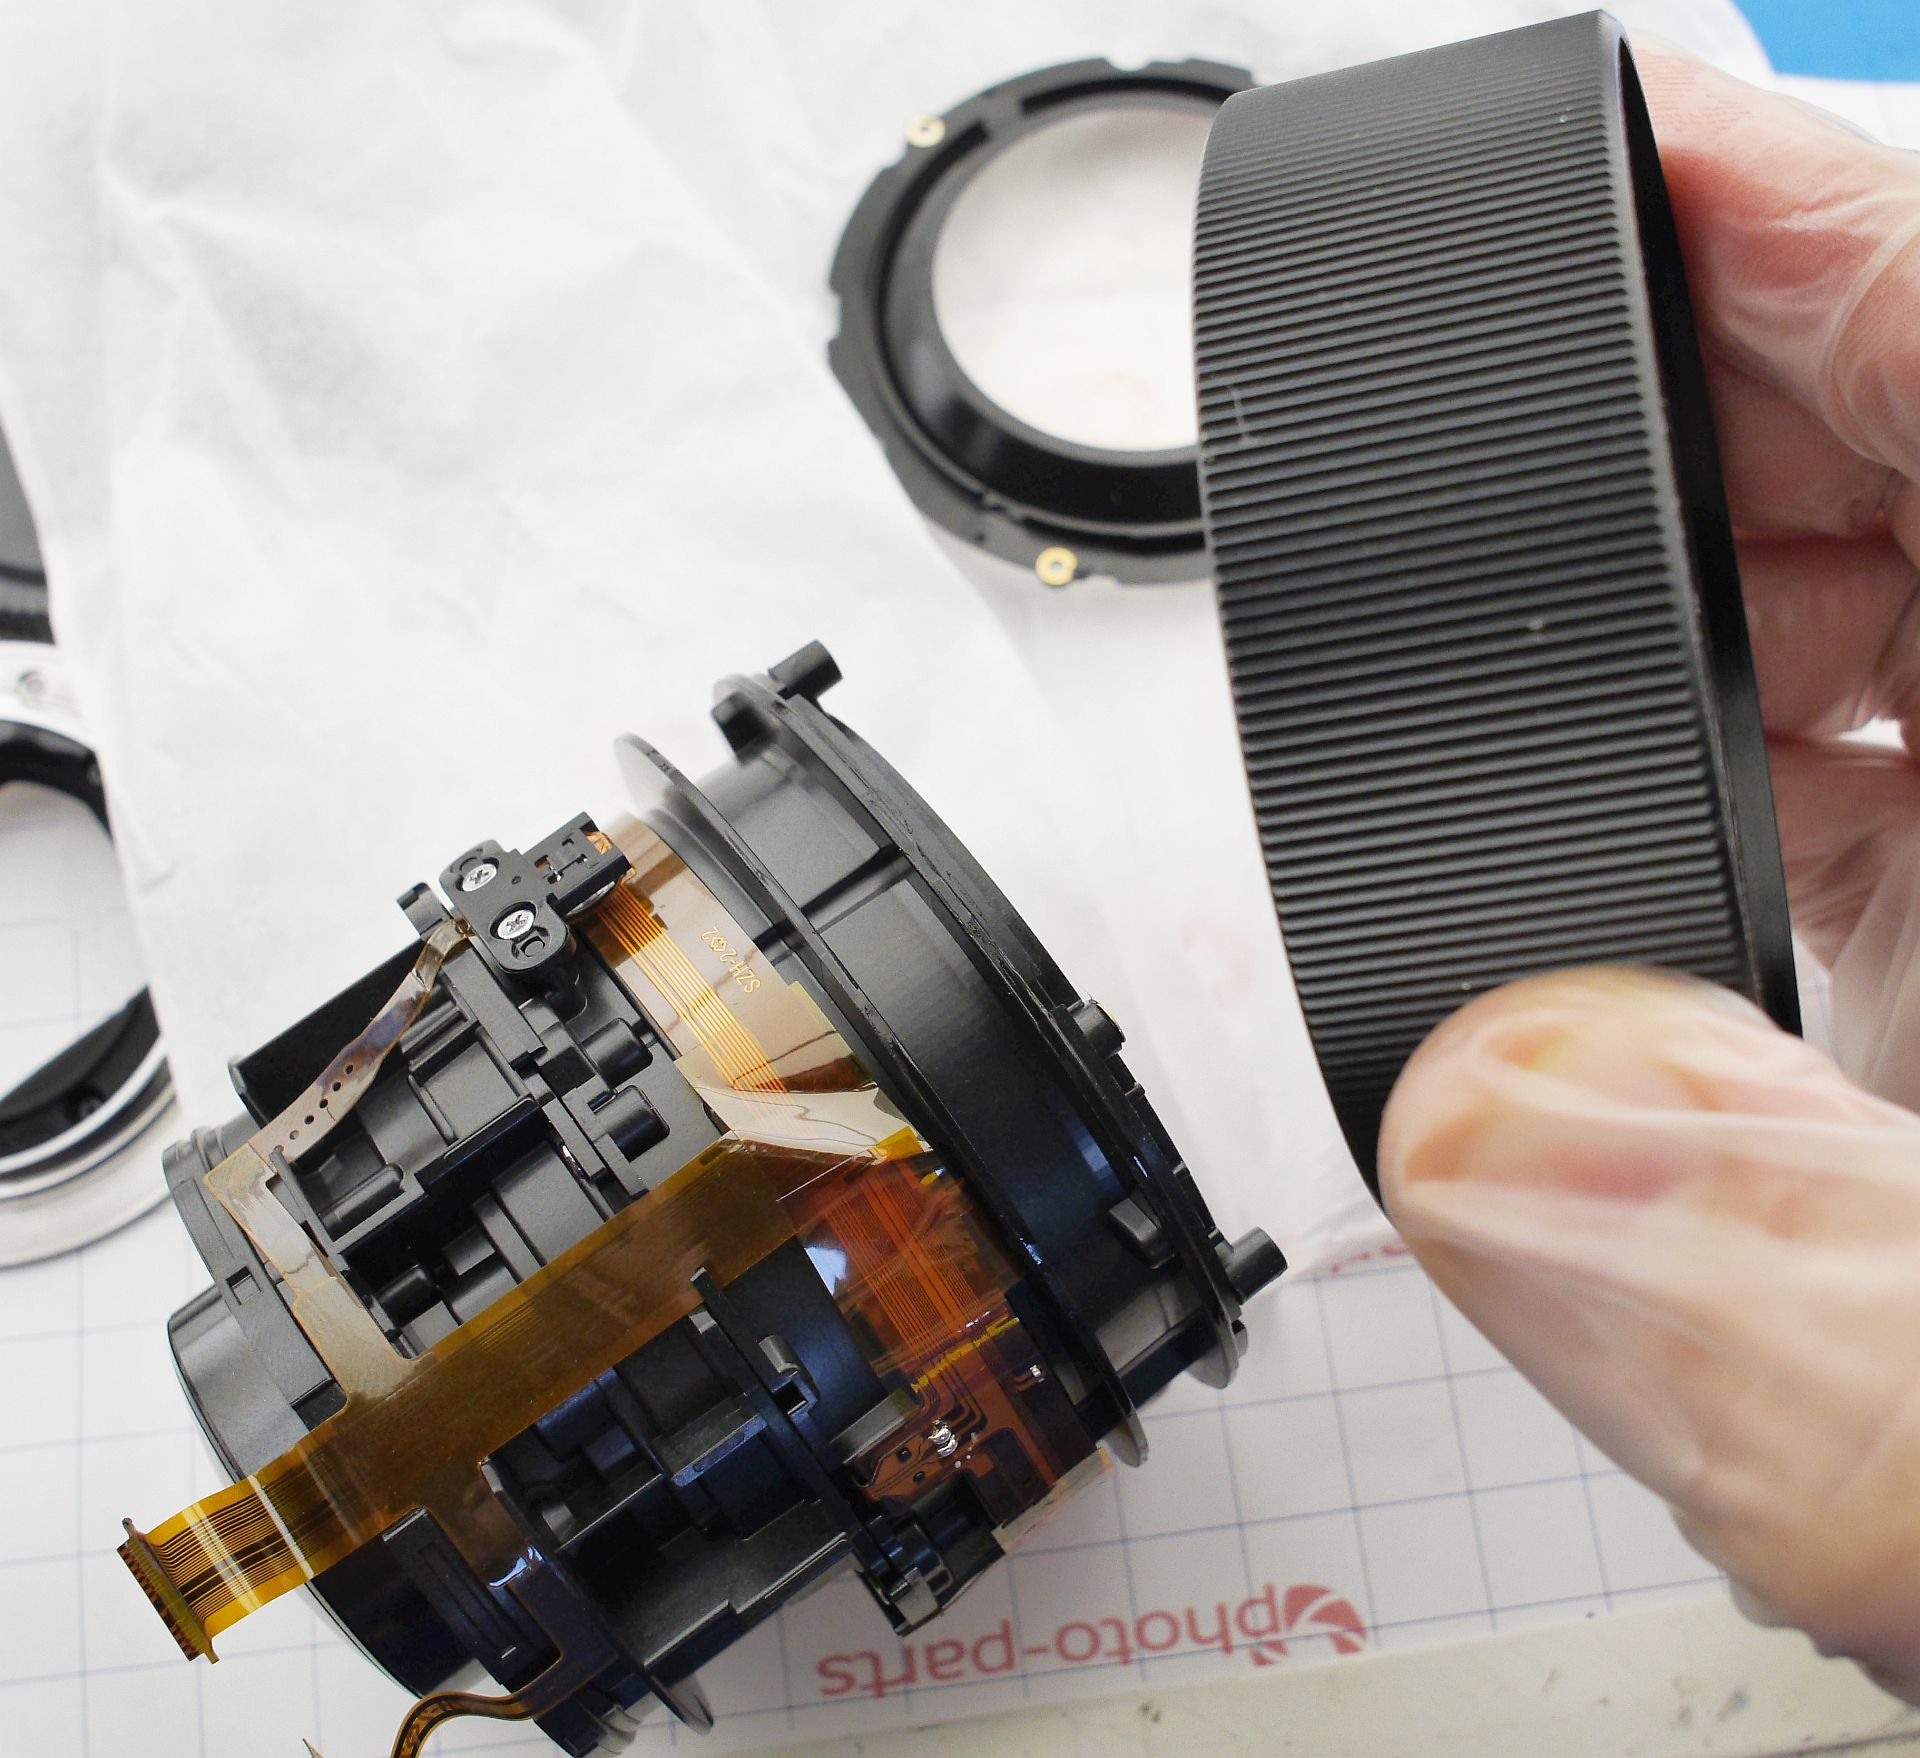
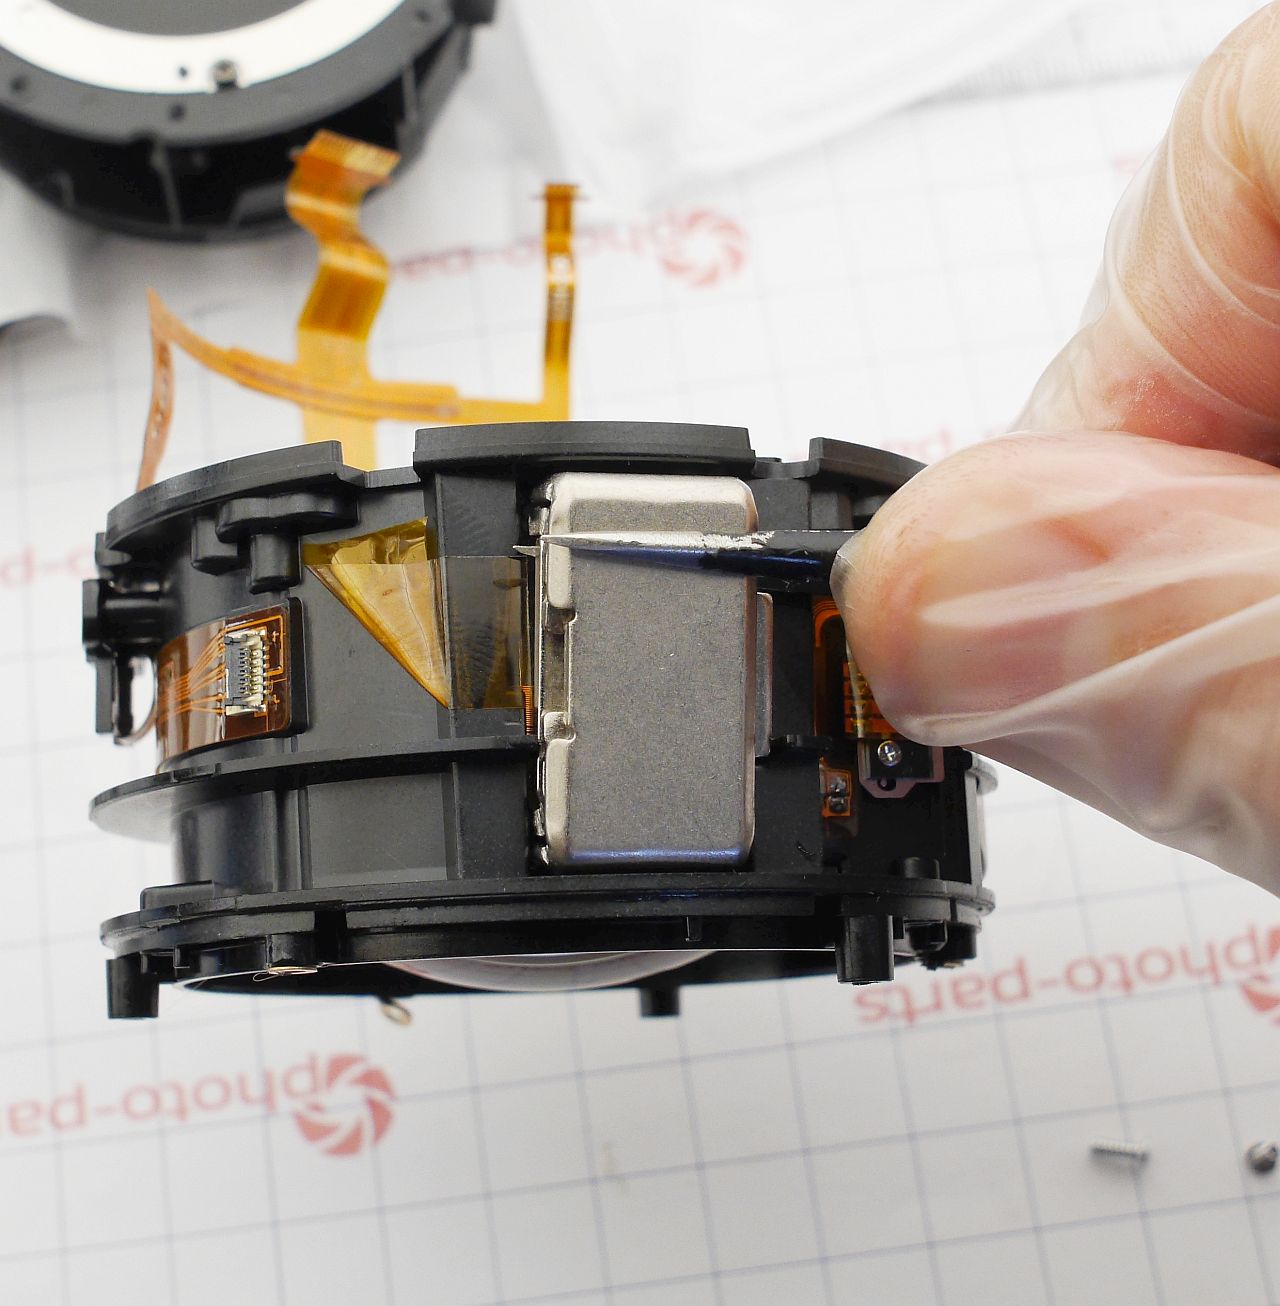
Now we're down to the actuating mechanisms - just the aperture and the focus motor. Here's a closer look at the focusing system:

Judging by the large magnets, this is clearly a linear electromagnetic motor. Structurally, it works like a speaker: a coil carrying current moves through the strong magnetic field of a permanent magnet. The differences? First, the focusing lens is much heavier than a speaker diaphragm, so there are two coils. Second, the lens position must be precisely maintained, so the system uses two sensors: a displacement sensor (magnetic encoder) and an endstop sensor (optical interrupter).
The displacement sensor outputs two sine waves with a 90° phase shift, giving the relative movement direction and distance. The endstop sensor is used only once during initialization, giving an absolute reference point.
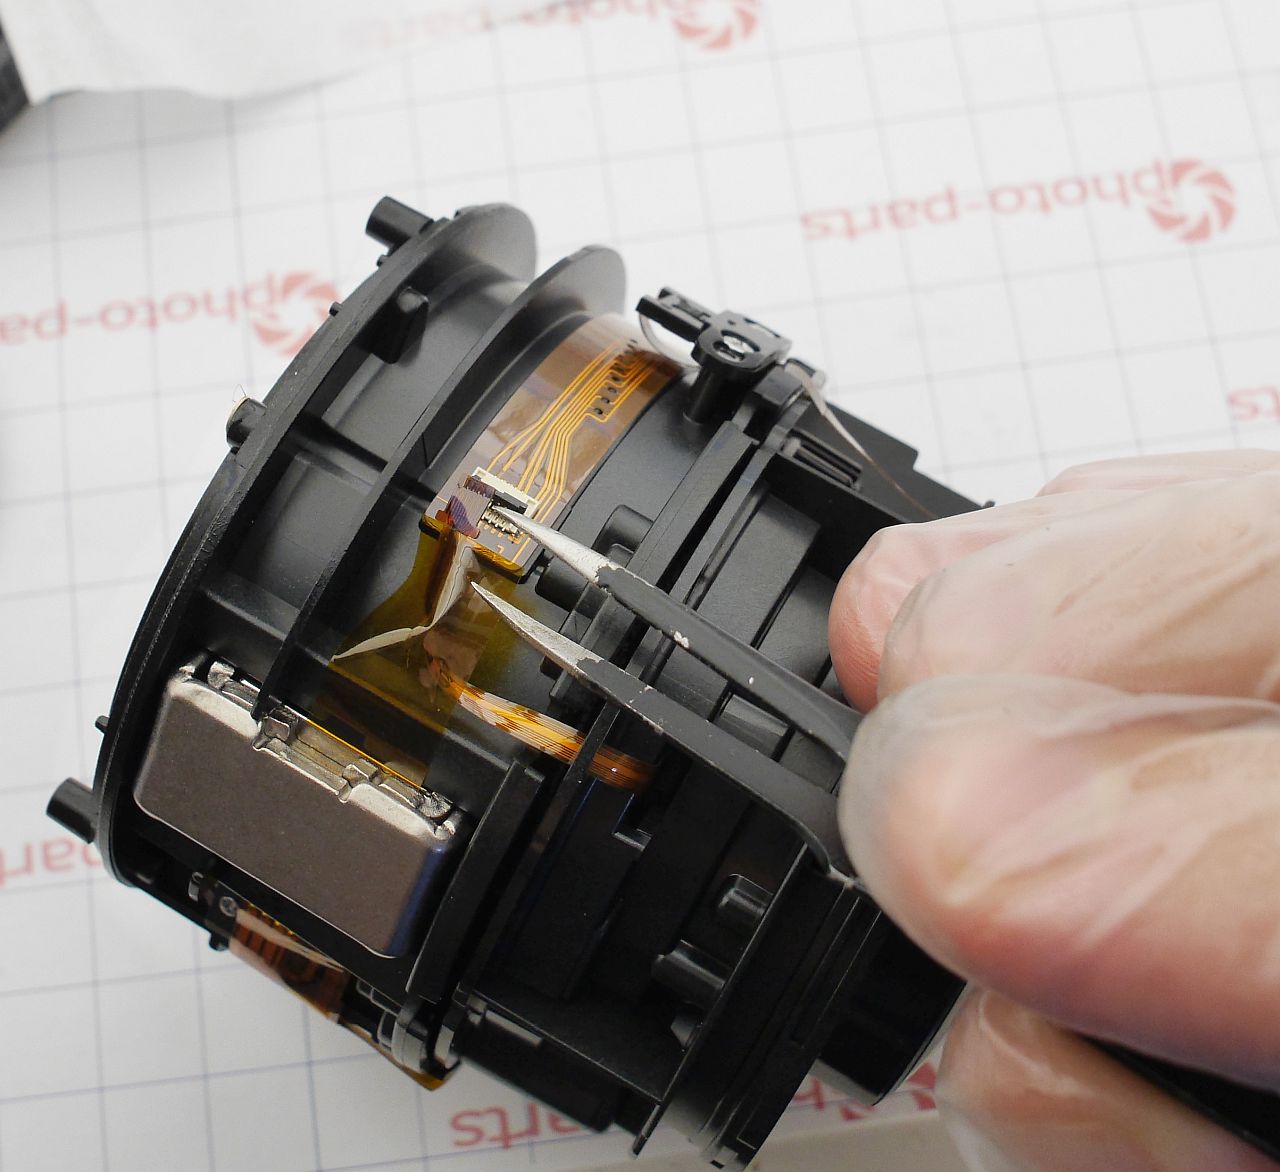
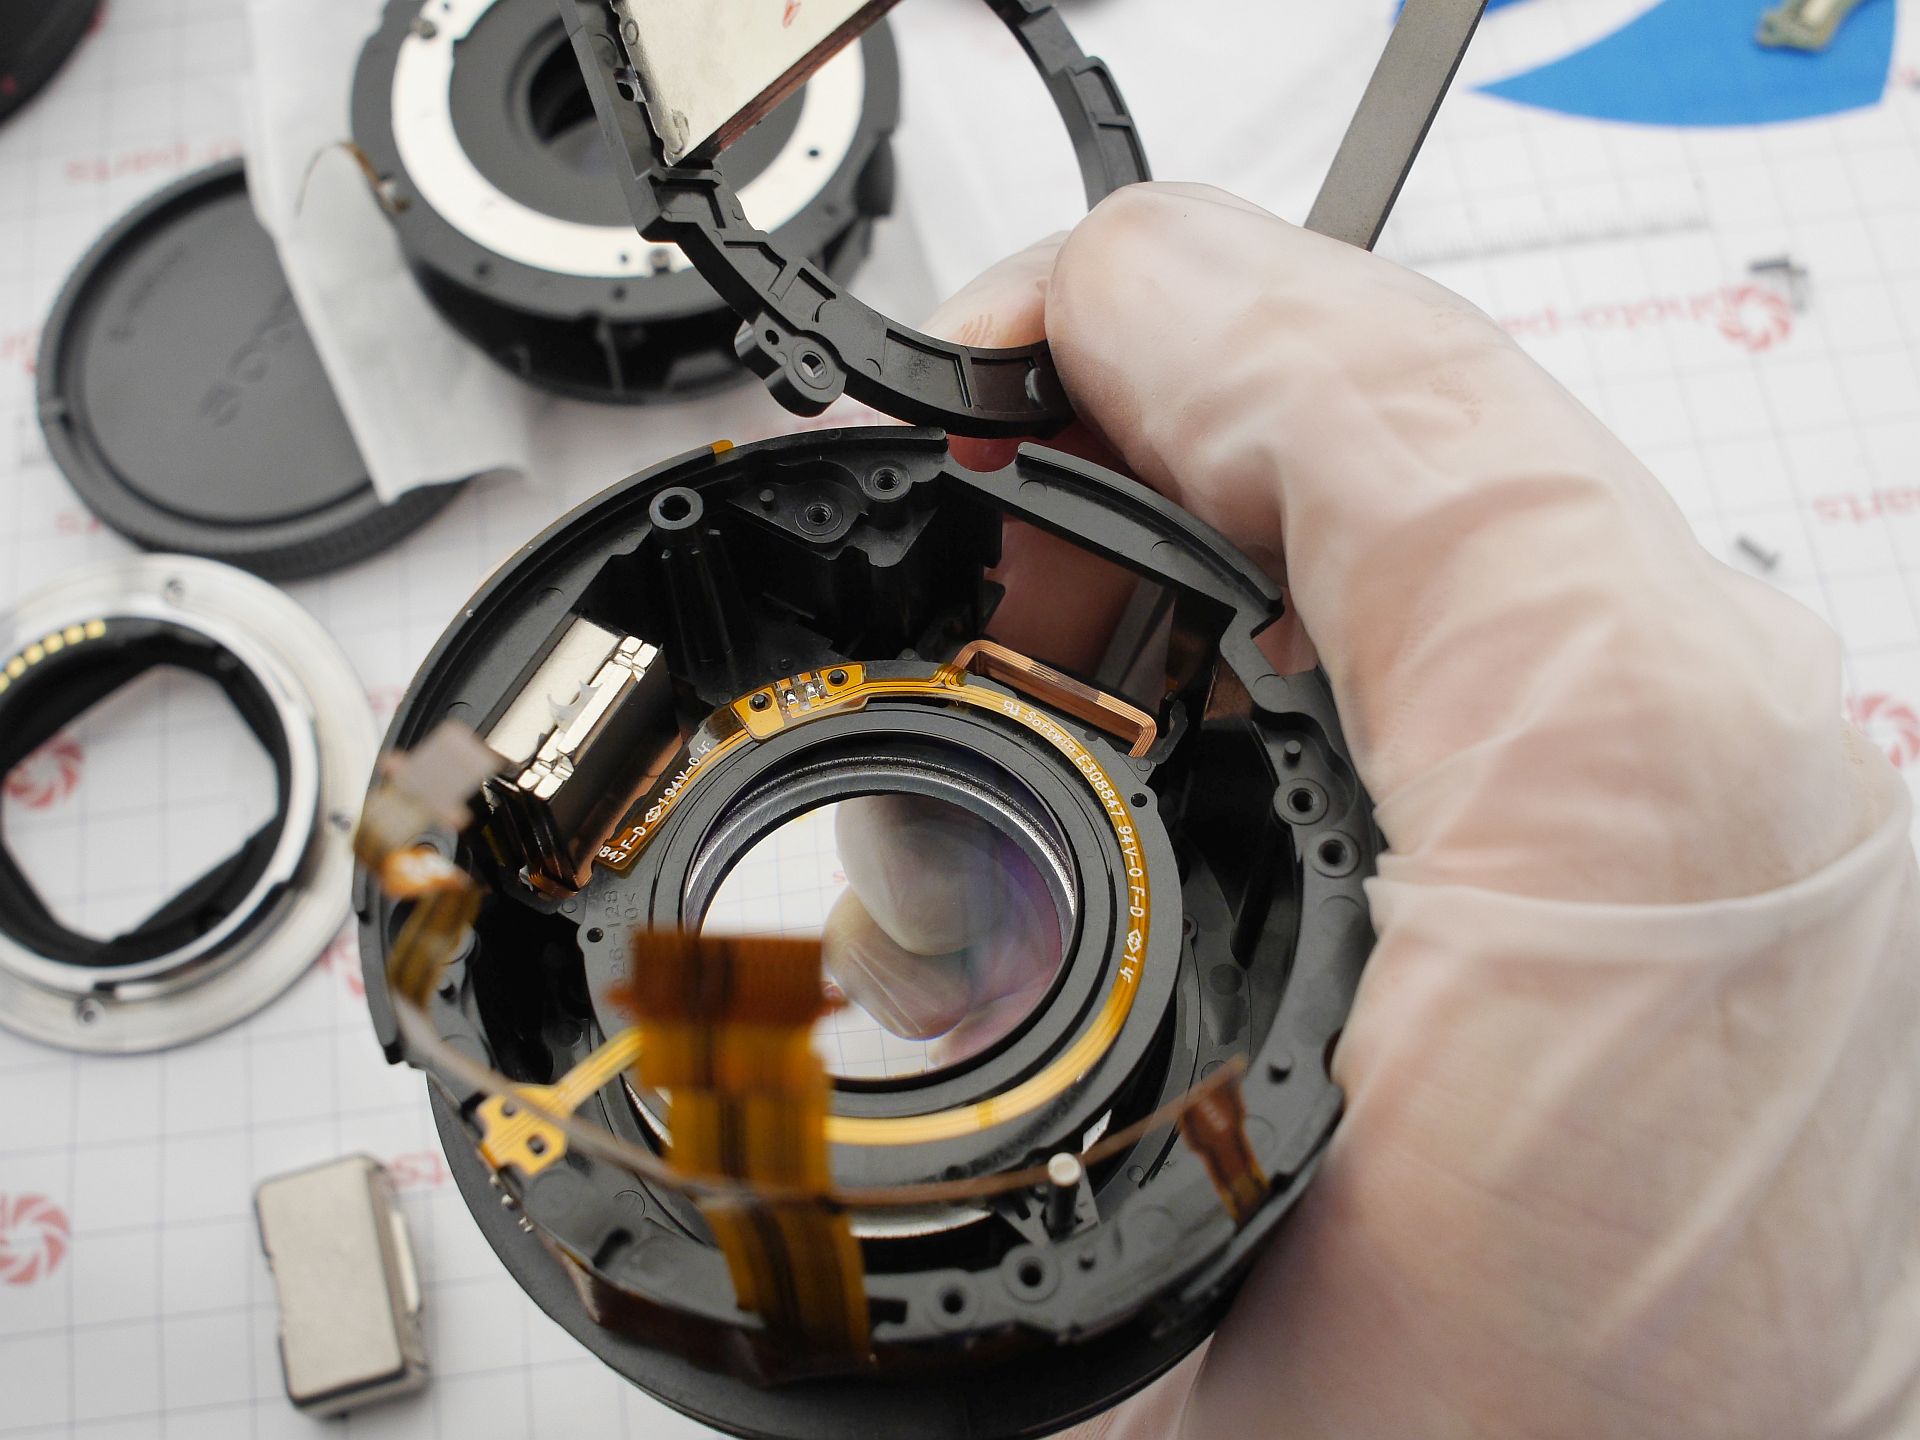
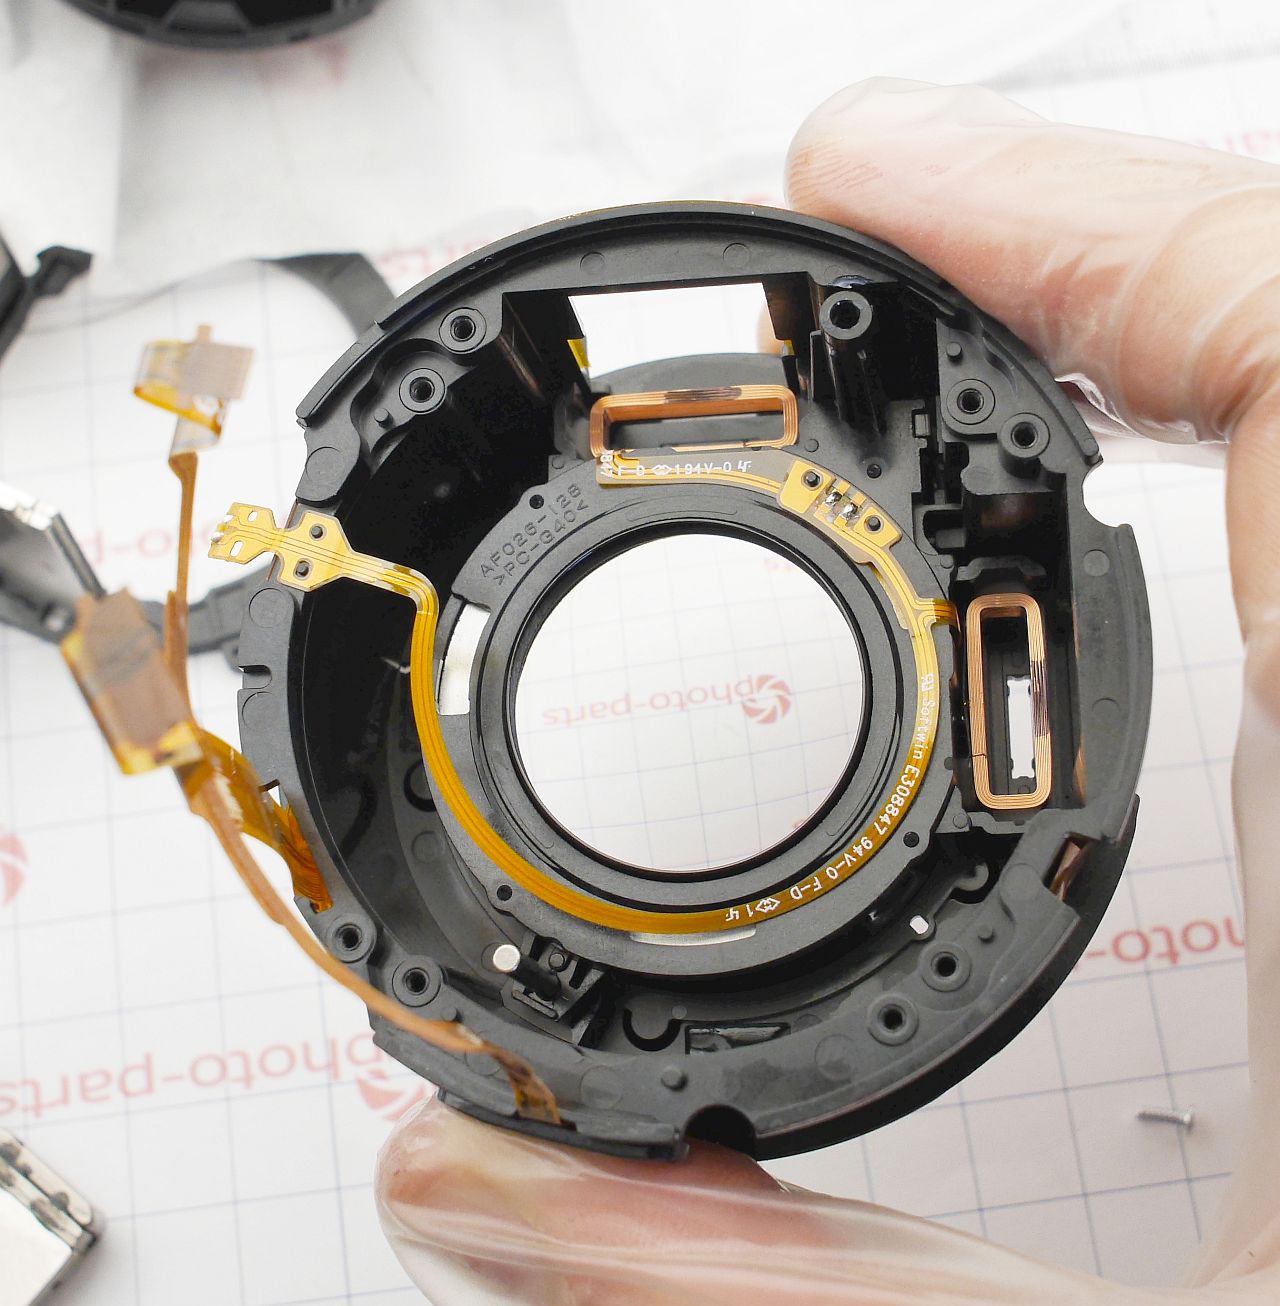
To understand the issue with focus, we'll need to disassemble the unit all the way down to the focusing lens. That means separating the aperture unit - carefully detaching the control flex and disconnecting the aperture:

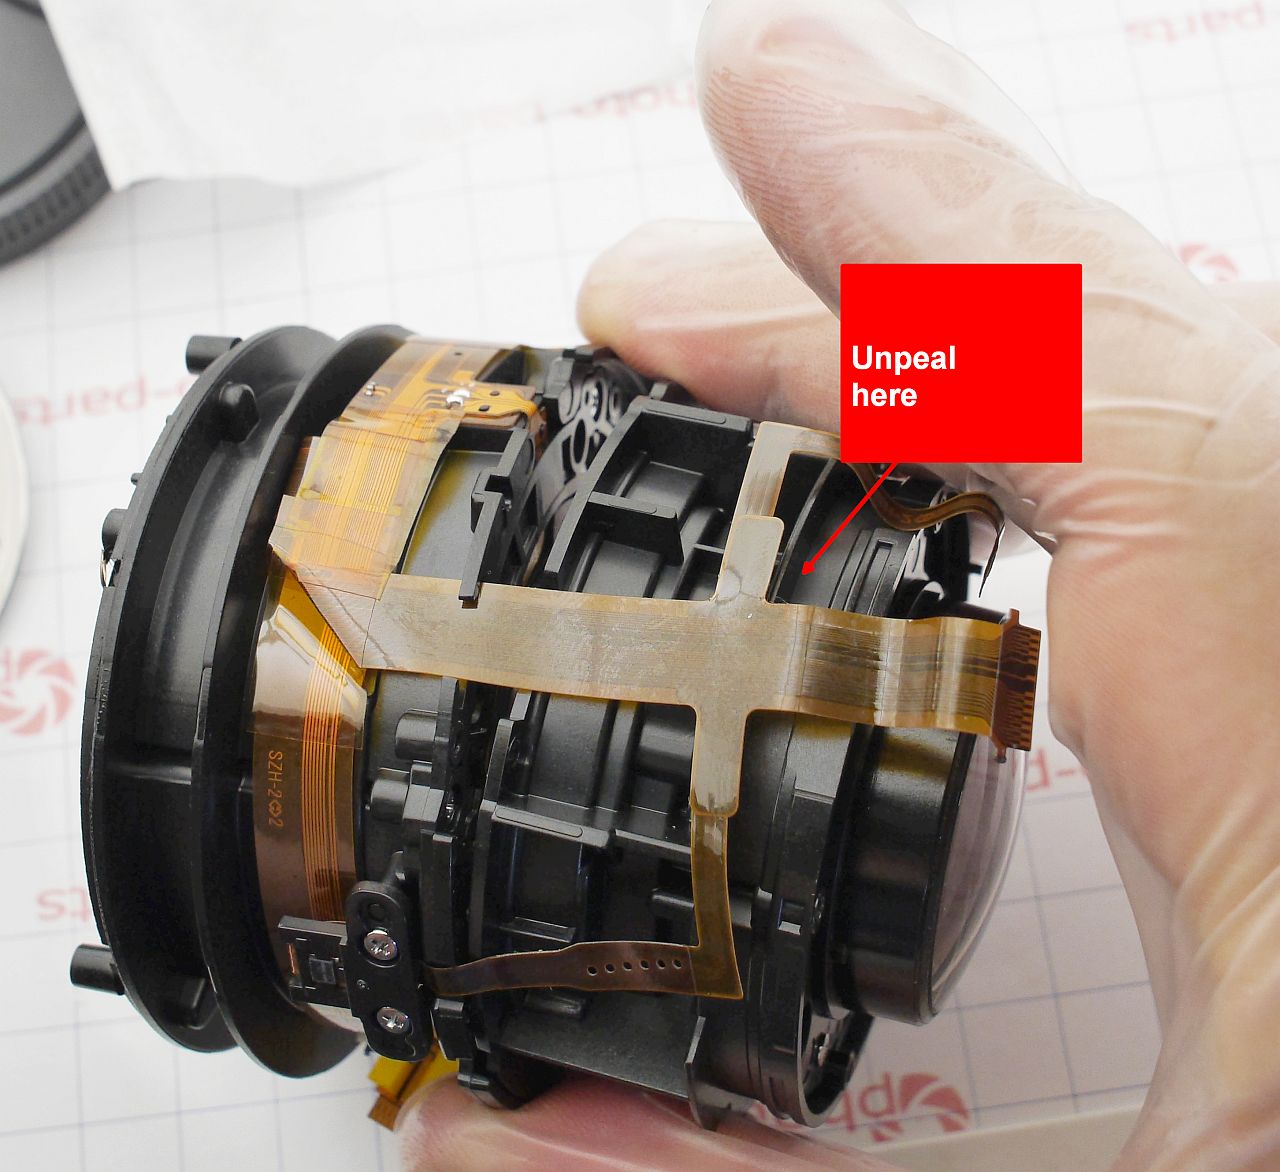
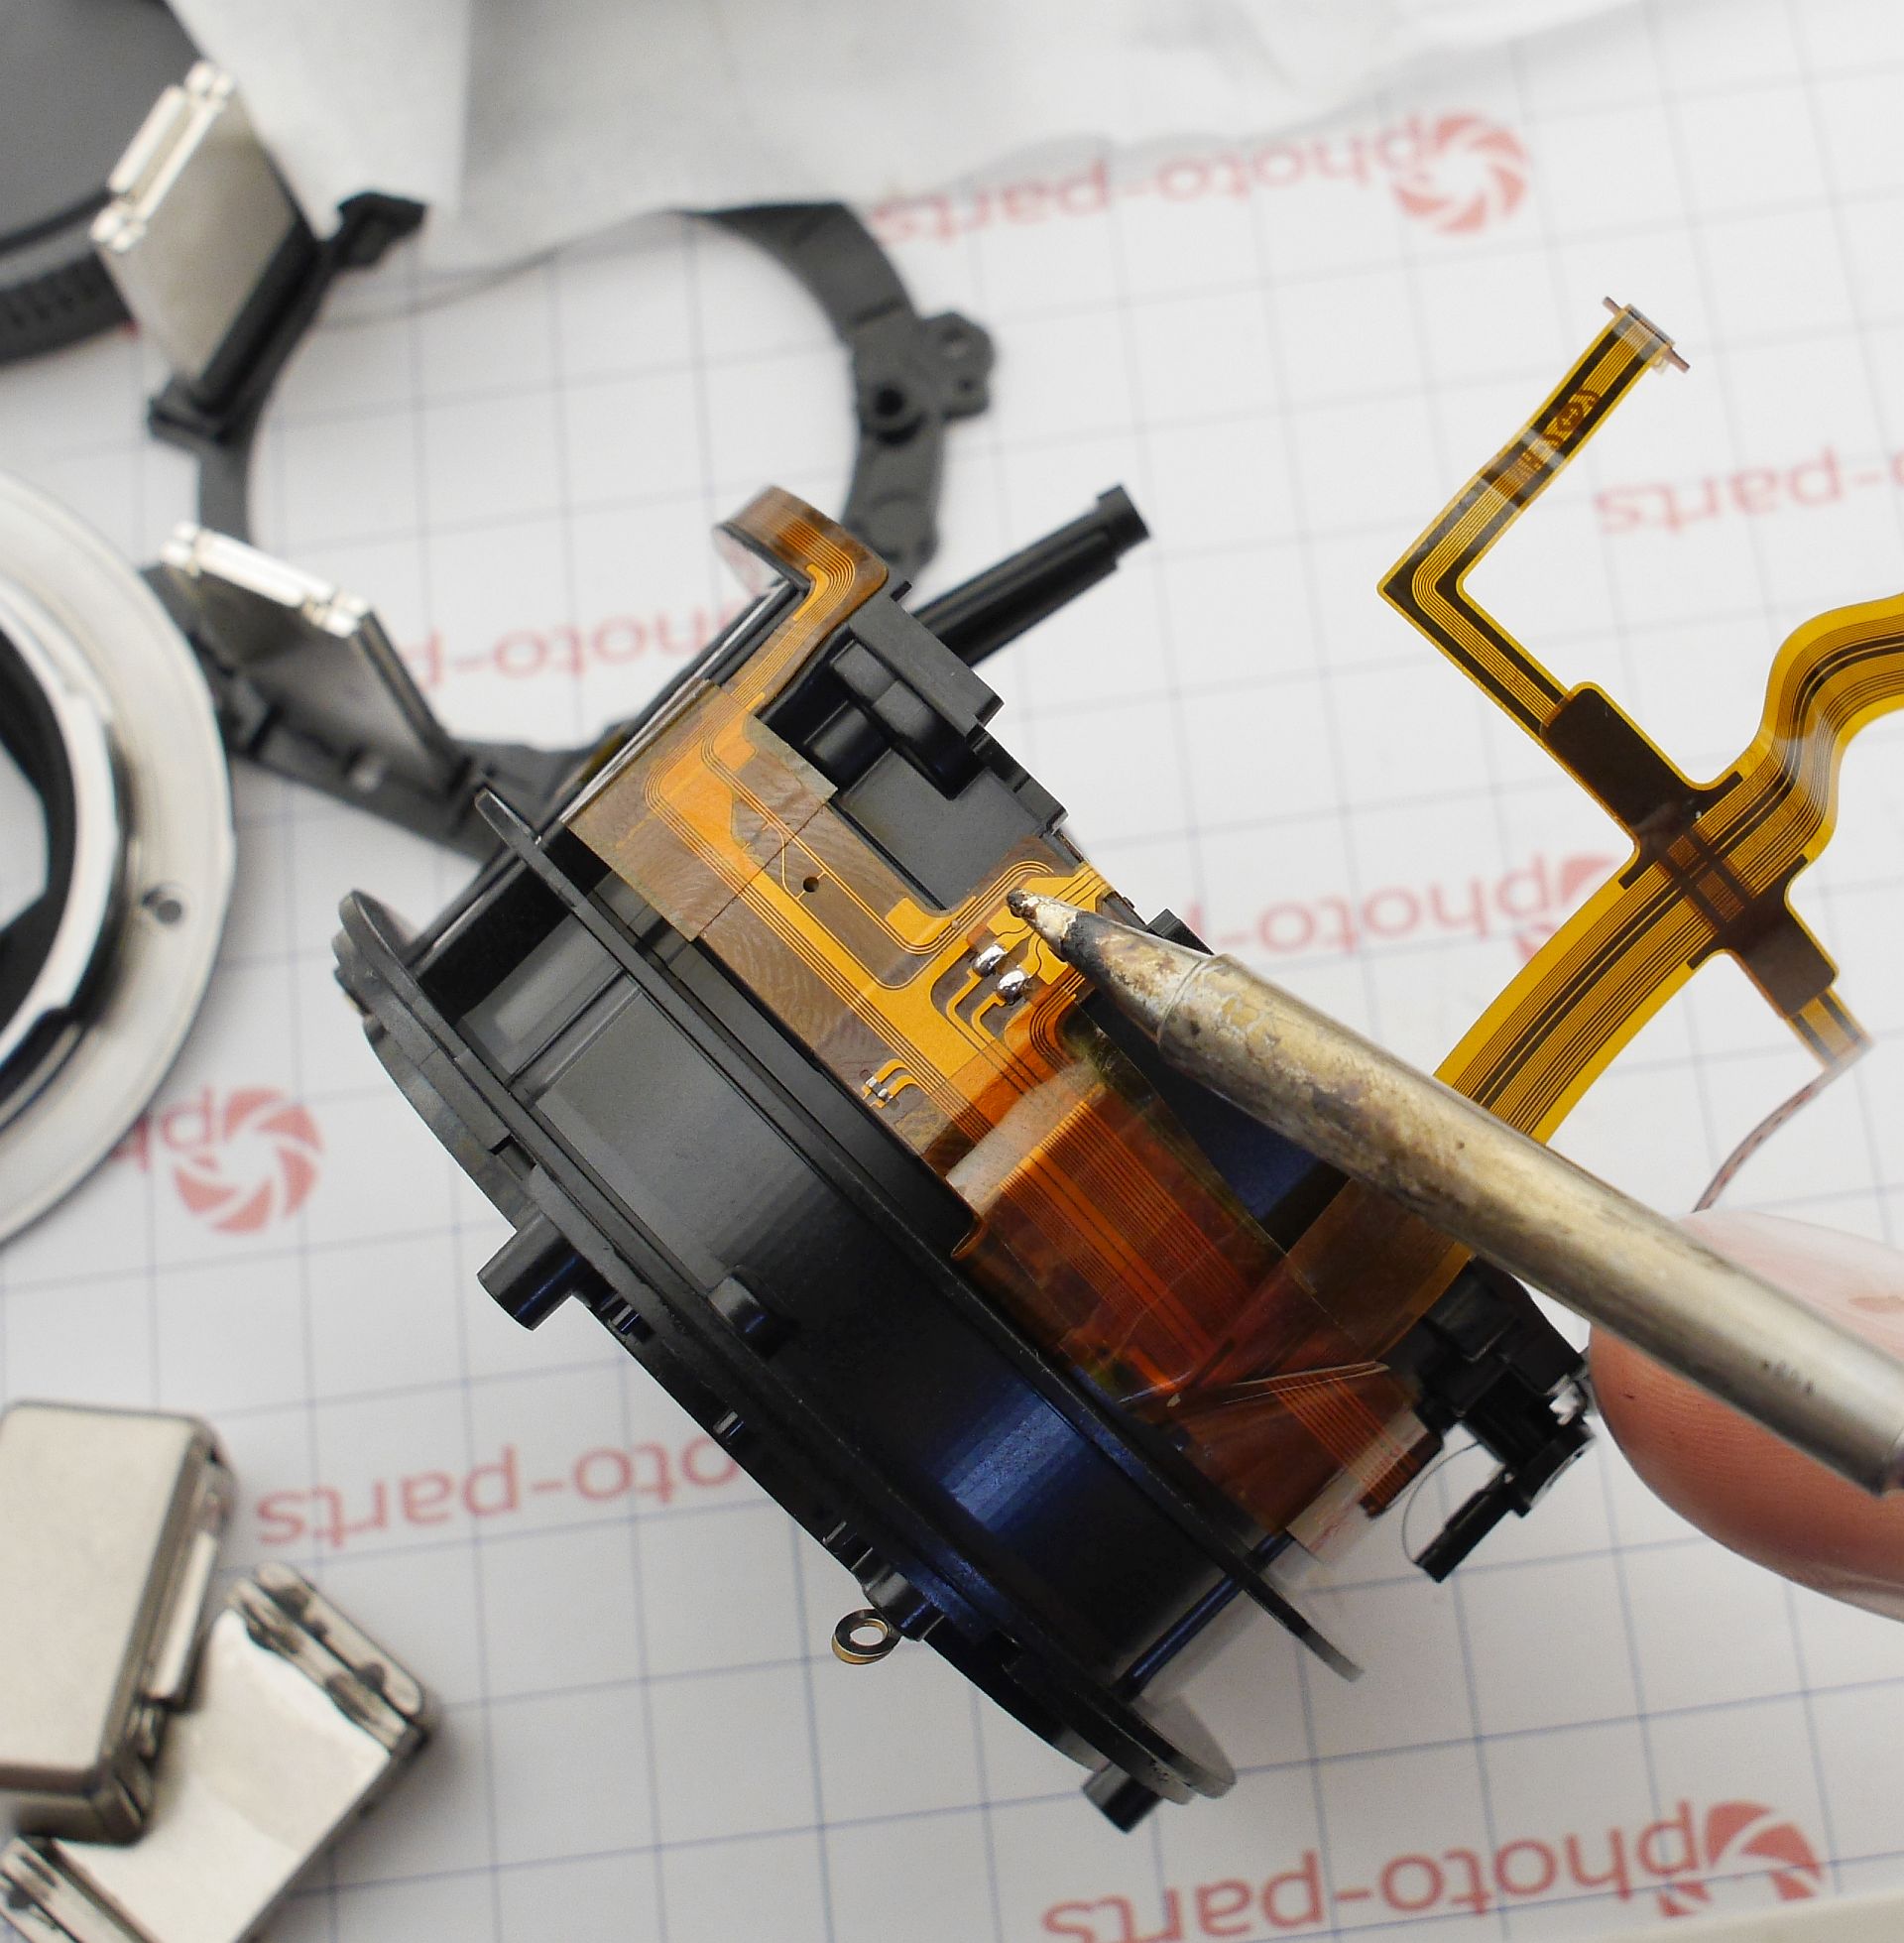
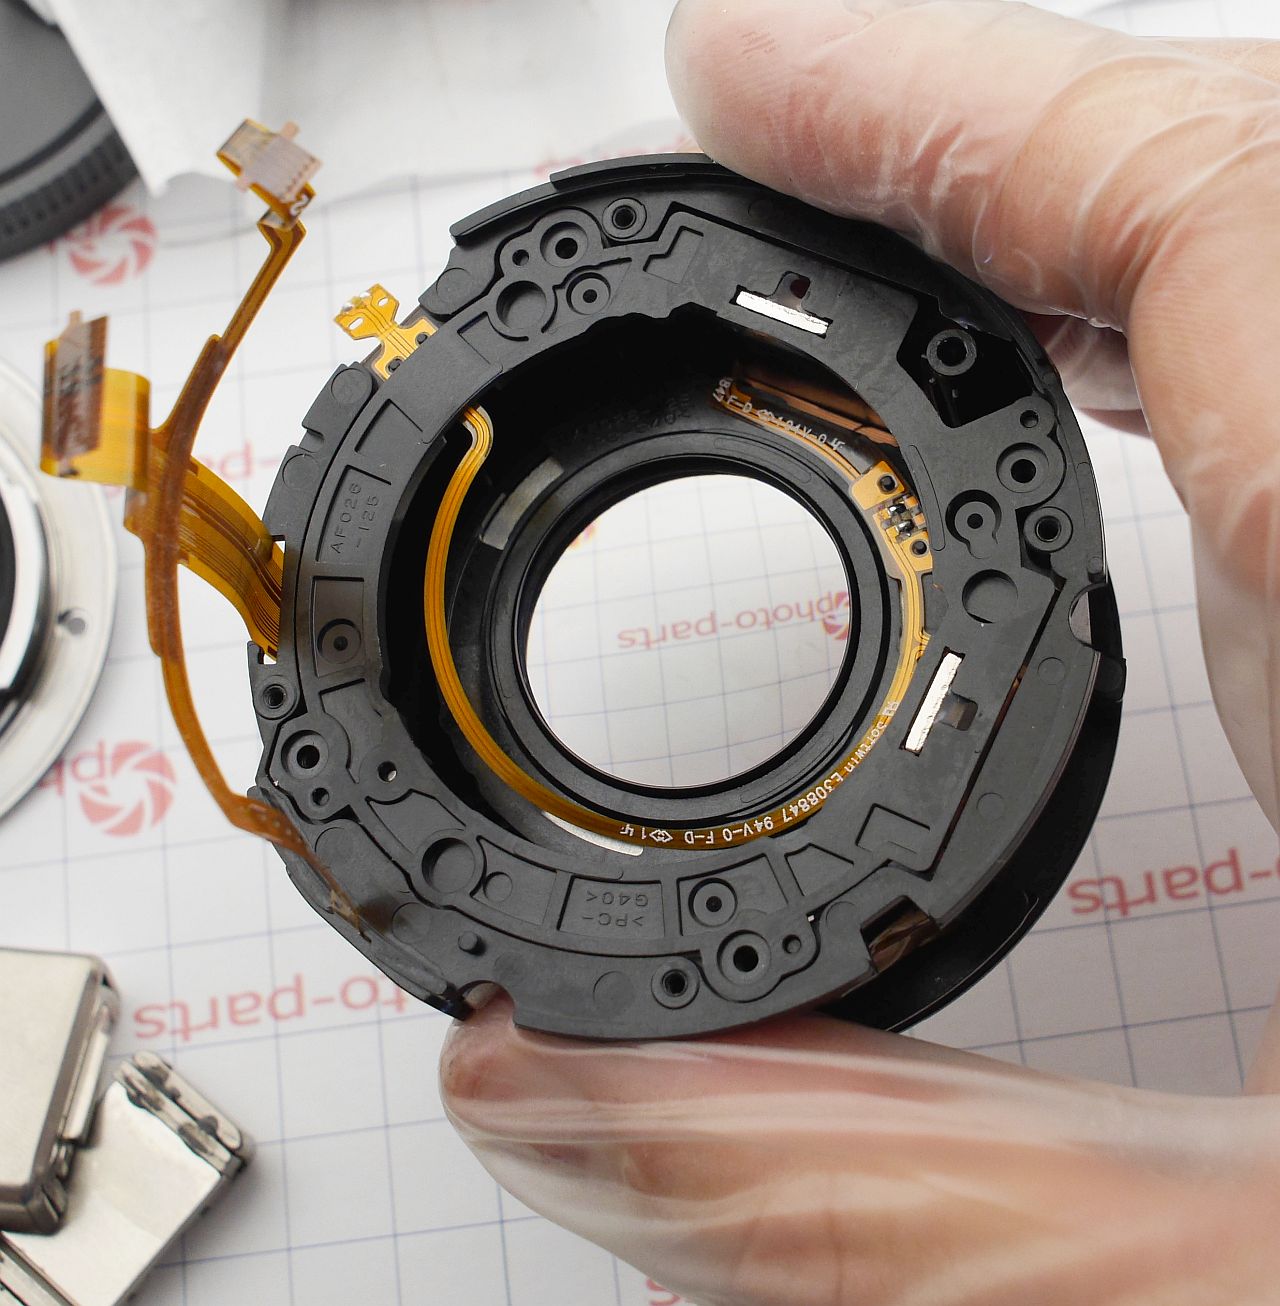
The back of the focus assembly looks like this:
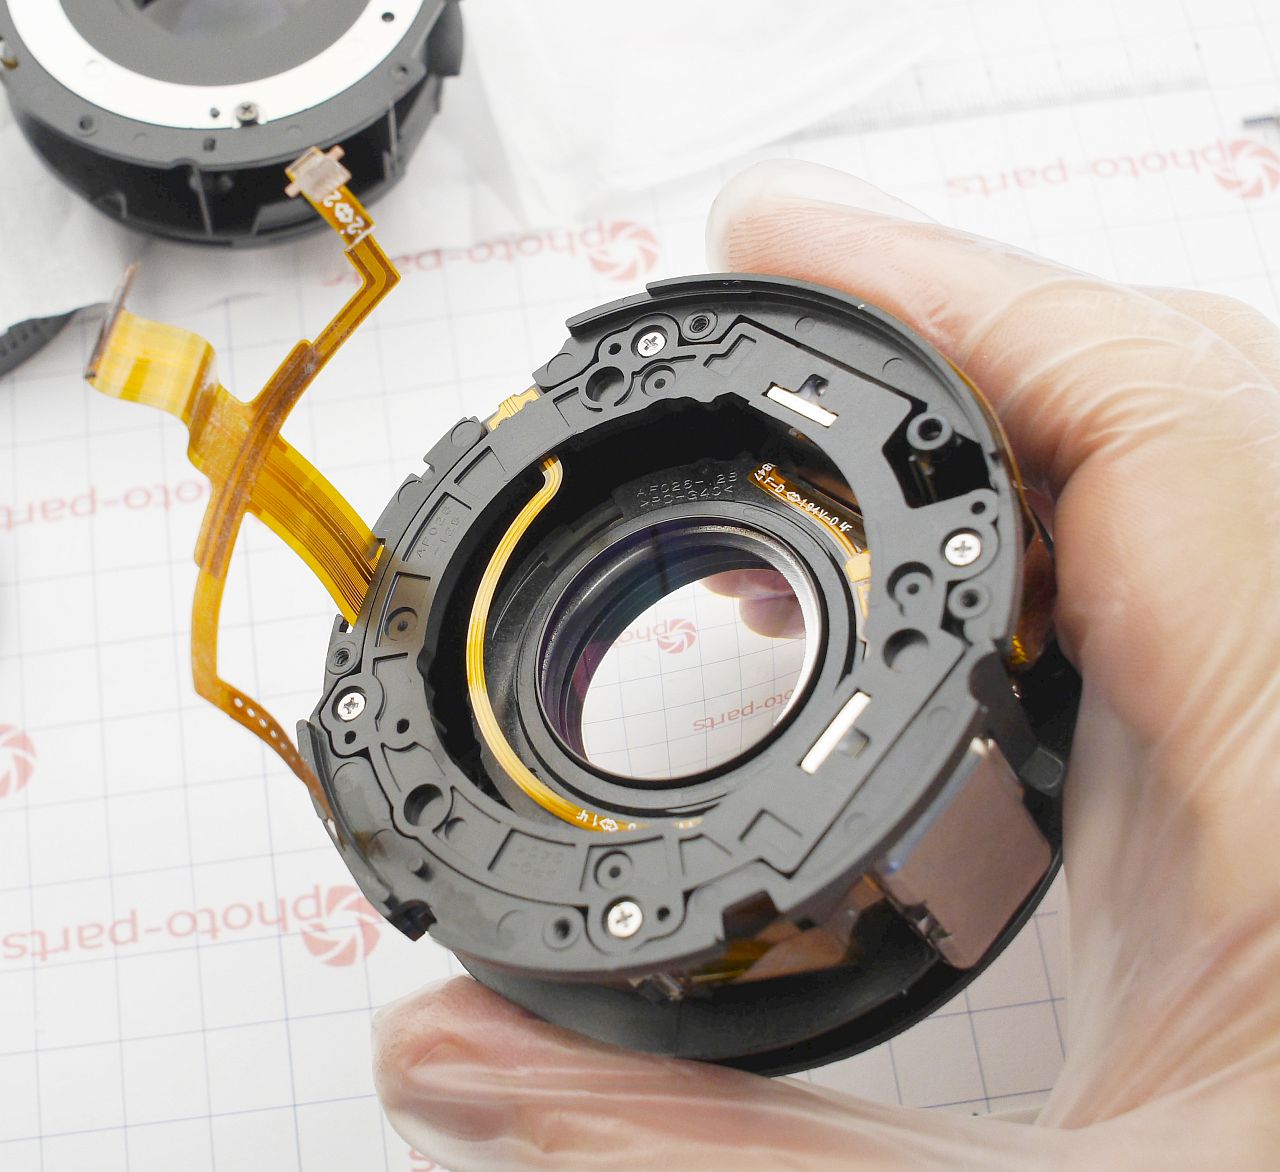
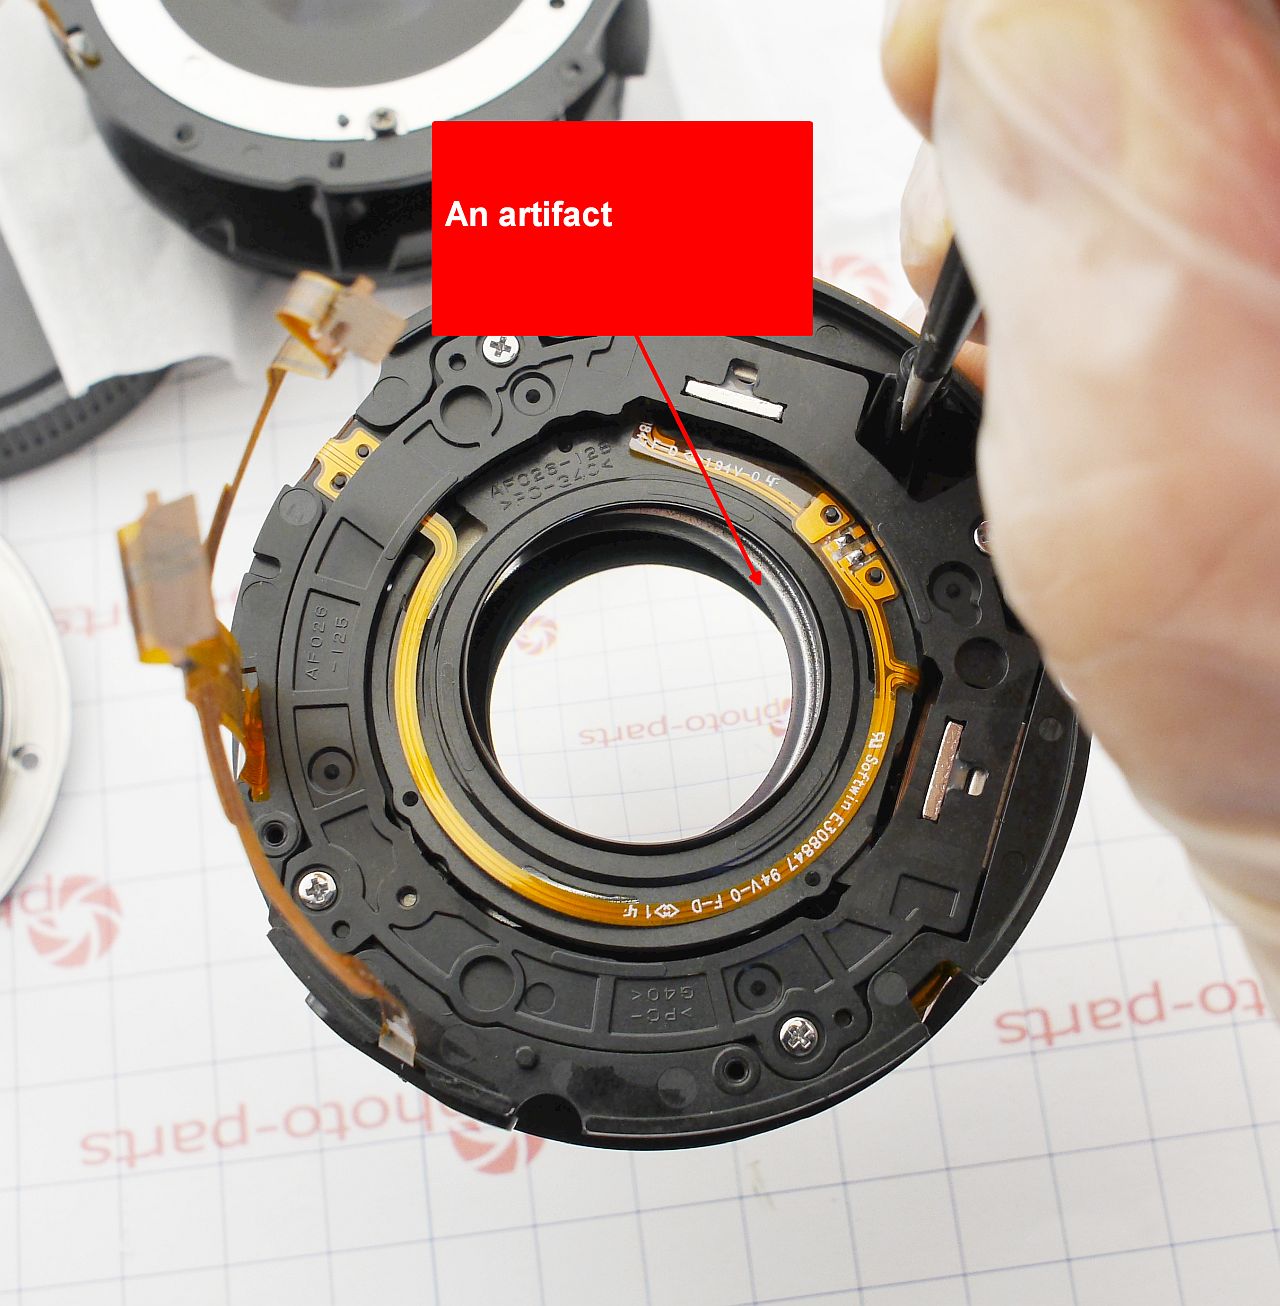
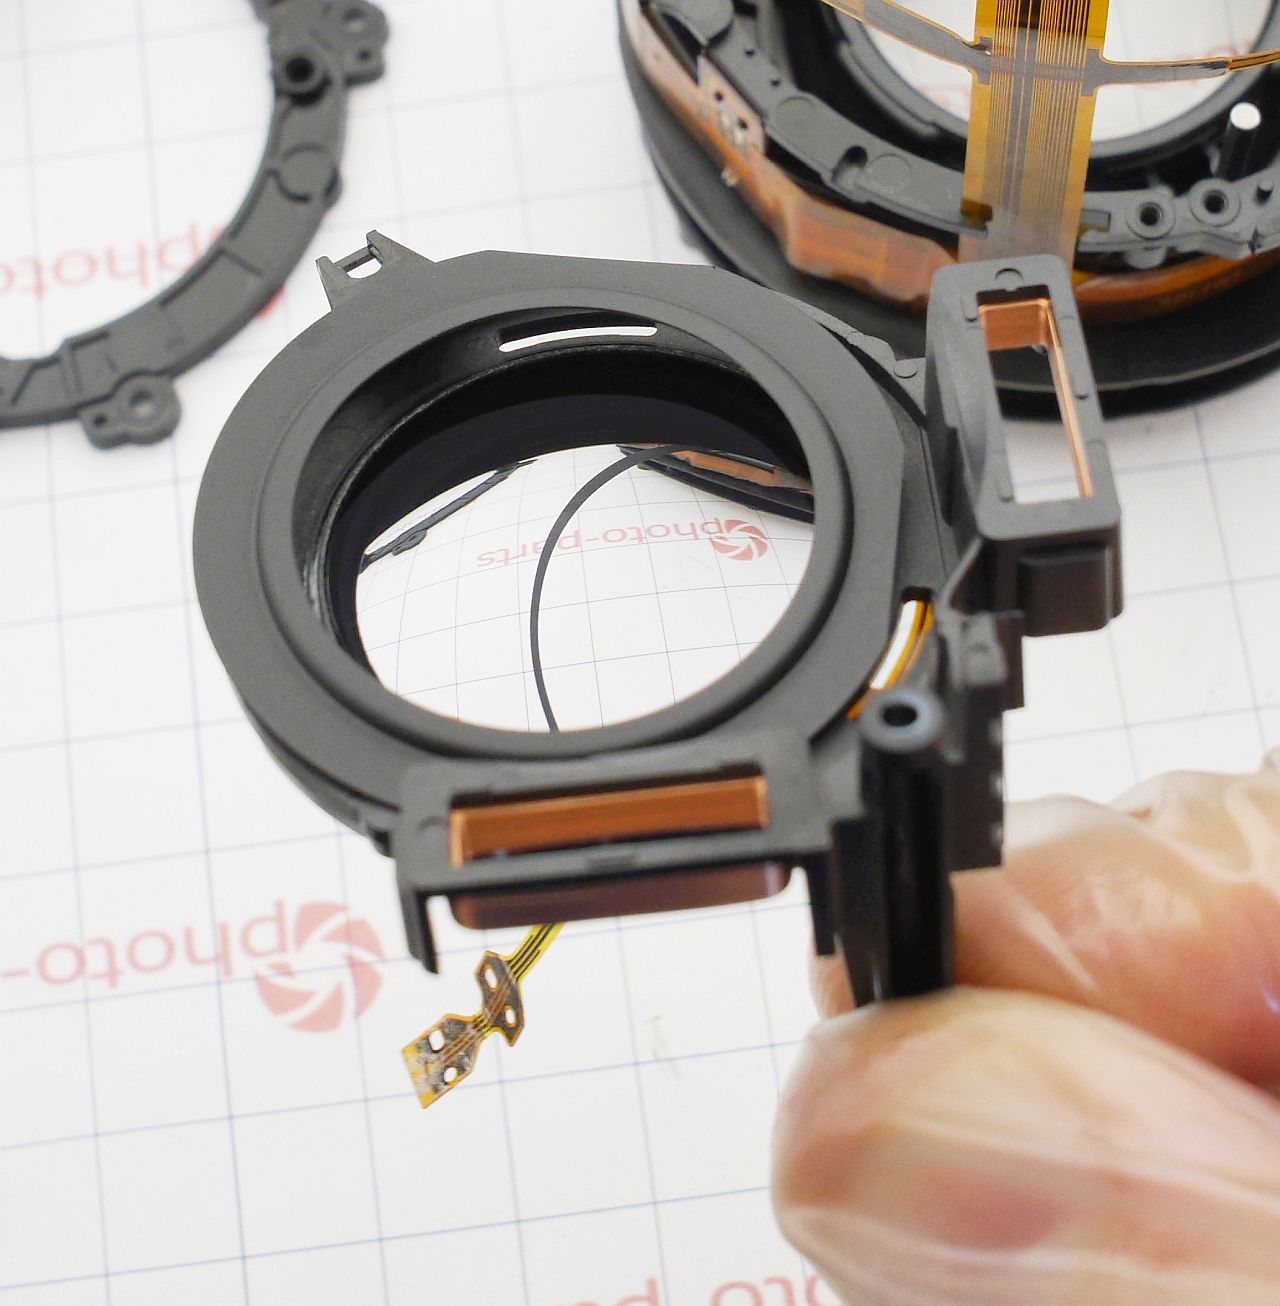
And here's a likely culprit - something's clearly misaligned with the focusing lens:
Let's hope it's not the lens falling out of its holder - that usually means scratches or irreversible decentering.
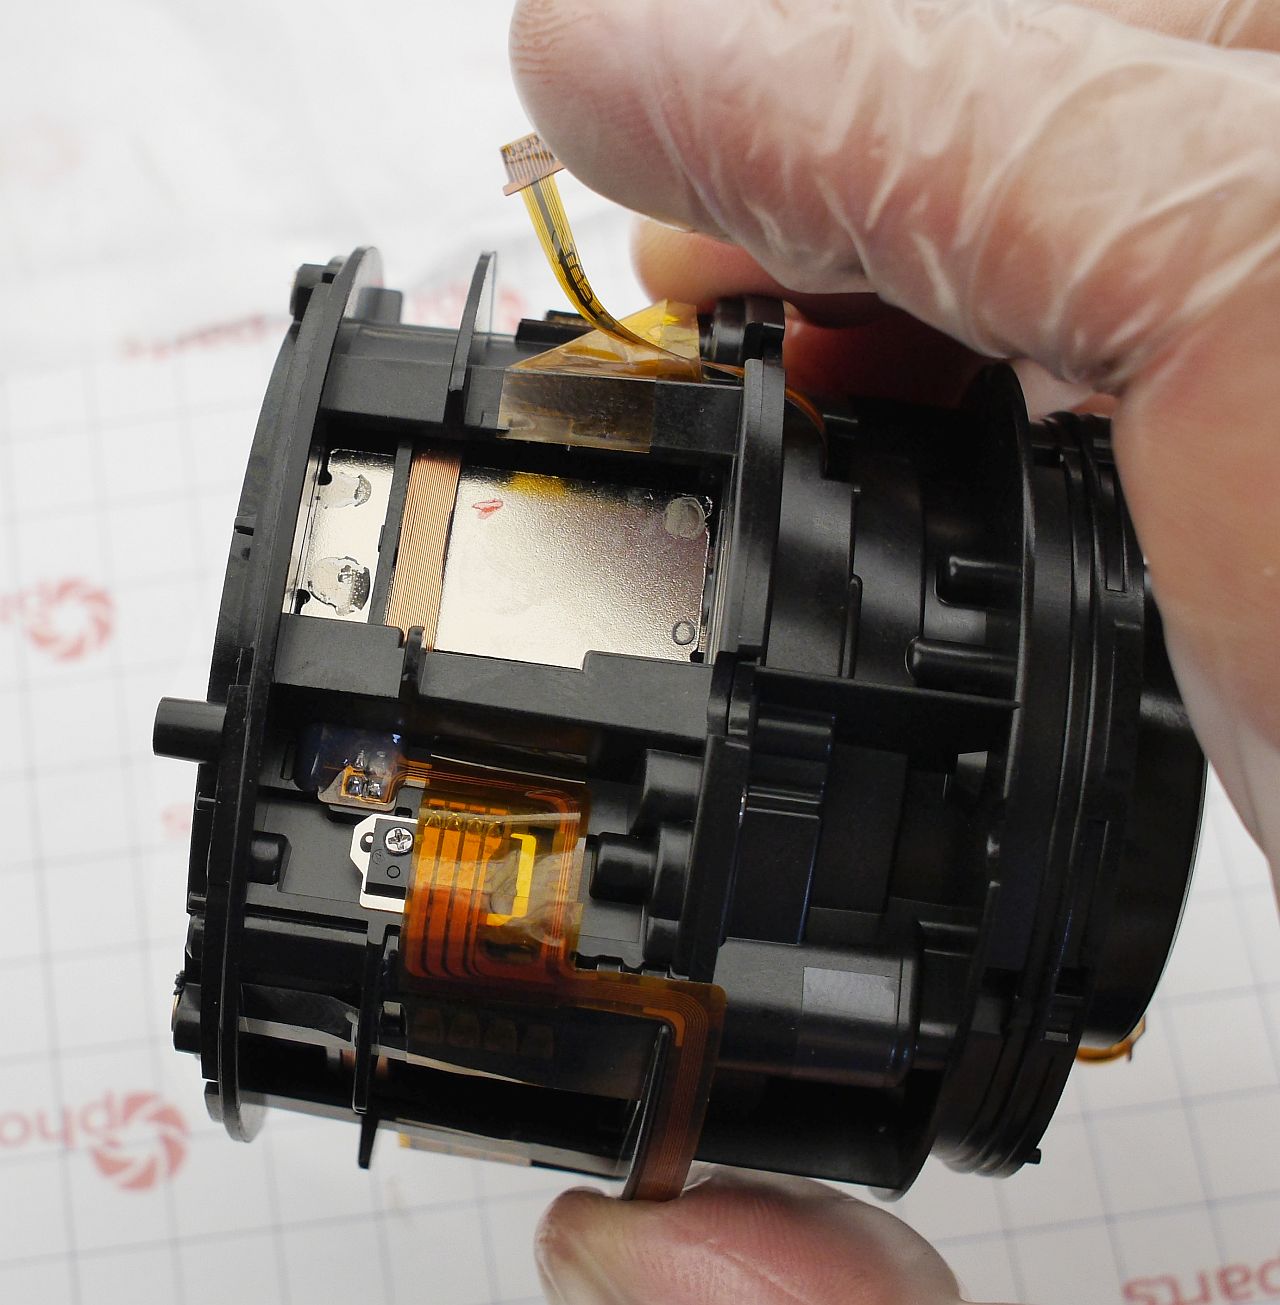
Let's go deeper. Removing the lens requires opening the magnetic system, which presents a challenge: these magnets are very strong. The tool bends, the magnet doesn't budge. Applying serious force, I finally realized - the magnet is not only strong, it's glued in.
Once the magnets are separated, you can remove the plastic guide-holder and desolder the coil flex:
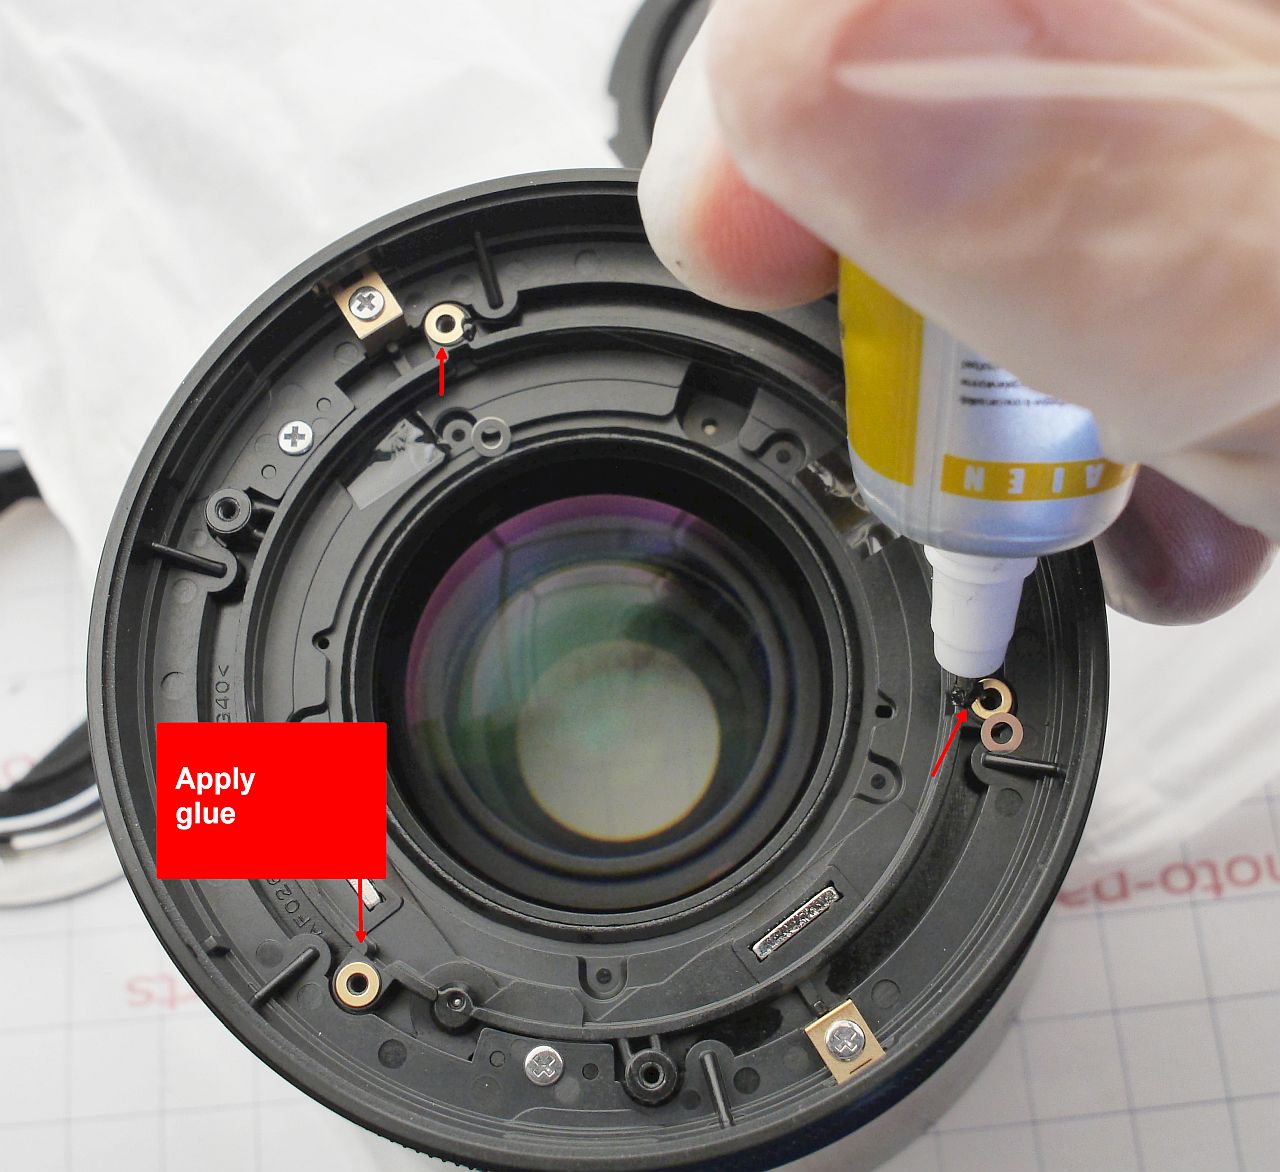
Out comes the lens - and what a relief! The actual lens is fine. It was just the black decorative mask on the focusing lens that had slipped. Turns out it was held on with weak double-sided tape, and apparently heat caused the adhesive to fail.
A couple drops of glue, and the mask sits firmly again:
Reassembly follows the reverse order. Be cautious when reinstalling the magnets and lens components.
Once you've confirmed the lens moves smoothly from end to end, it's time to reassemble and test - though I had no doubts at this point.
Conclusion: Autofocus is fully restored. I'm happy with the optical performance - and the repair process was satisfying too.
Happy shooting!
Add Comment
This policy contains information about your privacy. By posting, you are declaring that you understand this policy:
- Your name, rating, website address, town, country, state and comment will be publicly displayed if entered.
- Aside from the data entered into these form fields, other stored data about your comment will include:
- Your IP address (not displayed)
- The time/date of your submission (displayed)
- Your email address will not be shared. It is collected for only two reasons:
- Administrative purposes, should a need to contact you arise.
- To inform you of new comments, should you subscribe to receive notifications.
- A cookie may be set on your computer. This is used to remember your inputs. It will expire by itself.
This policy is subject to change at any time and without notice.
These terms and conditions contain rules about posting comments. By submitting a comment, you are declaring that you agree with these rules:
- Although the administrator will attempt to moderate comments, it is impossible for every comment to have been moderated at any given time.
- You acknowledge that all comments express the views and opinions of the original author and not those of the administrator.
- You agree not to post any material which is knowingly false, obscene, hateful, threatening, harassing or invasive of a person's privacy.
- The administrator has the right to edit, move or remove any comment for any reason and without notice.
Failure to comply with these rules may result in being banned from submitting further comments.
These terms and conditions are subject to change at any time and without notice.
Comments