- Posted on
- • Lens repairs
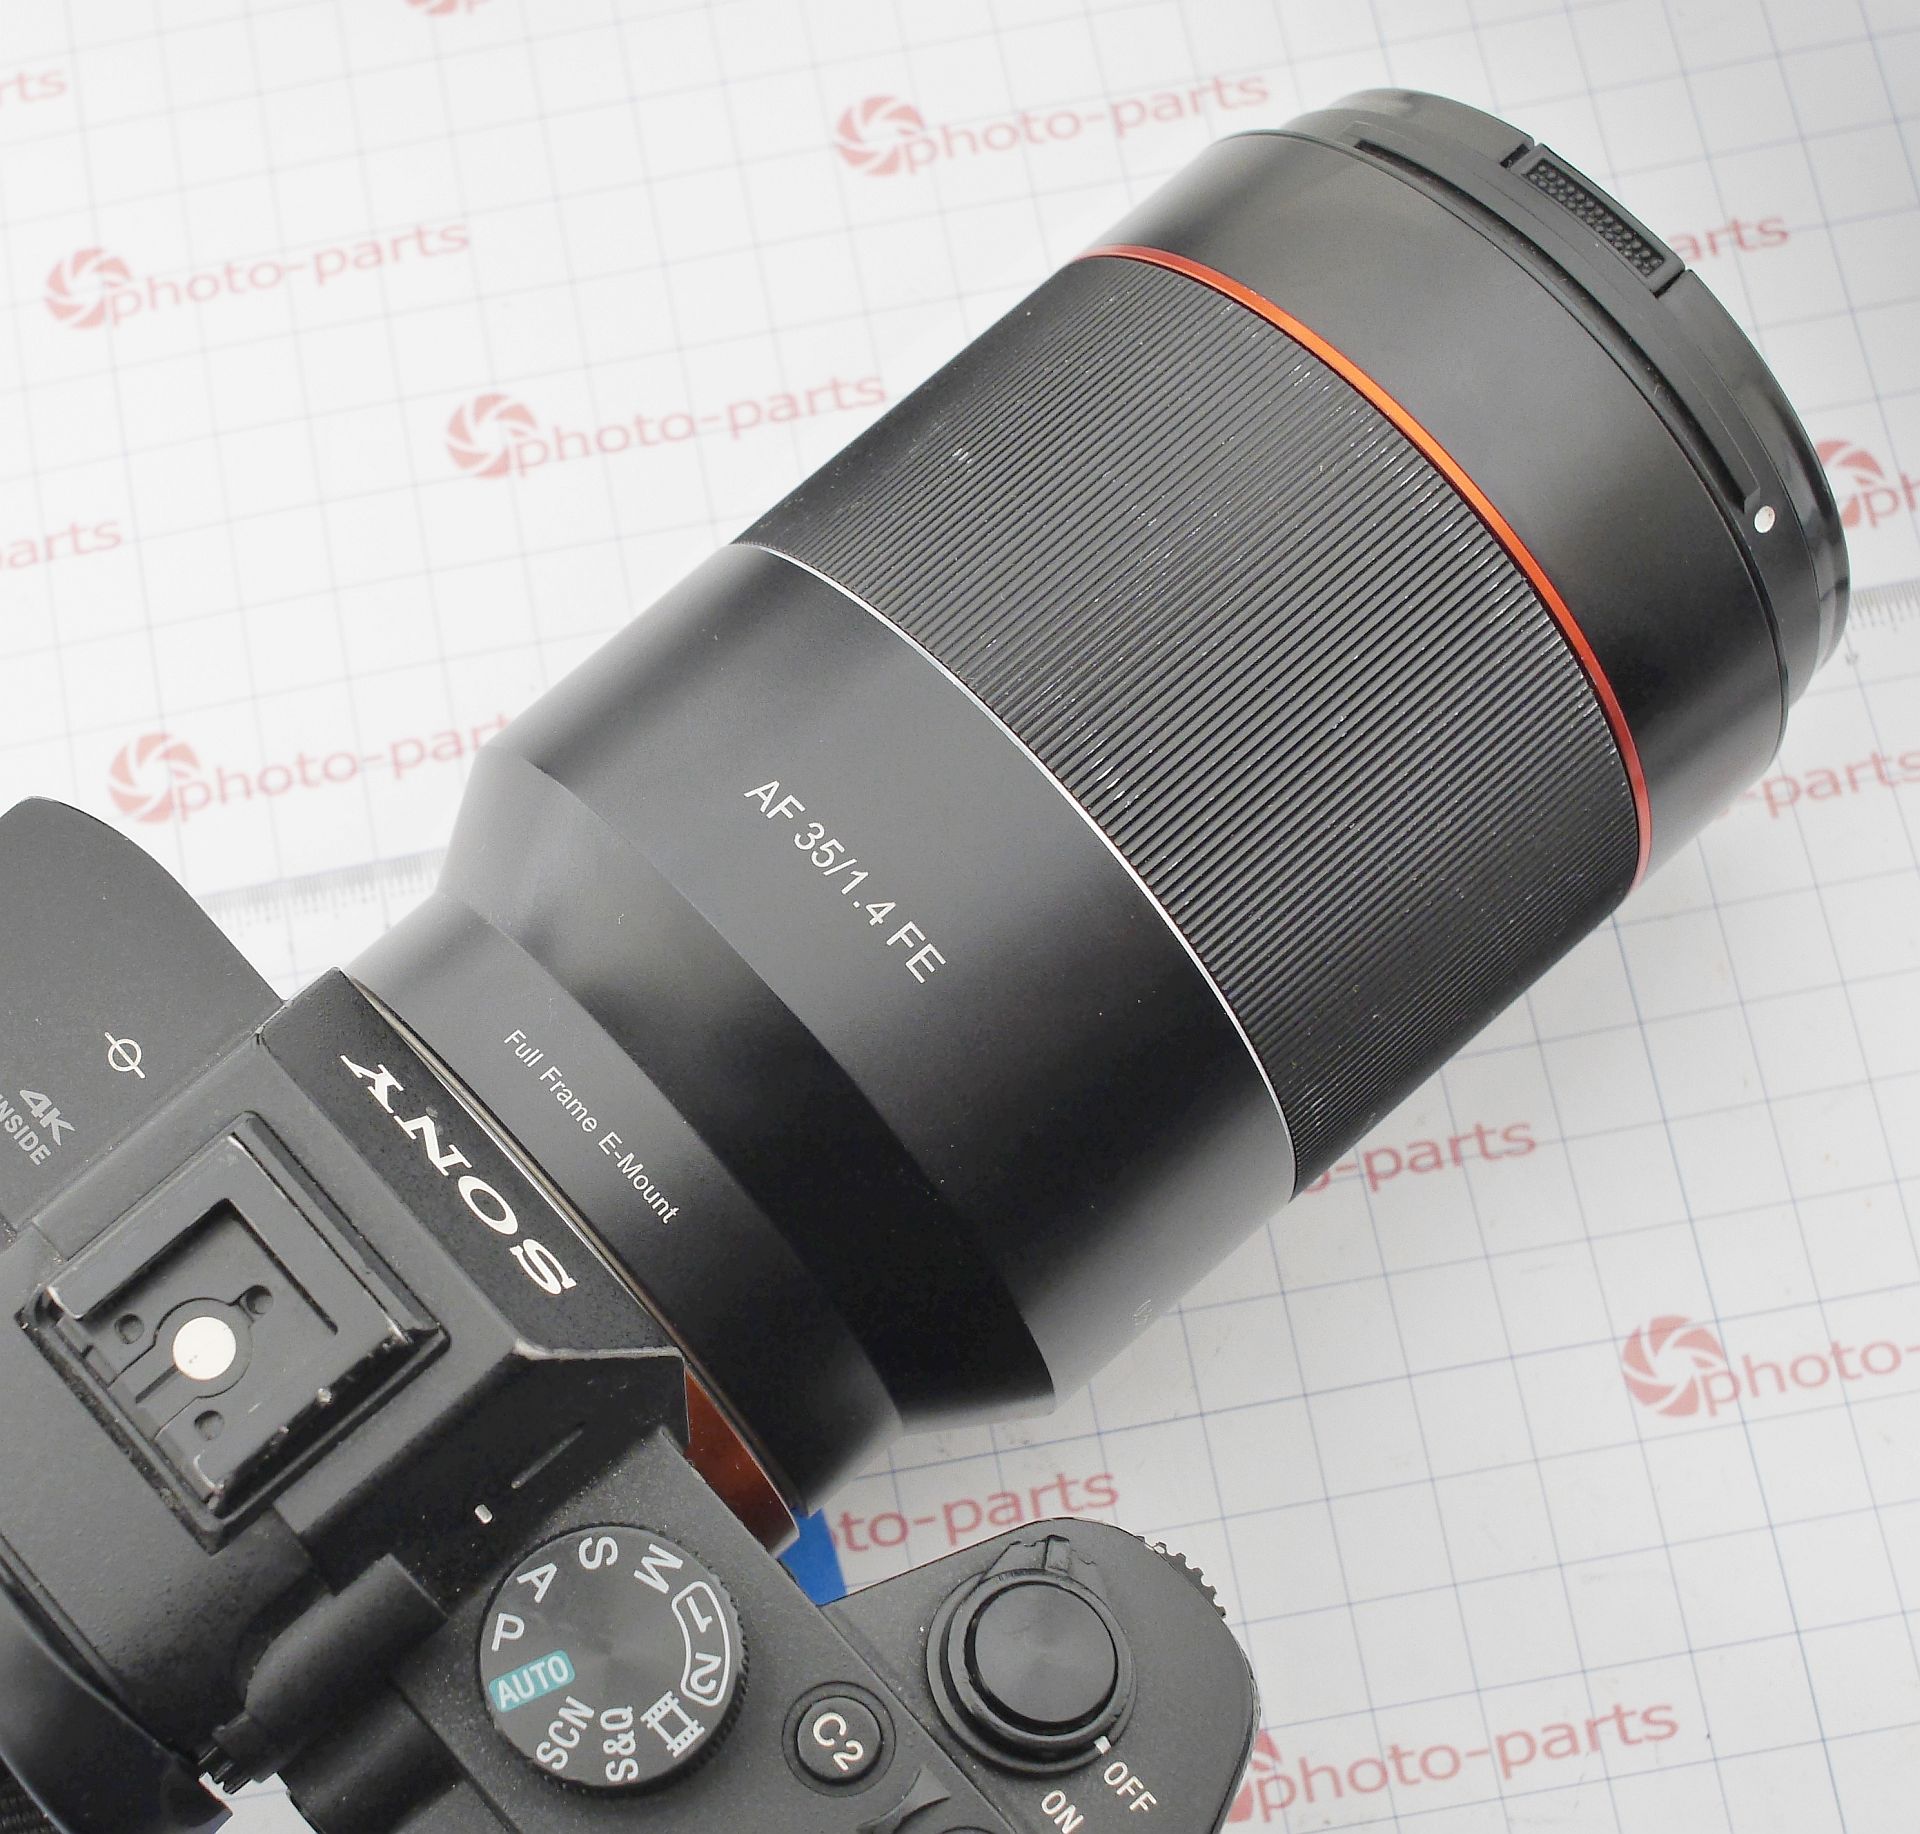
Samyang AF 35mm F1.4 for Sony - bulk repair of everything
- Author
-
-

- User
- Photo-parts
- Posts by this author
- Posts by this author
-
Fast autofocus lenses from the South Korean company Samyang are extremely interesting and slightly underrated. The company has journeyed from fully manual budget lenses to fully compatible autofocus models, and they've succeeded. Modern AF lenses don't just have autofocus; they're equipped with “trendy” ultrasonic motors of their own design. Considering the excellent image quality, I'd place them alongside both branded primes and general-purpose zooms.
Of course, there's a bit of hardware "tar" in the honey: reliability isn't quite their strength yet.
Judge for yourself - common failures include:
- Ultrasonic motor failures
- Stuck apertures
- Splitting in half at the lens mount
However, other issues are very rare, and the ones that do occur are usually easy to fix successfully. Below is a full repair report based on working with five (!) identical Samyang AF 35/1.4 FE lenses - all apperaed for service at the same time.
On the bench today:
- Lens #1: aperture won't fully open, so the camera detects it erratically.
- Lenses #2 & #3: autofocus completely fails - no detection by the camera.
- Lens #4: a funny combo of the above two issues, plus a previous repair attempt.
- Lens #5: broken mount and the ultrasonic motor failed from the same impact.
We start with disassembly, which thankfully is as simple as it gets - (almost) without quirks. Almost - since accessing some components requires optical alignment. It's done well but quite sensitive; returning the lens to perfect condition requires skill, and those production secrets will remain undisclosed.
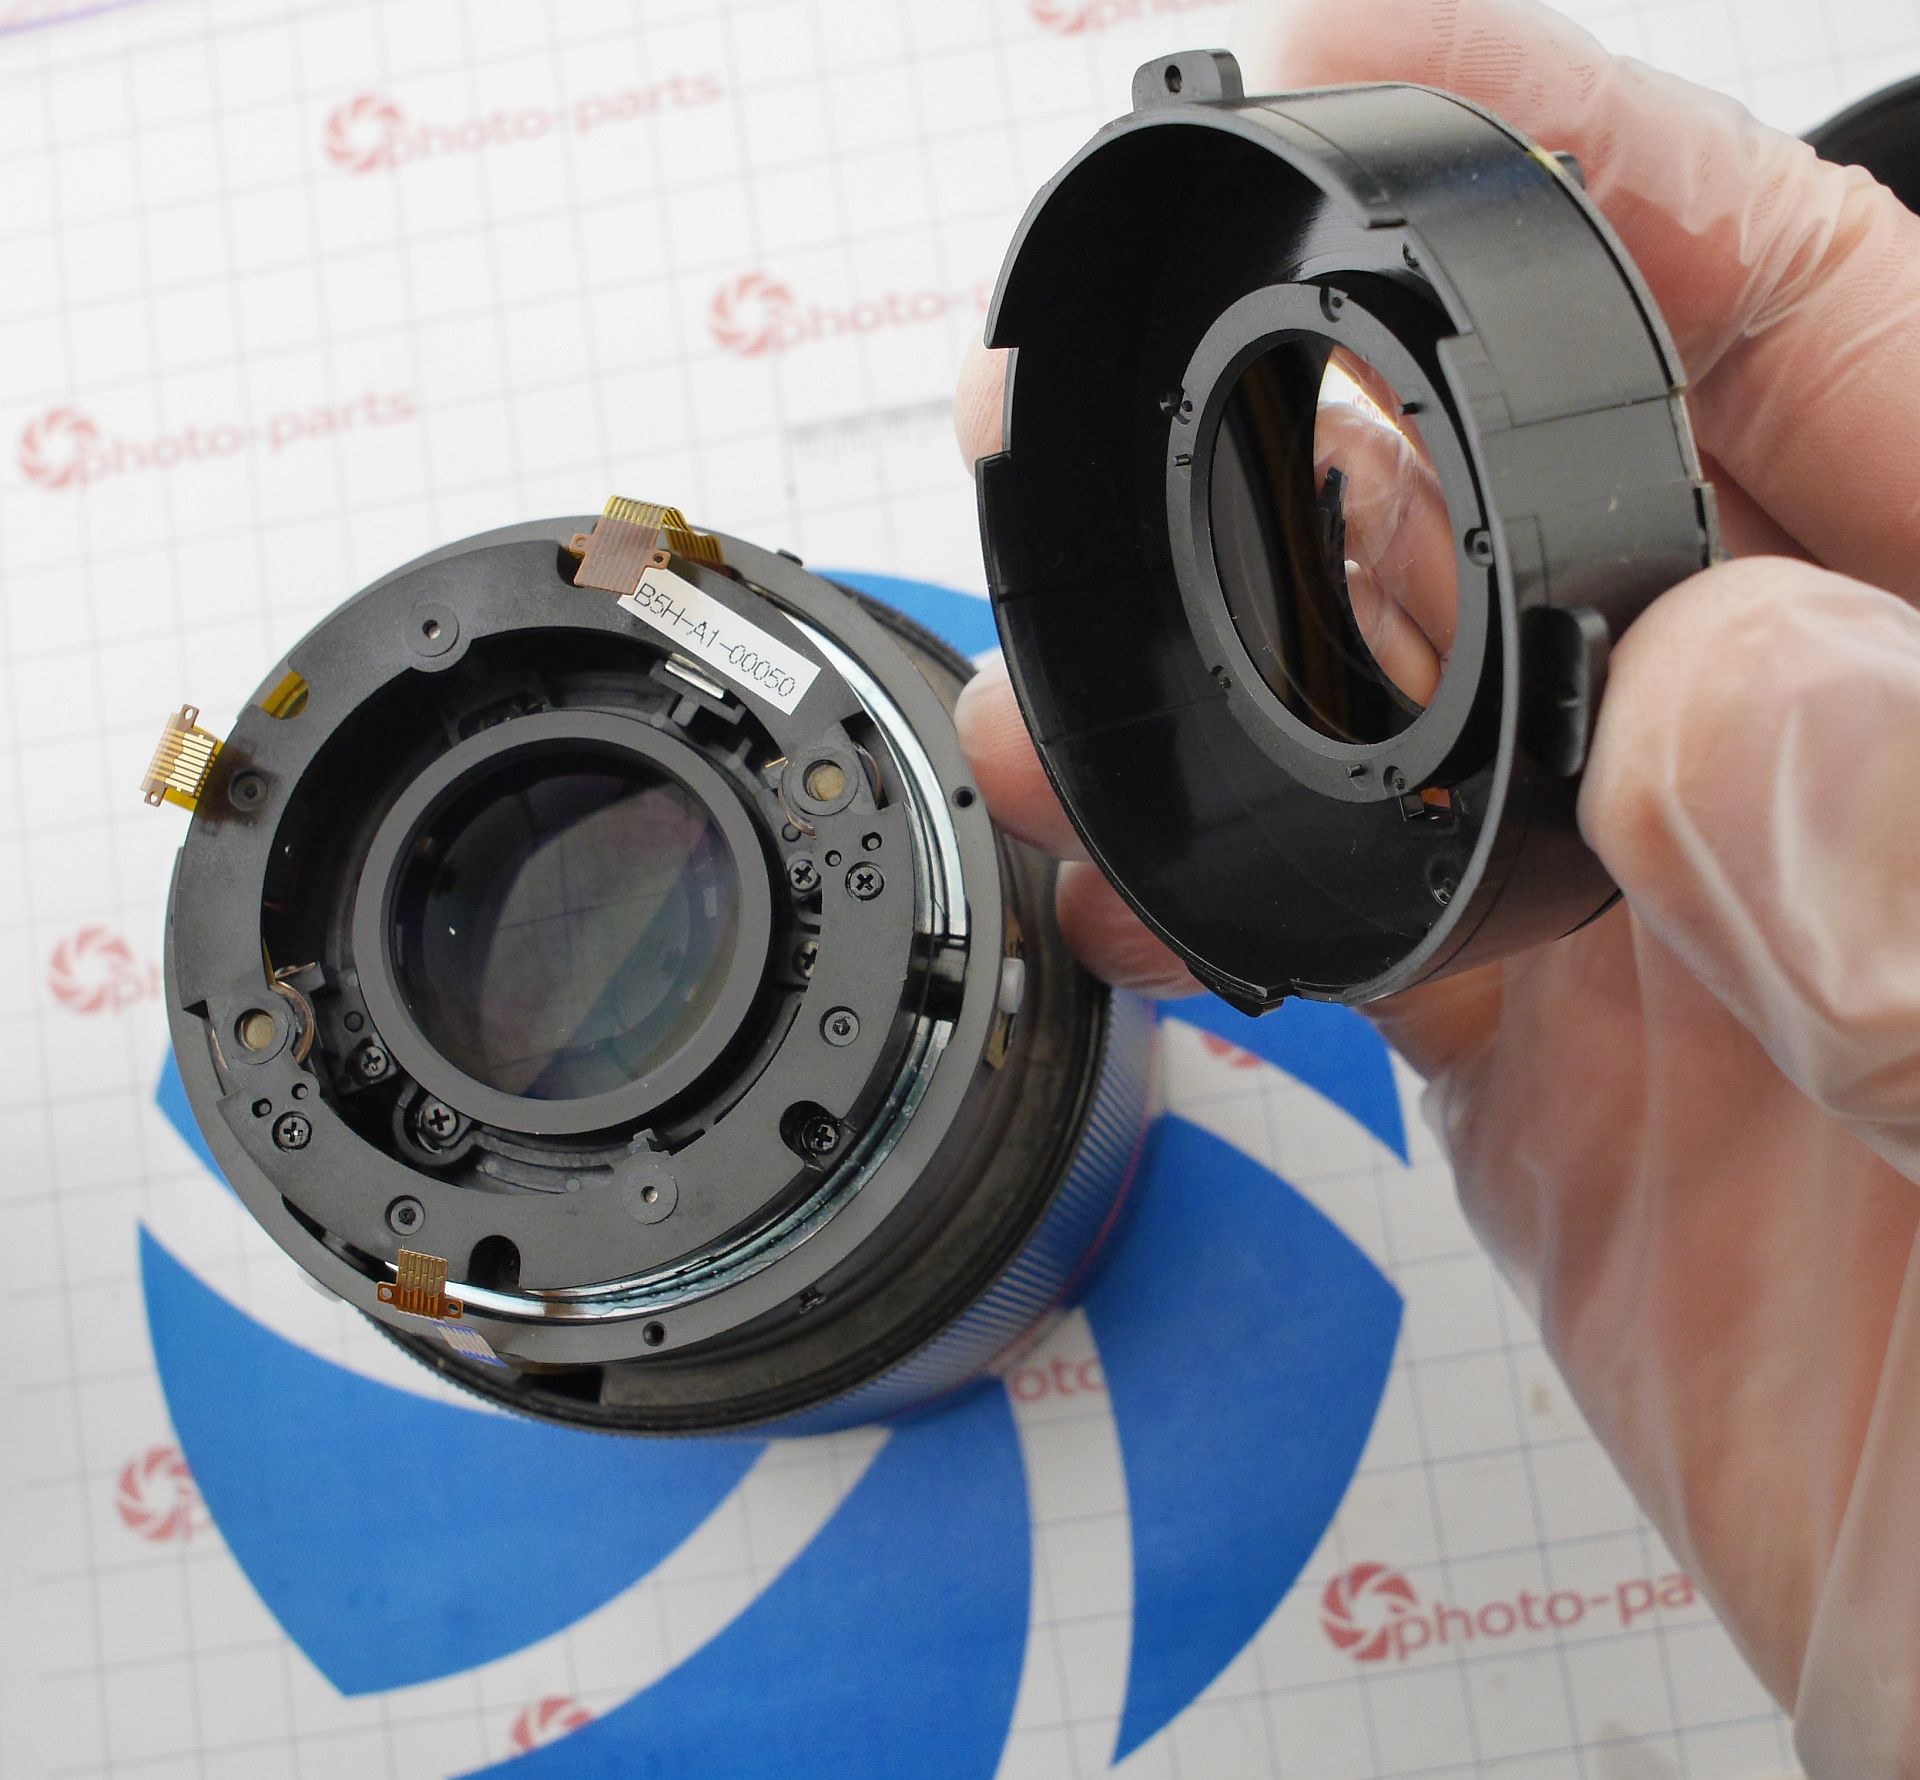
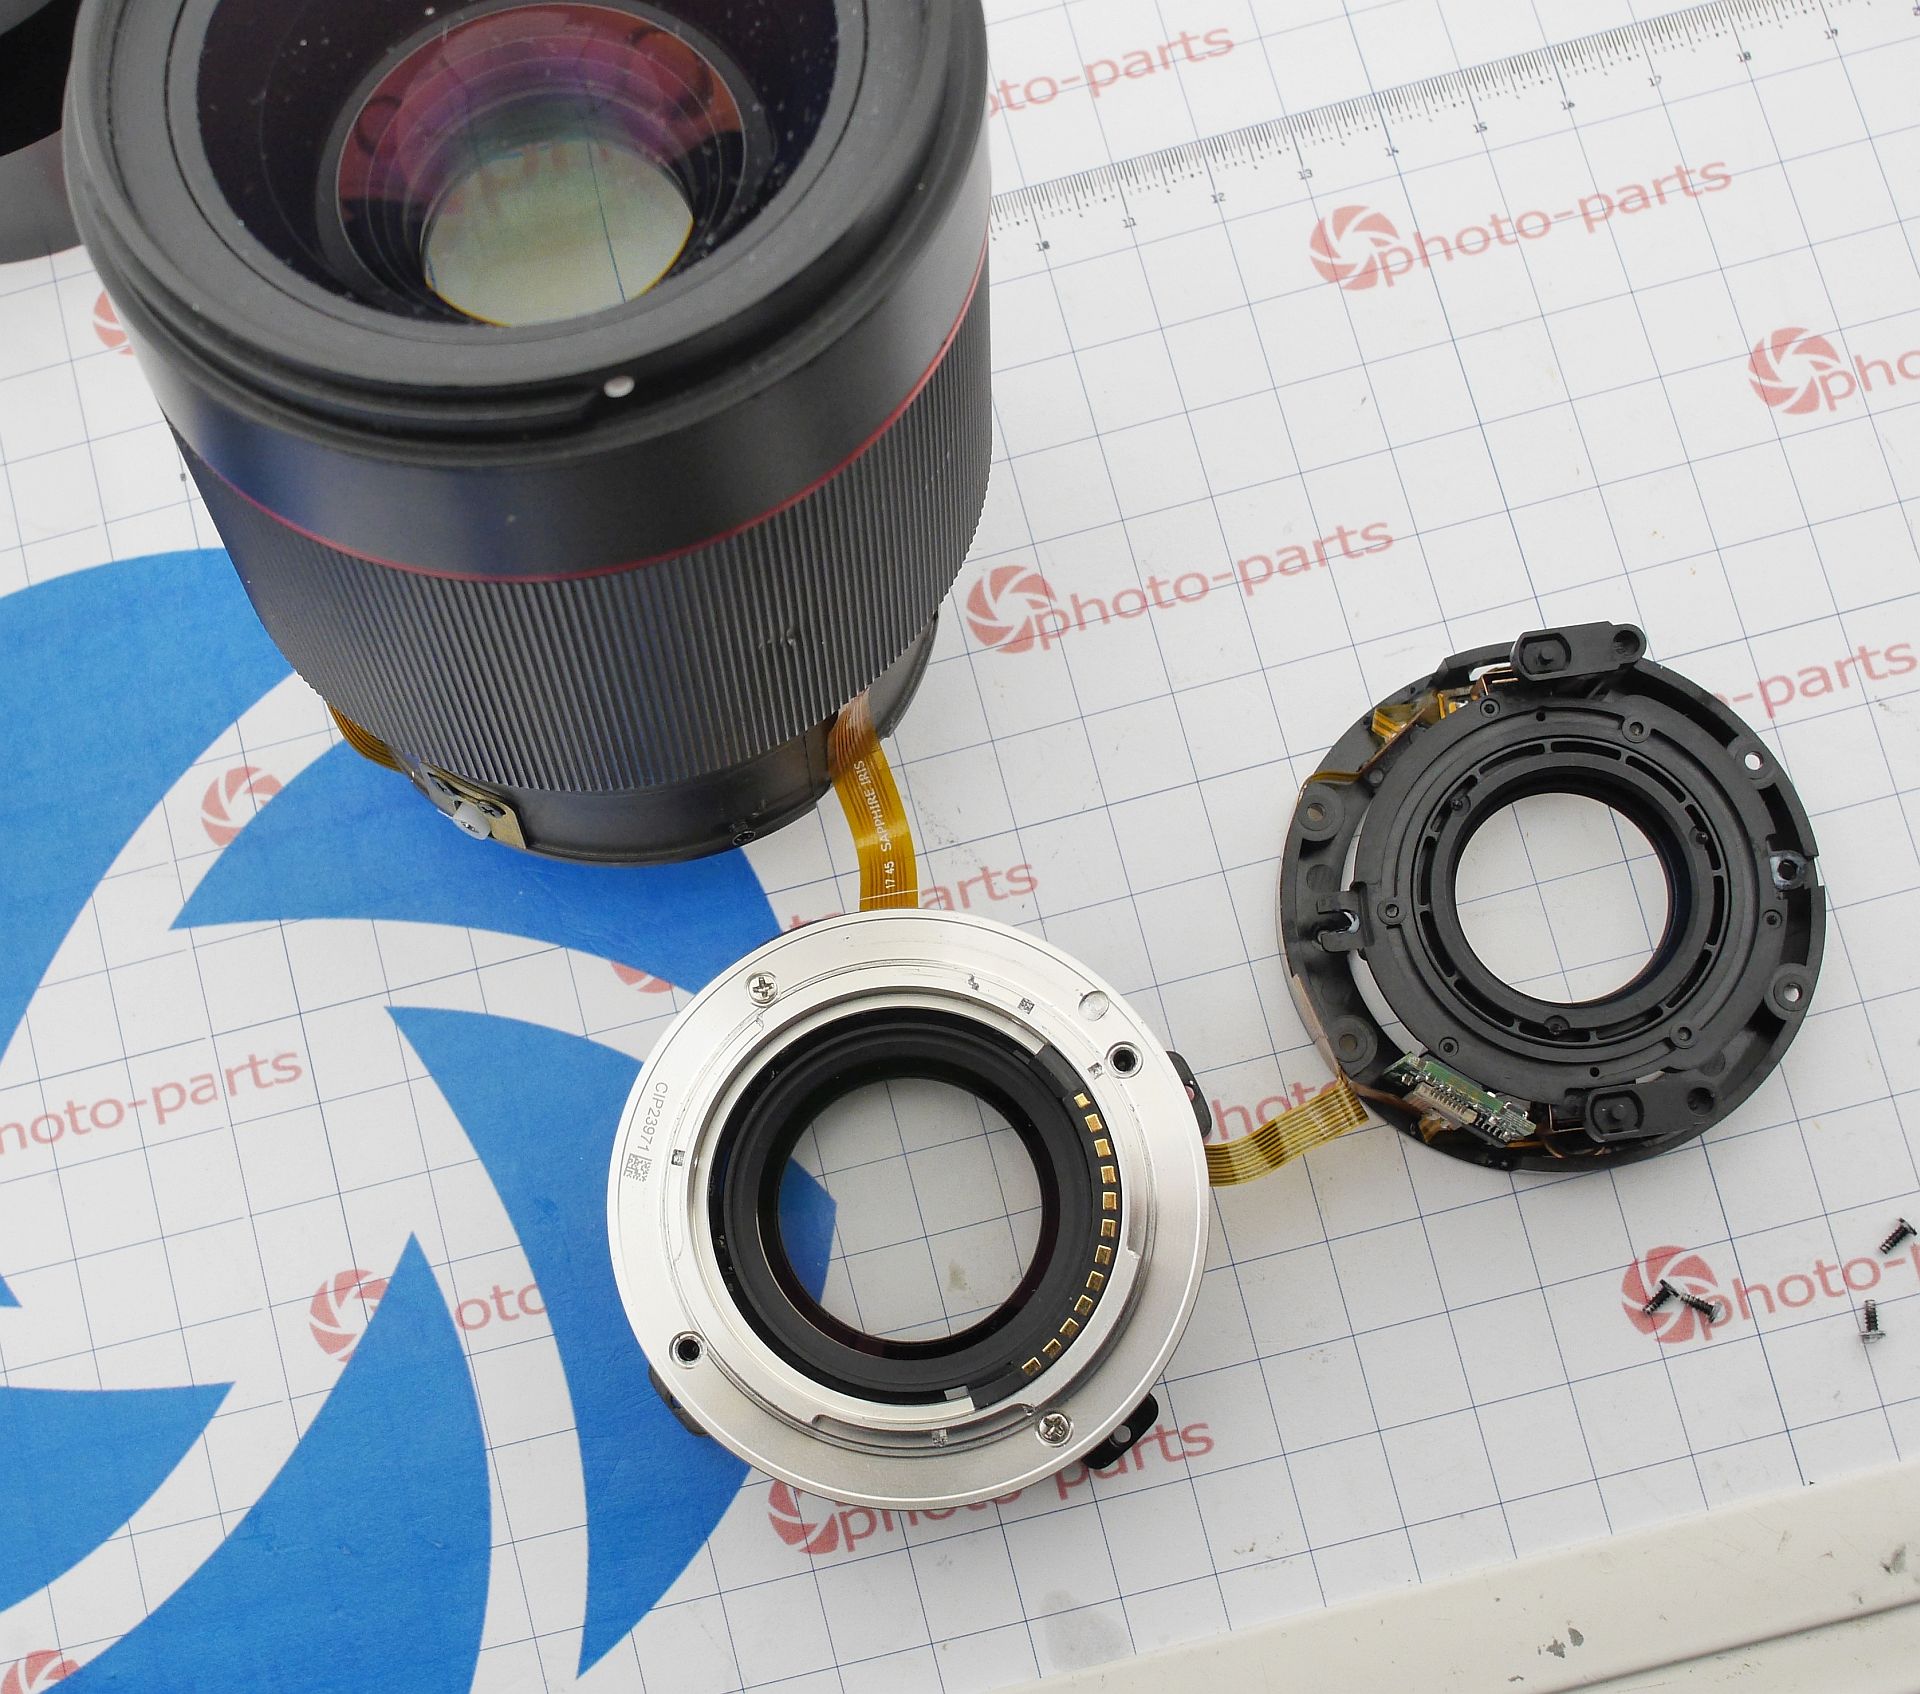
The lens is disassembled from both the front and the mount side.
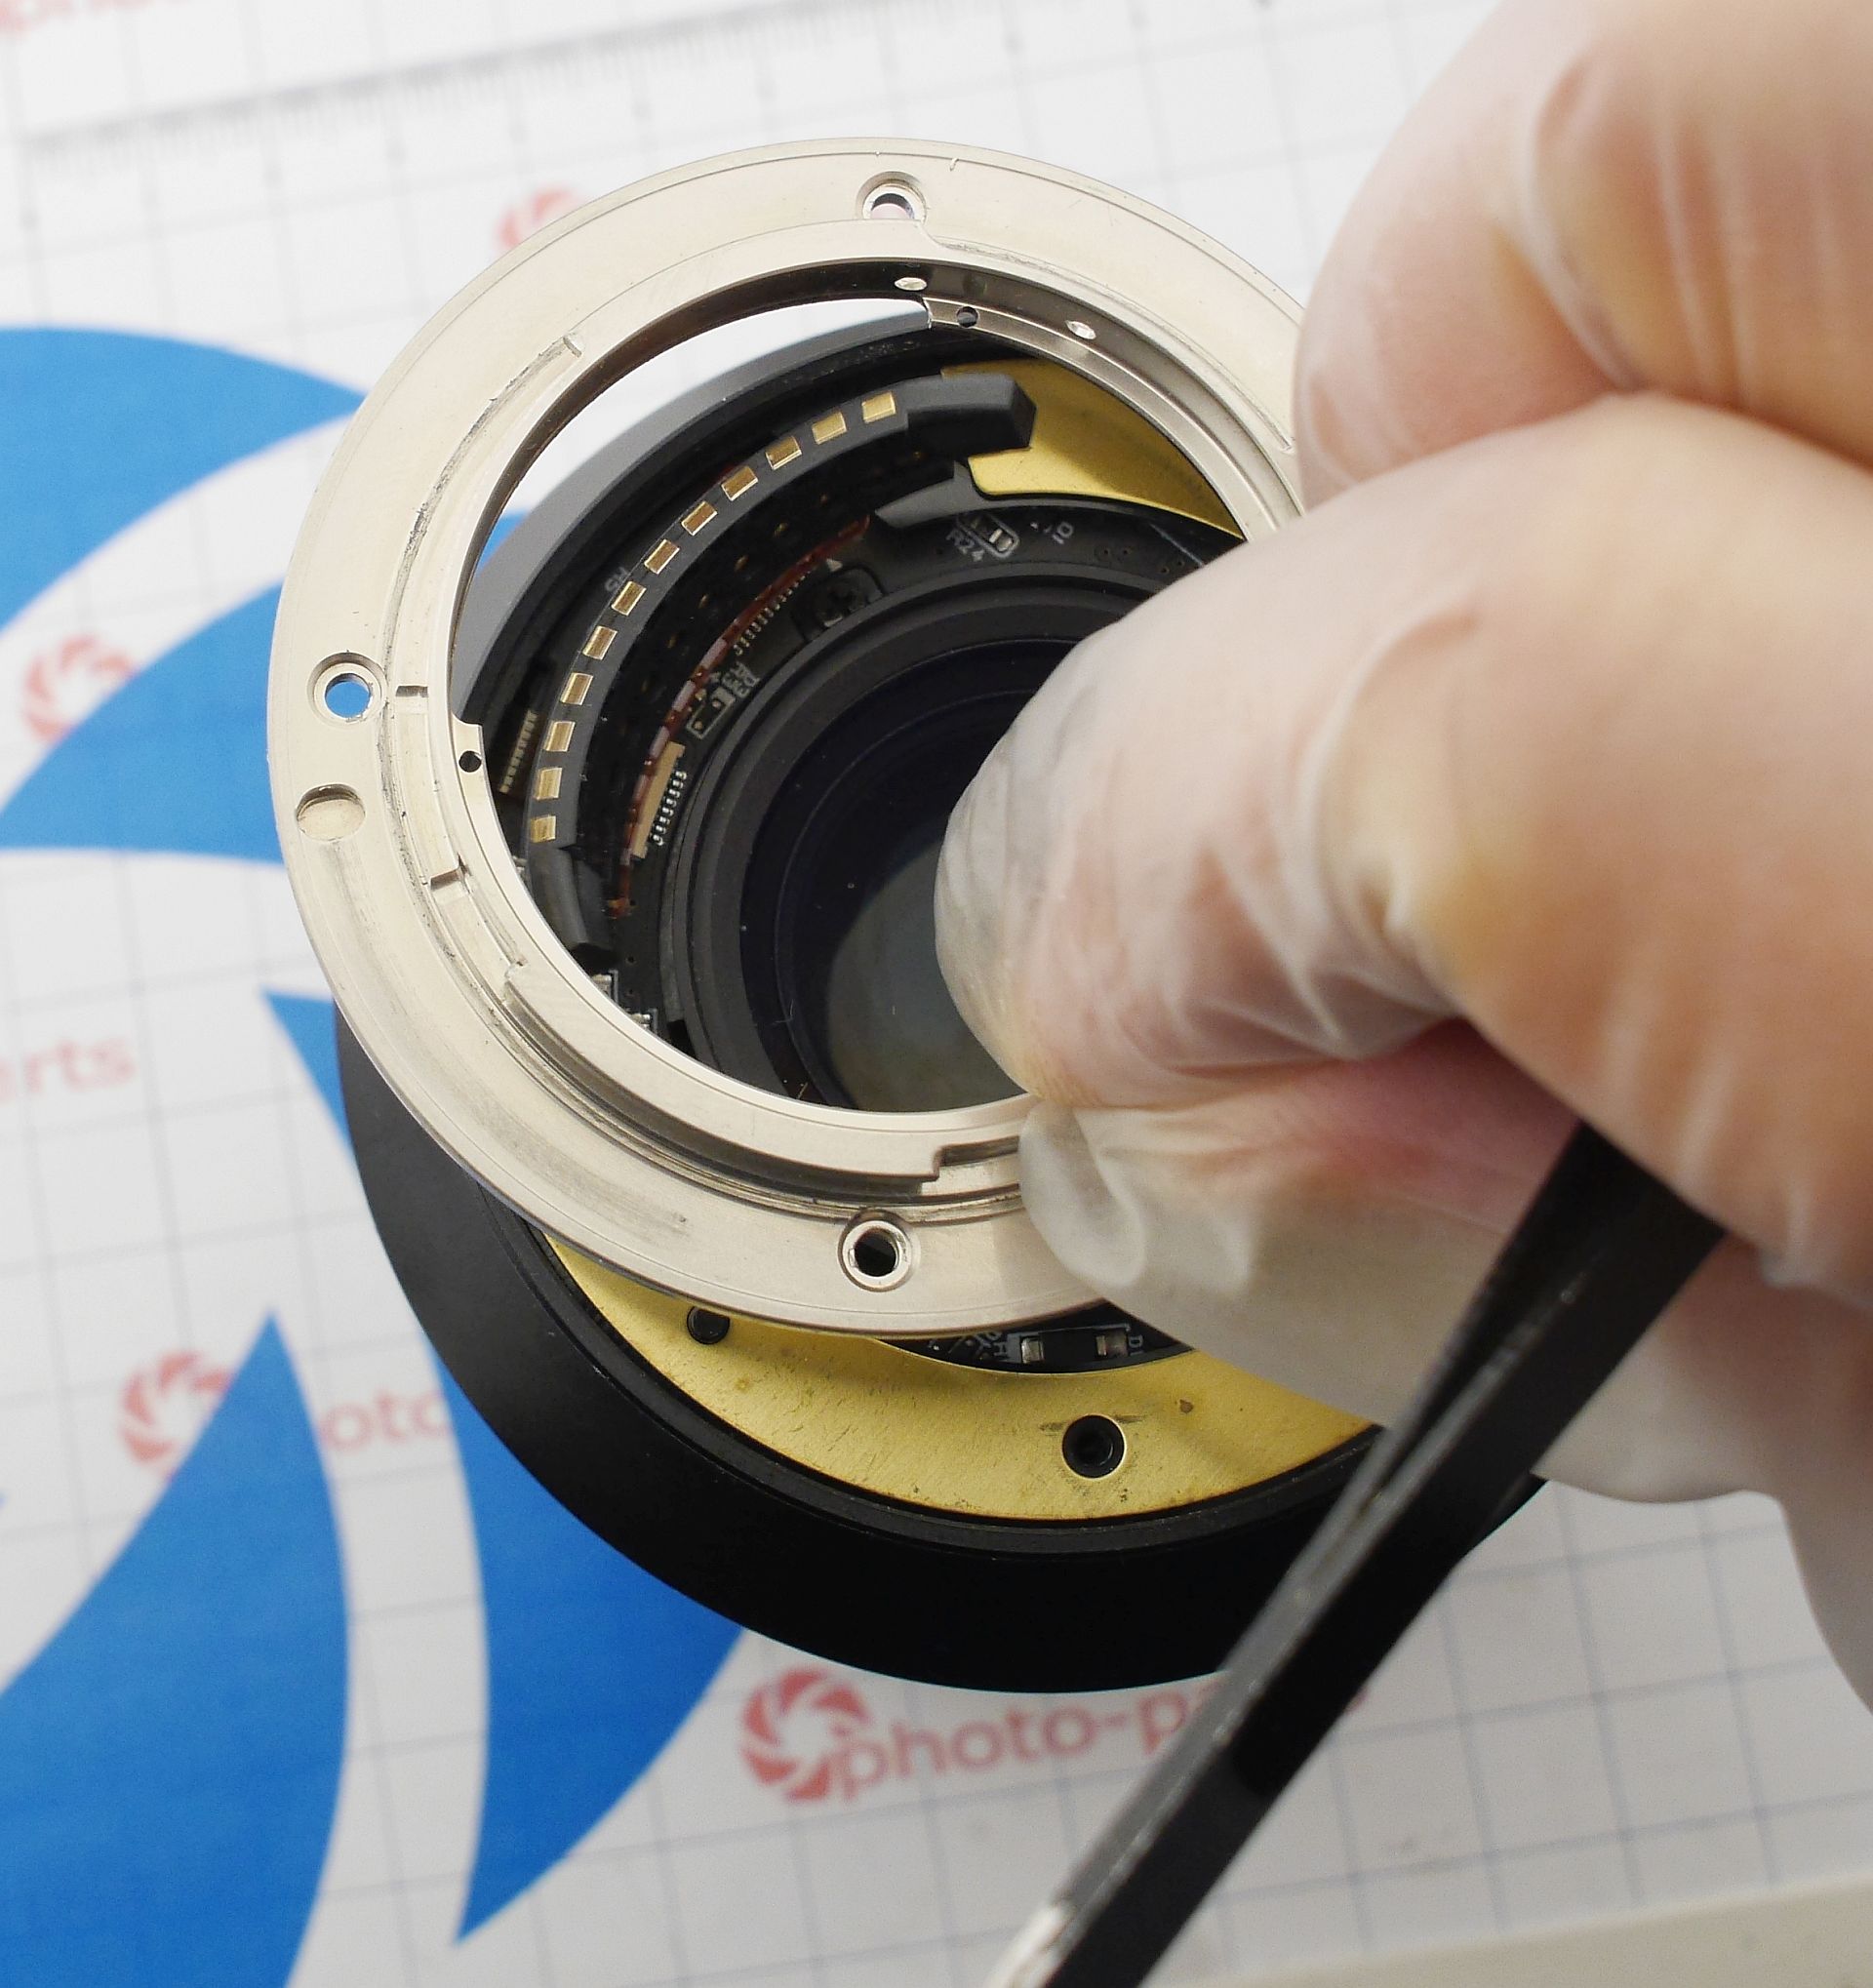
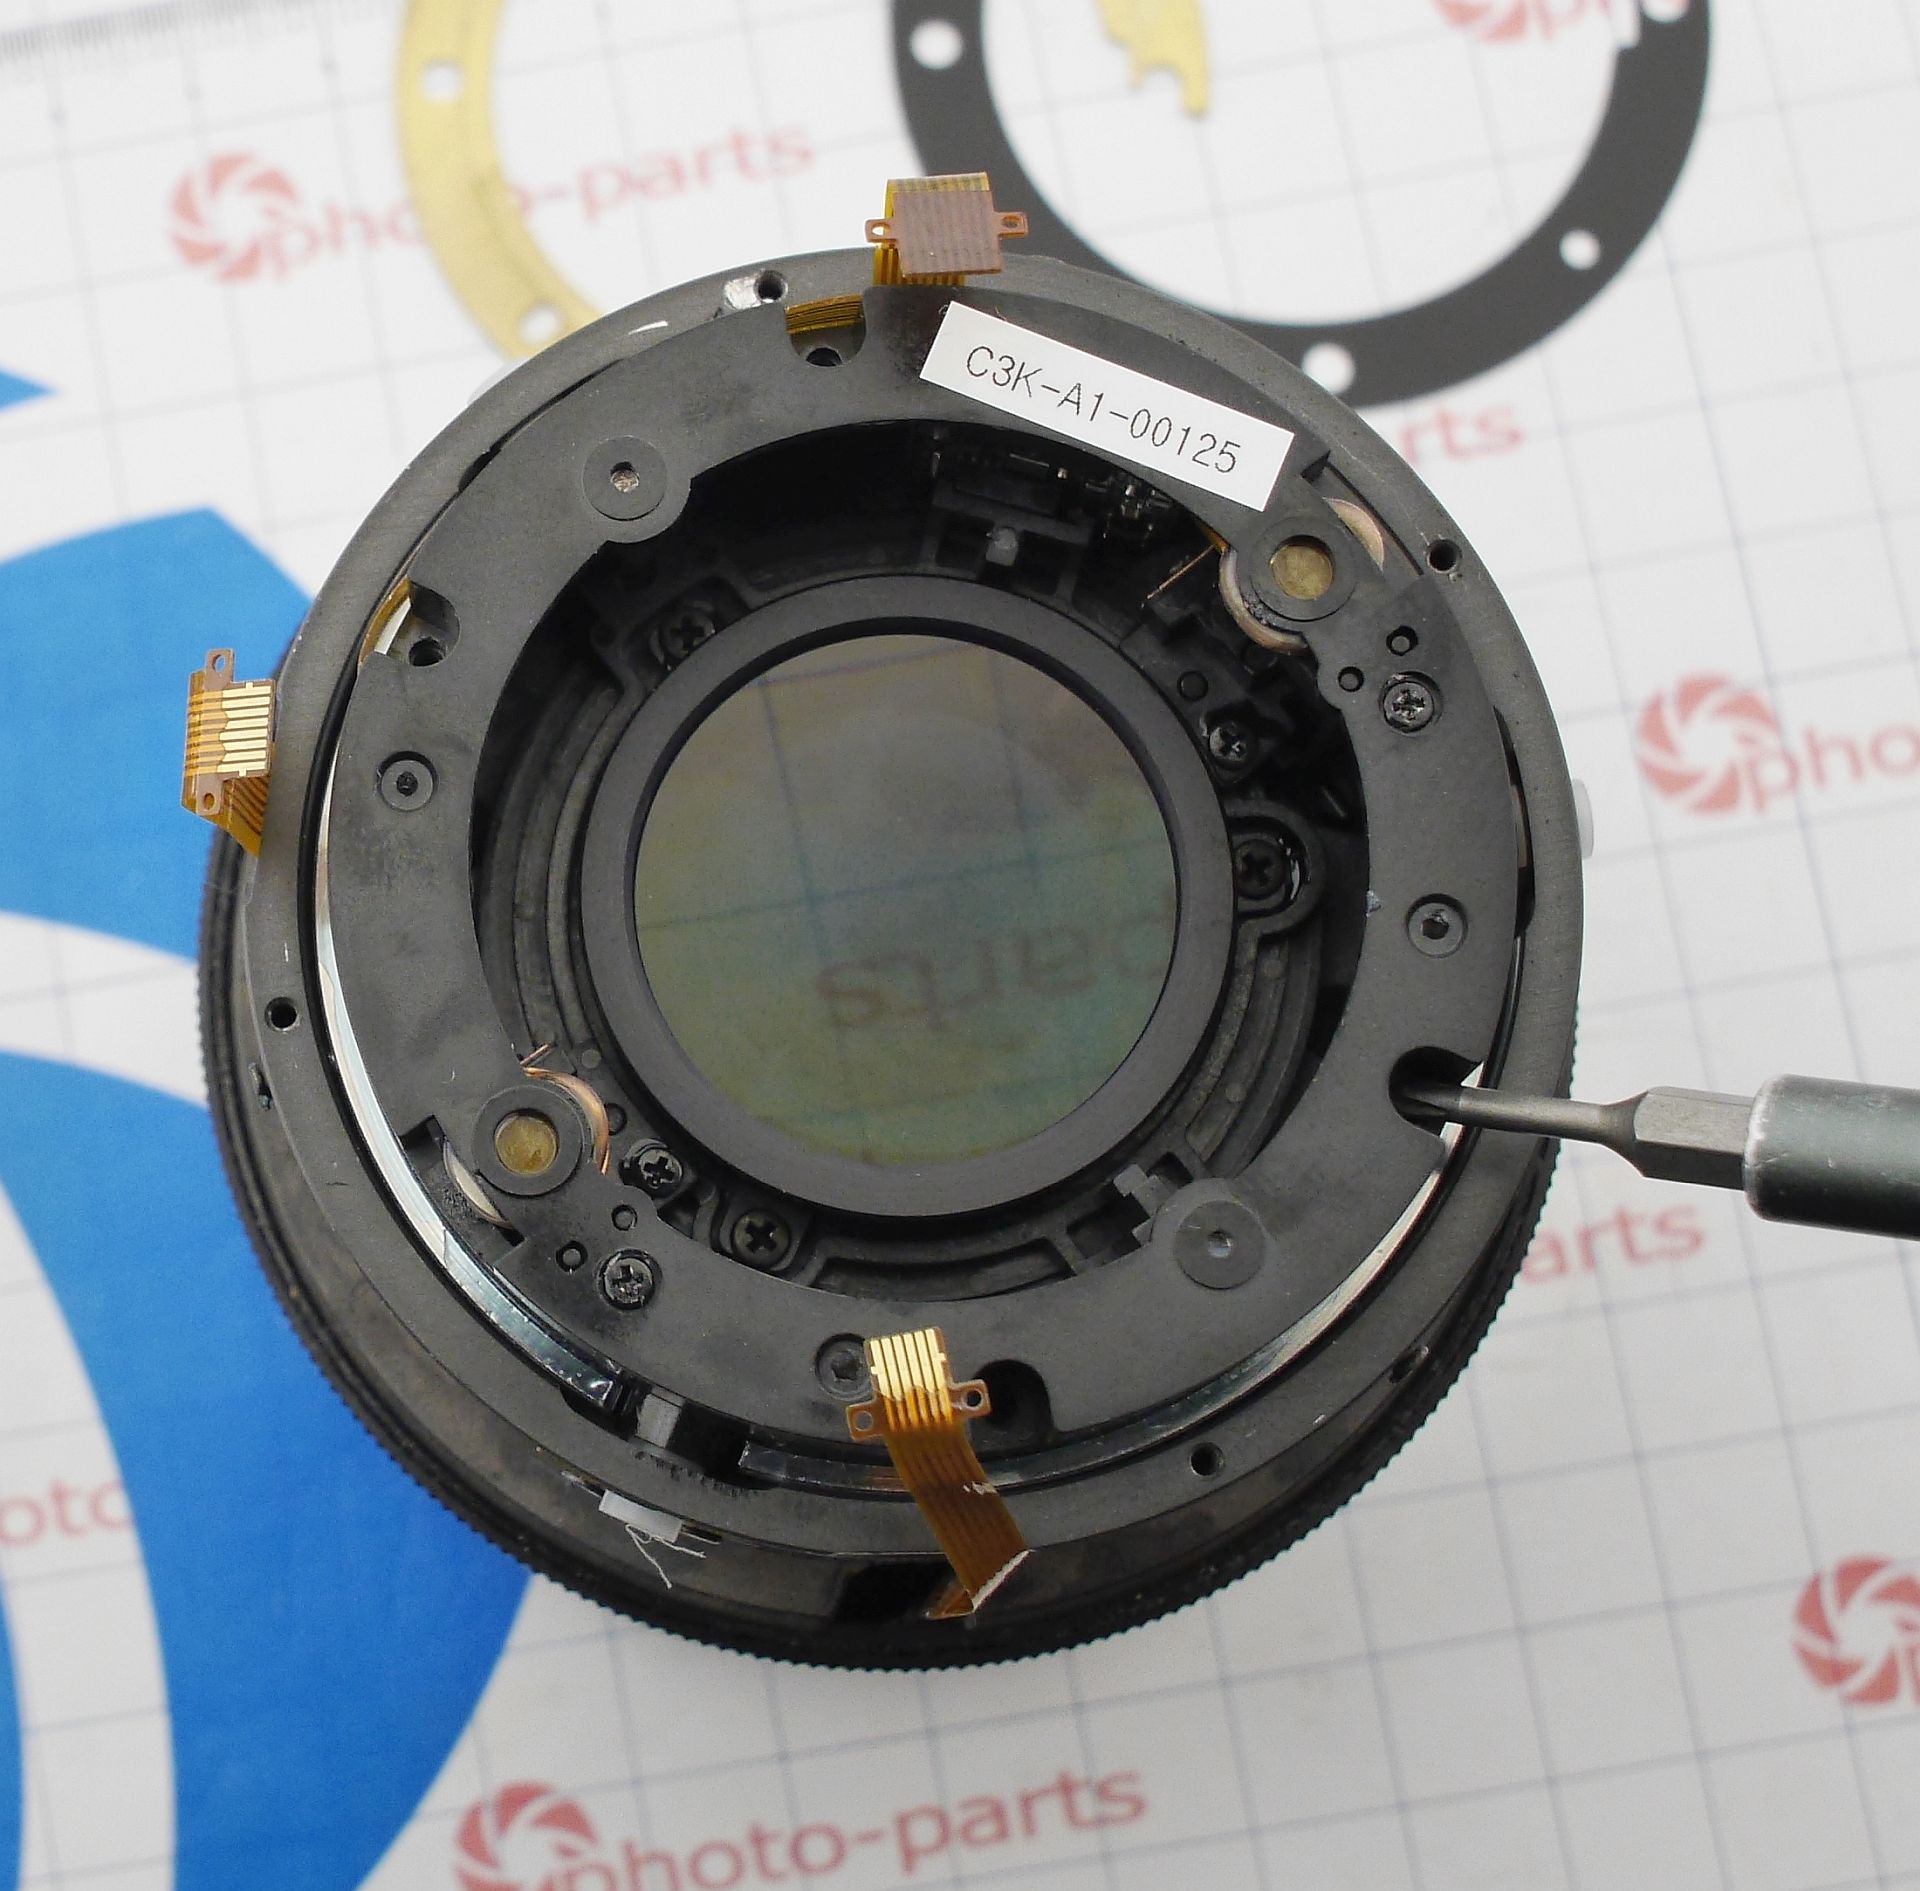
As usual, everything visible is unfastened, then the decorative bayonet insert is removed. After that, the mount itself is pried off and folded aside from the board:


Three screws hold the model-name housing, which carries no electrical parts, so it simply lifts off:
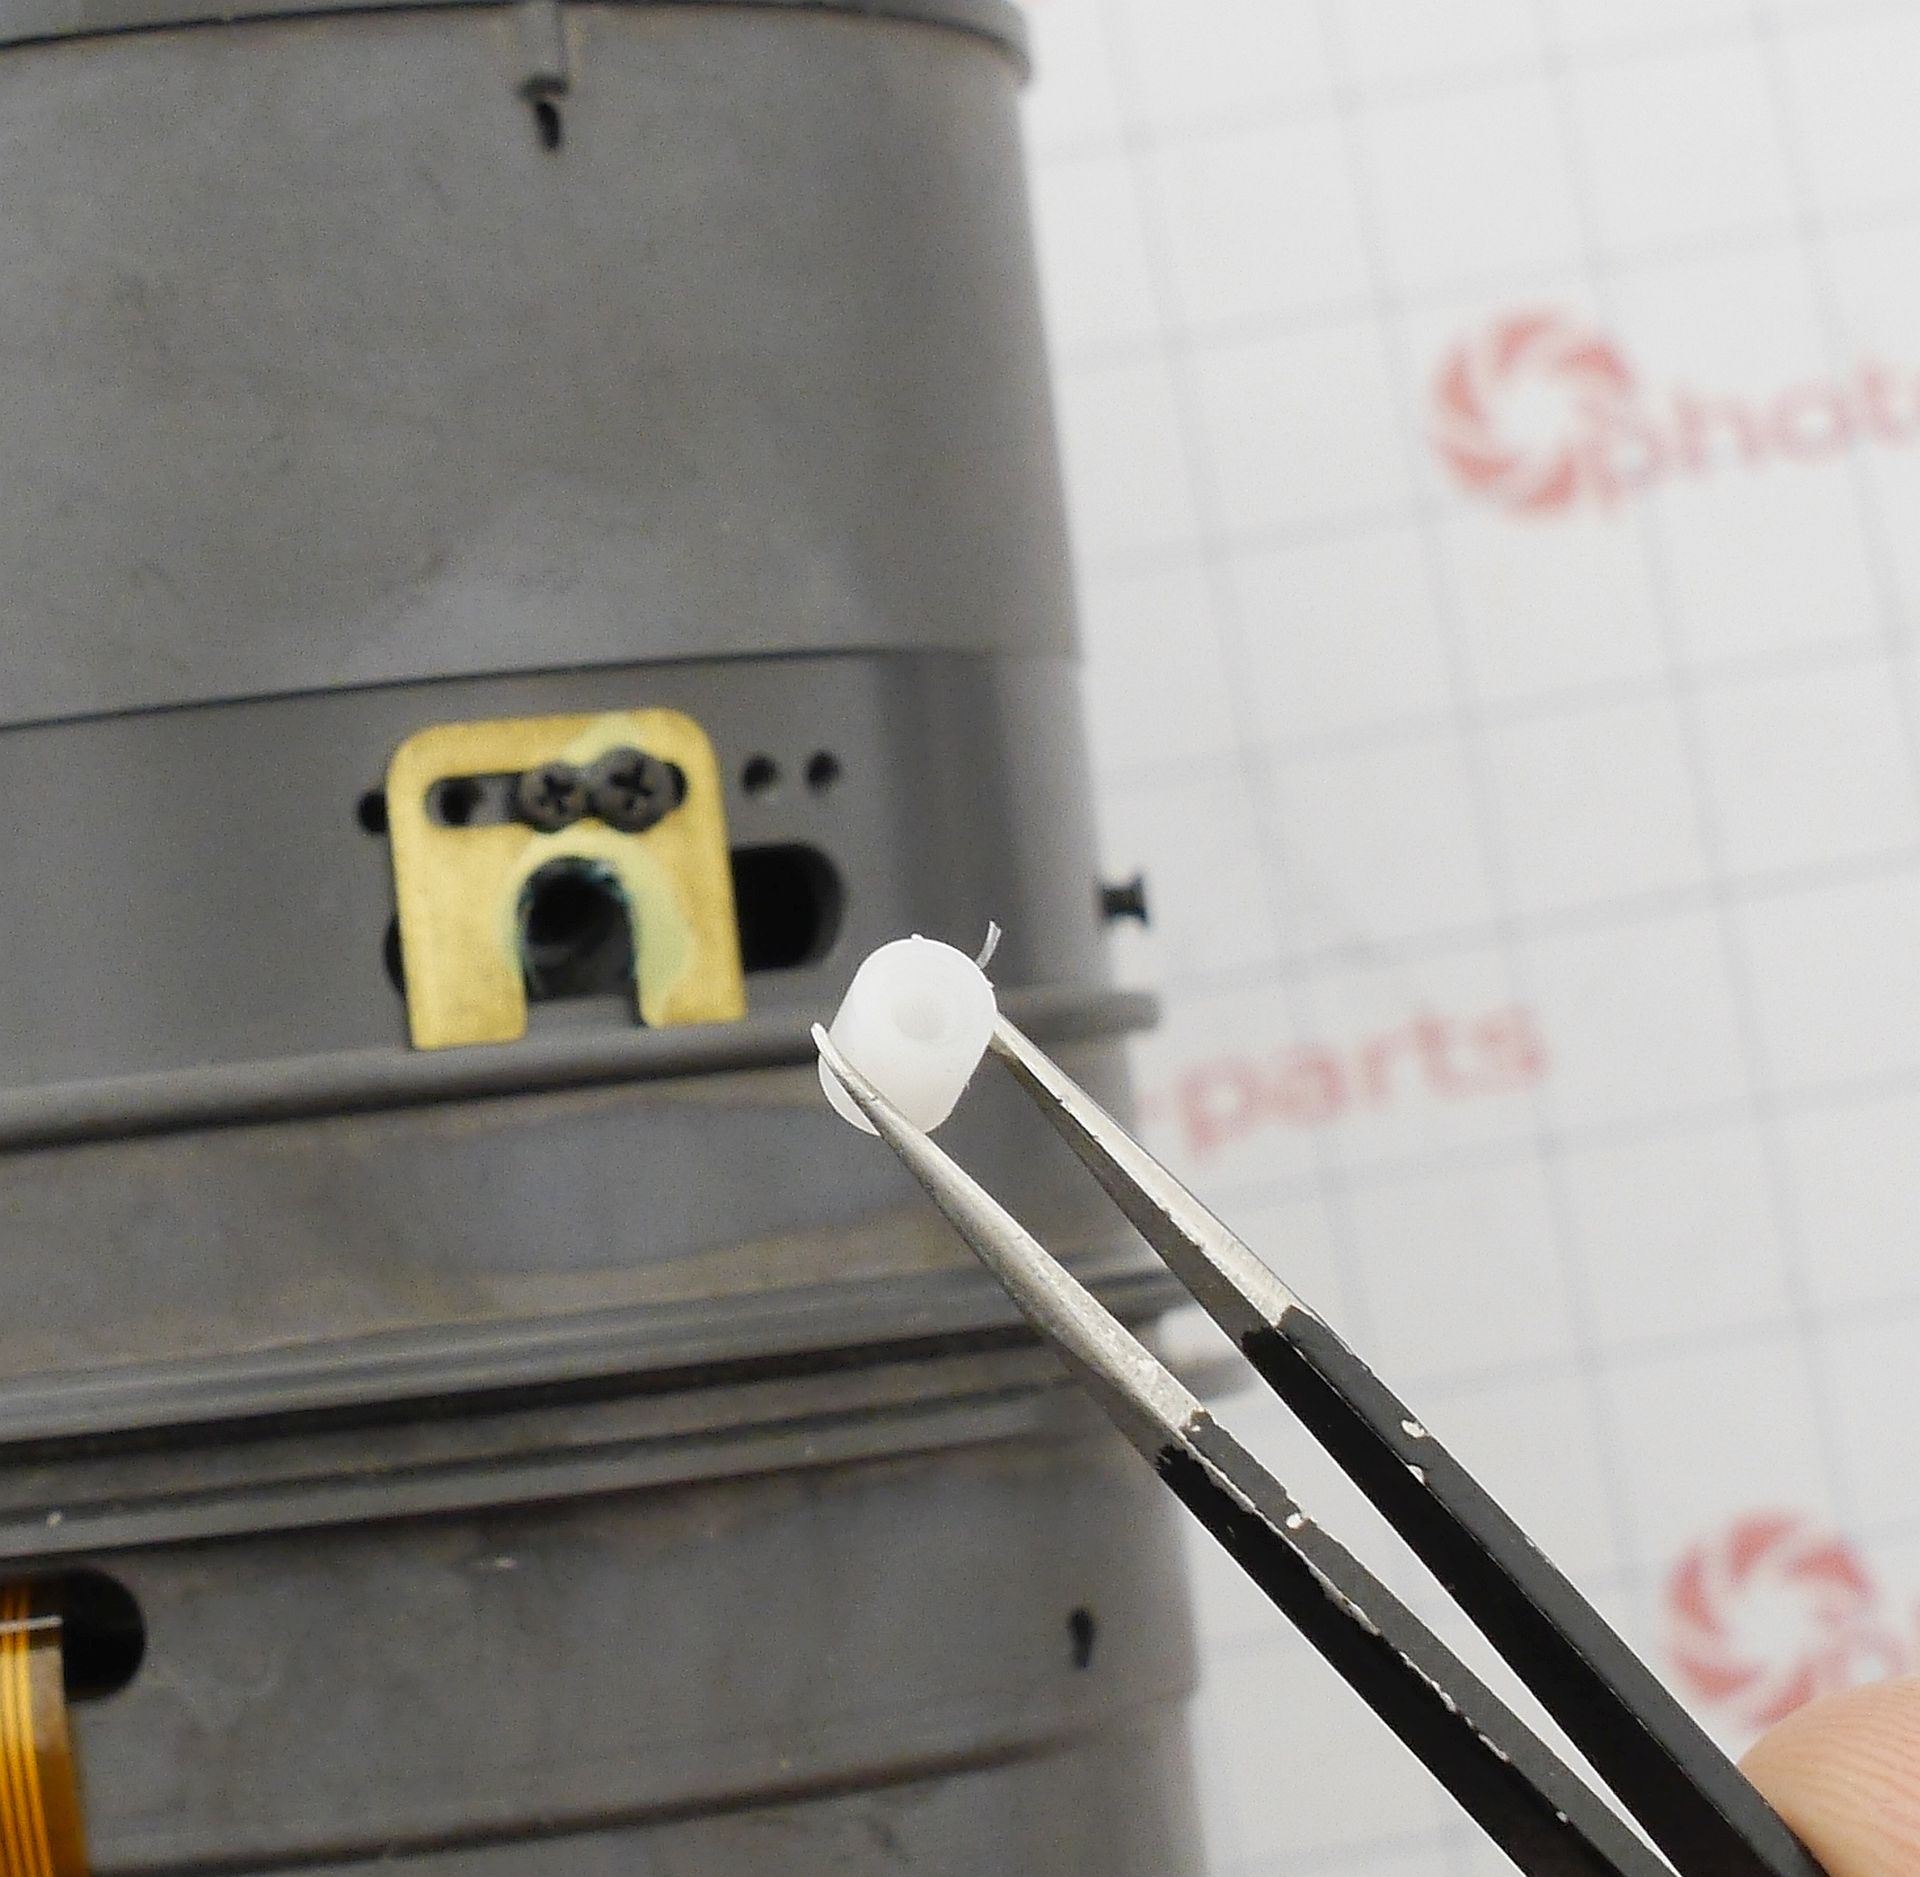
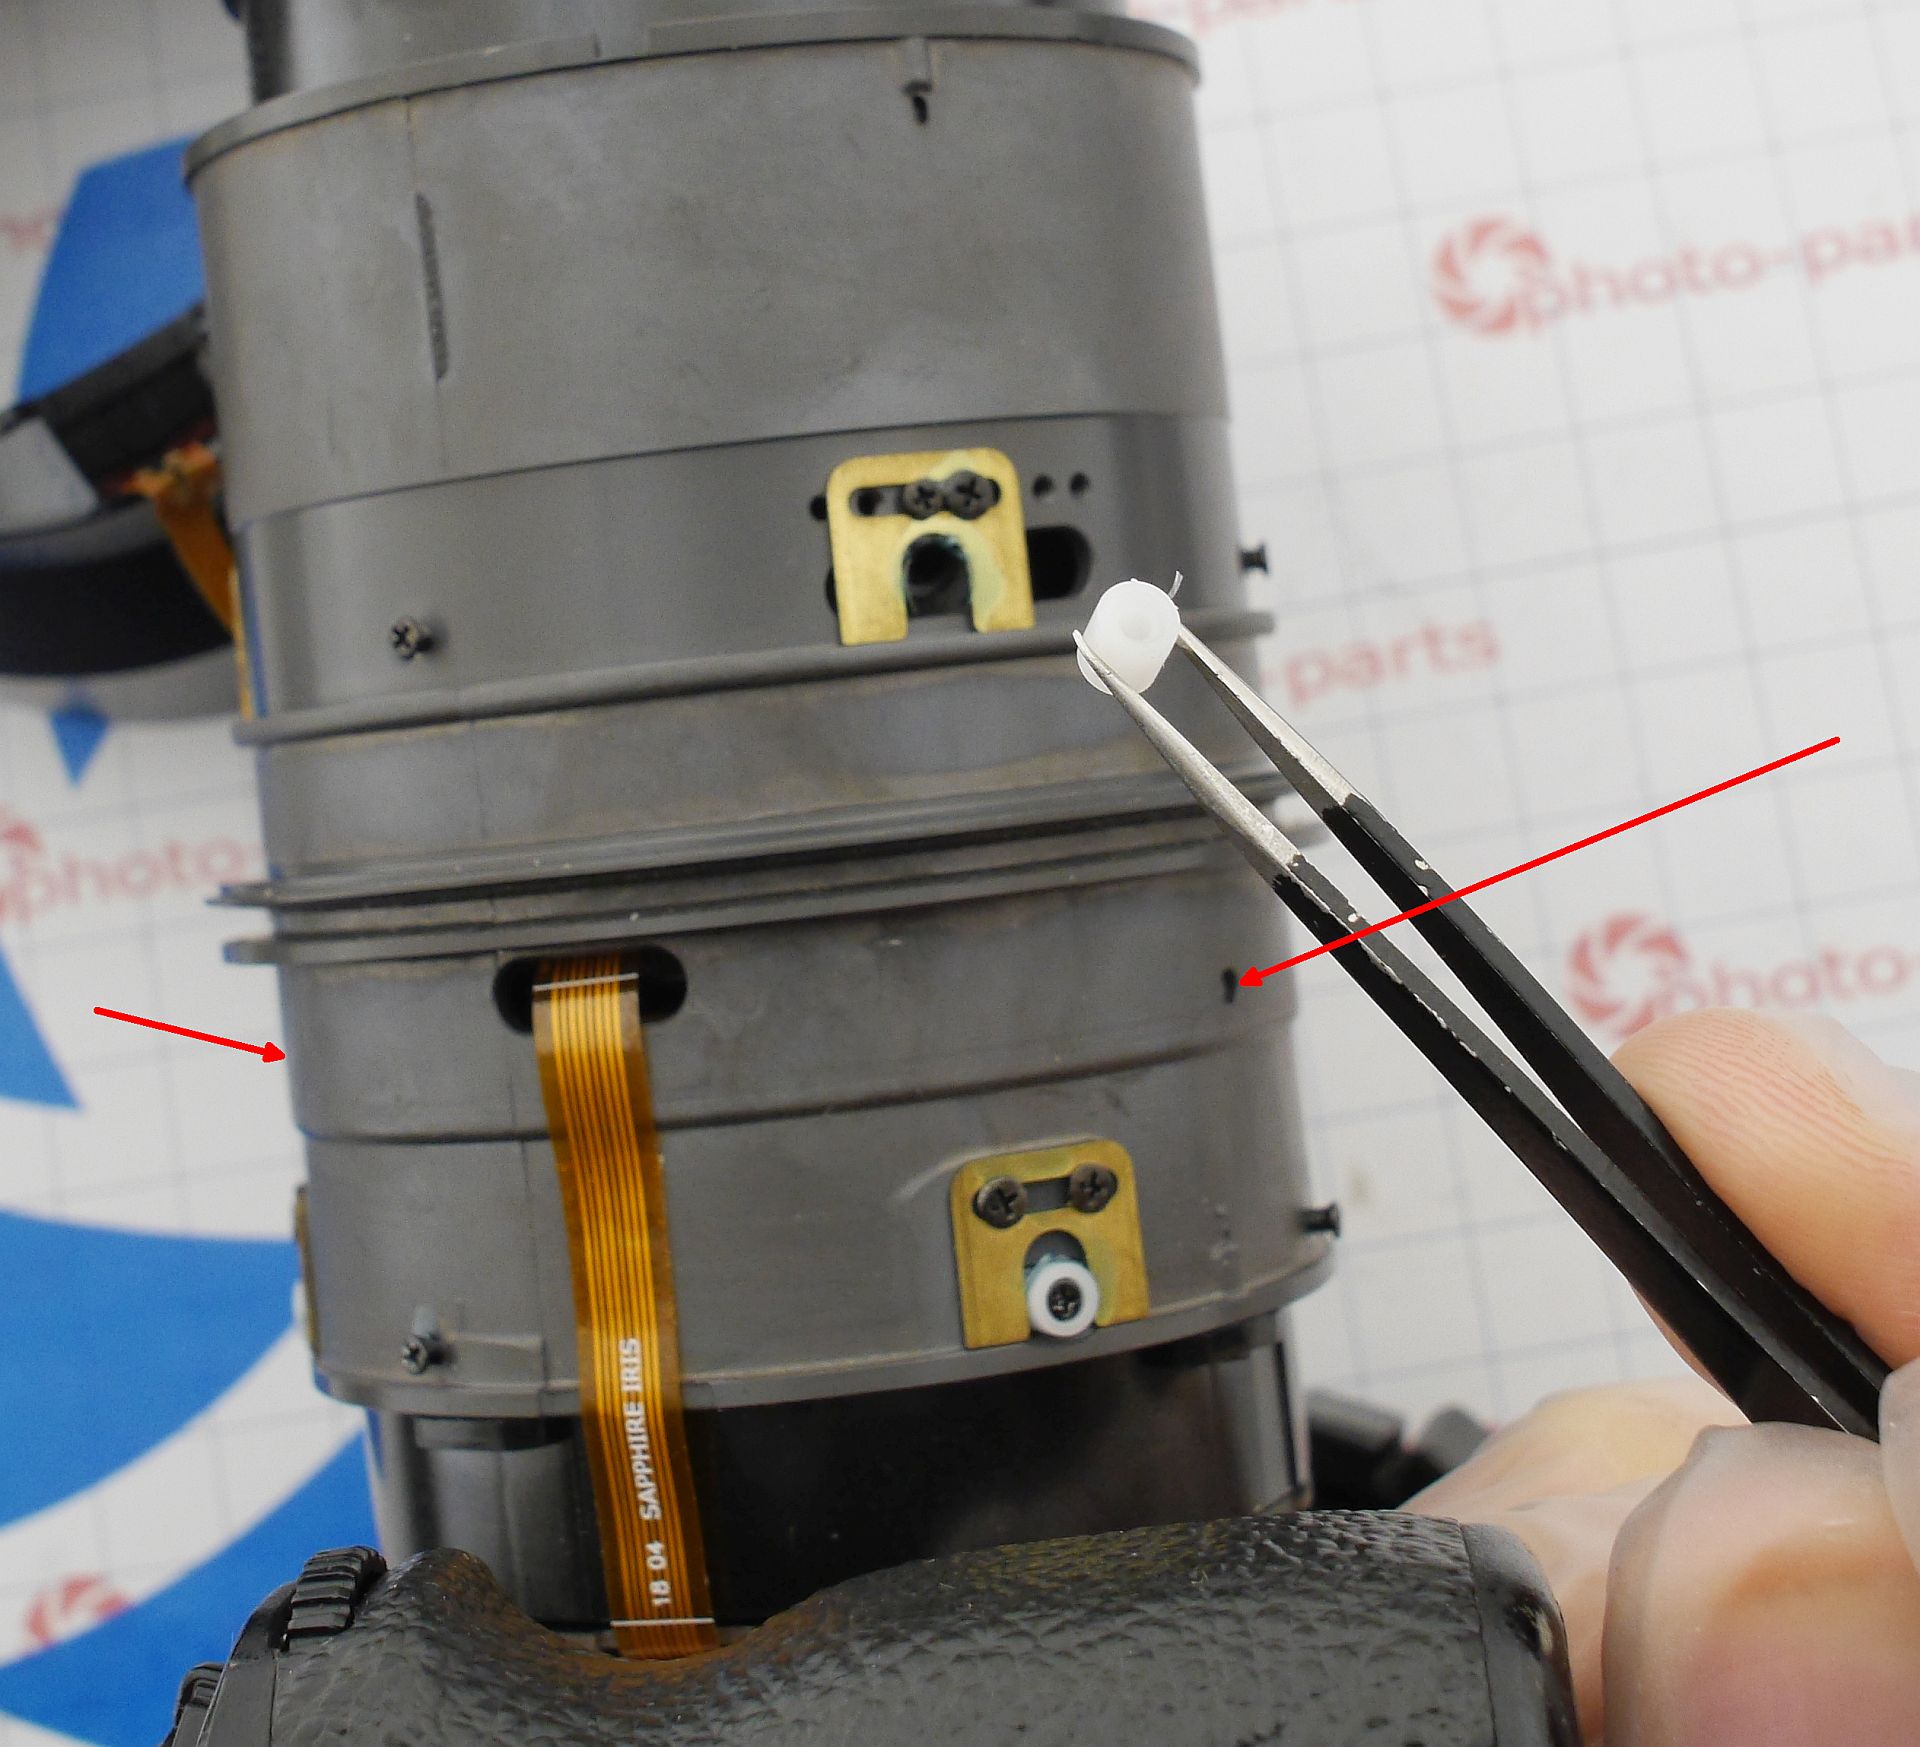
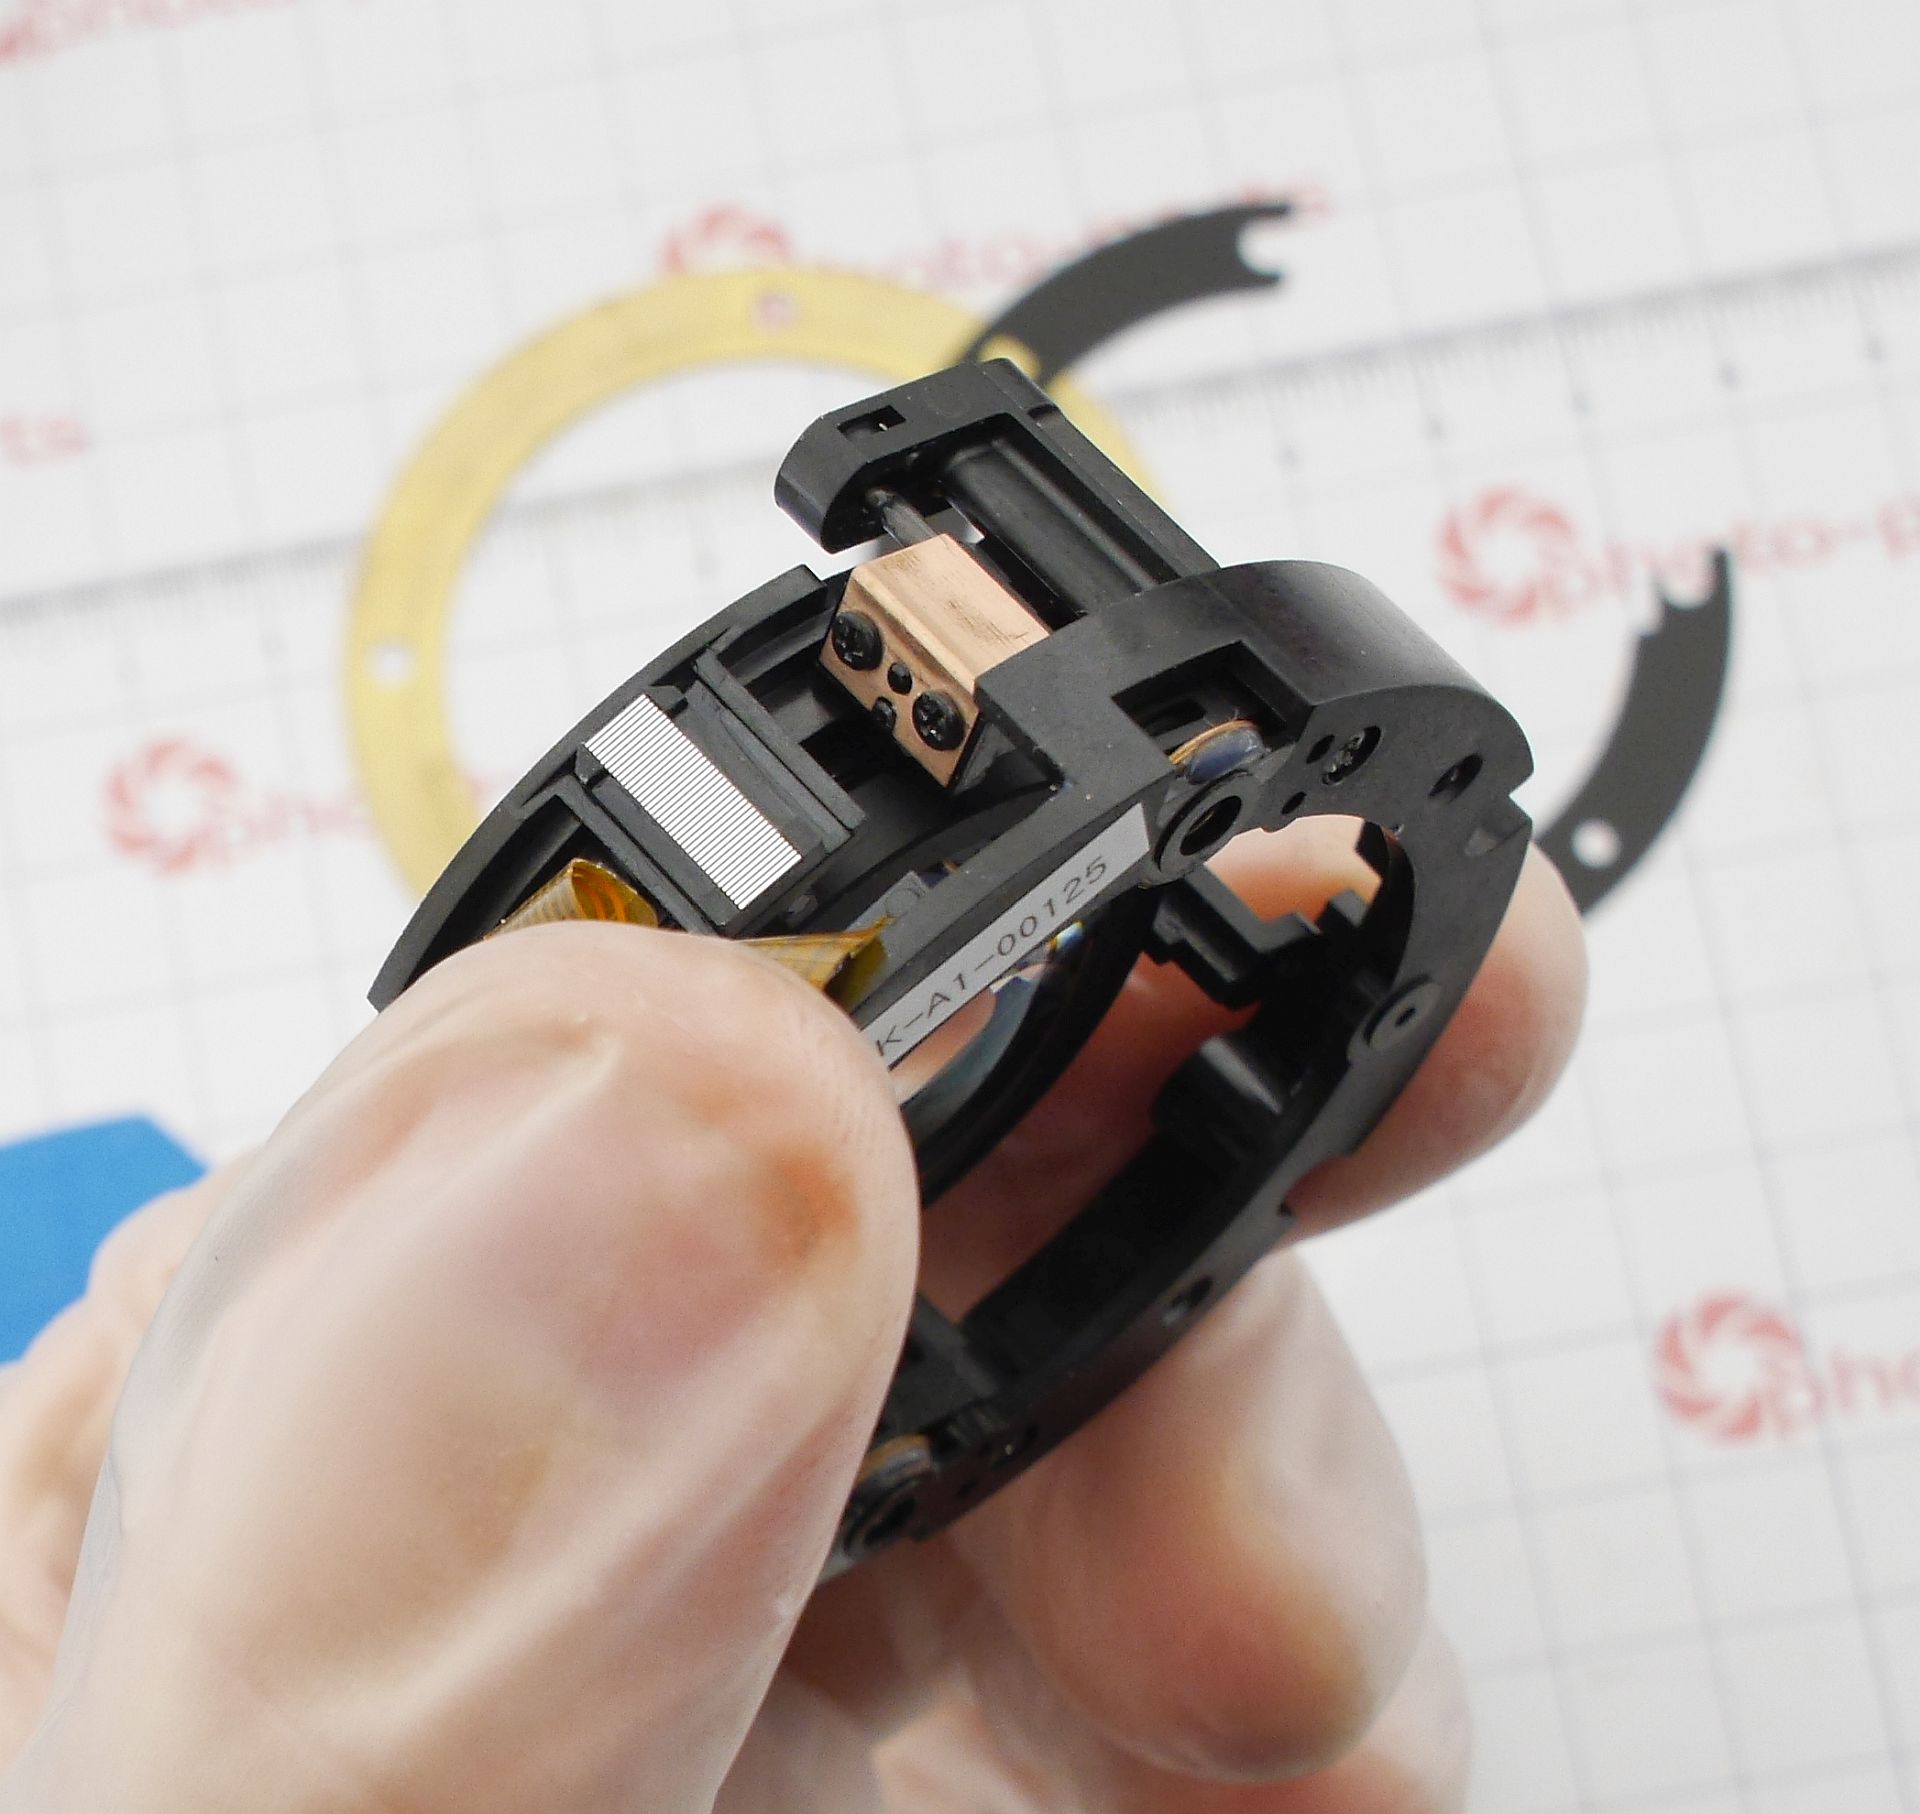
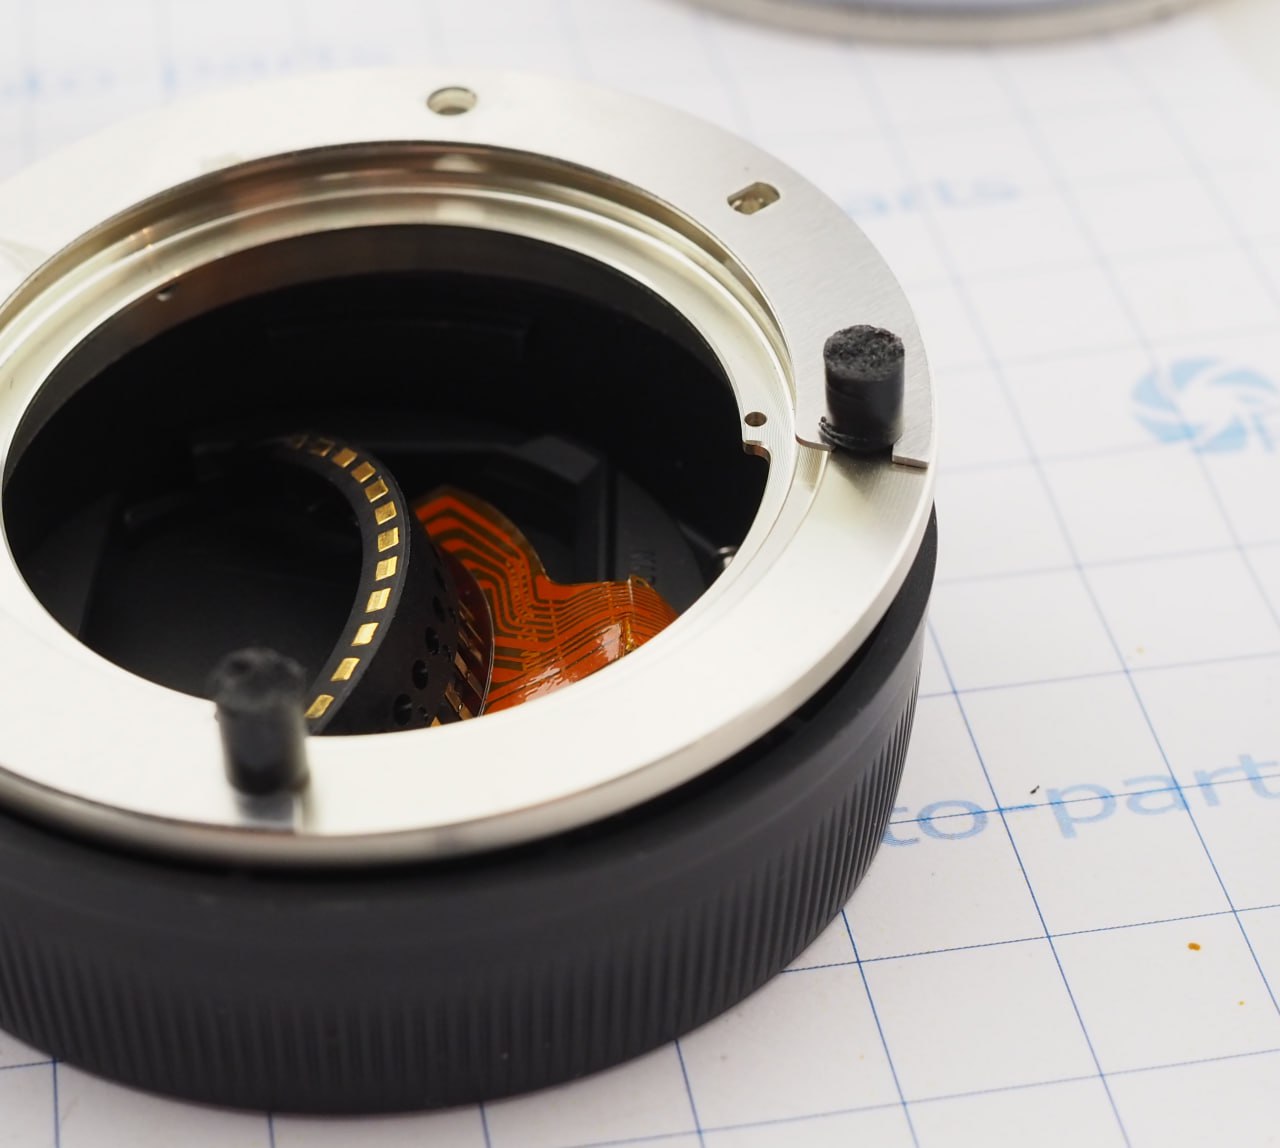
If the bayonet mount isn't broken, there's no need to remove the board - just disconnect the three flex cables:
Then, by removing four more screws, the rear lens block can be taken out. This piece holds the board and the lens mass. All it takes for the worst damage while dropping the camera, even in carrying case.
The four support bosses won't hold - they snap, the mount flies one way (with board and cable), and the lens another.
That completes the rear teardown. If the issue was only autofocus, you can skip ahead.
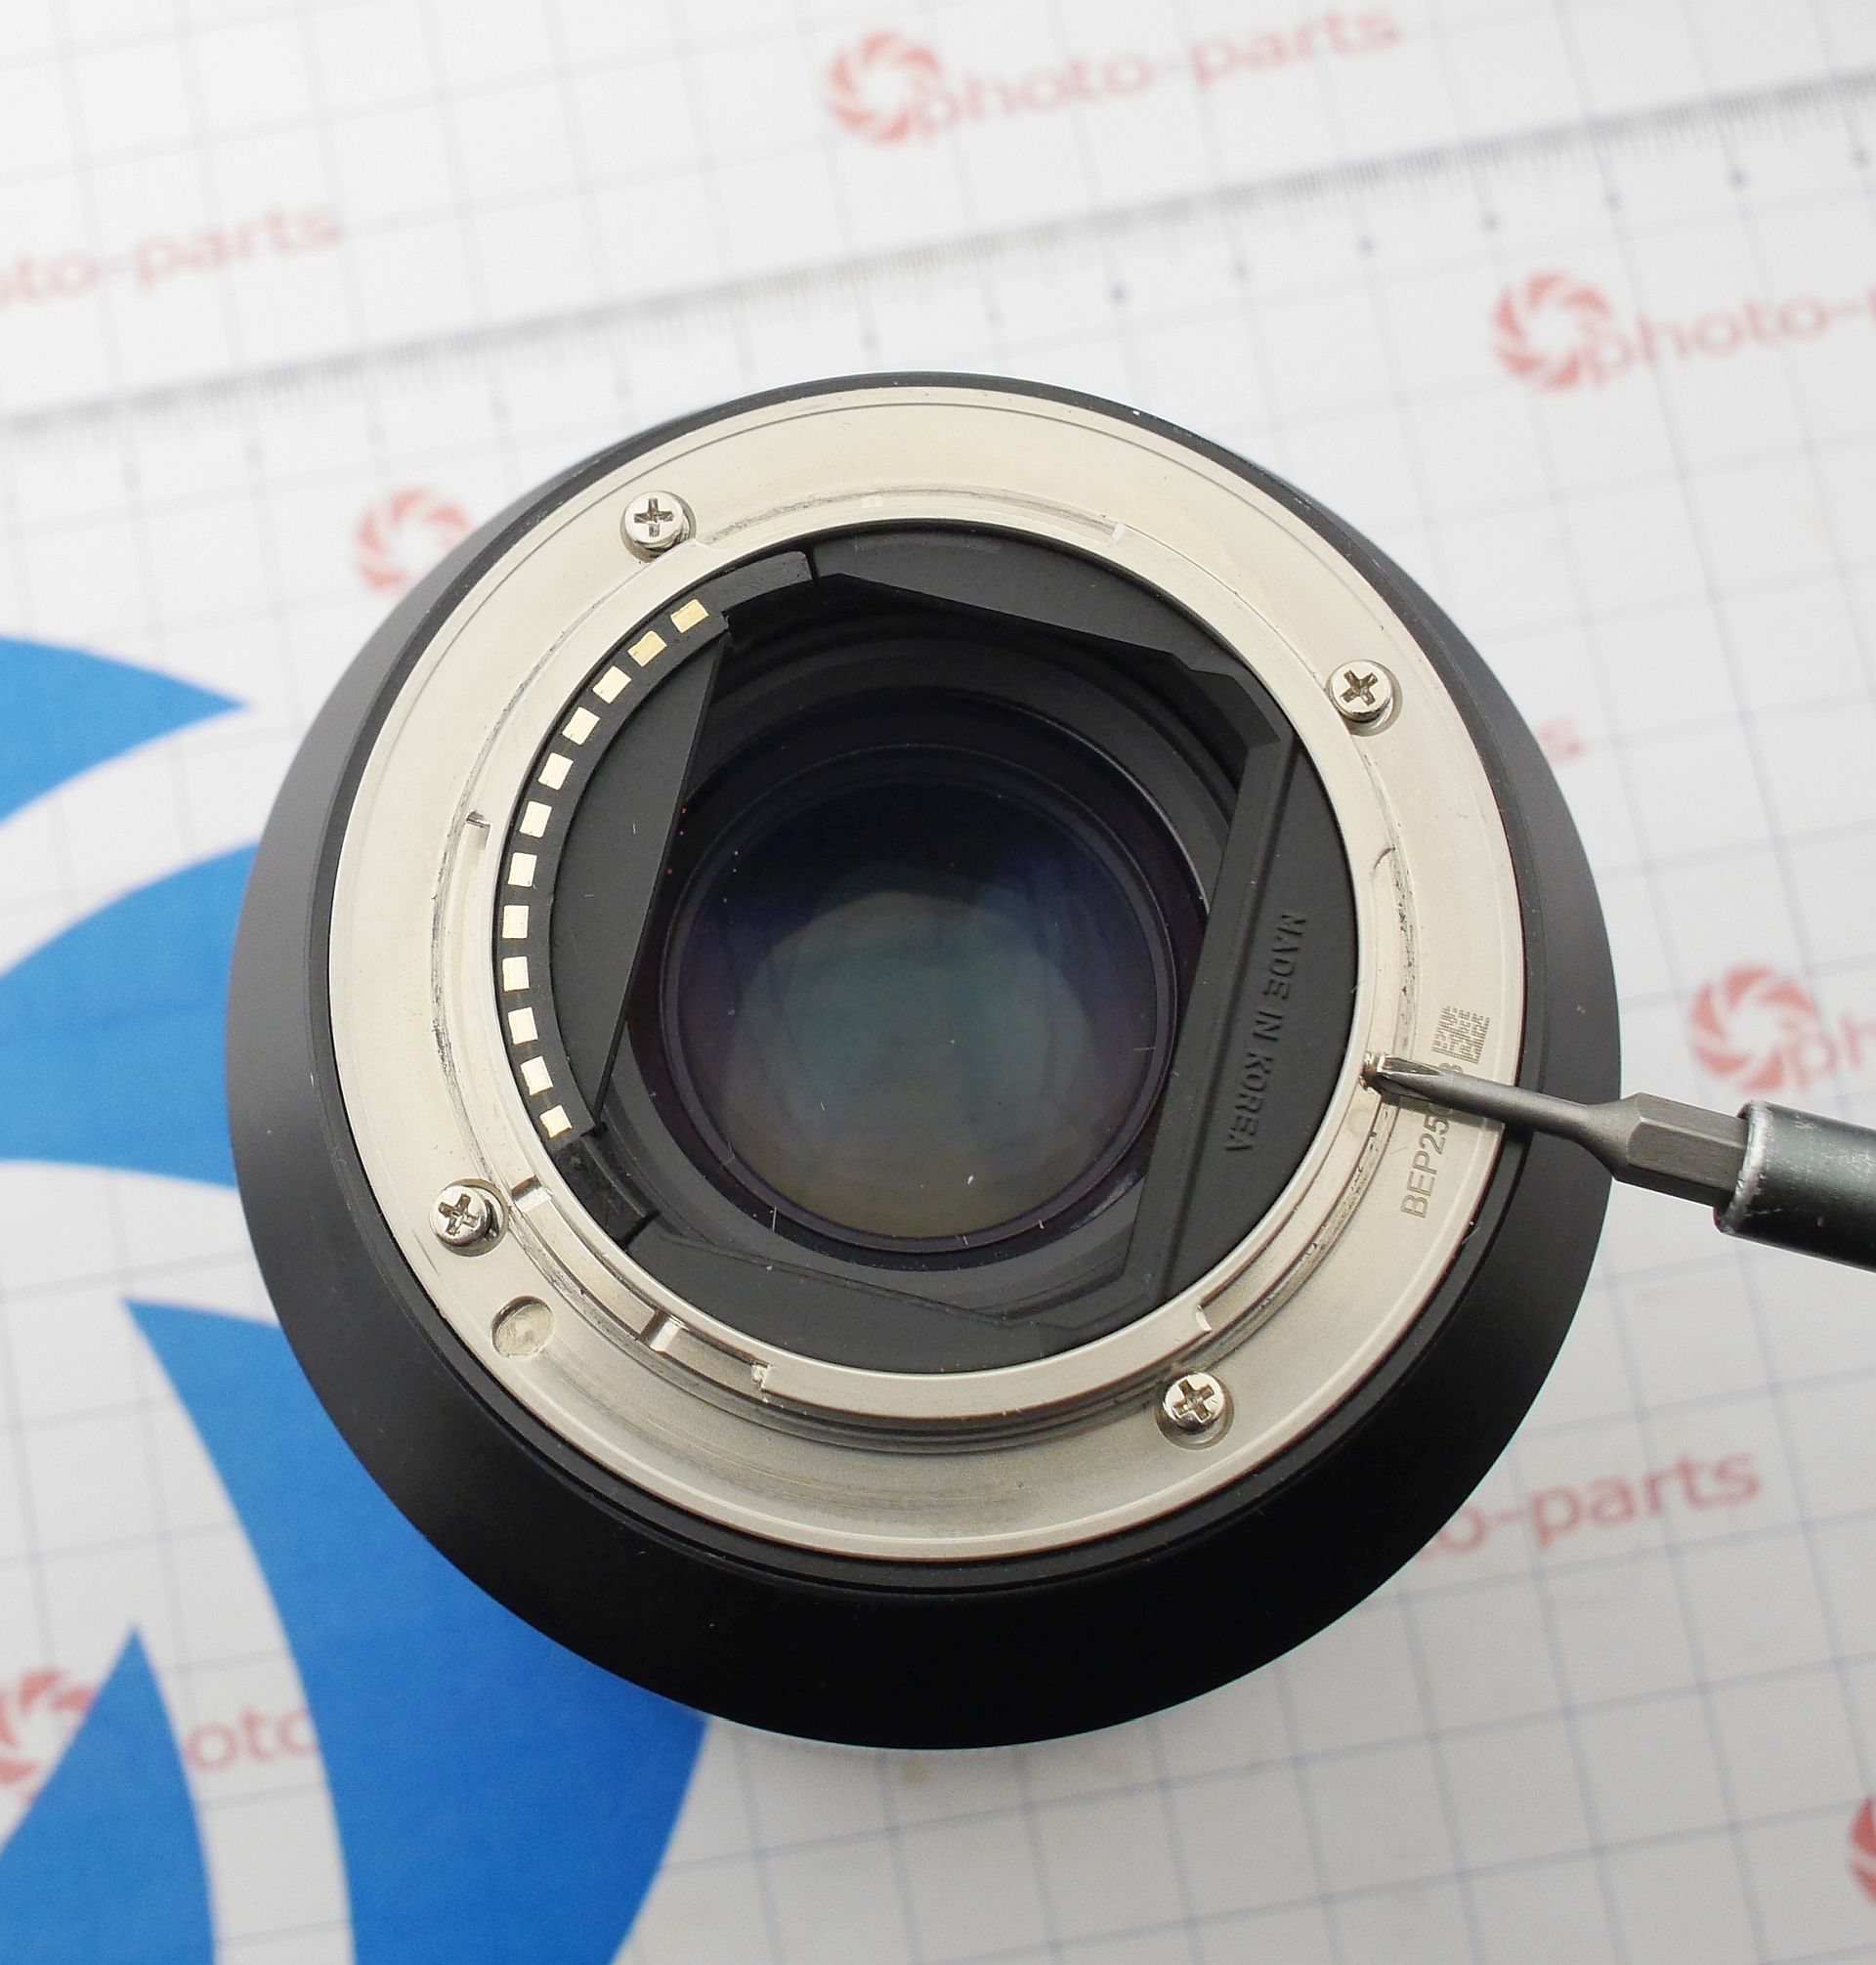
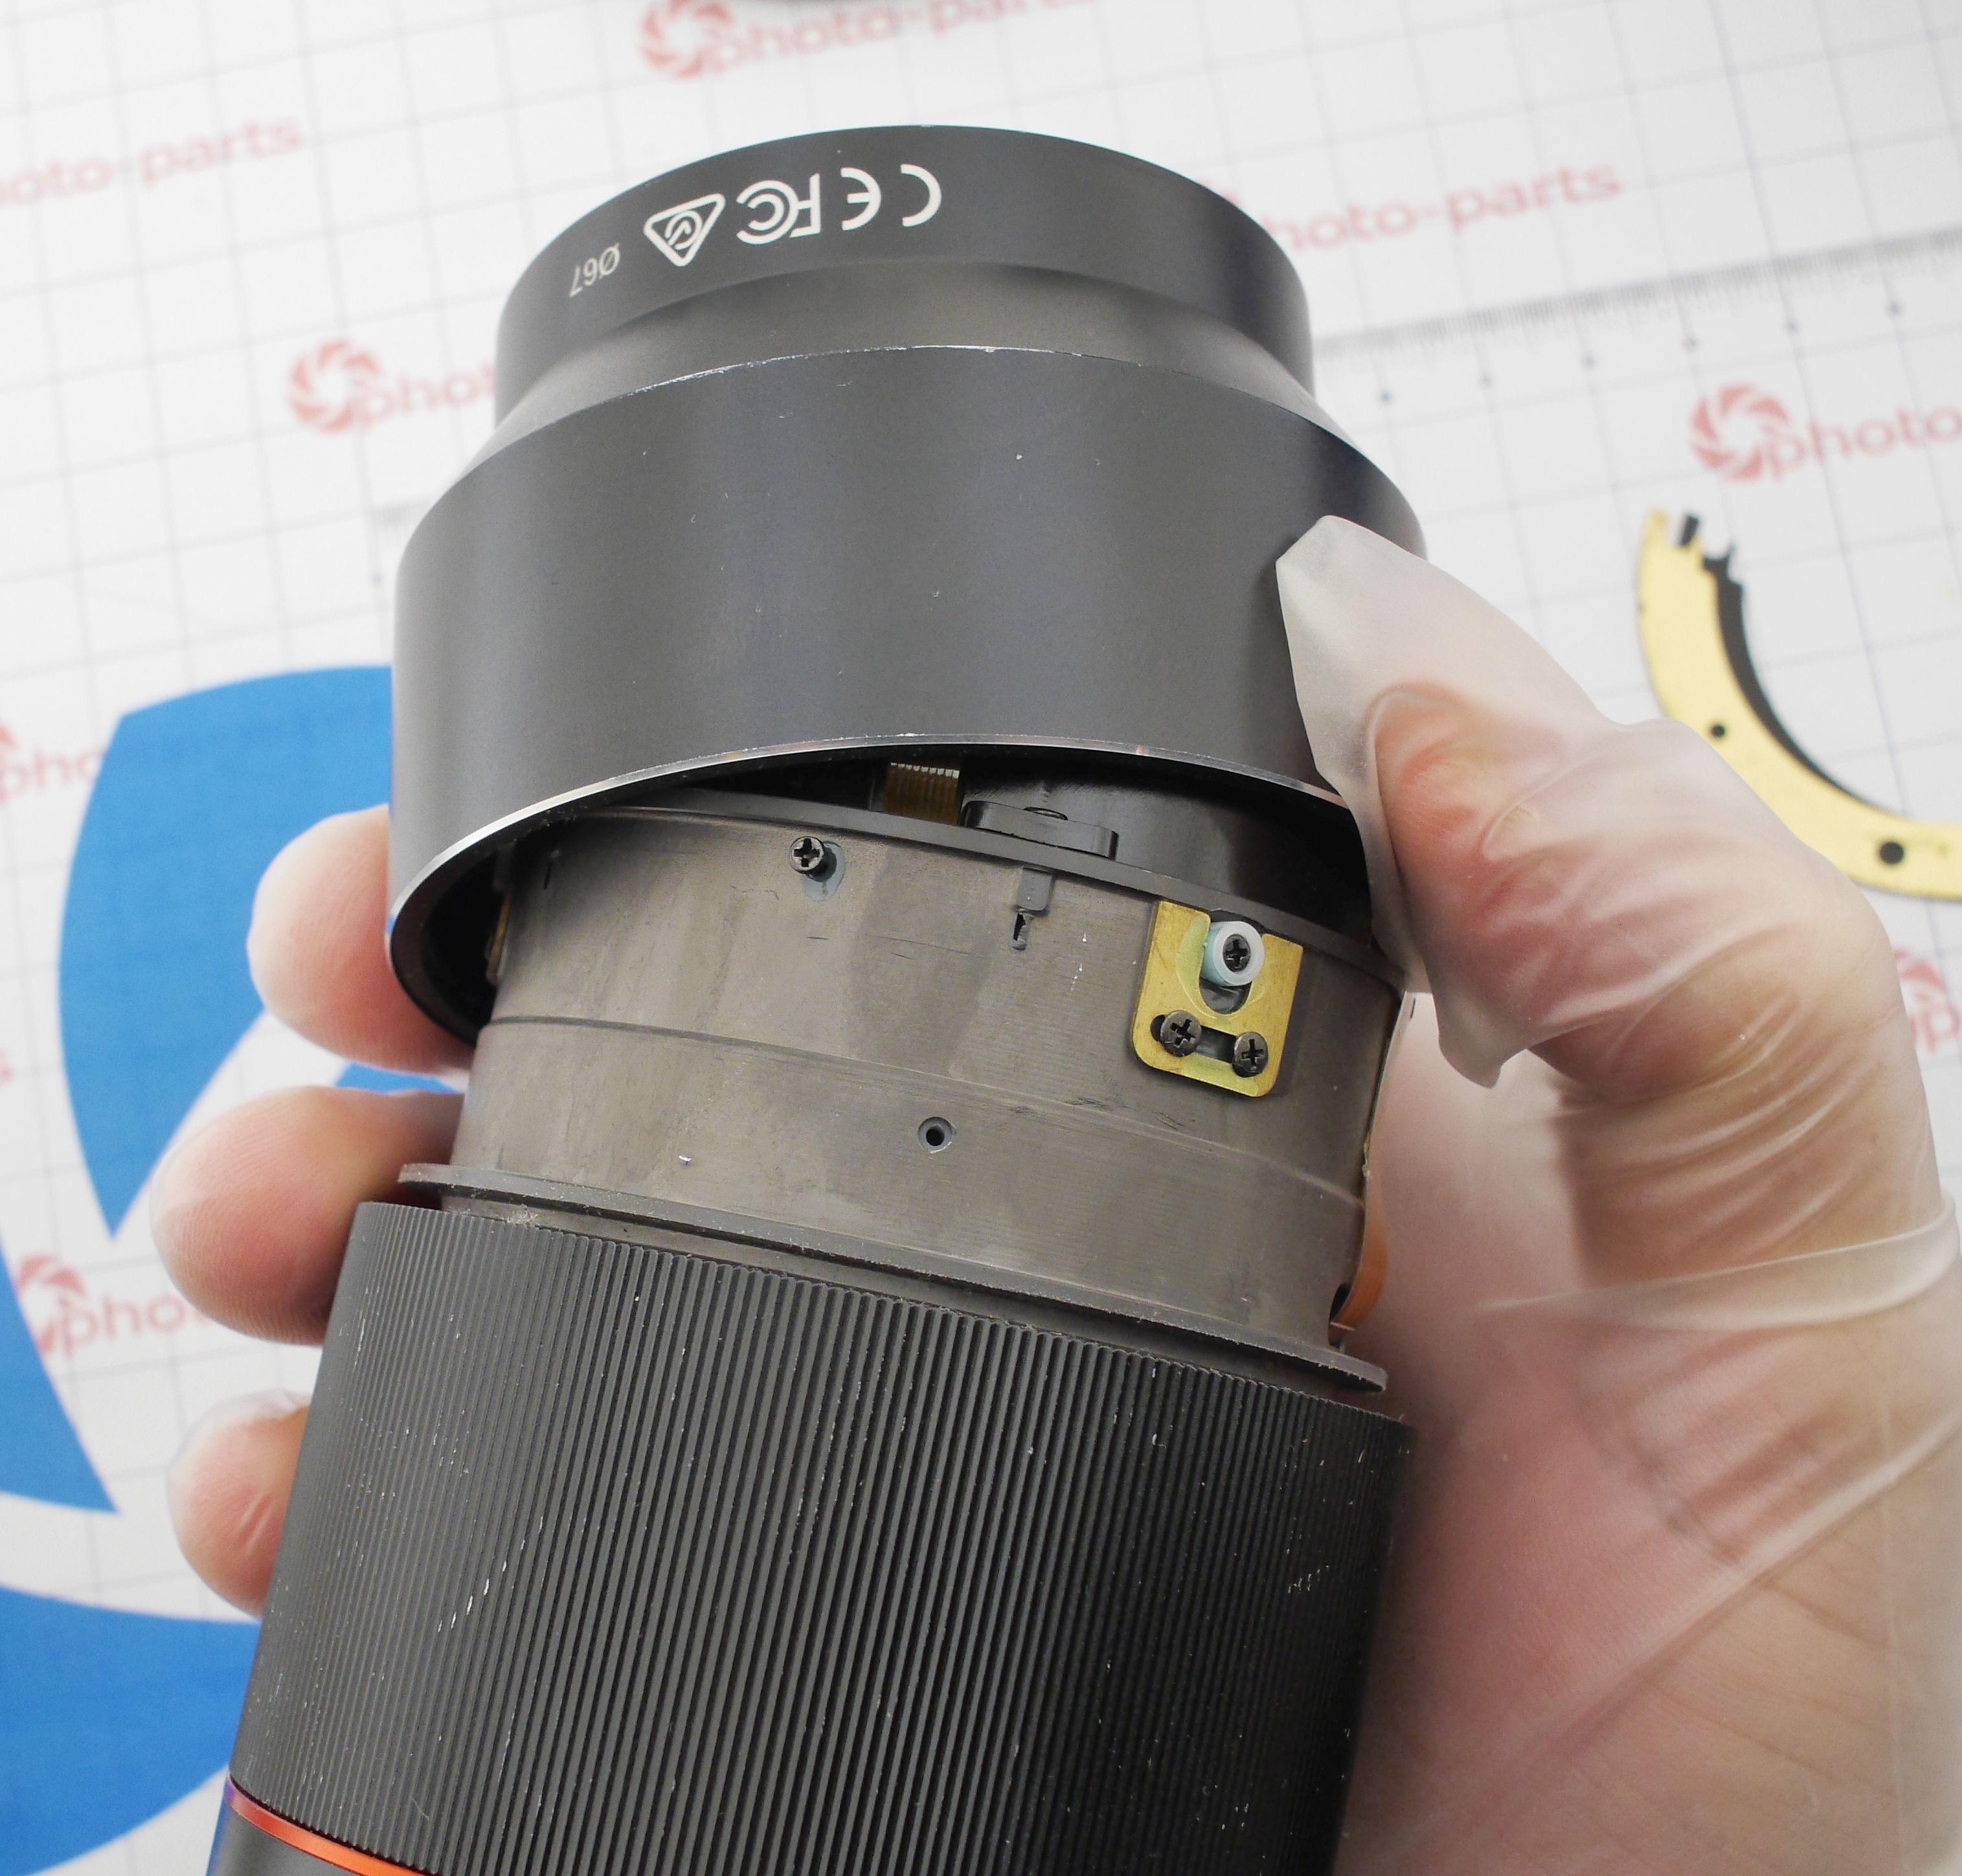
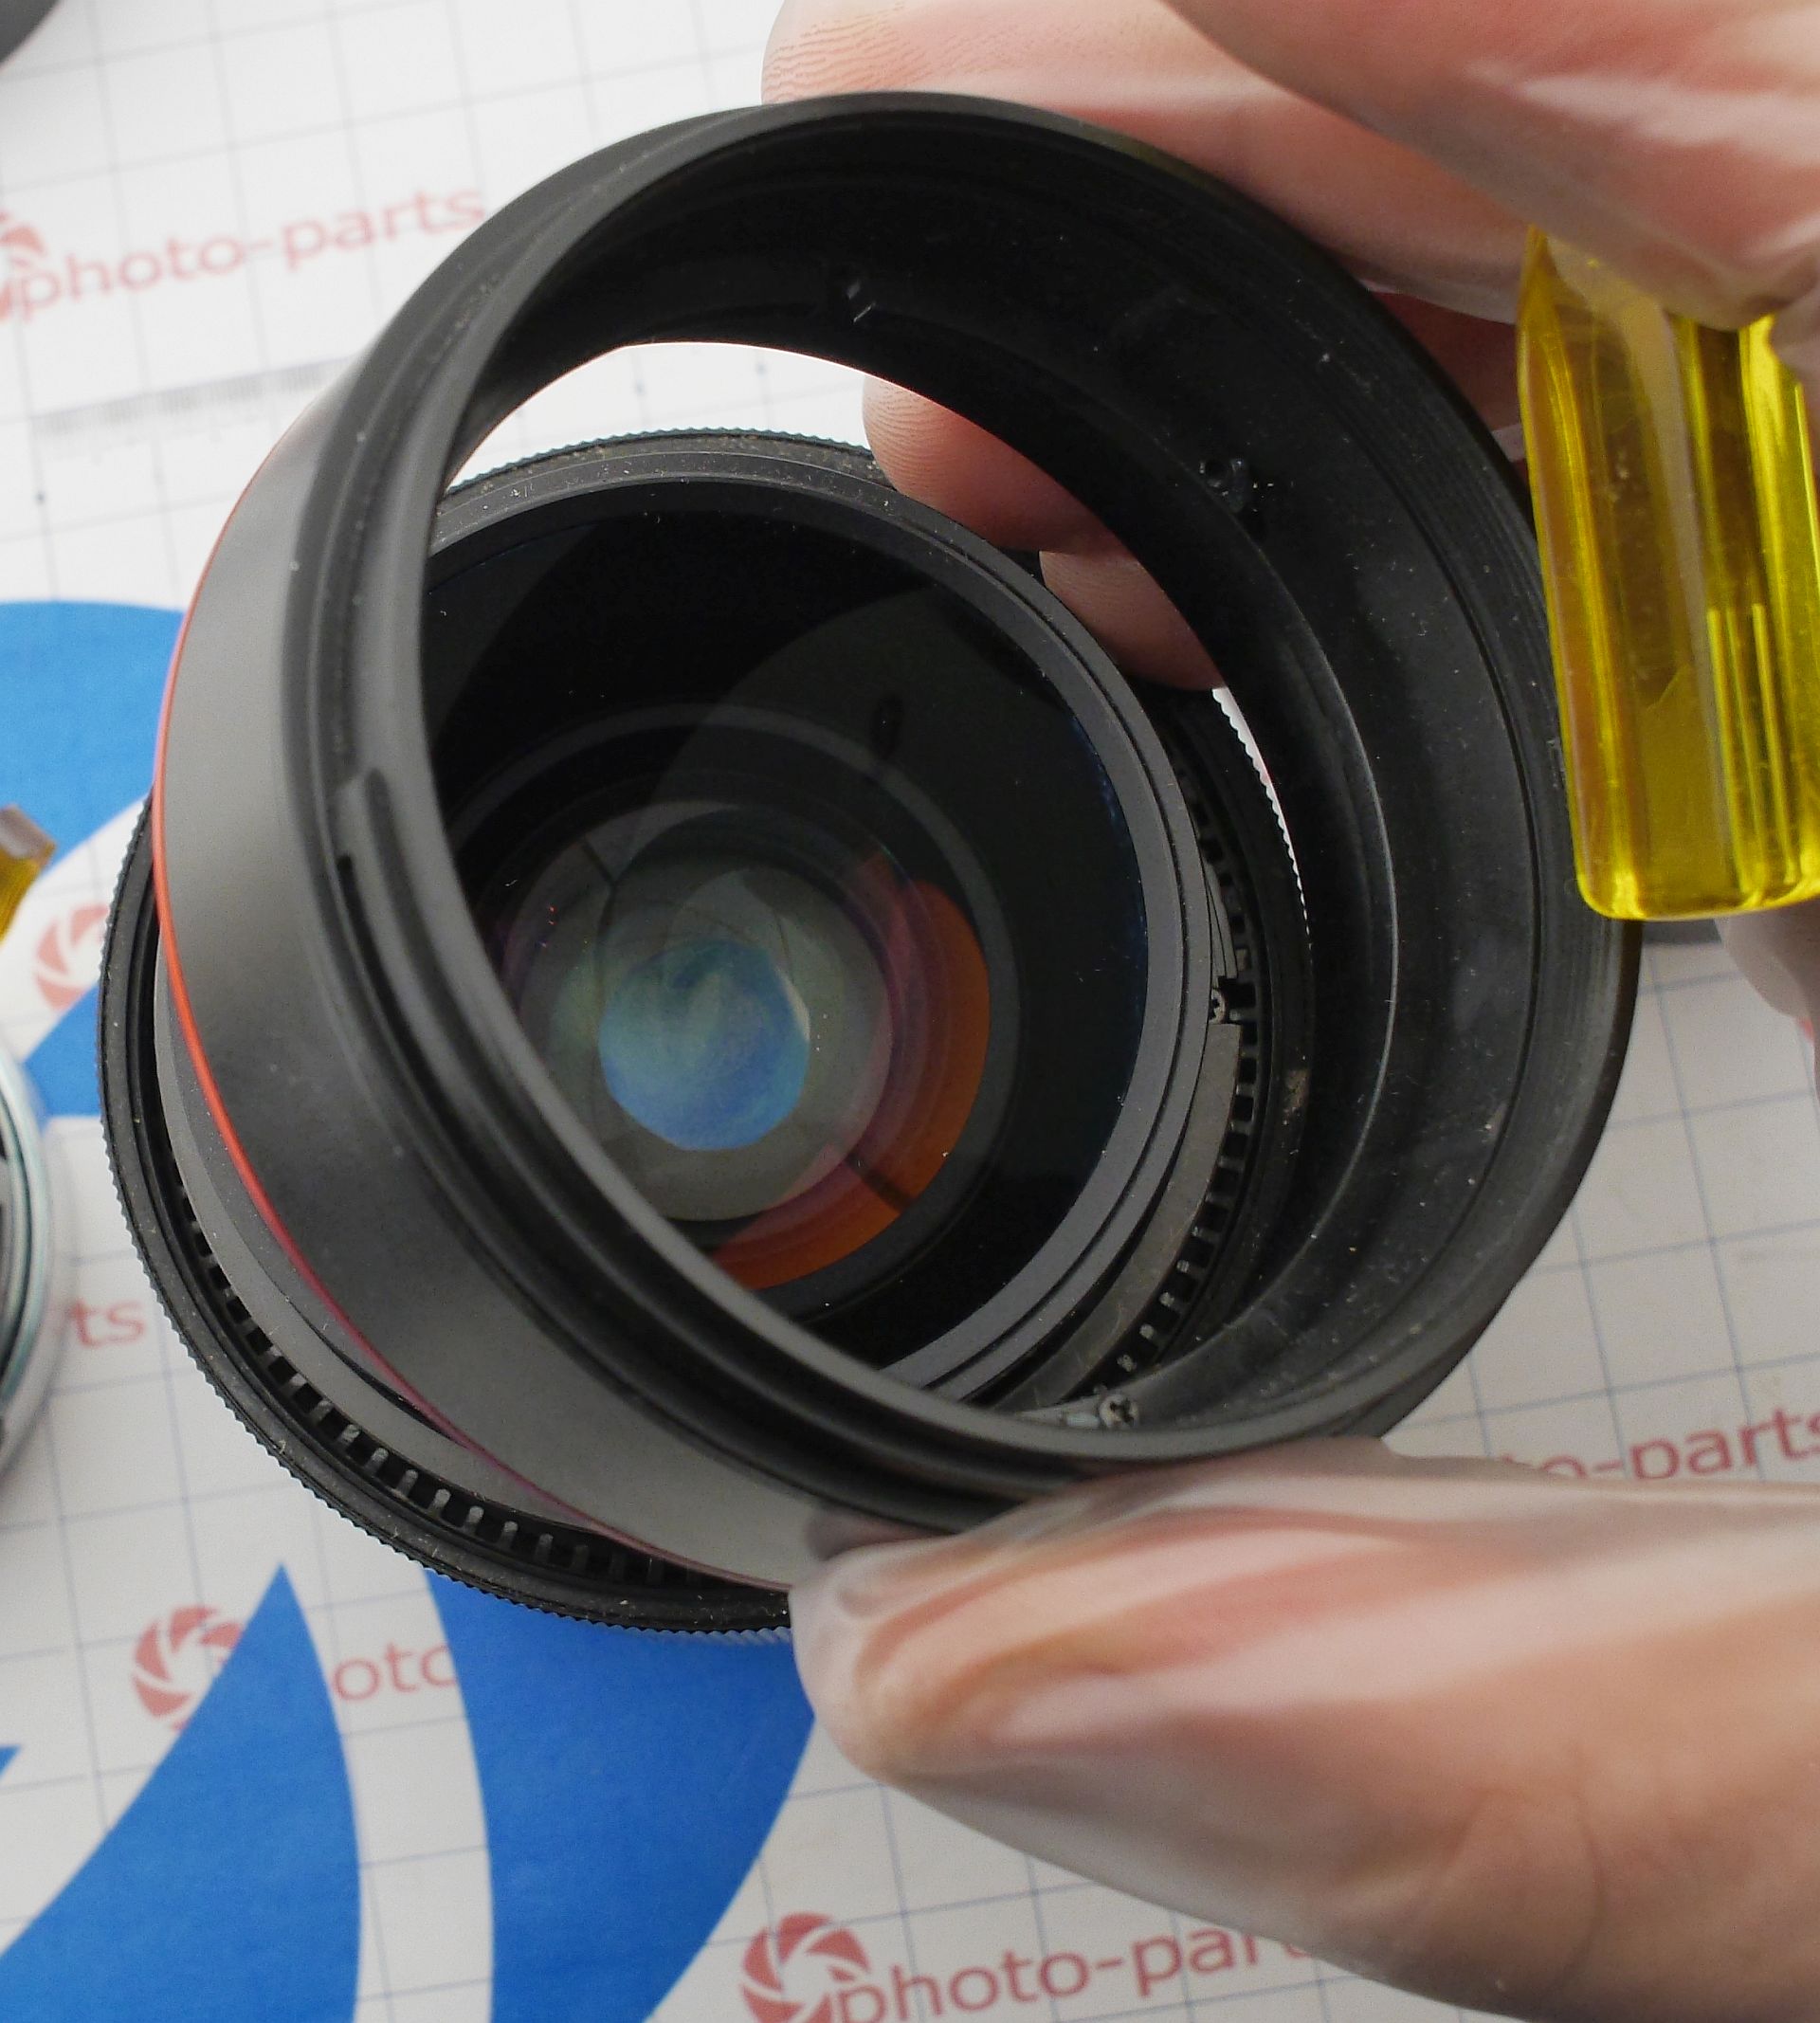
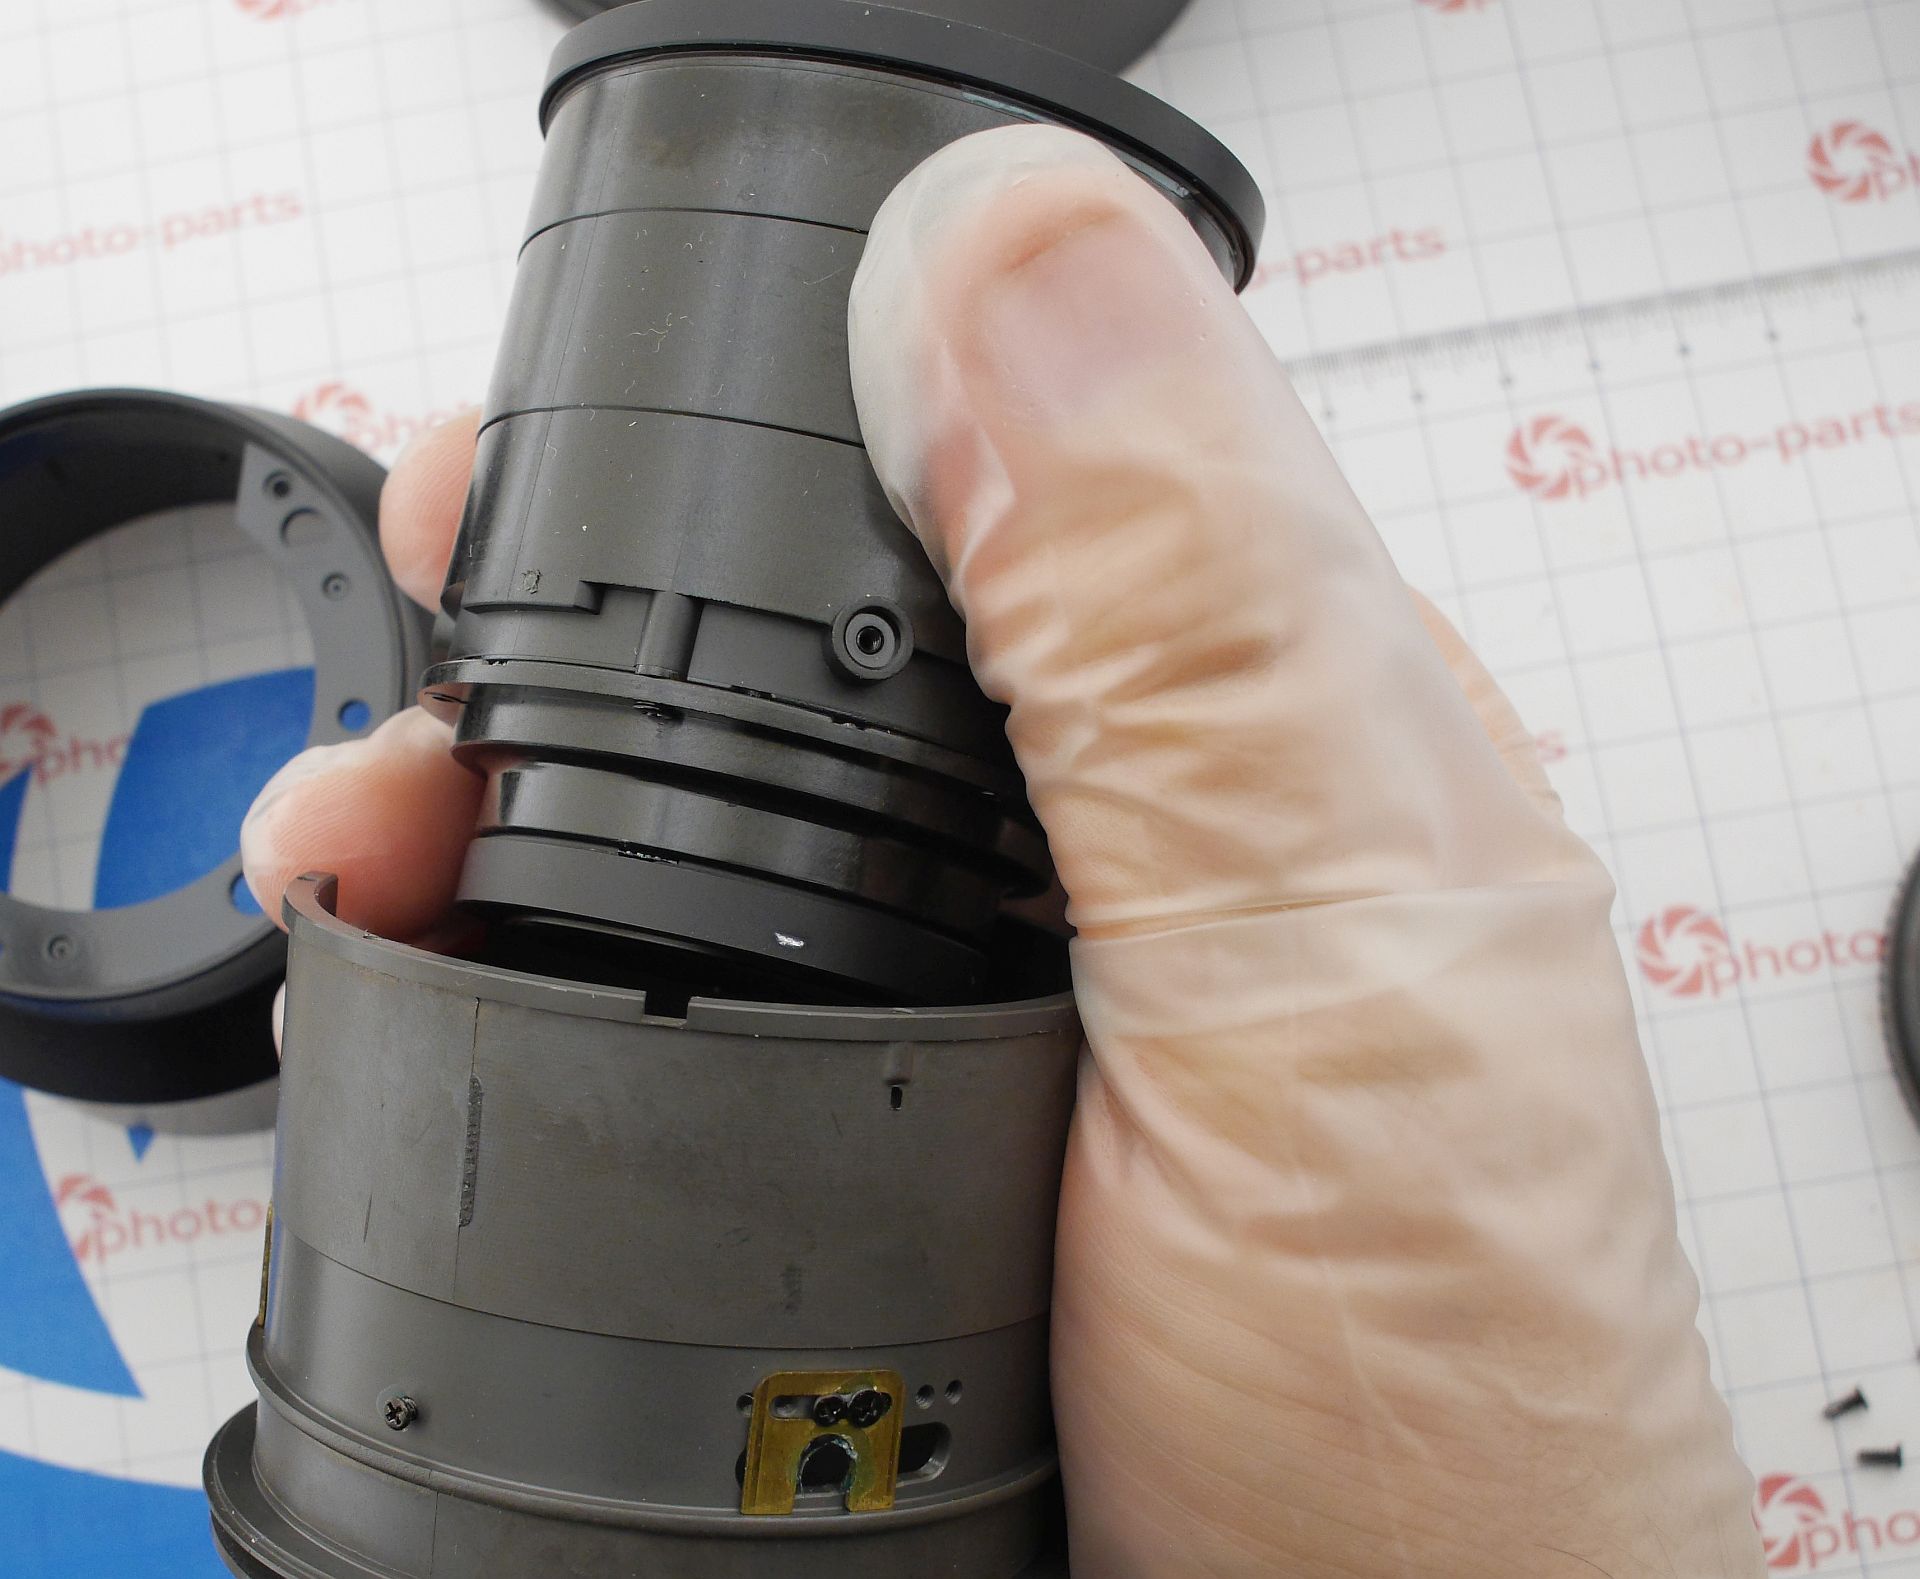
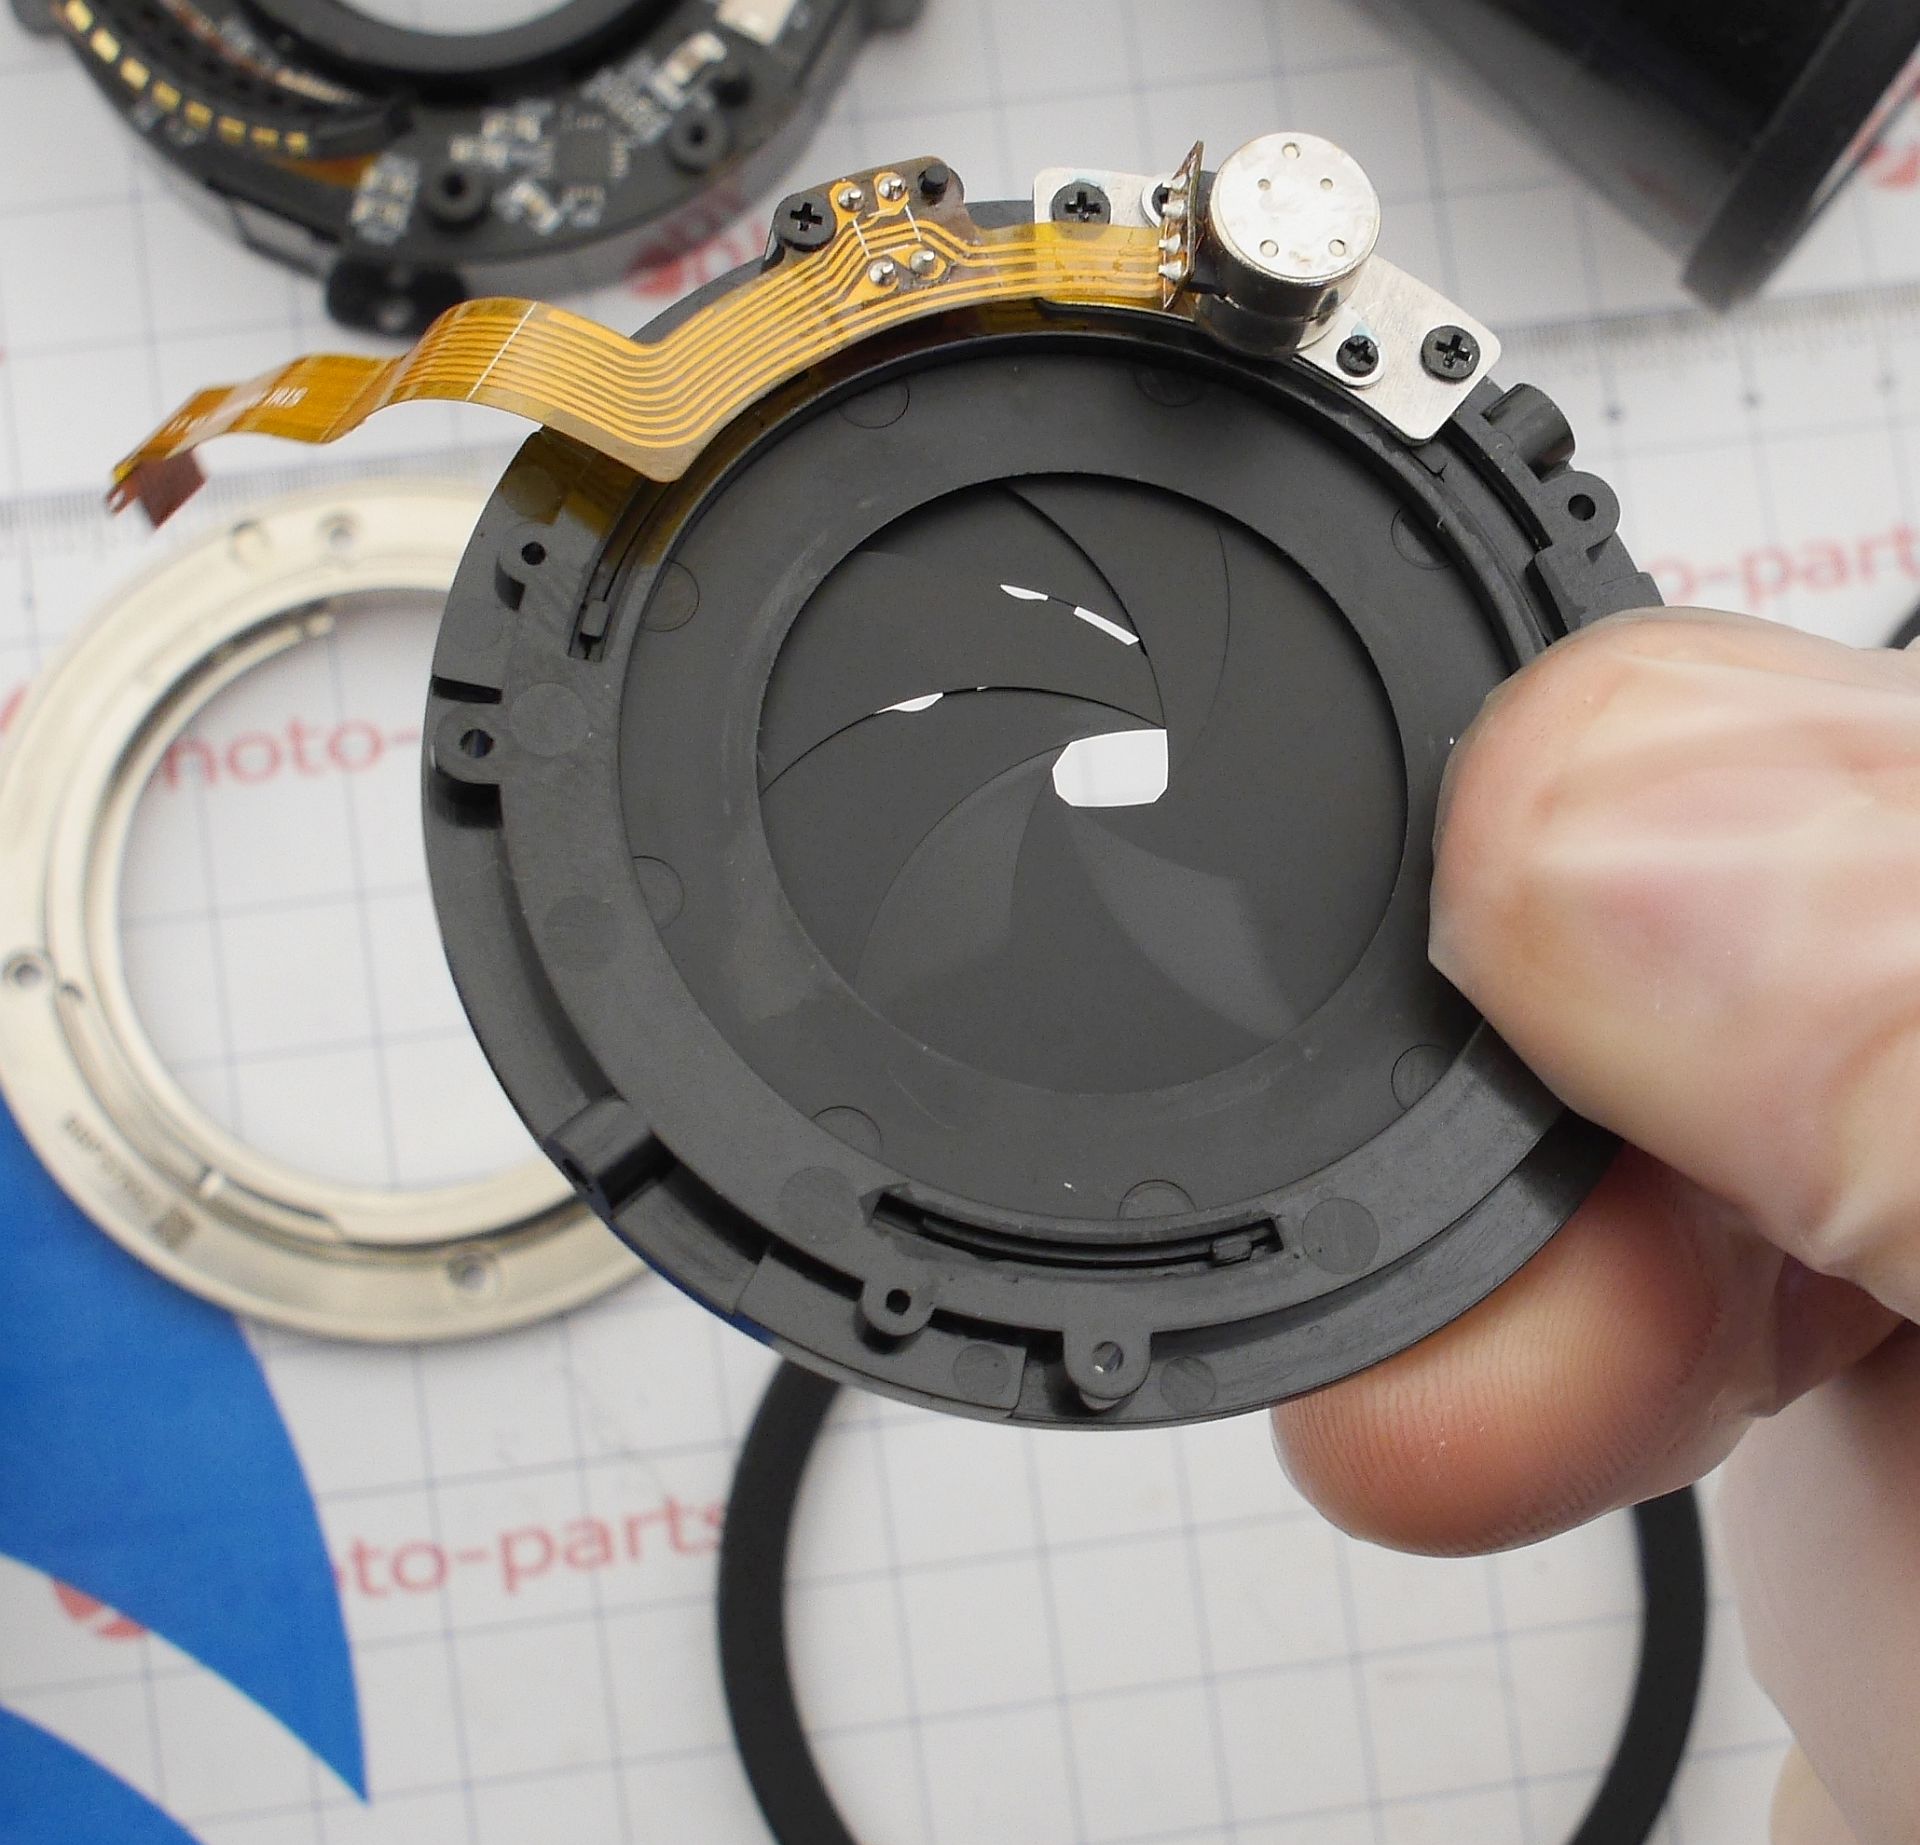
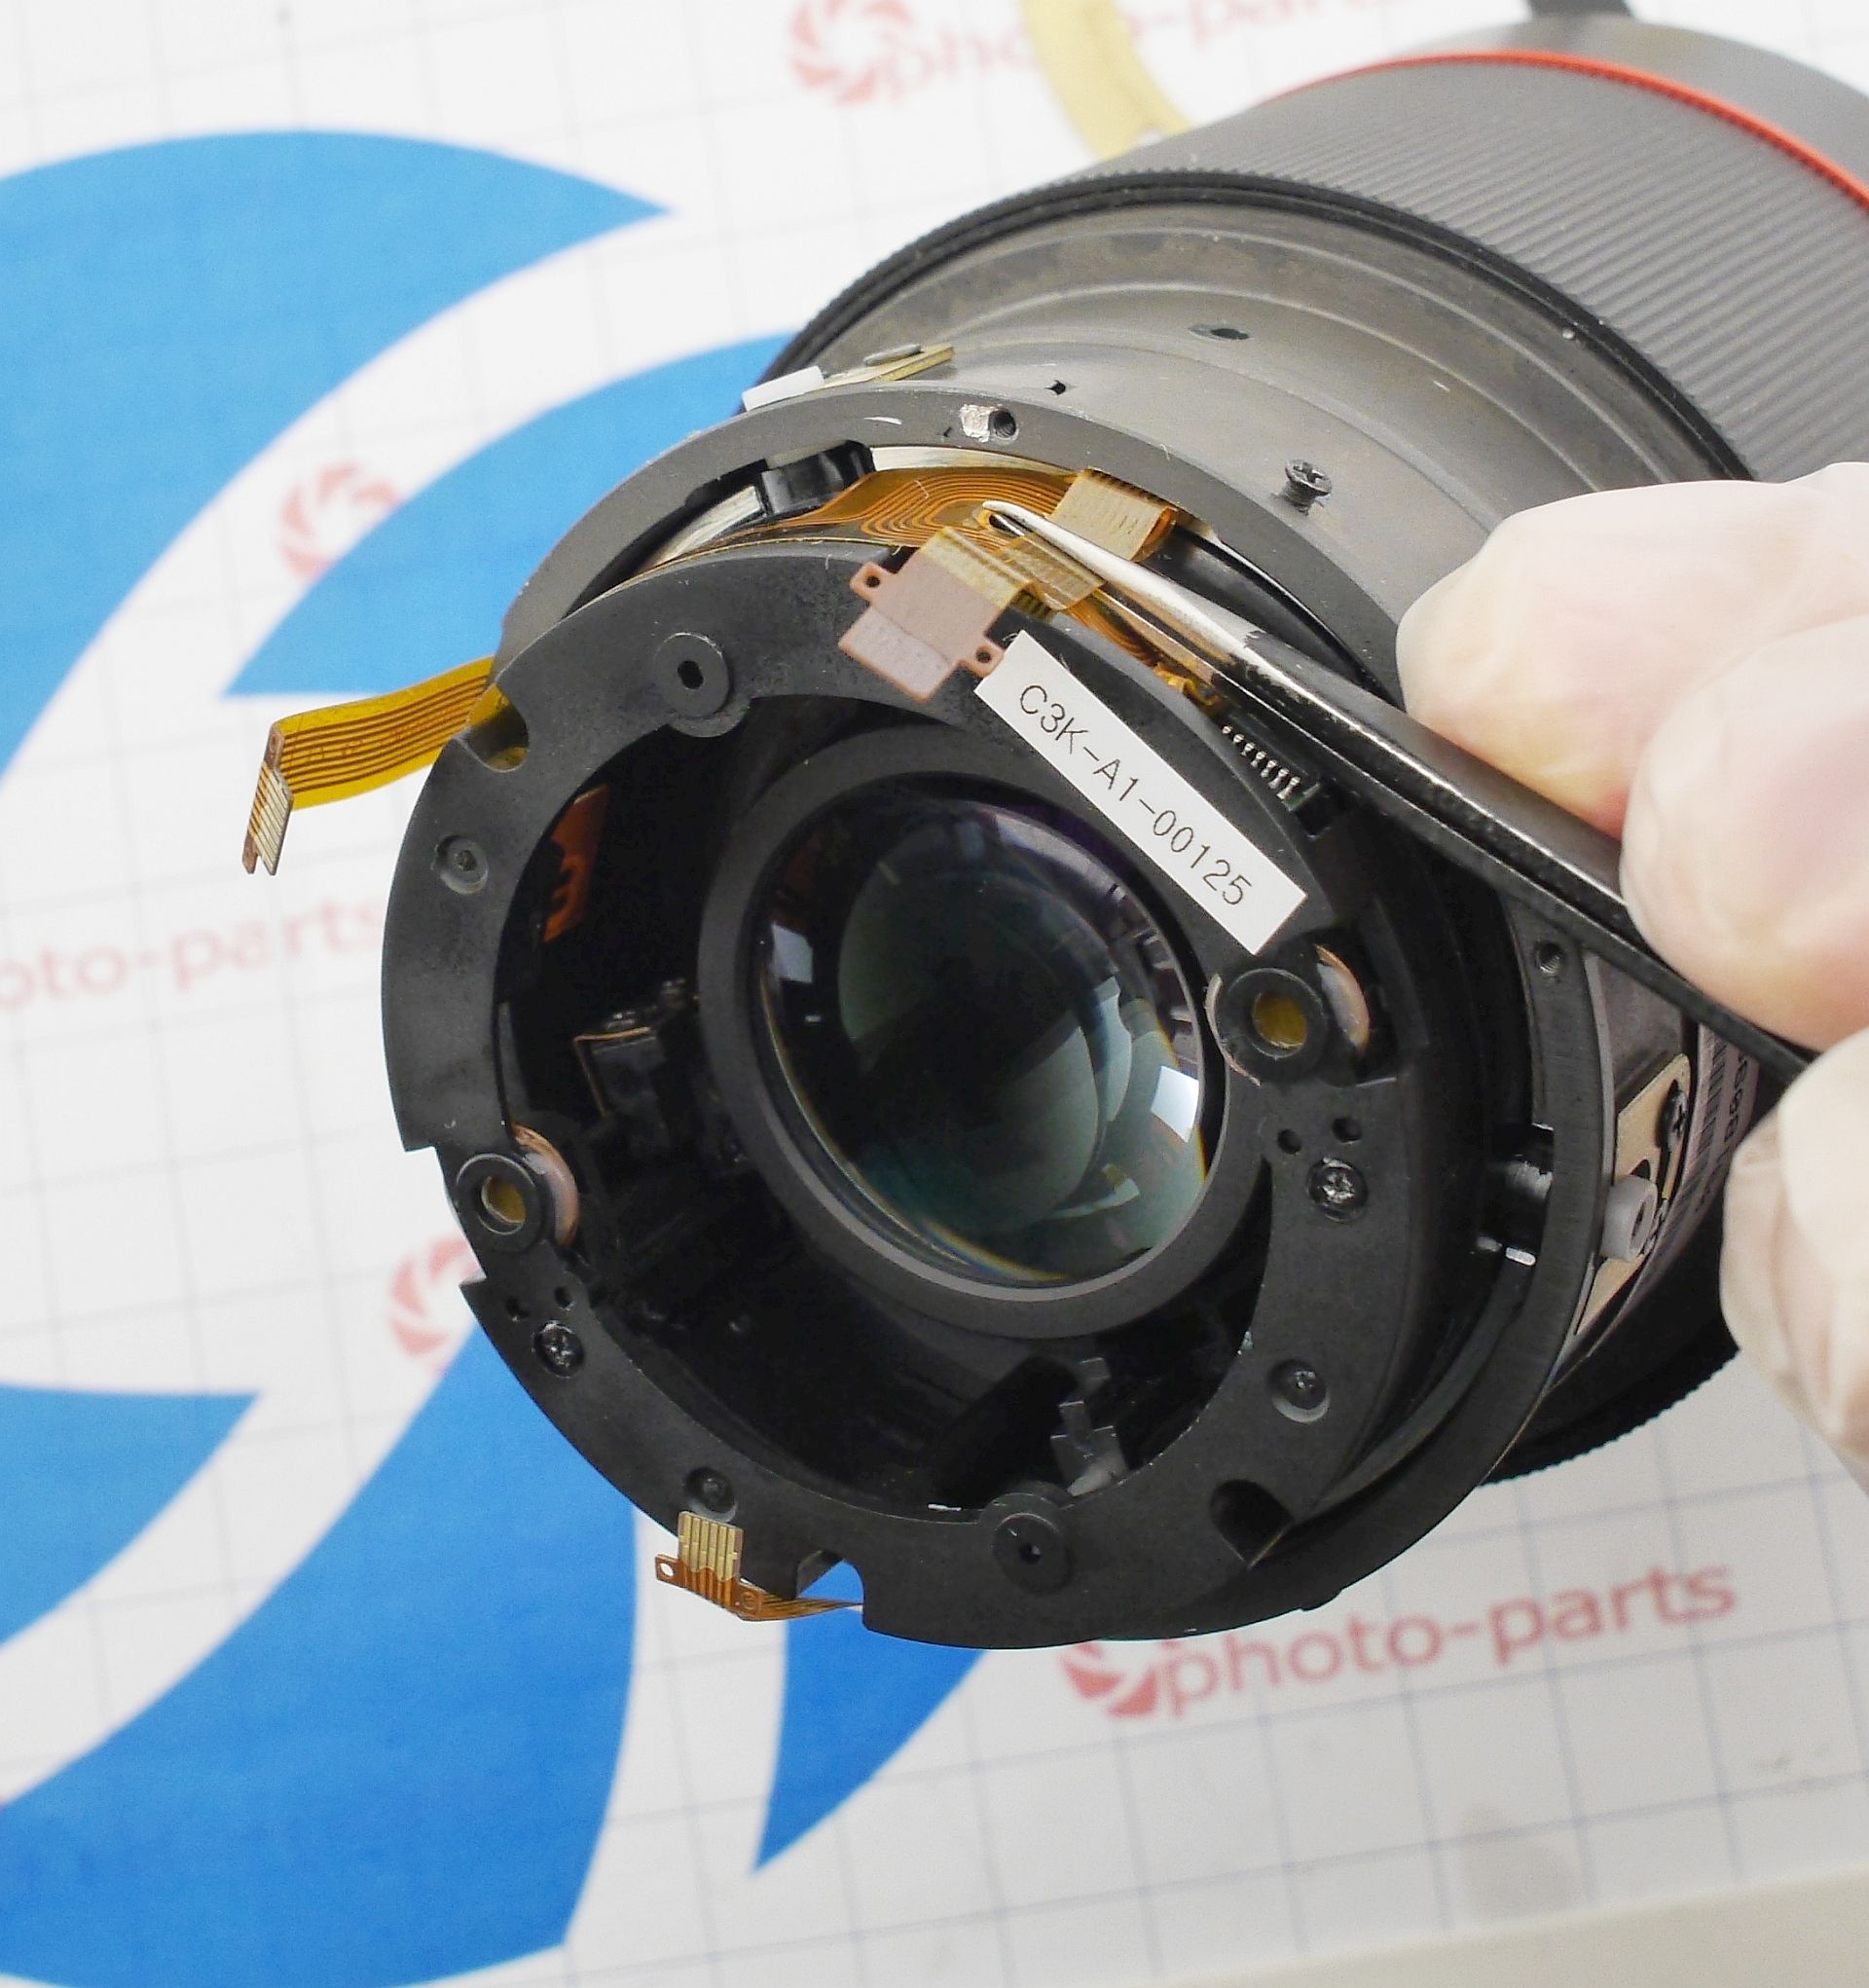
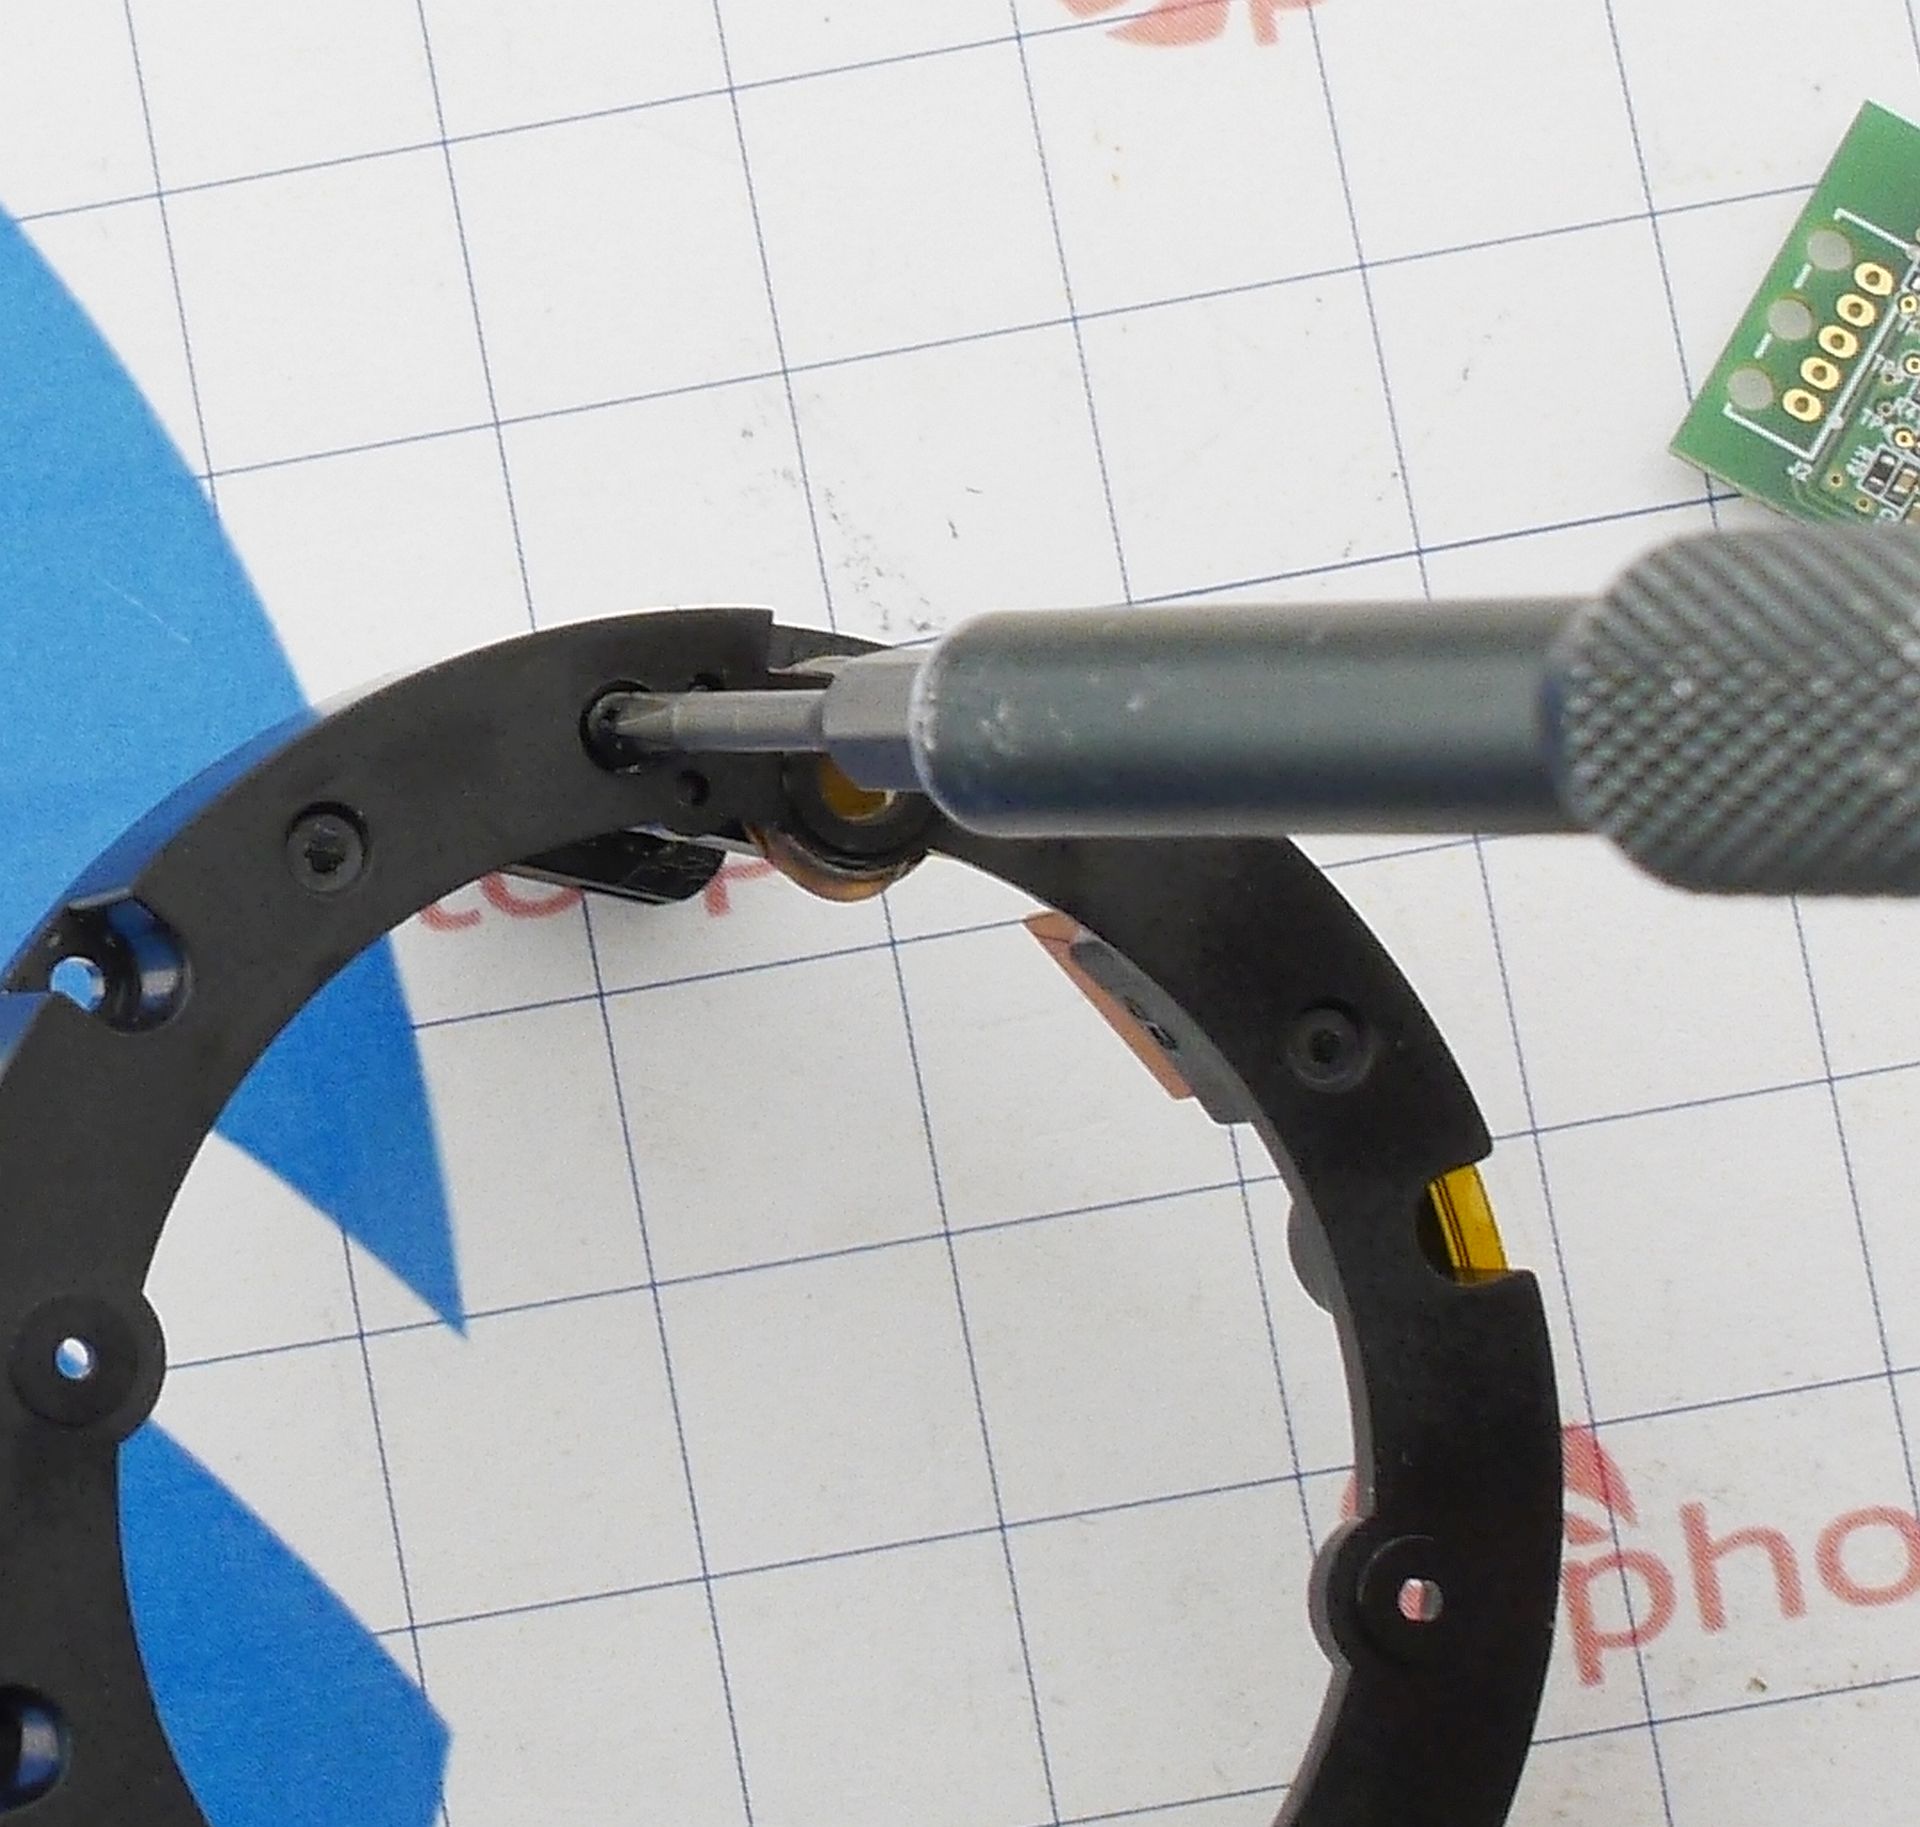
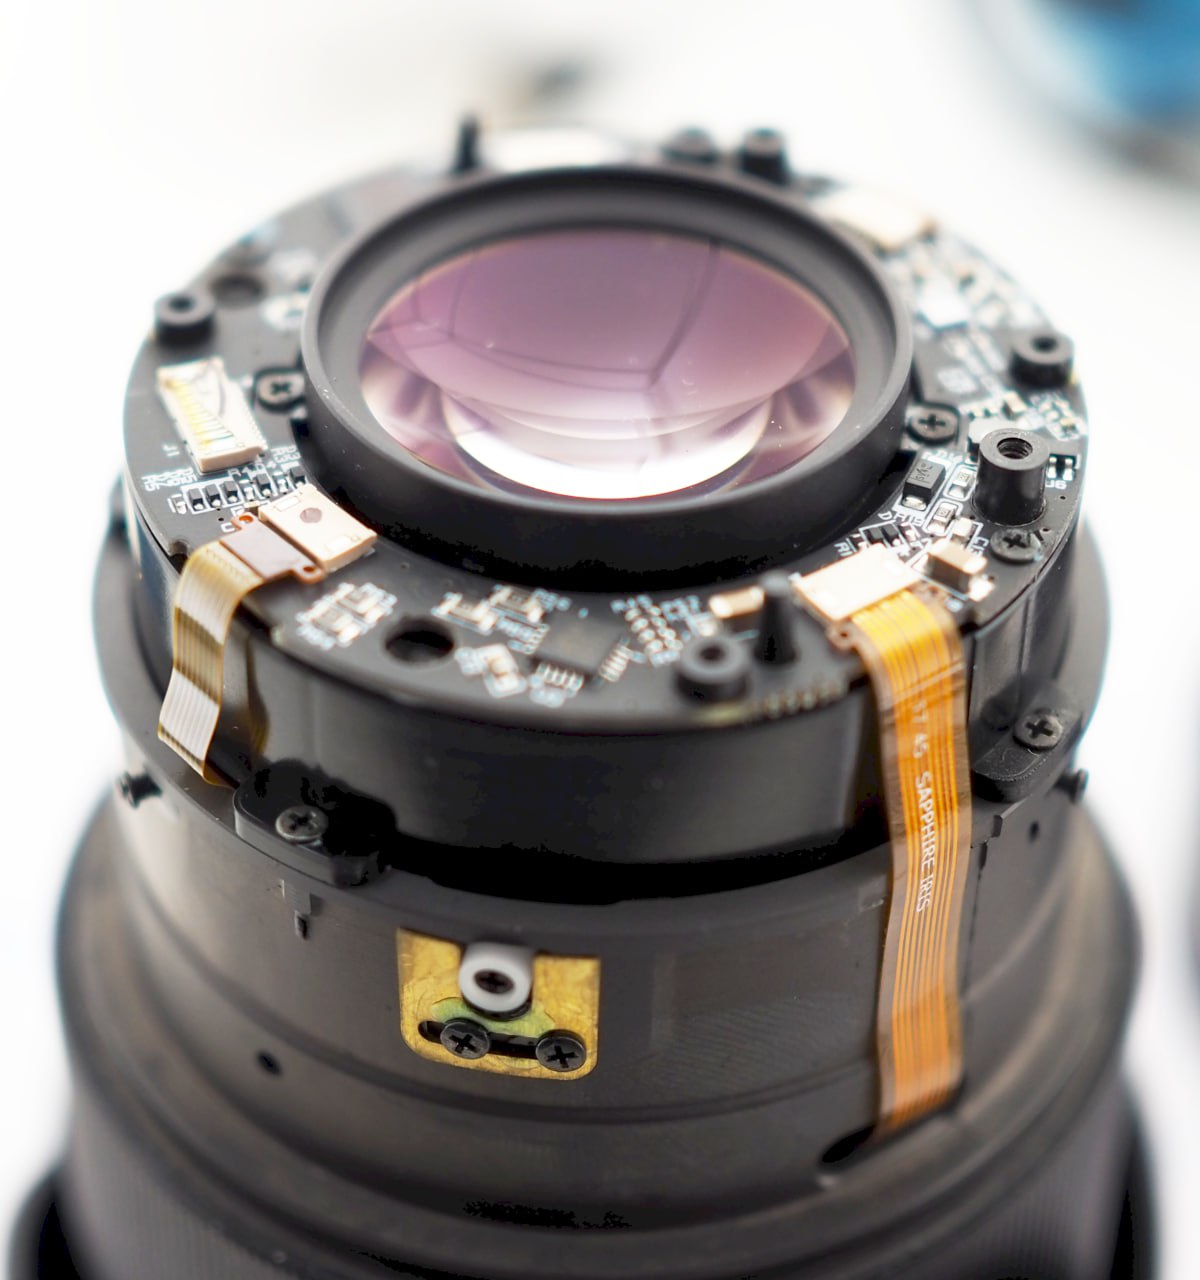
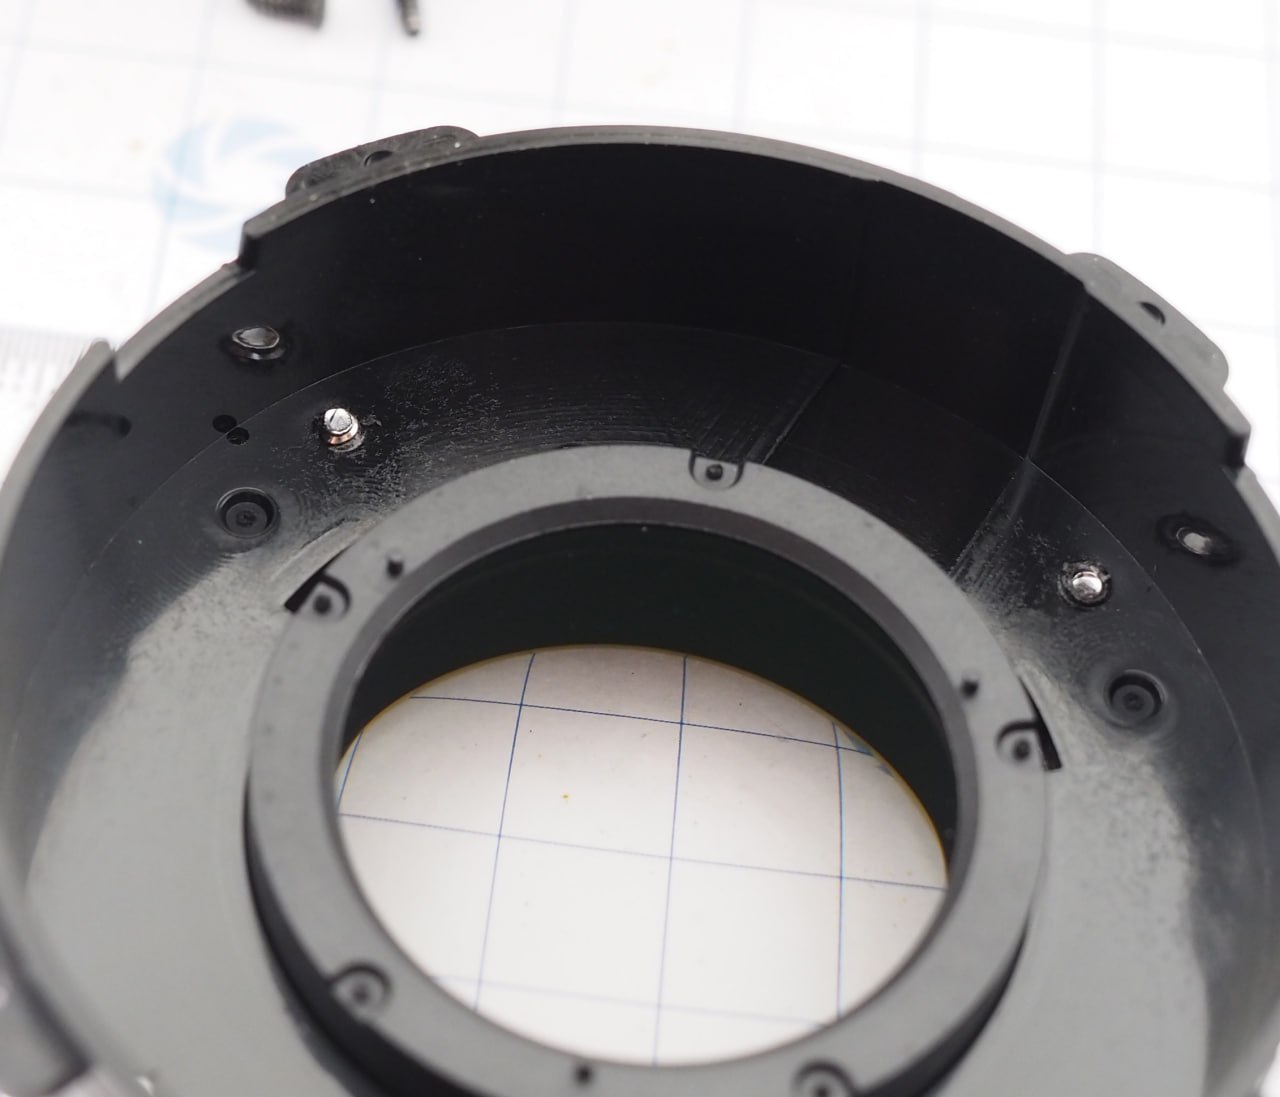
To reach the aperture module, we disassemble from the front. Use a spanner to remove the decorative cap, revealing three screws holding the filter ring:
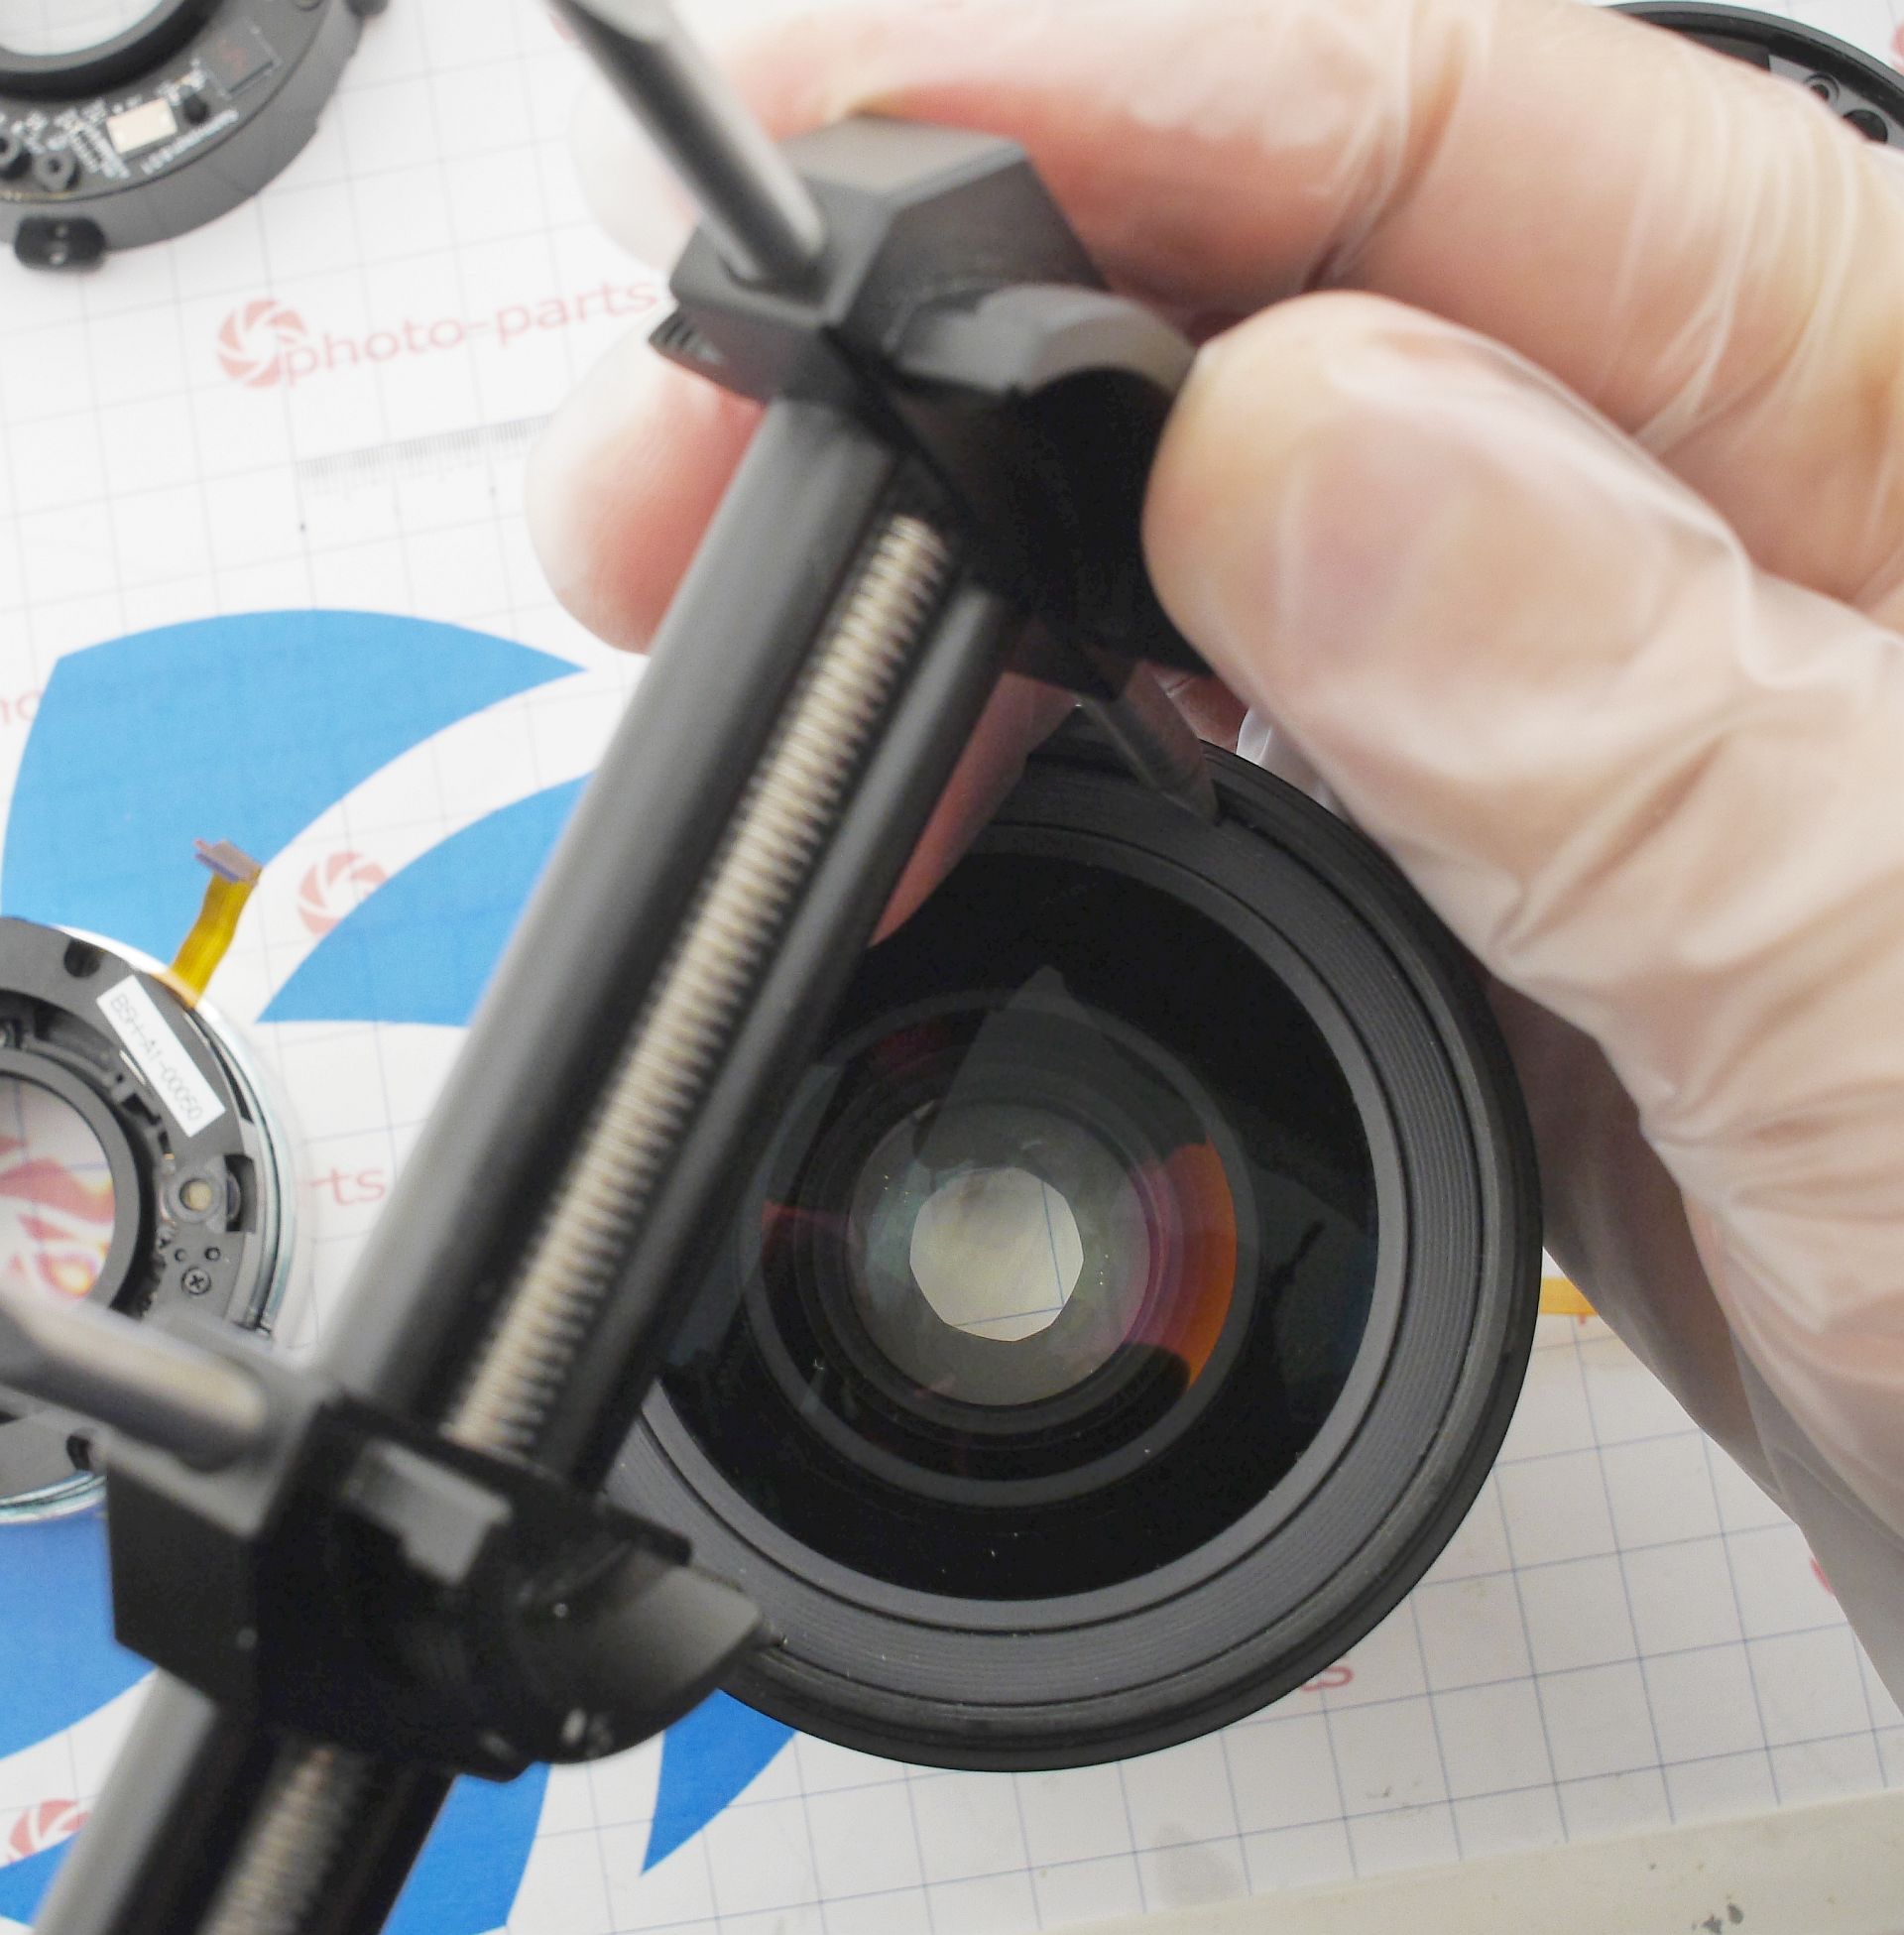
The filter ring comes off easily. To remove the focus ring, unscrew the manual focus sensor mount and slide it inward:
‼Attention‼
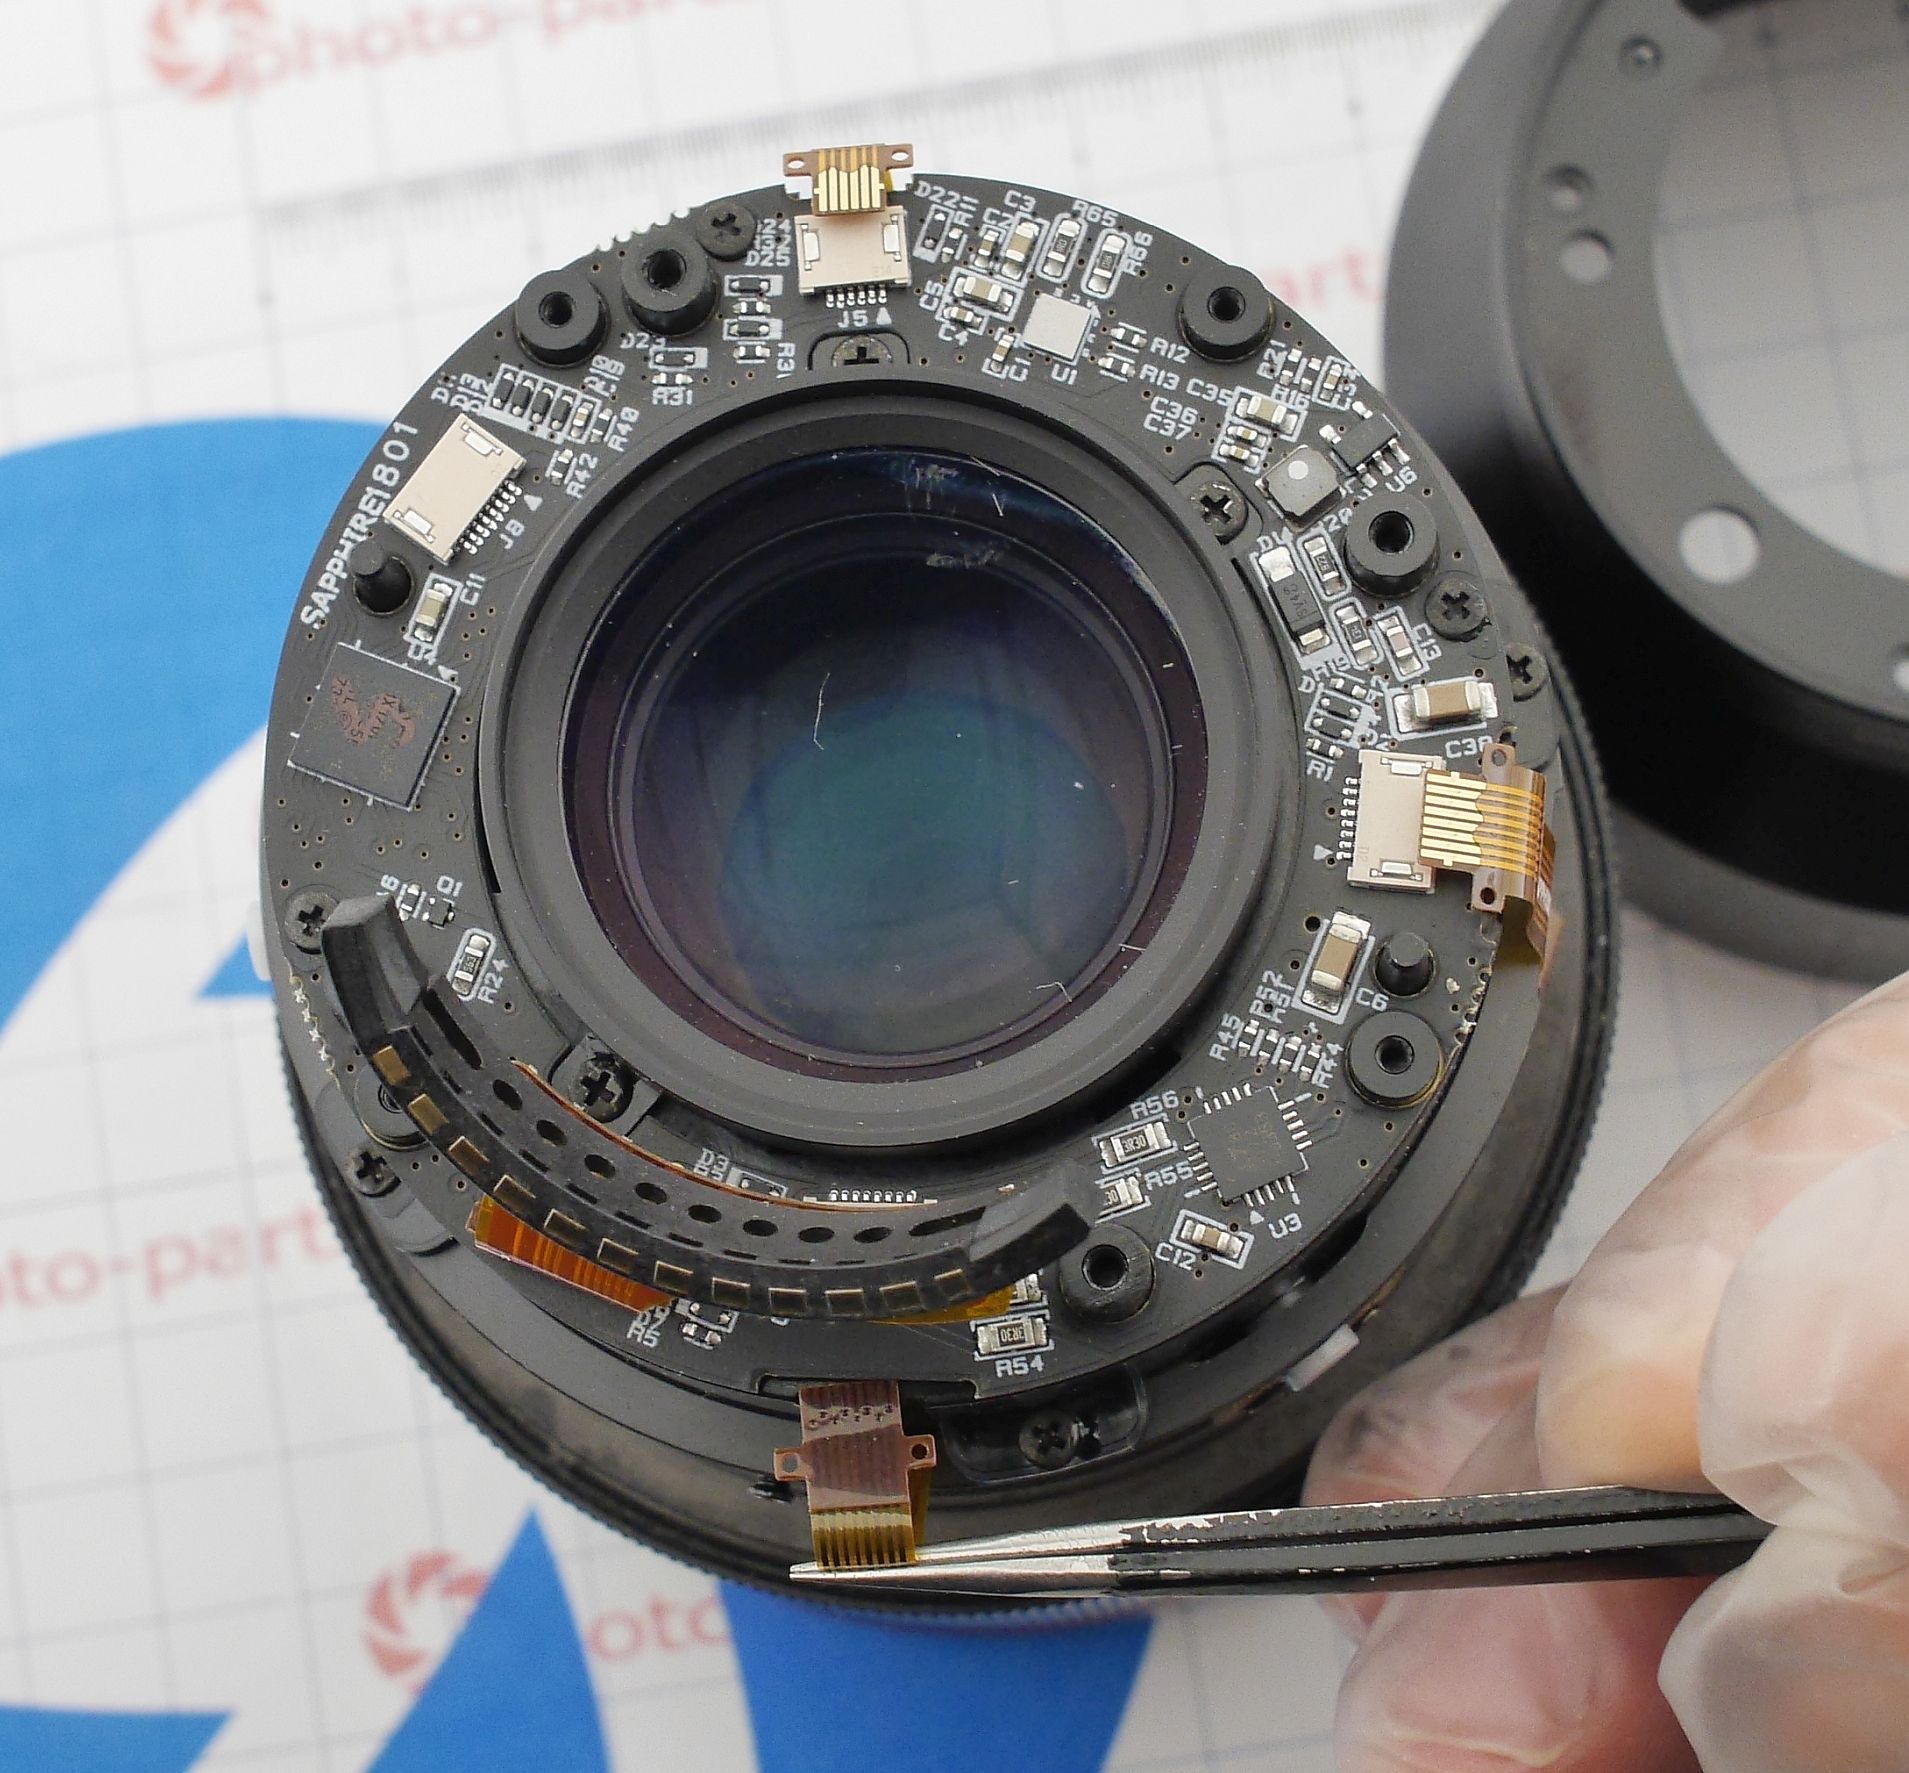
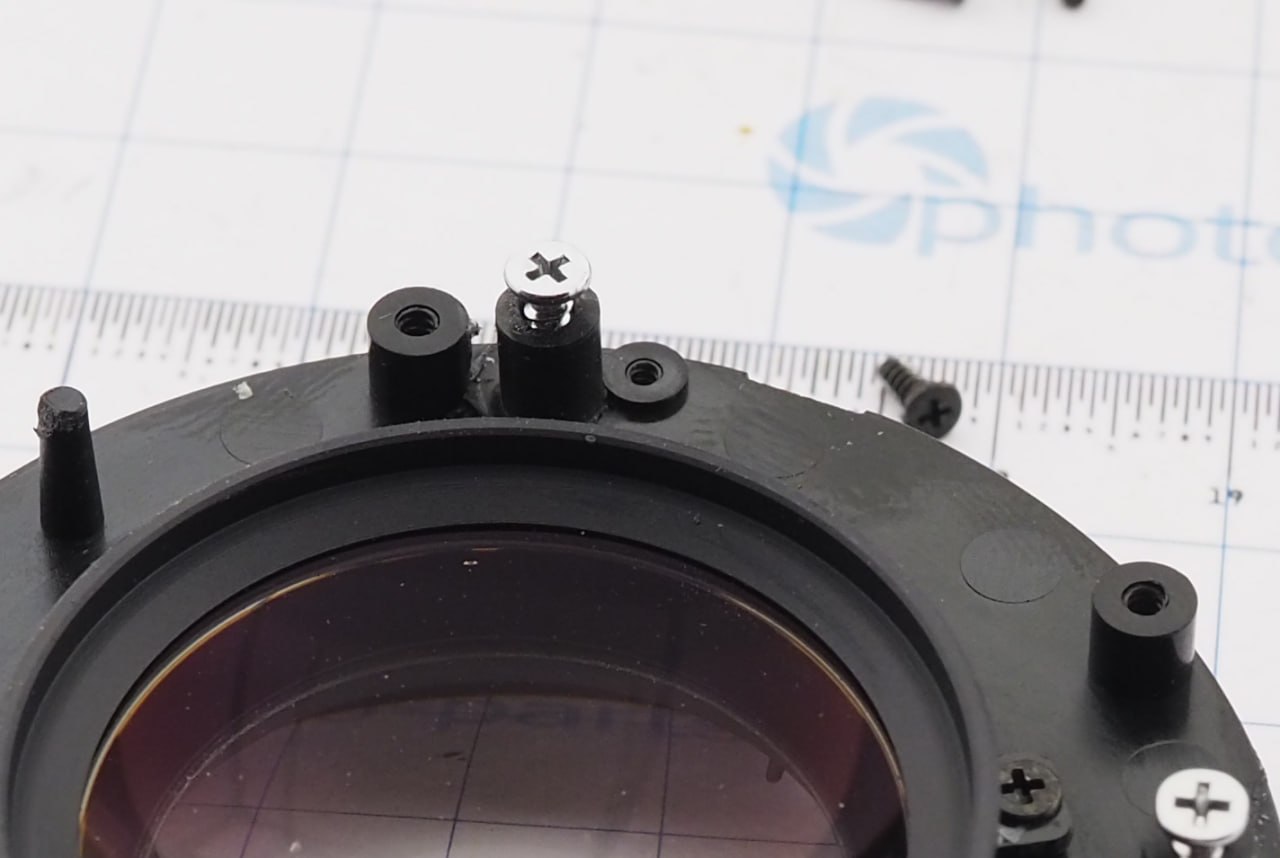
The next steps are only for repairing the aperture and will brake optical alignment of the front lens group! Don't perform unless necessary. The first lens group is held by three plastic collars and three screws embedded in the main barrel:
The collars roughly position the lens; the screws fine-tune and lock it. If you don't move the brass guides, don't mix up lens orientation (mark it pre-removal), and don't overtighten the screws, alignment is almost preserved.
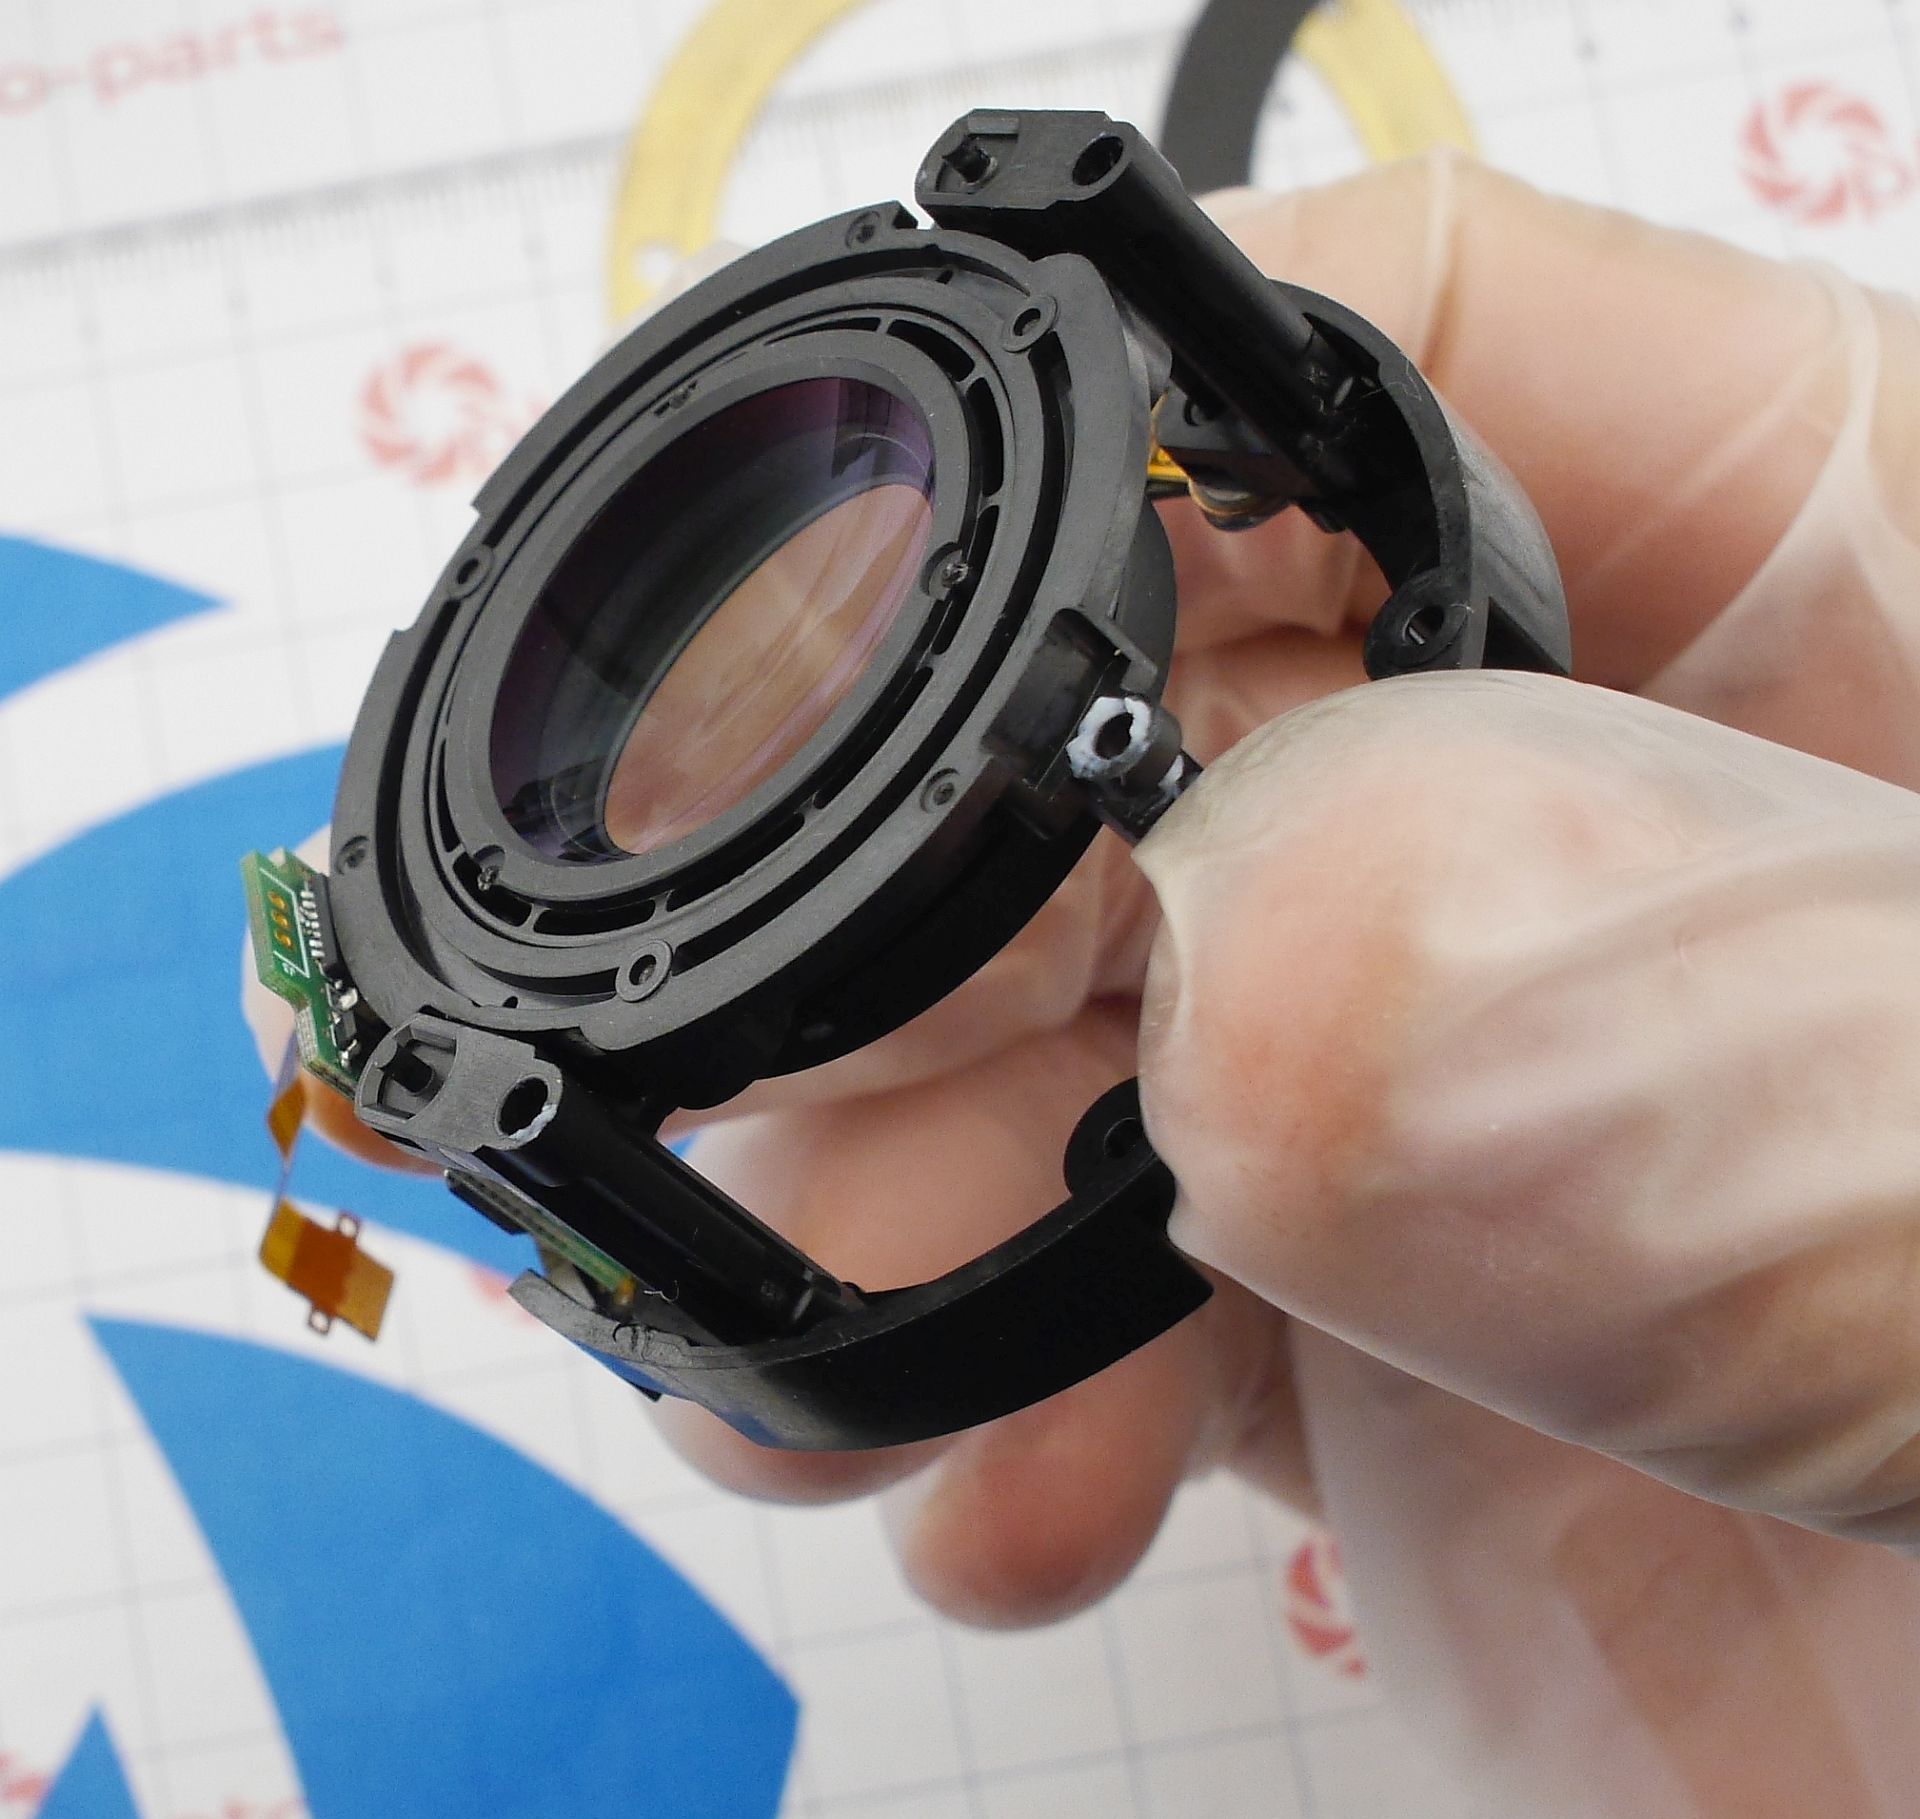
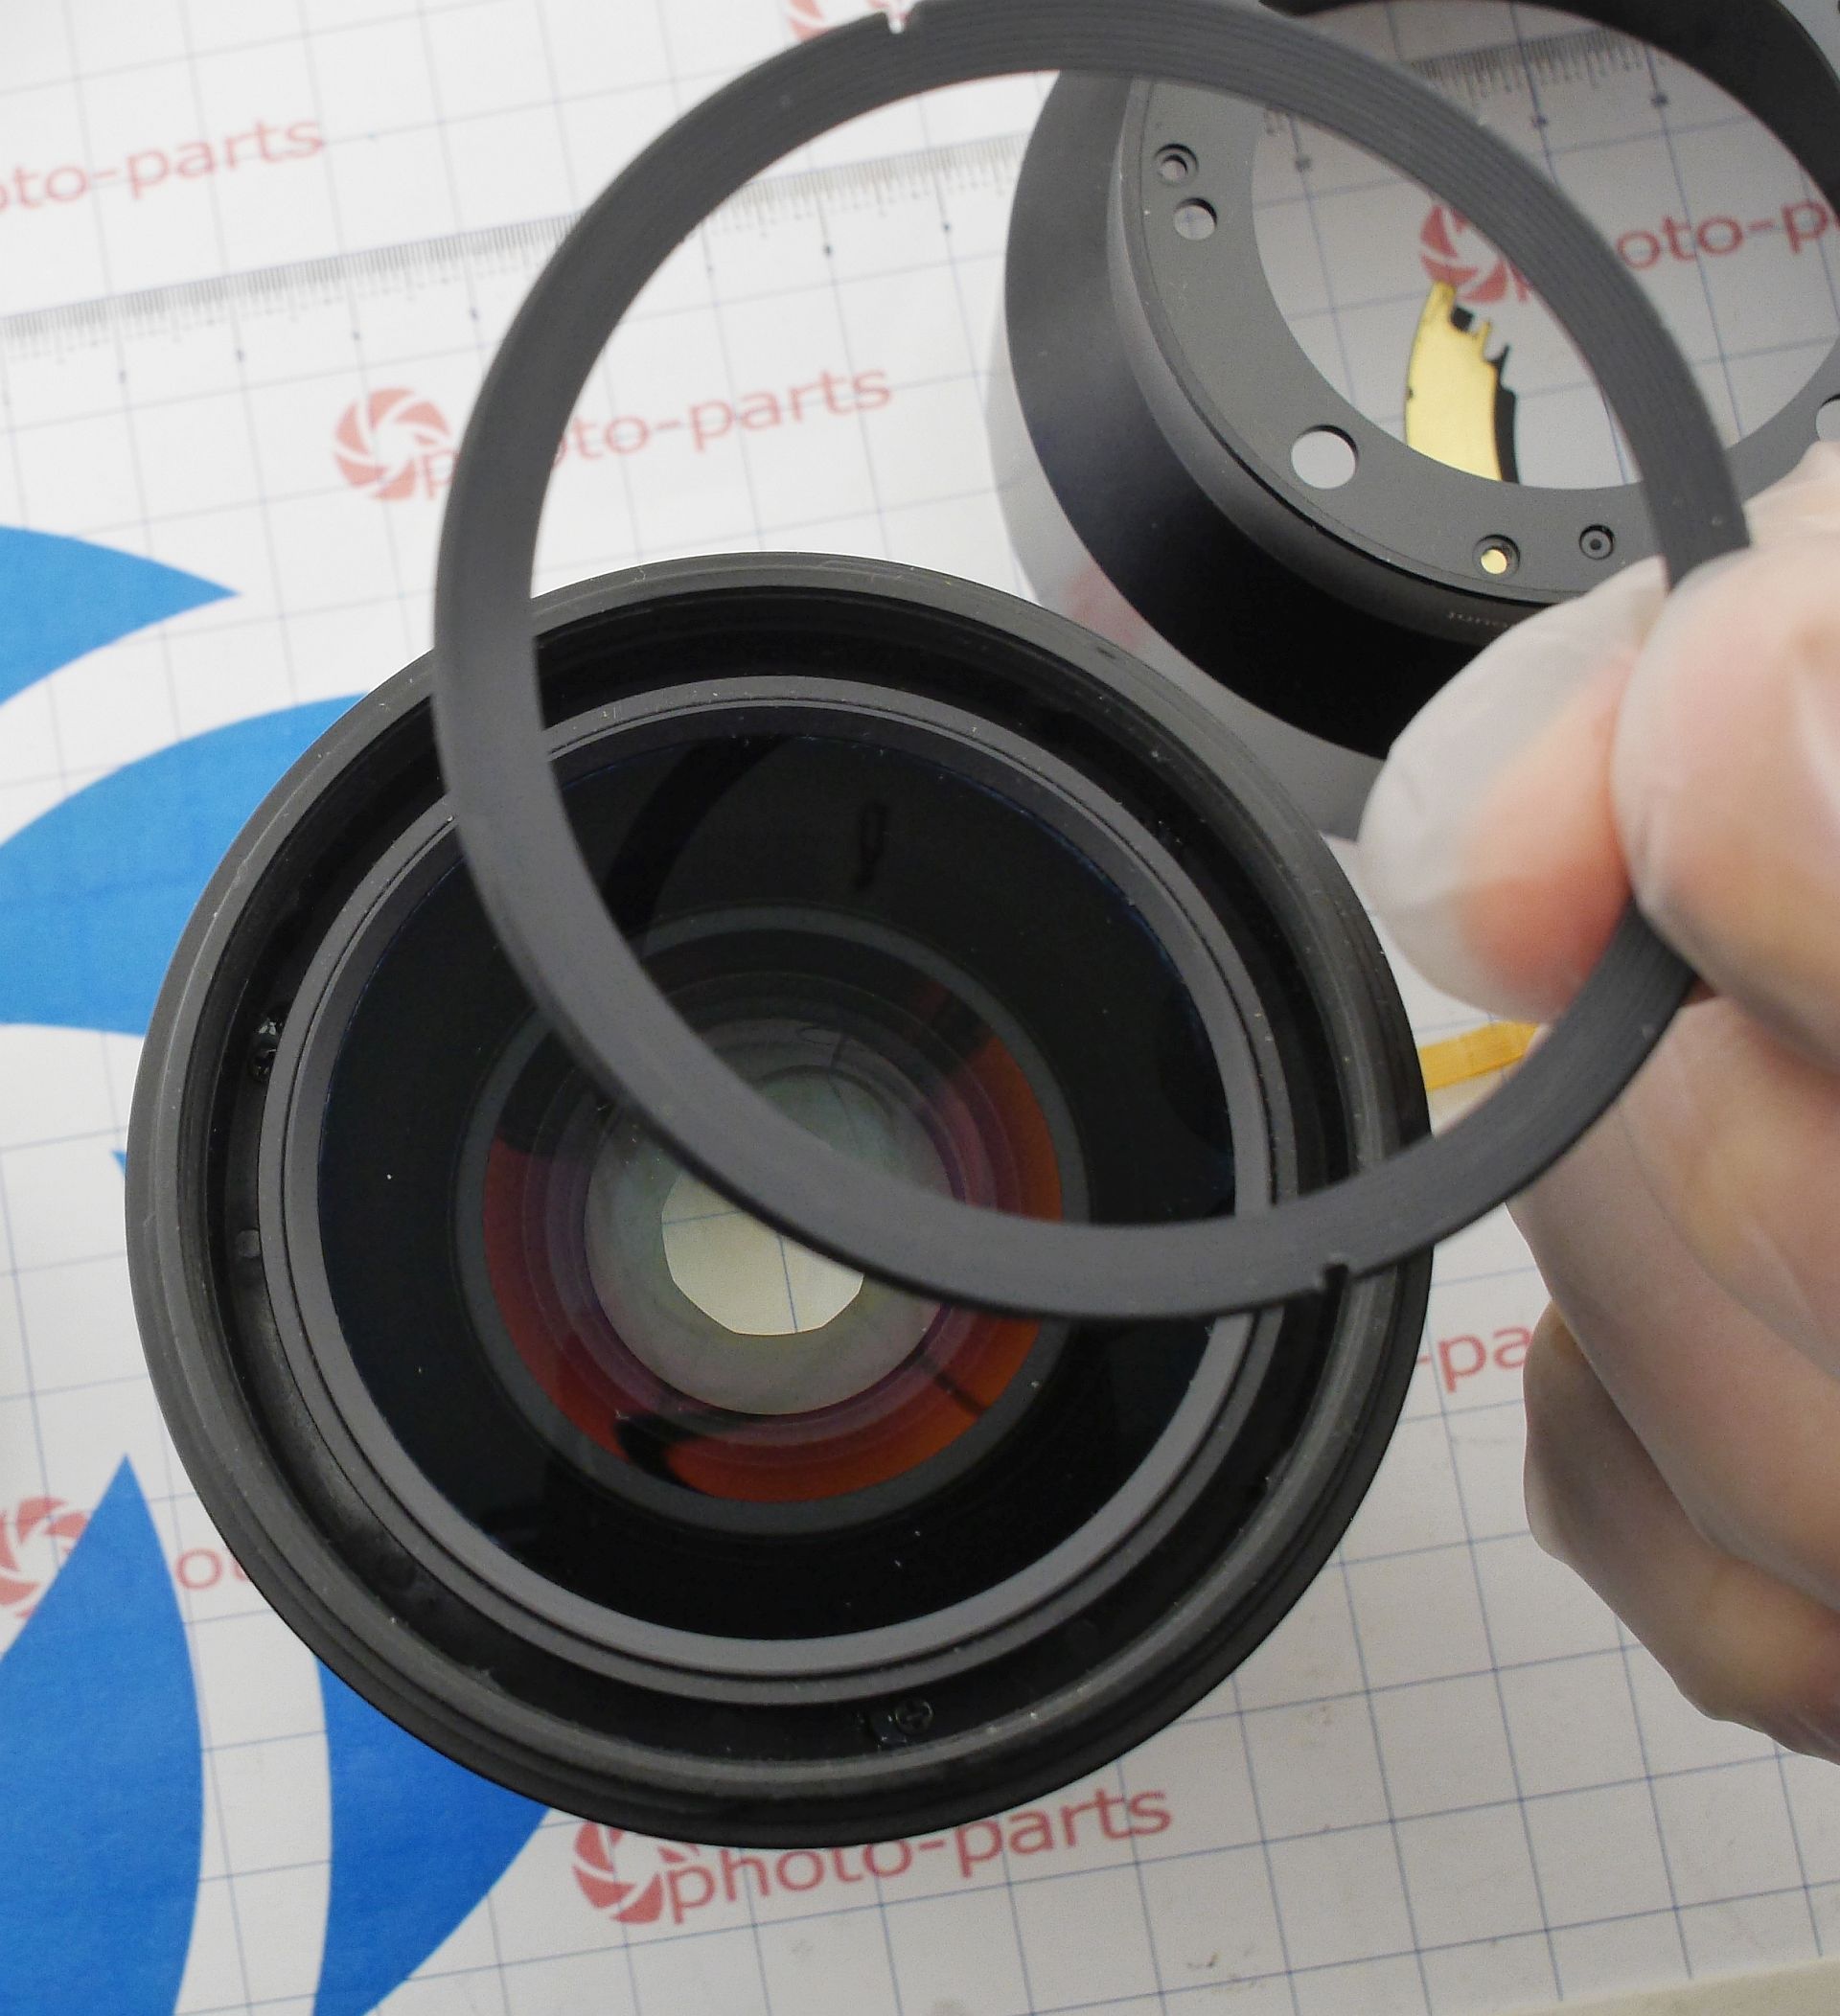
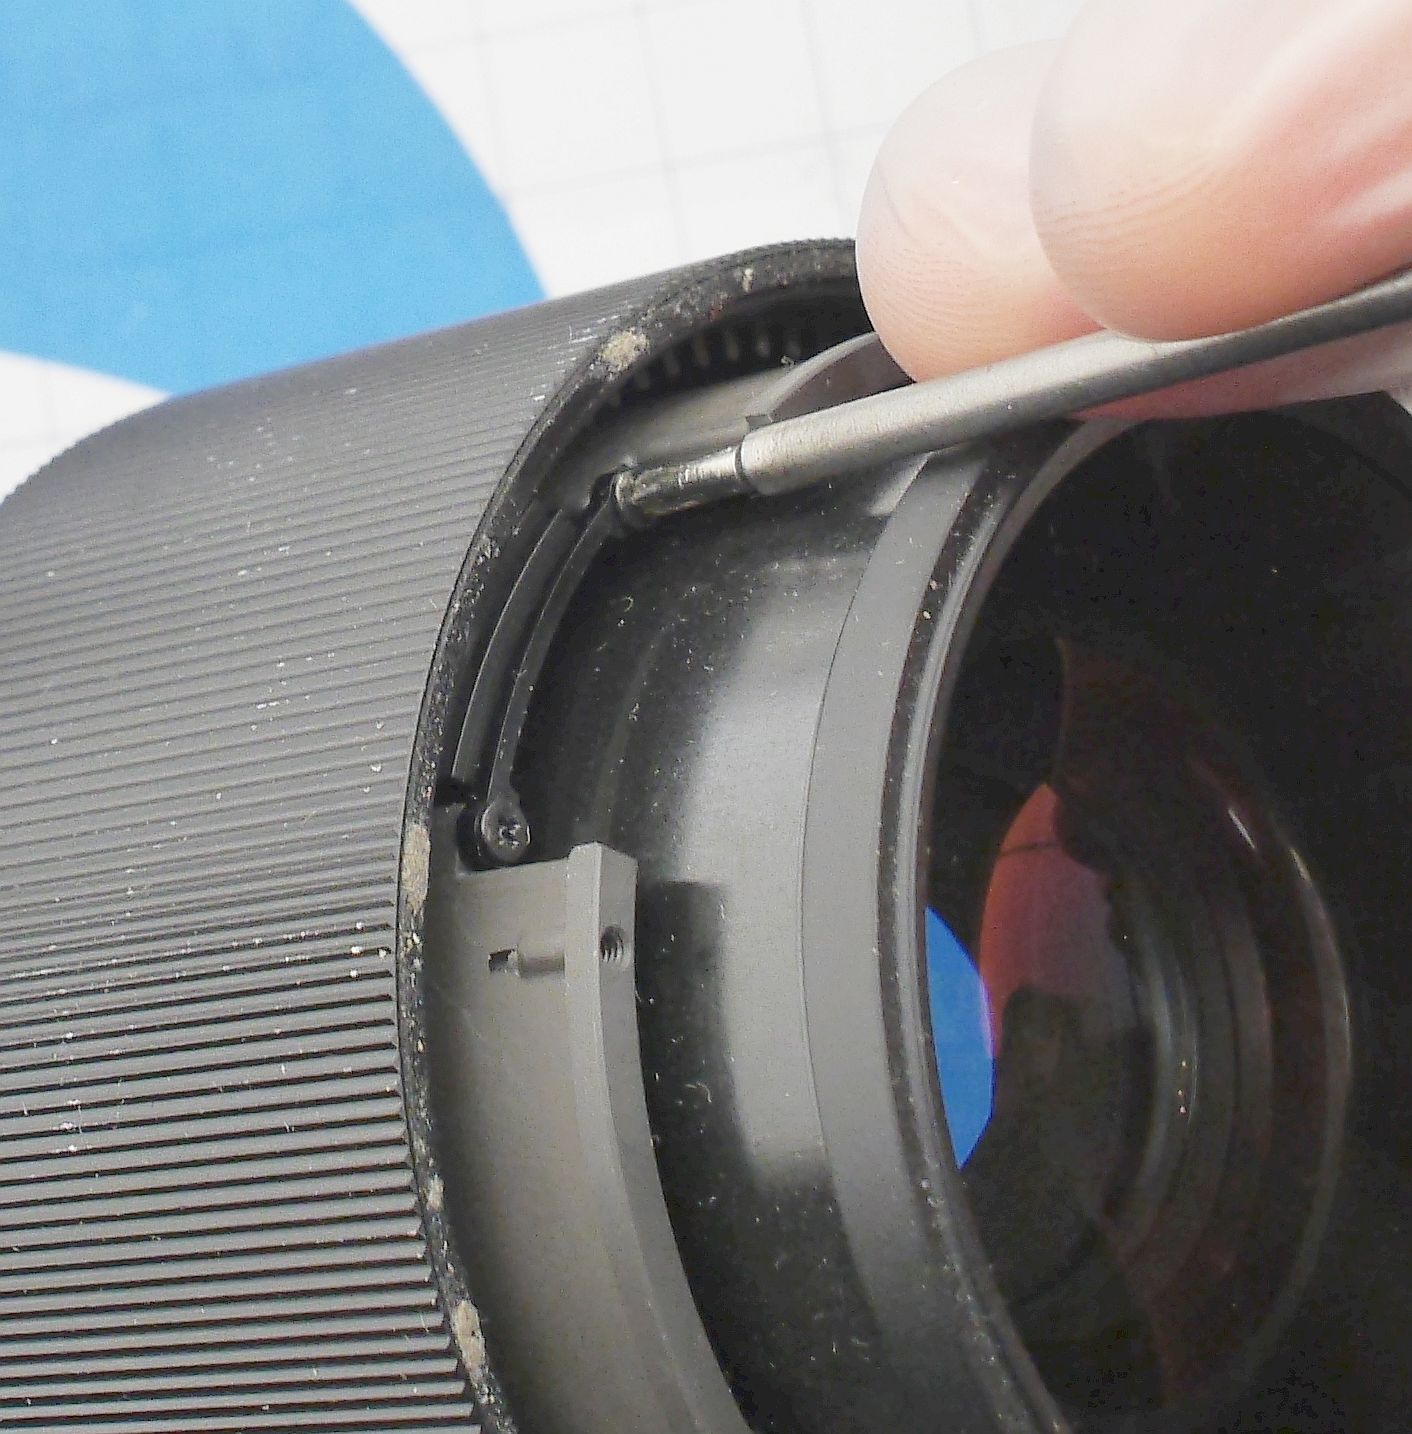
The aperture (the lens was removed to access this) is held not by screws, but on two plastic clips:
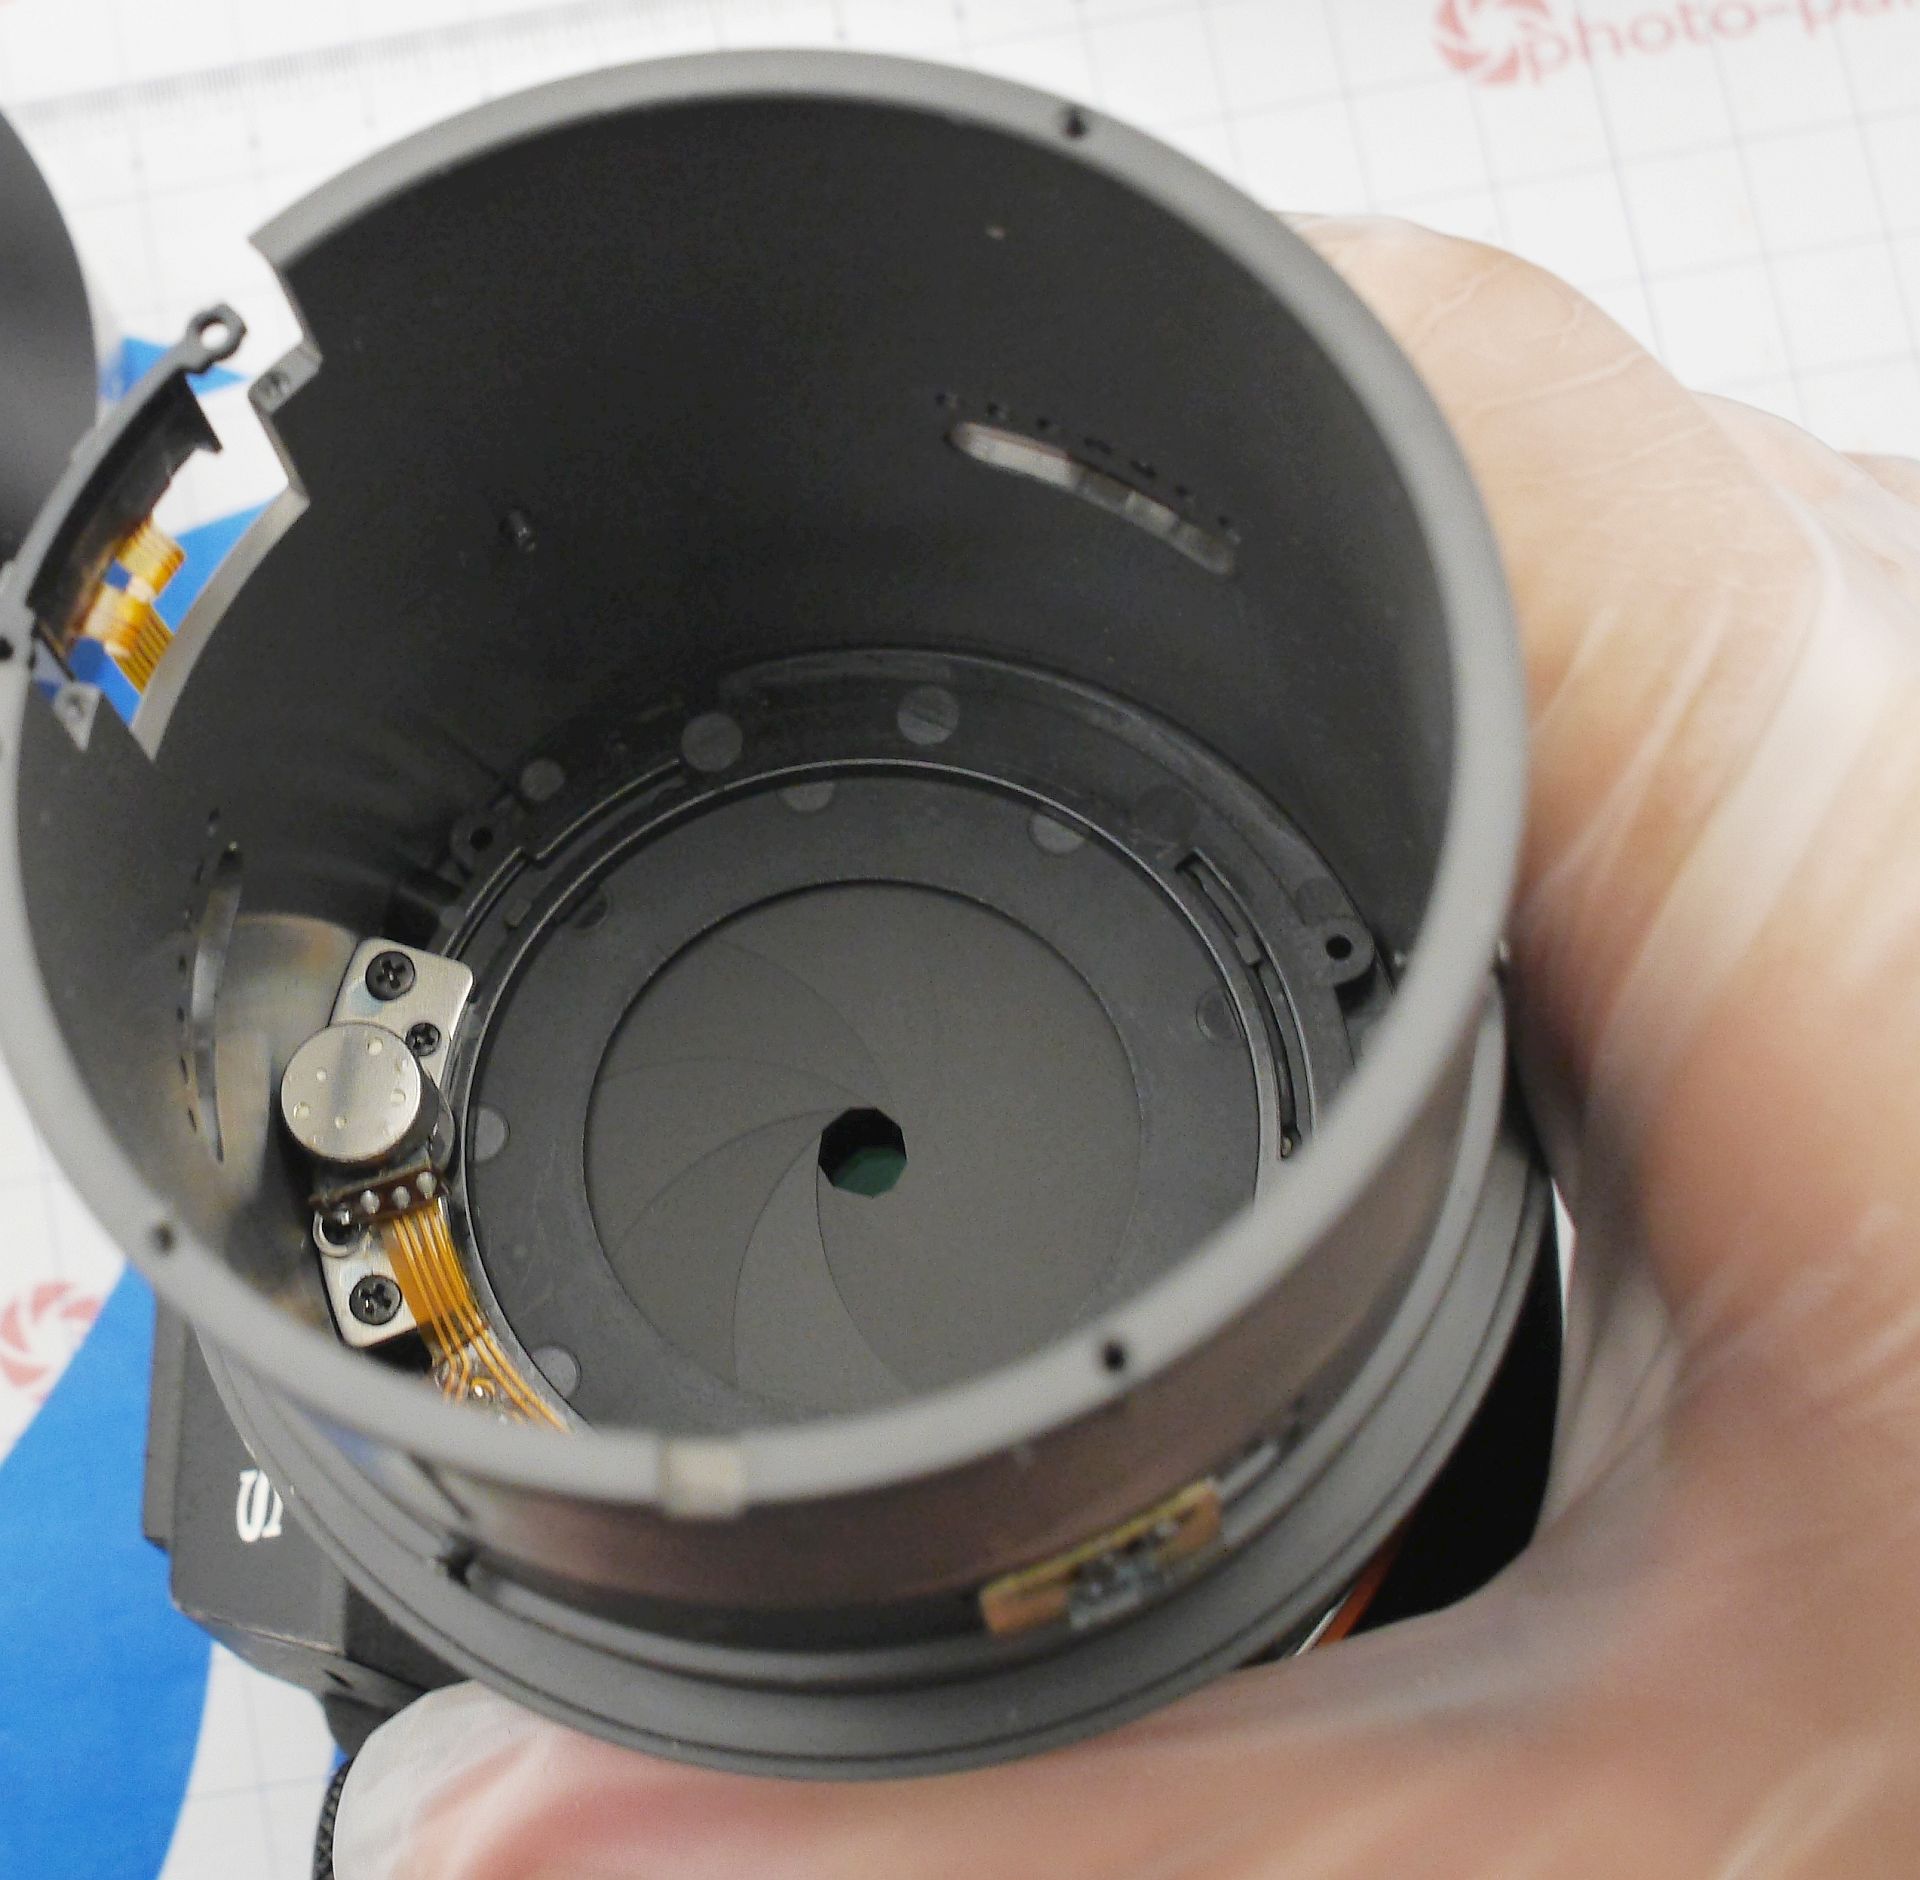
It slides forward - and in my case, was shattered:
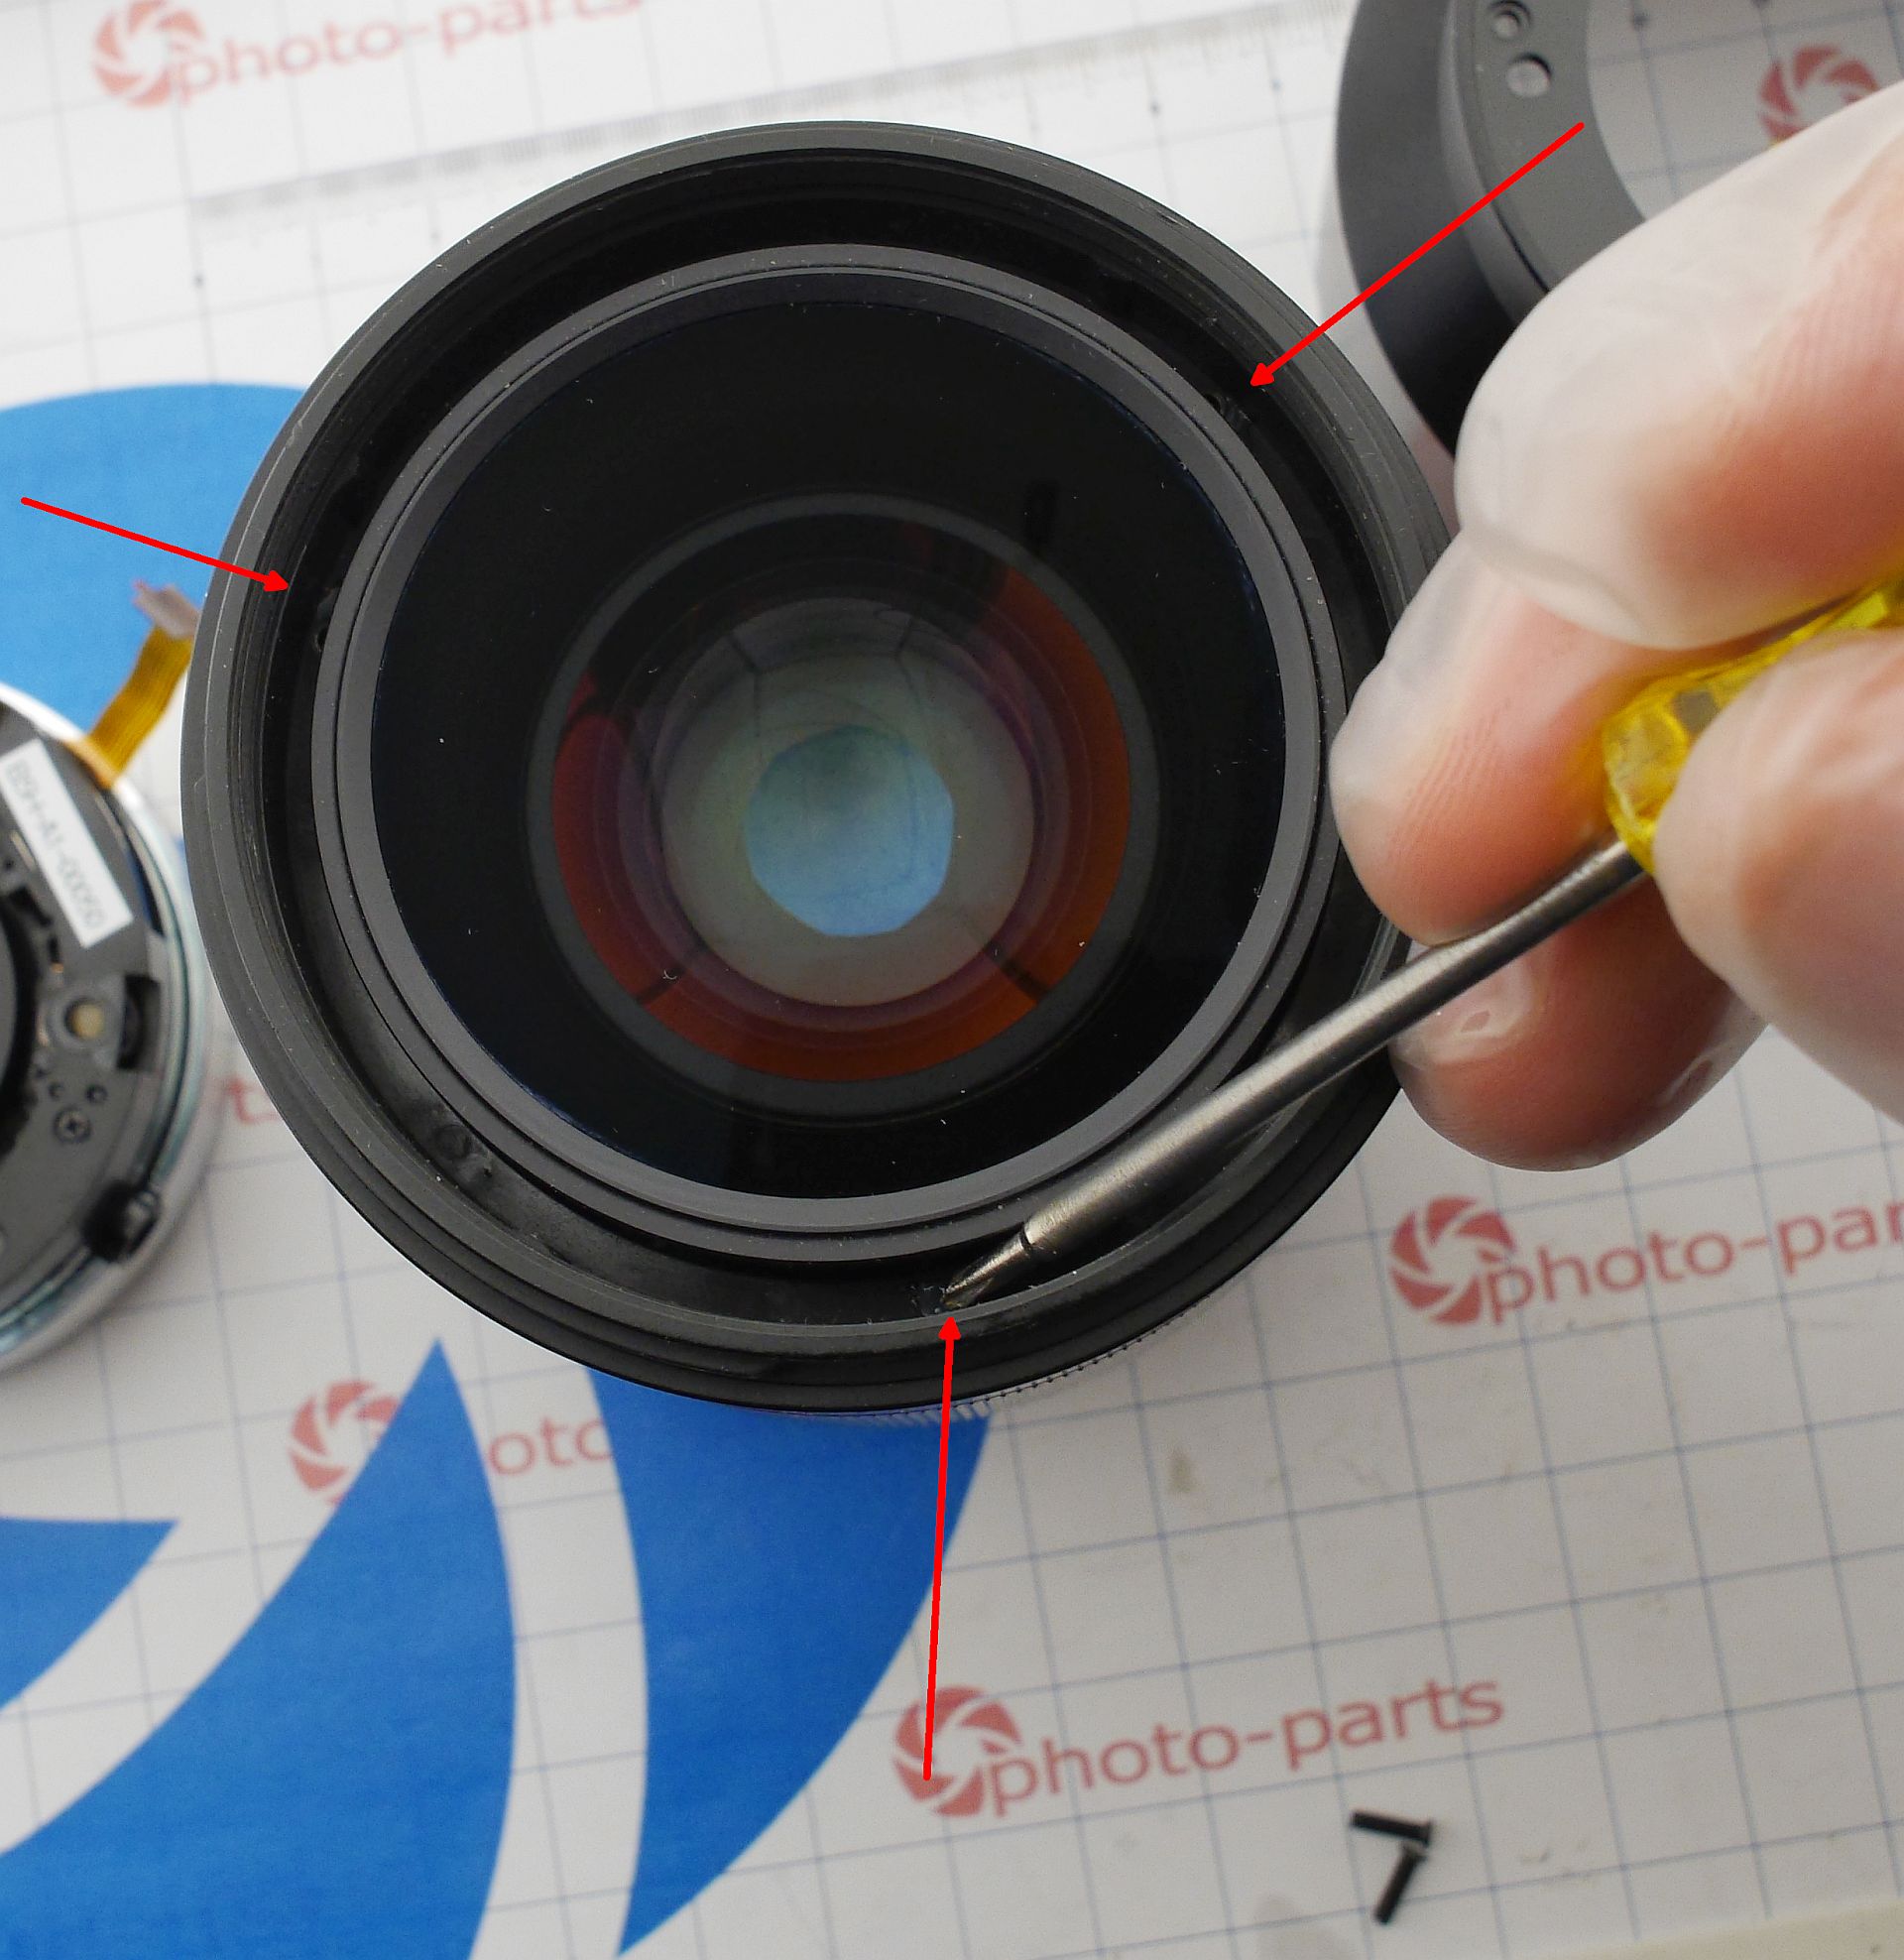
Three screws hold the halves of it and set the initial blade position - reinstall them as per the old seating marks:
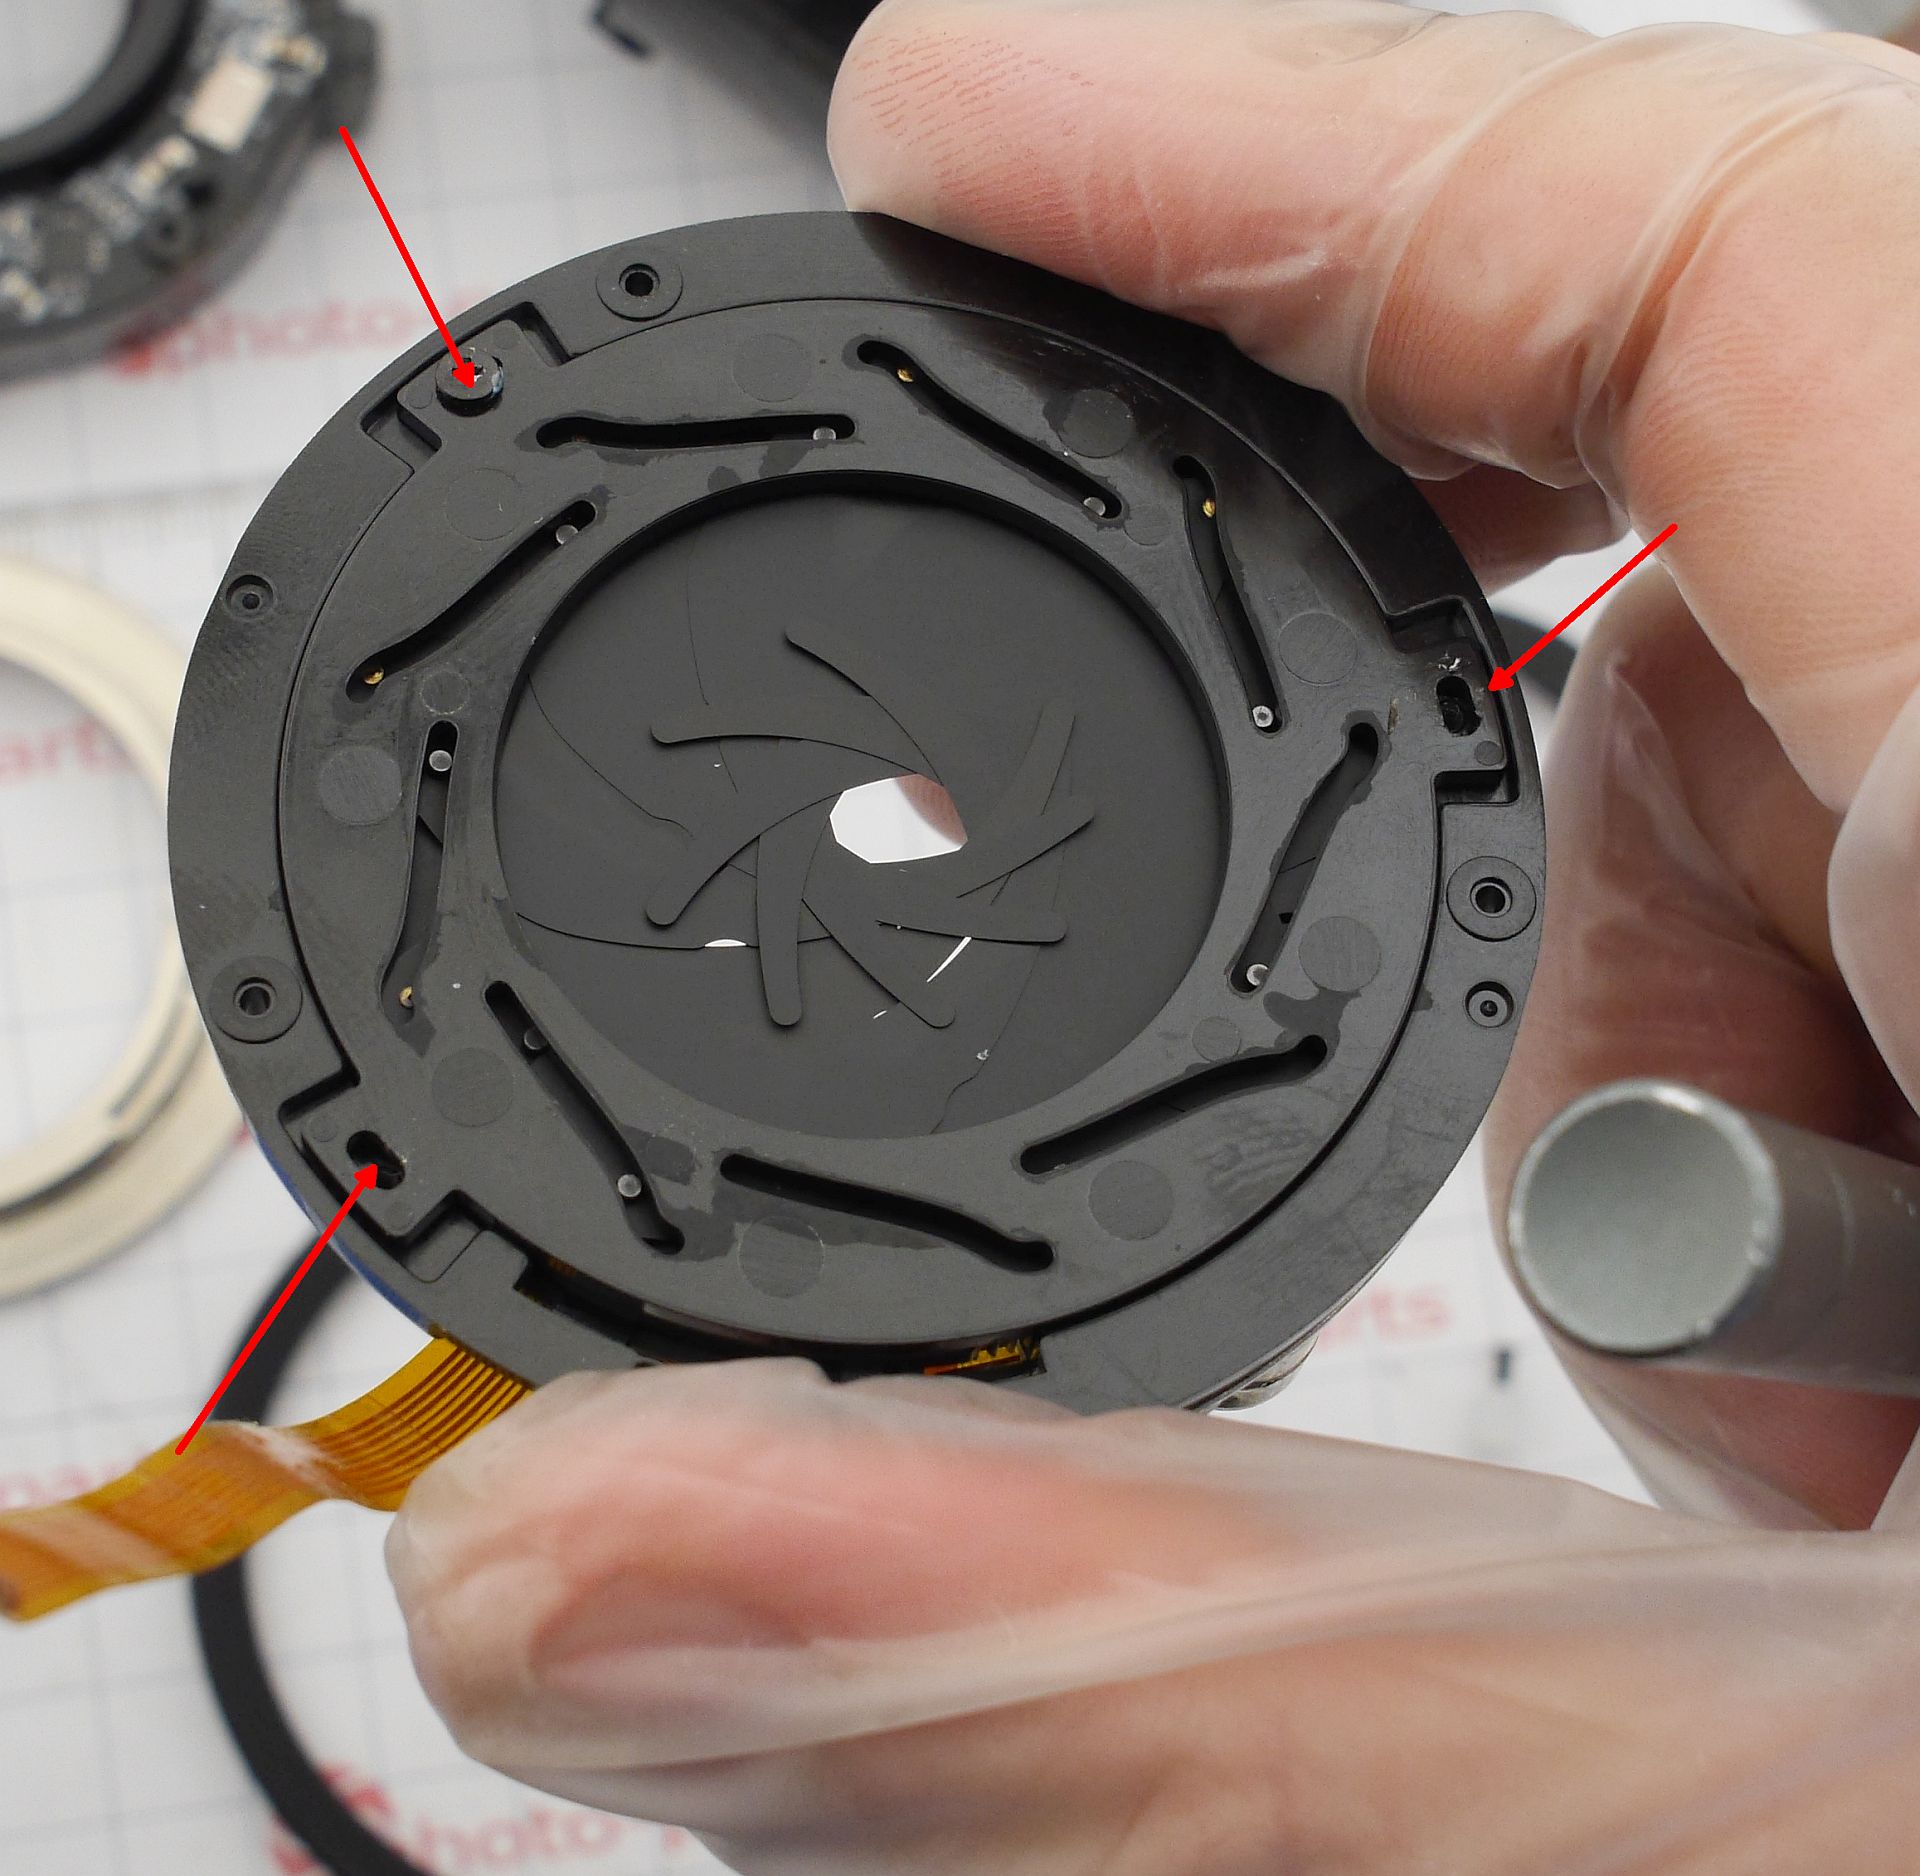
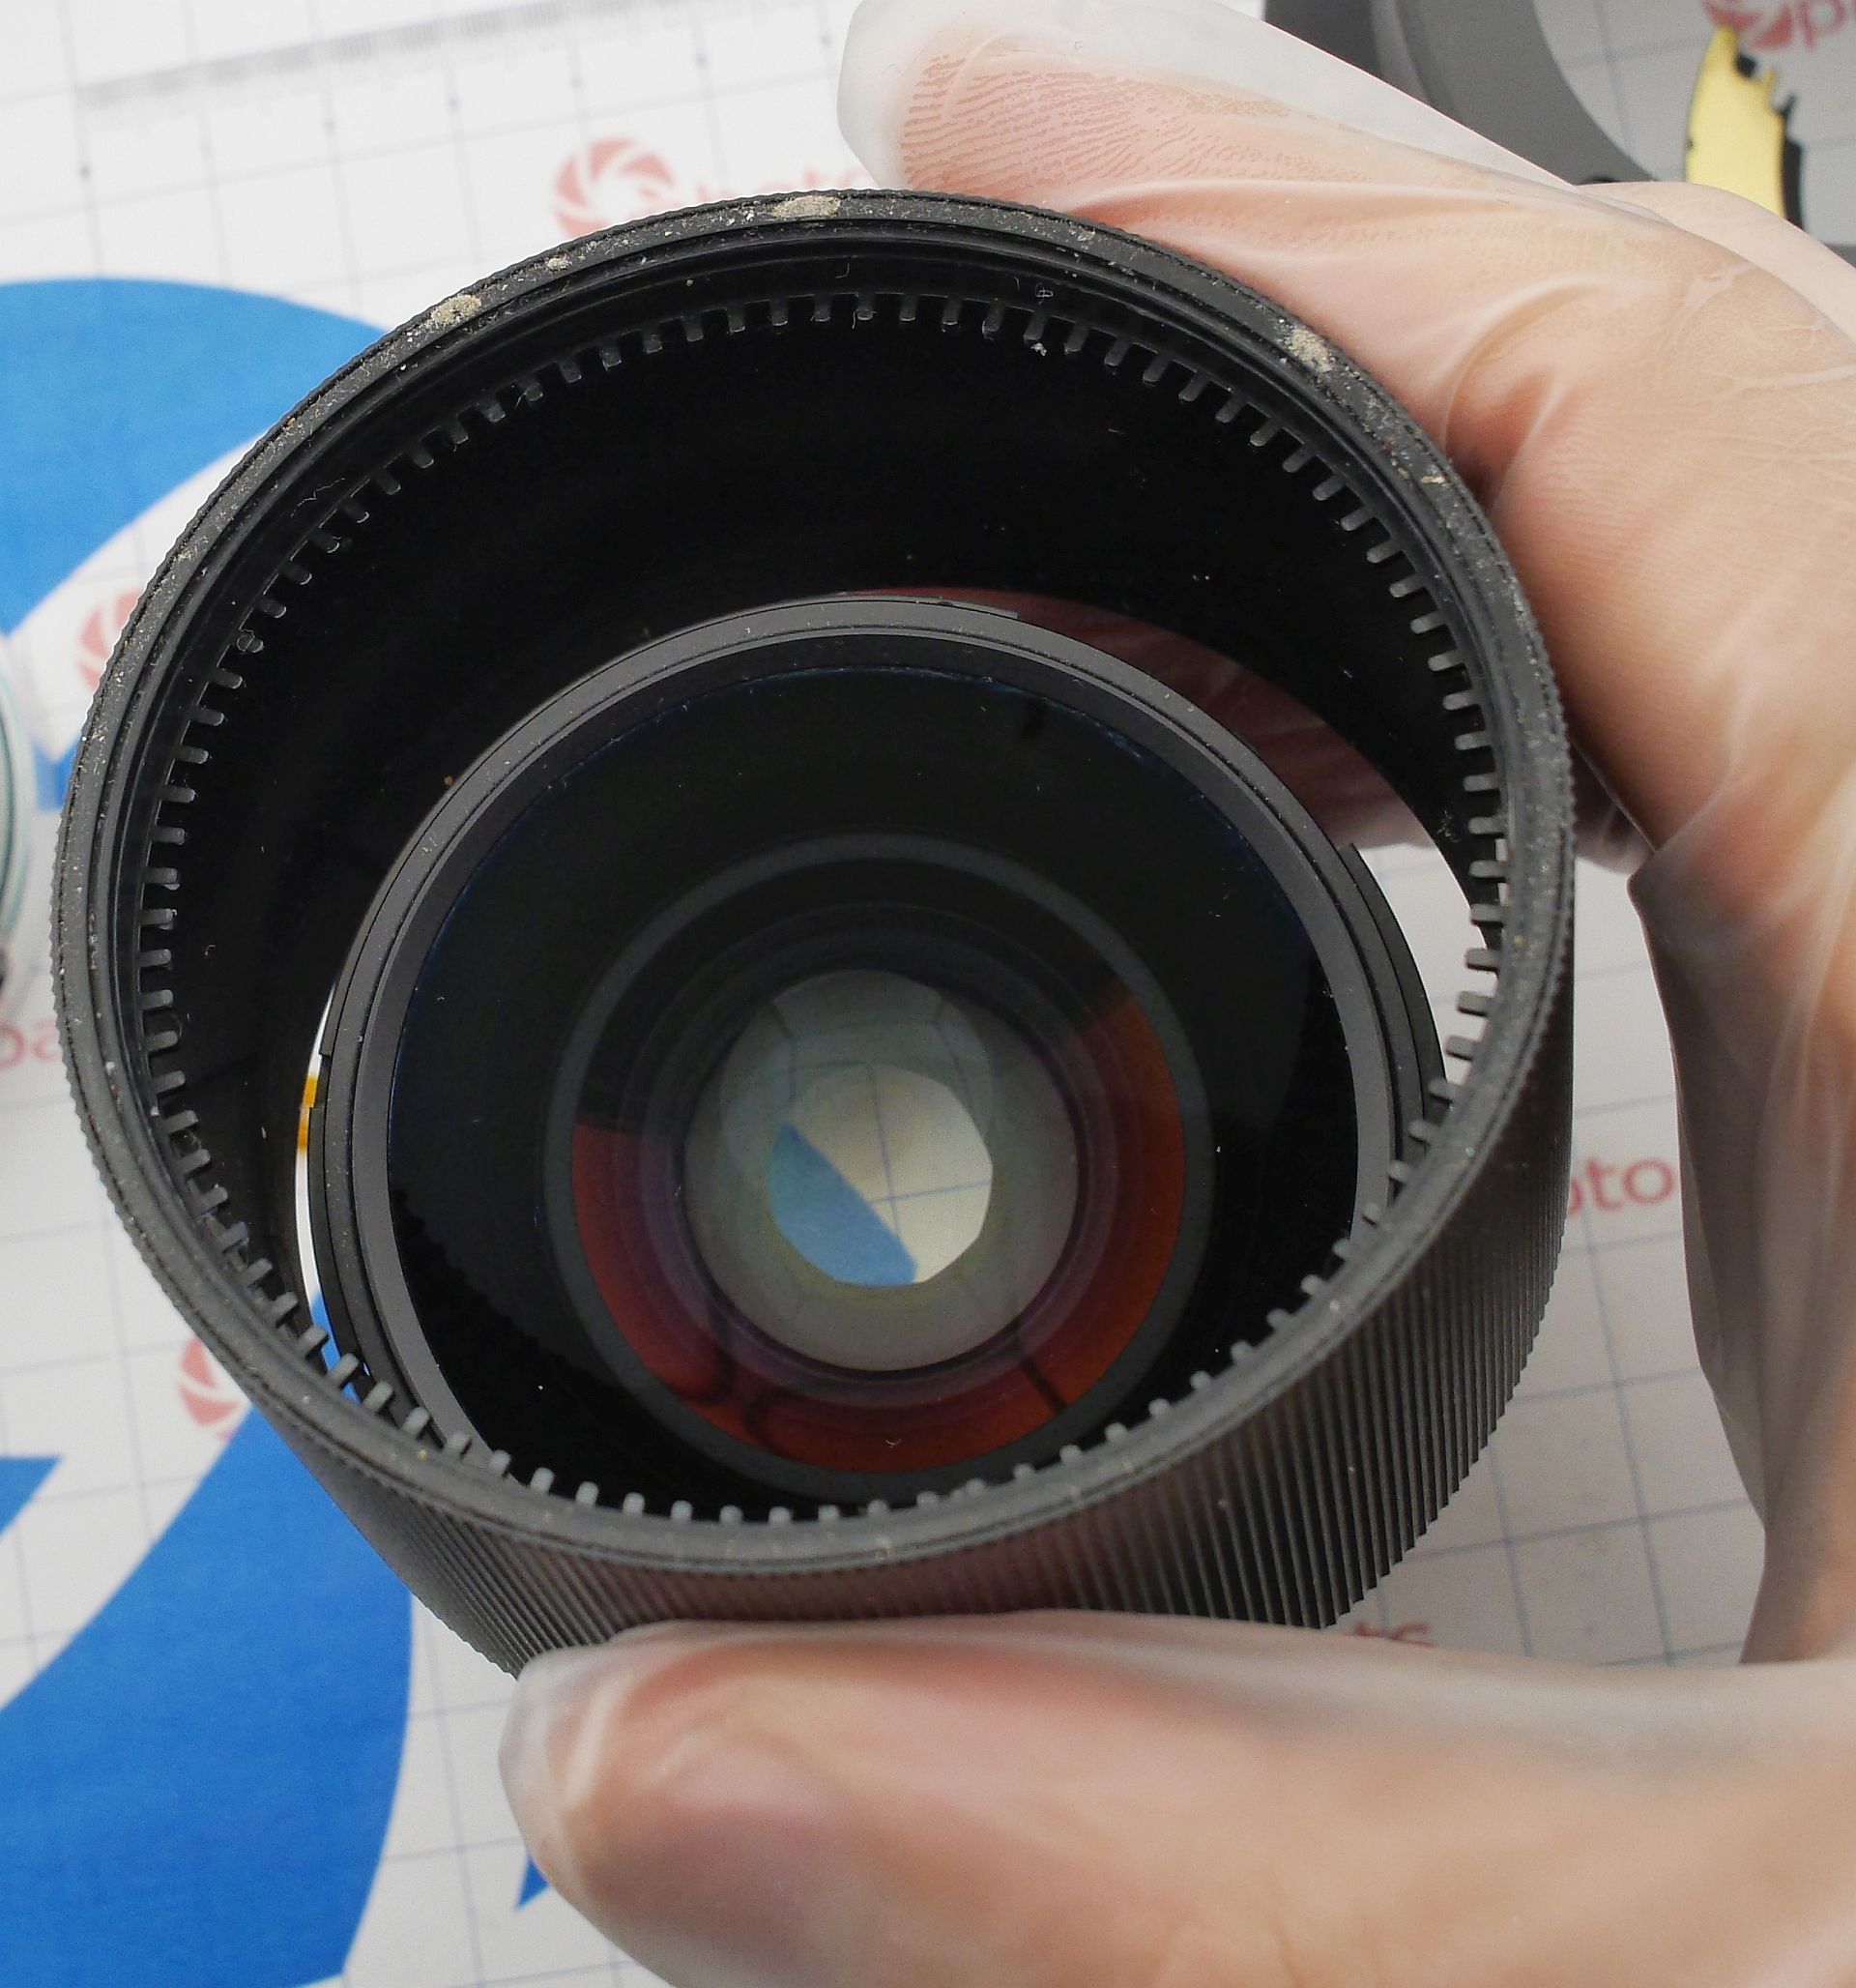
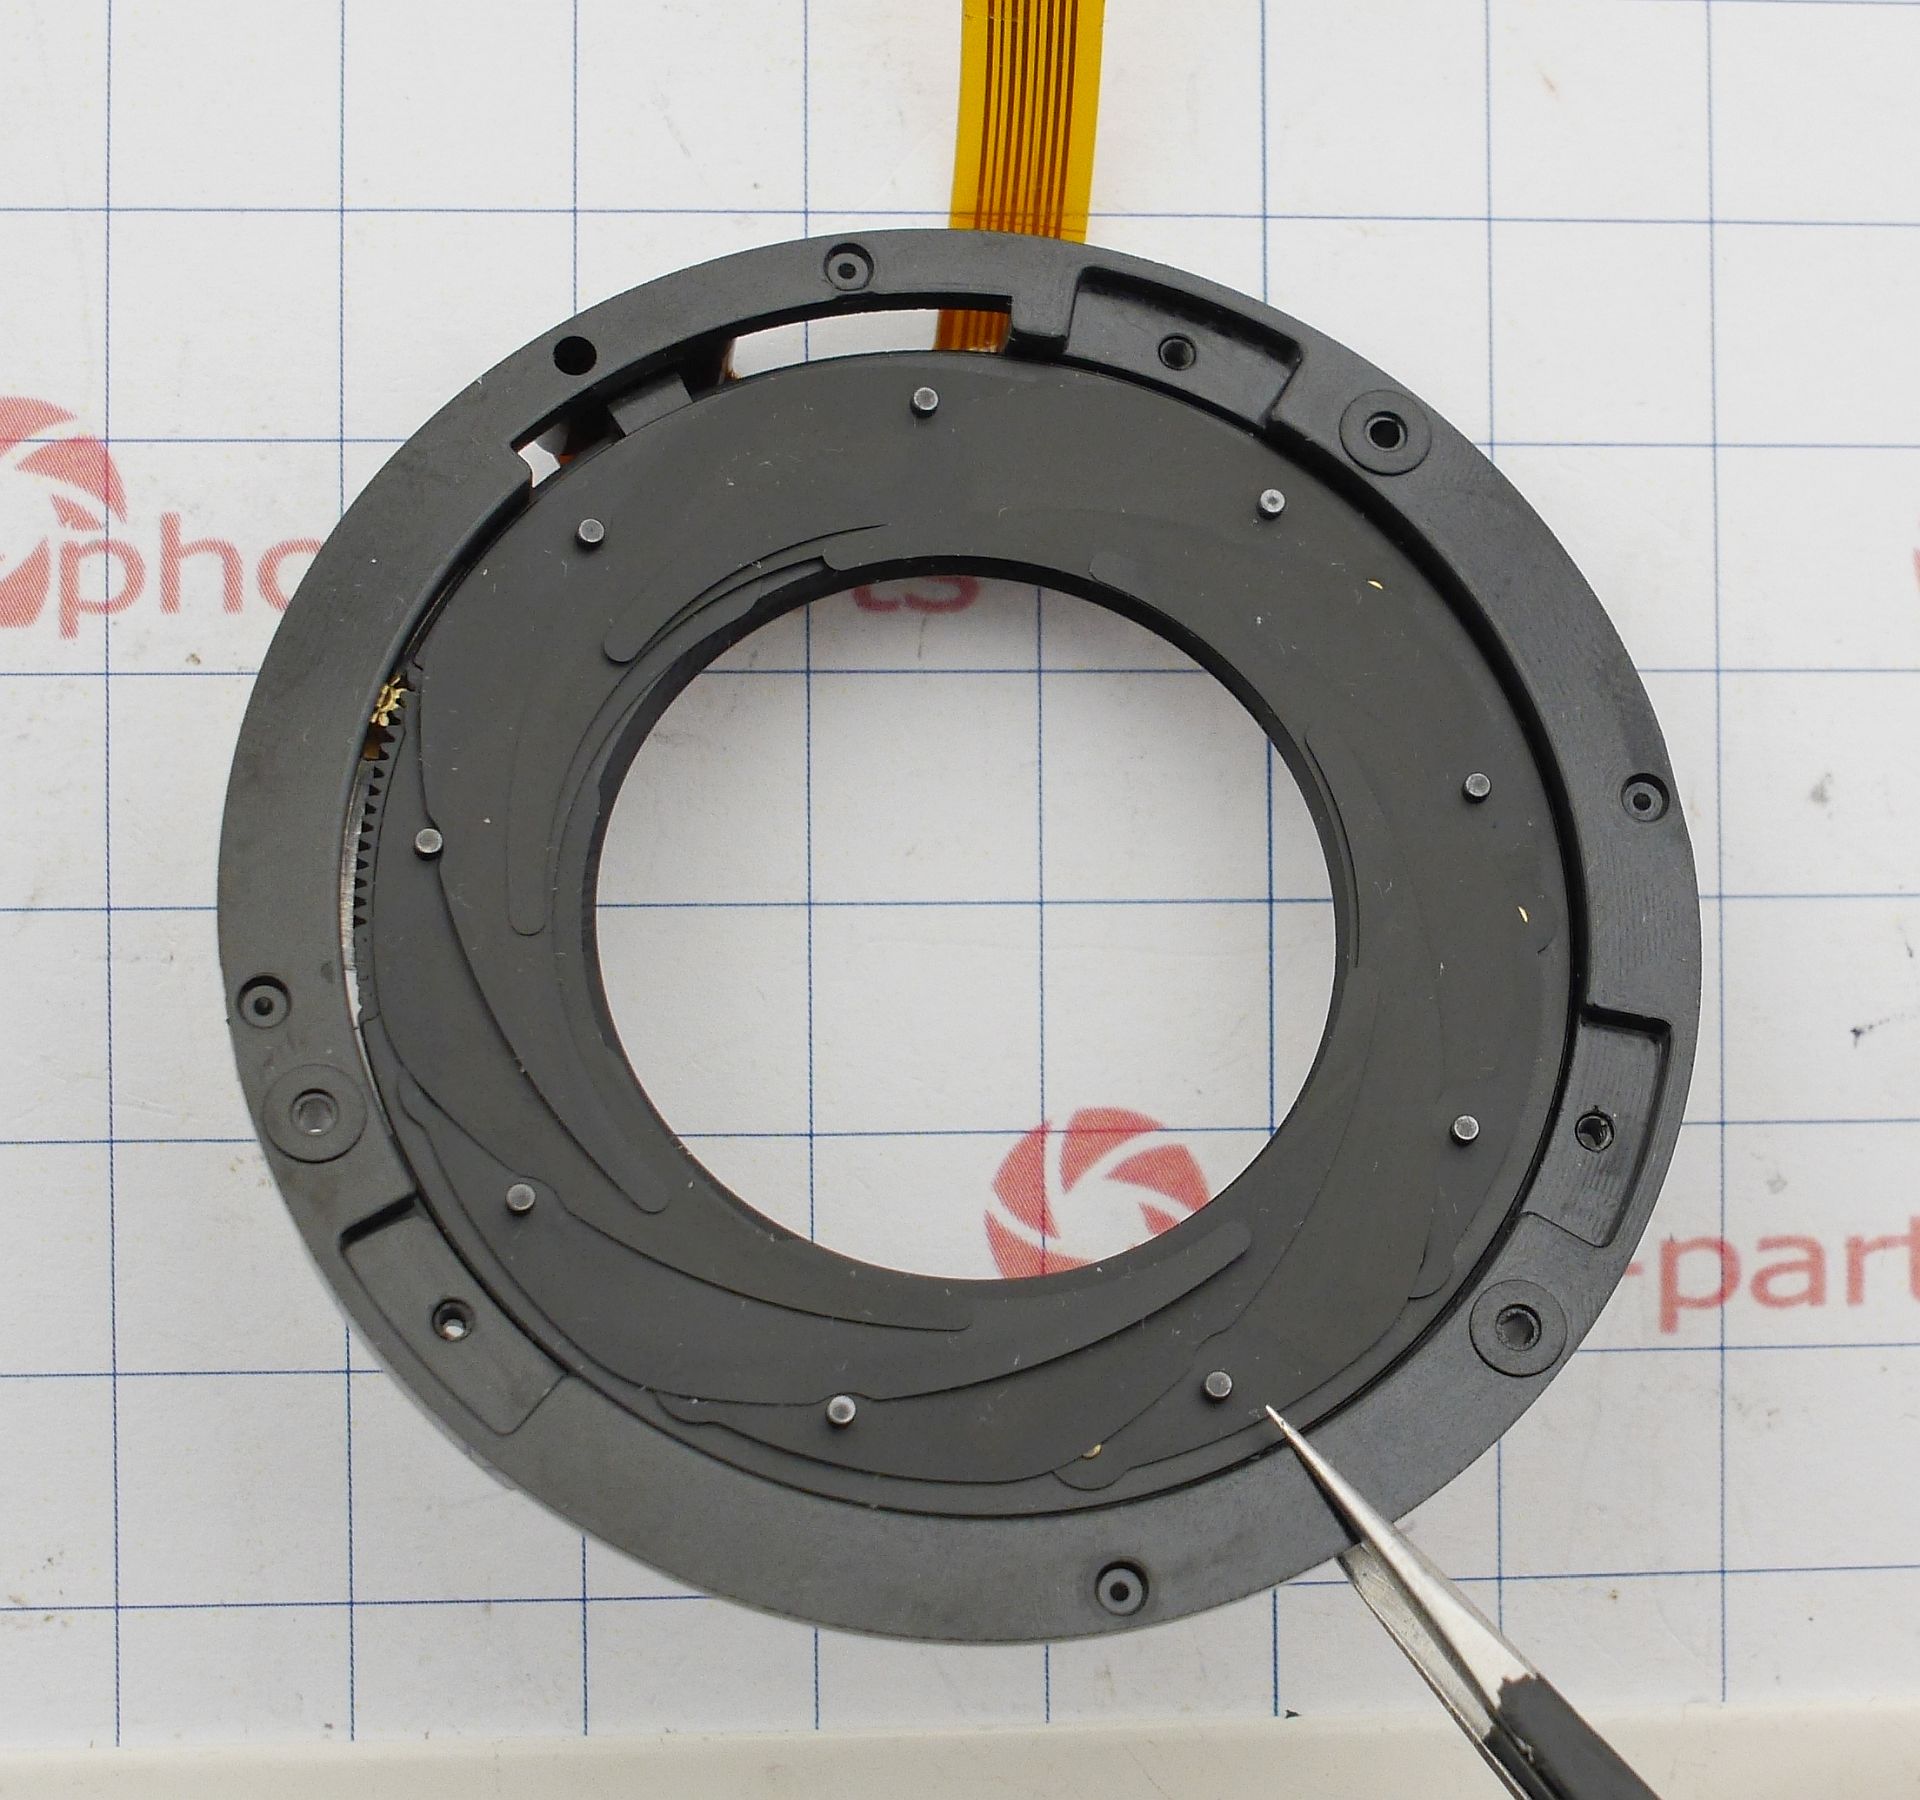
To check smoothness, remove the blades, turn the inner ring by hand. That's how smoothly the assembled aperture should move:
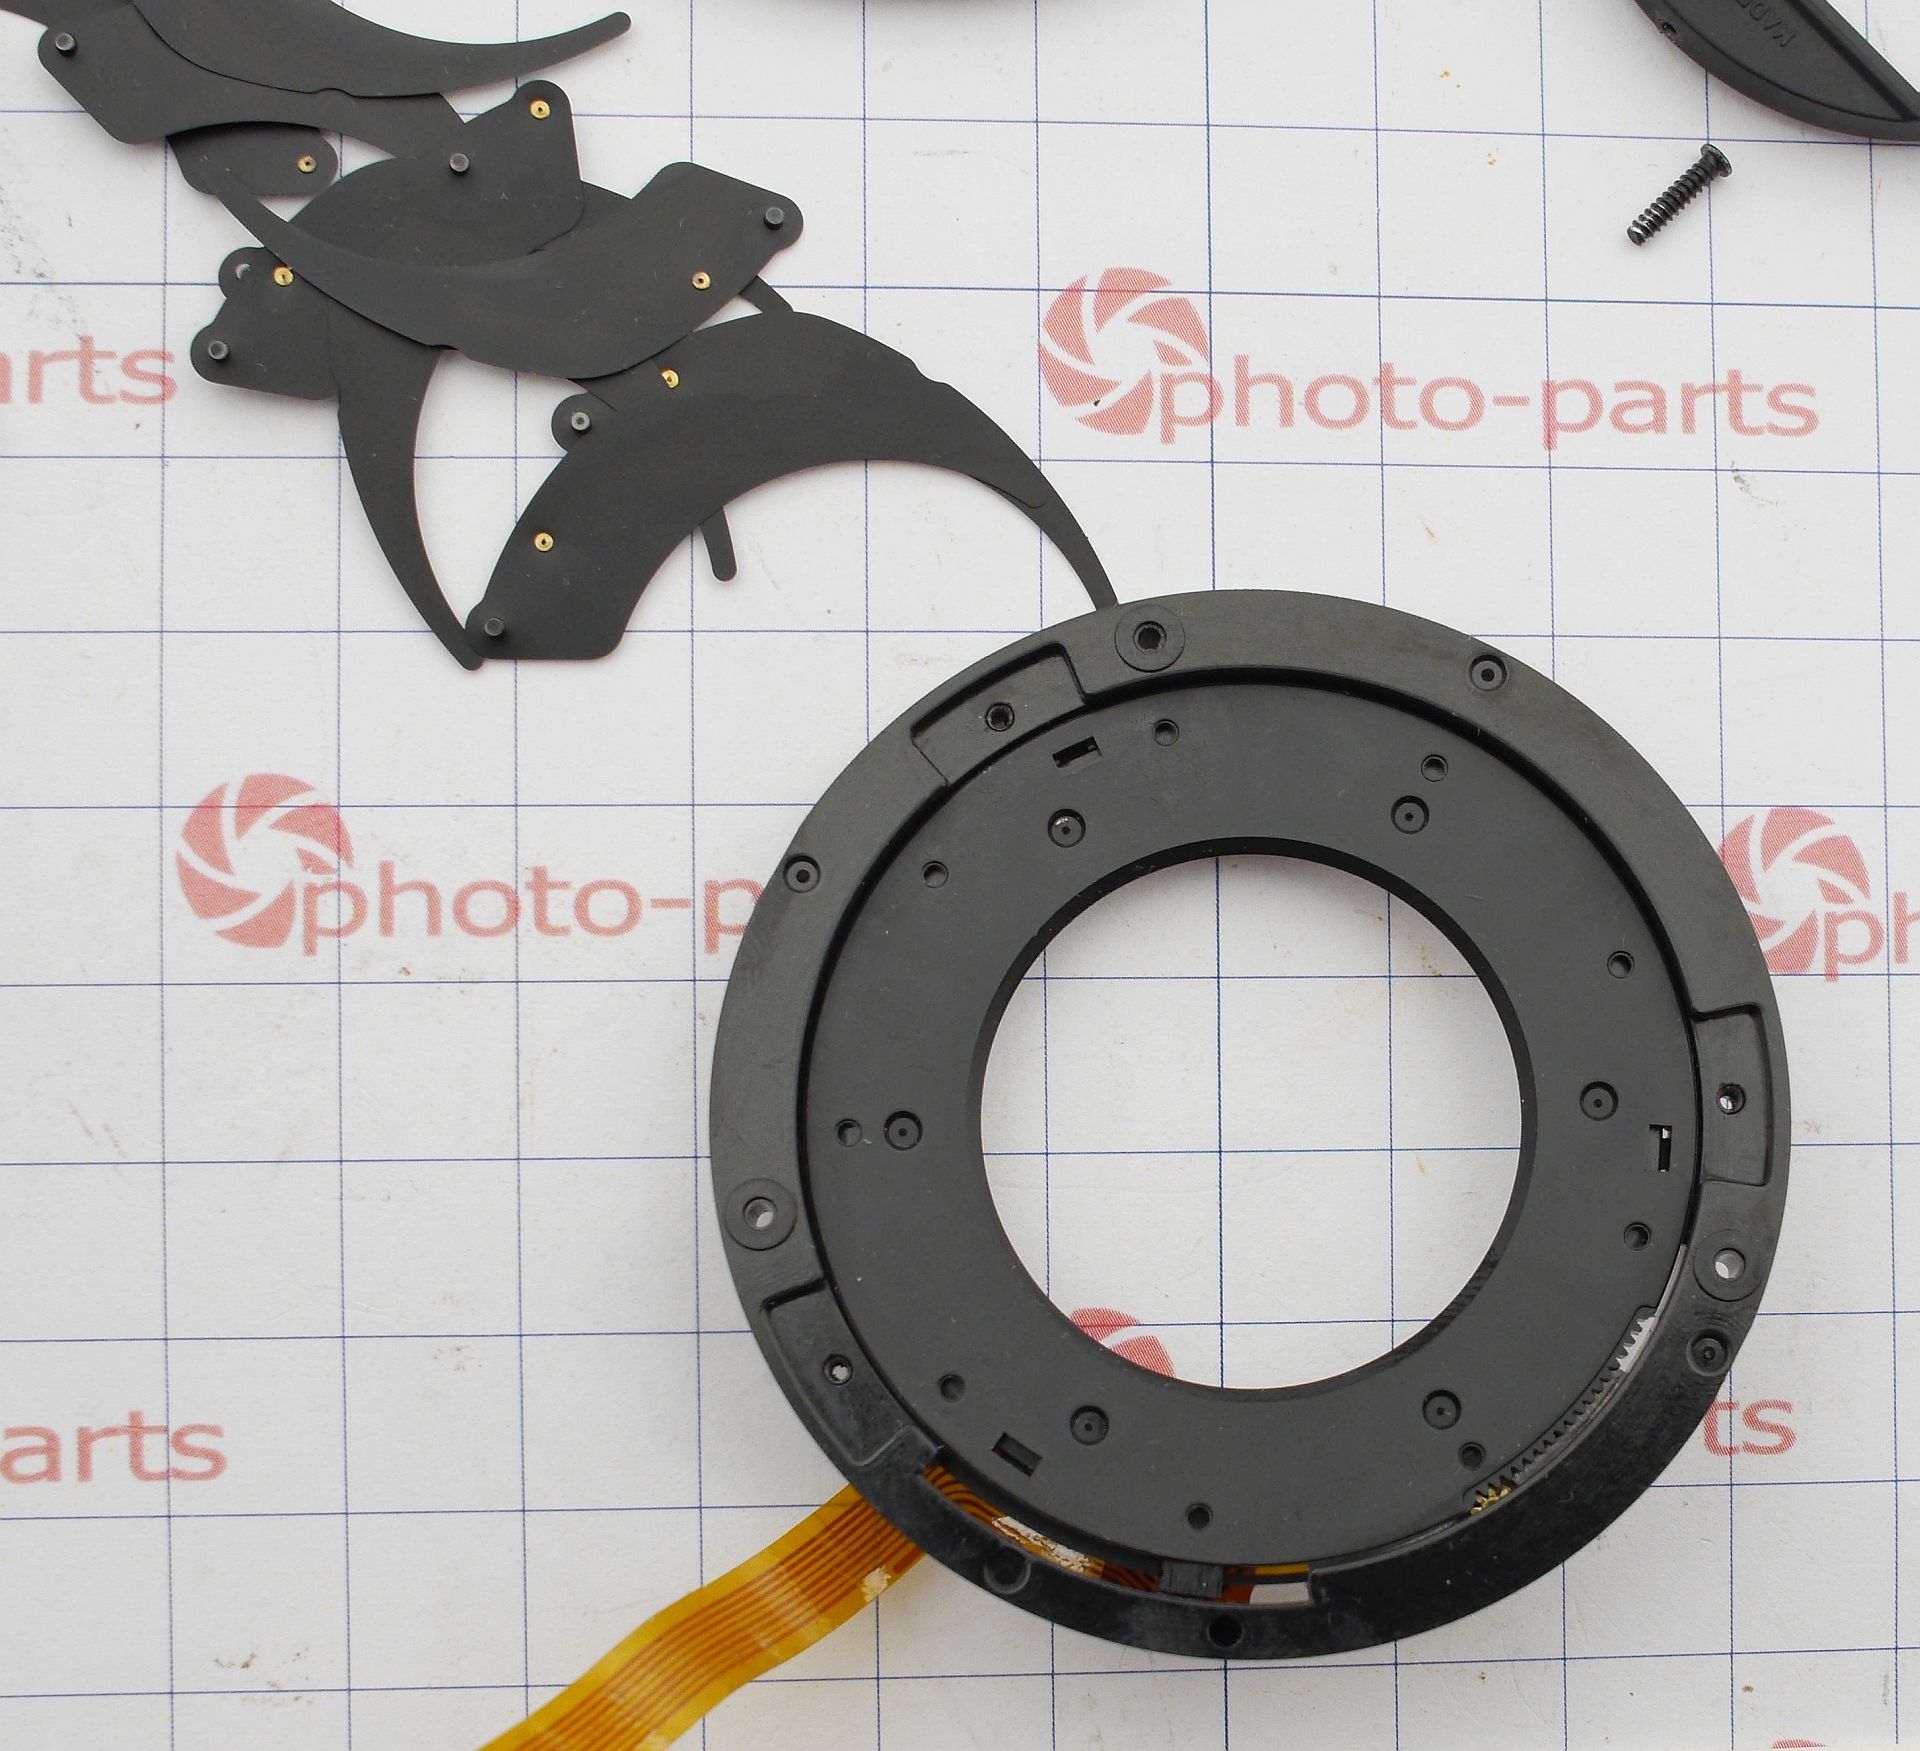
Blade installation follows a universal rule: first blade tip goes counterclockwise, every next blade goes clockwise. The final two blades are fed under the first - this is the trickiest part:
In one lens the aperture was contaminated with oil (where did that come from?), but cleaning saved it.
In another it was stuck at f/1.8 - loosening the screws just a quarter turn fixed it.
Next: focus.
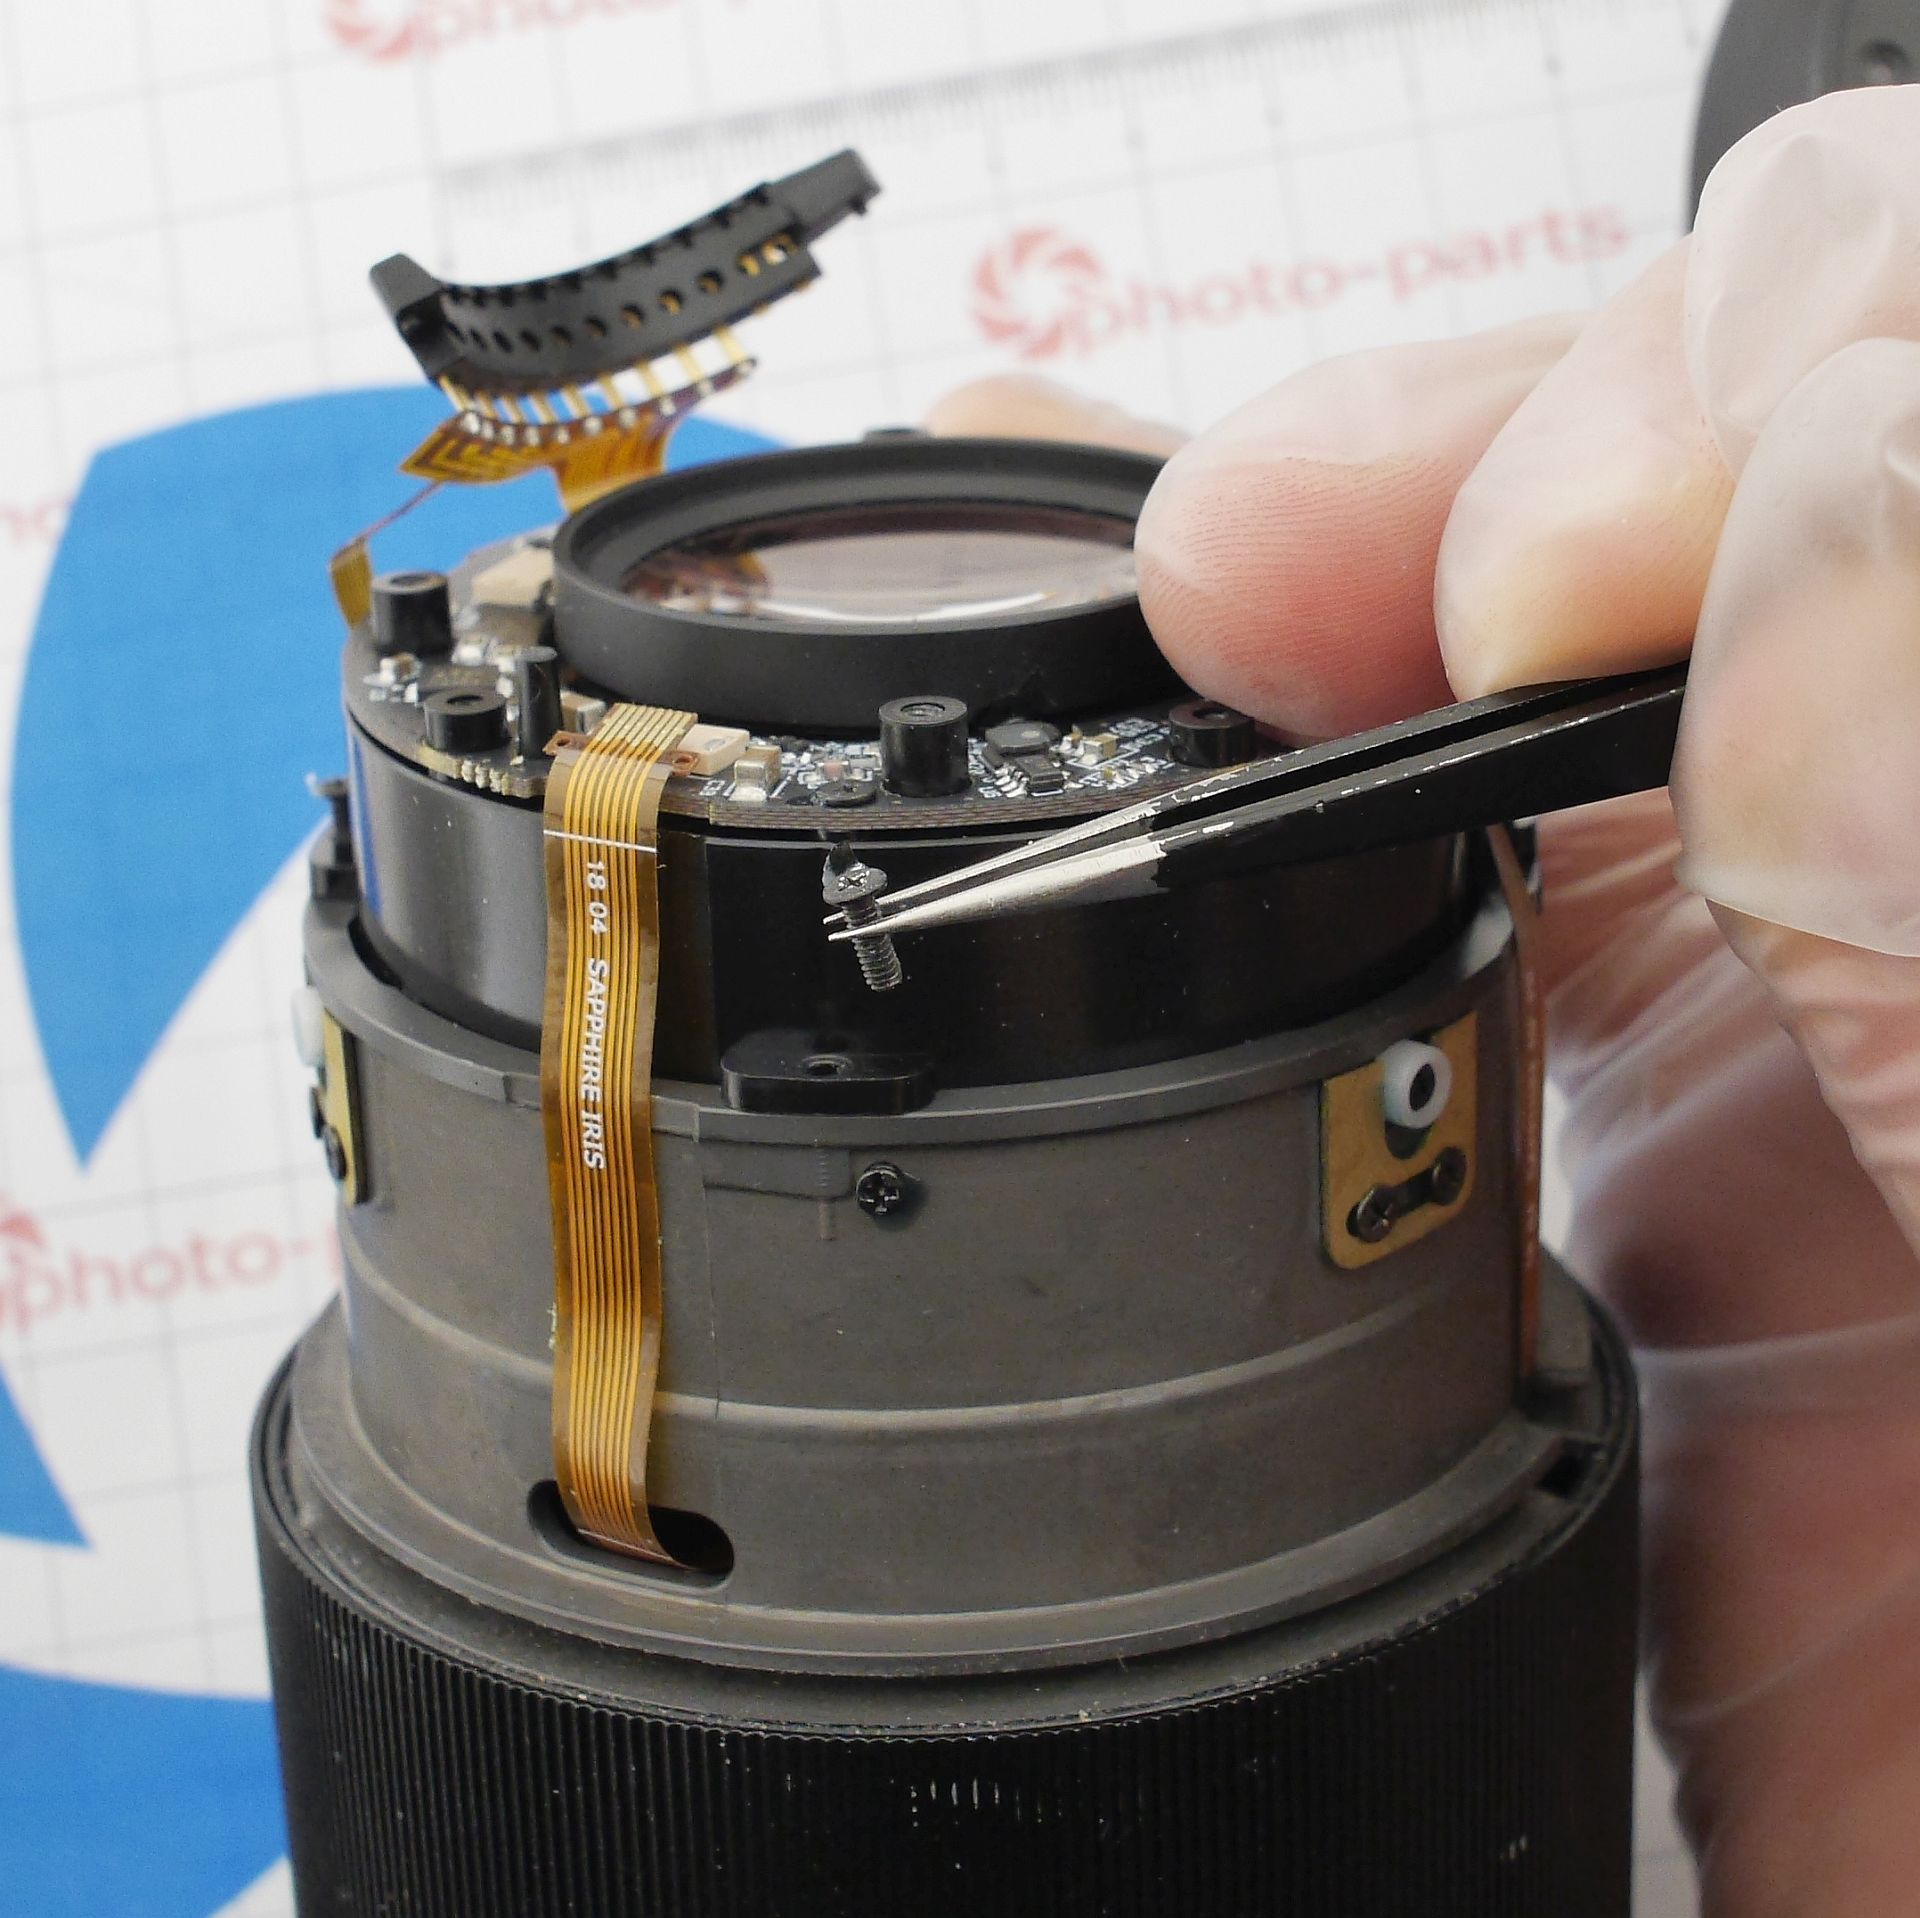
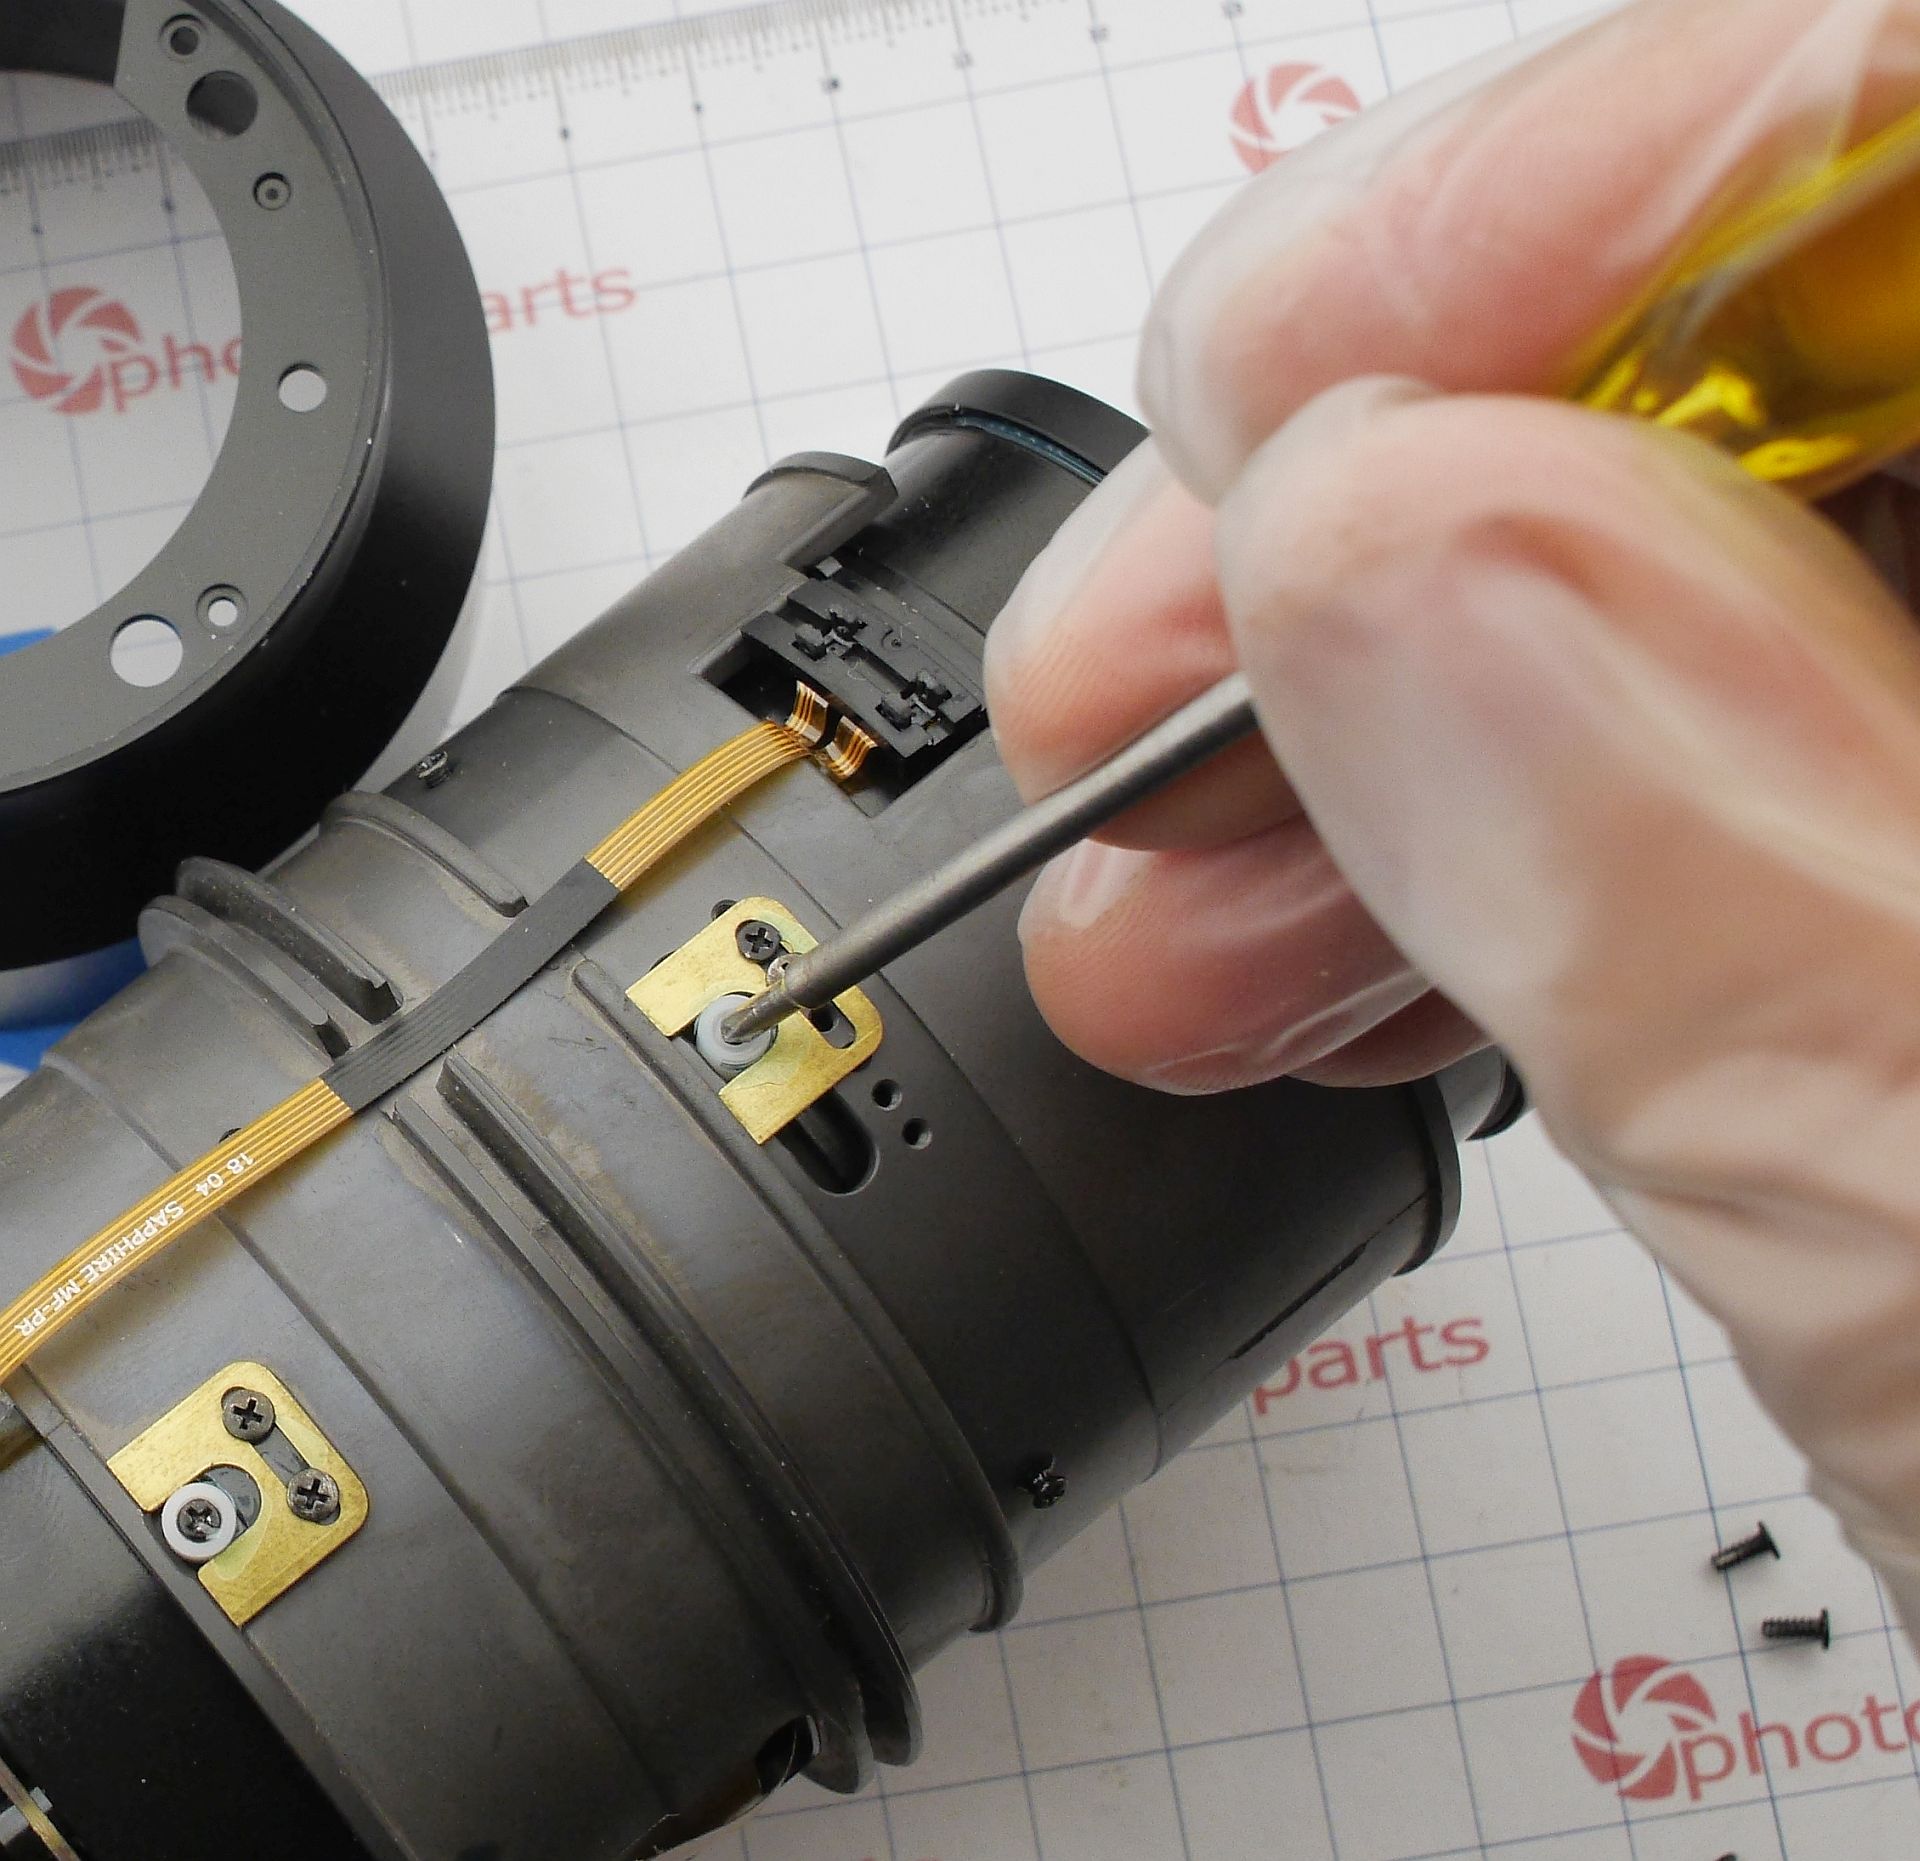
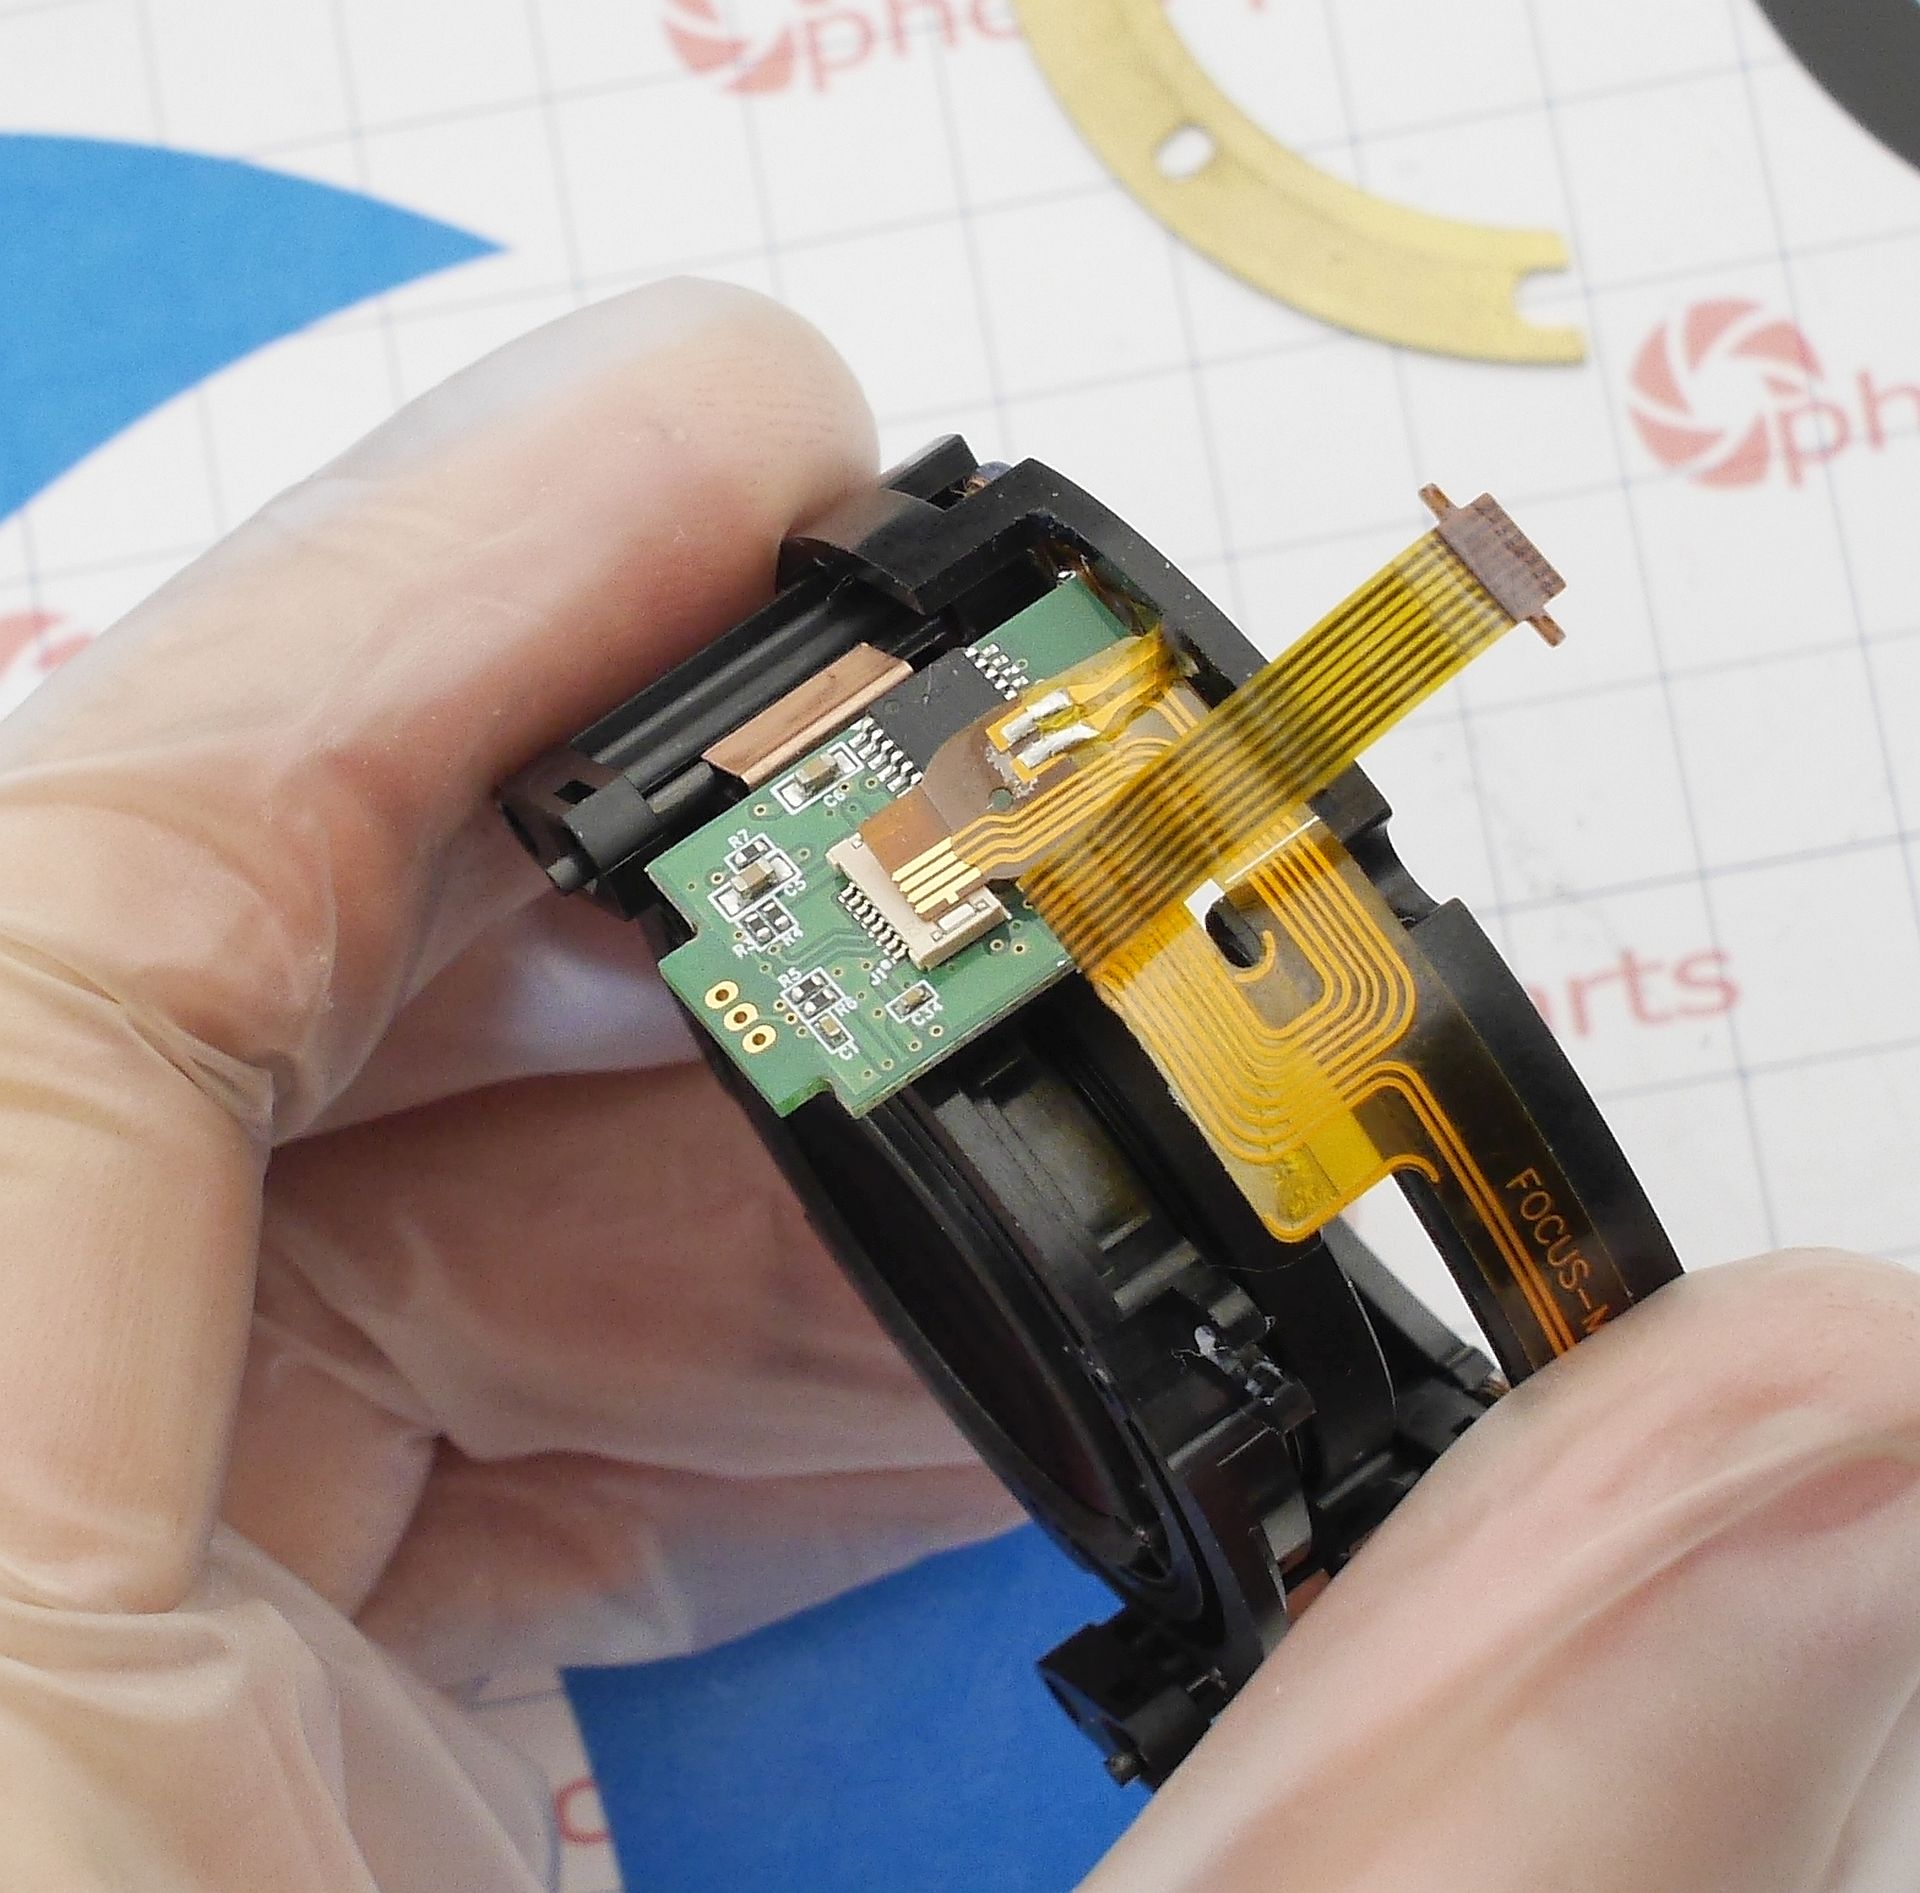
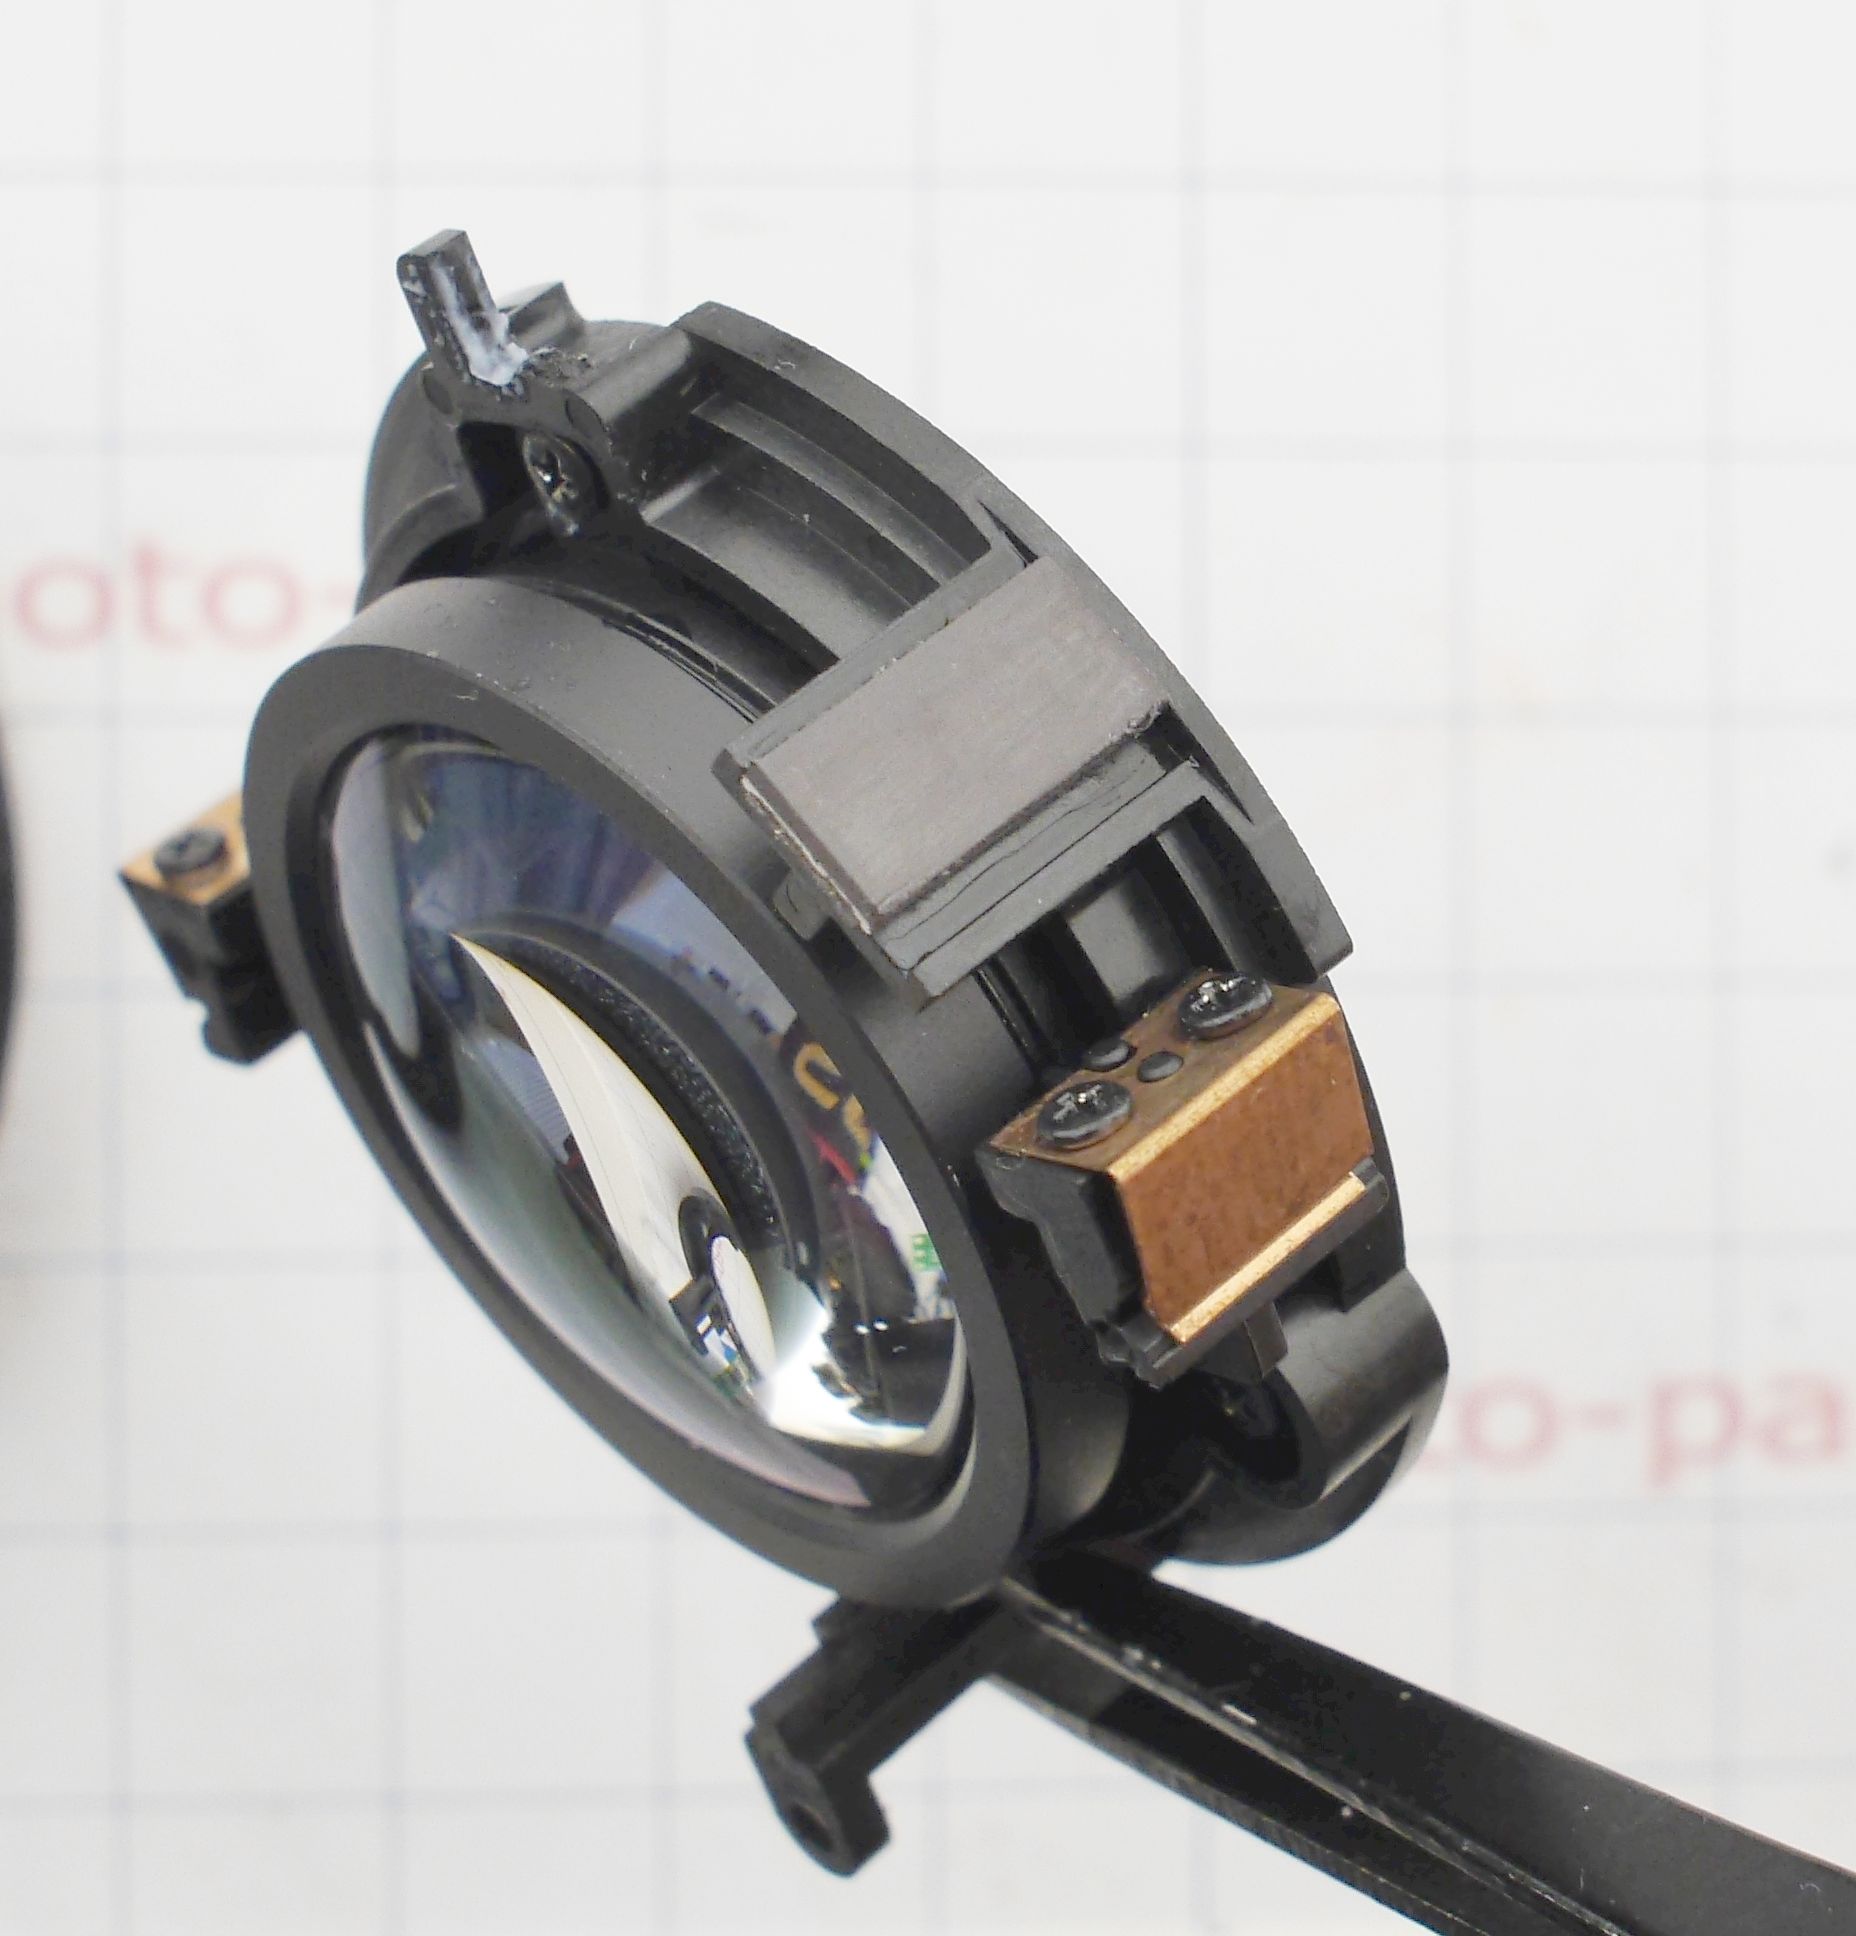
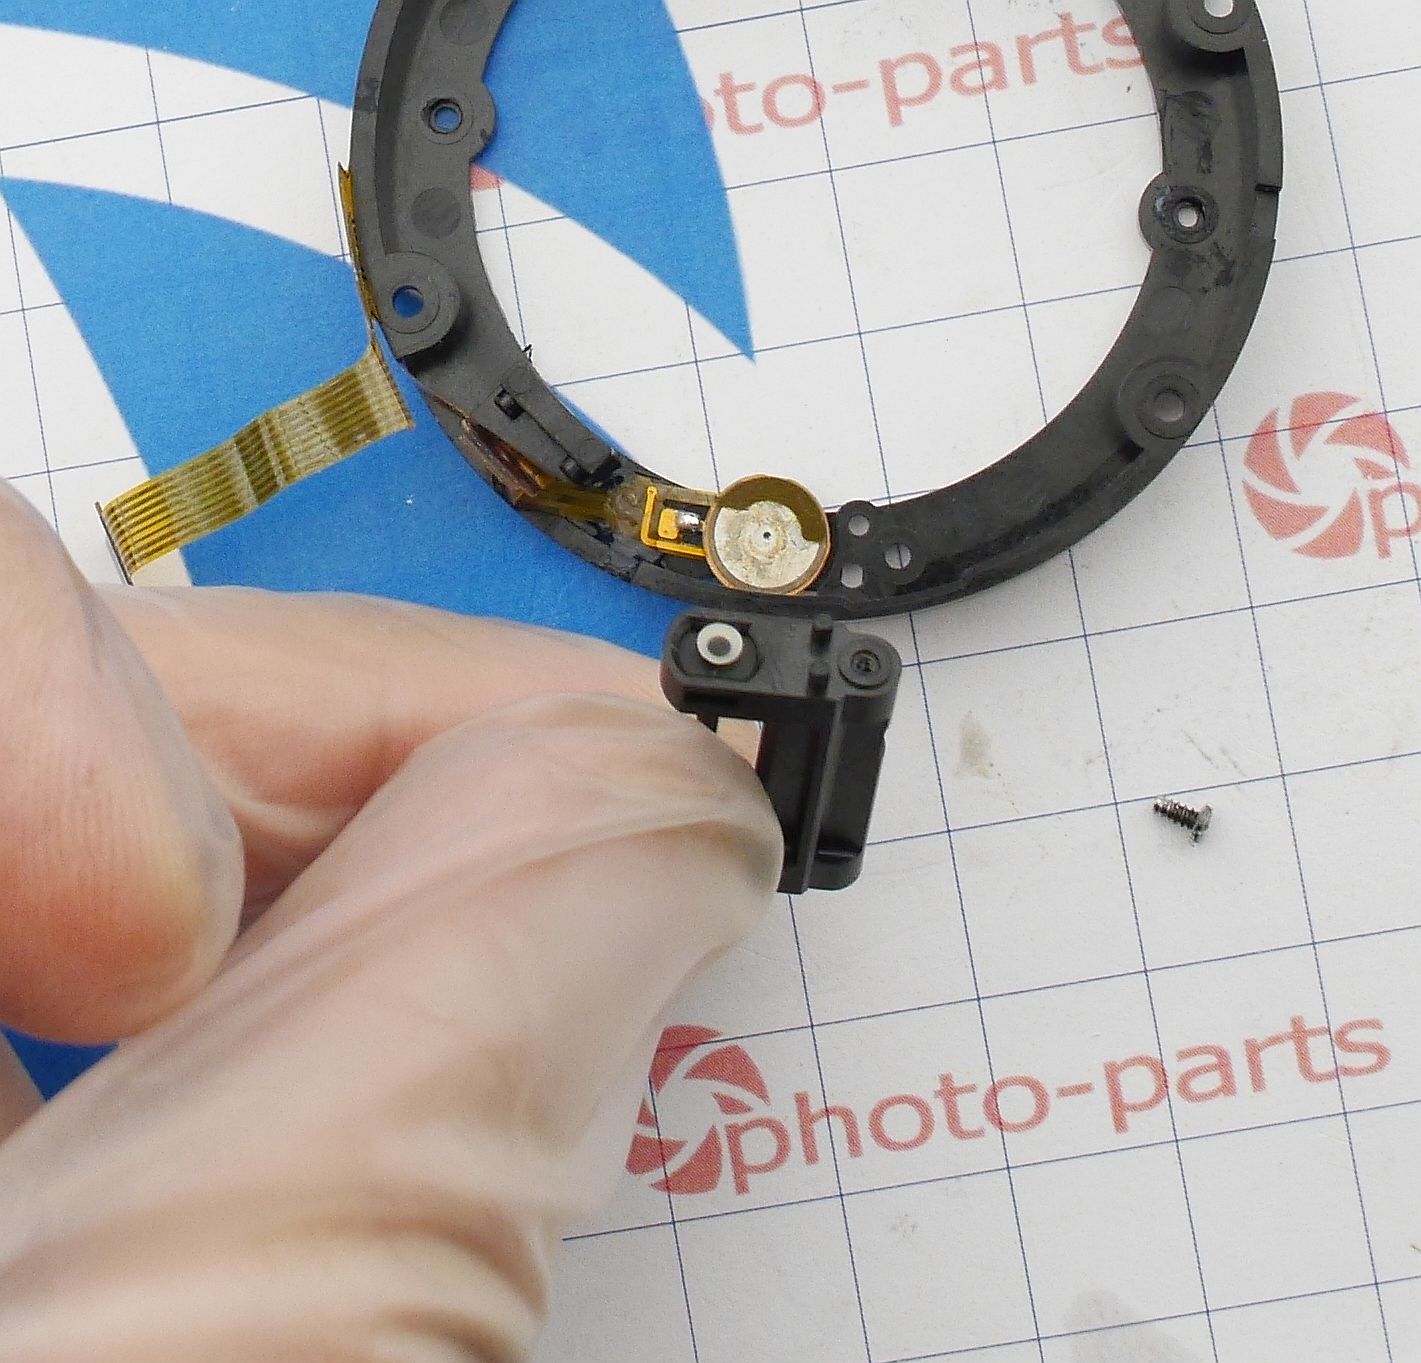
The motor block holds only the focusing lens - it has no alignment screws and removes after unscrewing the visible mounts. Remember to lift the flex before pulling the block:
And here's the motor:
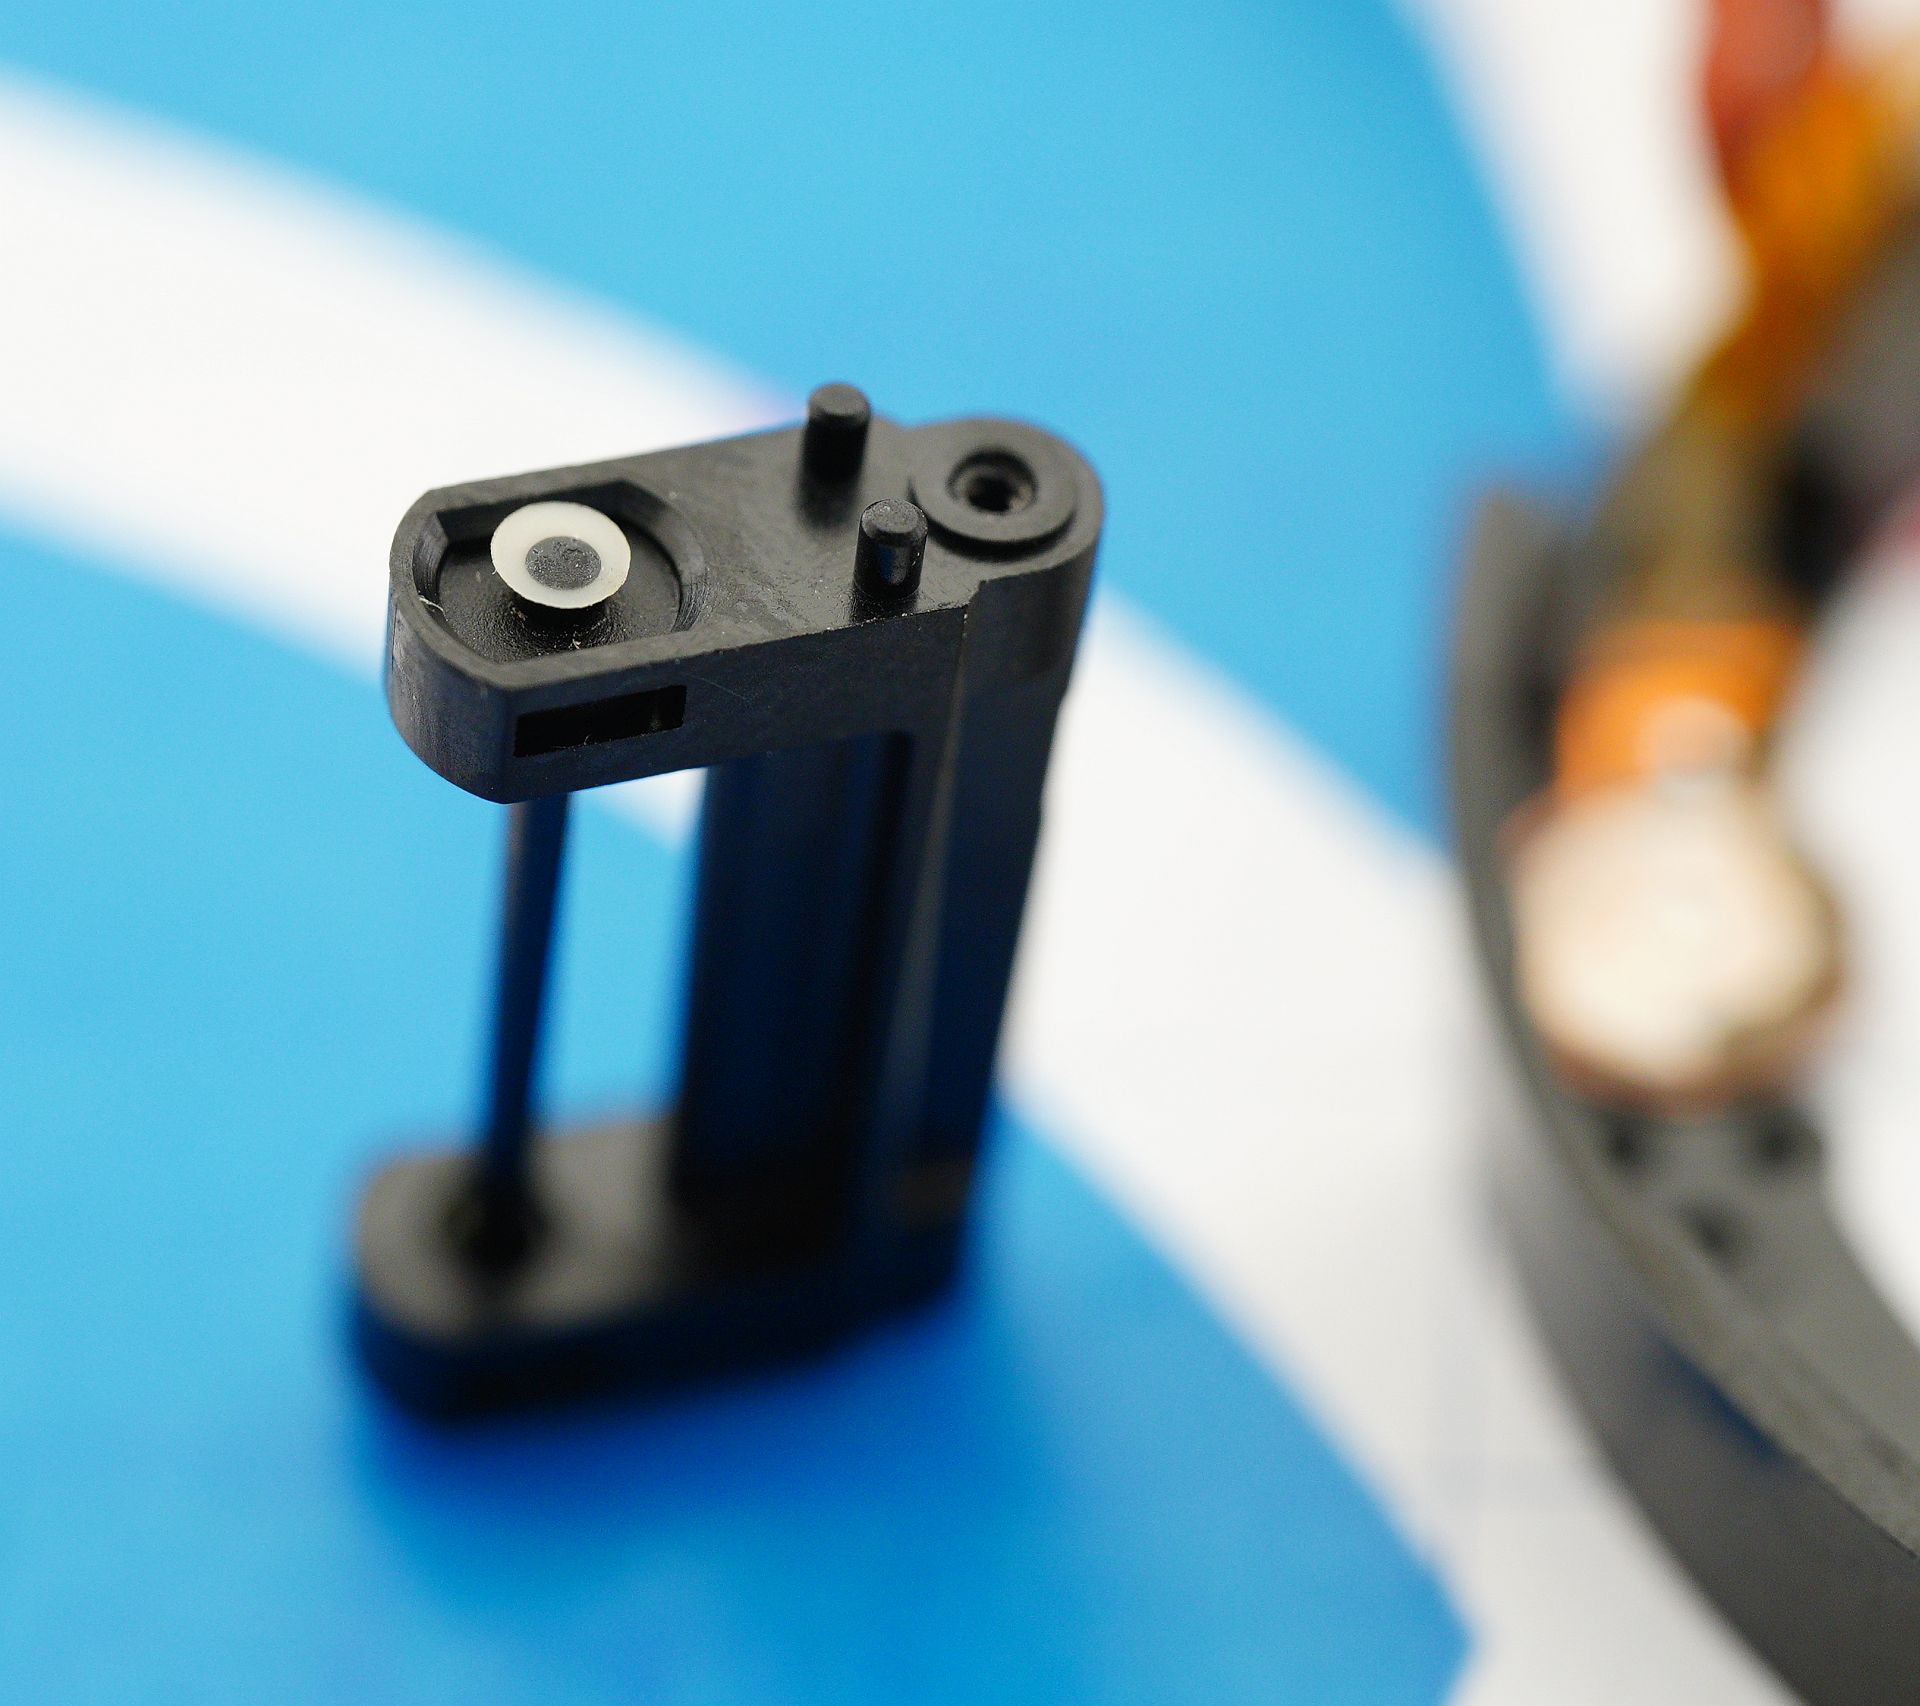
Simple yet elegant - it's classified by Sony as DDSWM, I call it “piezo stick motor.” In fact, two sticks. Two identical piezo elements on opposite sides vibrate the focus lens along two rods, using friction to shift it. One failed motor is enough to freeze the lens - no motor can overcome friction on the other rod. Unlike Sony, there's only one failure mode: the rod detaches from the ceramic. Disassembly will confirm.
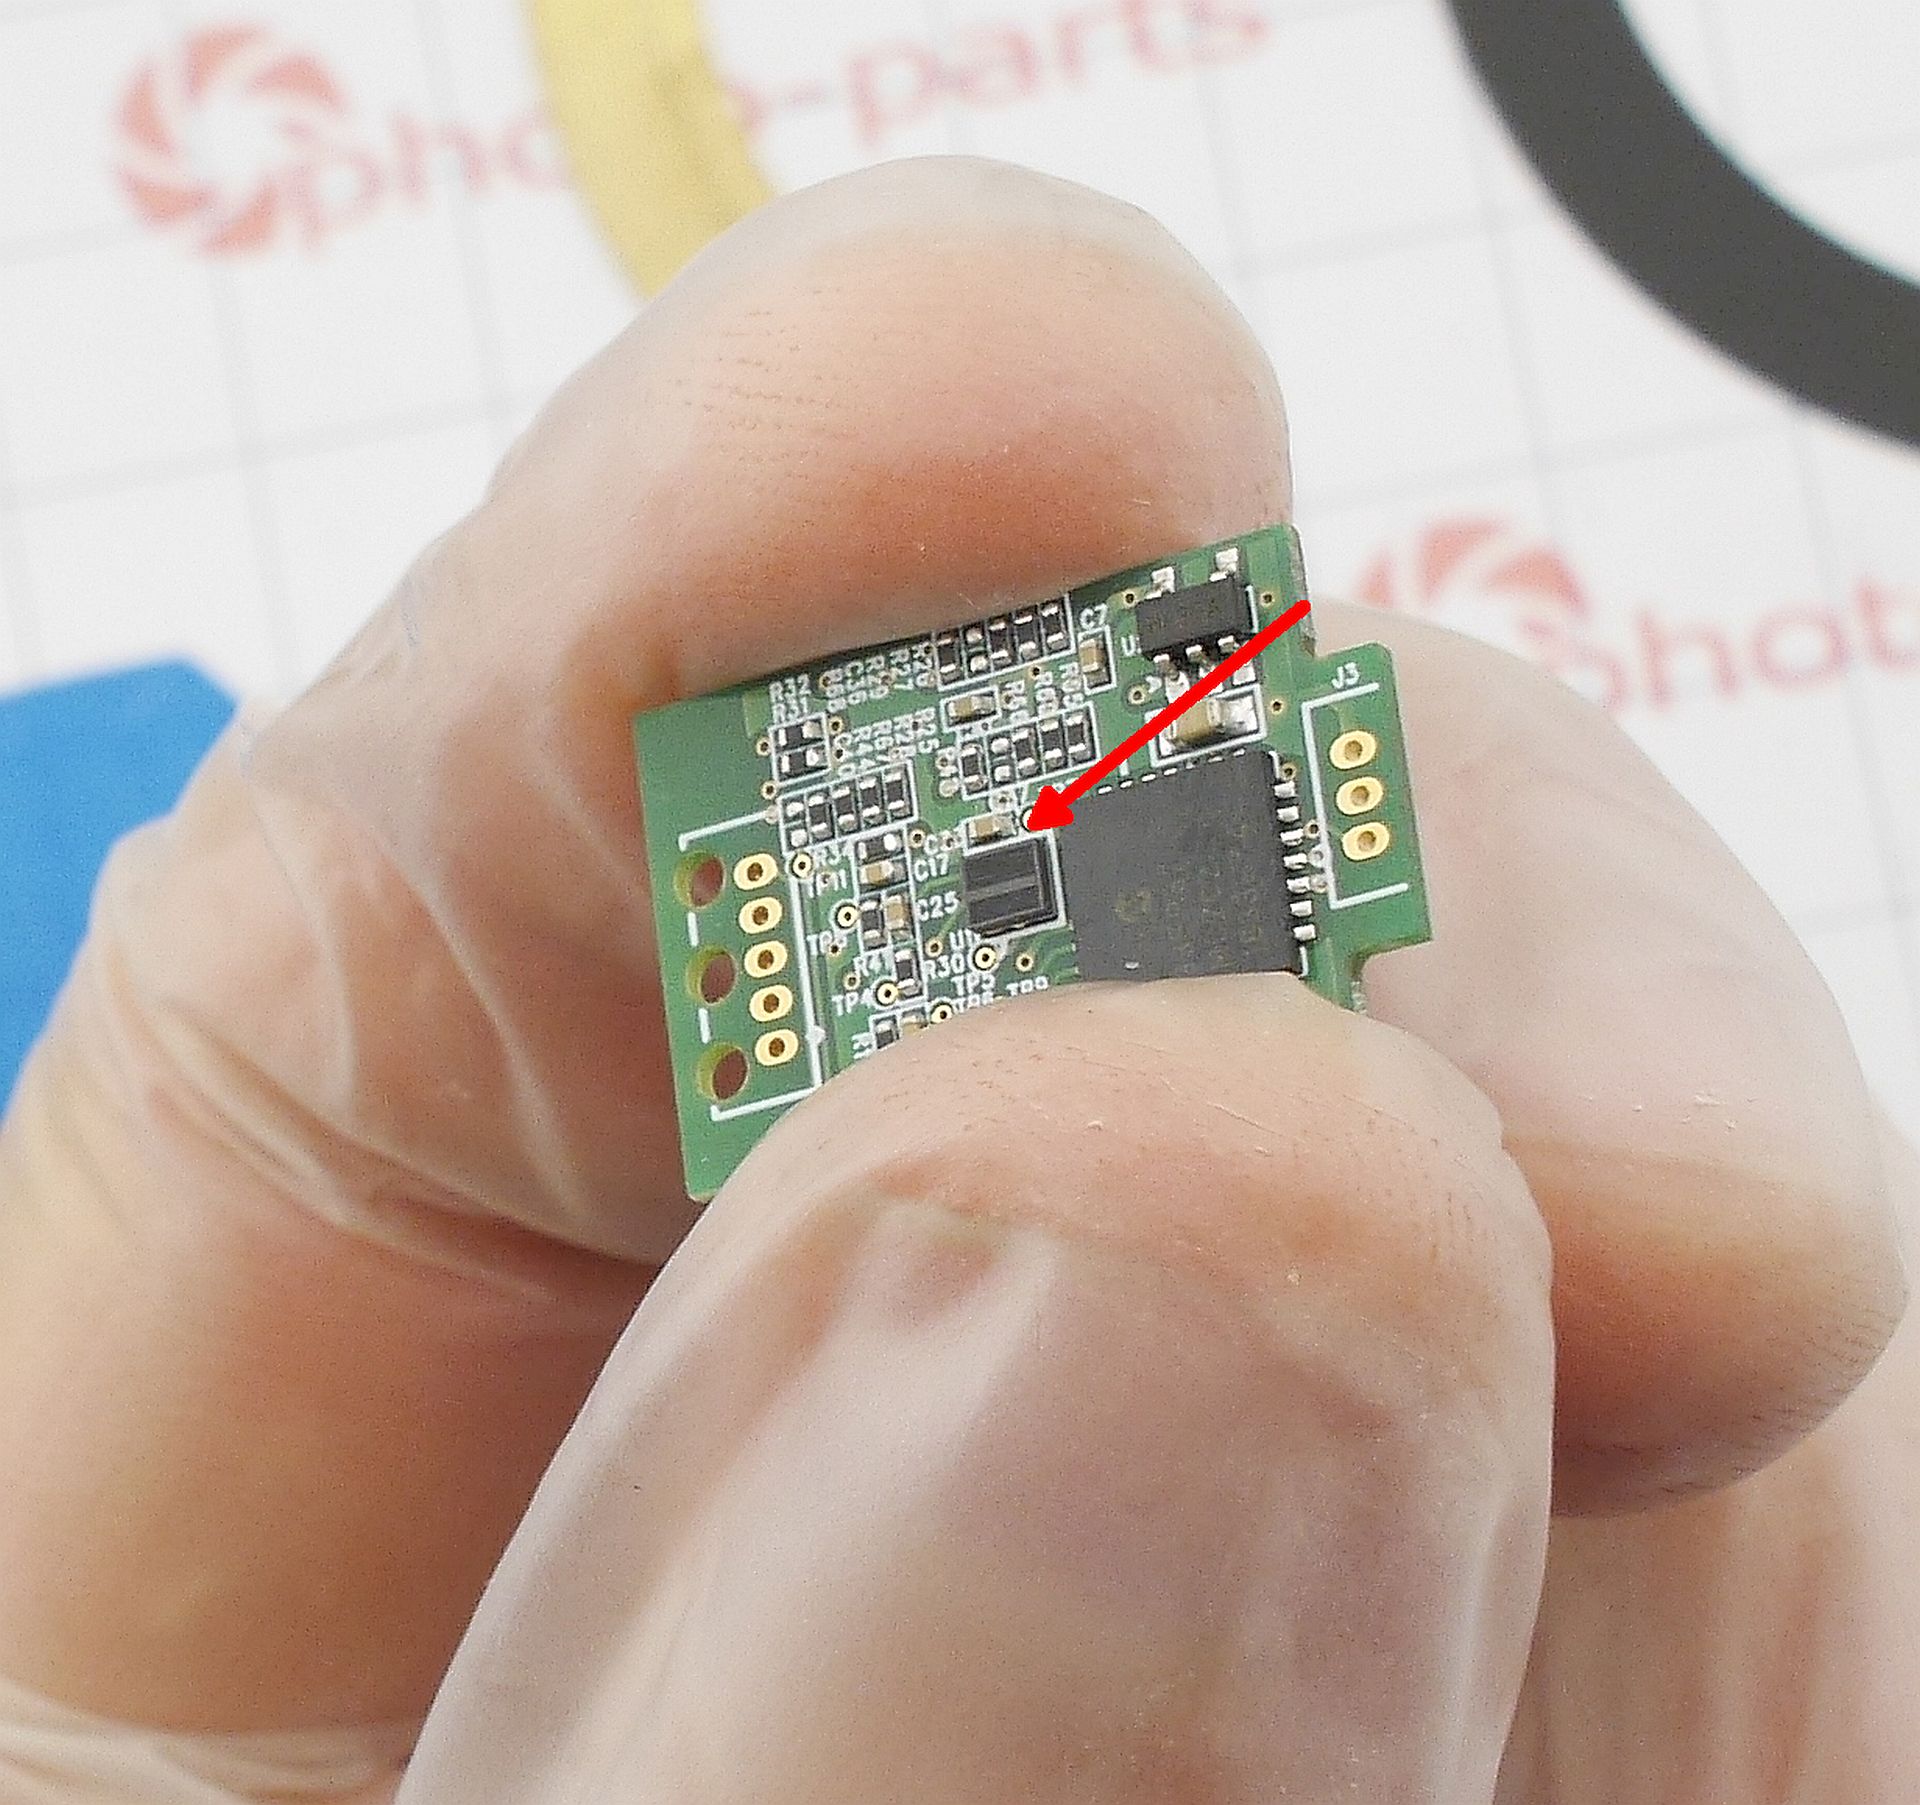
Loosen (not fully remove) two screws per side that clamp the plate onto the rod; unplug the sensor flex and remove its board. Then the focus lens comes right off:

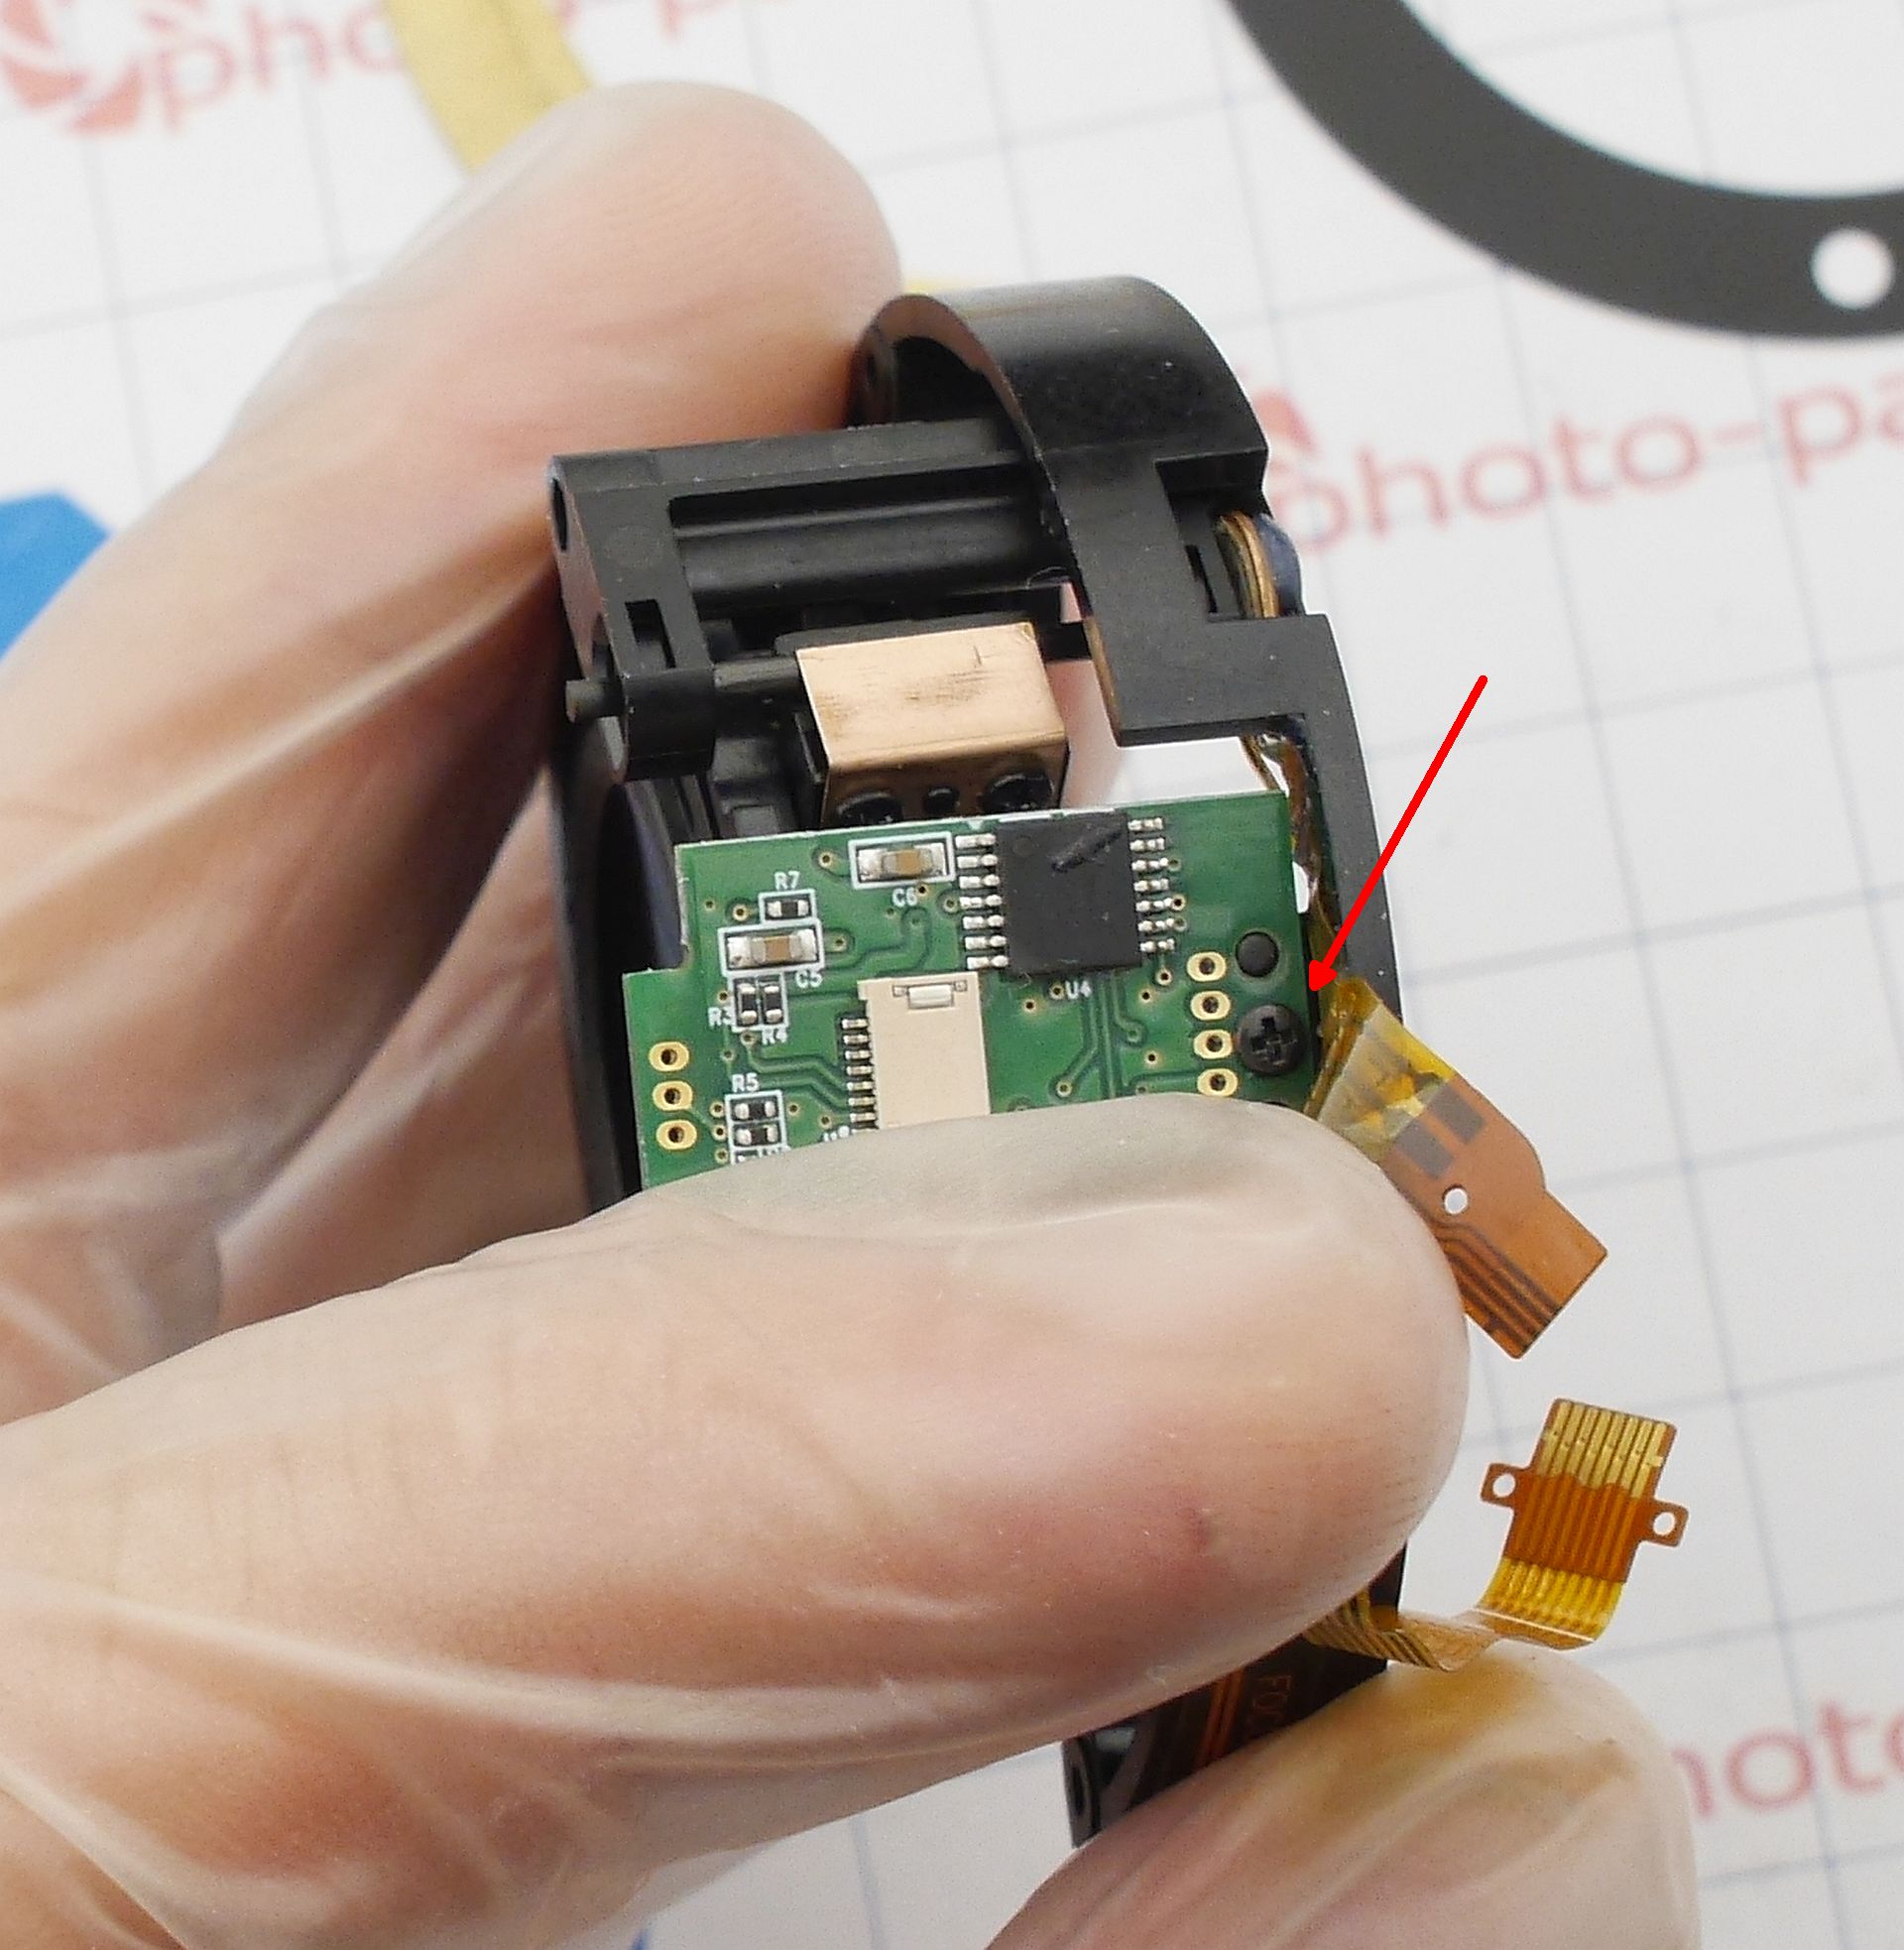
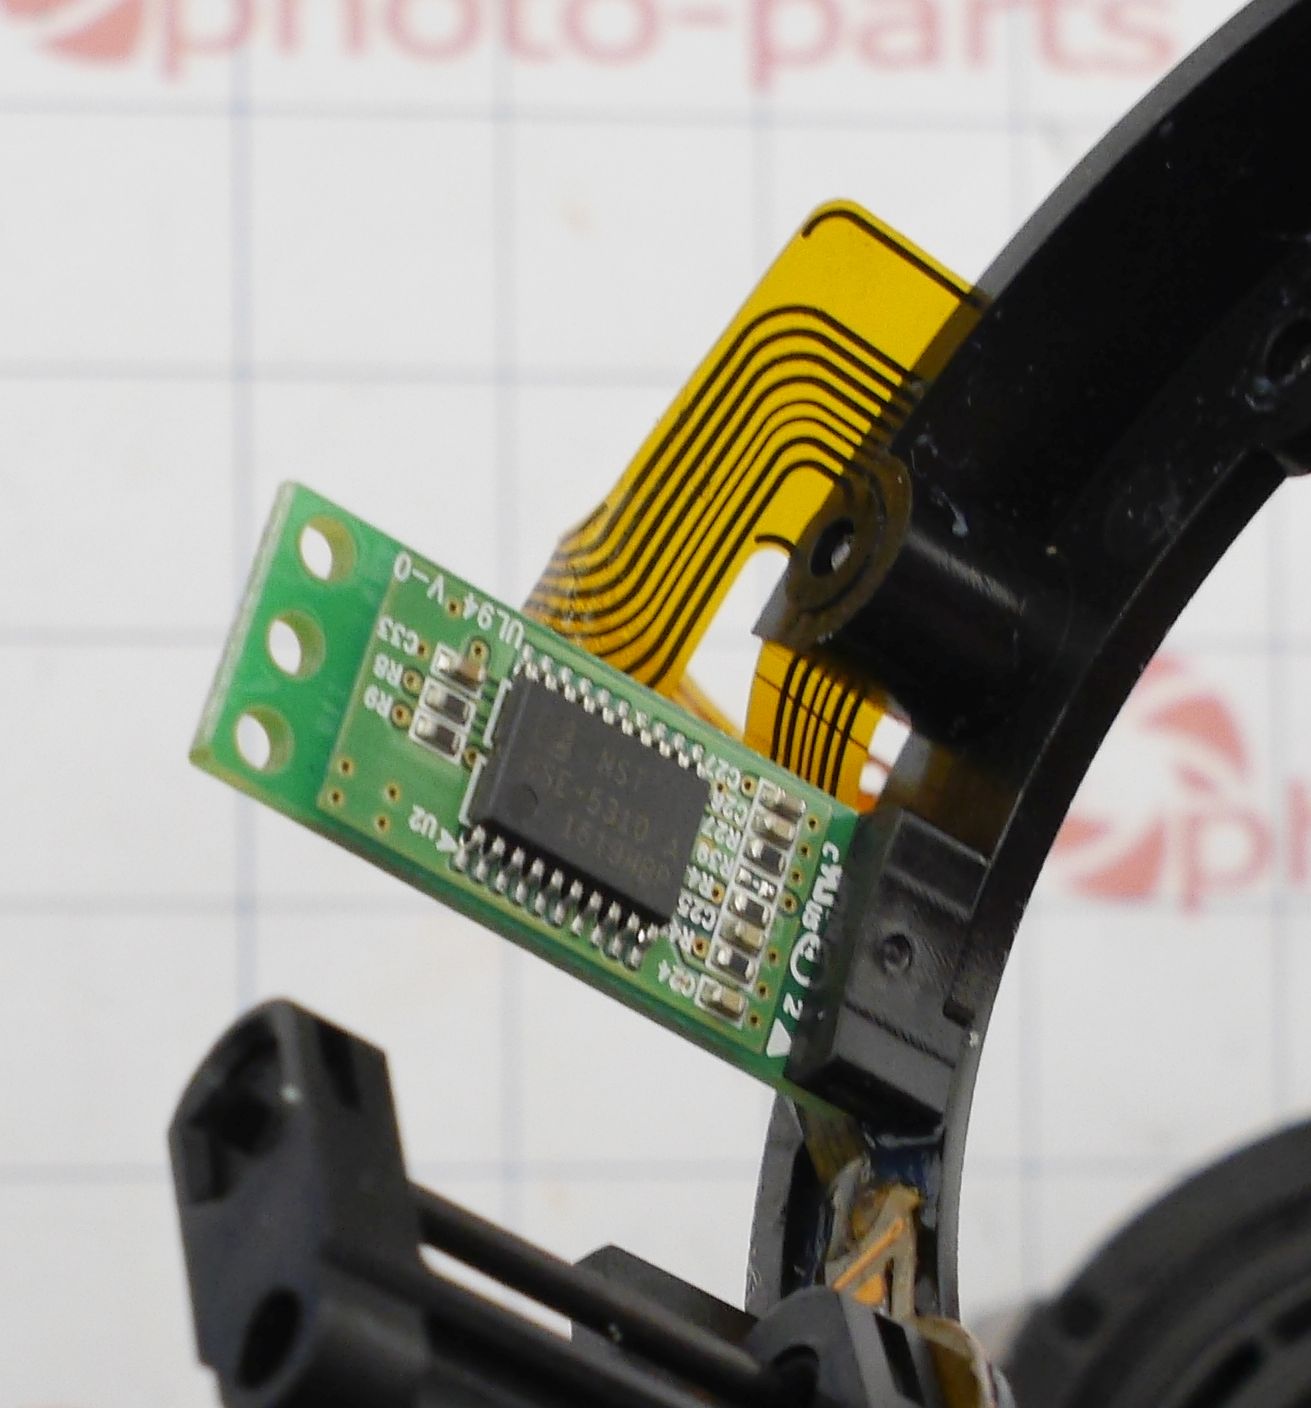
Interesting aside: sensors come in two variants!
I presumed only optical types existed - striped bar and open optocoupler:
Not quite understand how Samyang managed to make it function. The board must pulse with each strip crossing. In Canon designs, a diffraction grid is added - here there's none, and the sensor is across the stripes:
The optocoupler seems larger than the stripes. How it detects single movements - I don't know. Likely some DSP magic onboard, taking to attention separate MCU on the sensor board.
In one lens I encountered a magnetic sensor:
A monolithic bar of magnetized material. Kind of like a cassette tape, but thick.
The sensor is self-contain IC. Possibly a Hall sensor, it works at a distance, but sensitive area is big enough to ignore fine movements. Antother possibility is MR head, but it requires close contact with tape. Still a mystery.
We're going to disassemble the motor to inspect the failure. Remove the screw holding the autofocus rod:
The failure was obvious - the rod detached from the piezo motor:
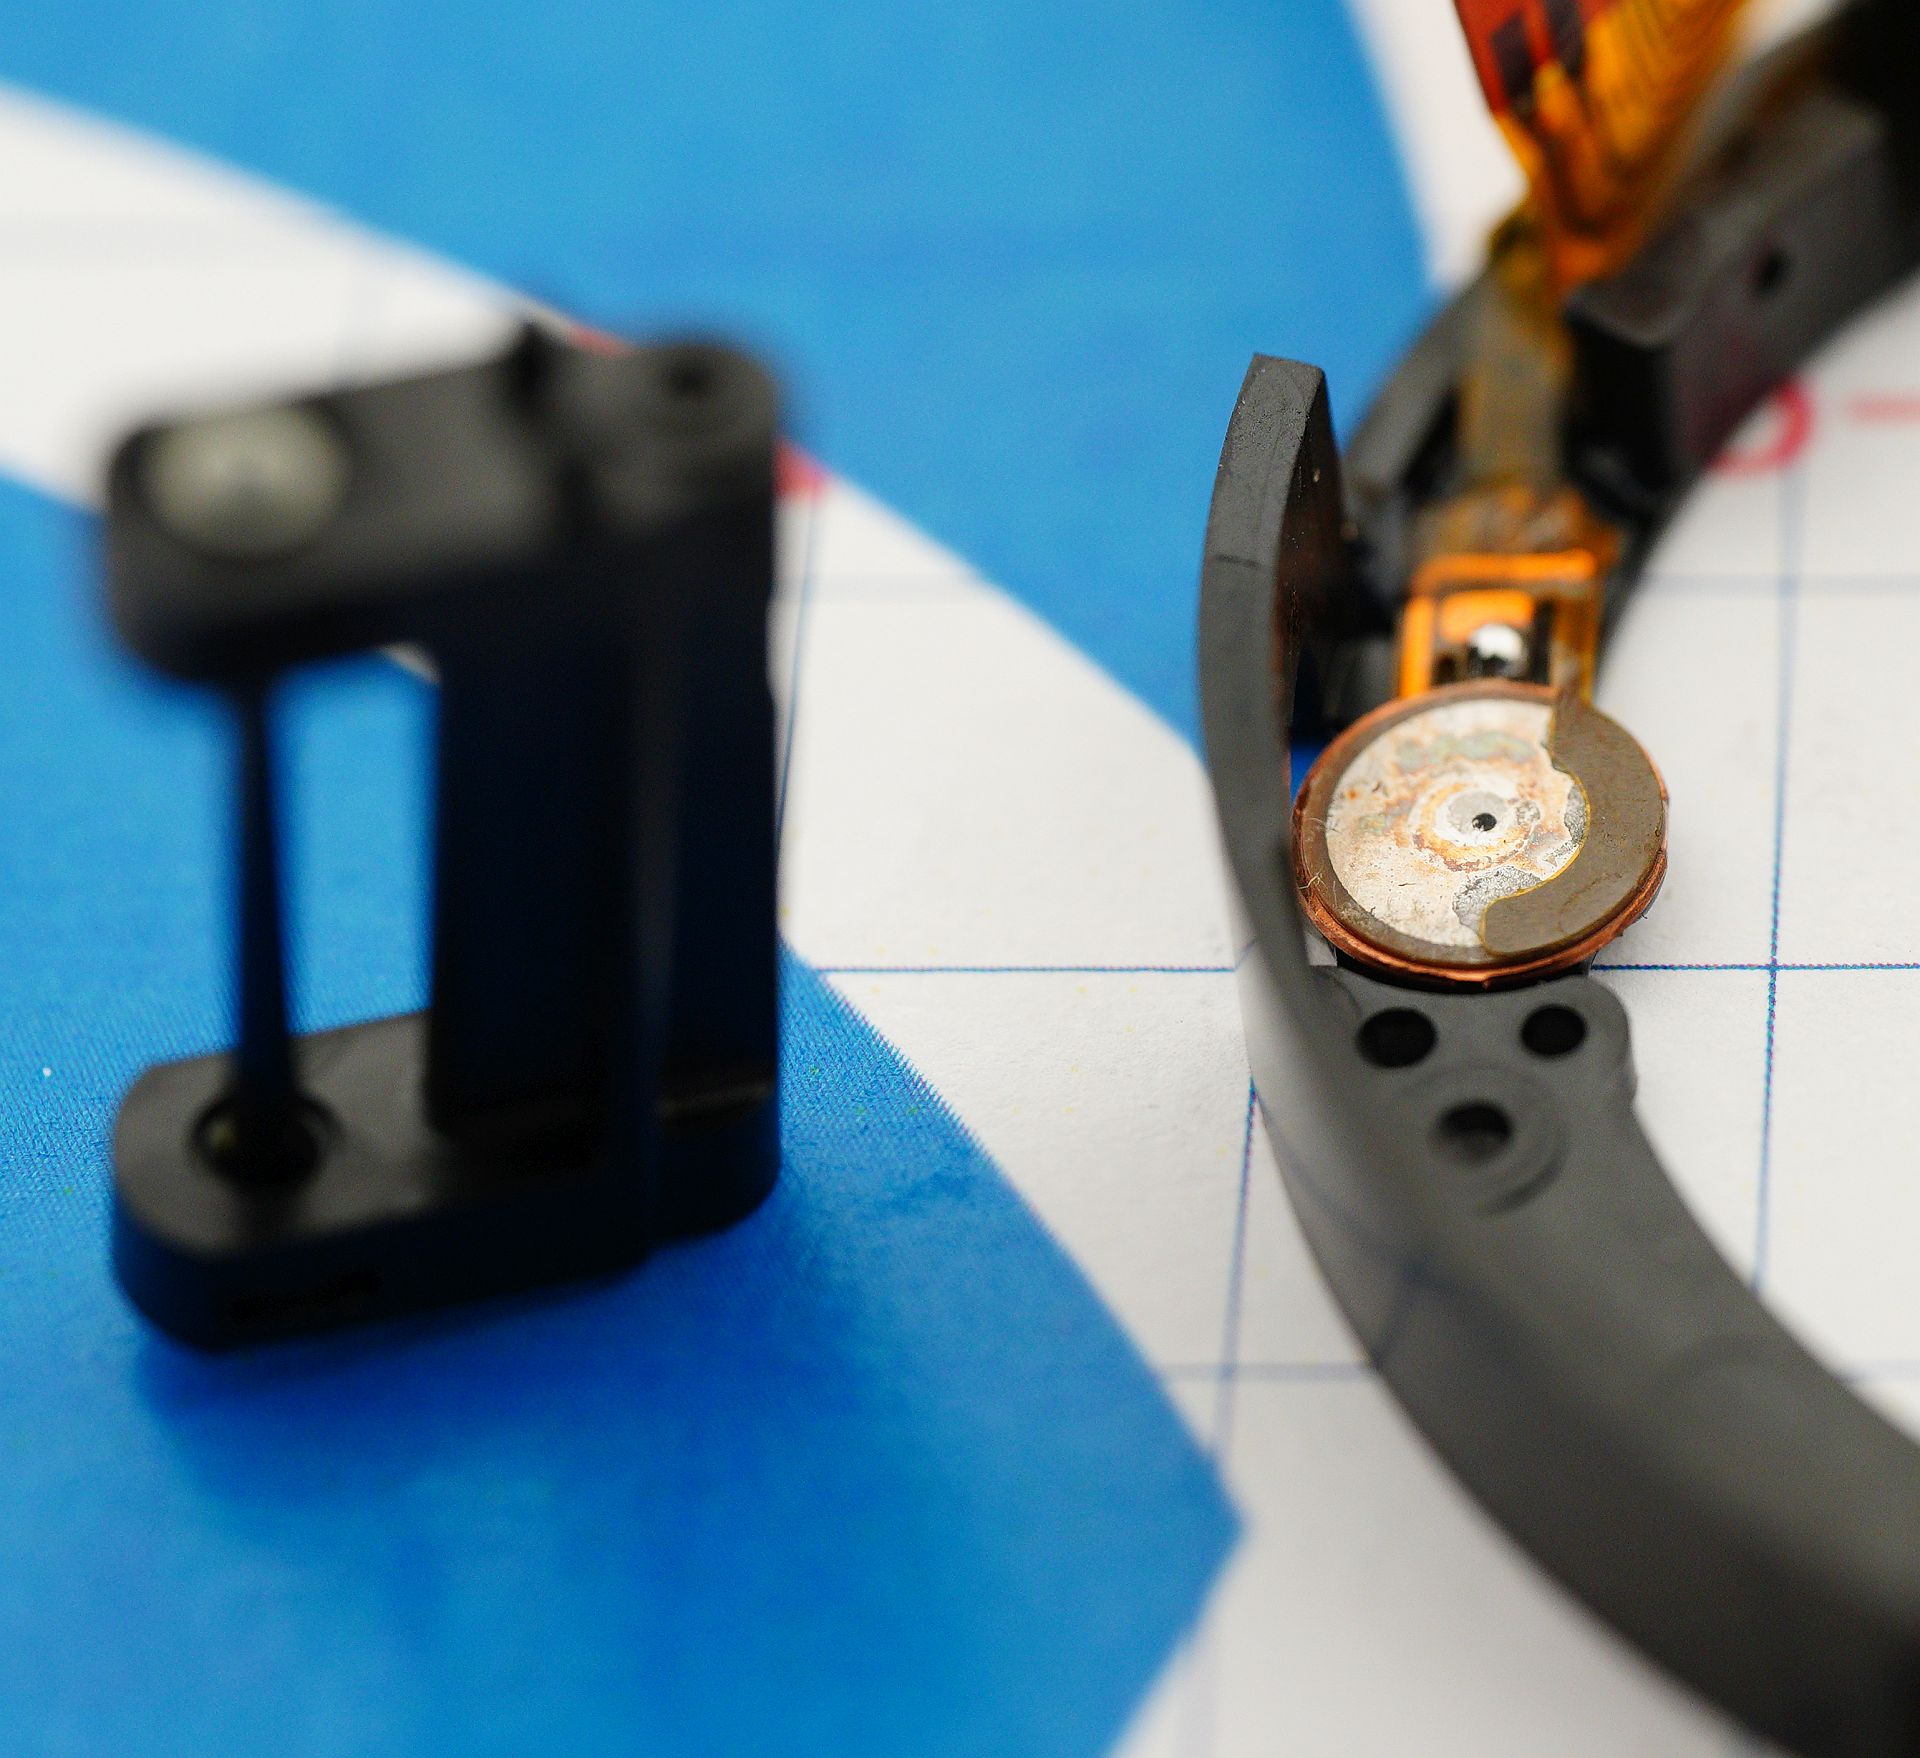
Beautiful! Repair is trivial - a tiny dot of super glue, reassemble and press gently, wait an hour to set.
I always test “in-air” to avoid re-teardown if something's off:
Some video-content here:
So, the first four lenses are fully repaired.
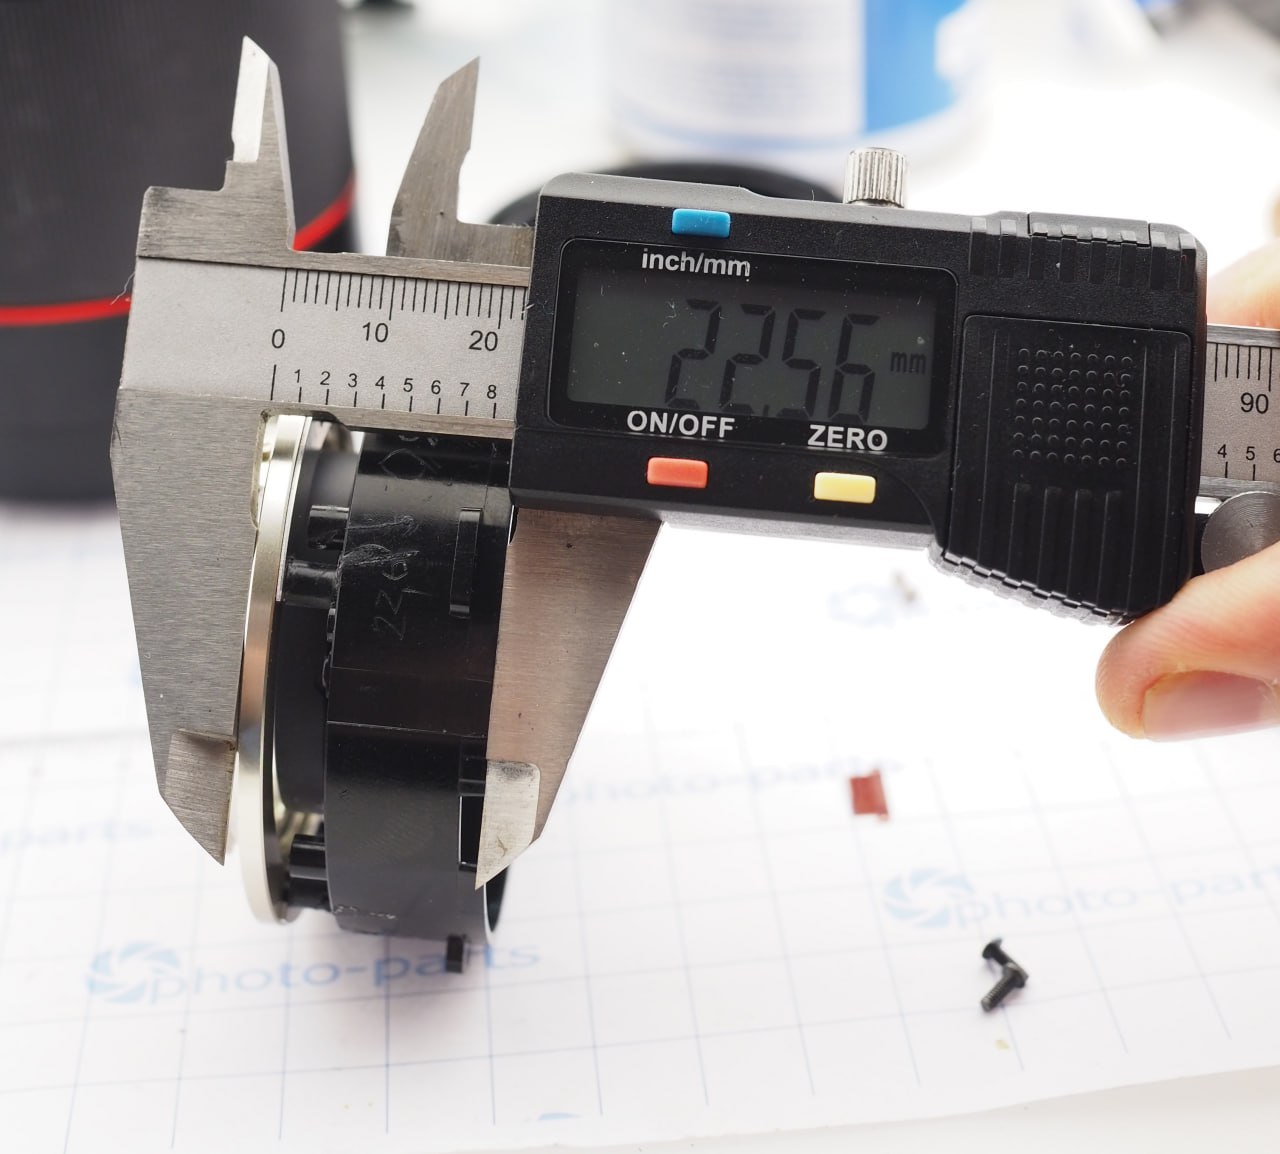
The fifth - most damaged, with broken plastic that doesn't glue easily. But there's a solution.
All four support bosses remained on the mount:
Repair is tricky - PCB wraps around them with zero clearance:
Solution: free bosses remains from screws, glue them exactly in place (gap to gap). Single attempt - must position perfectly first.
After glue sets, drill old threads slightly oversize so native mount screws don't grip at all. Then - importantly - drill a through-hole through the rear lens housing, so all weight will be carried by the wall of lens mount, not bosses:
Use longer screws so they protrude slightly after assembly:
Once overall rigidity is restored, adjust each boss to identical height - compensating for damage and glue.
A caliper worked; others might need a micrometer and plate:
Done! Five out of five lenses revived with moderate effort.
May your photos be beautiful on outstanding gear!
Add Comment
This policy contains information about your privacy. By posting, you are declaring that you understand this policy:
- Your name, rating, website address, town, country, state and comment will be publicly displayed if entered.
- Aside from the data entered into these form fields, other stored data about your comment will include:
- Your IP address (not displayed)
- The time/date of your submission (displayed)
- Your email address will not be shared. It is collected for only two reasons:
- Administrative purposes, should a need to contact you arise.
- To inform you of new comments, should you subscribe to receive notifications.
- A cookie may be set on your computer. This is used to remember your inputs. It will expire by itself.
This policy is subject to change at any time and without notice.
These terms and conditions contain rules about posting comments. By submitting a comment, you are declaring that you agree with these rules:
- Although the administrator will attempt to moderate comments, it is impossible for every comment to have been moderated at any given time.
- You acknowledge that all comments express the views and opinions of the original author and not those of the administrator.
- You agree not to post any material which is knowingly false, obscene, hateful, threatening, harassing or invasive of a person's privacy.
- The administrator has the right to edit, move or remove any comment for any reason and without notice.
Failure to comply with these rules may result in being banned from submitting further comments.
These terms and conditions are subject to change at any time and without notice.
Comments
Samyang AF 35mm f/1.4 FE Lens for Sony E ( Focus error problems)
please suggest service center and part :Cont 9555767667
Incredible nobody still commented the post.
Fan-tas-tic job!
Thanks for posting!