- Posted on
- • Camera repairs
Sony A7 Mark III – Saving it from the bin after water damage and clumsy hands
- Author
-
-

- User
- Photo-parts
- Posts by this author
- Posts by this author
-
I can accept "natural" damage without complaint. Water ate half the camera? Alright, it happens. A drop cracked the shell? Fair enough.
But when some butterfingered “technician” makes things worse inside - I get furious.
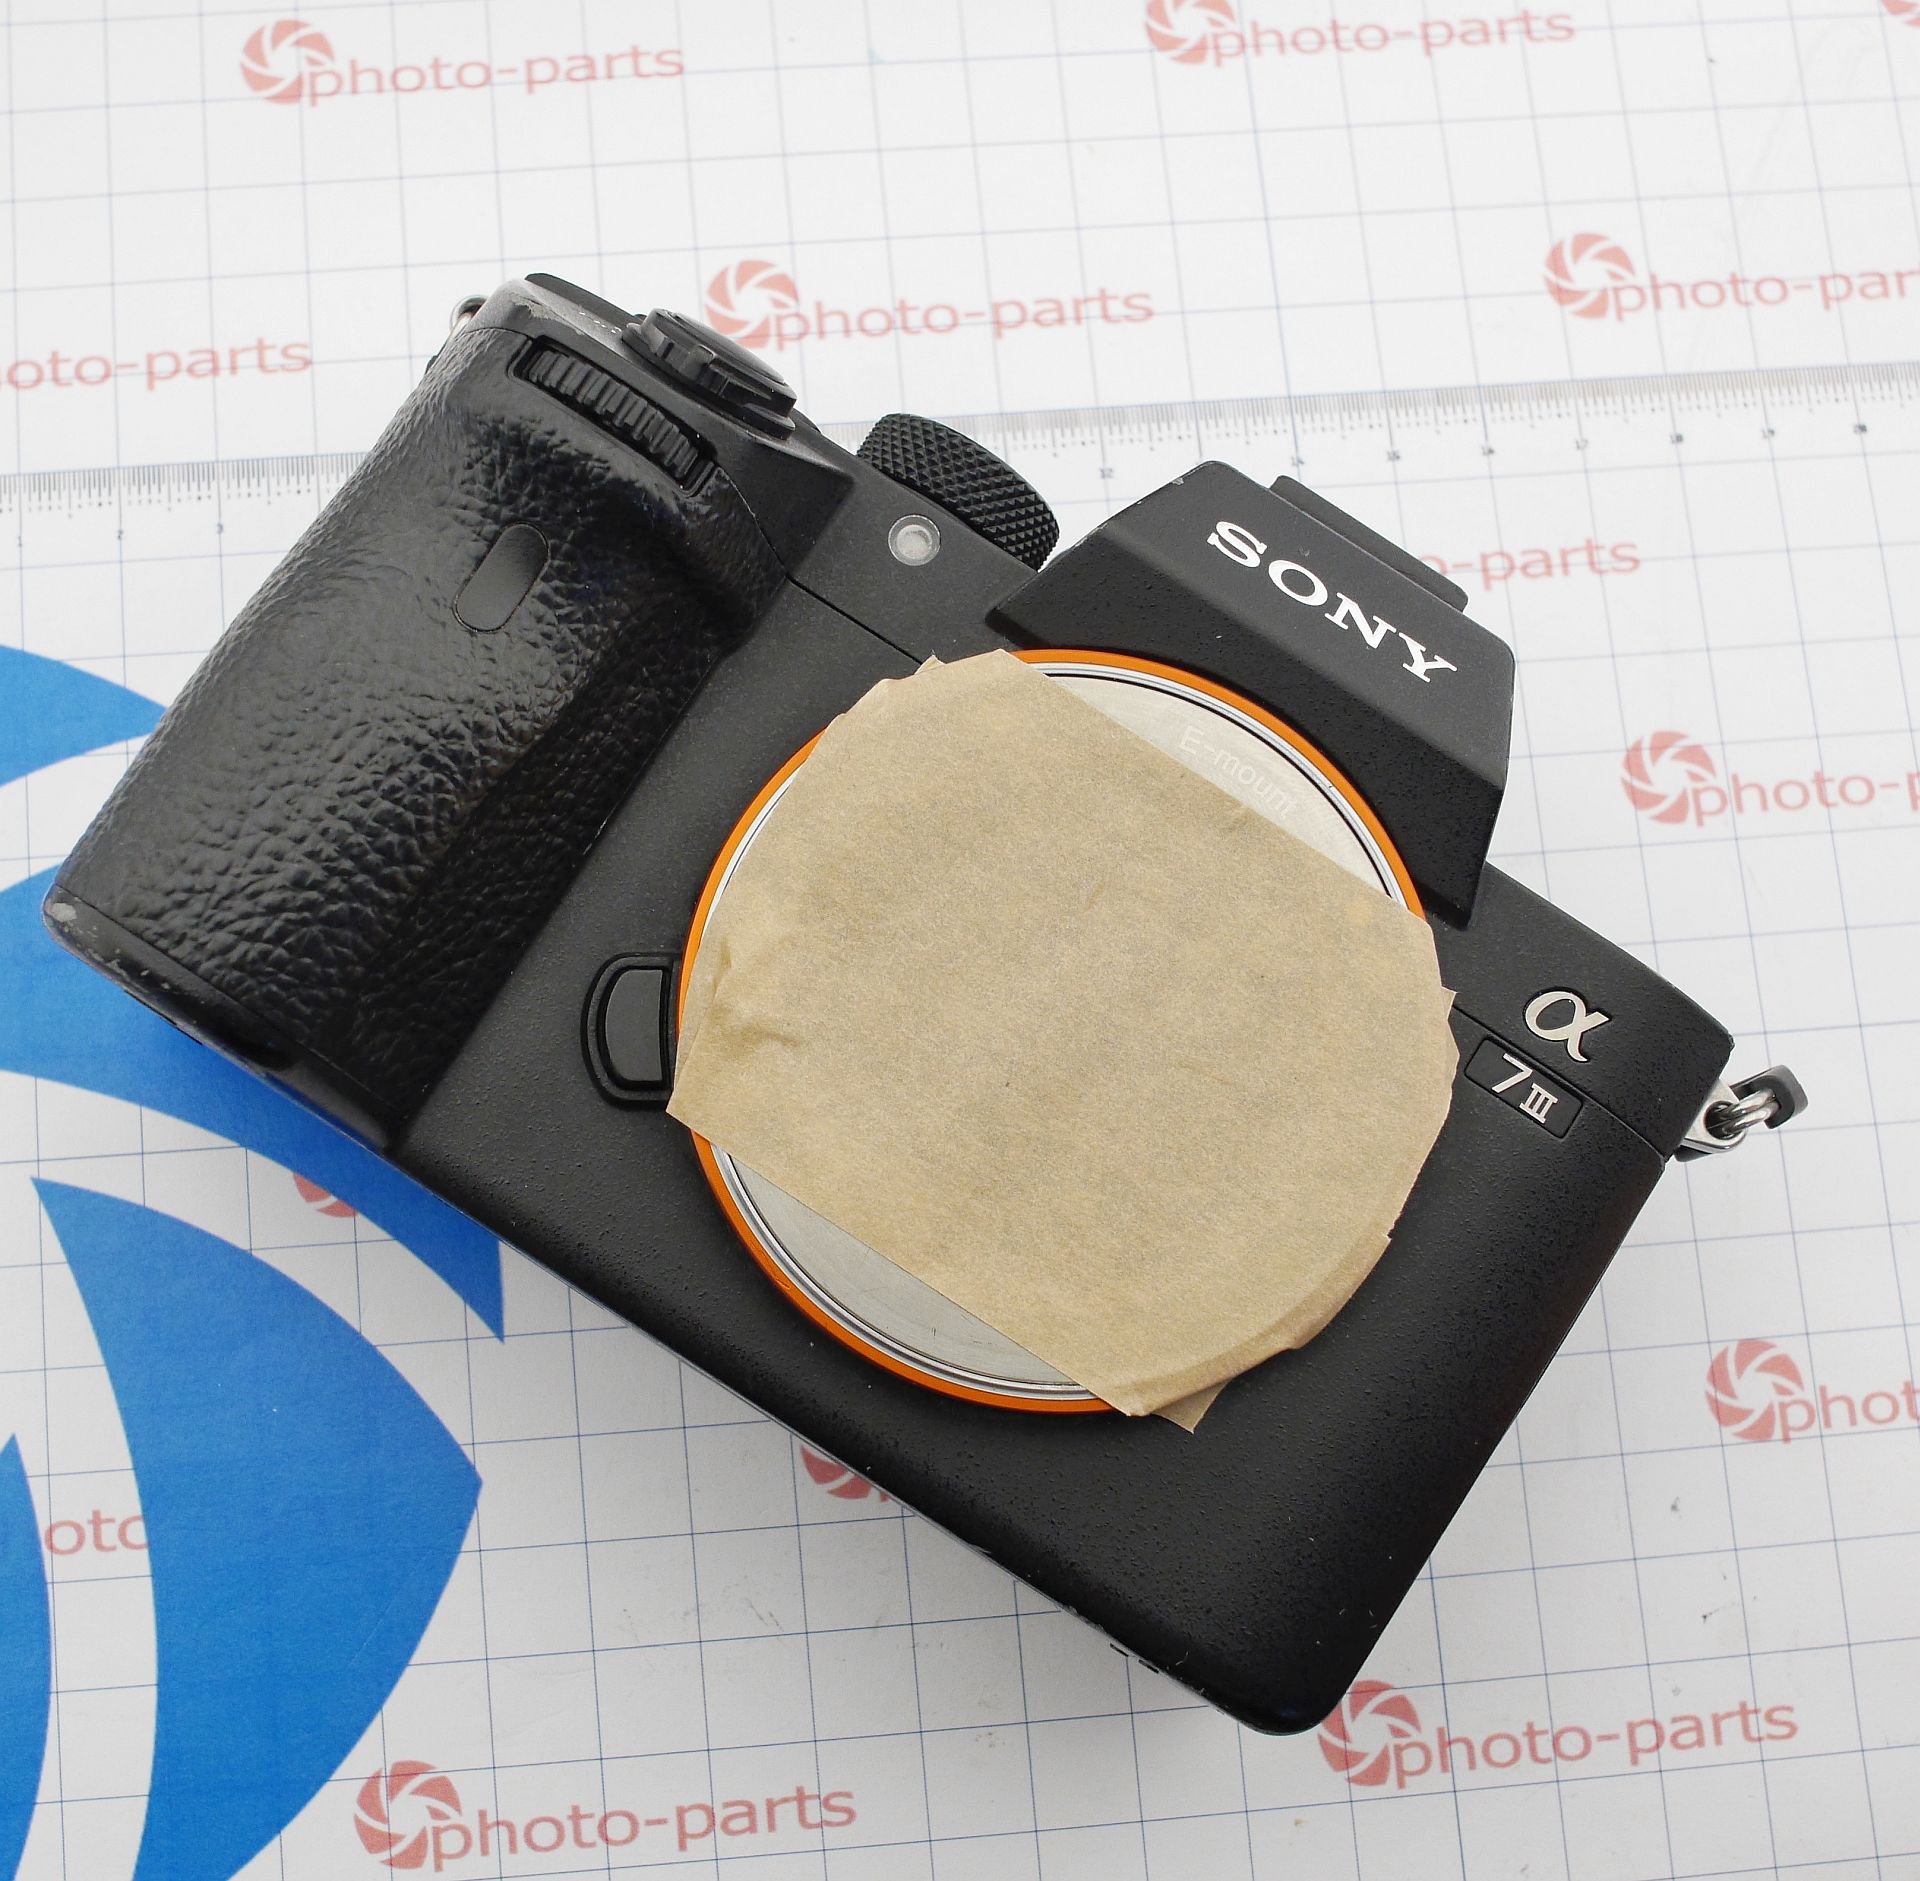
This camera arrived with the complaint: “the display doesn’t work, it reboots after language selection, and overall it’s not in great shape.”
Turns out - even that was a lie. The camera was completely dead, zero reaction to the power lever.
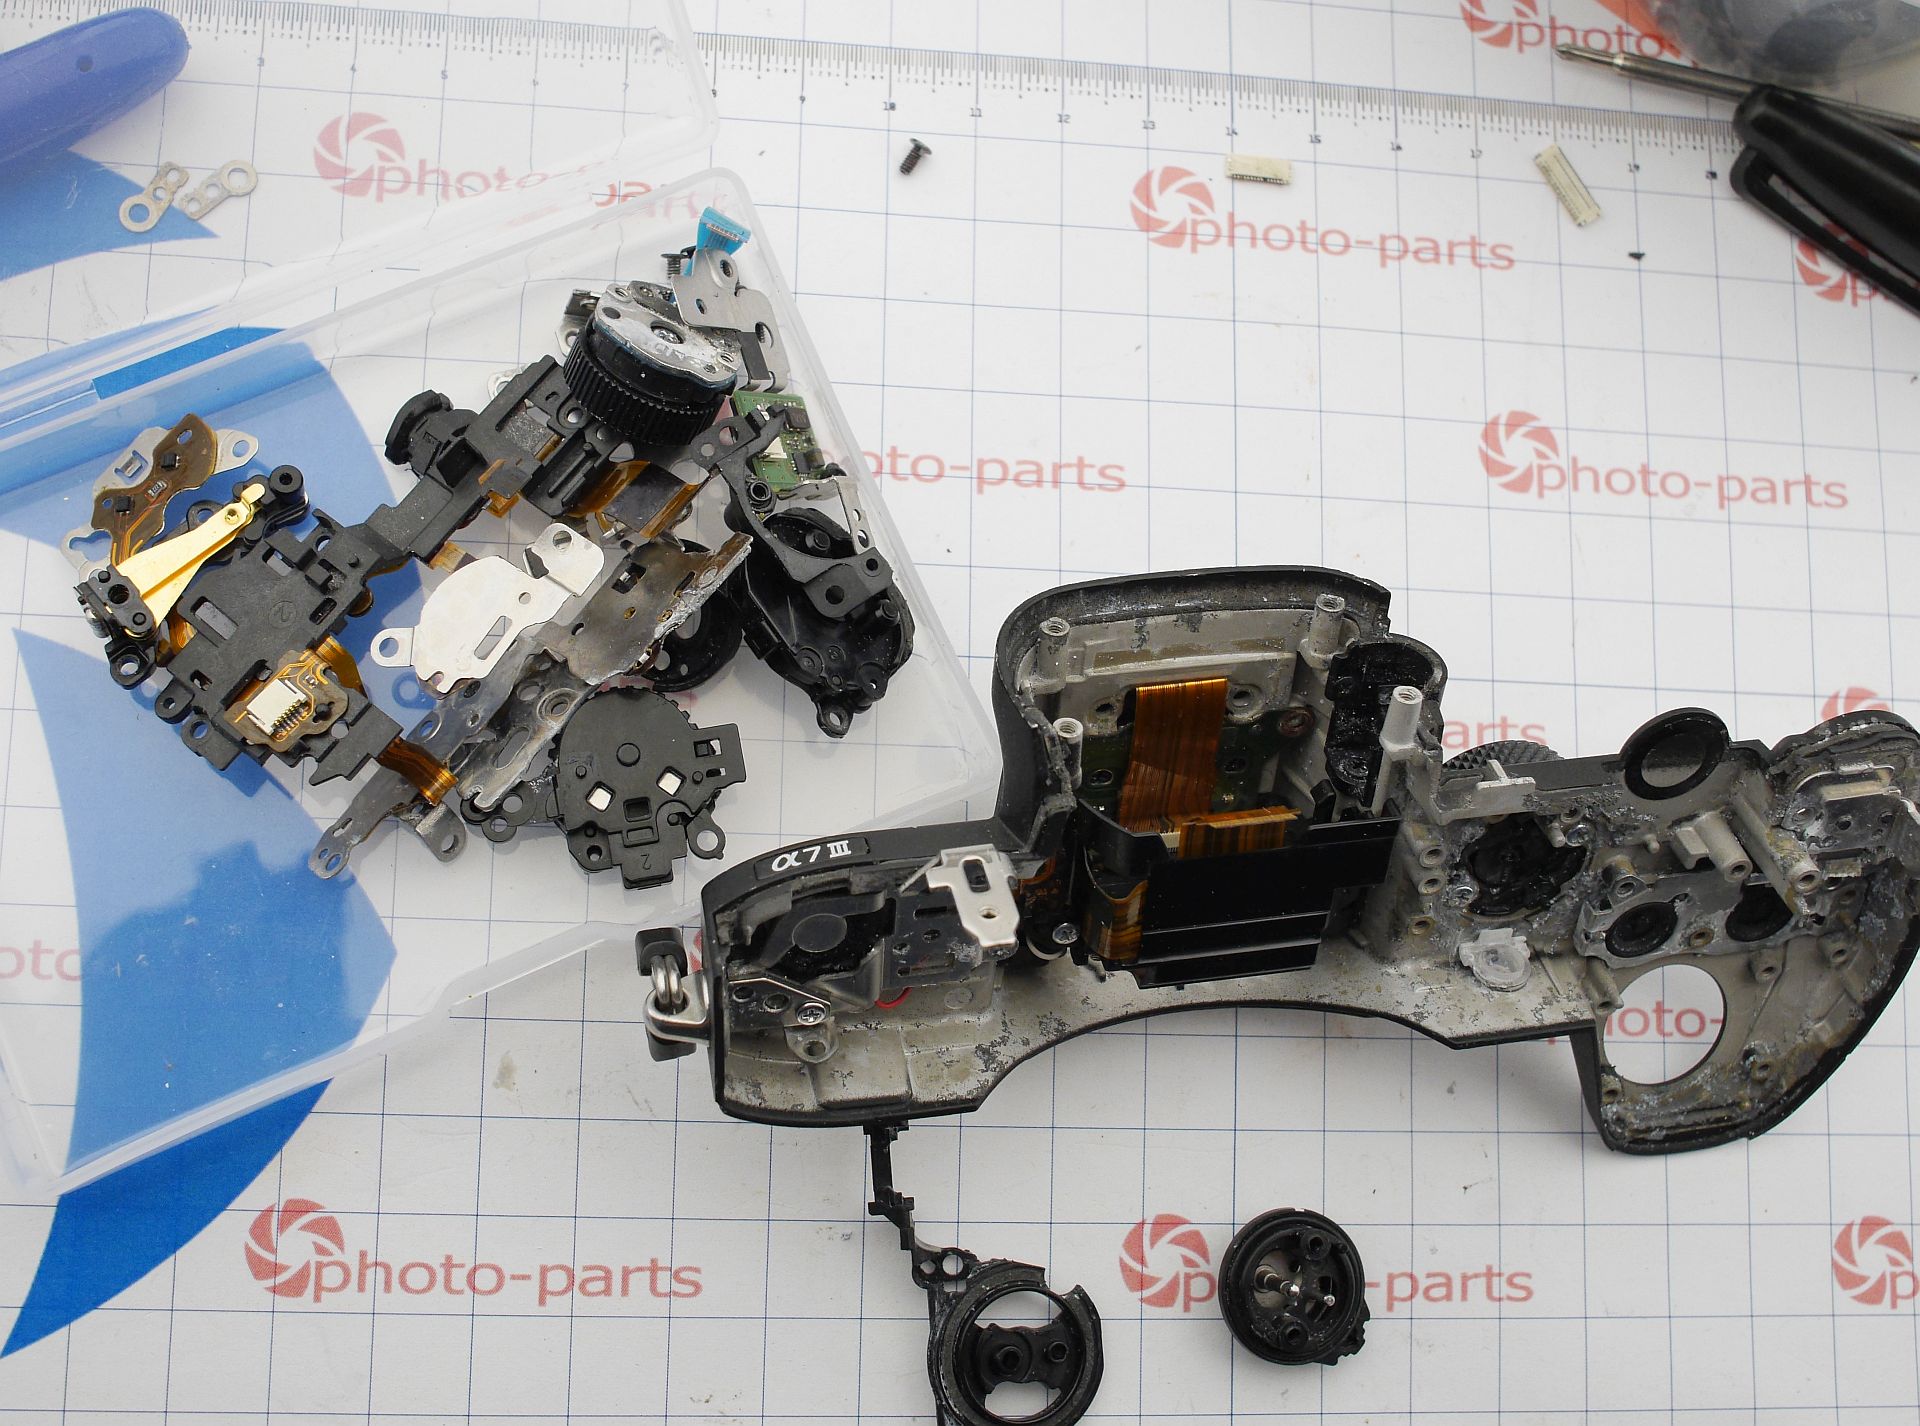
Let’s begin the teardown.
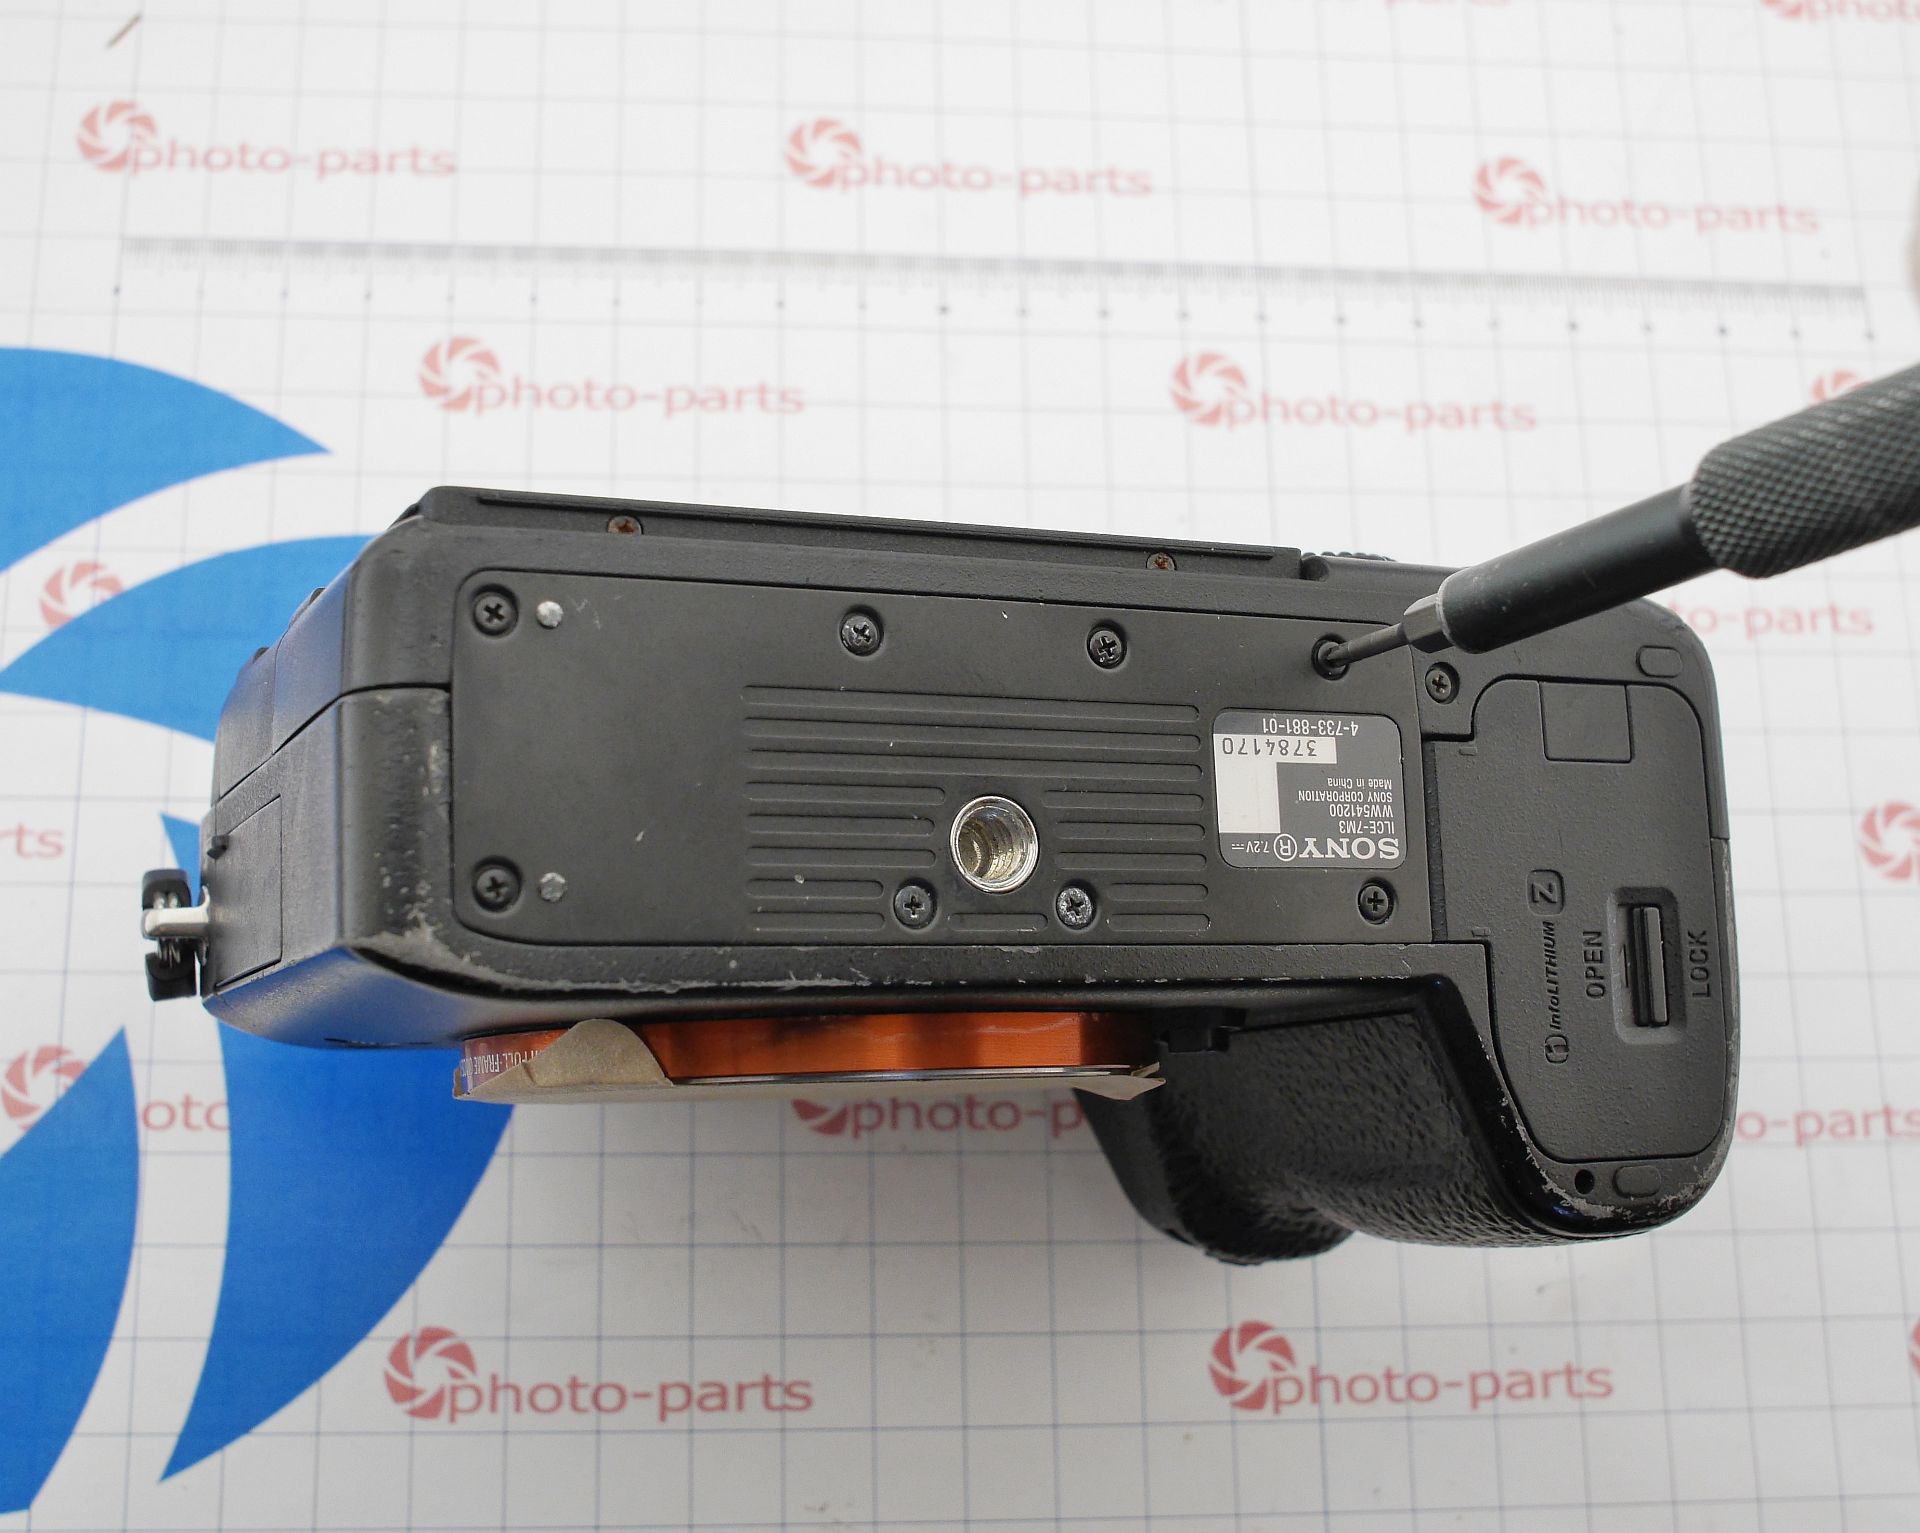
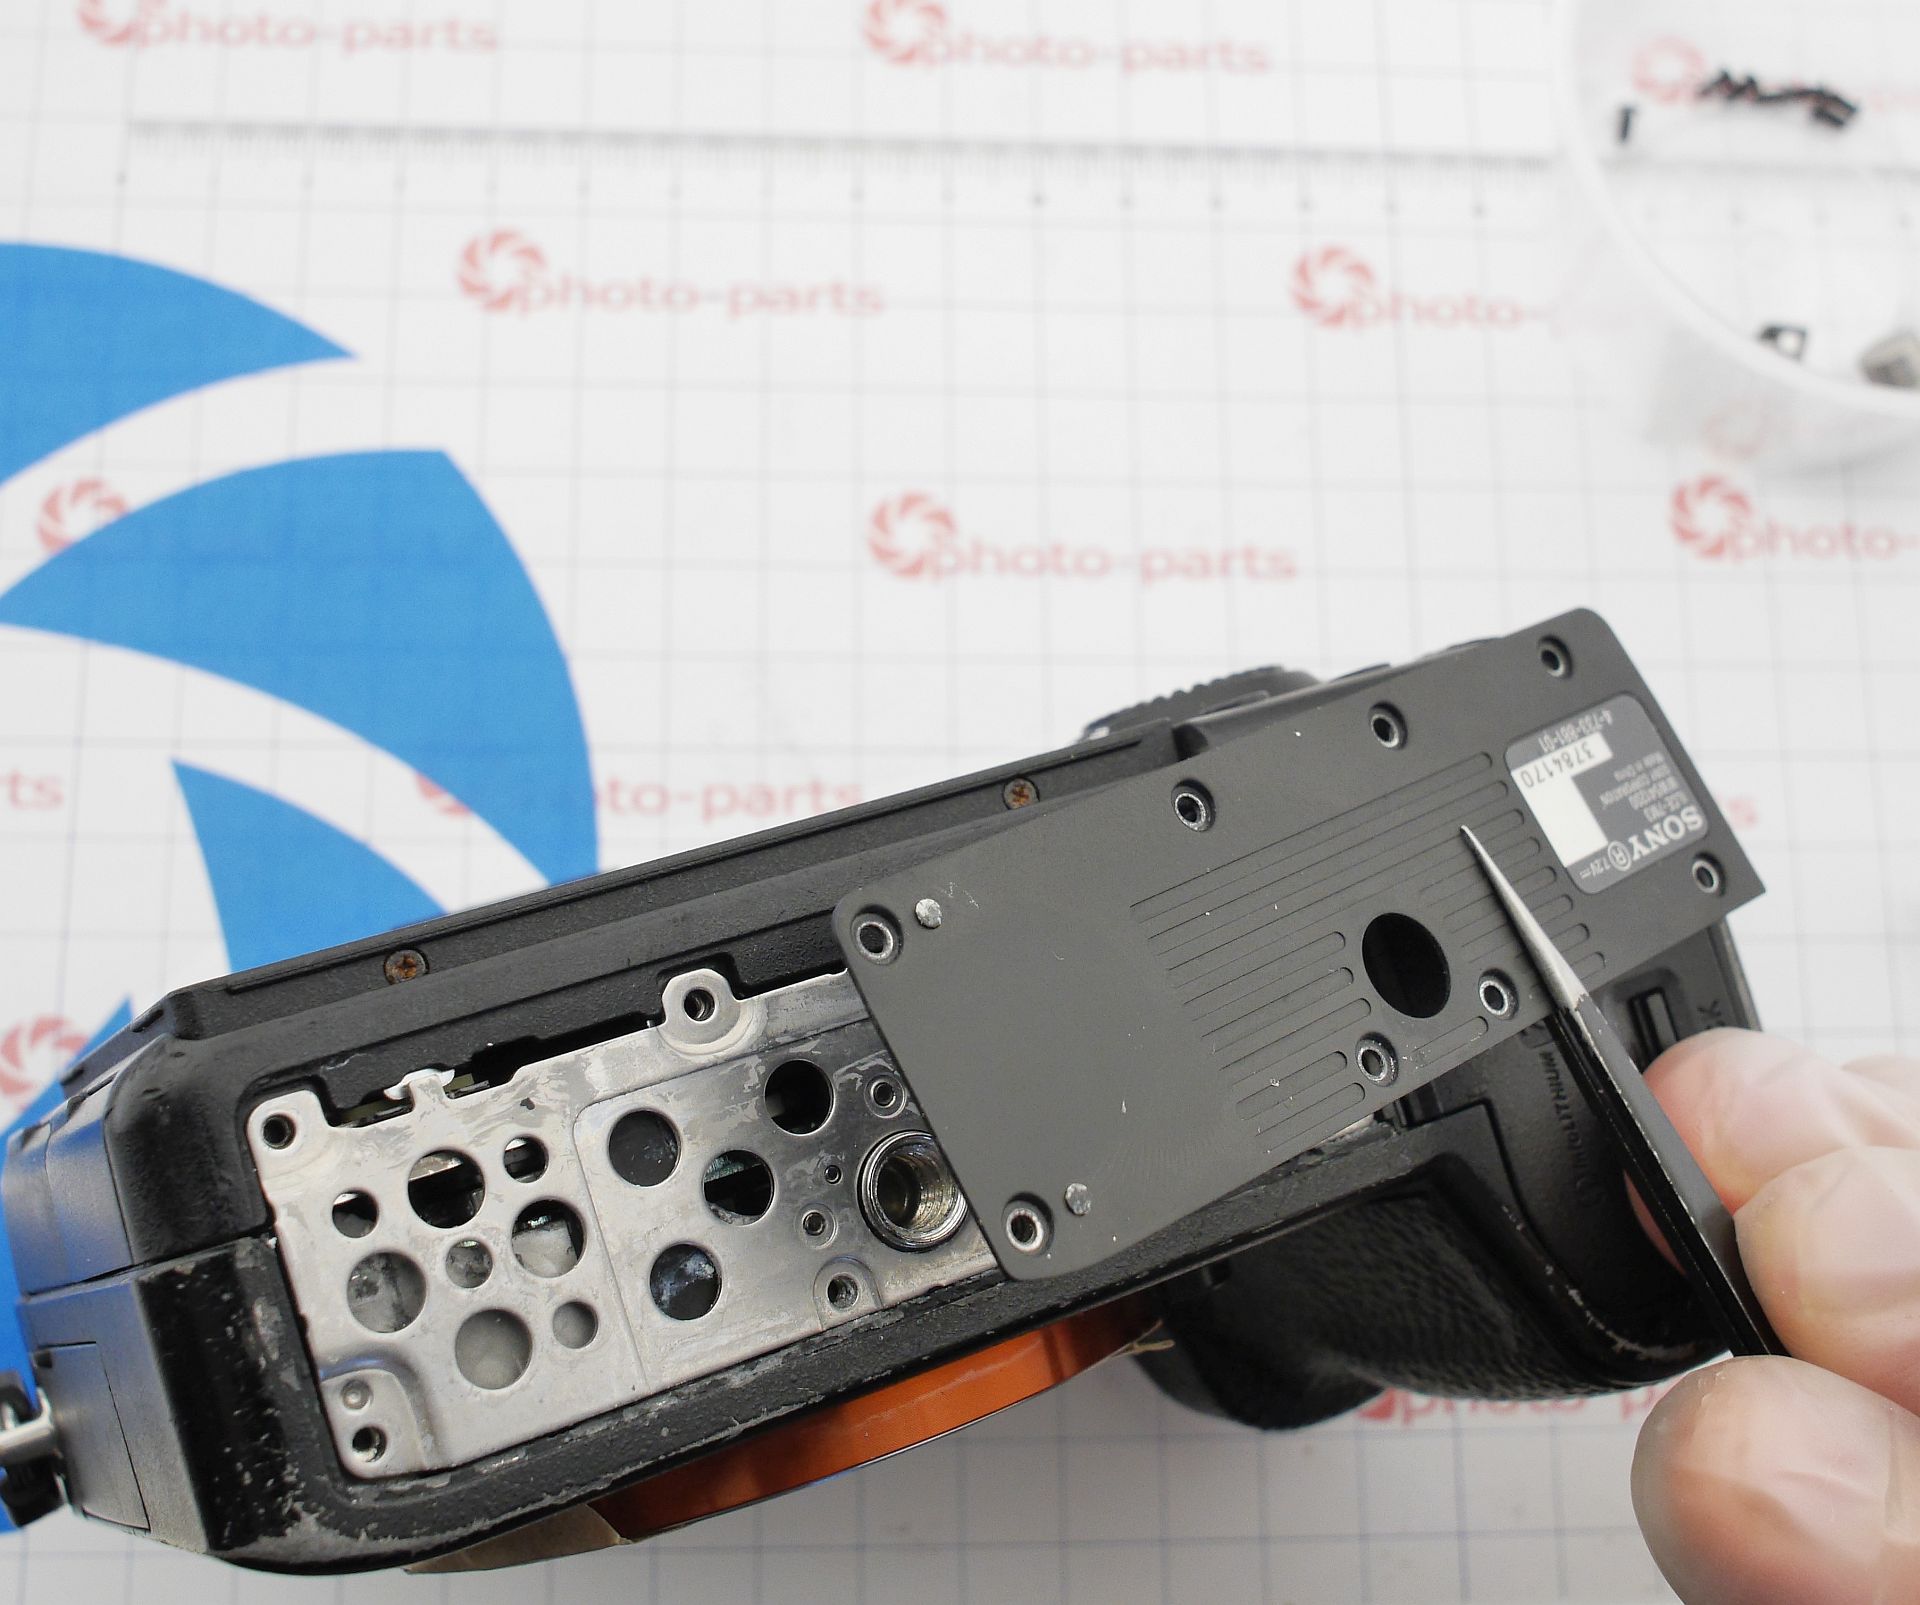
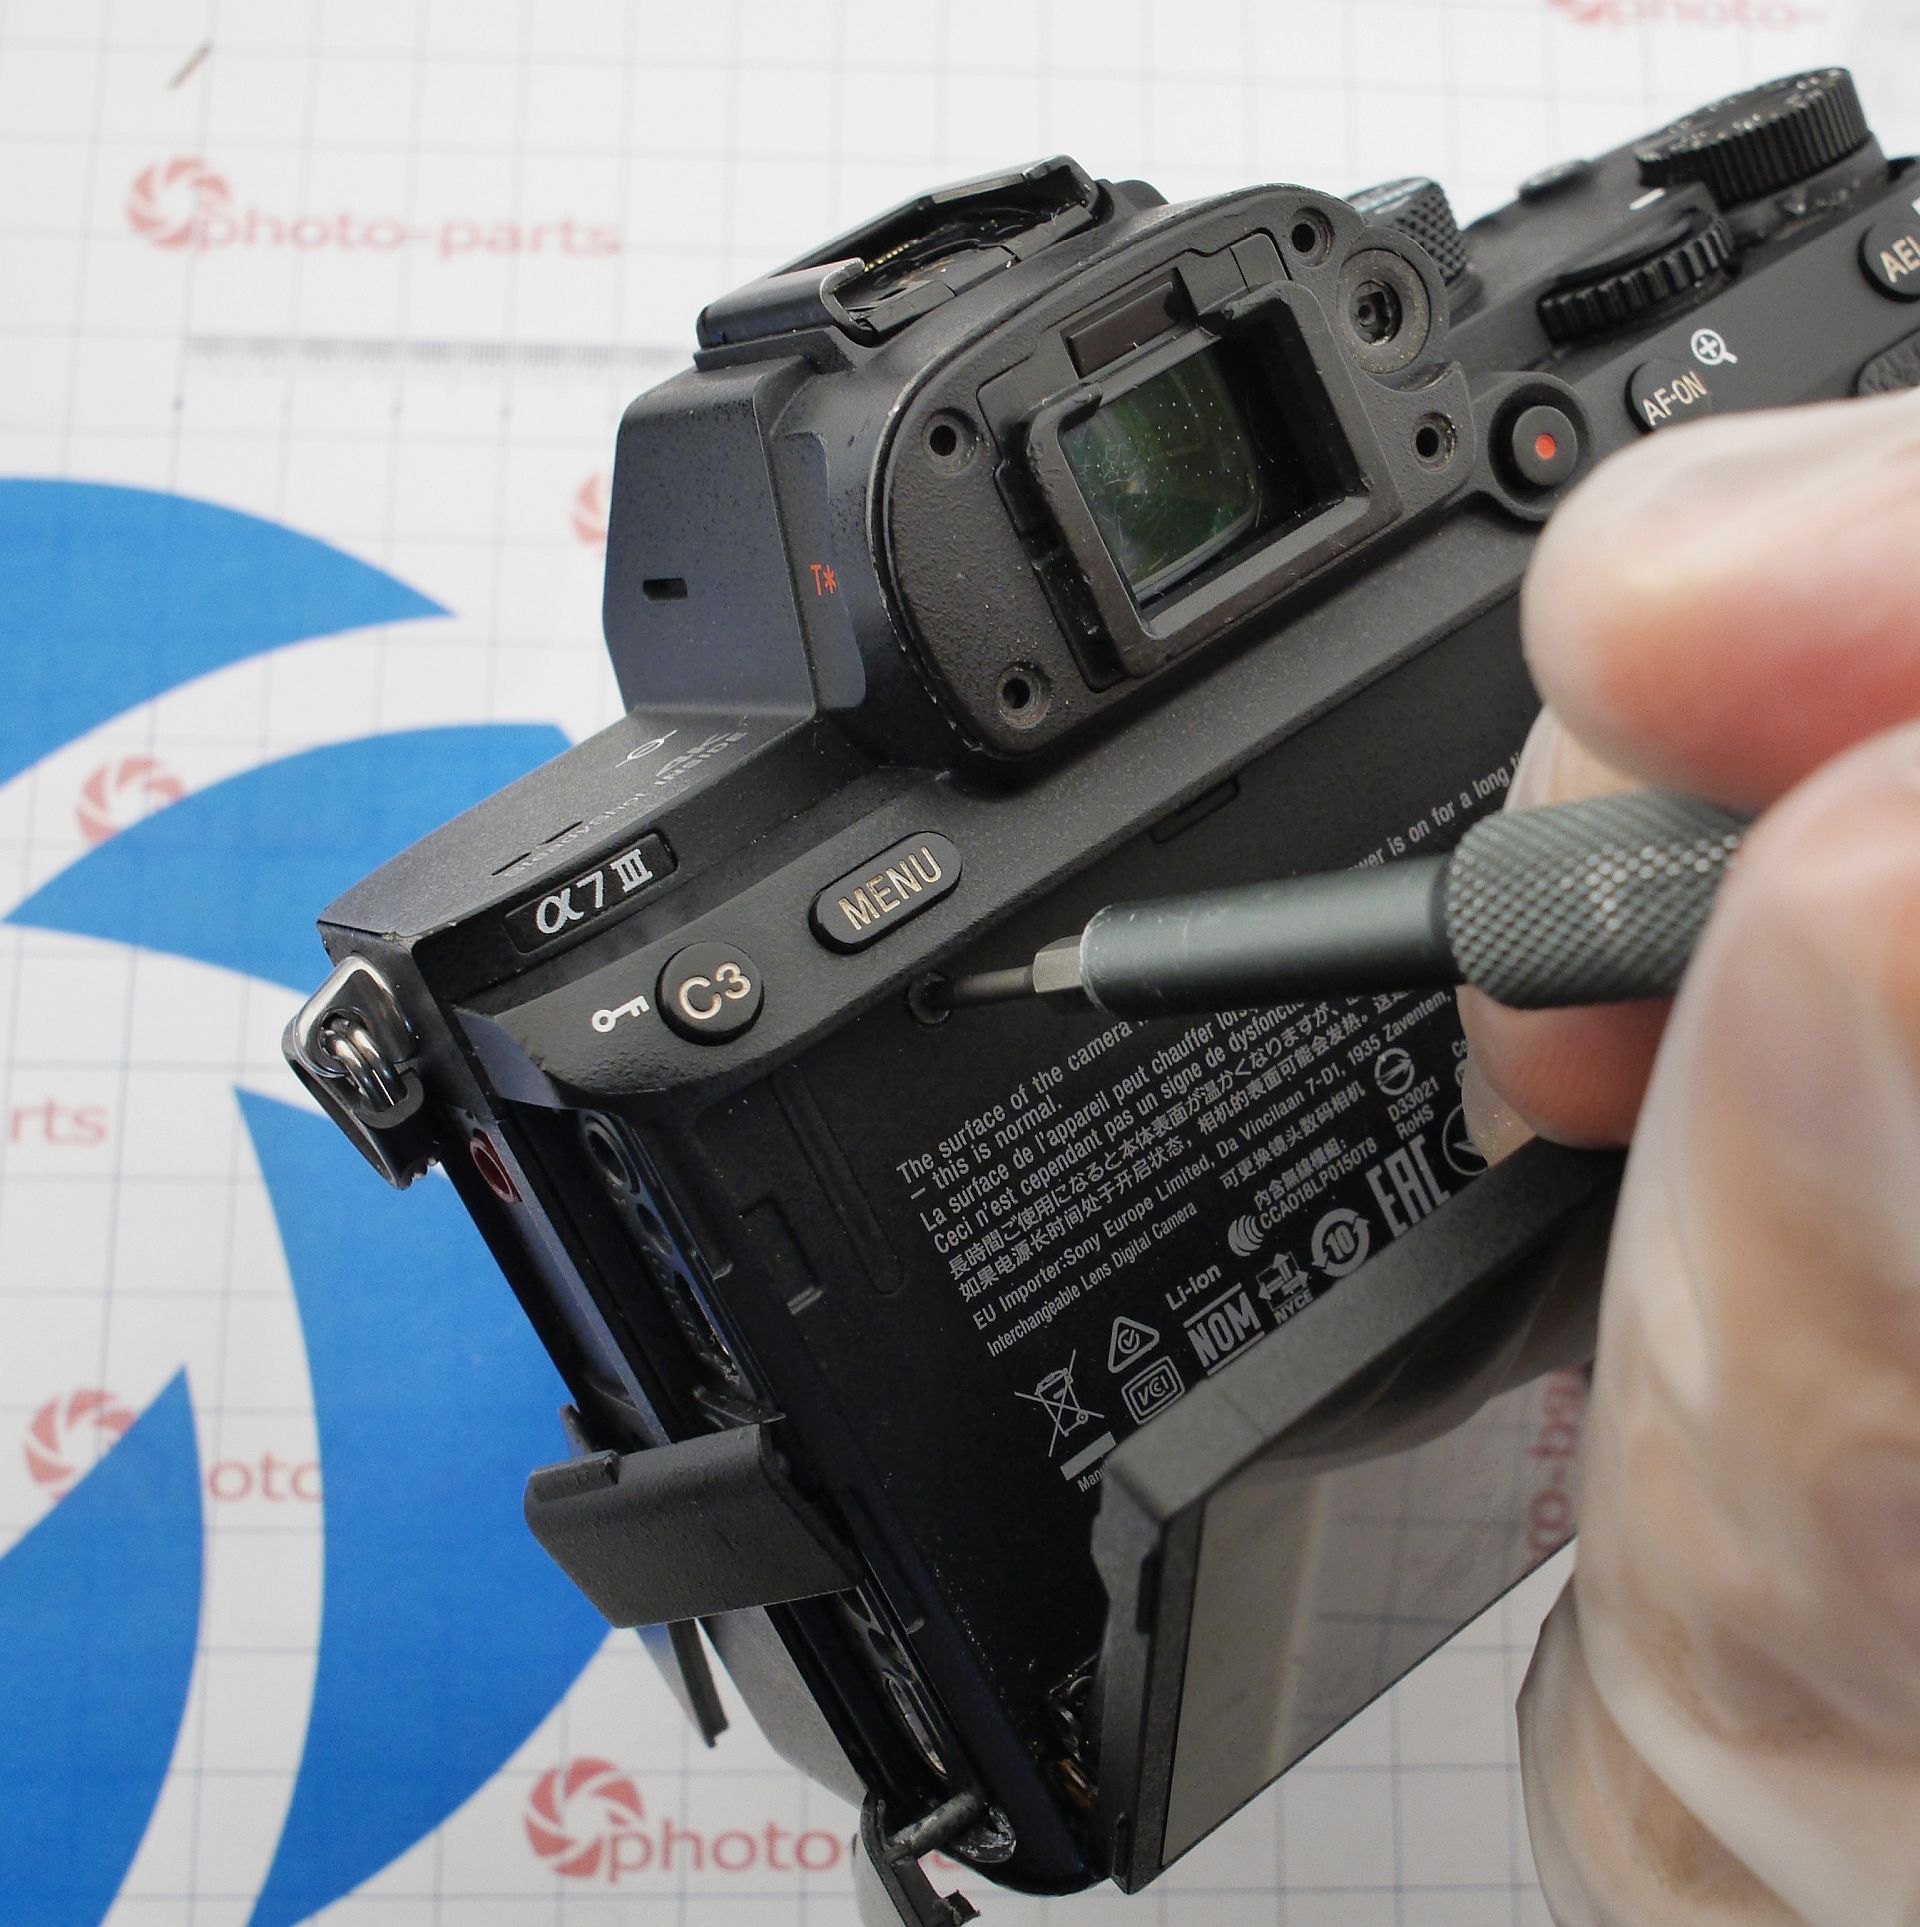
Start by unscrewing every visible screw from the bottom of the body, and remove the name panel:
Under the rubber grip we find two shiny screws:
Next, remove:
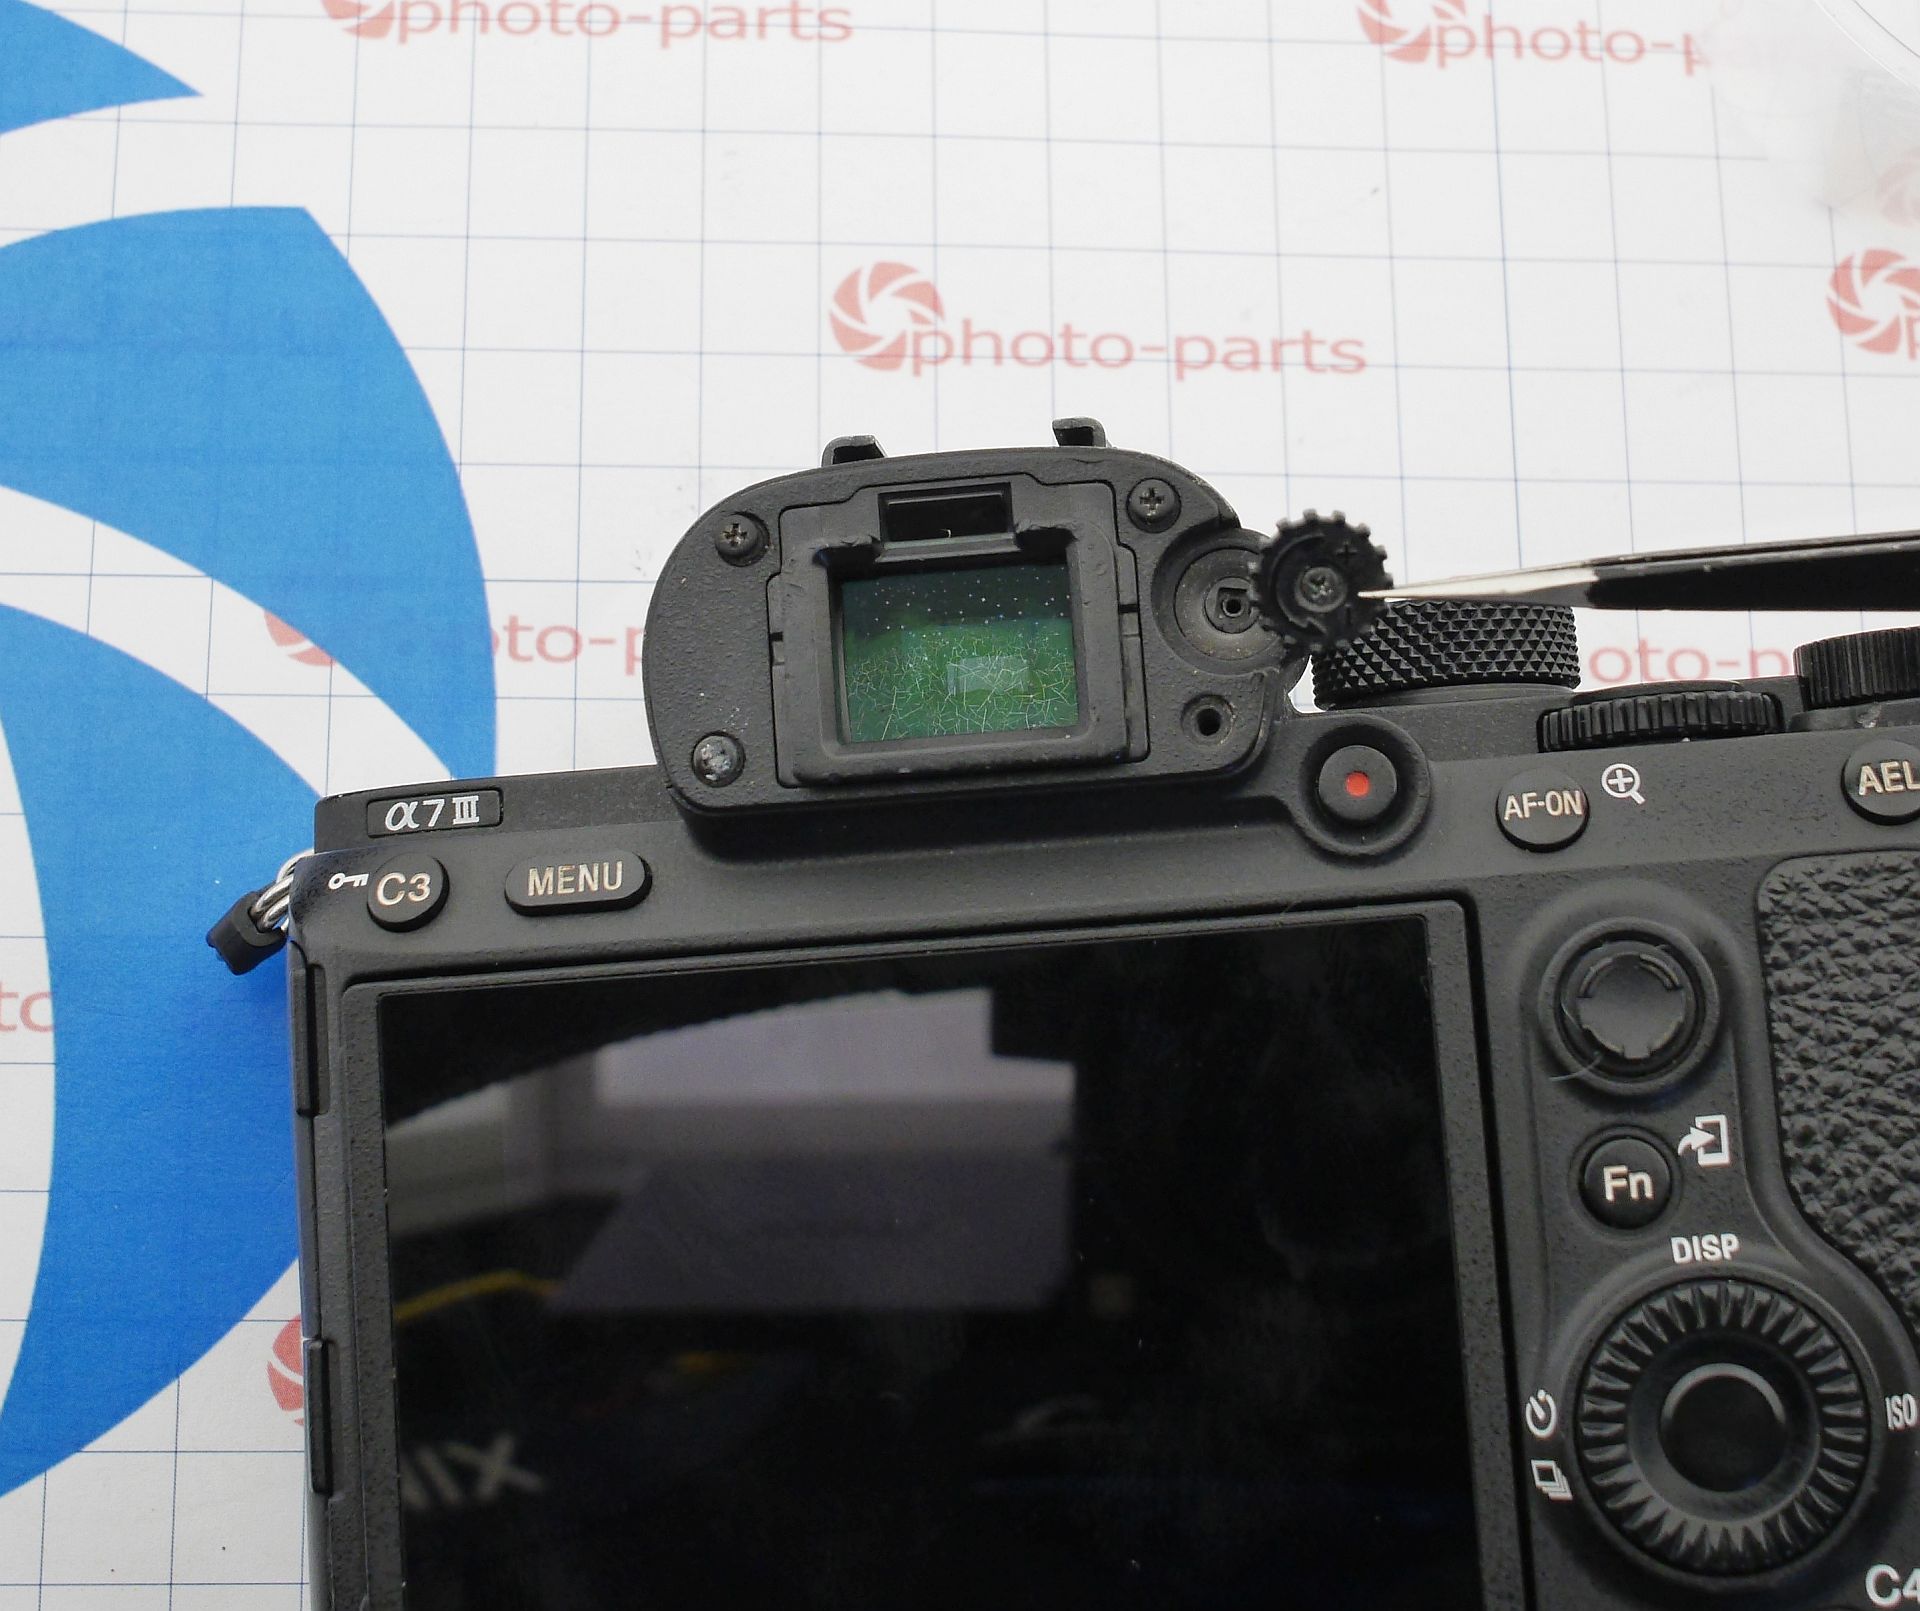
- the EVF screws and eye-sight correction screw;
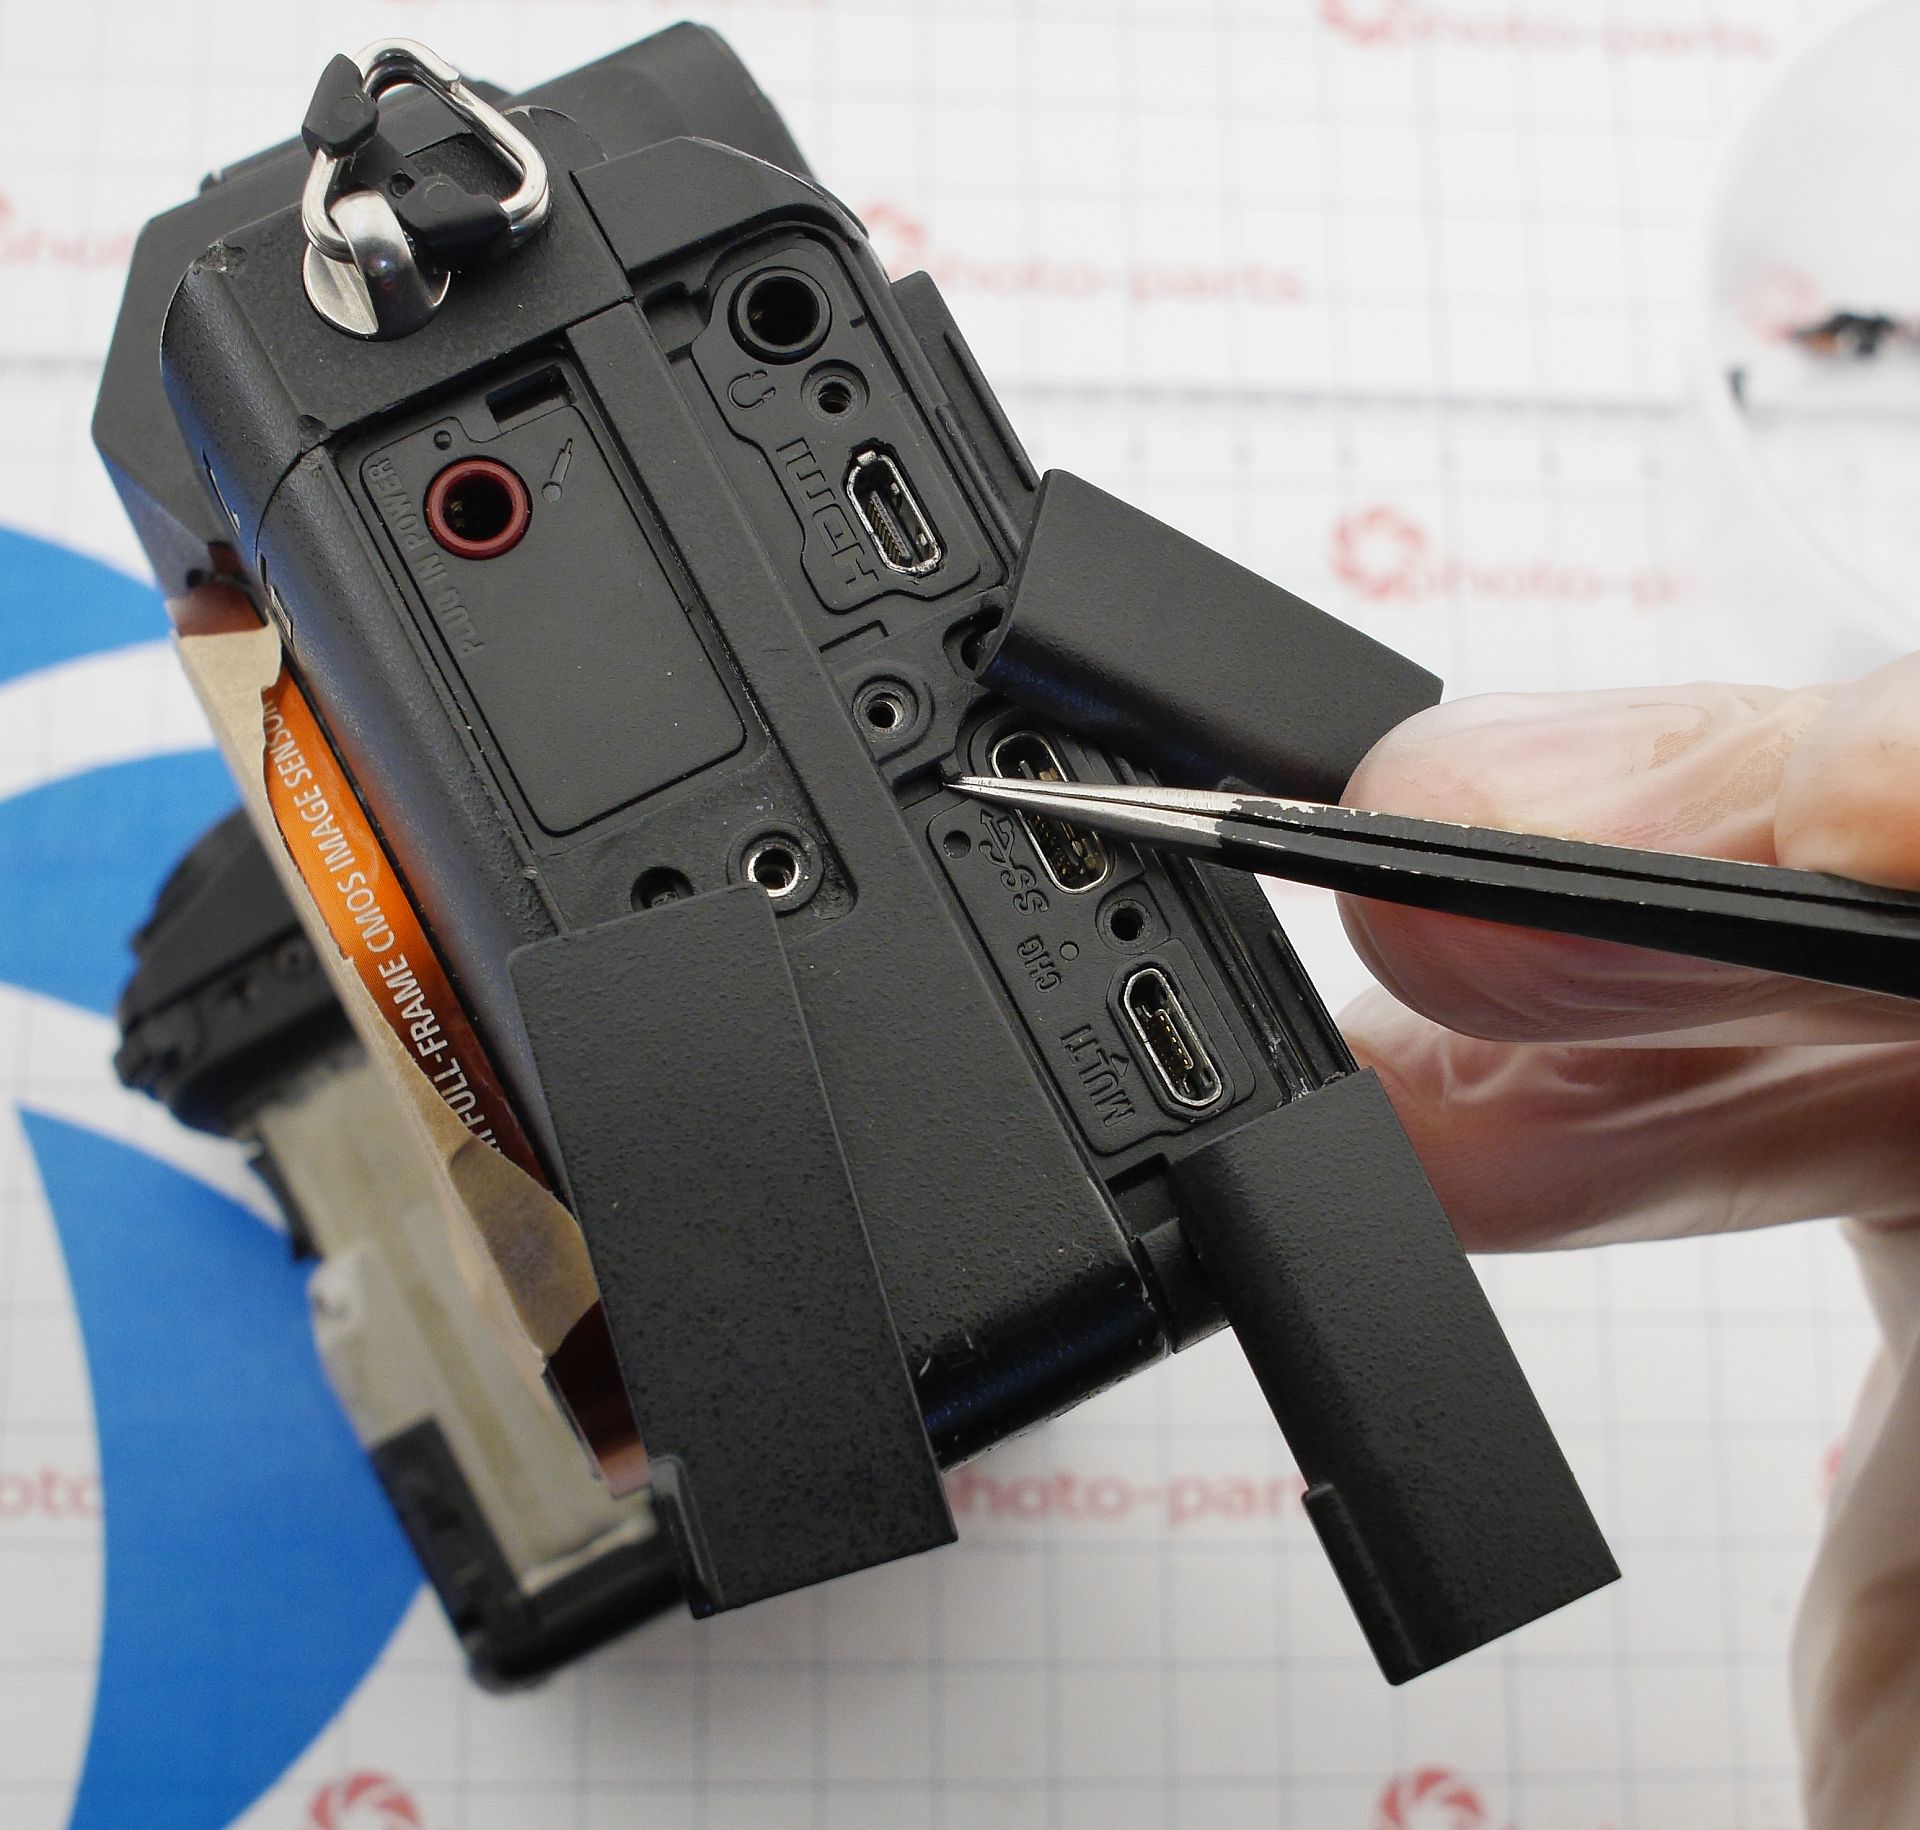
- all screws under the I/O rubber covers;
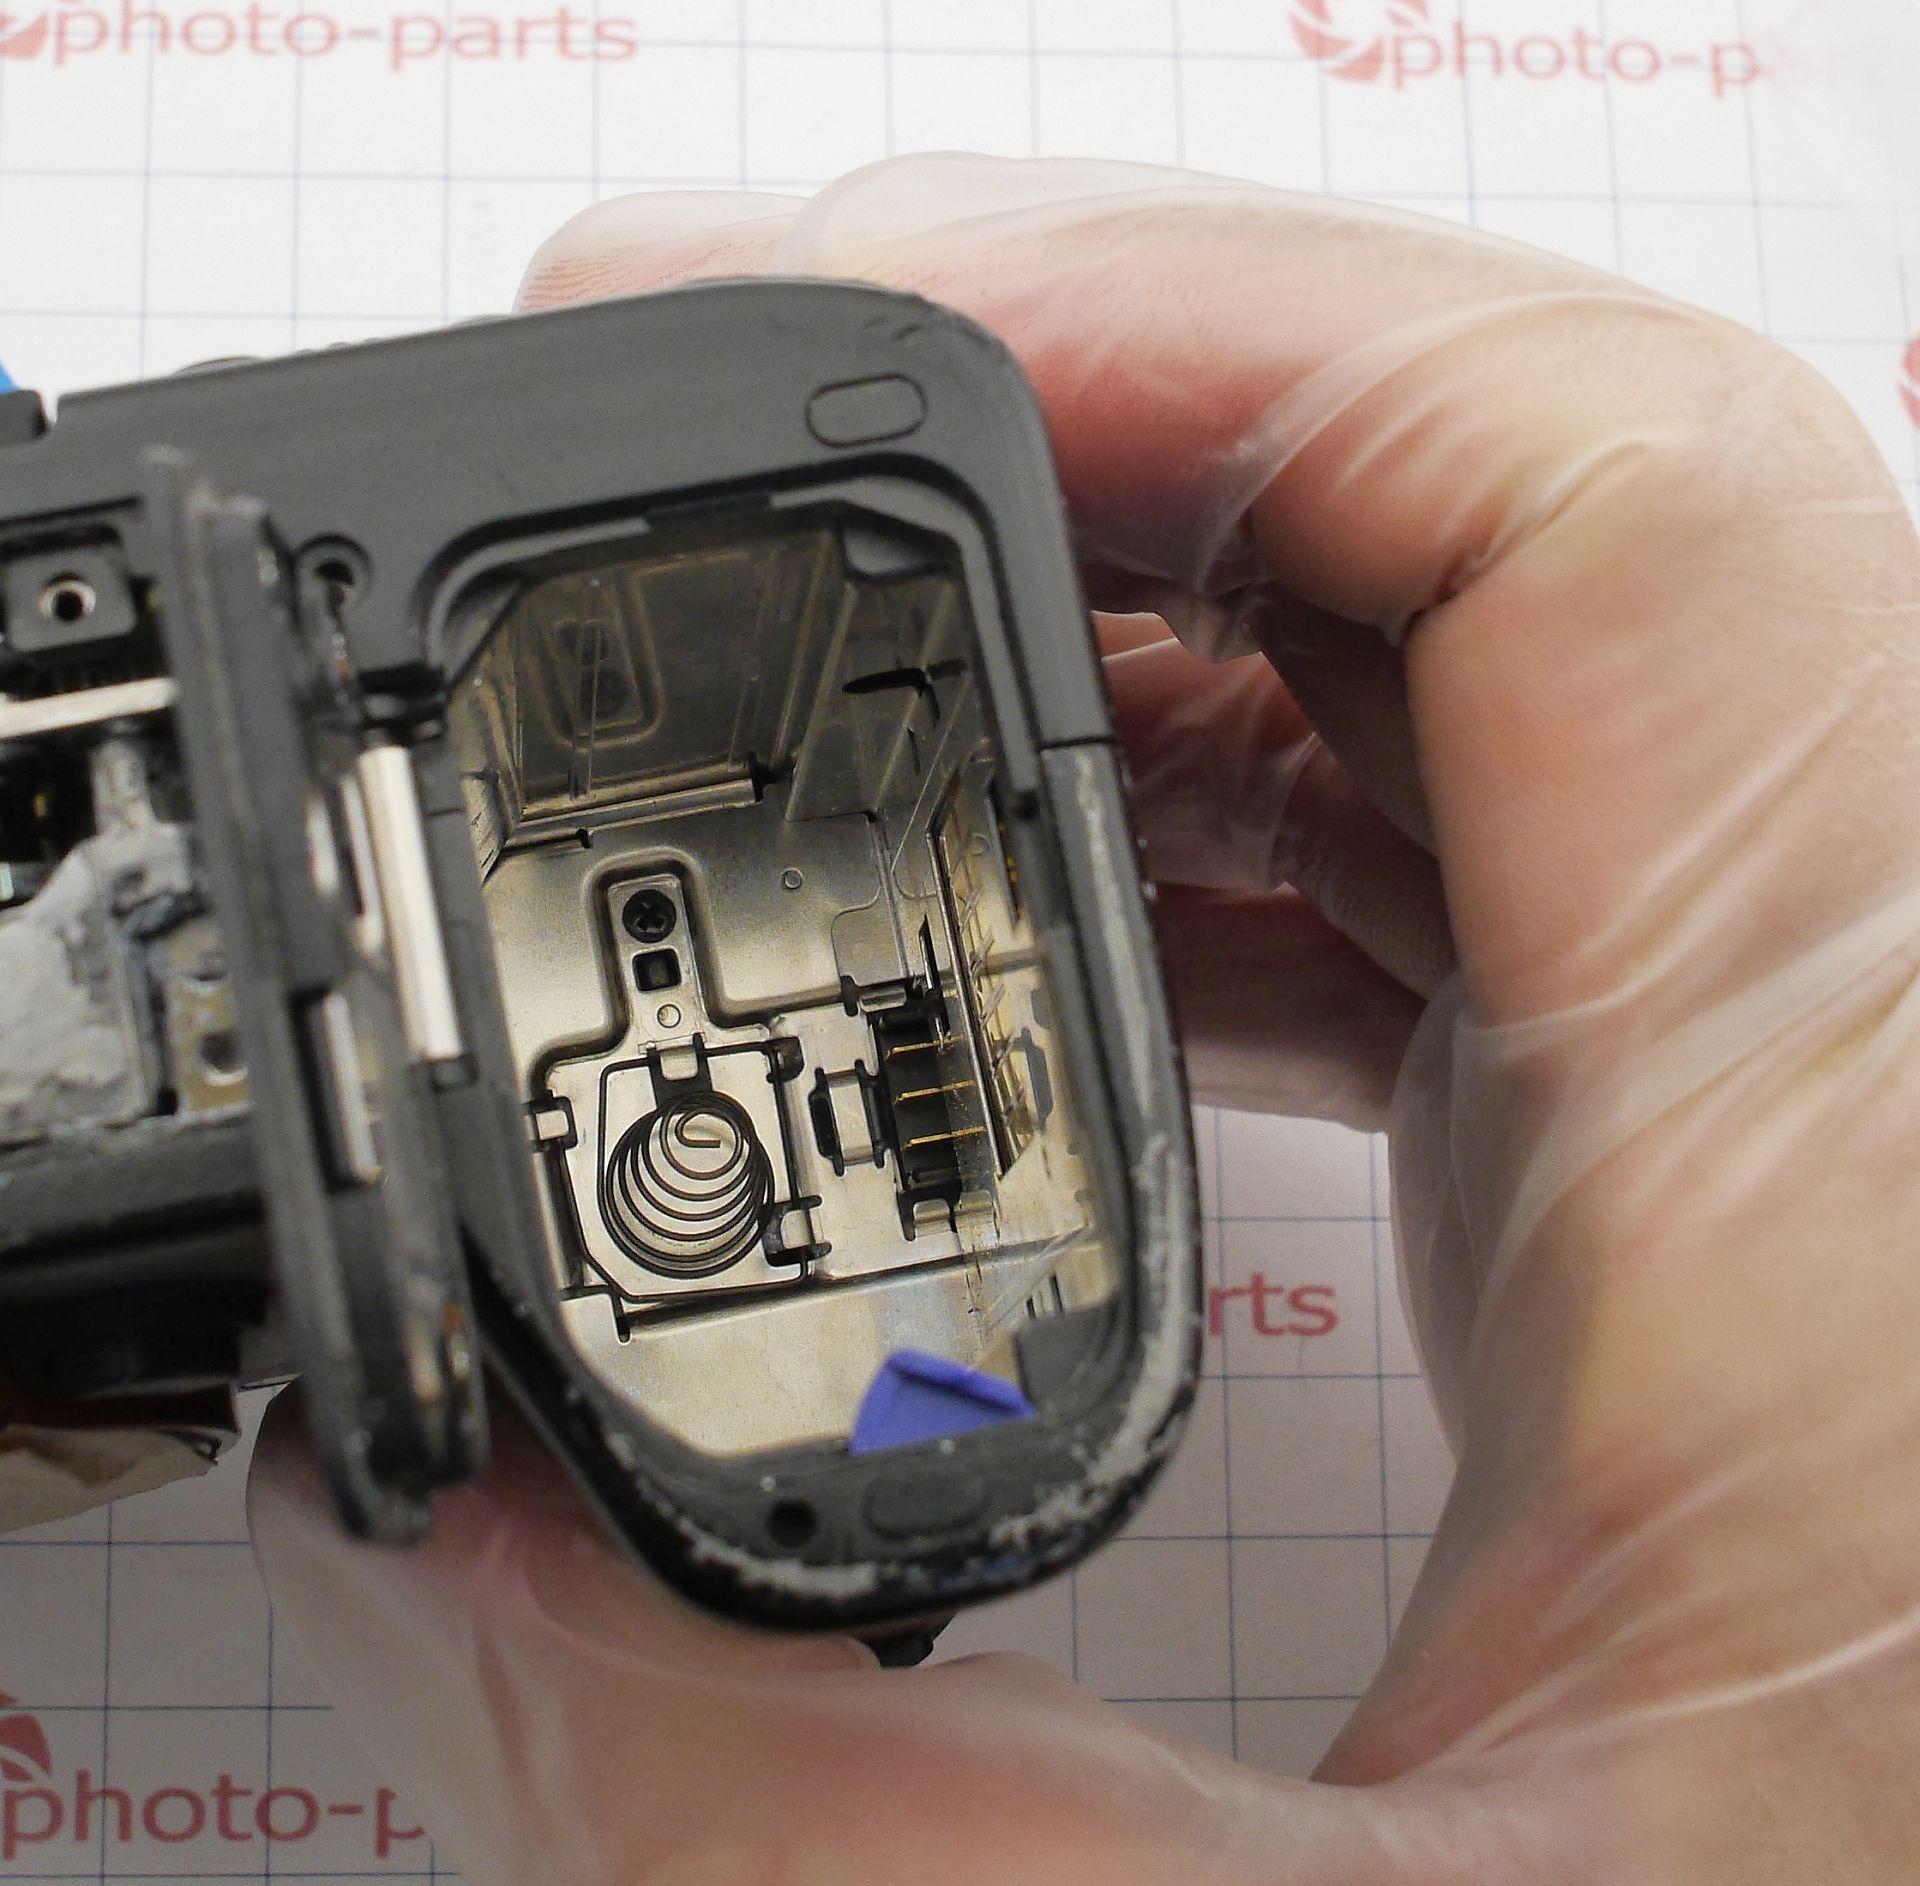
- one deep inside the battery compartment;
- two screws under the SD card door;
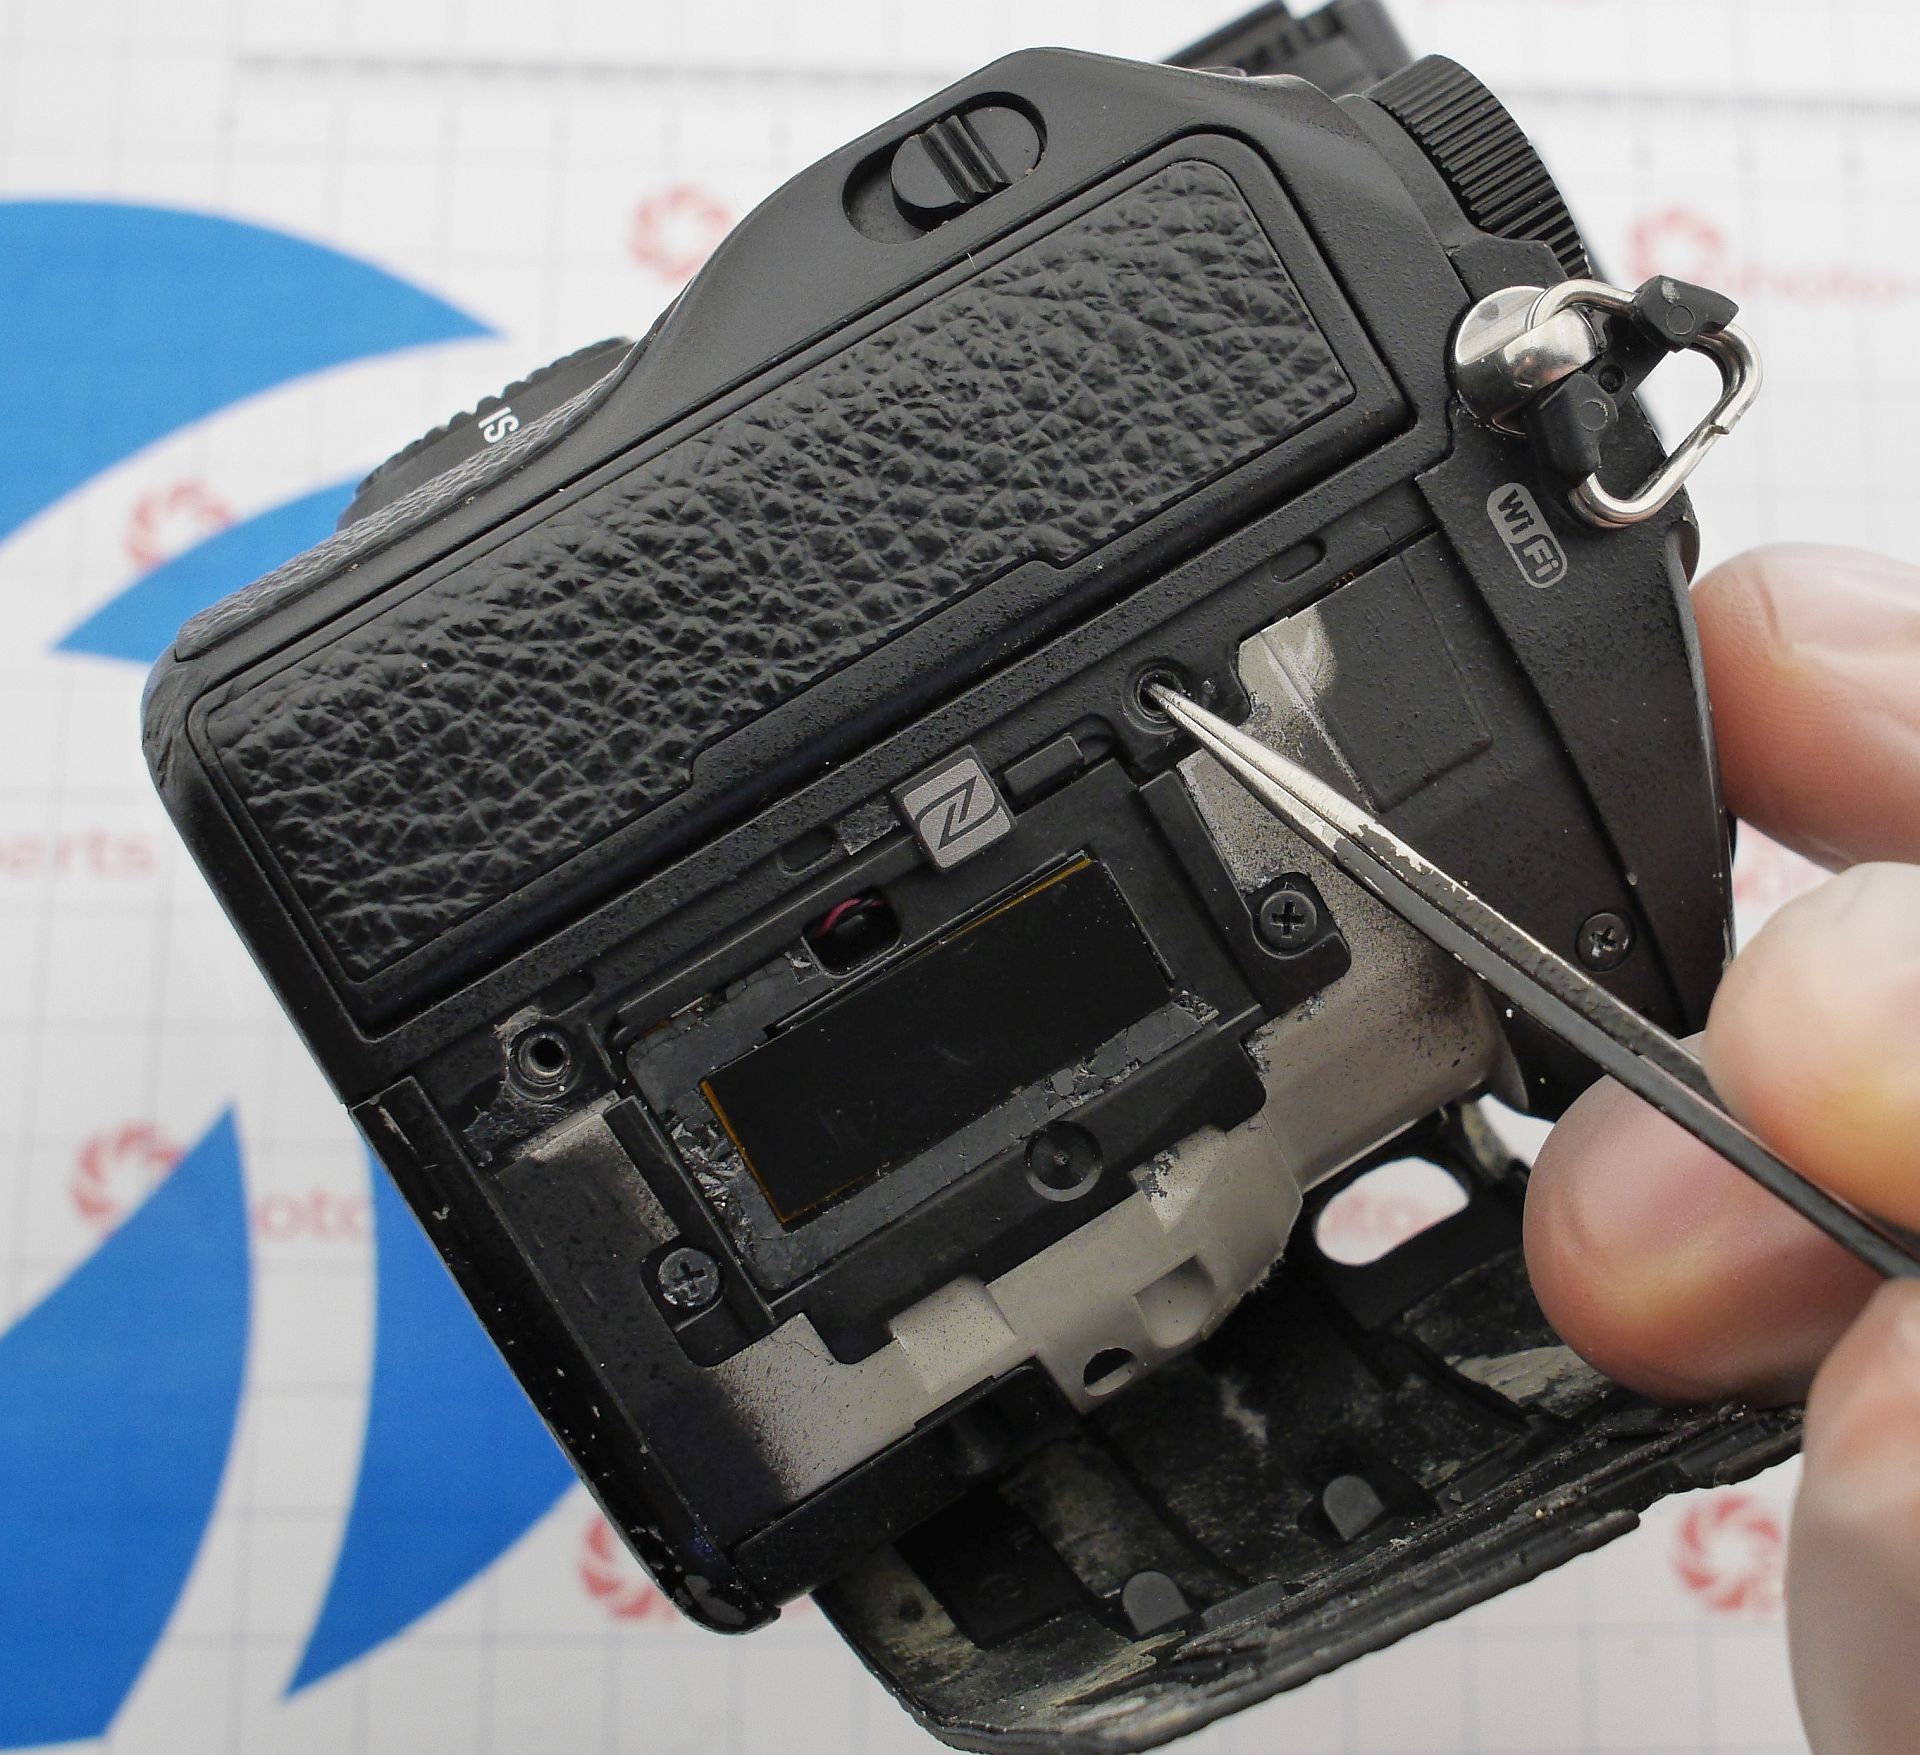
- one screw beneath the flip screen:
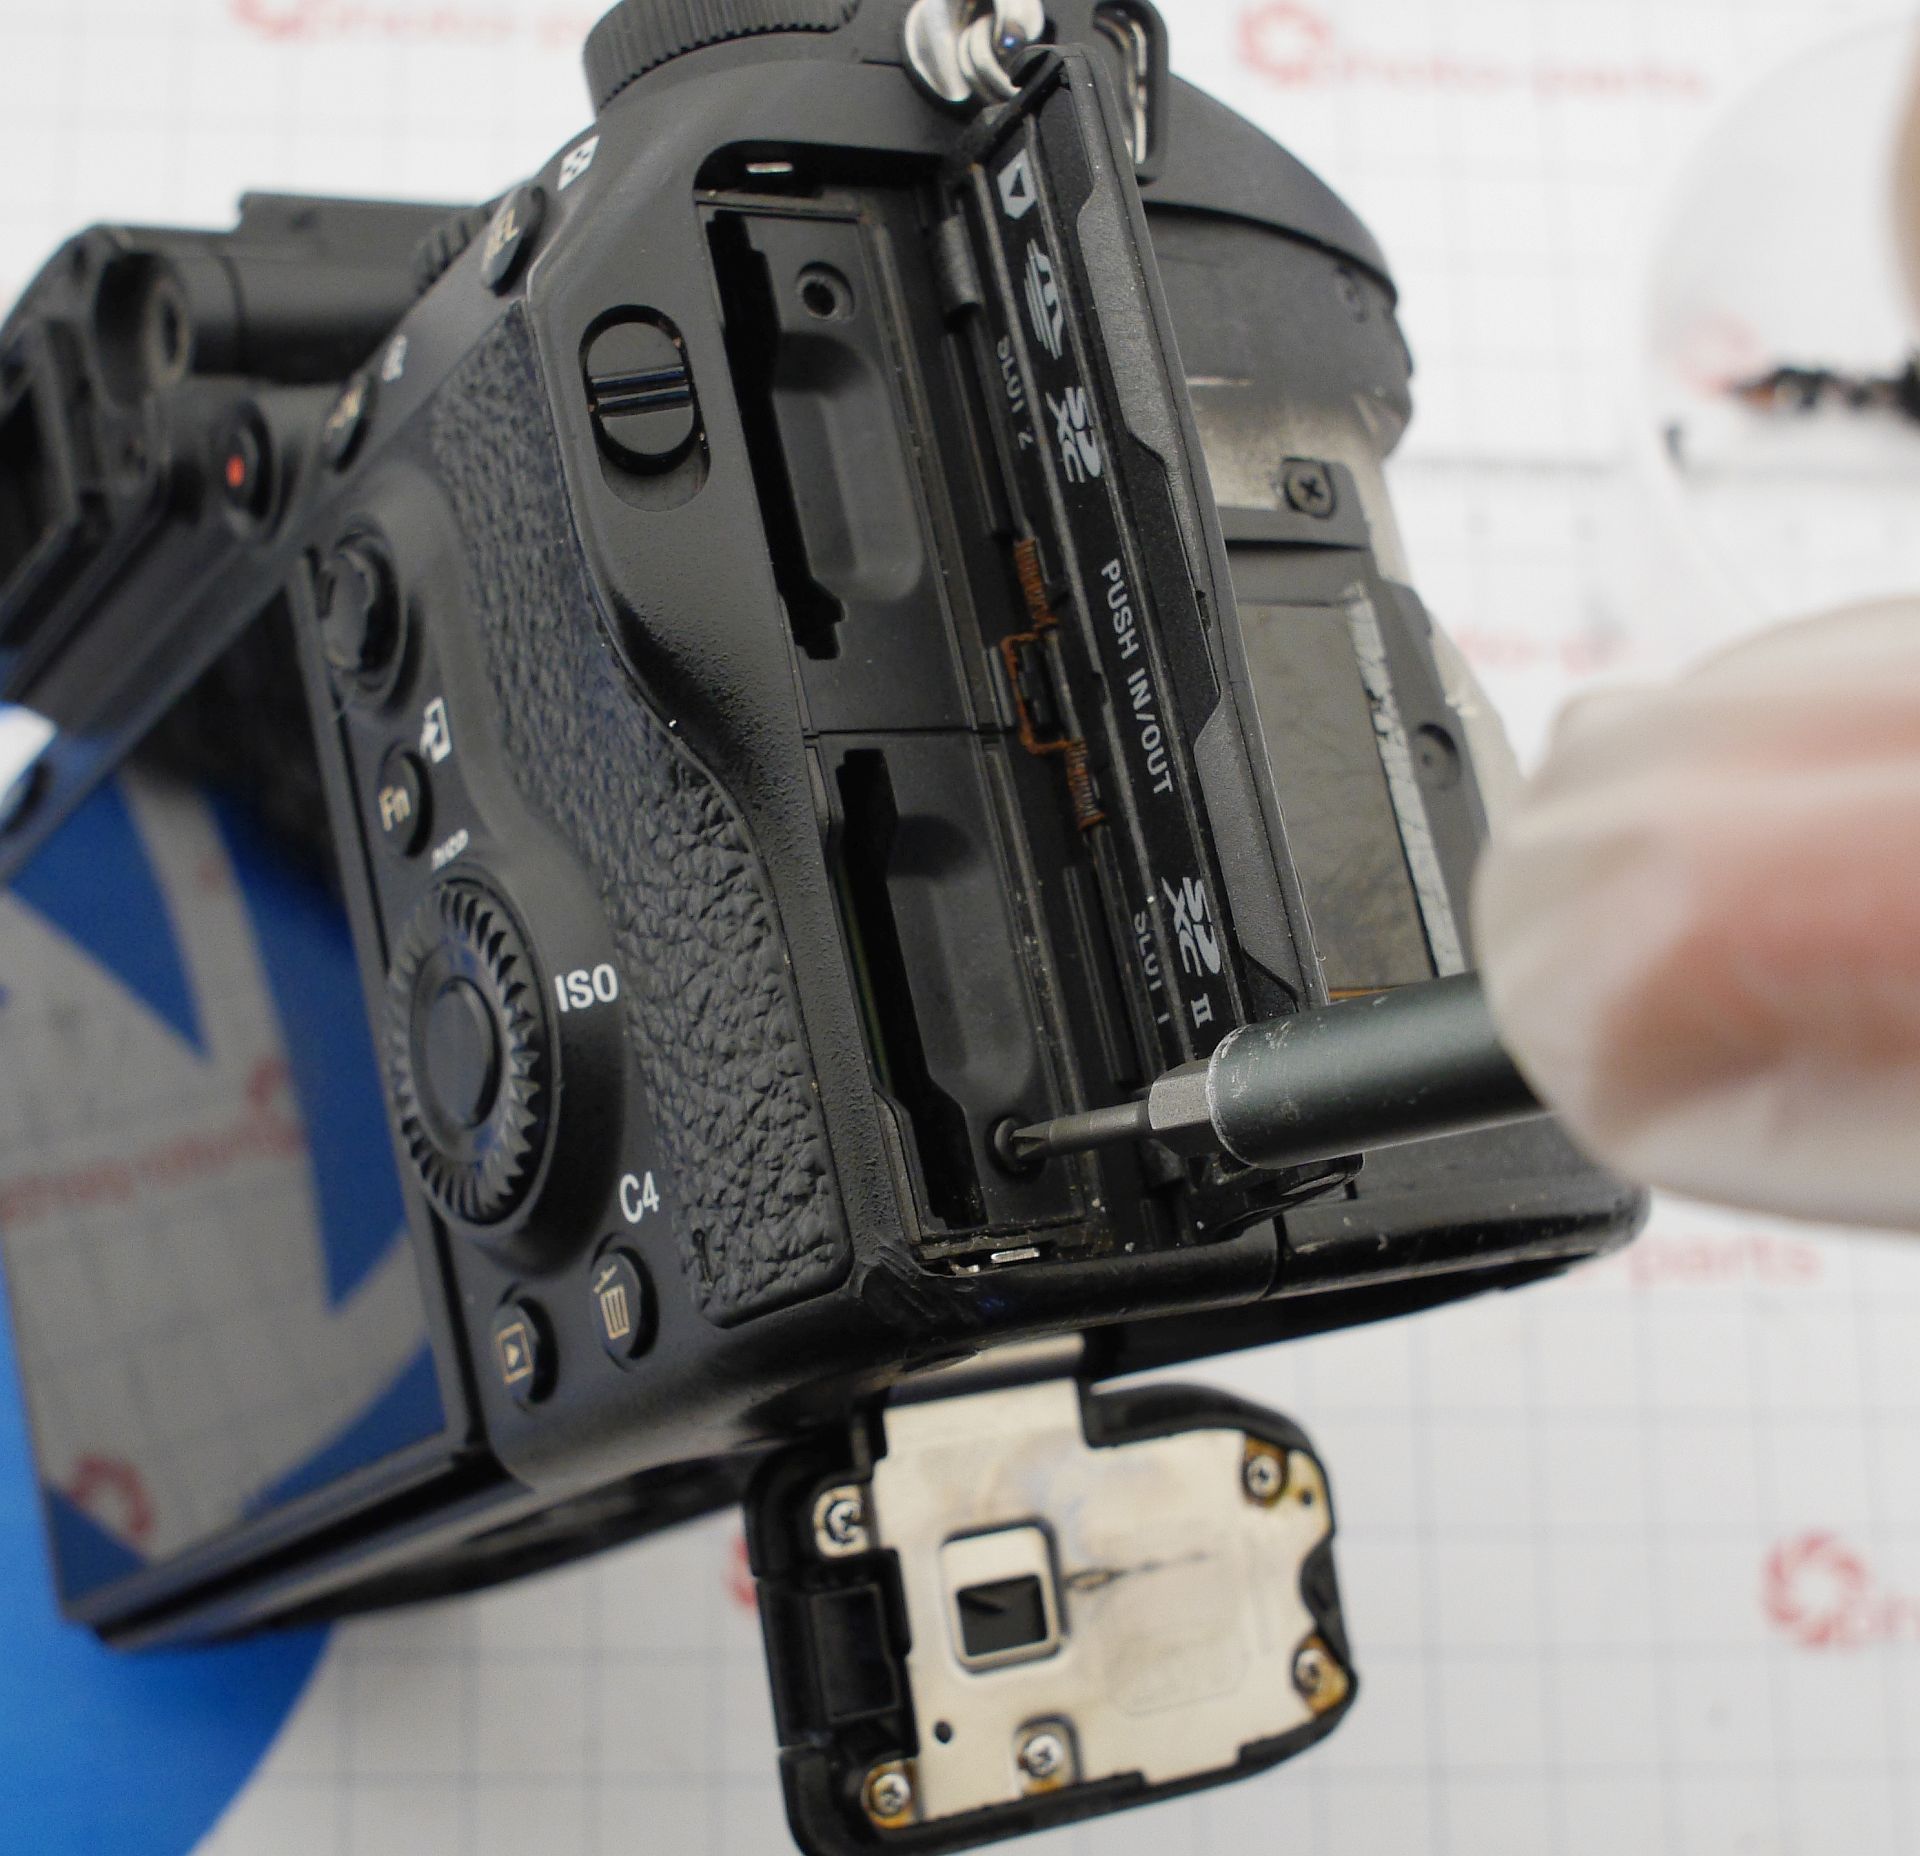
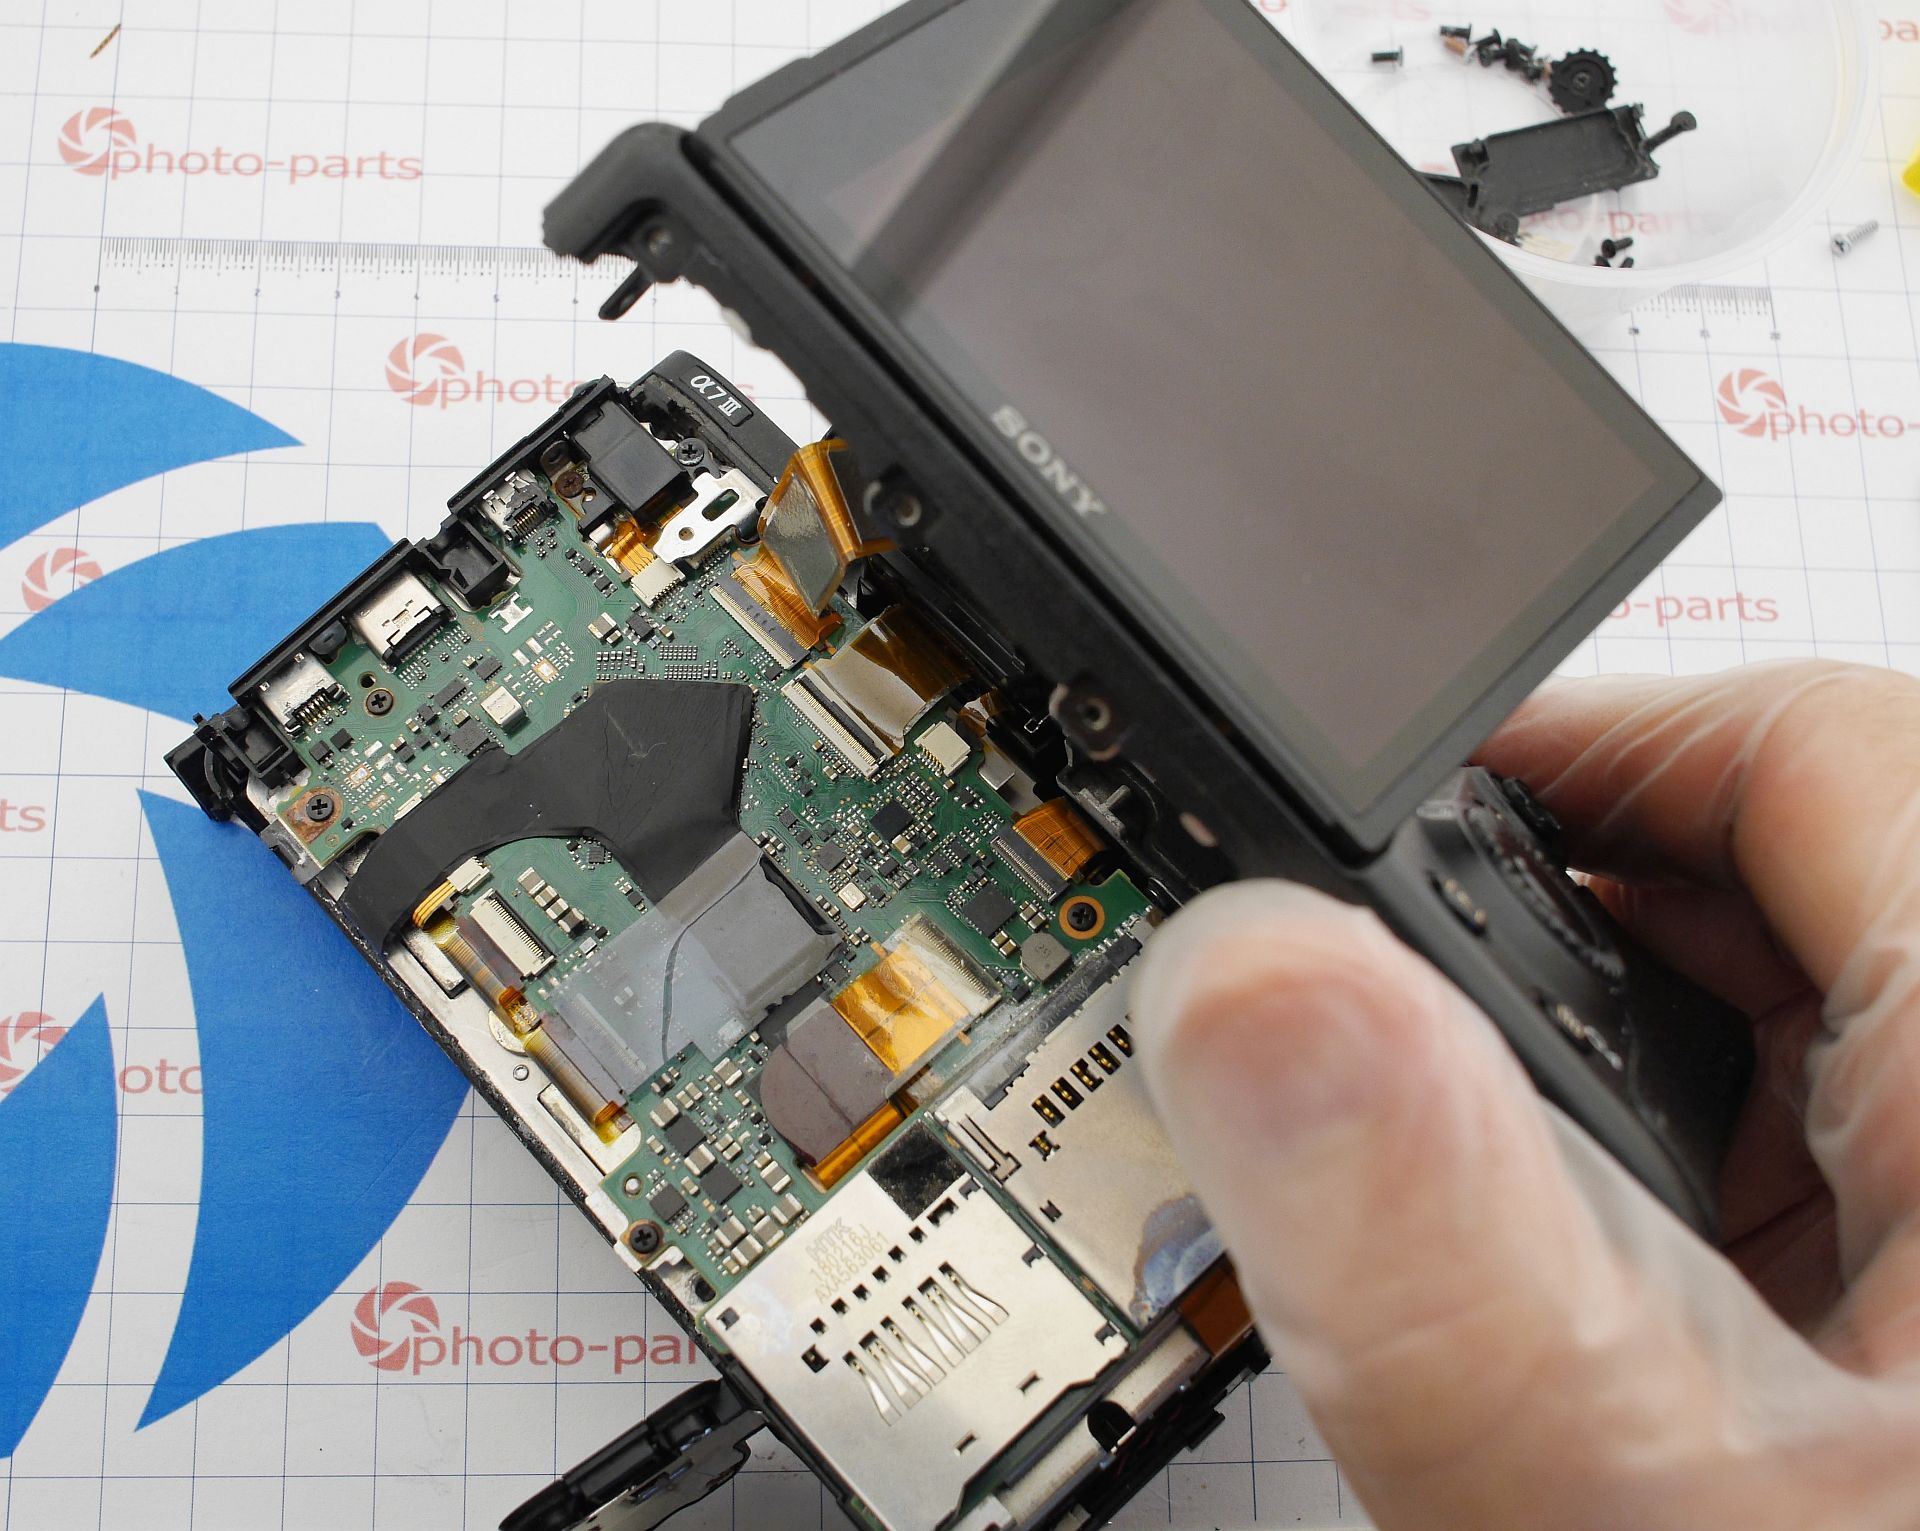
Carefully pry the rear panel and slide it toward the viewfinder - there’s a flex cable to disconnect:
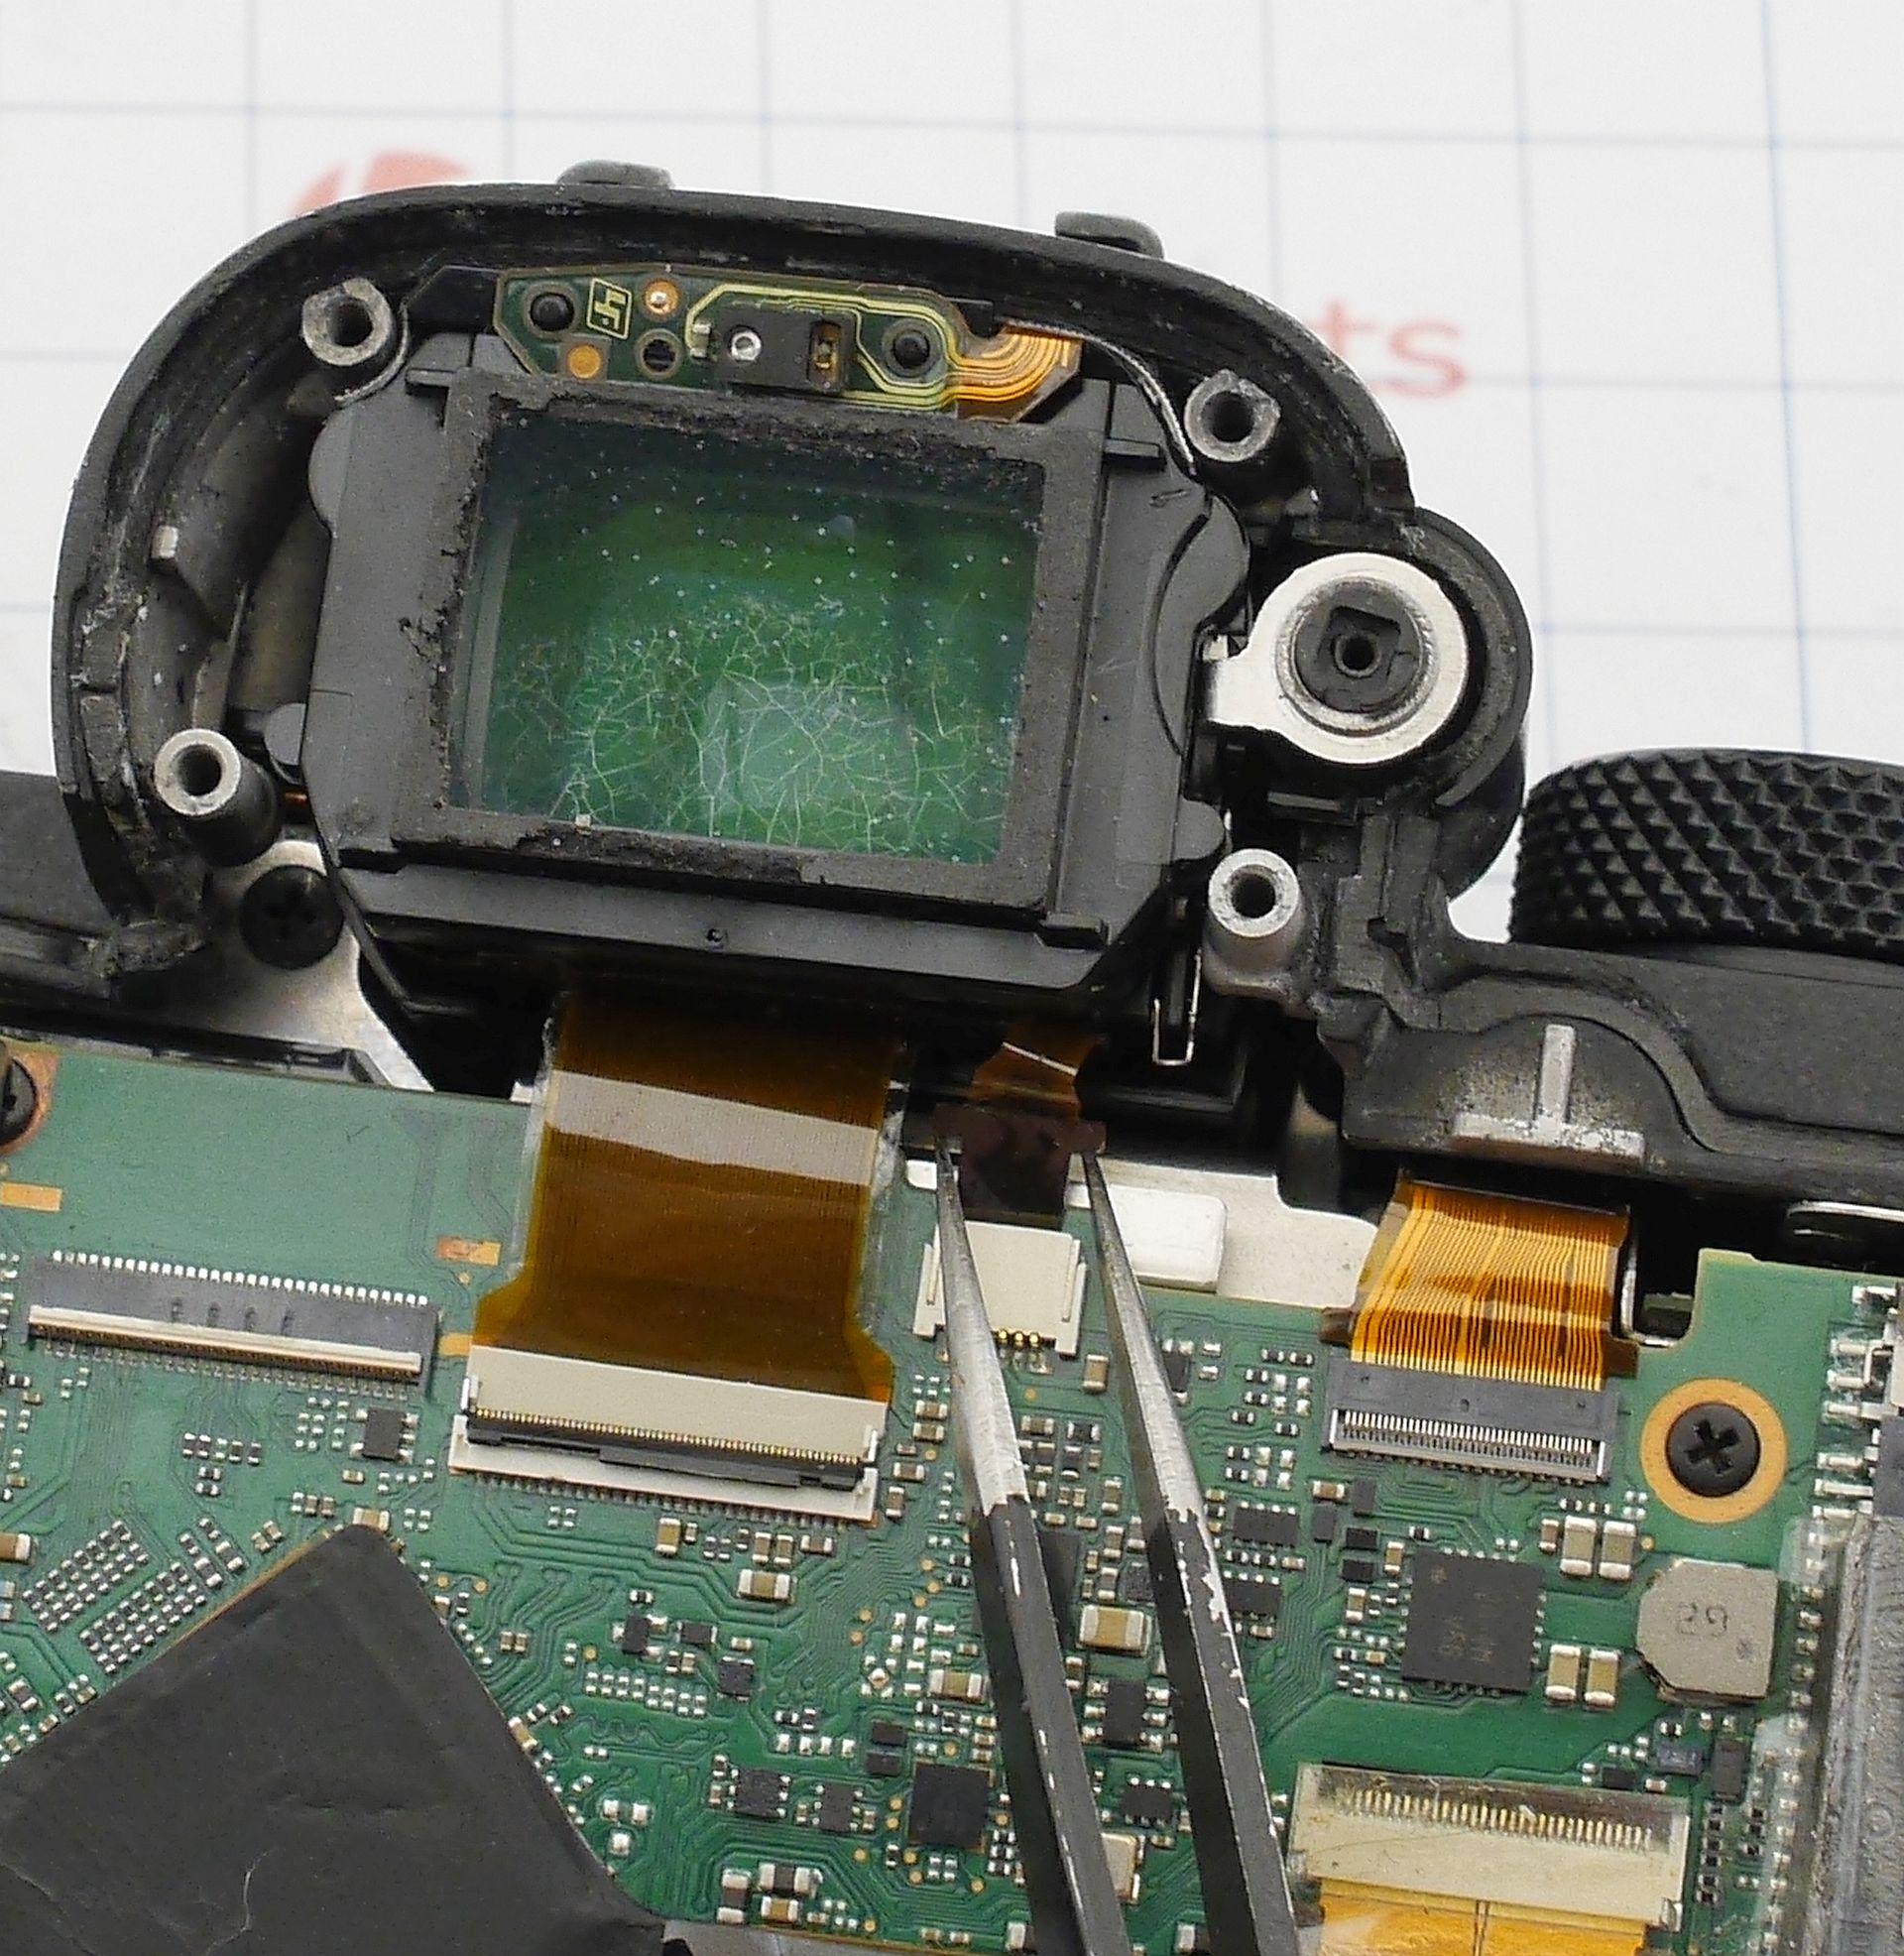
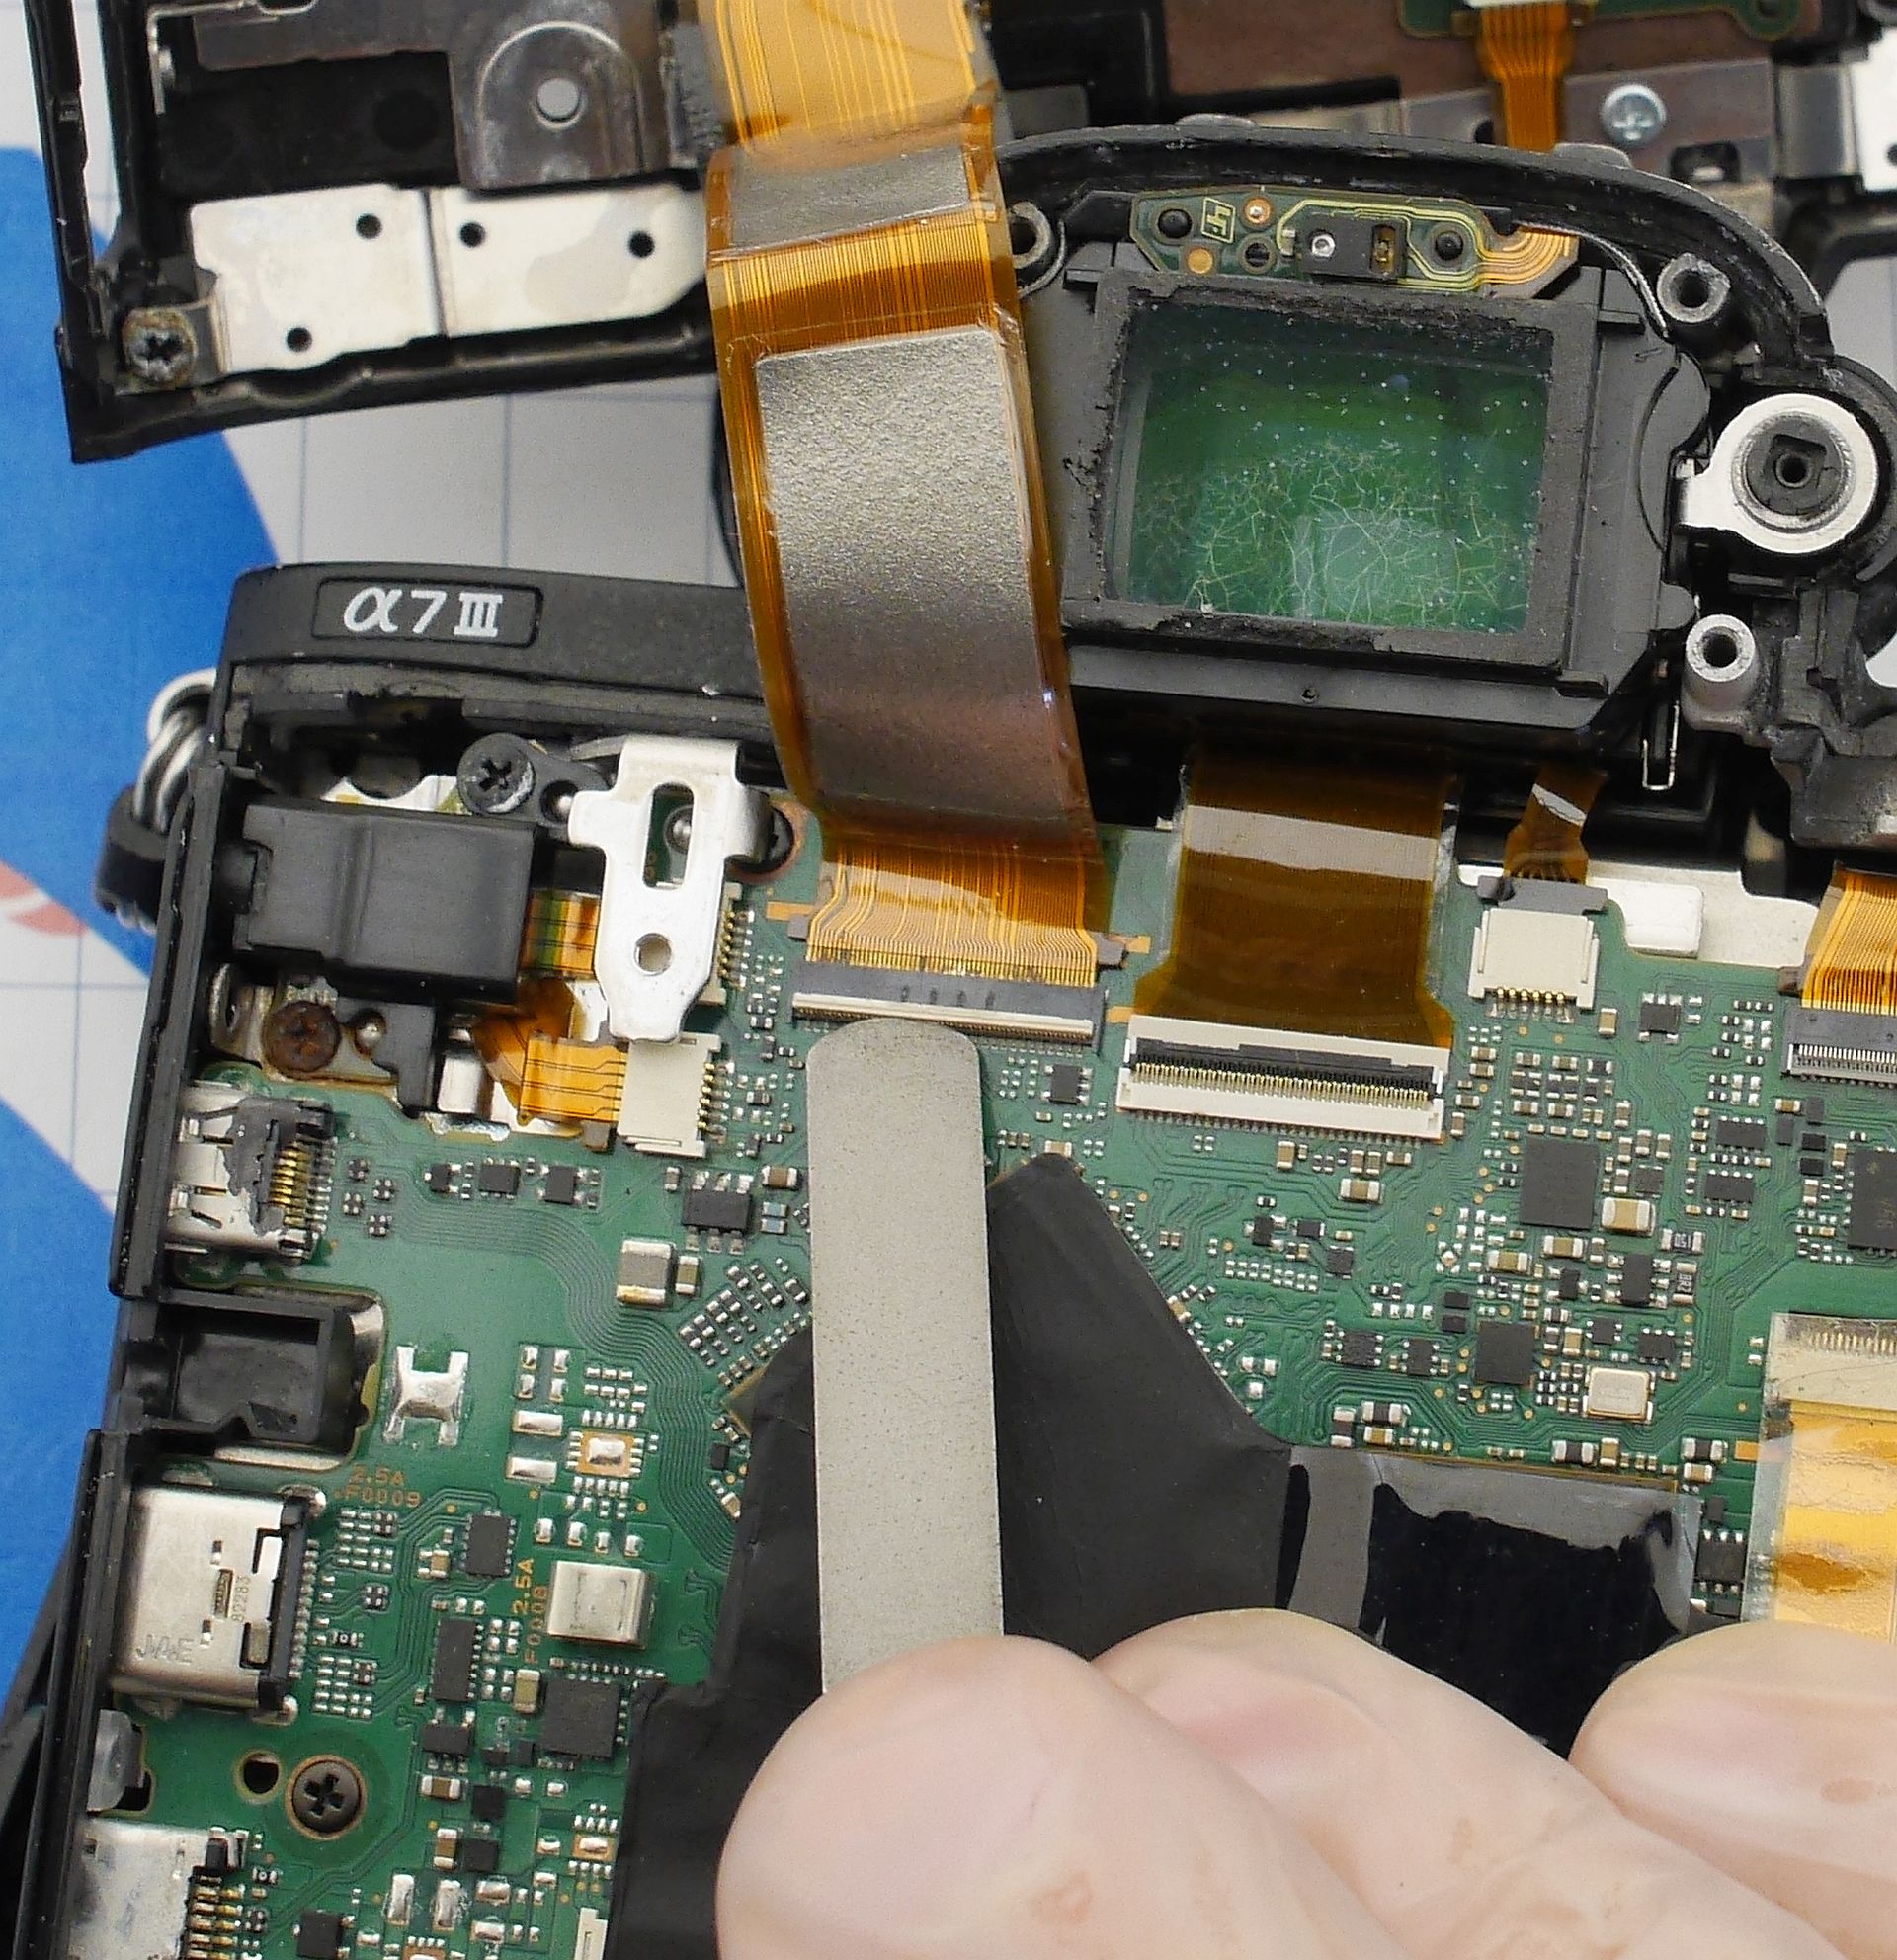 First surprise on closer inspection: the EVF lenses have strange streaks.
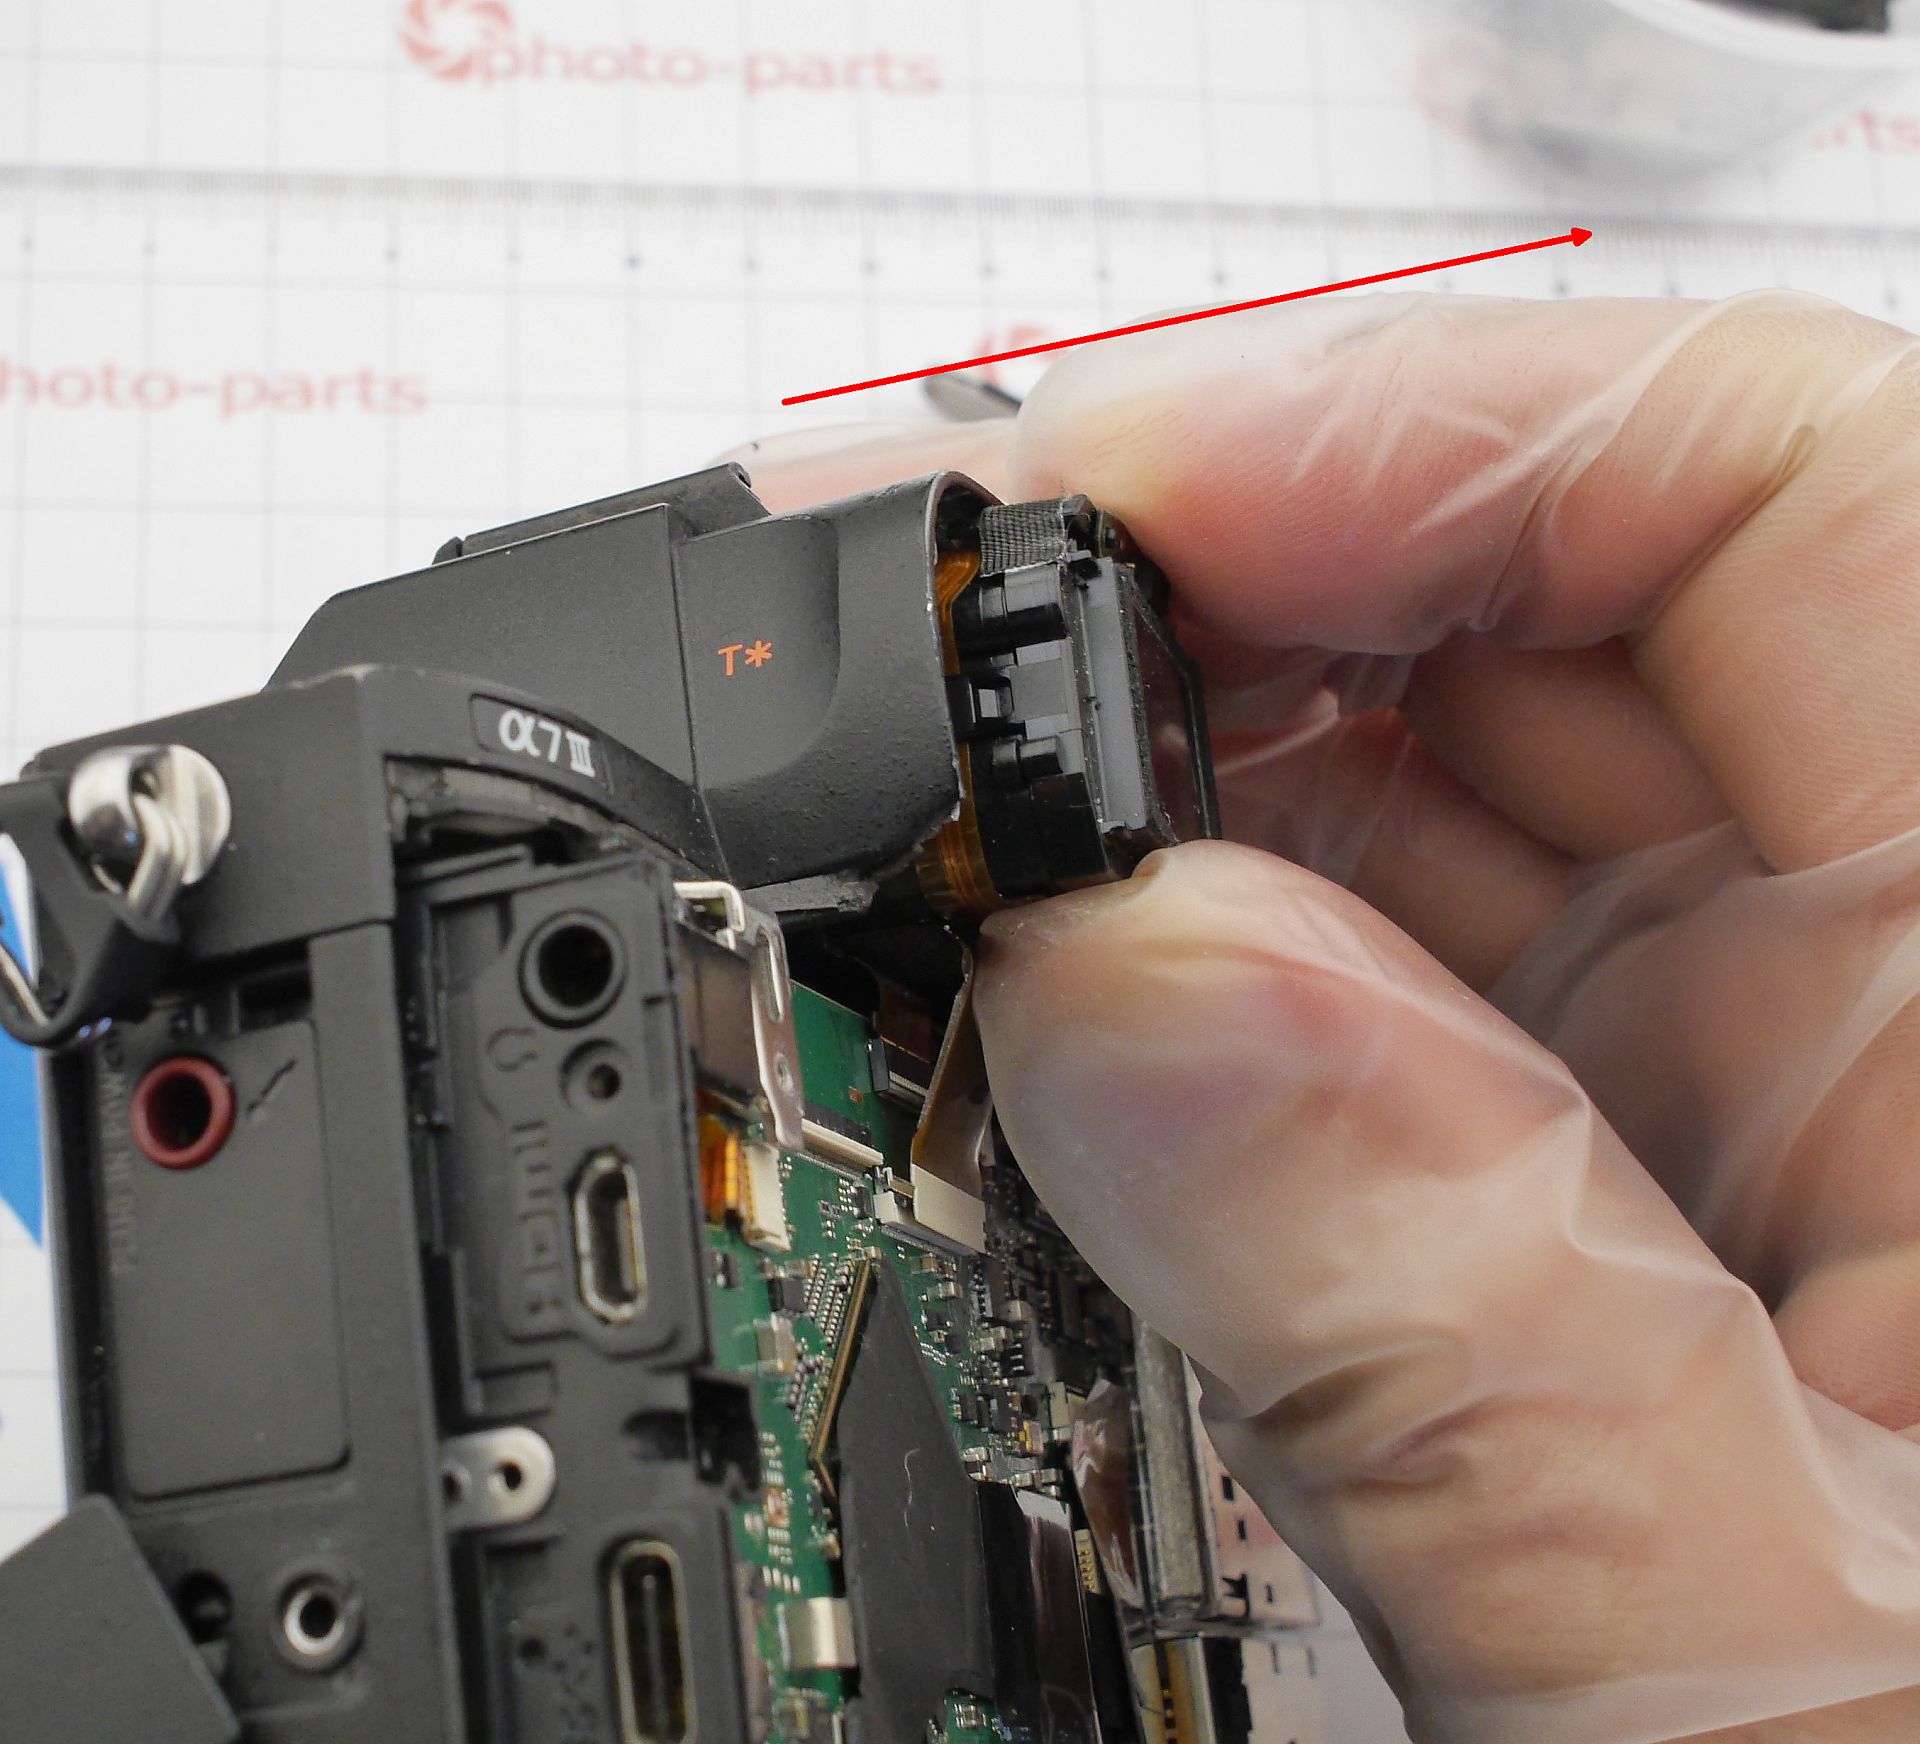
 To access the mainboard, we need to remove the top panel. That starts with removing the EVF: disconnect its flex cables and gently pull it outward. It’s held by thermal tape and needs some careful wiggling.
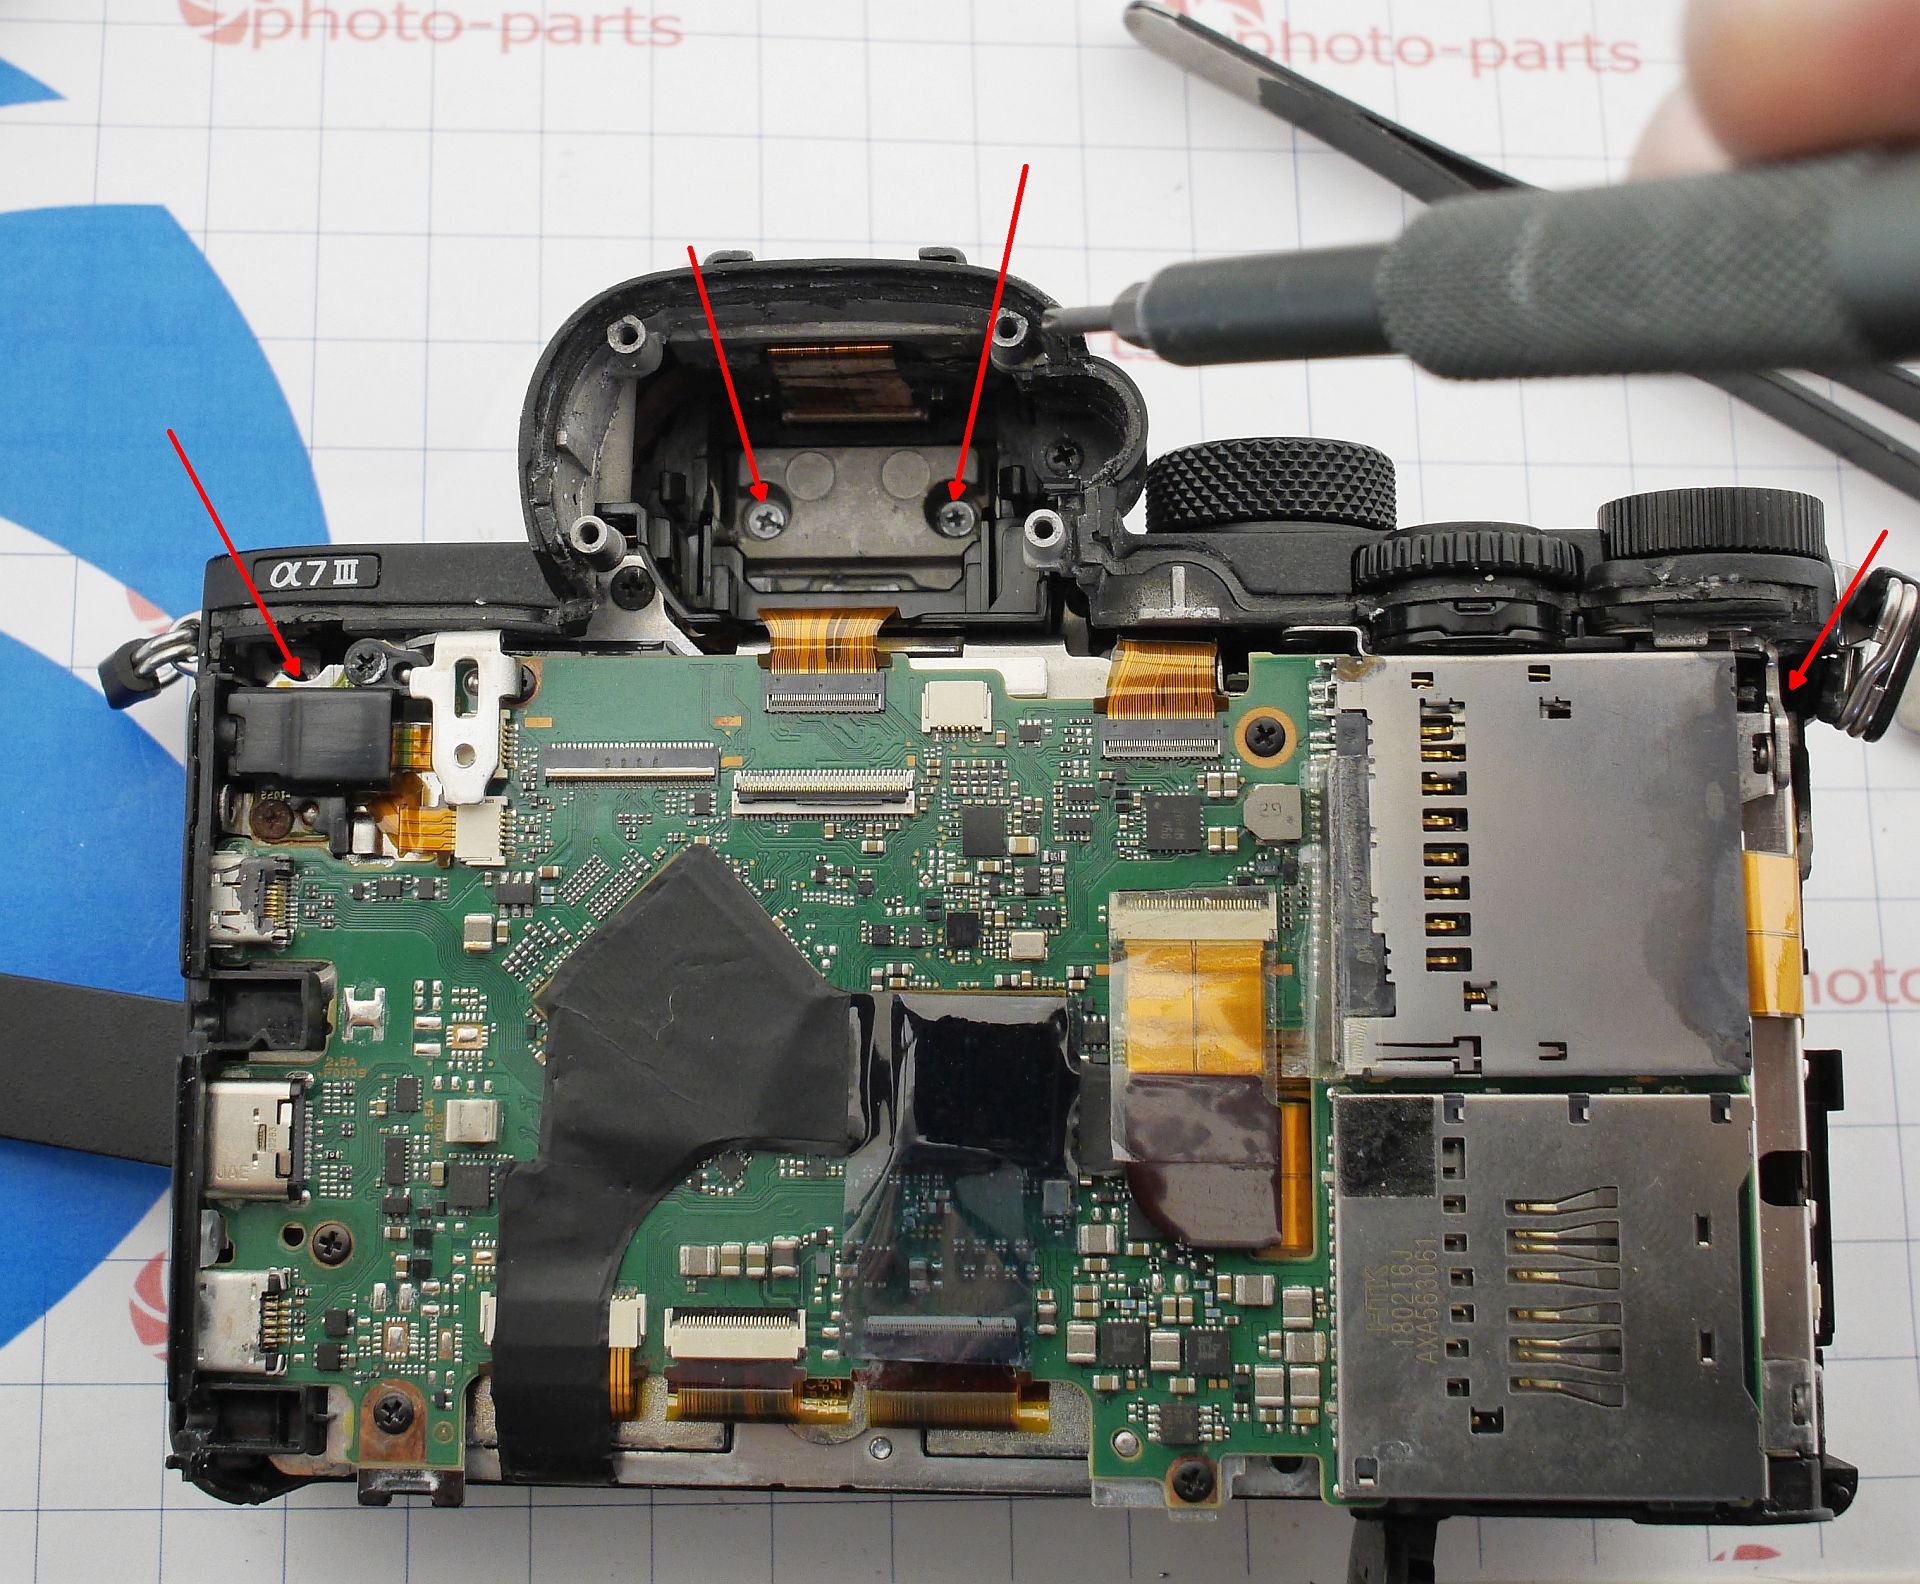
Unscrew the 4 top panel screws (highlighted, silver):
 Two small screws are hidden under the rubber grip:
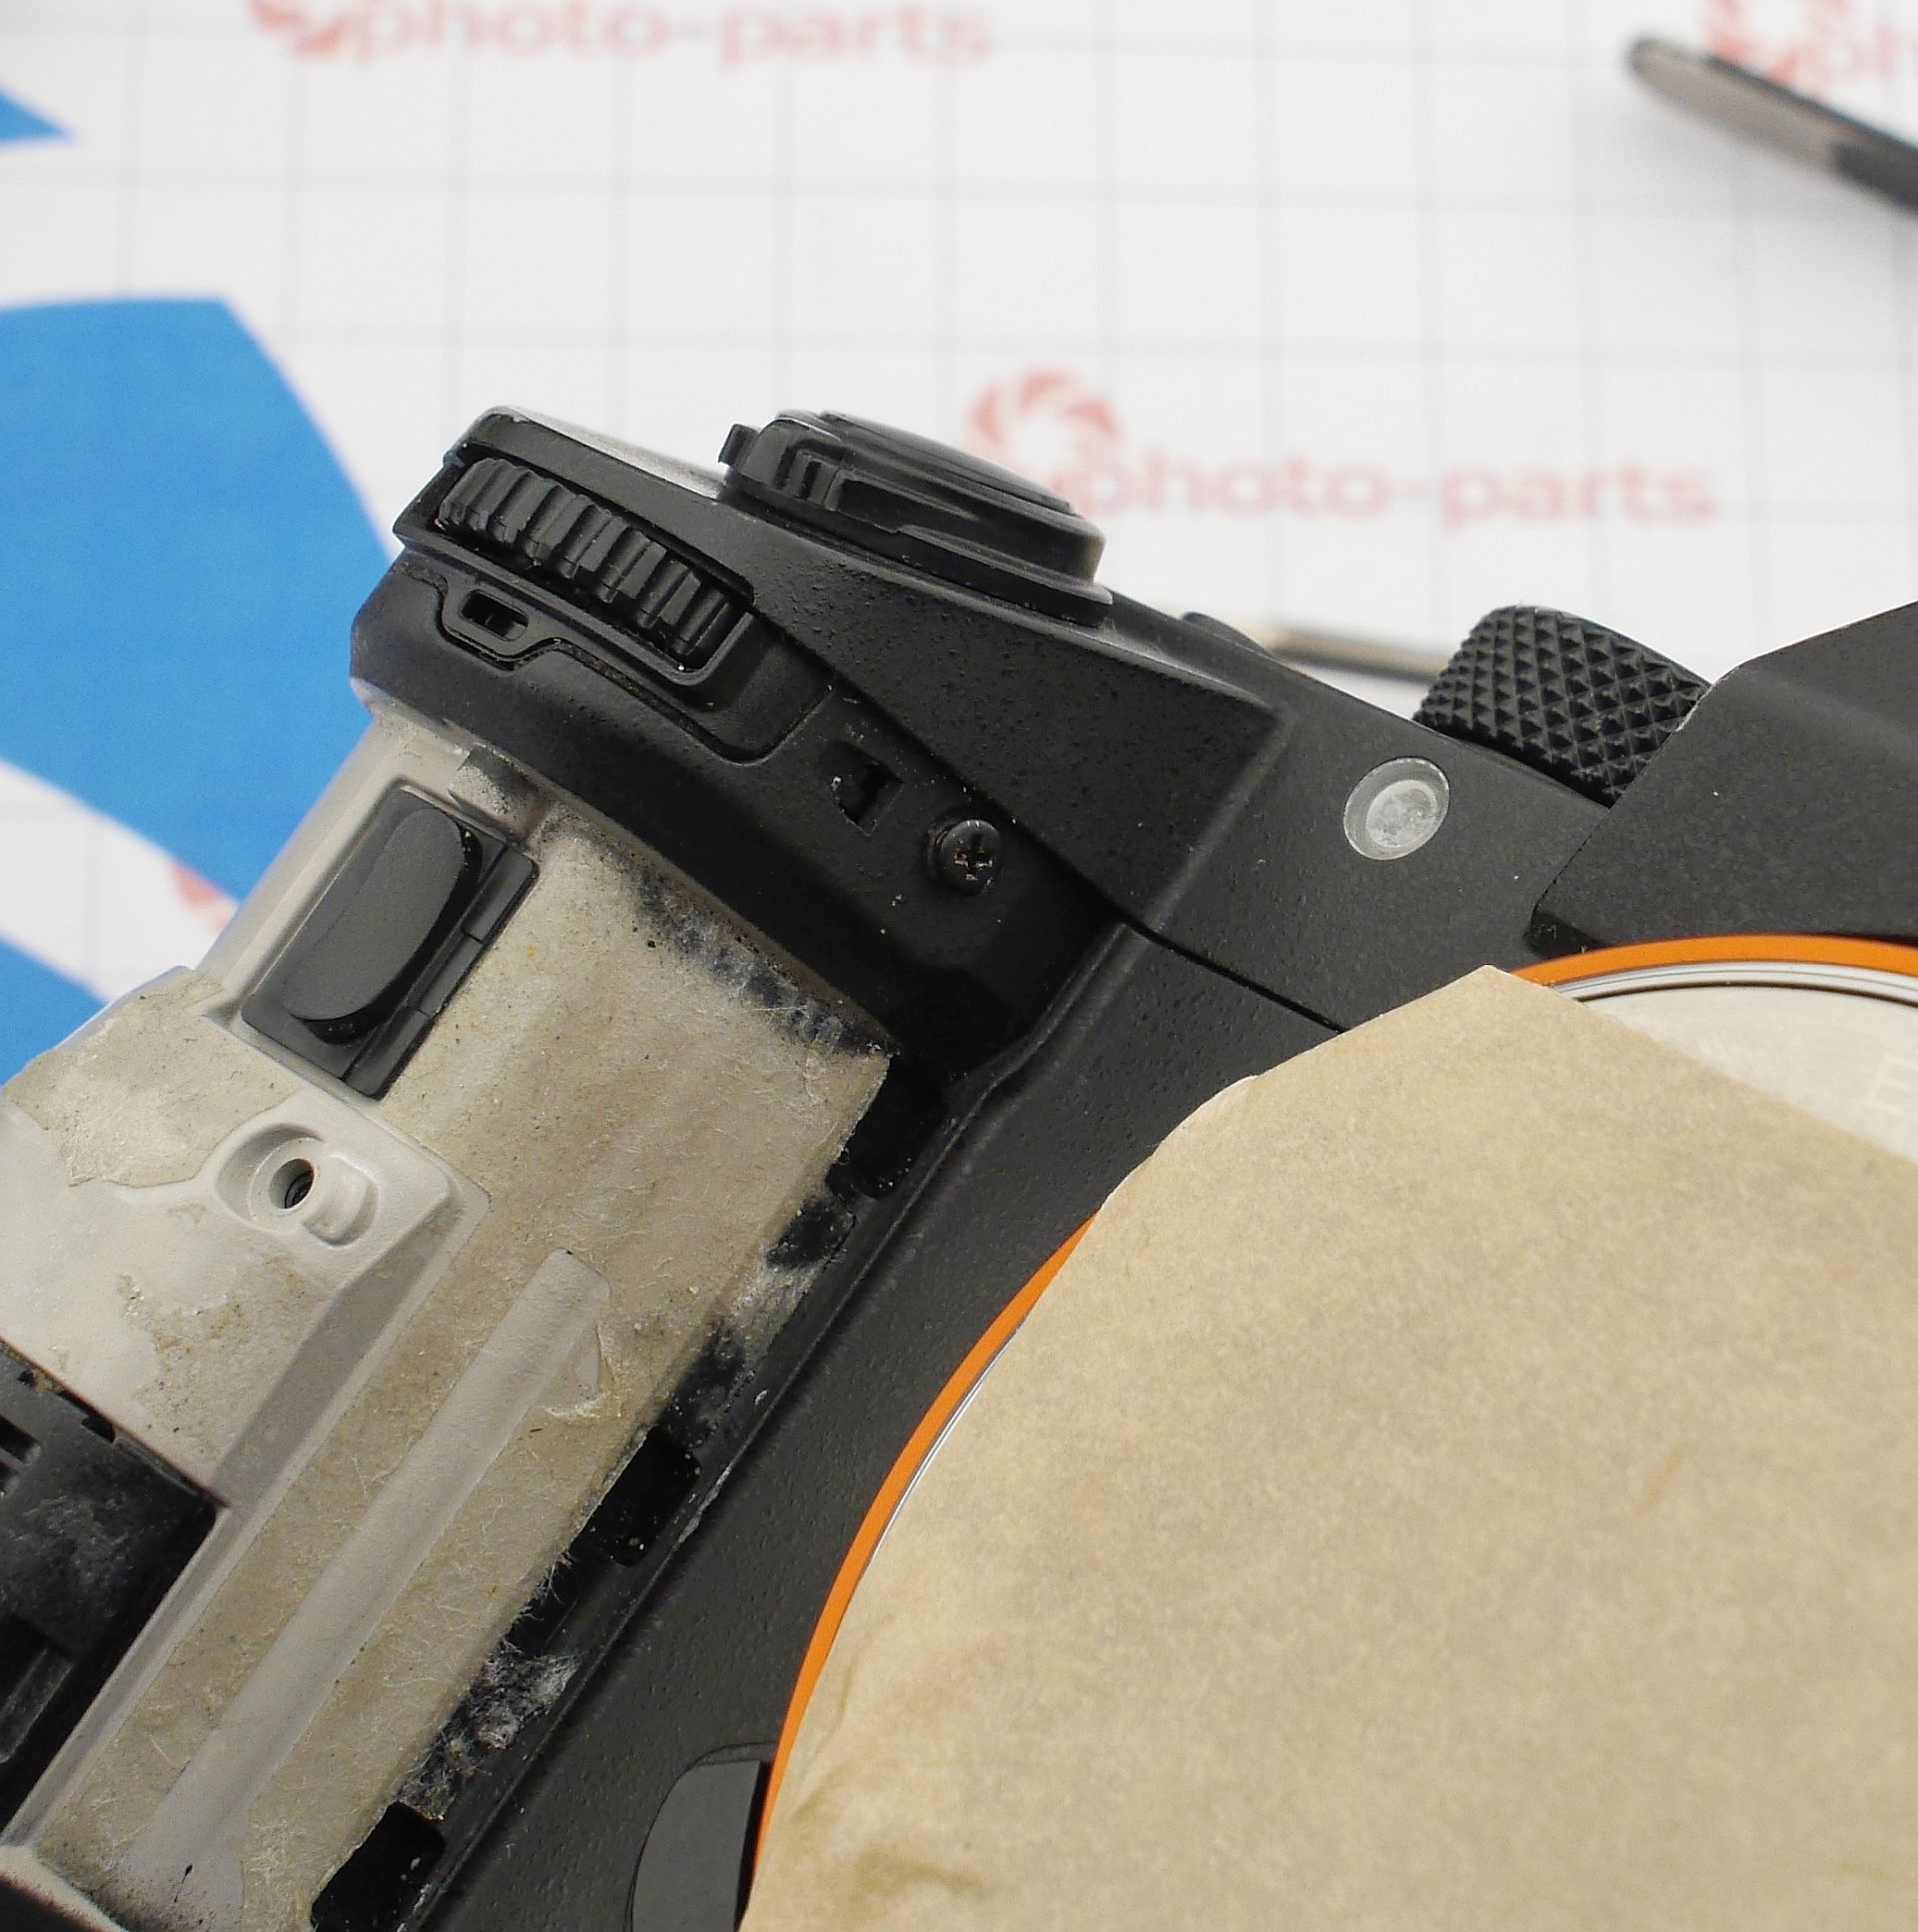
Now the top panel comes off vertically:
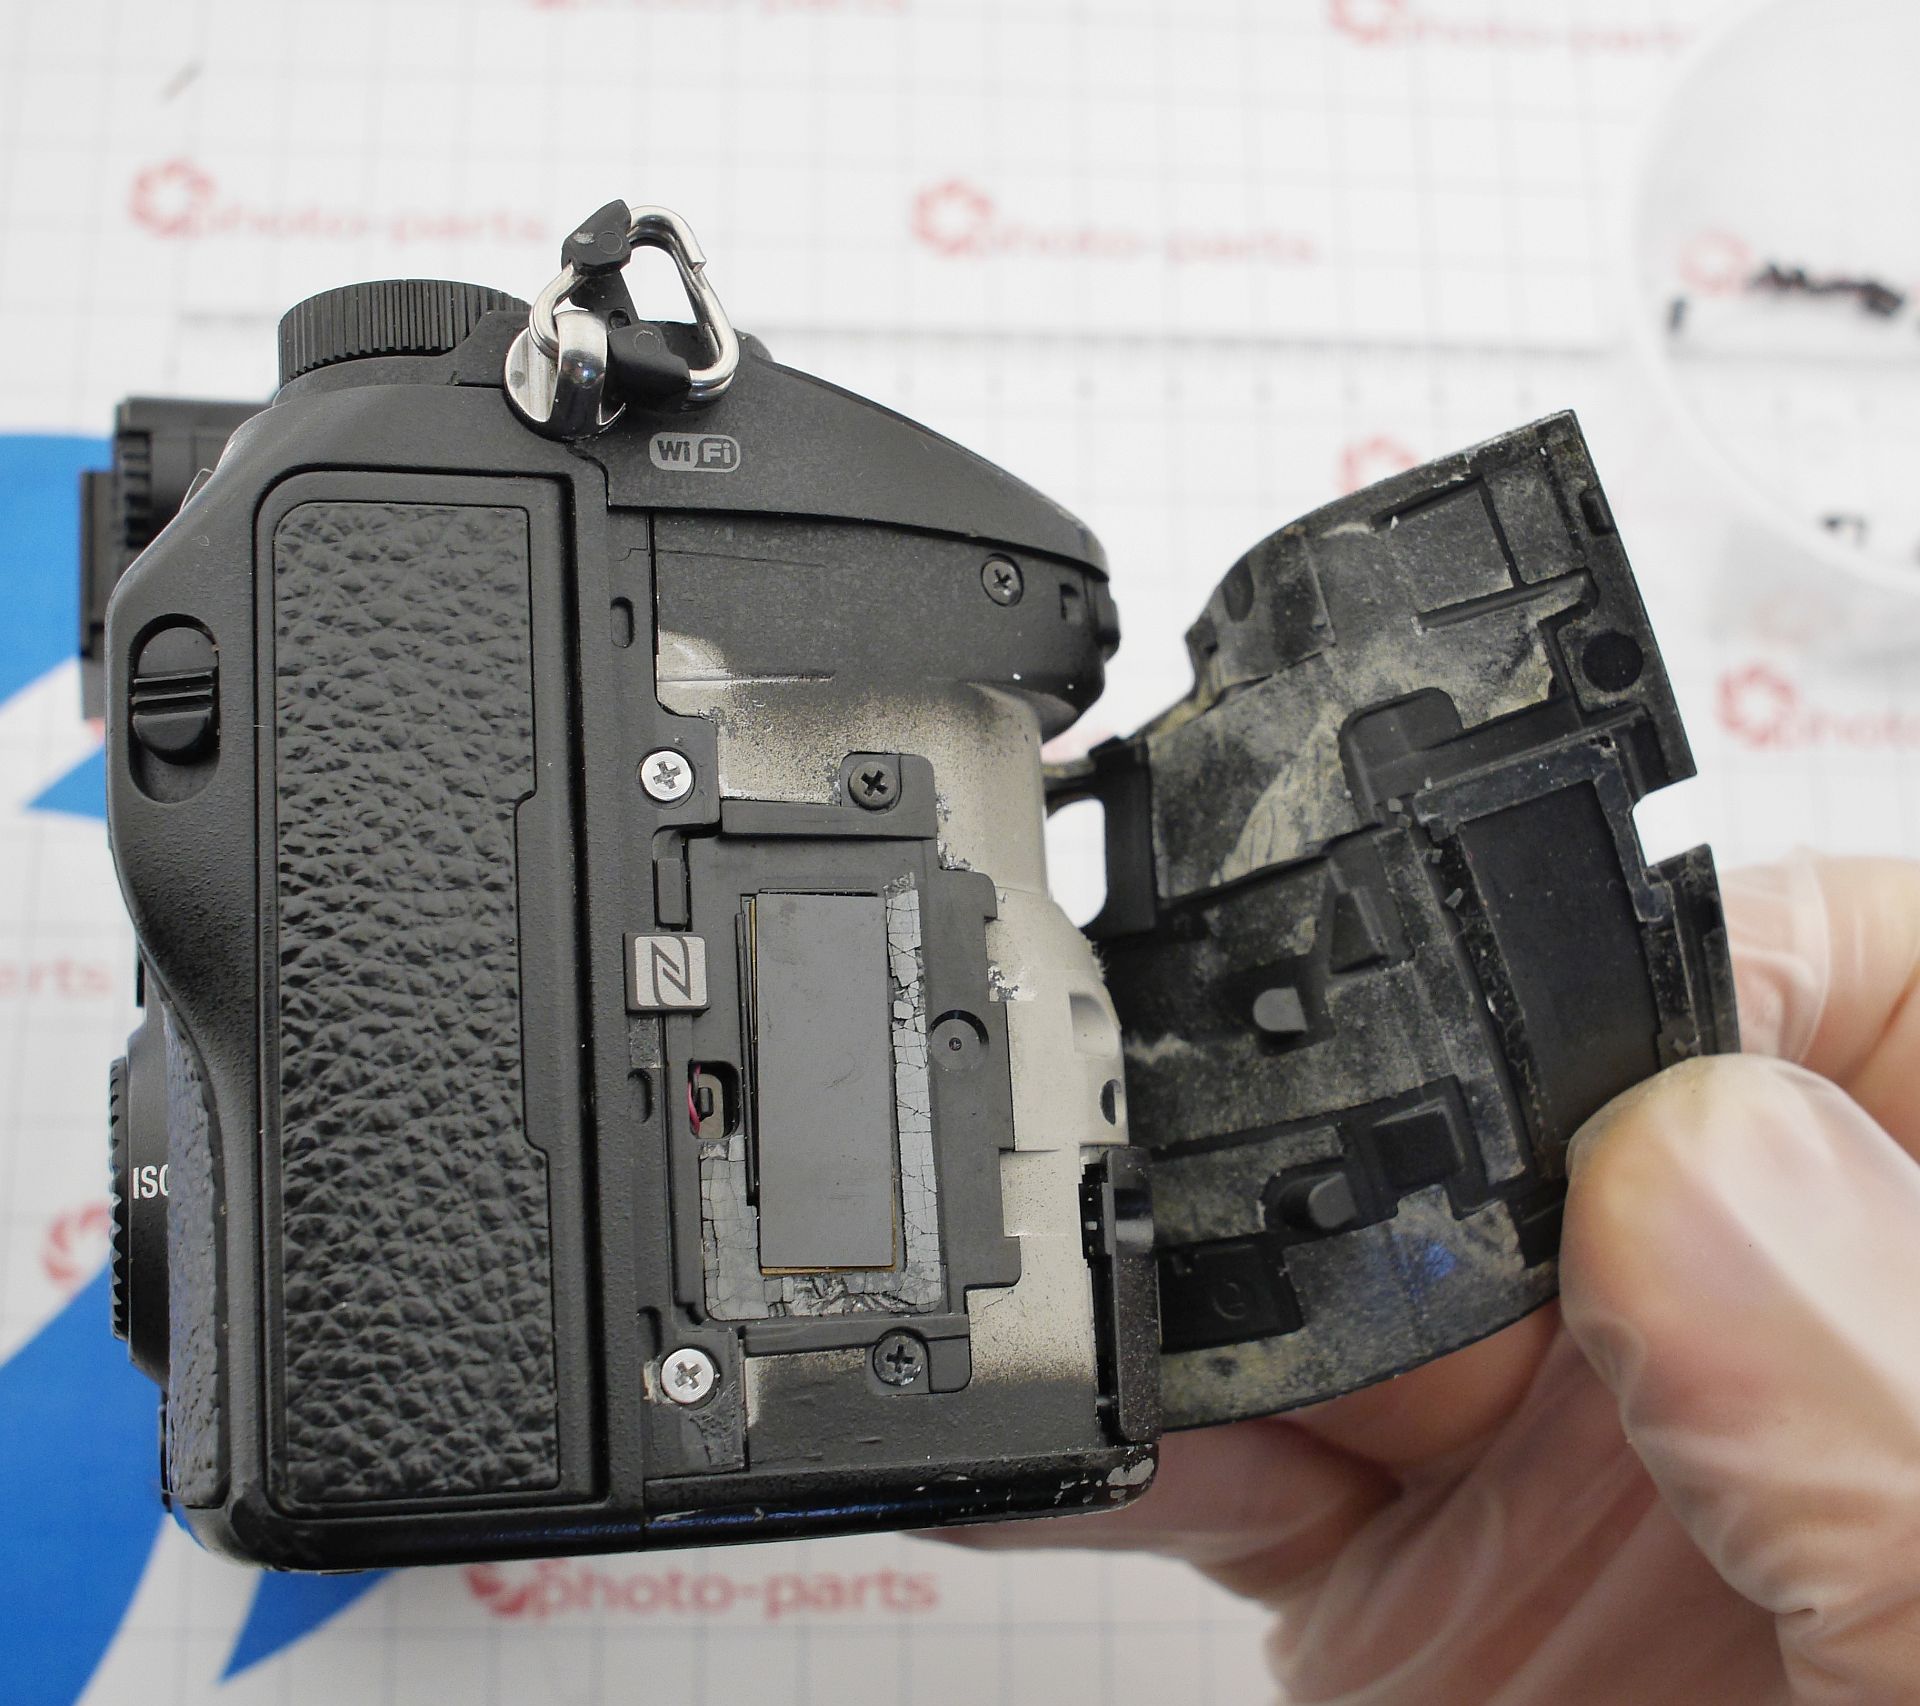
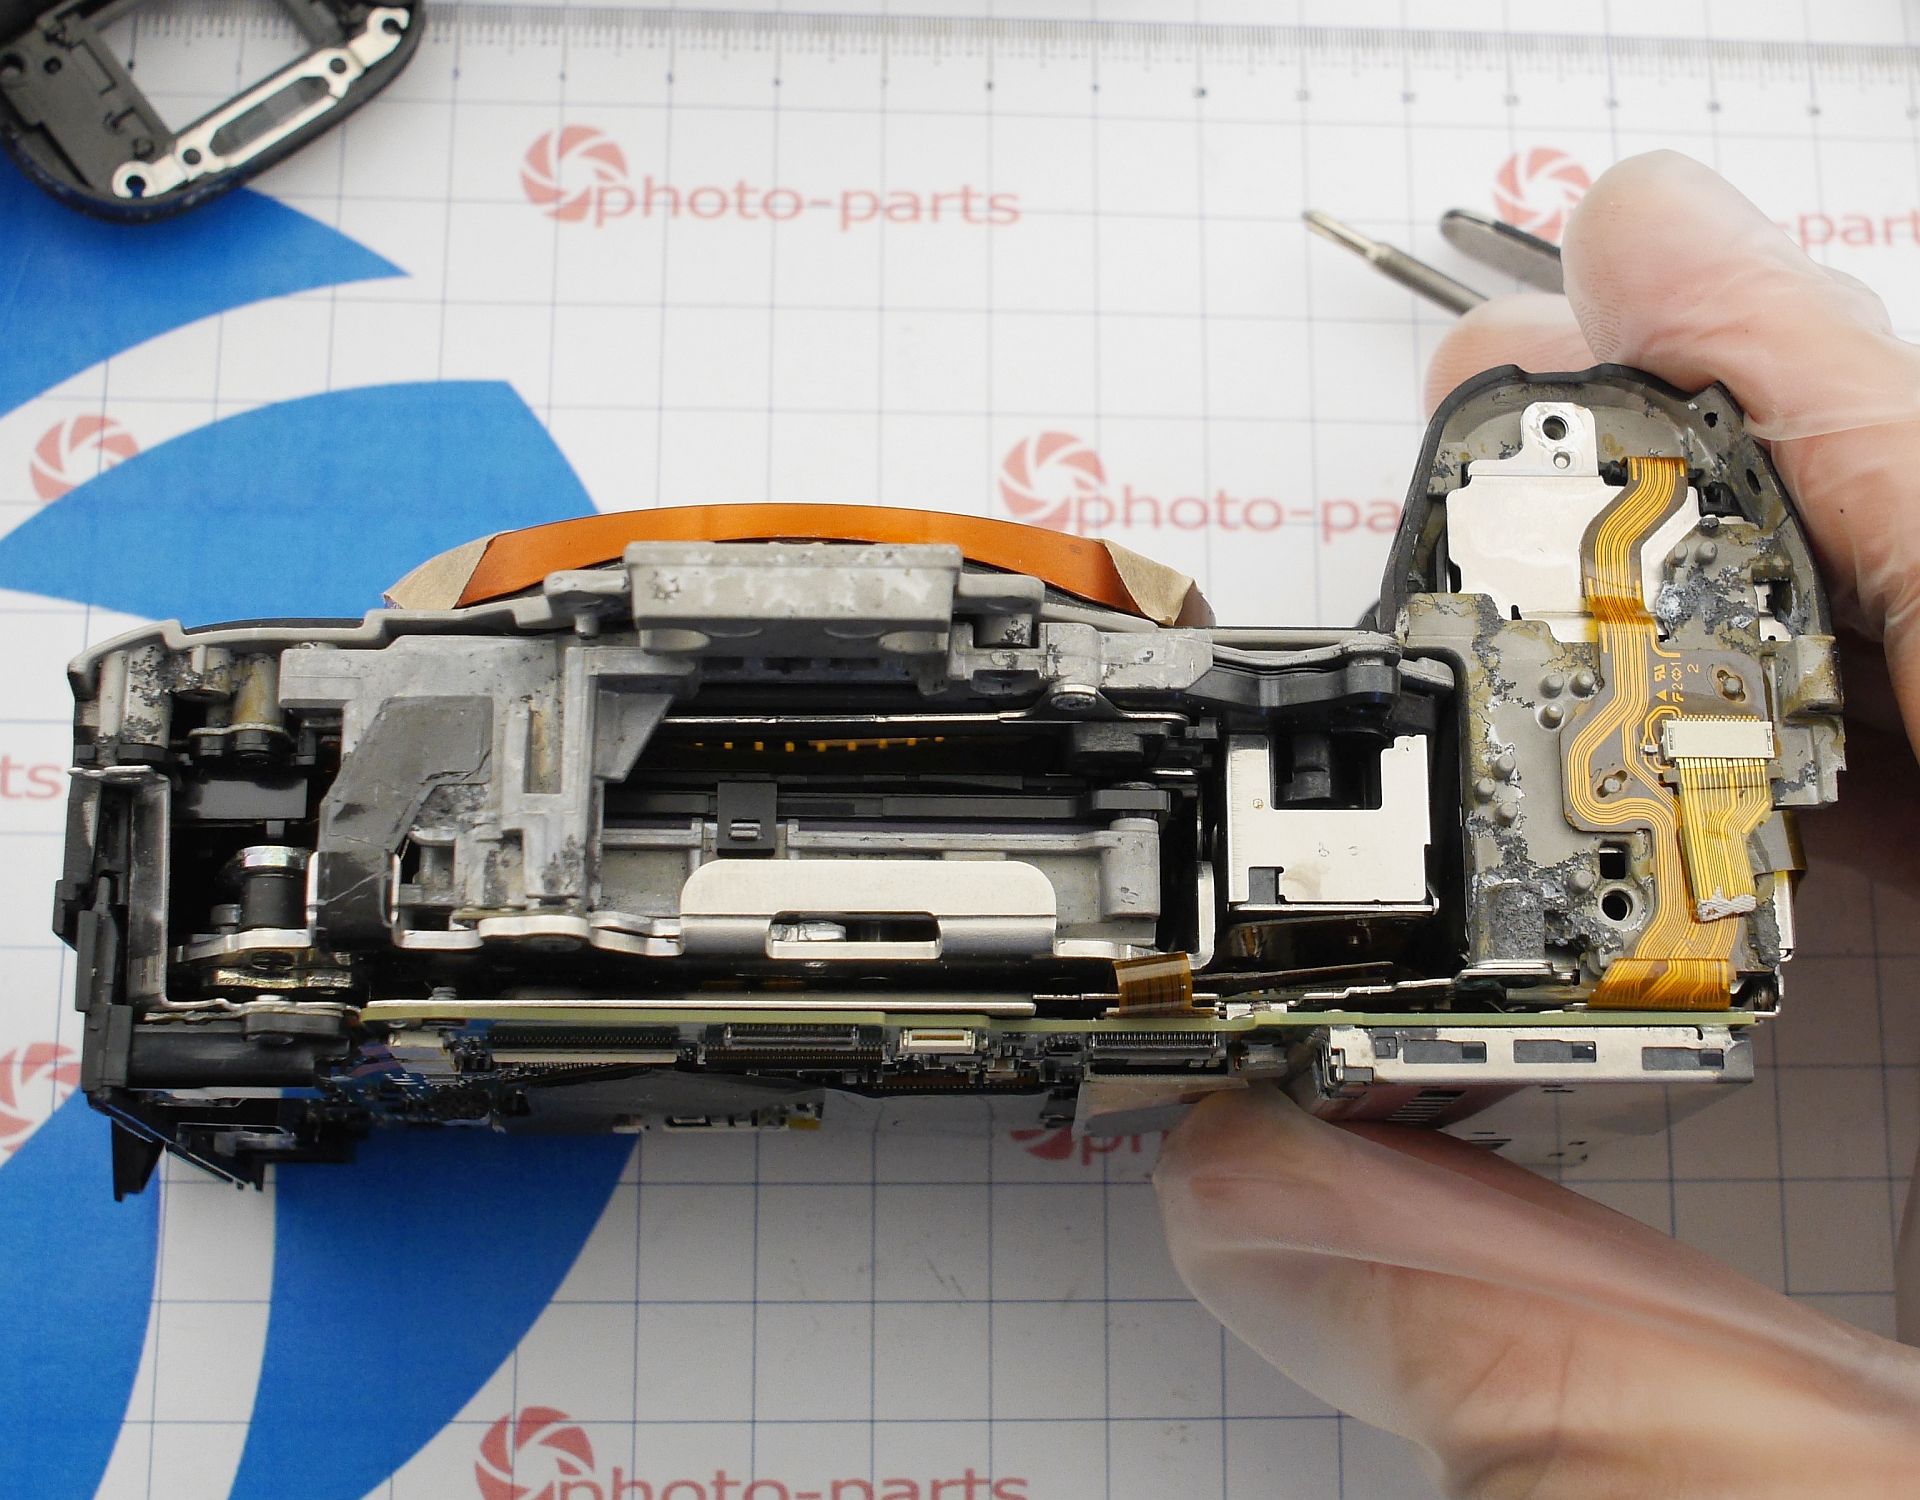
 Yikes - the magnesium frame has taken serious water damage. Oxidation flakes are everywhere - in the battery compartment, around the sensor mount. This won’t be an easy fix.
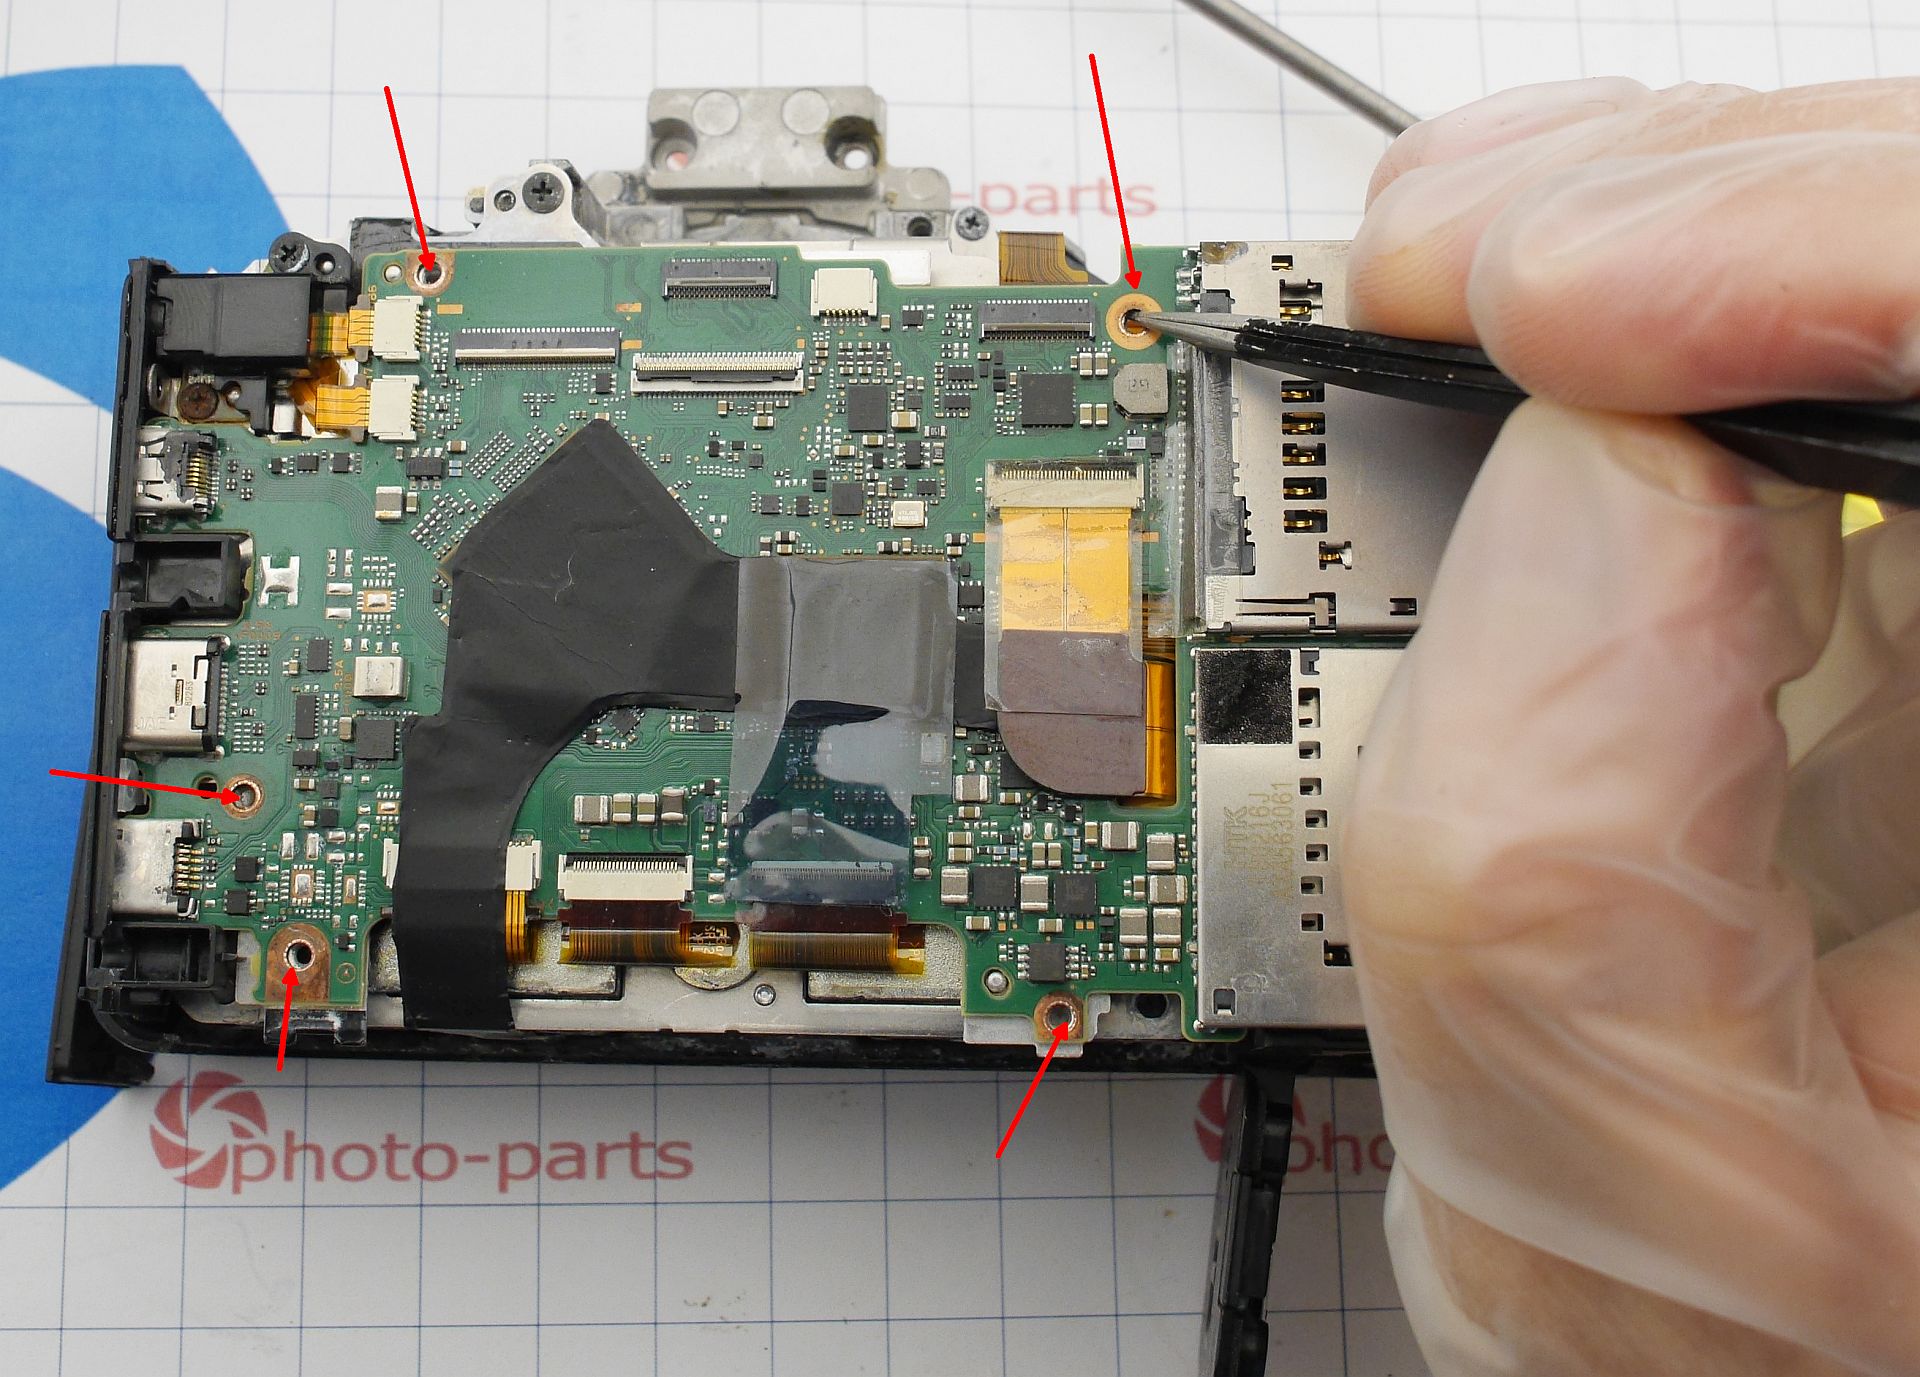
 Time to remove the mainboard. Unscrew everything marked, disconnect flex cables, and gently peel off the thermal film. Oh - one edge is already torn. First evidence that someone’s been inside. It won’t be the last.
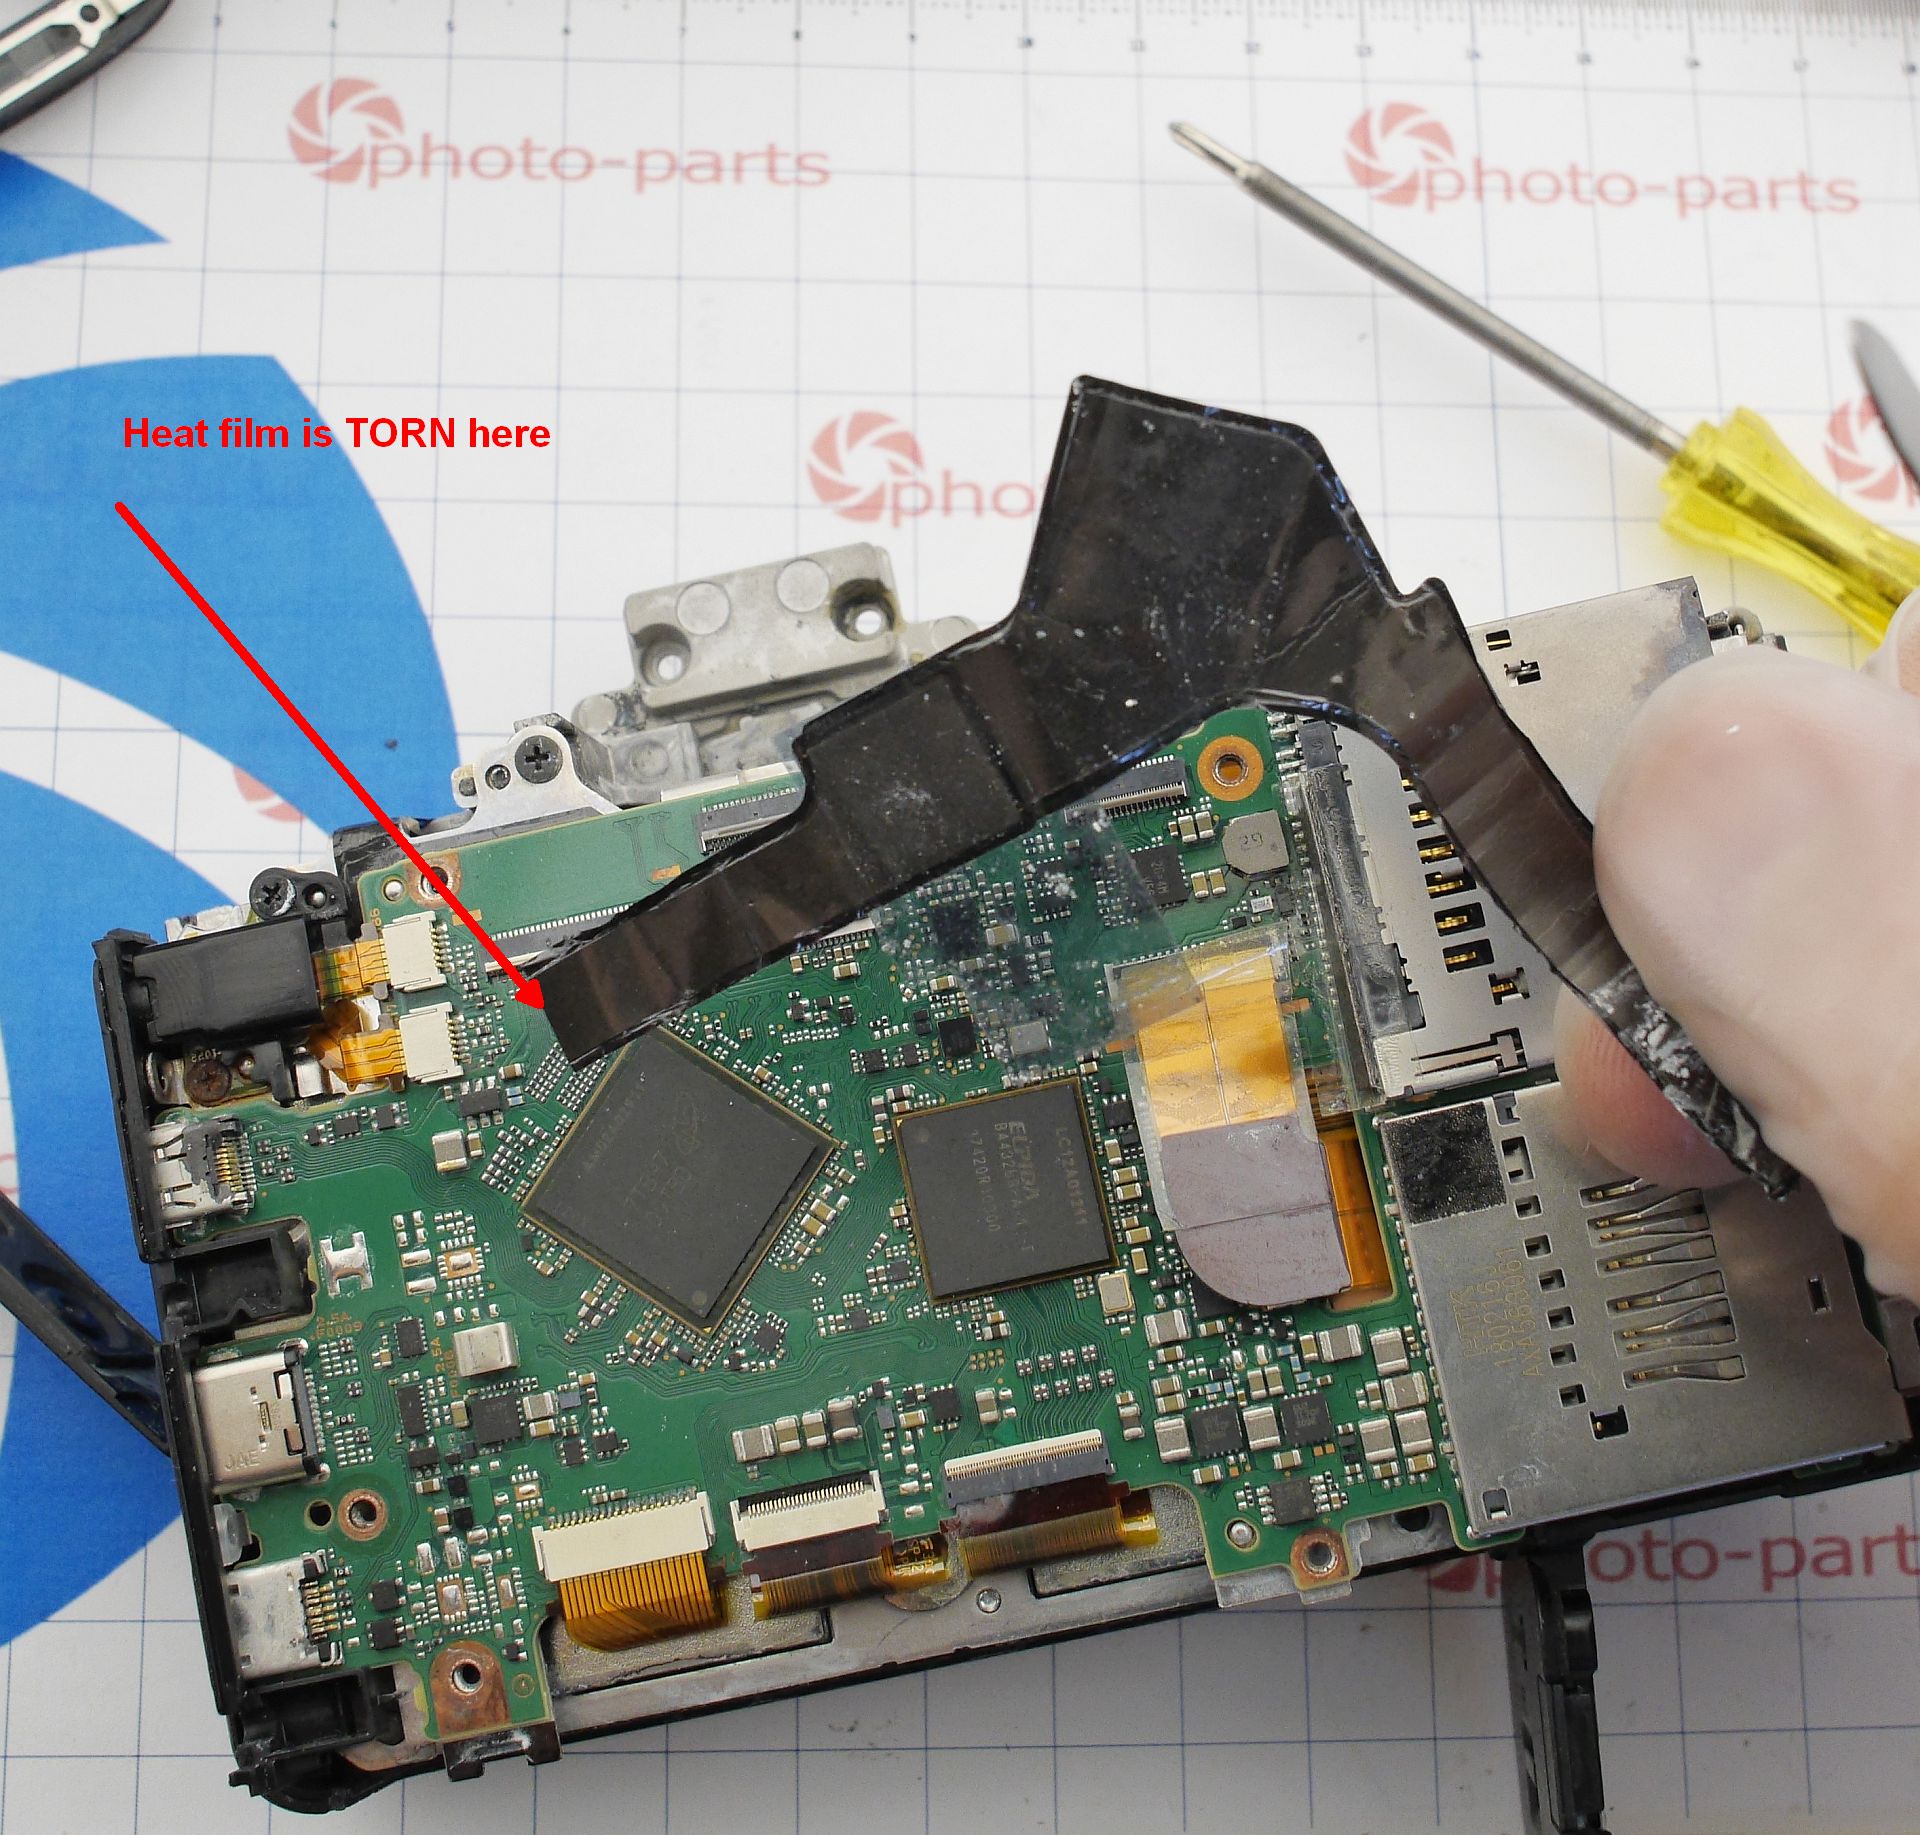
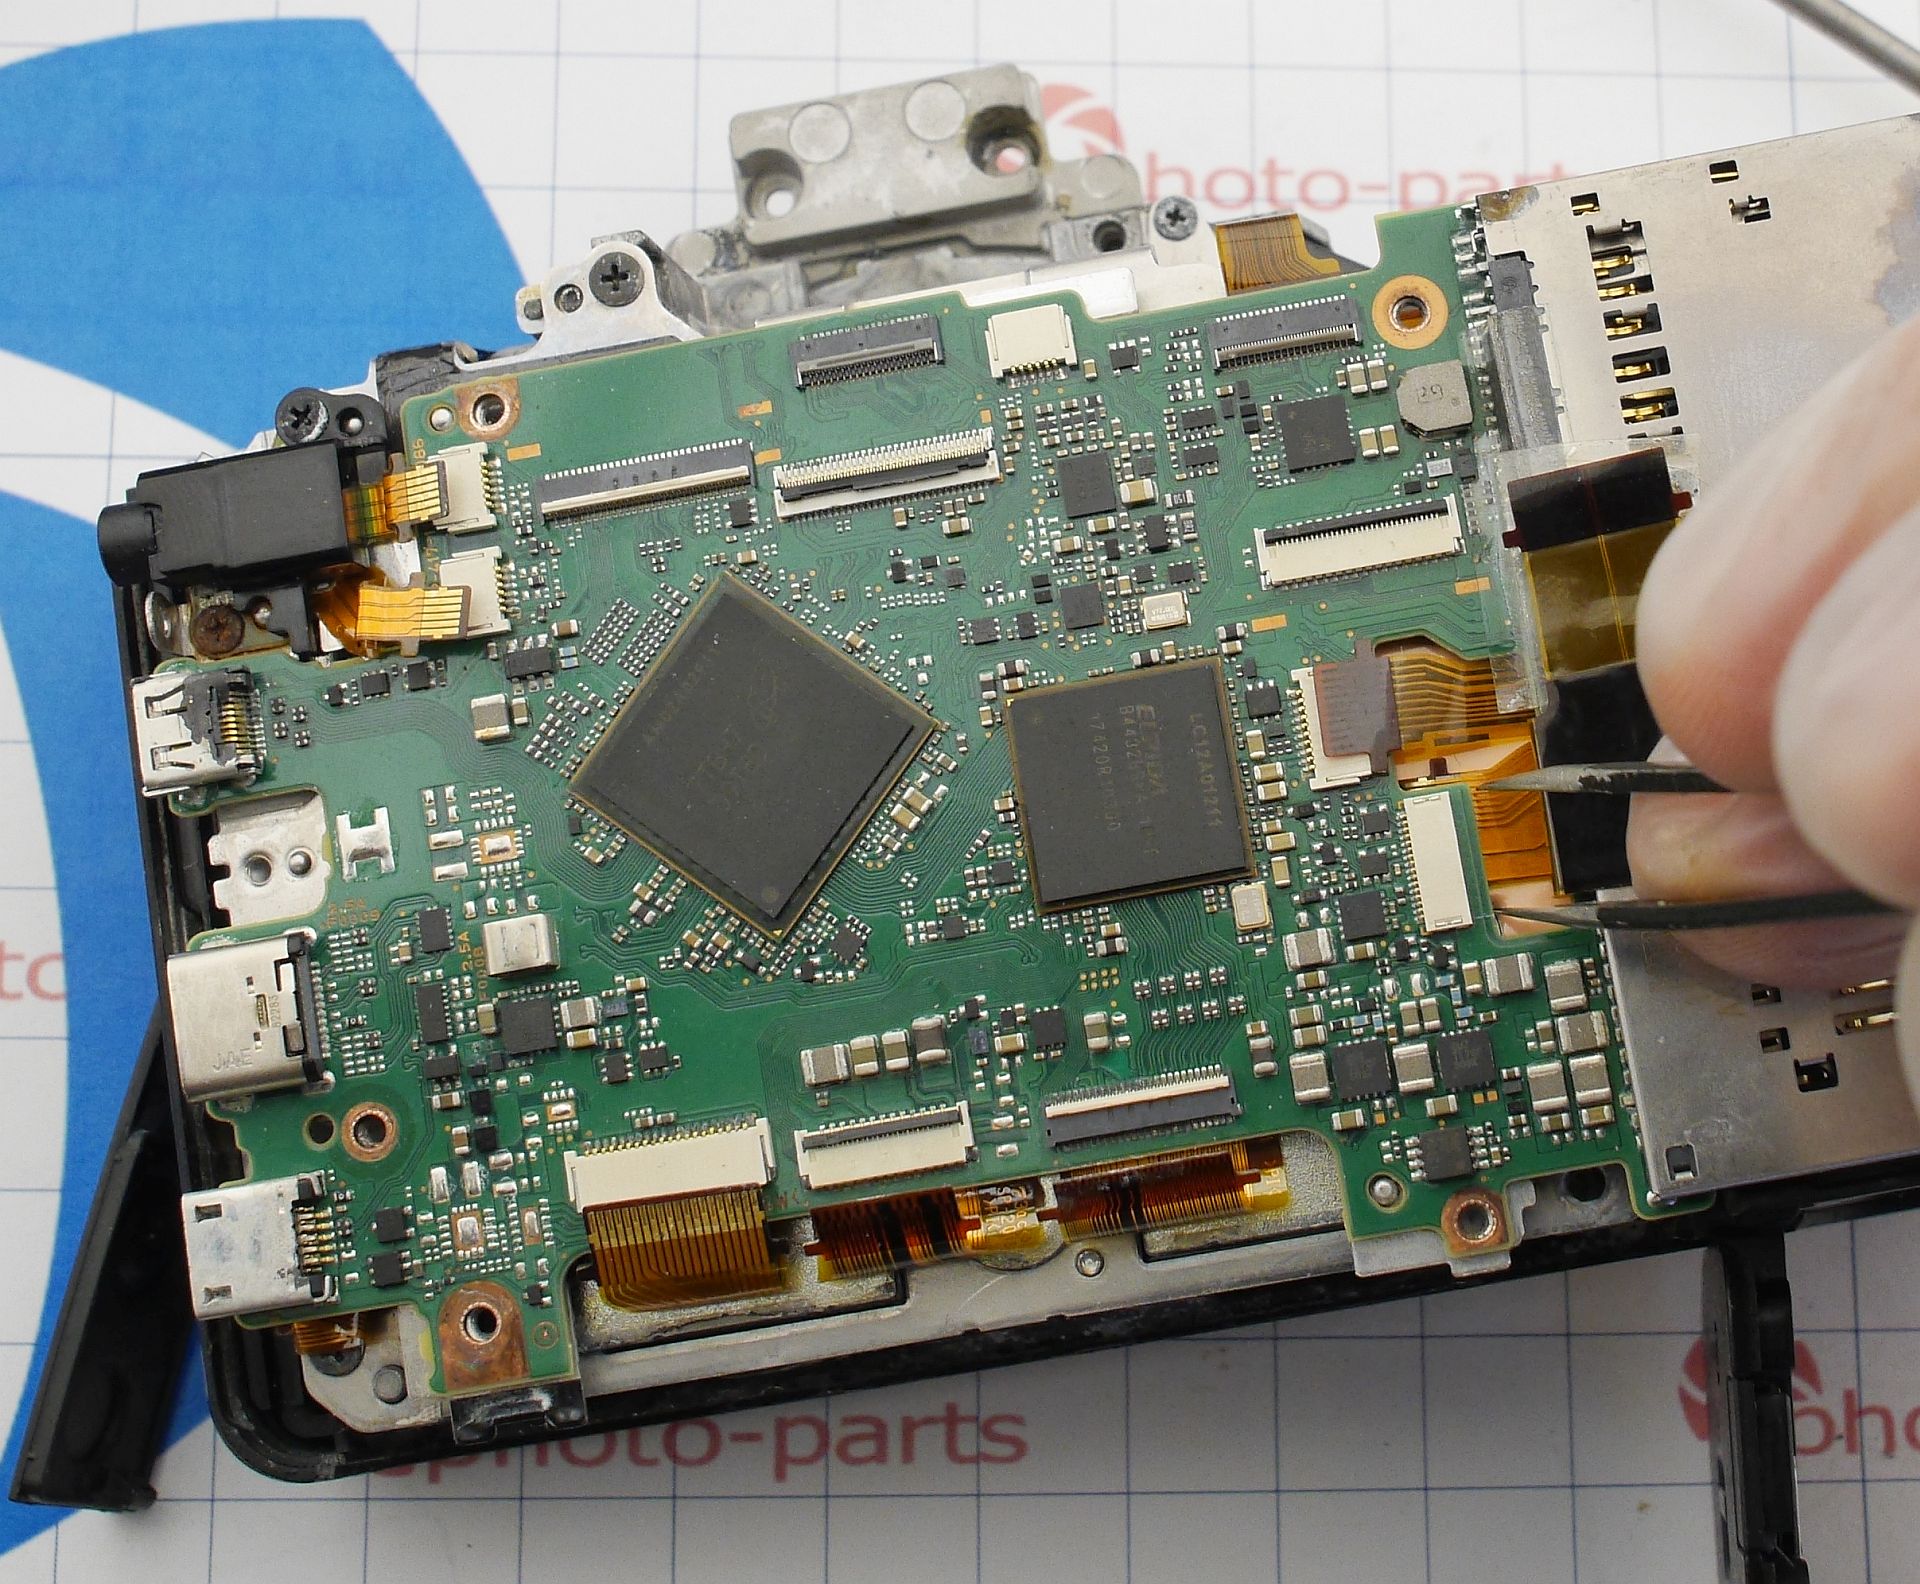
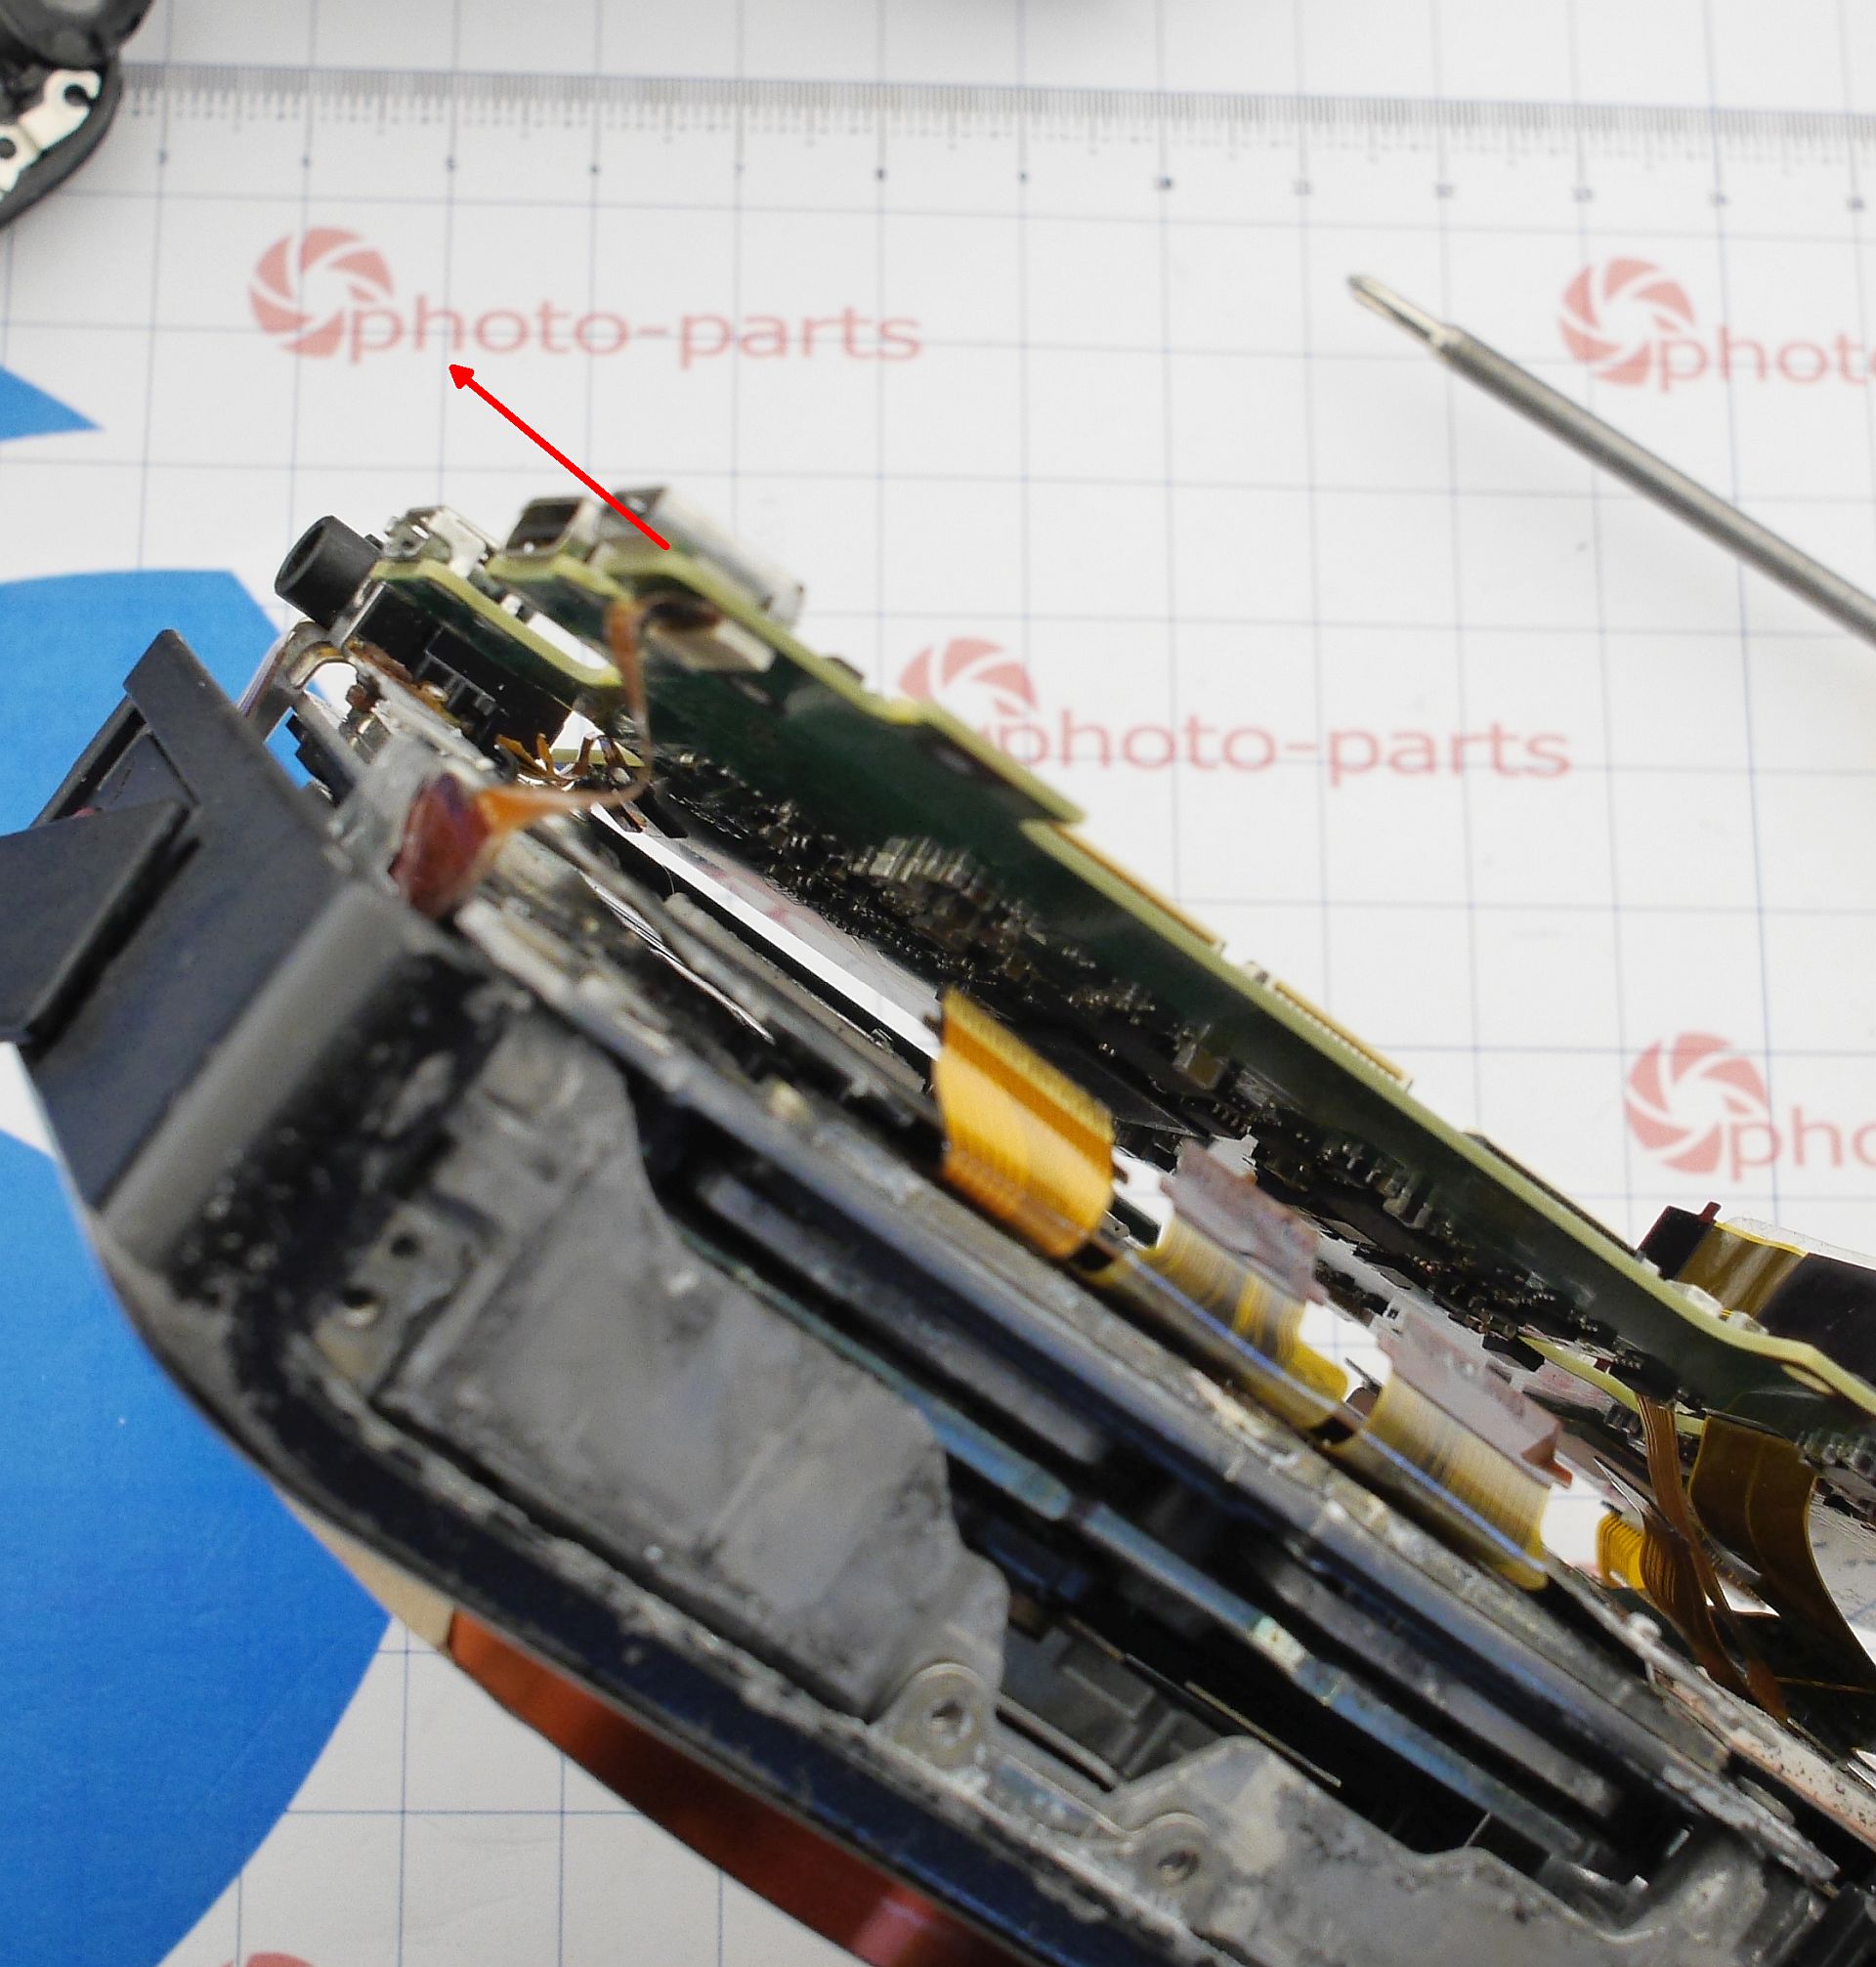
Now disconnect the flex cables which conneced from below. Start with the mechanical assembly (bottom left corner), then flip the board and disconnect two cables from the top side:
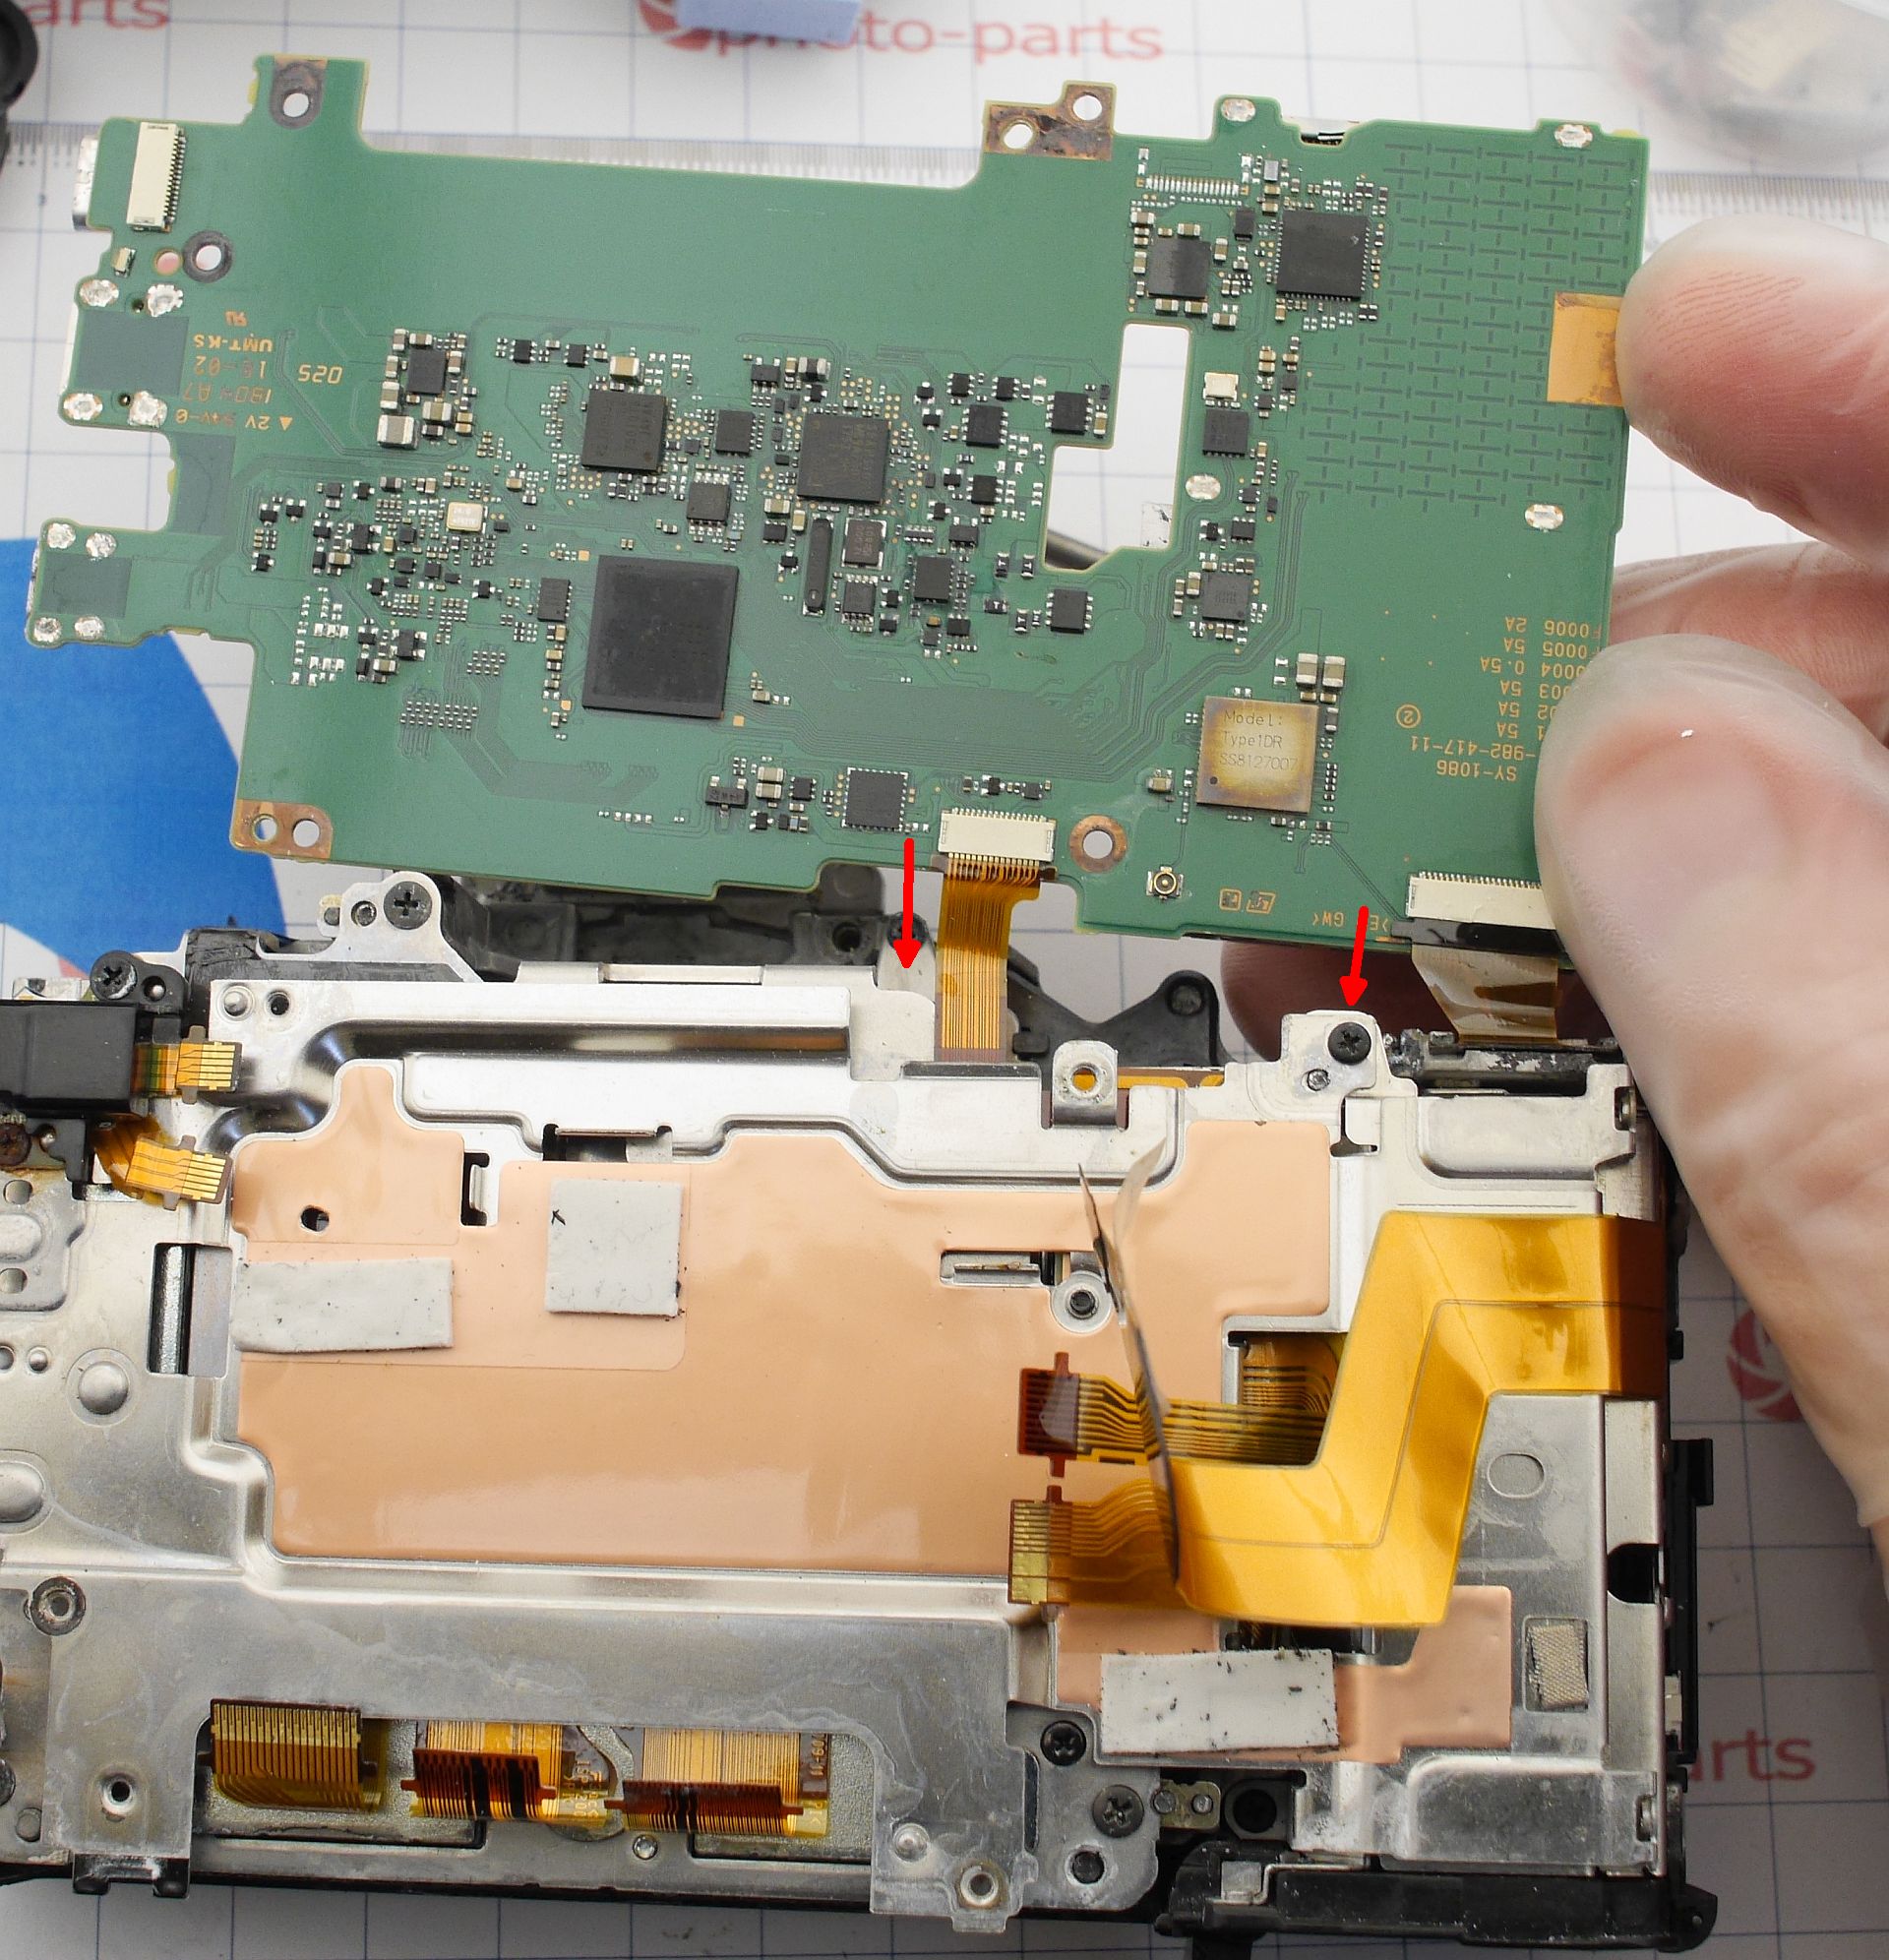
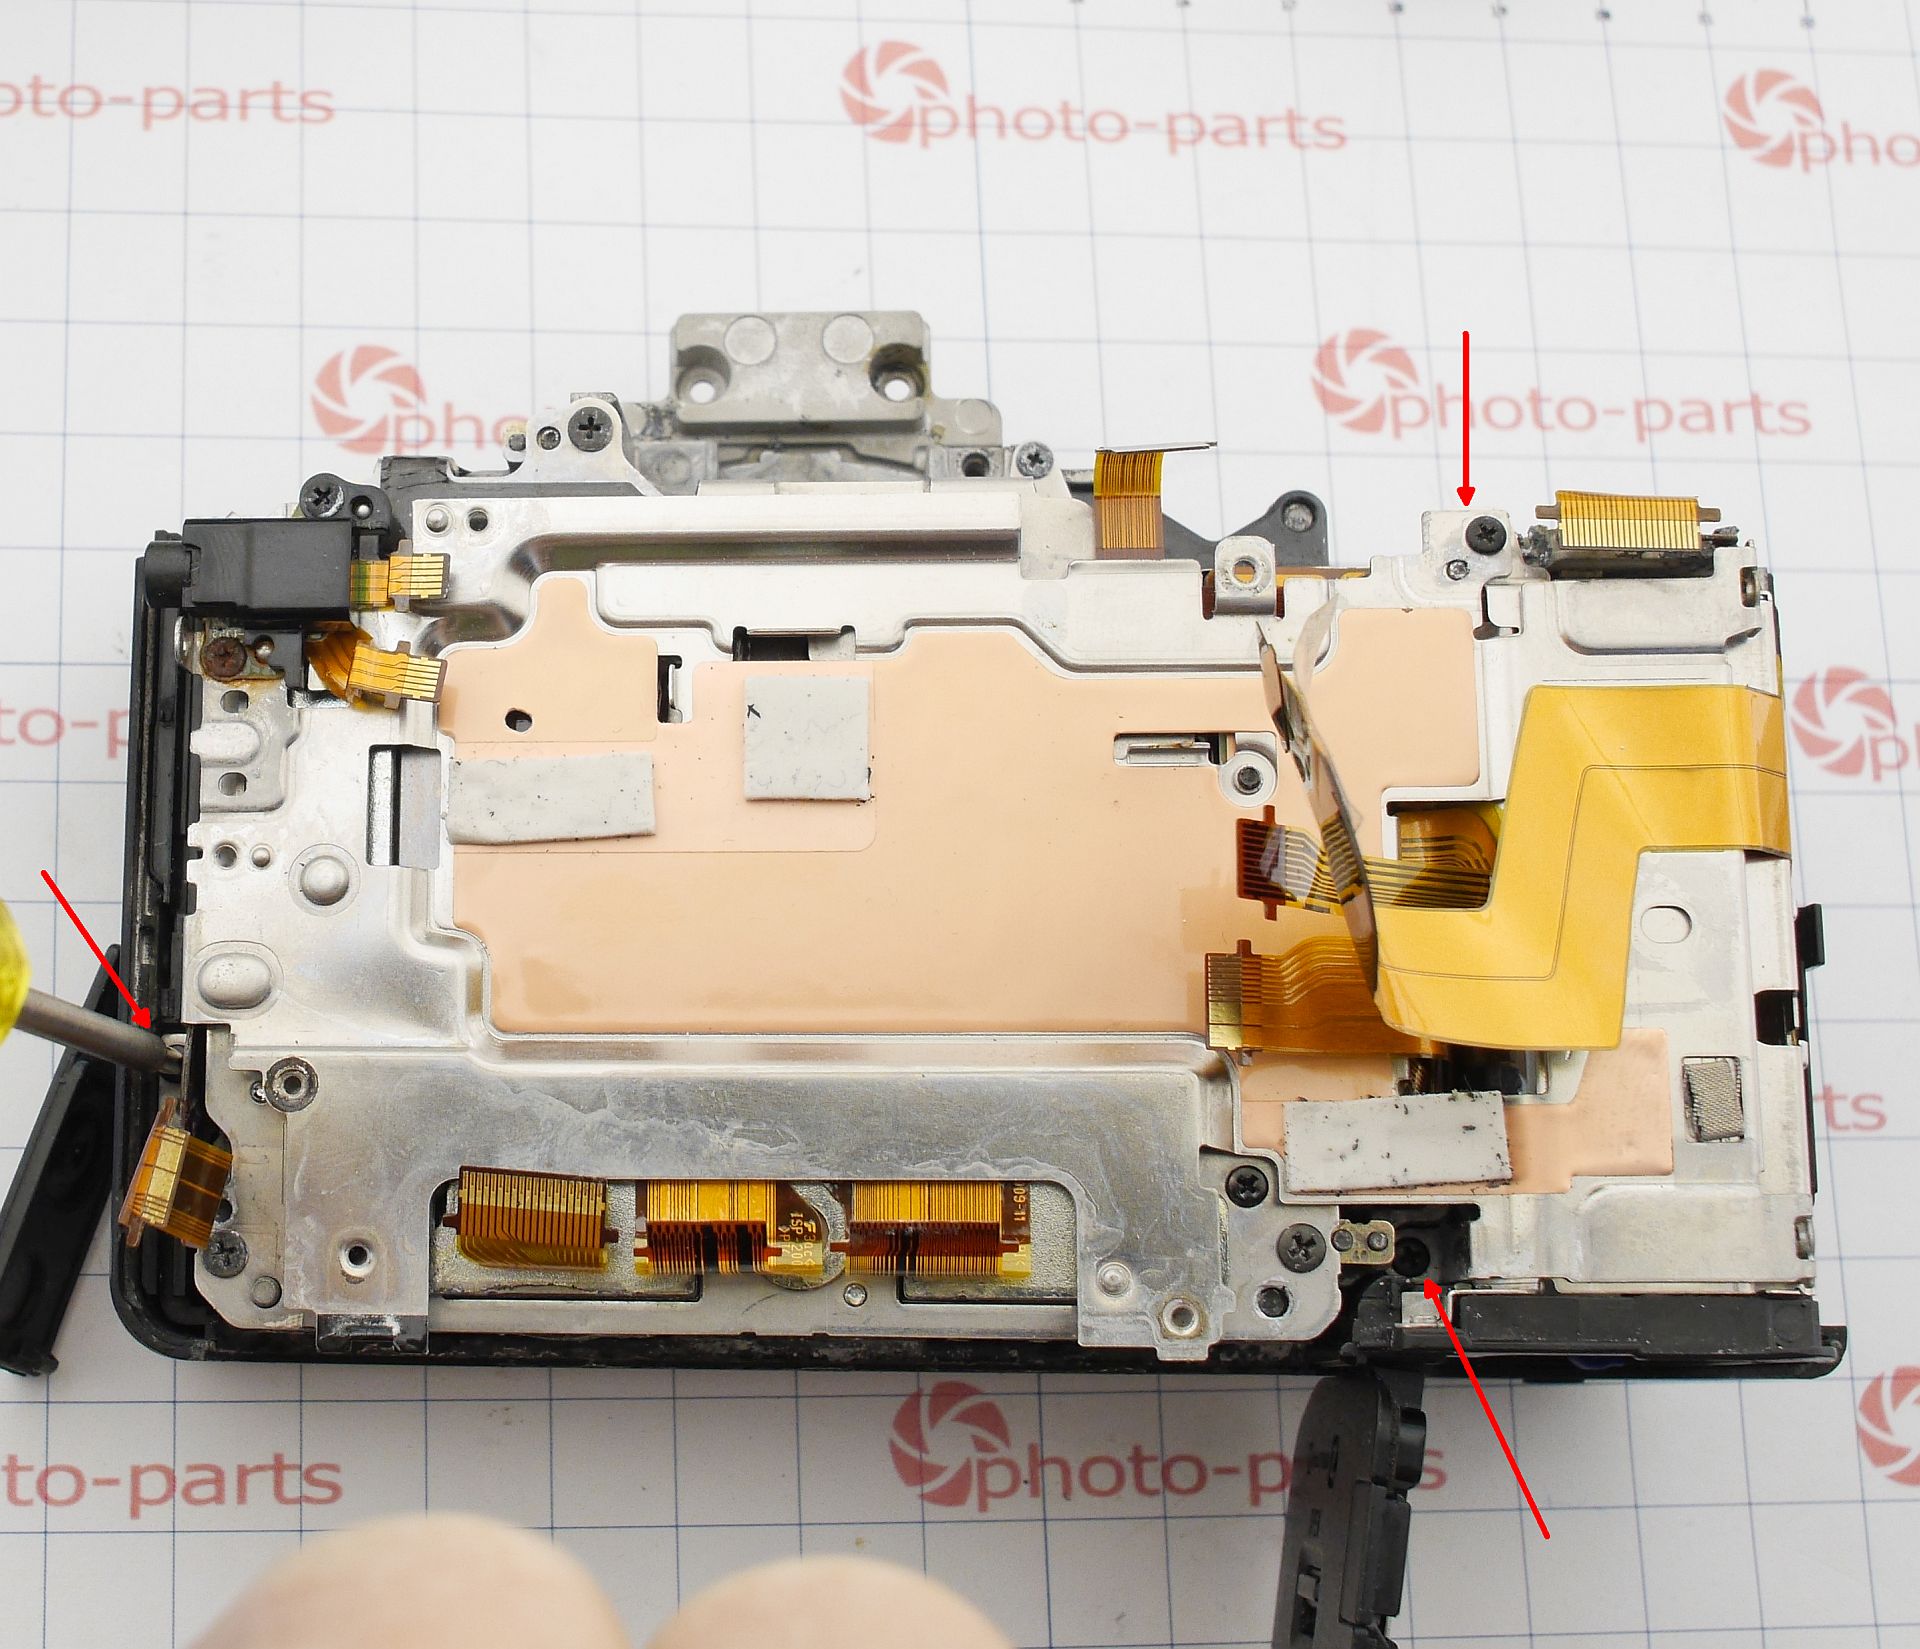
The board is in bad shape, but we’ll get back to it. Let’s move on to the shutter and sensor block.
Remove the plate held by three screws:
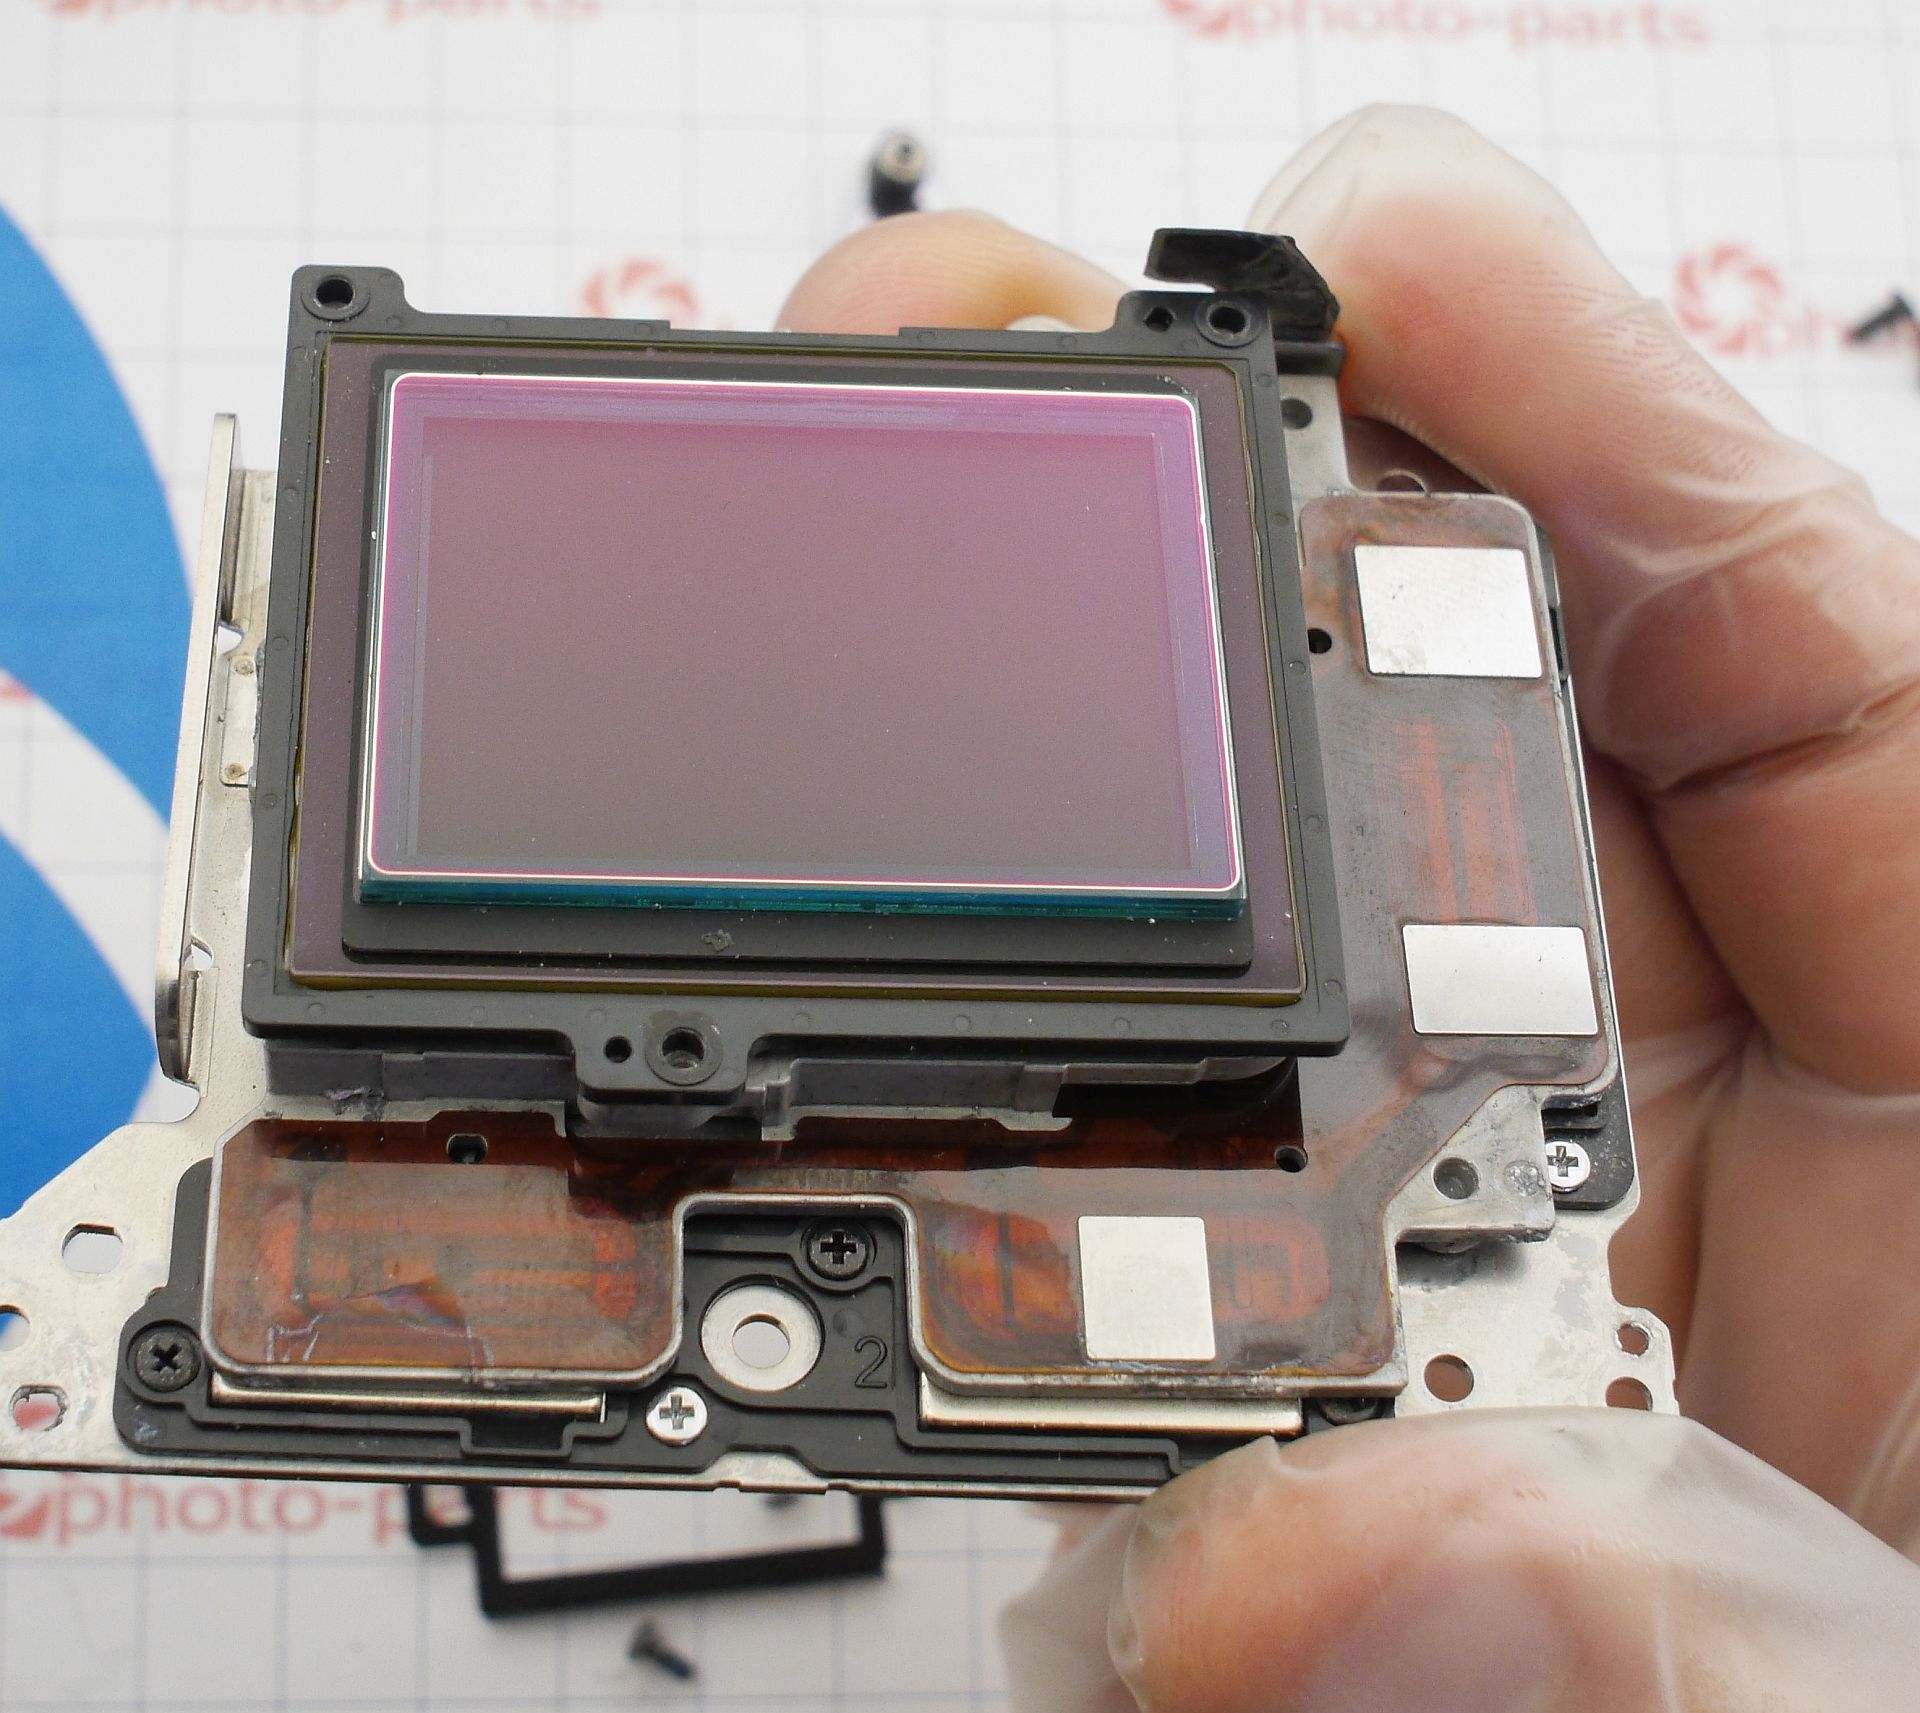
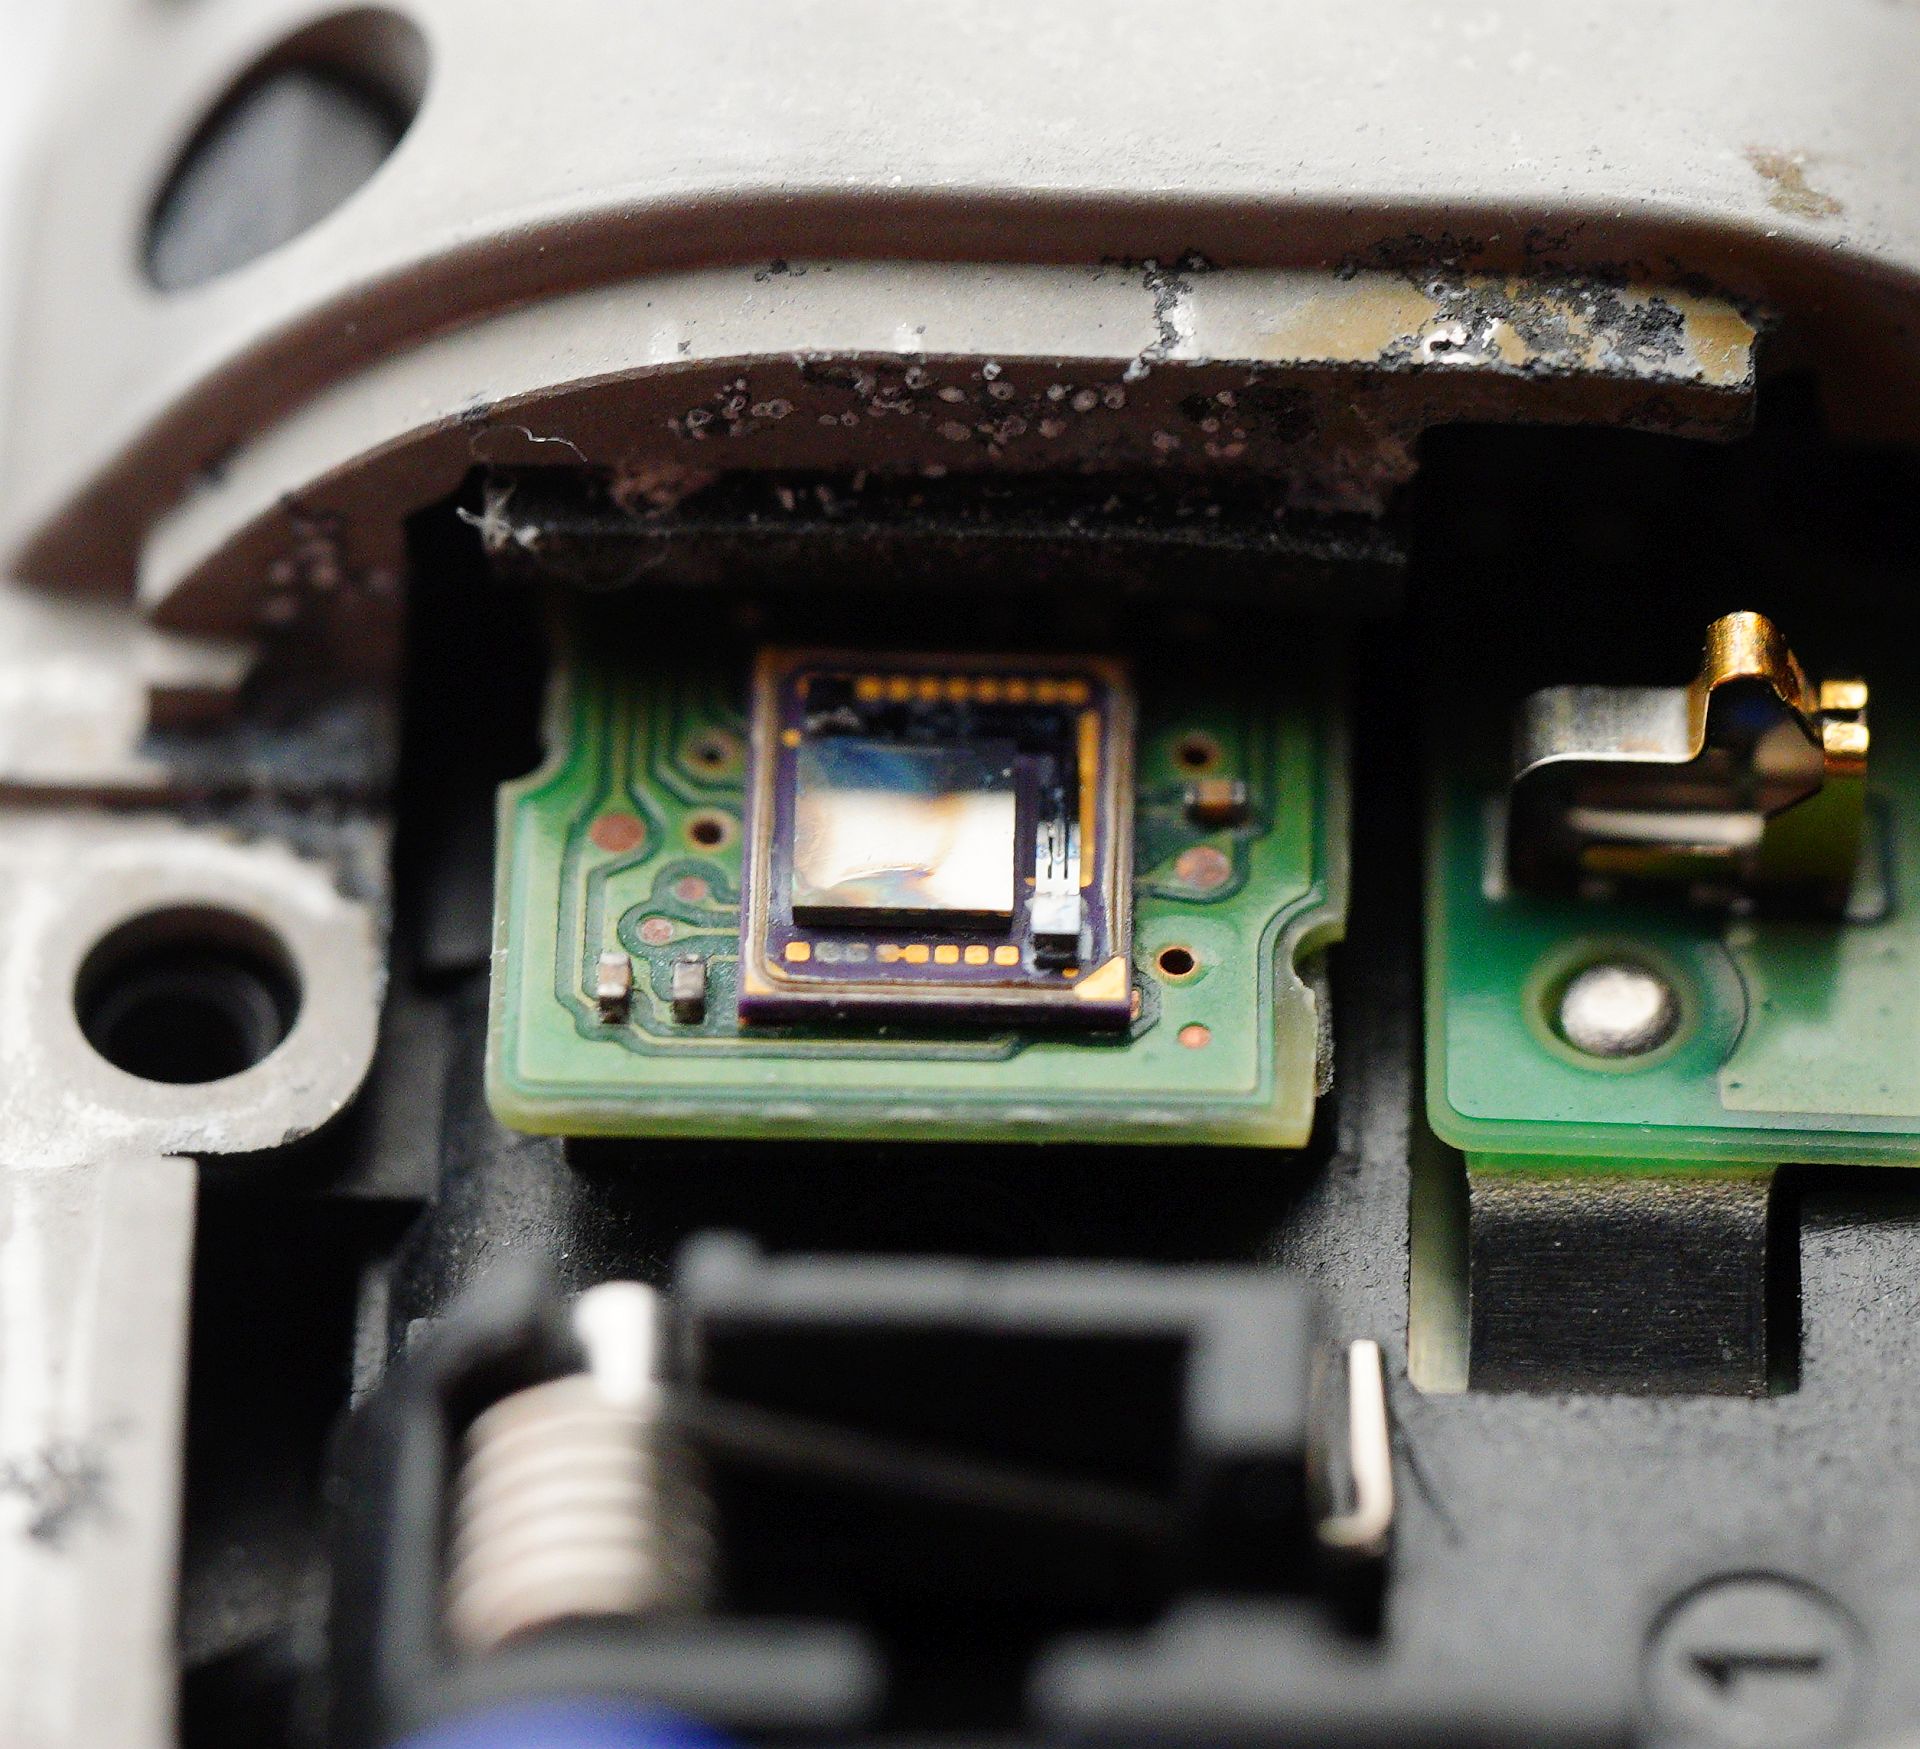
Before removing the sensor, it’s best to secure the calibration washers - they sit directly under the screws. That’s in an ideal case, though. In my situation, the sensor had clearly been tampered with, and the thermal film was torn:
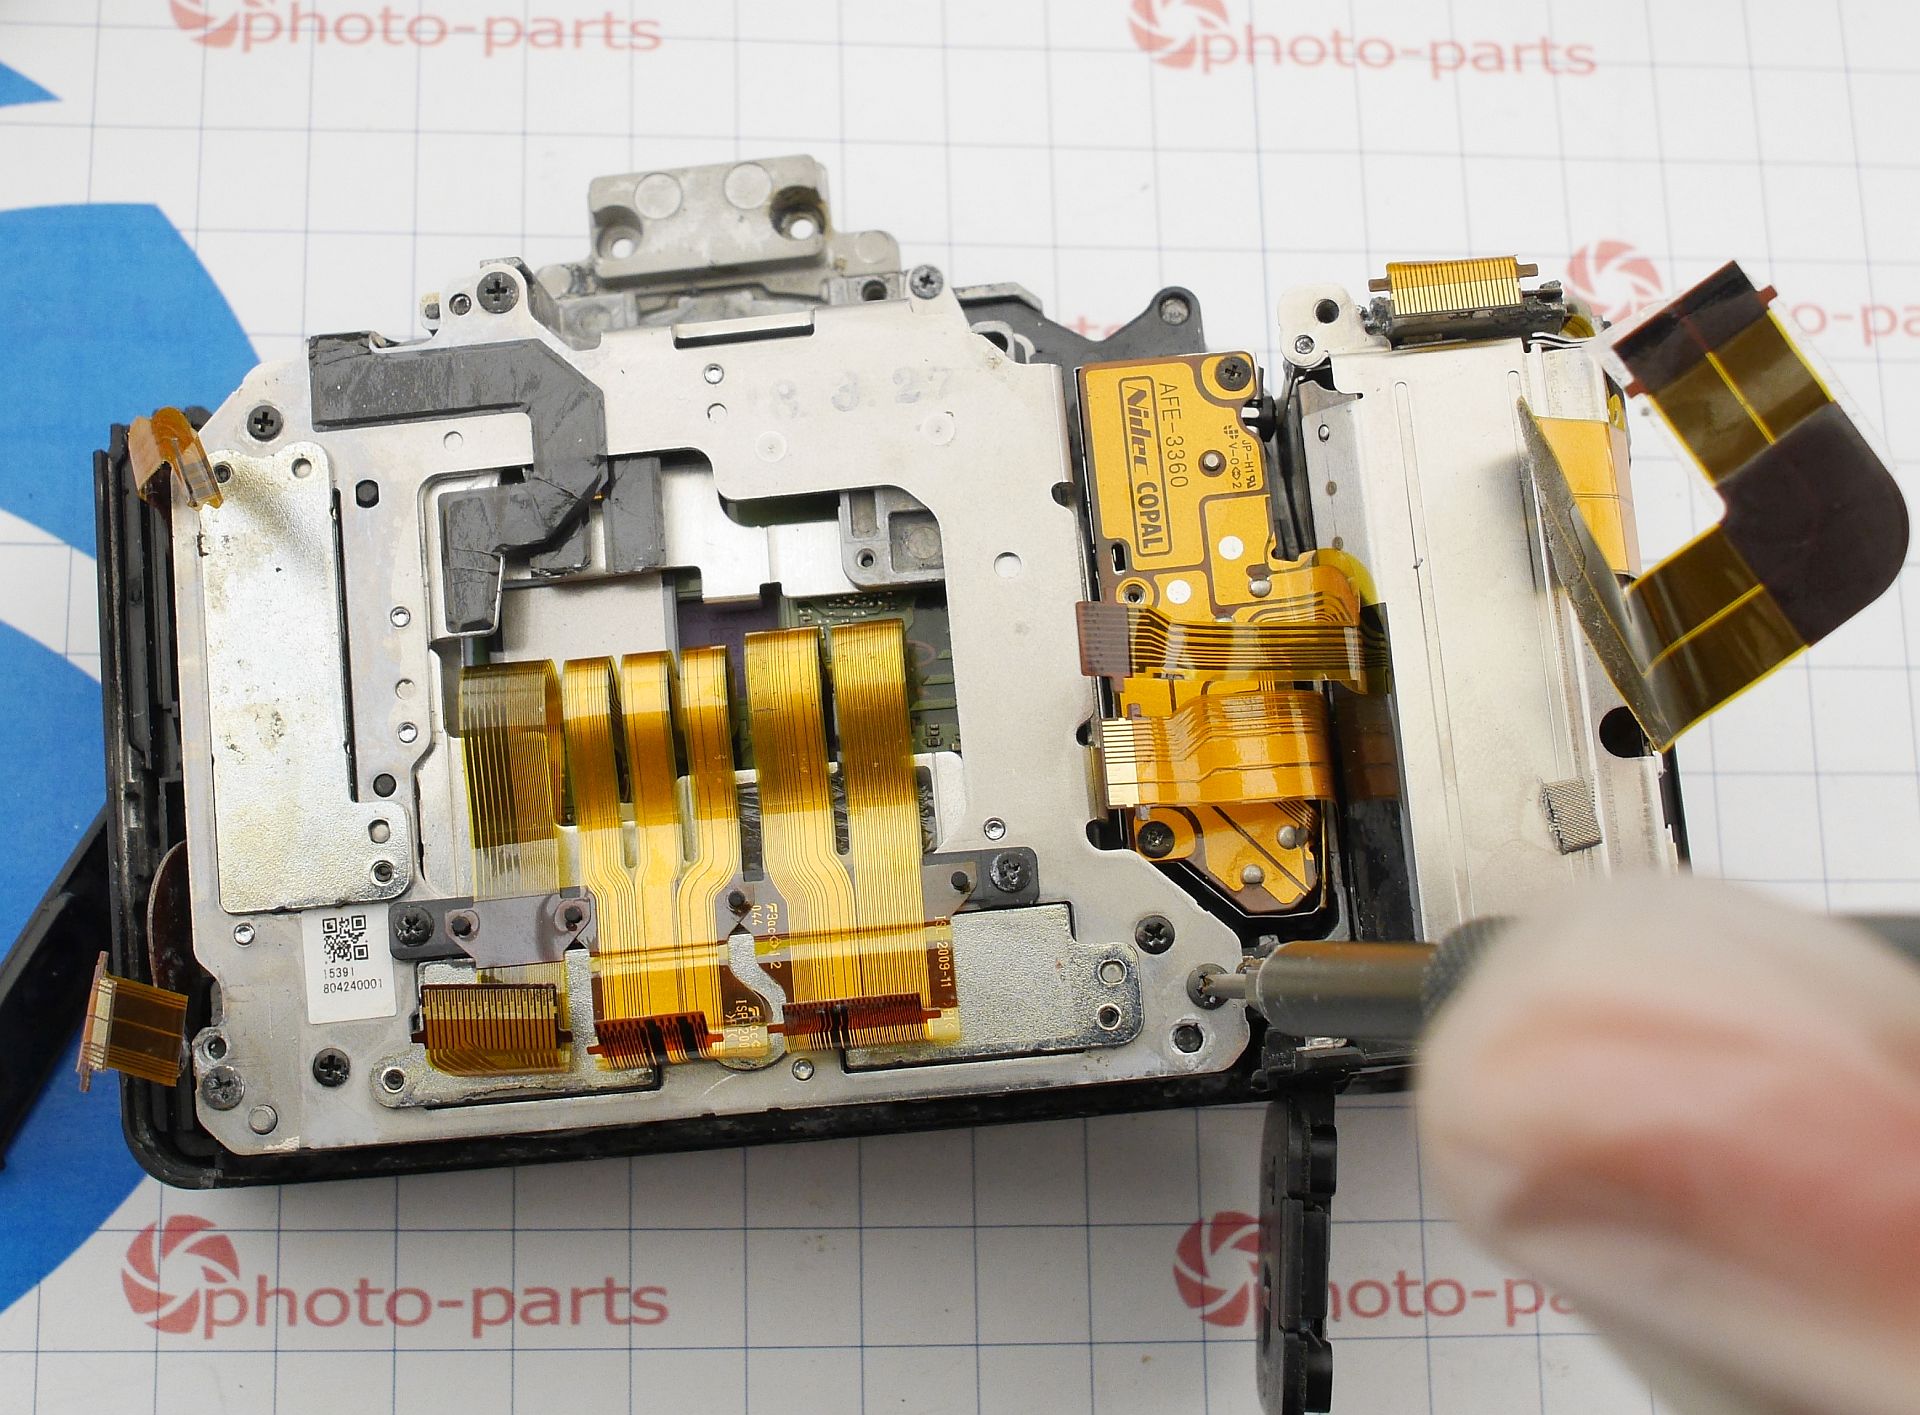
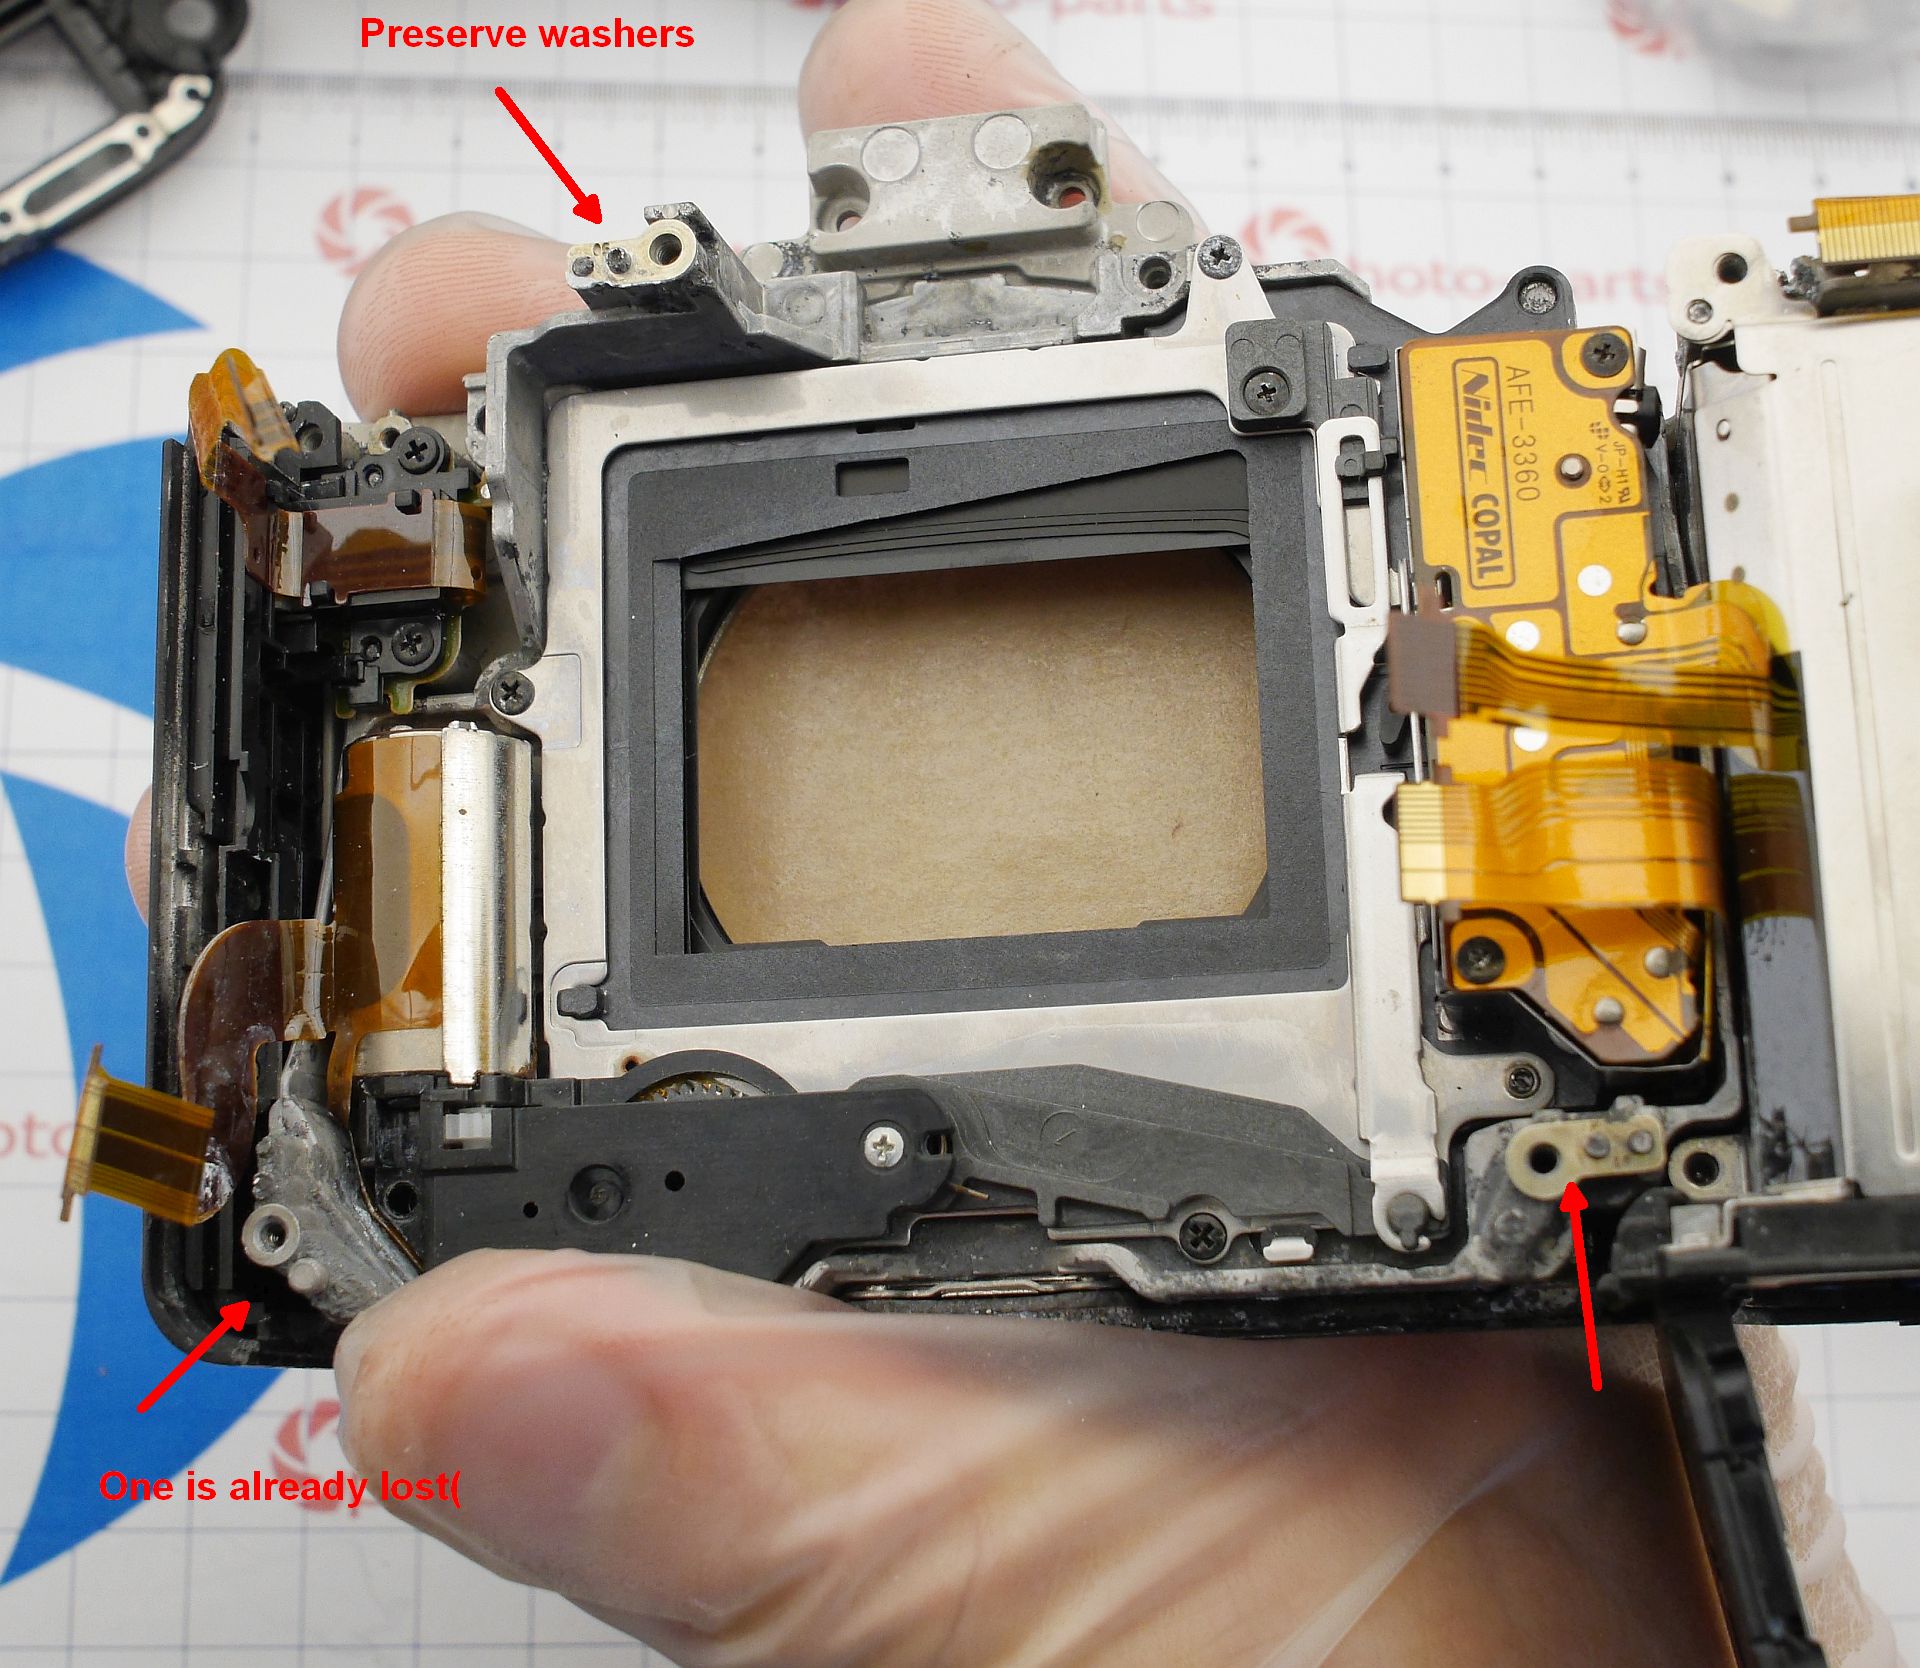
One of the washer is missing. Maybe they didn’t touch the sensor itself? Nope - the stabilizer won’t move, and the coils are stuck to the magnets. Something’s wrong here.
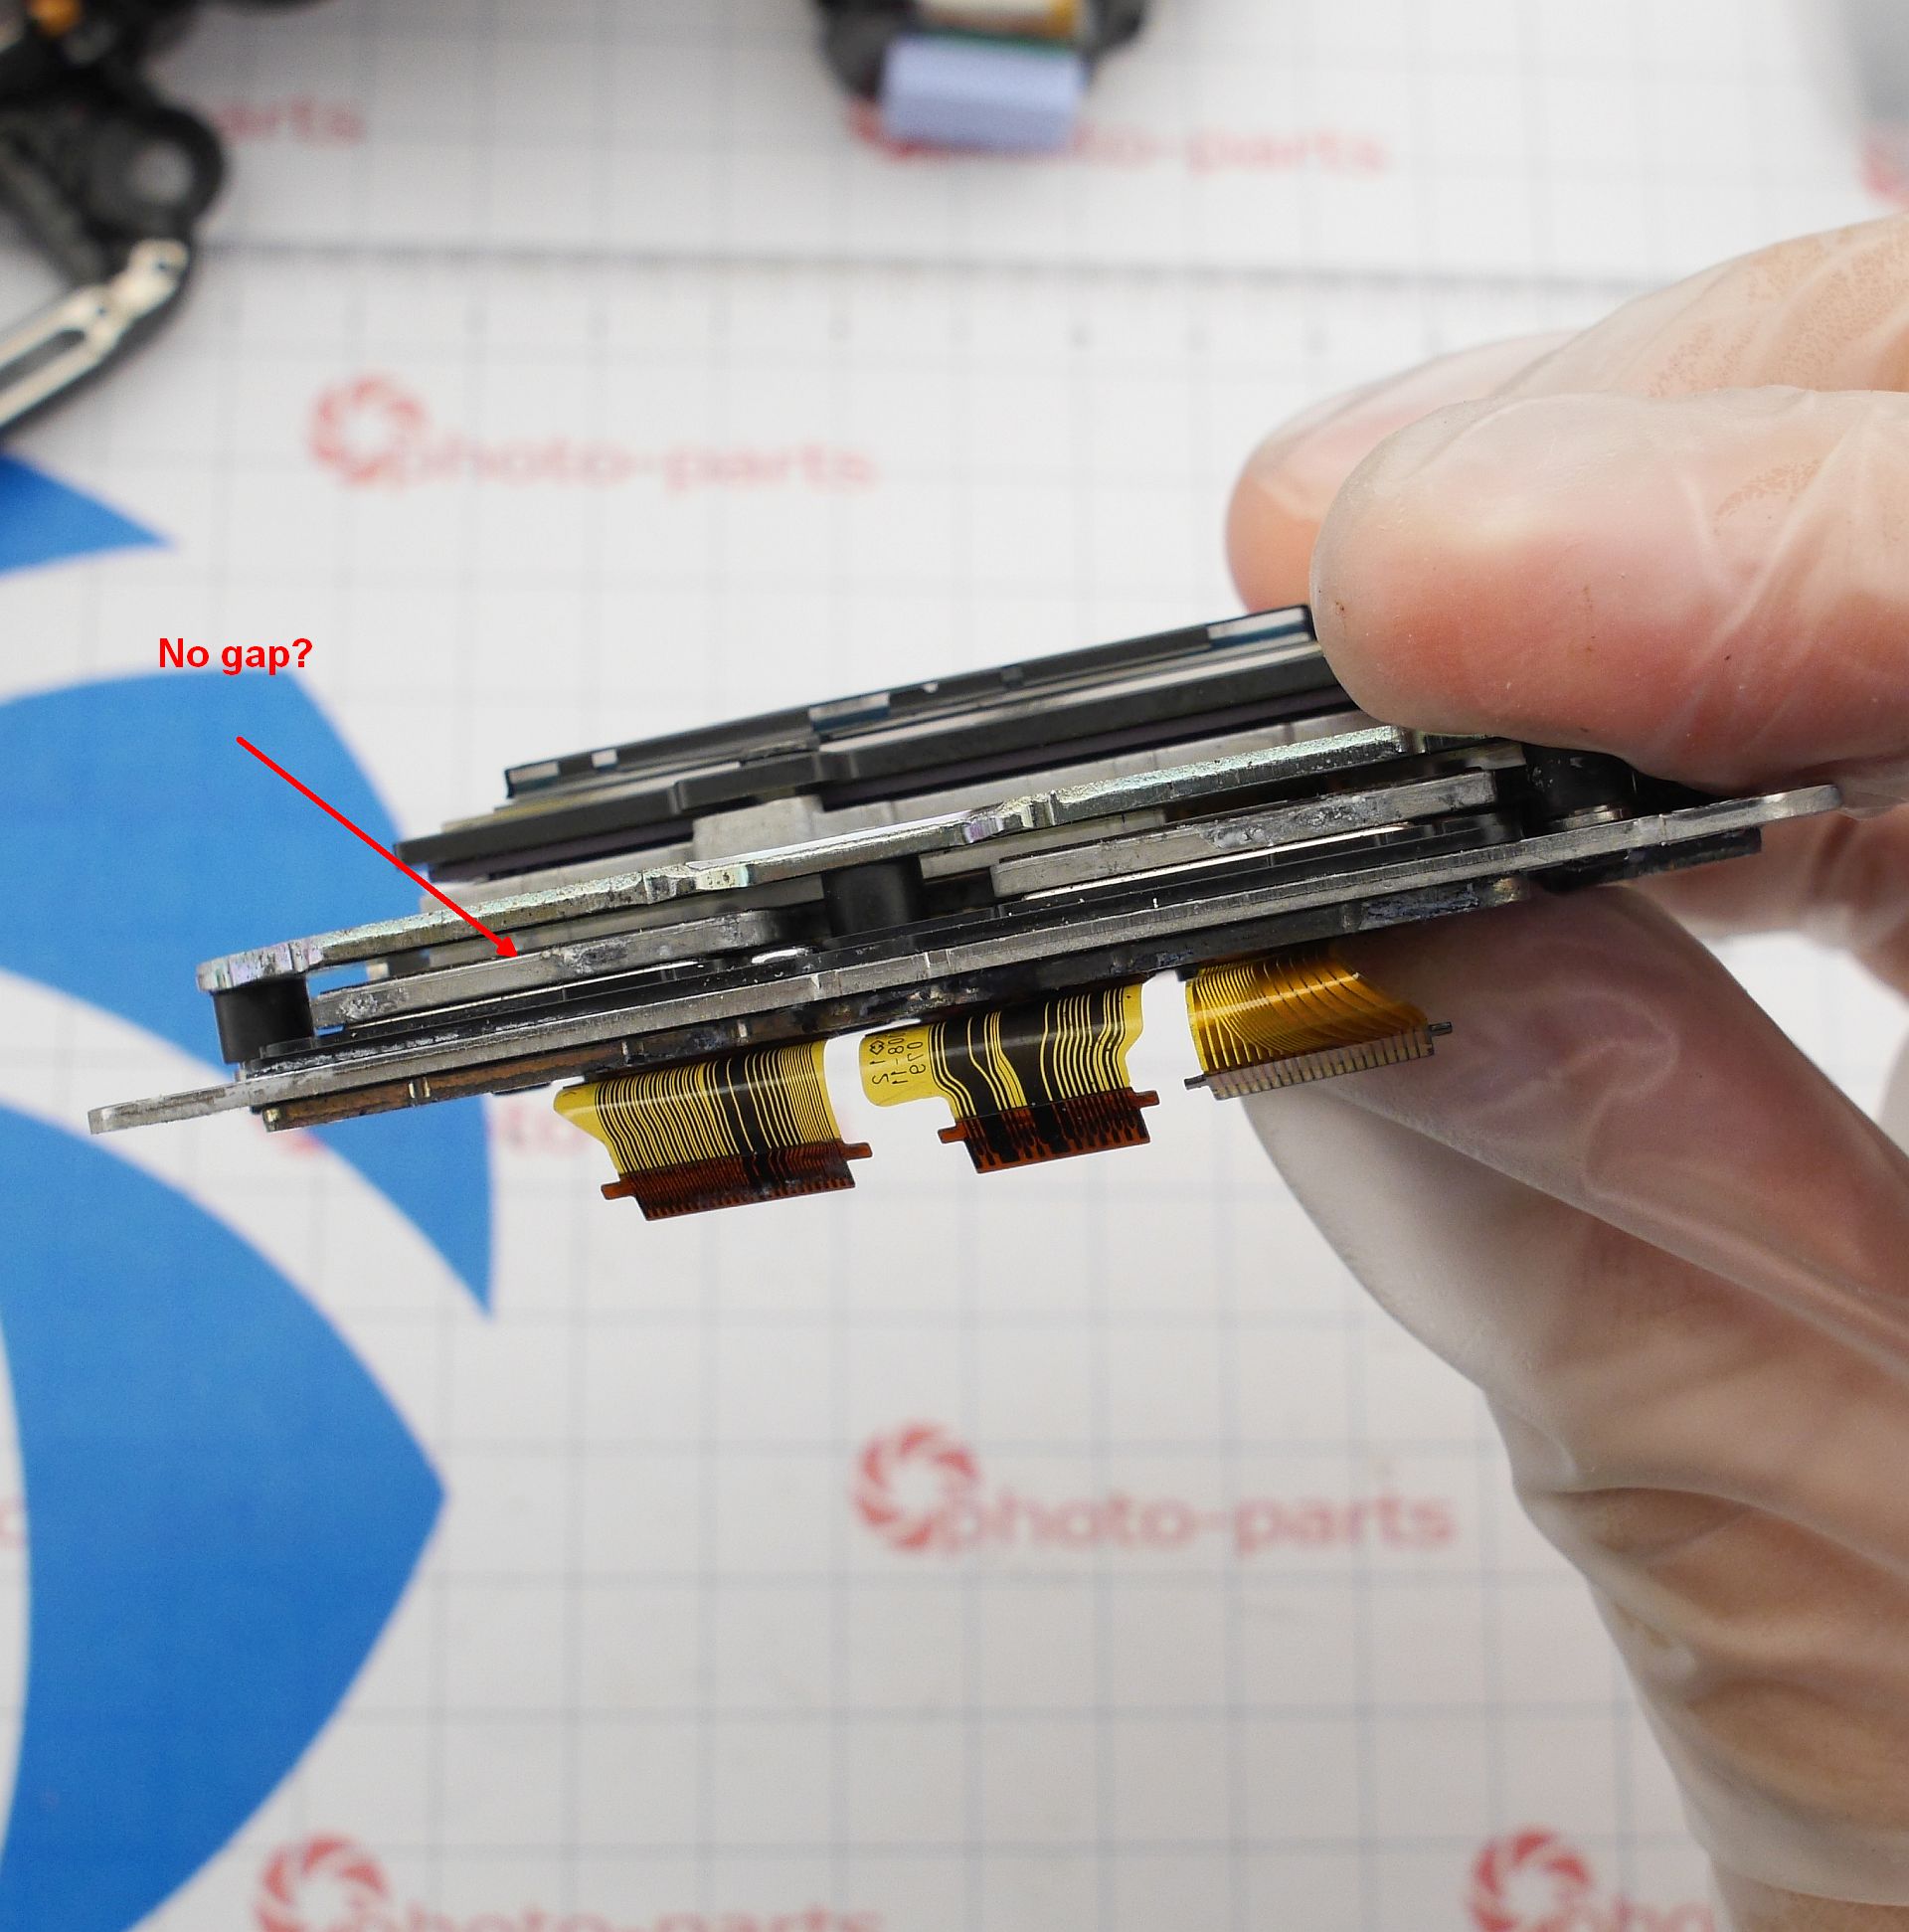 Let’s disassemble the IBIS module. Three screws hold the top plate (a magnetic latch), and it’s fixed in place by strong magnets. Lifting it risks losing the tiny ball bearings the sensor floats on. Oh - someone already lost them before me.
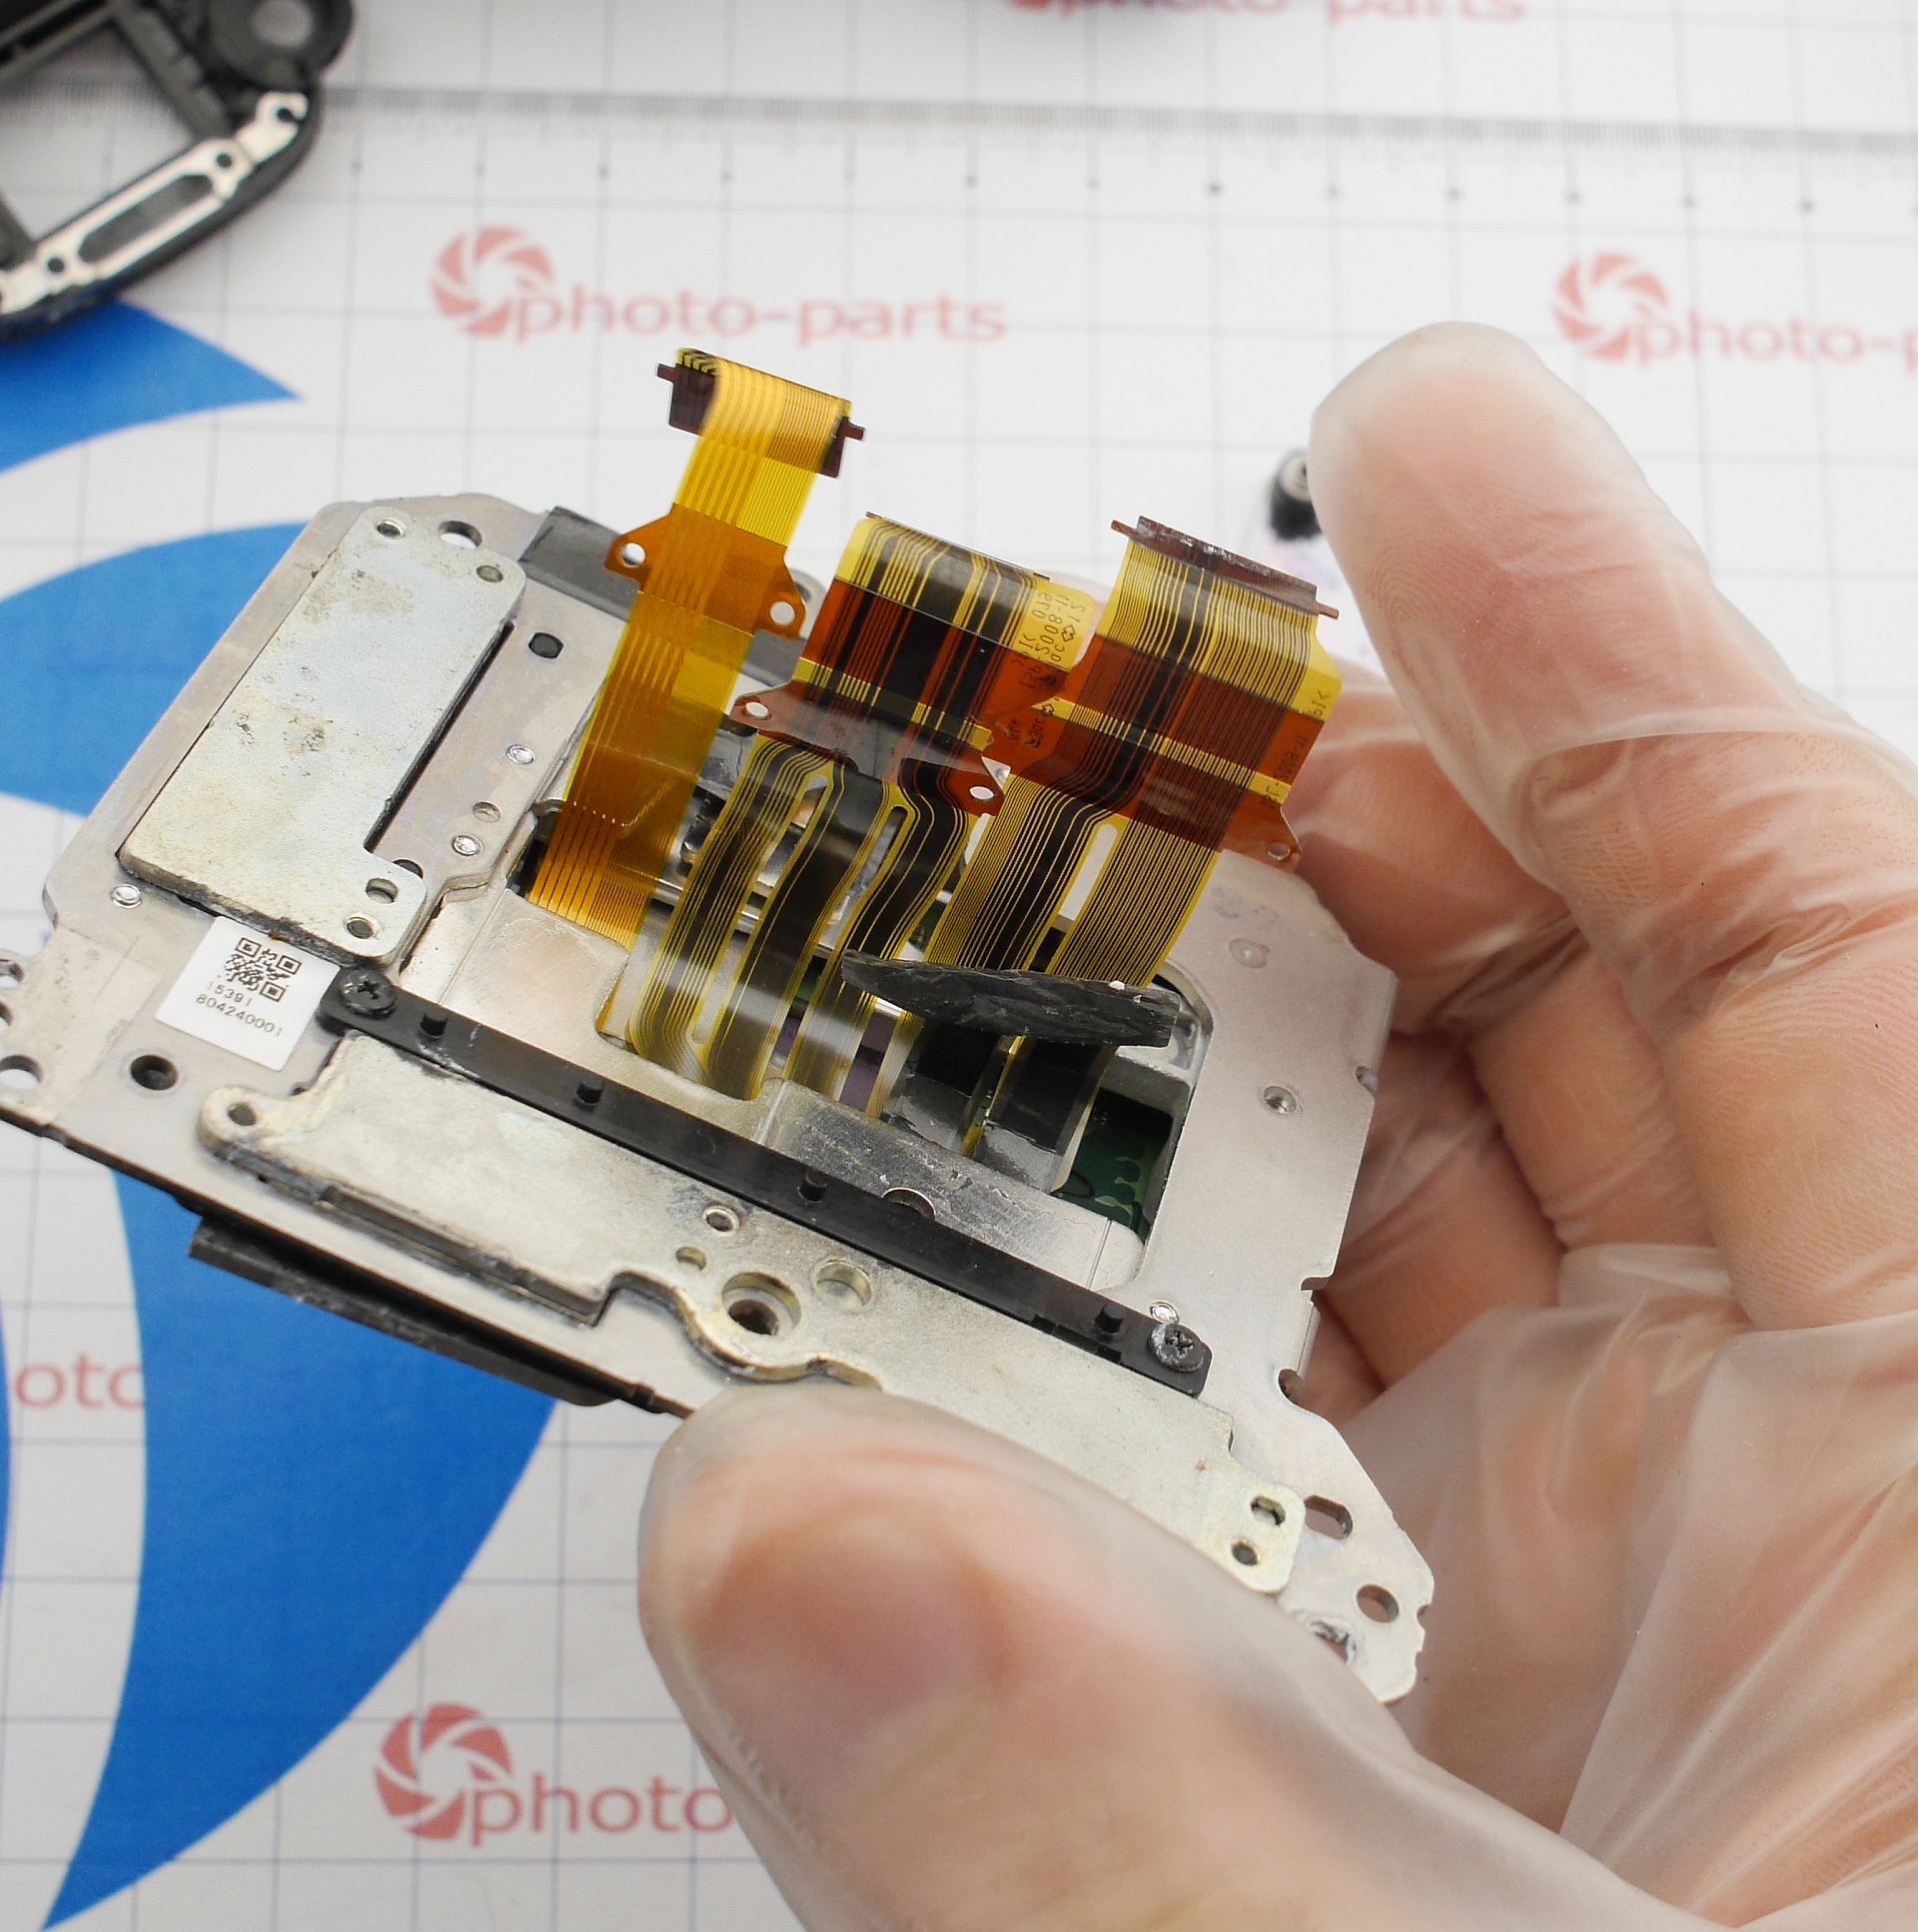
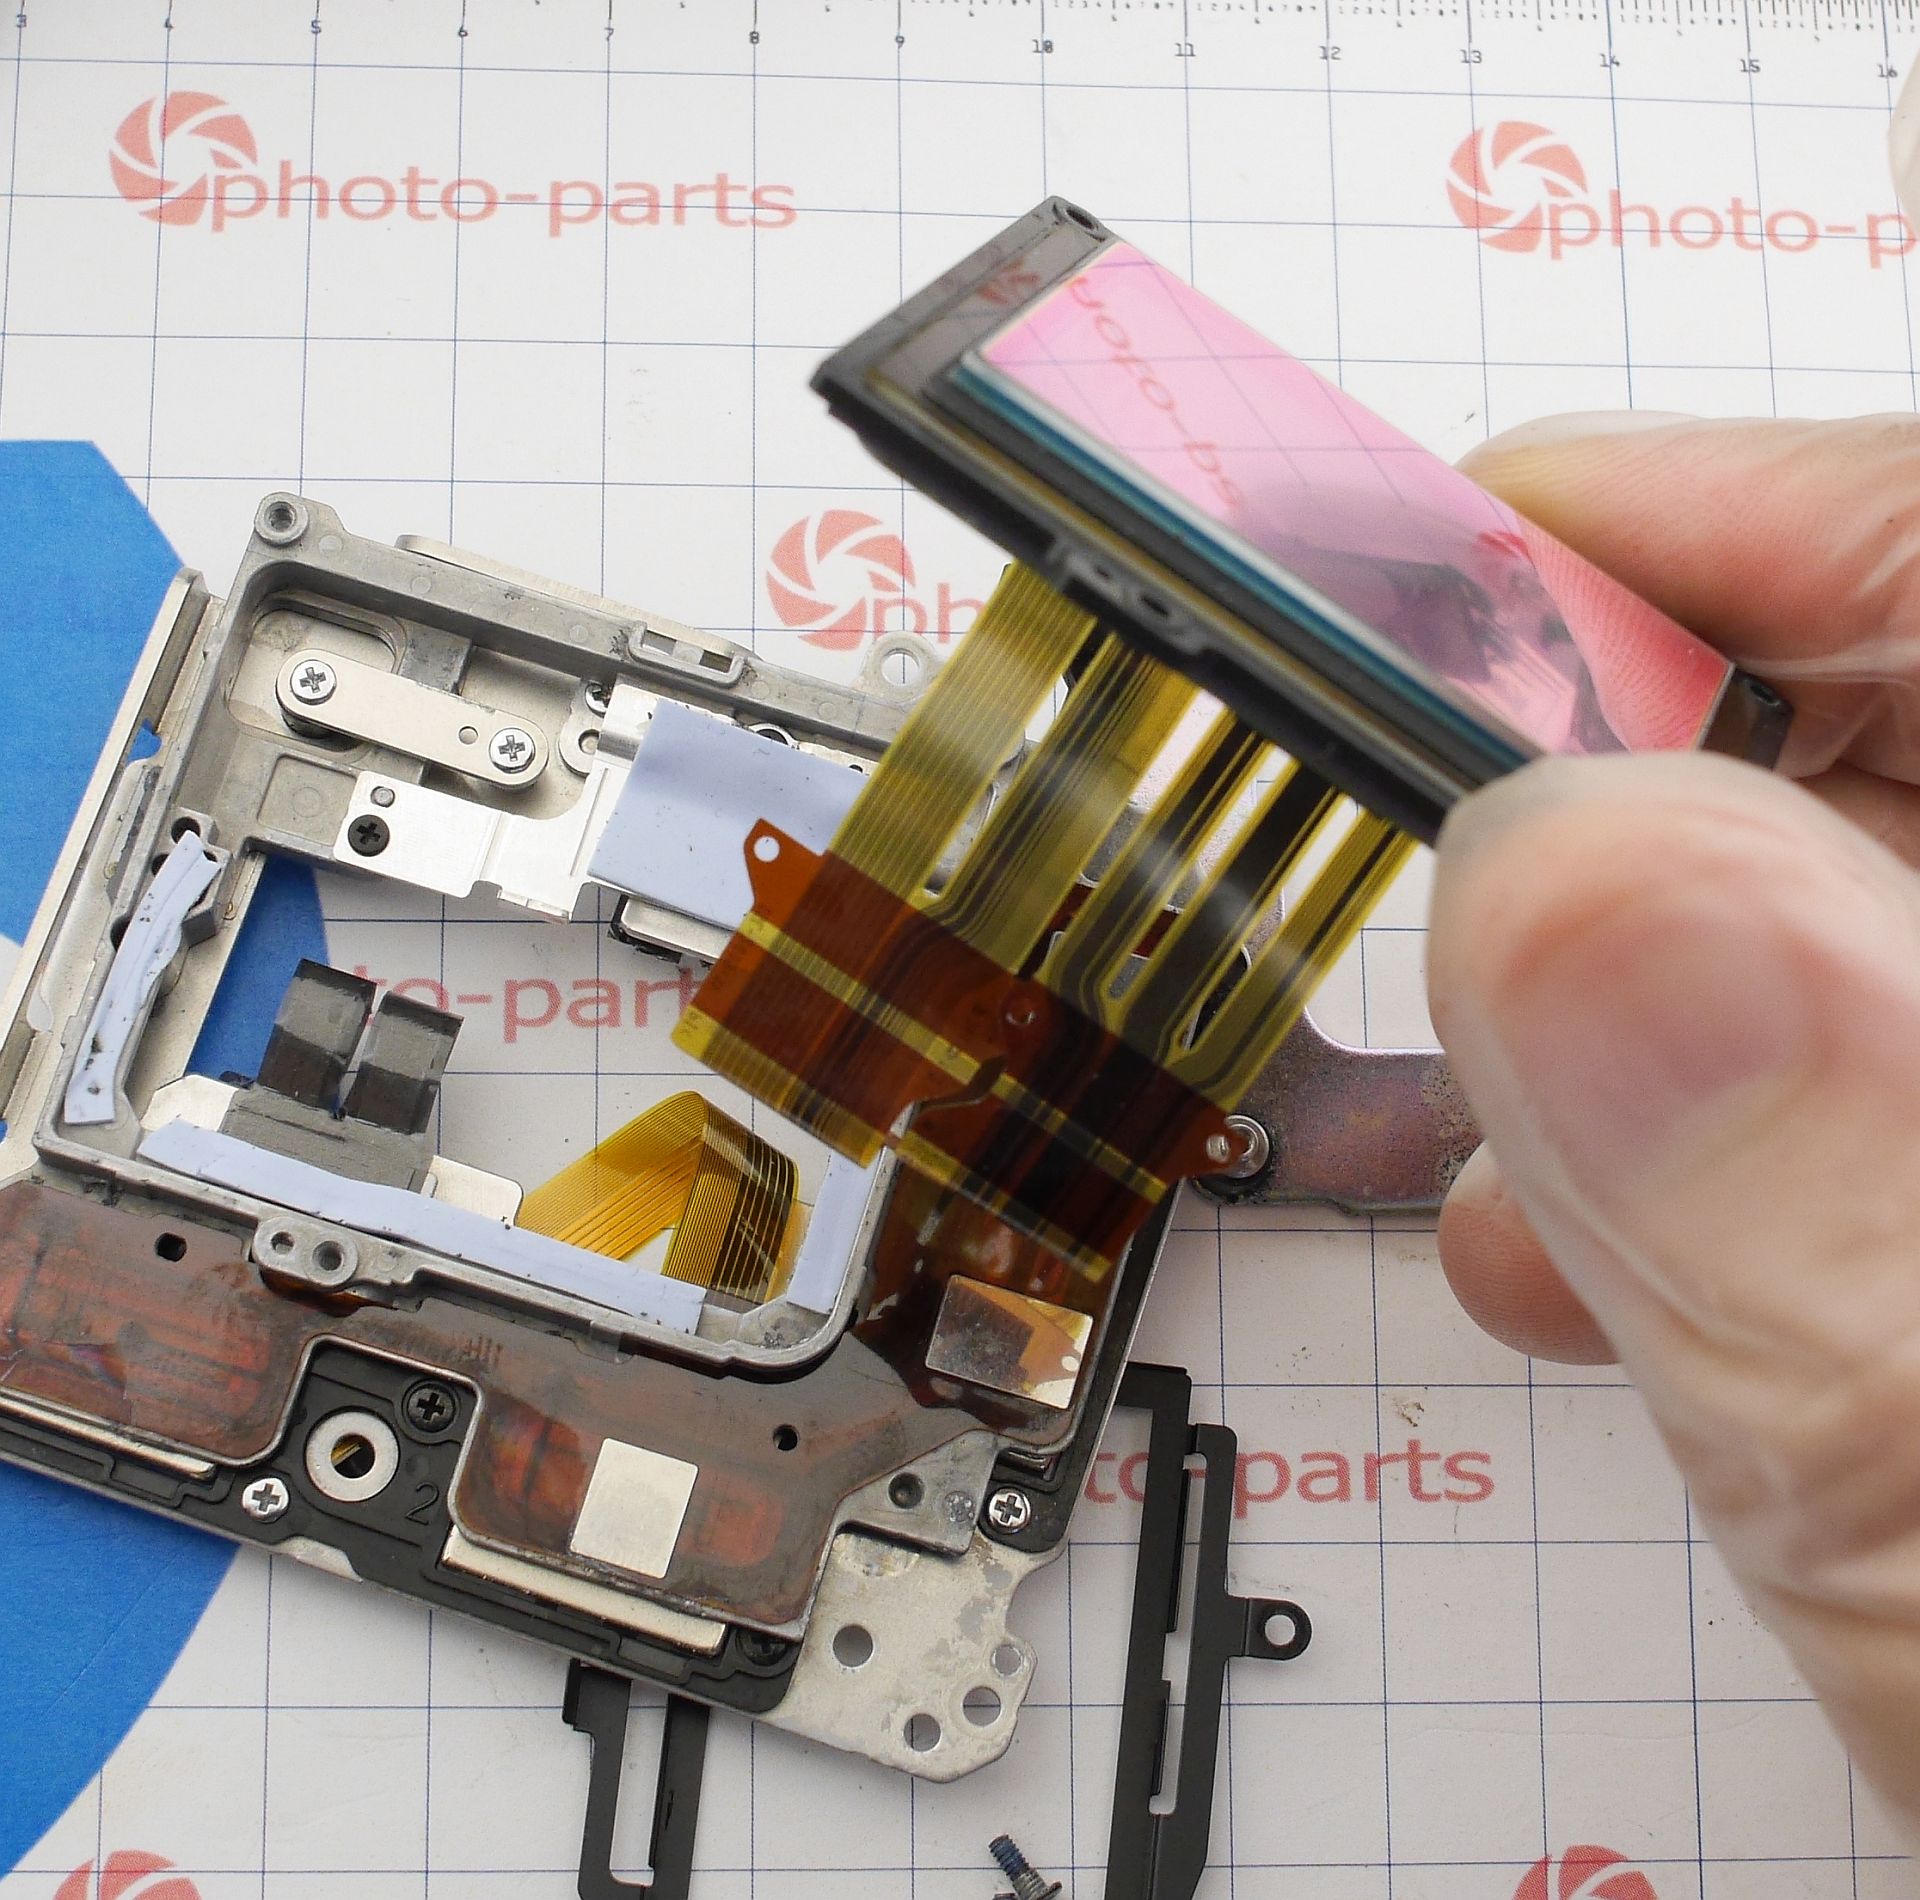
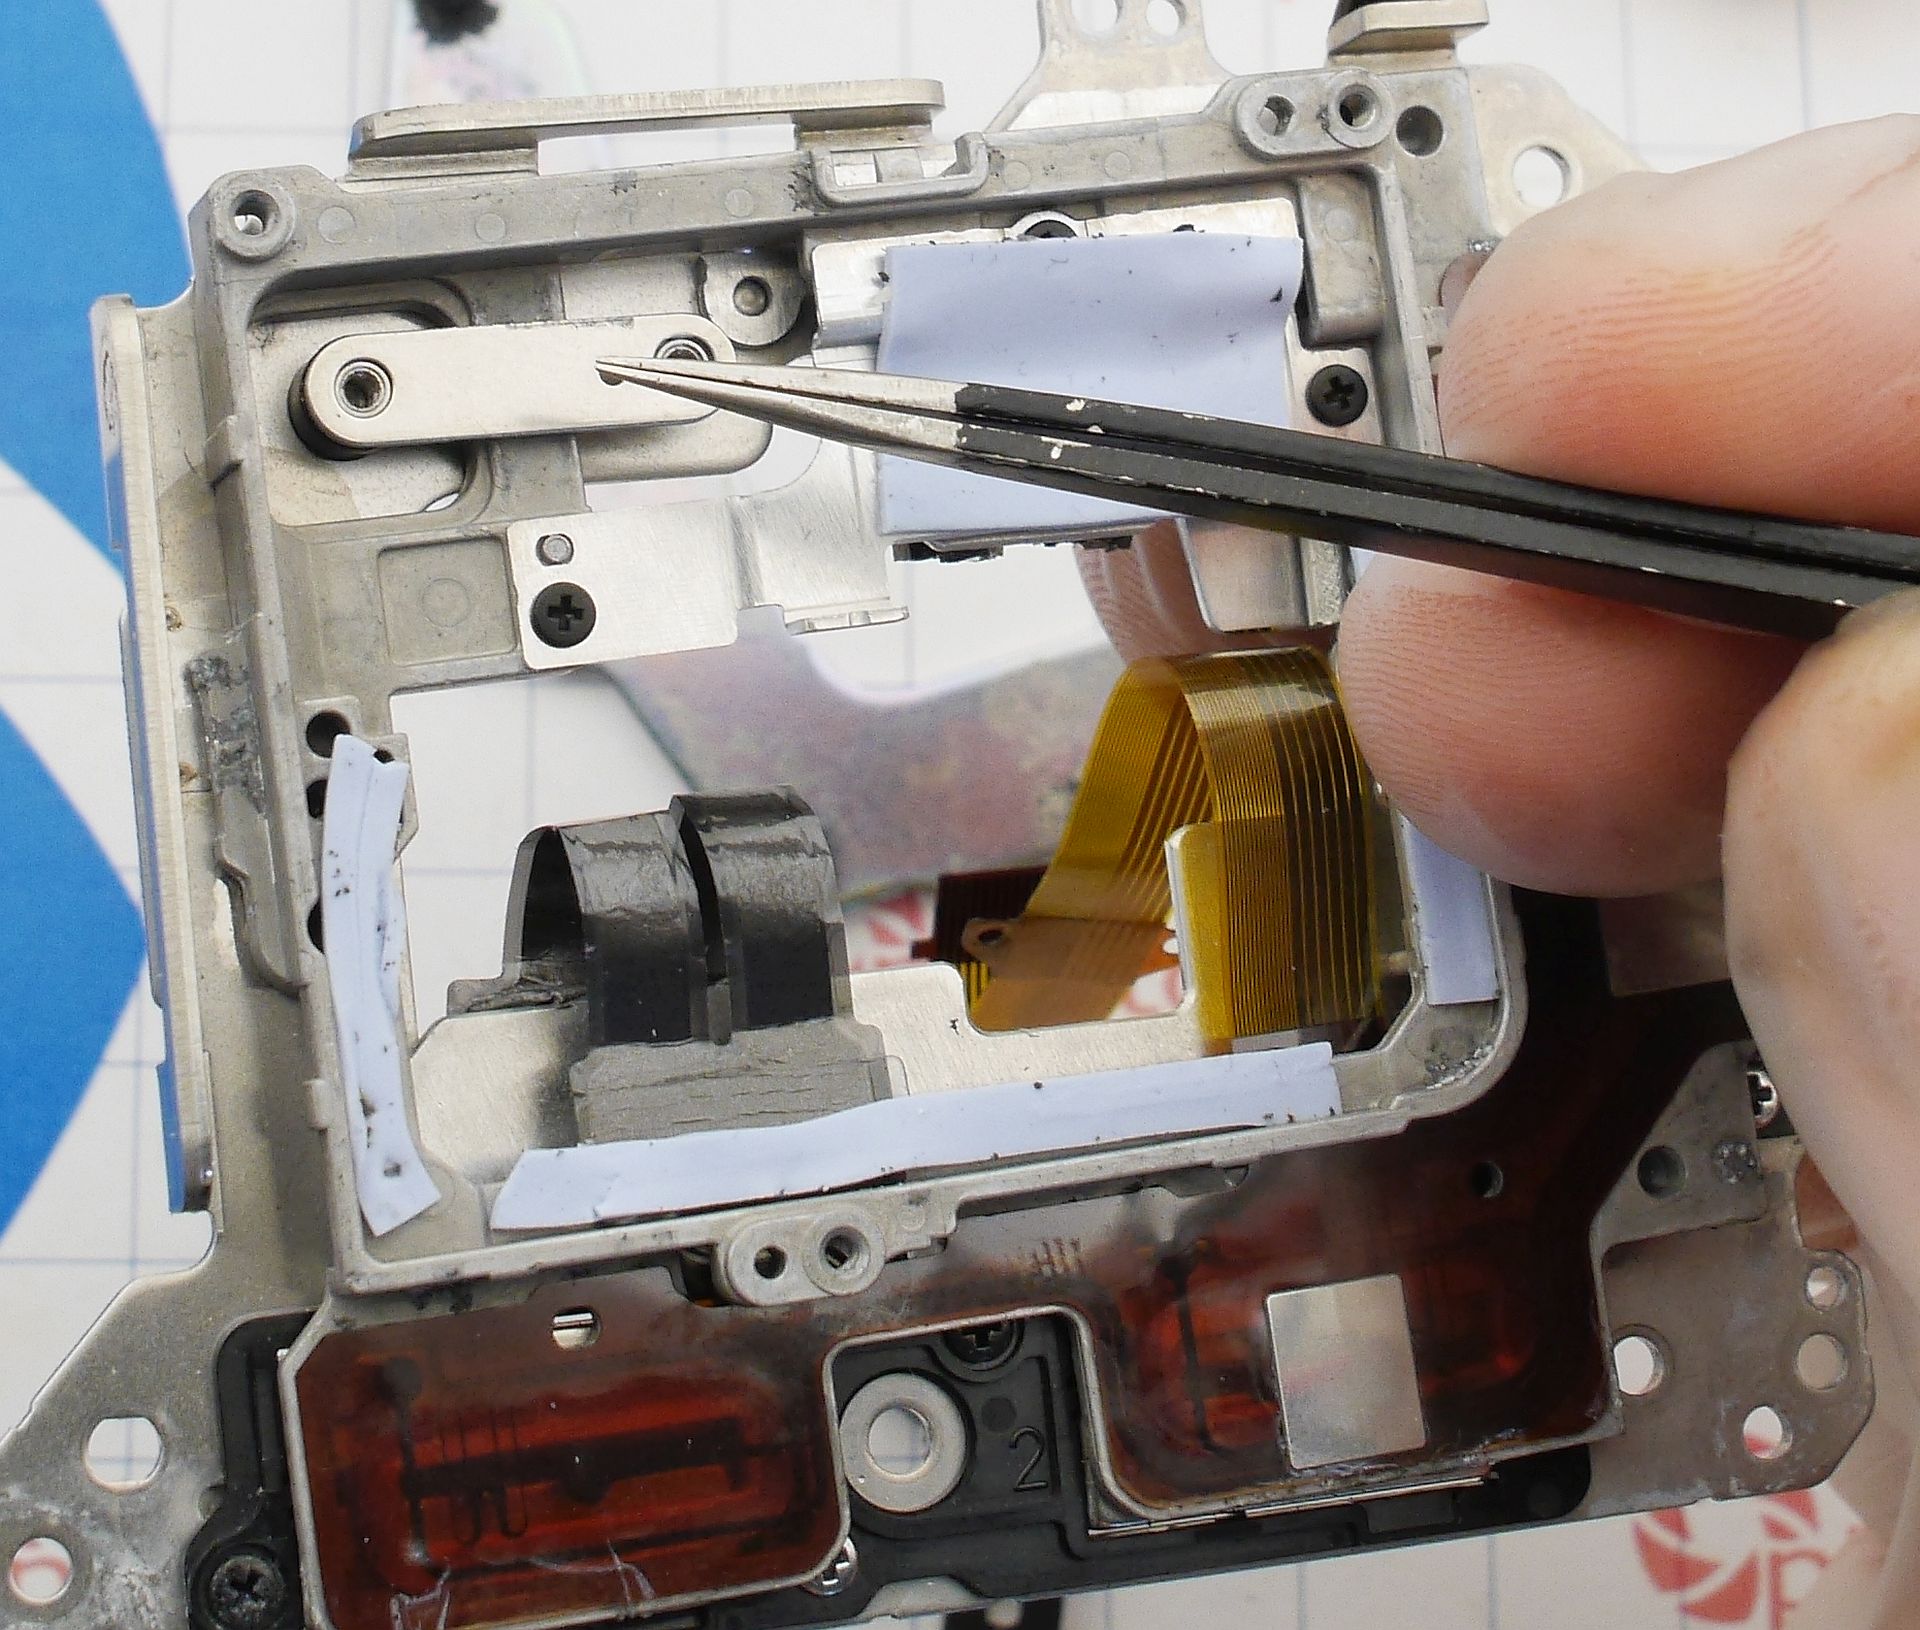
The sensor cables are peeled off from left to right. Then unscrew the sensor (3 screws) and remove it from the frame. Underneath, remove a small bridge plate and the entire IBIS module comes apart.
Let’s disassemble the IBIS module. Three screws hold the top plate (a magnetic latch), and it’s fixed in place by strong magnets. Lifting it risks losing the tiny ball bearings the sensor floats on. Oh - someone already lost them before me.
The sensor cables are peeled off from left to right. Then unscrew the sensor (3 screws) and remove it from the frame. Underneath, remove a small bridge plate and the entire IBIS module comes apart.
Note: thermal tape removal is not shown - I didn’t have any.

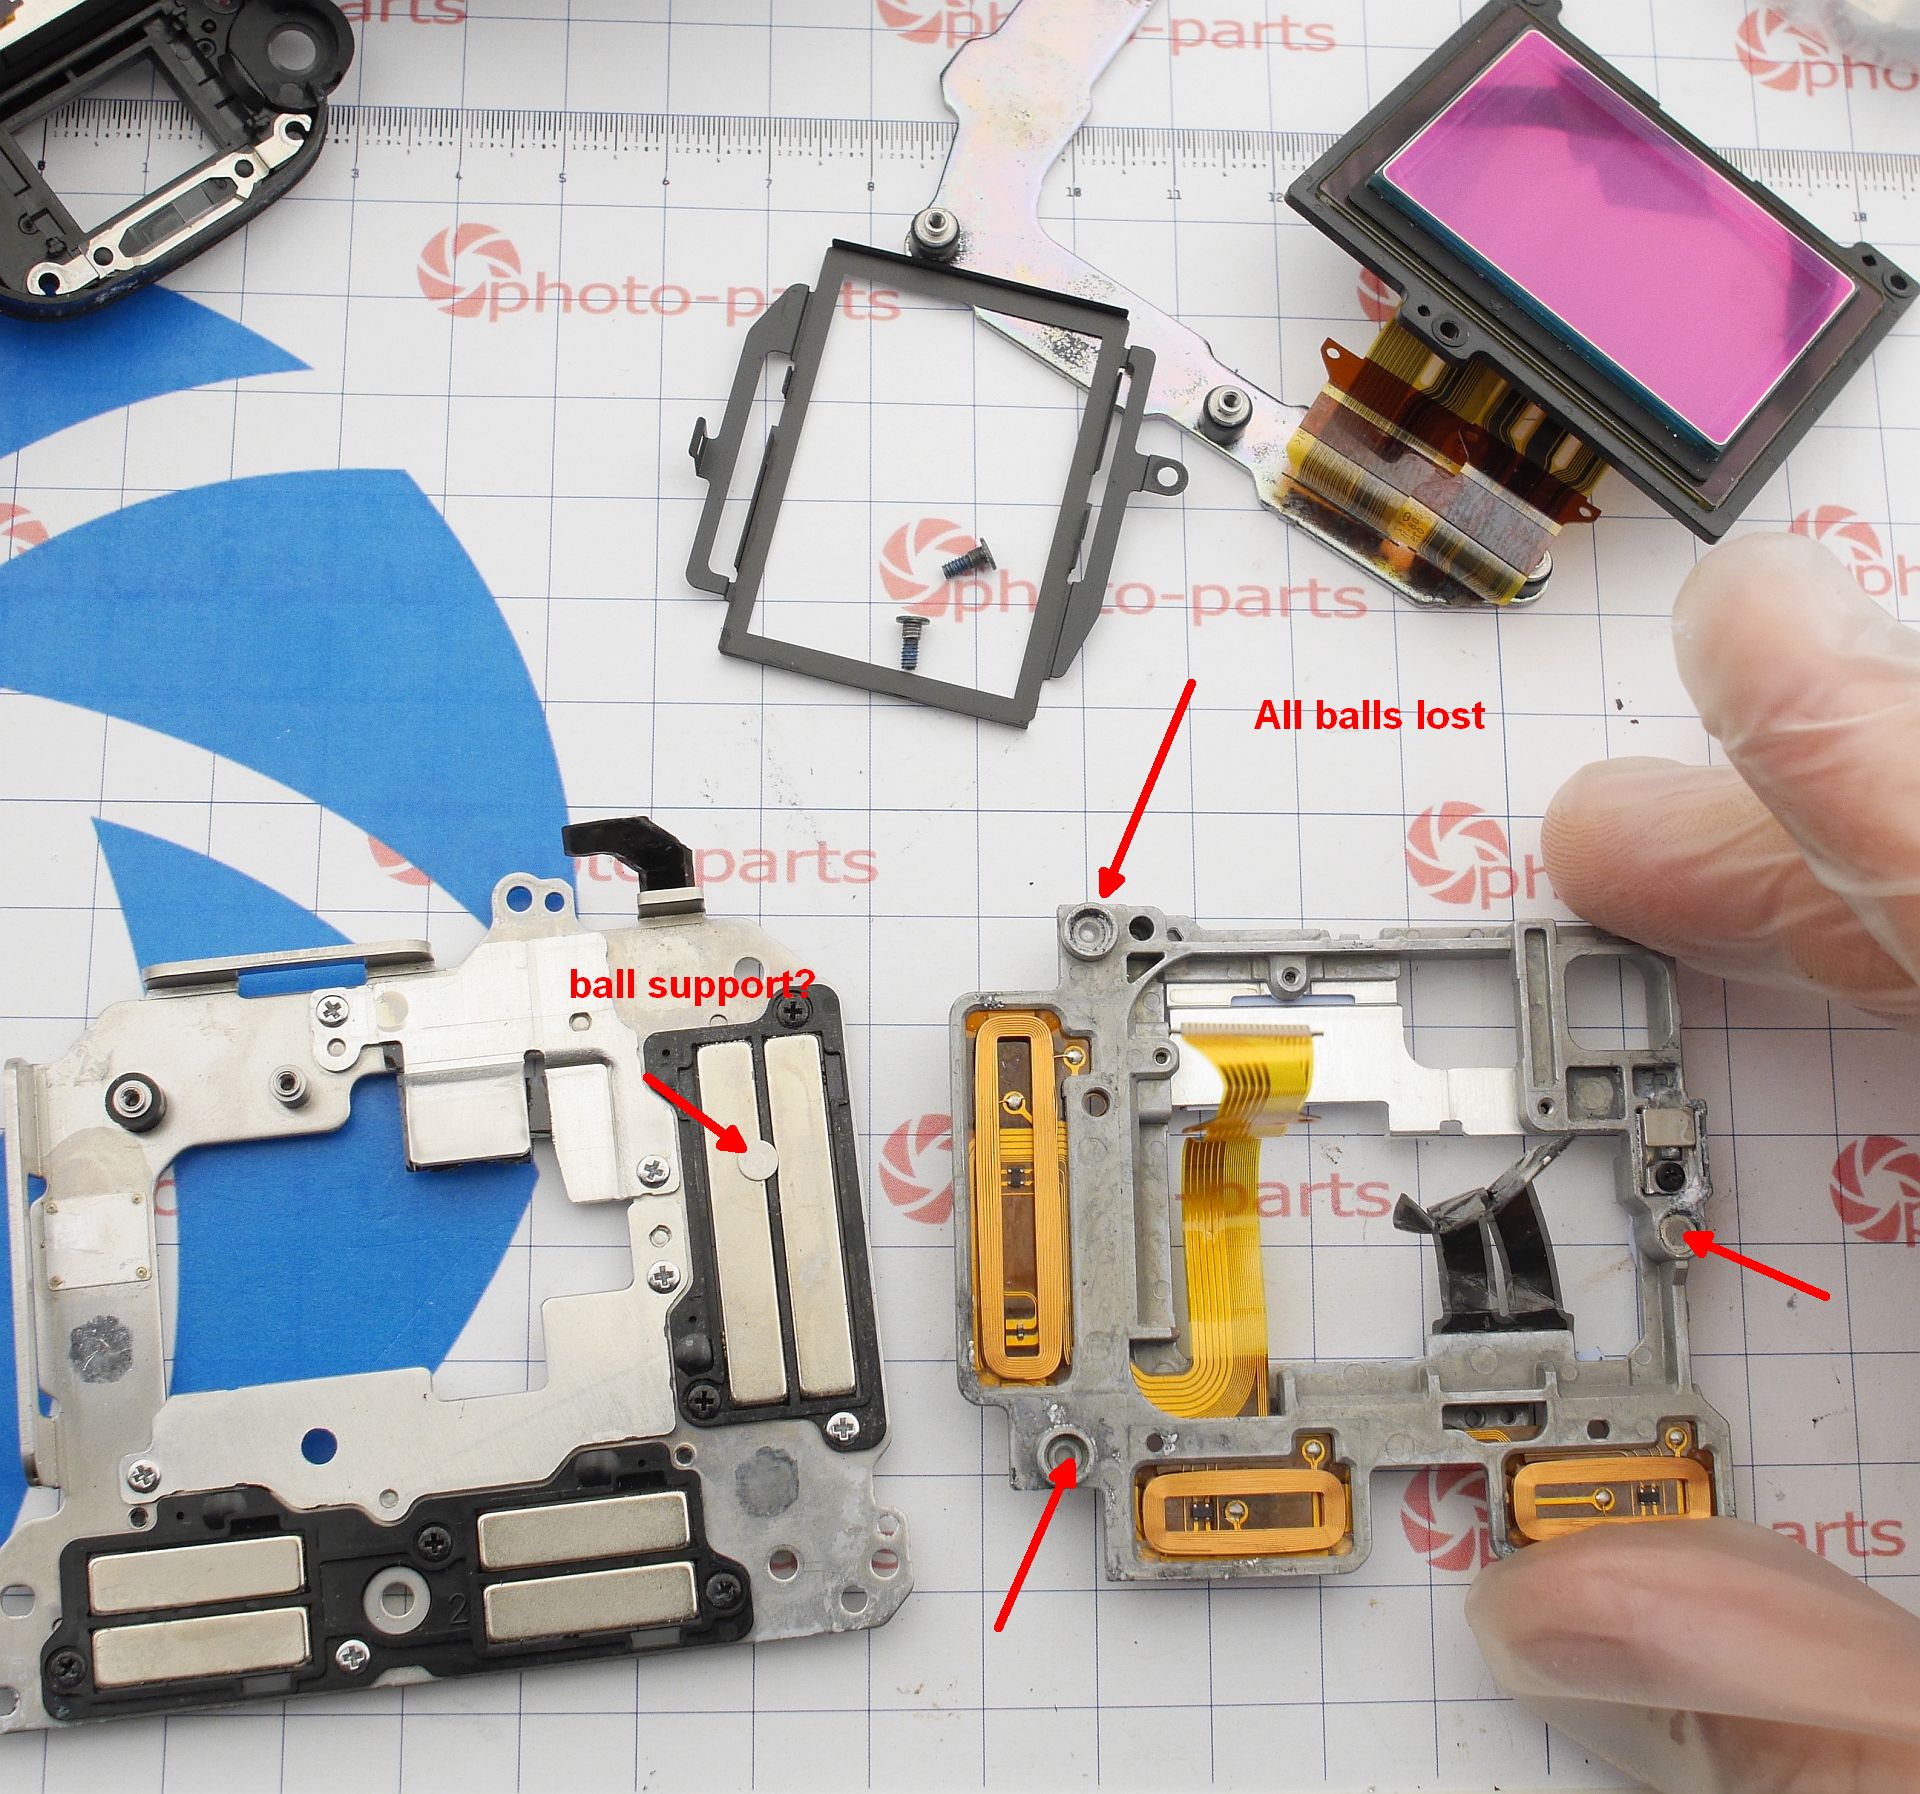
Now, sending a strong beams of hate to the previous “technician”. No balls on the magnets. One support pad was misaligned, one missing. That’s bad - without a donor, you can’t restore this IBIS module properly. It’s nearly impossible to match the pad thikness exactly, and the sensor will tilt.
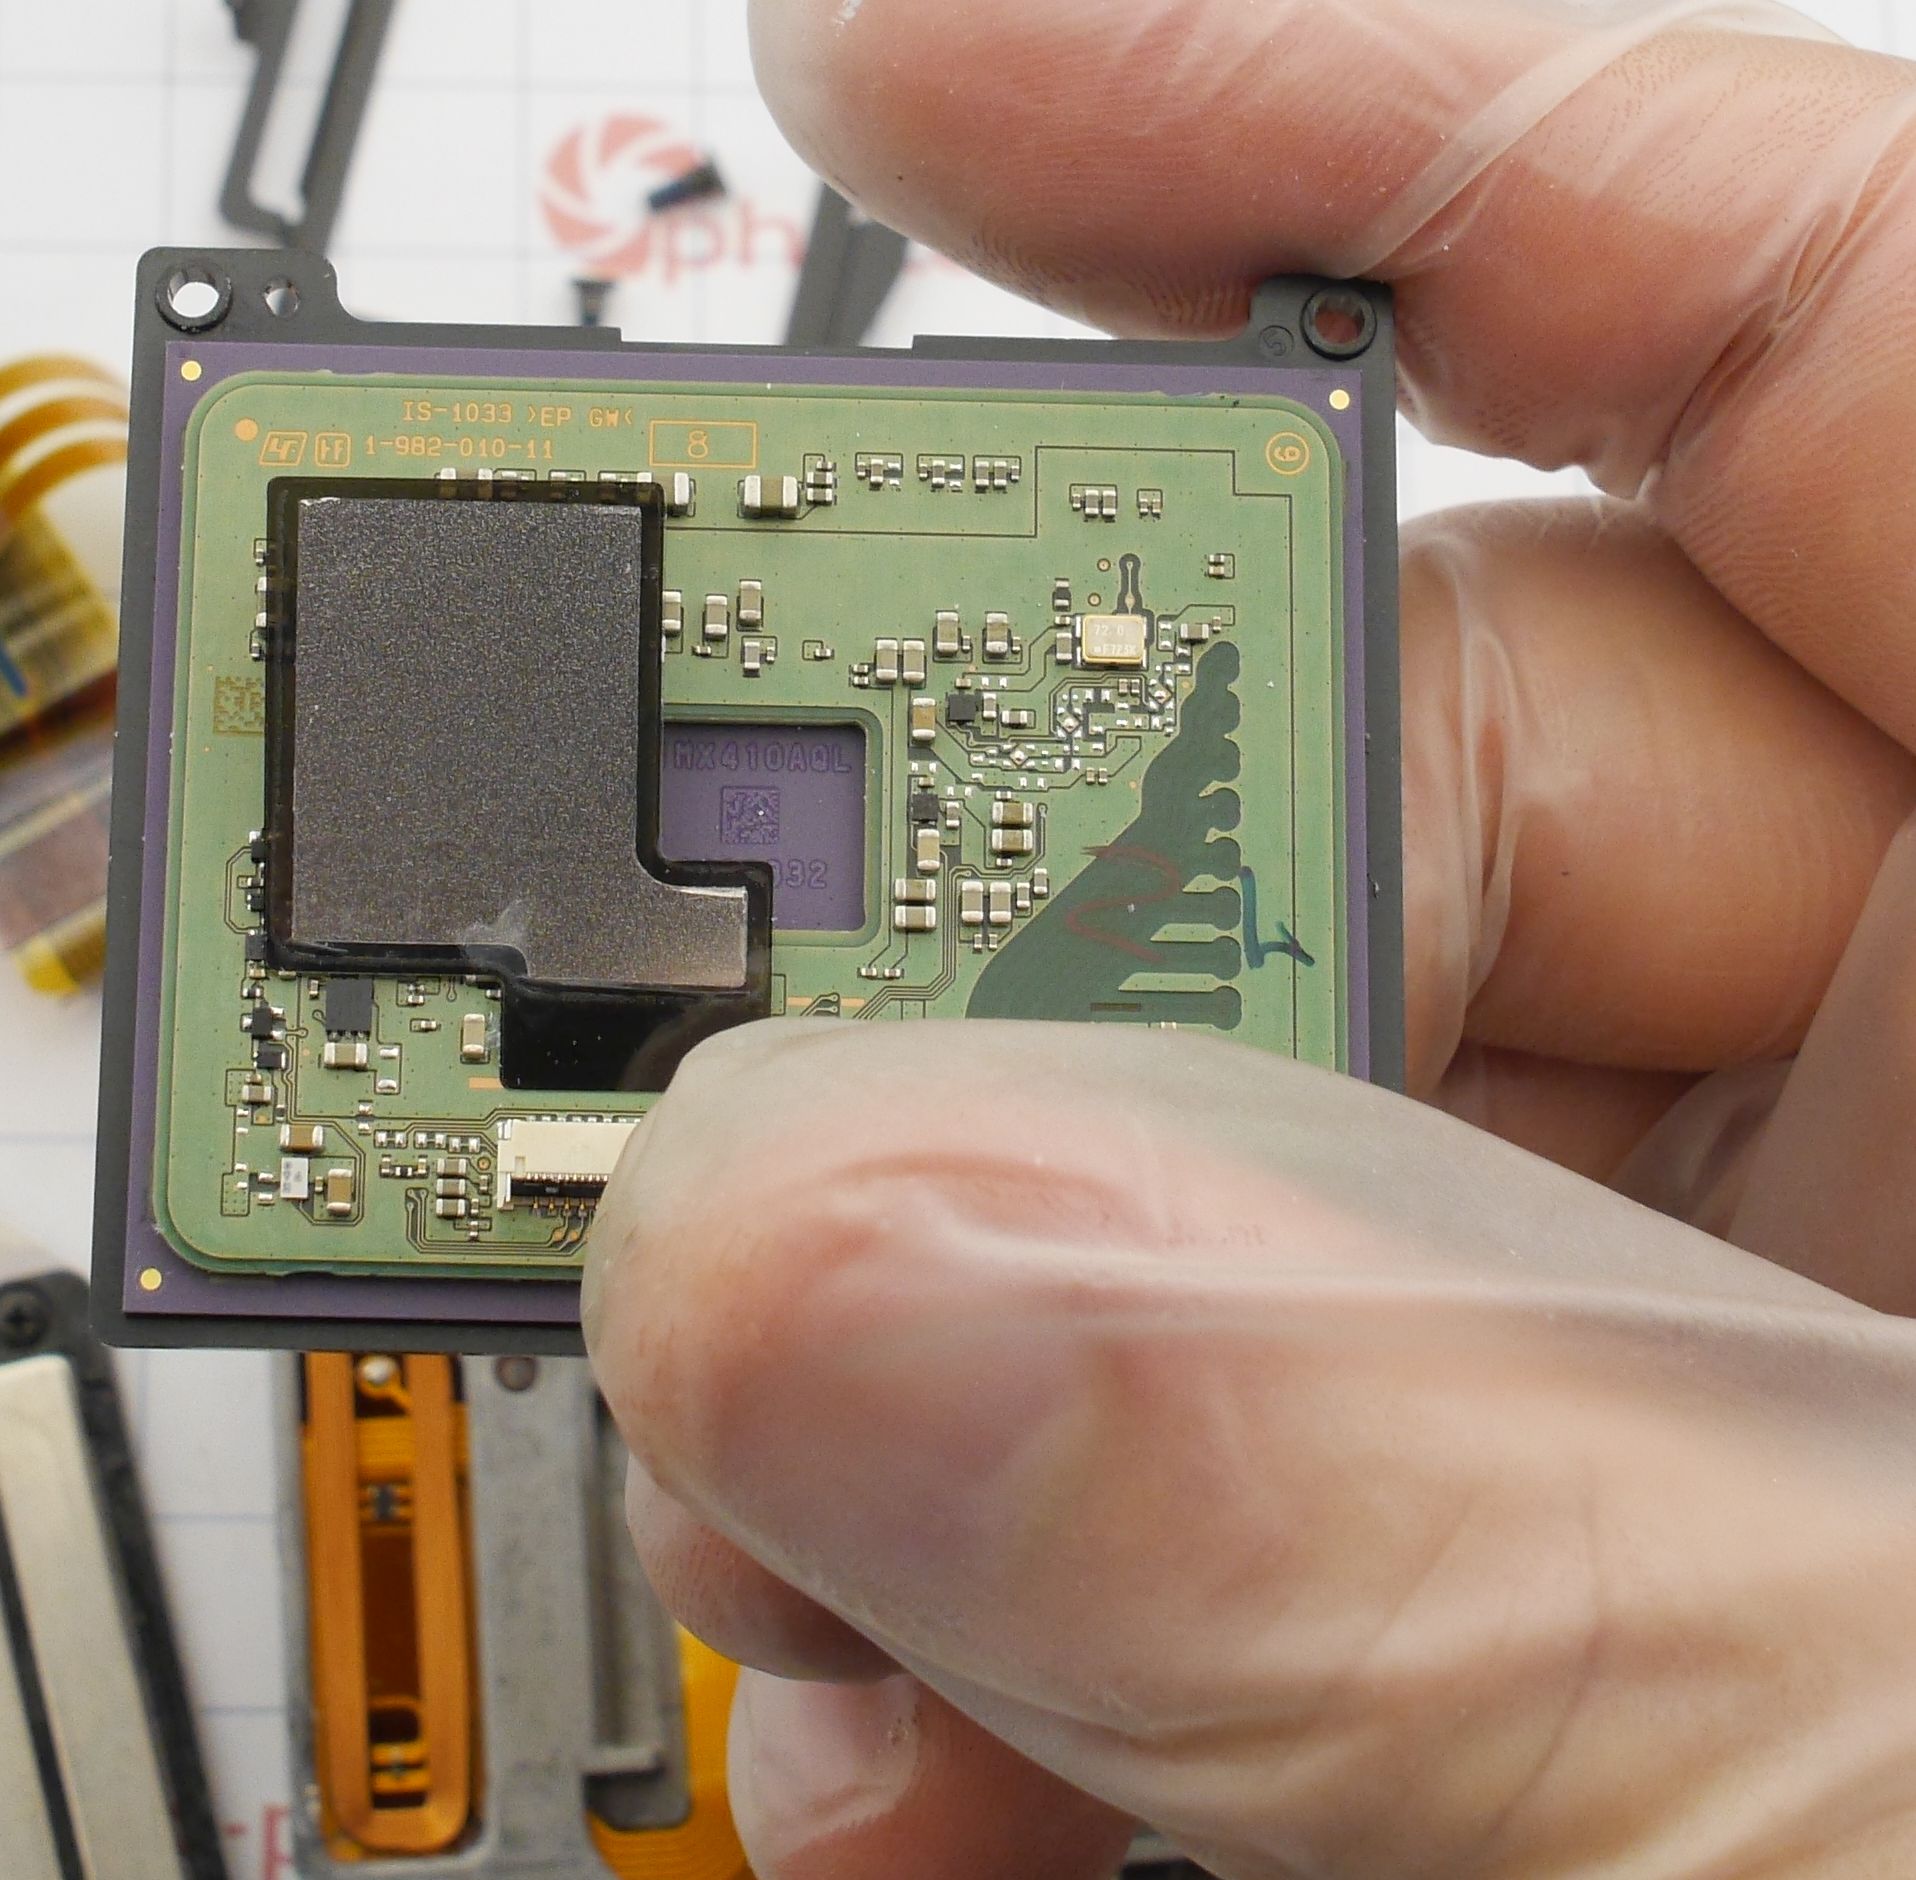
 Side note - now I know the sensor model: it’s an IMX410AQL.
Here’s an interesting sensor list - I didn’t know A7C and A7M3 used the same chip.
 Anyway, I repaired the IBIS module off-screen. I needed 3 ball bearings, thermal film, and one support pad to bring it back to life. Again - without a donor, don’t even try.
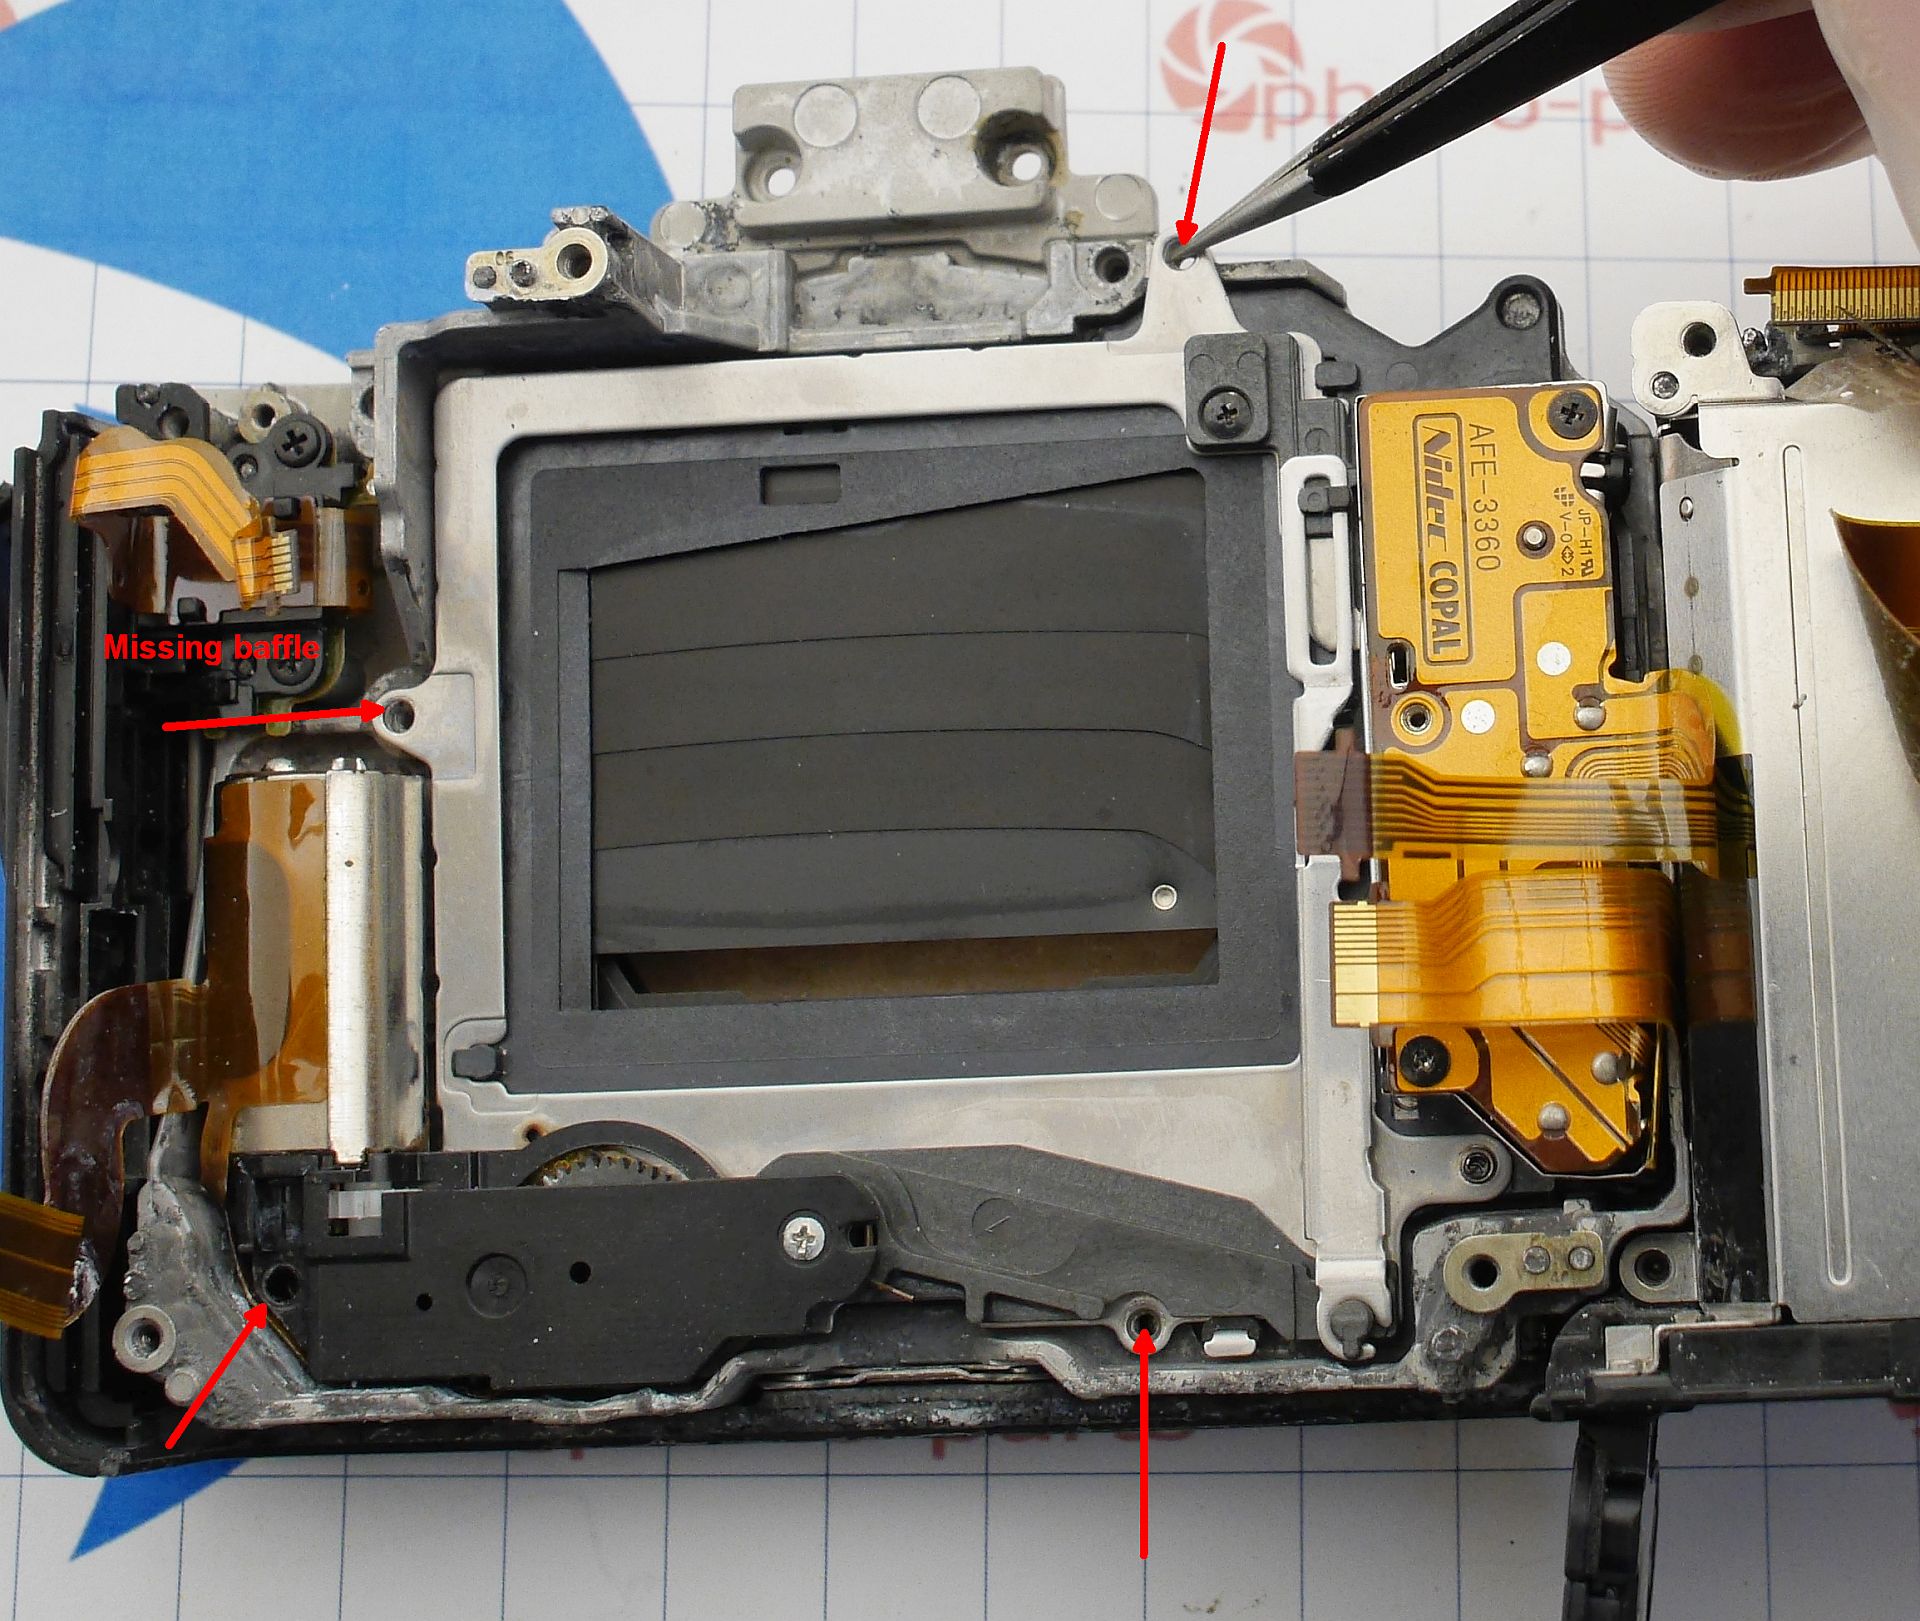
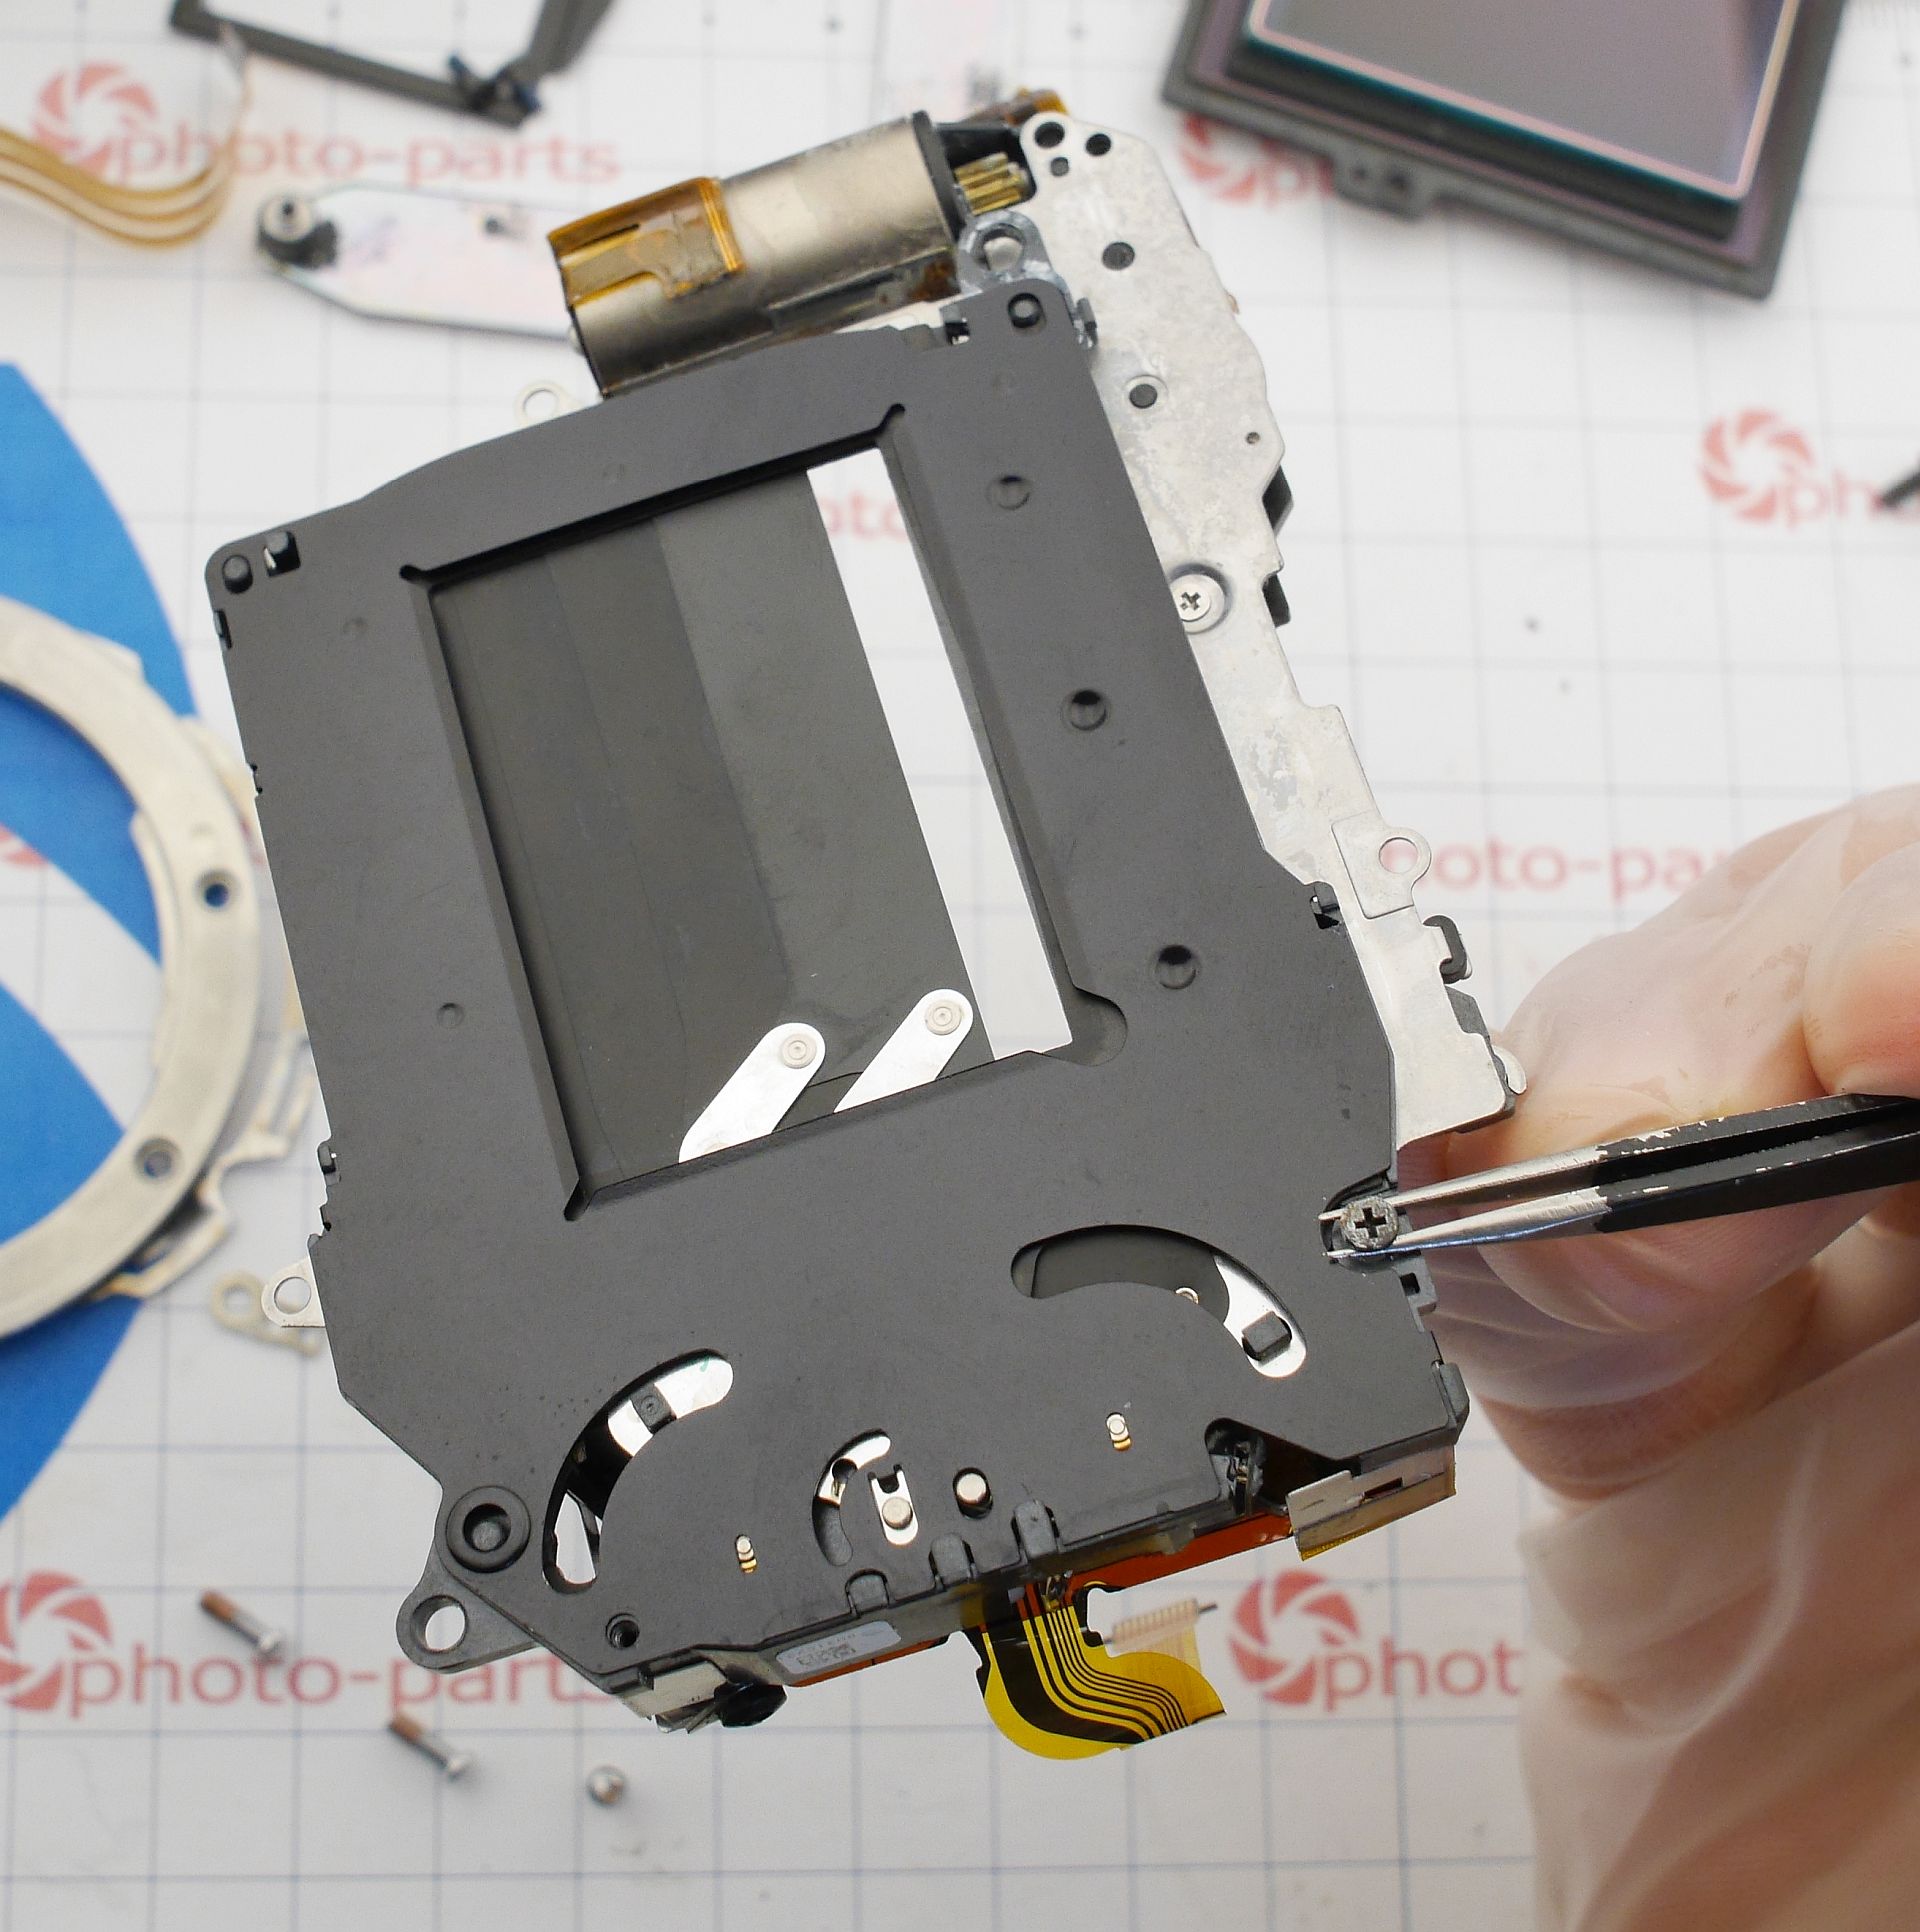
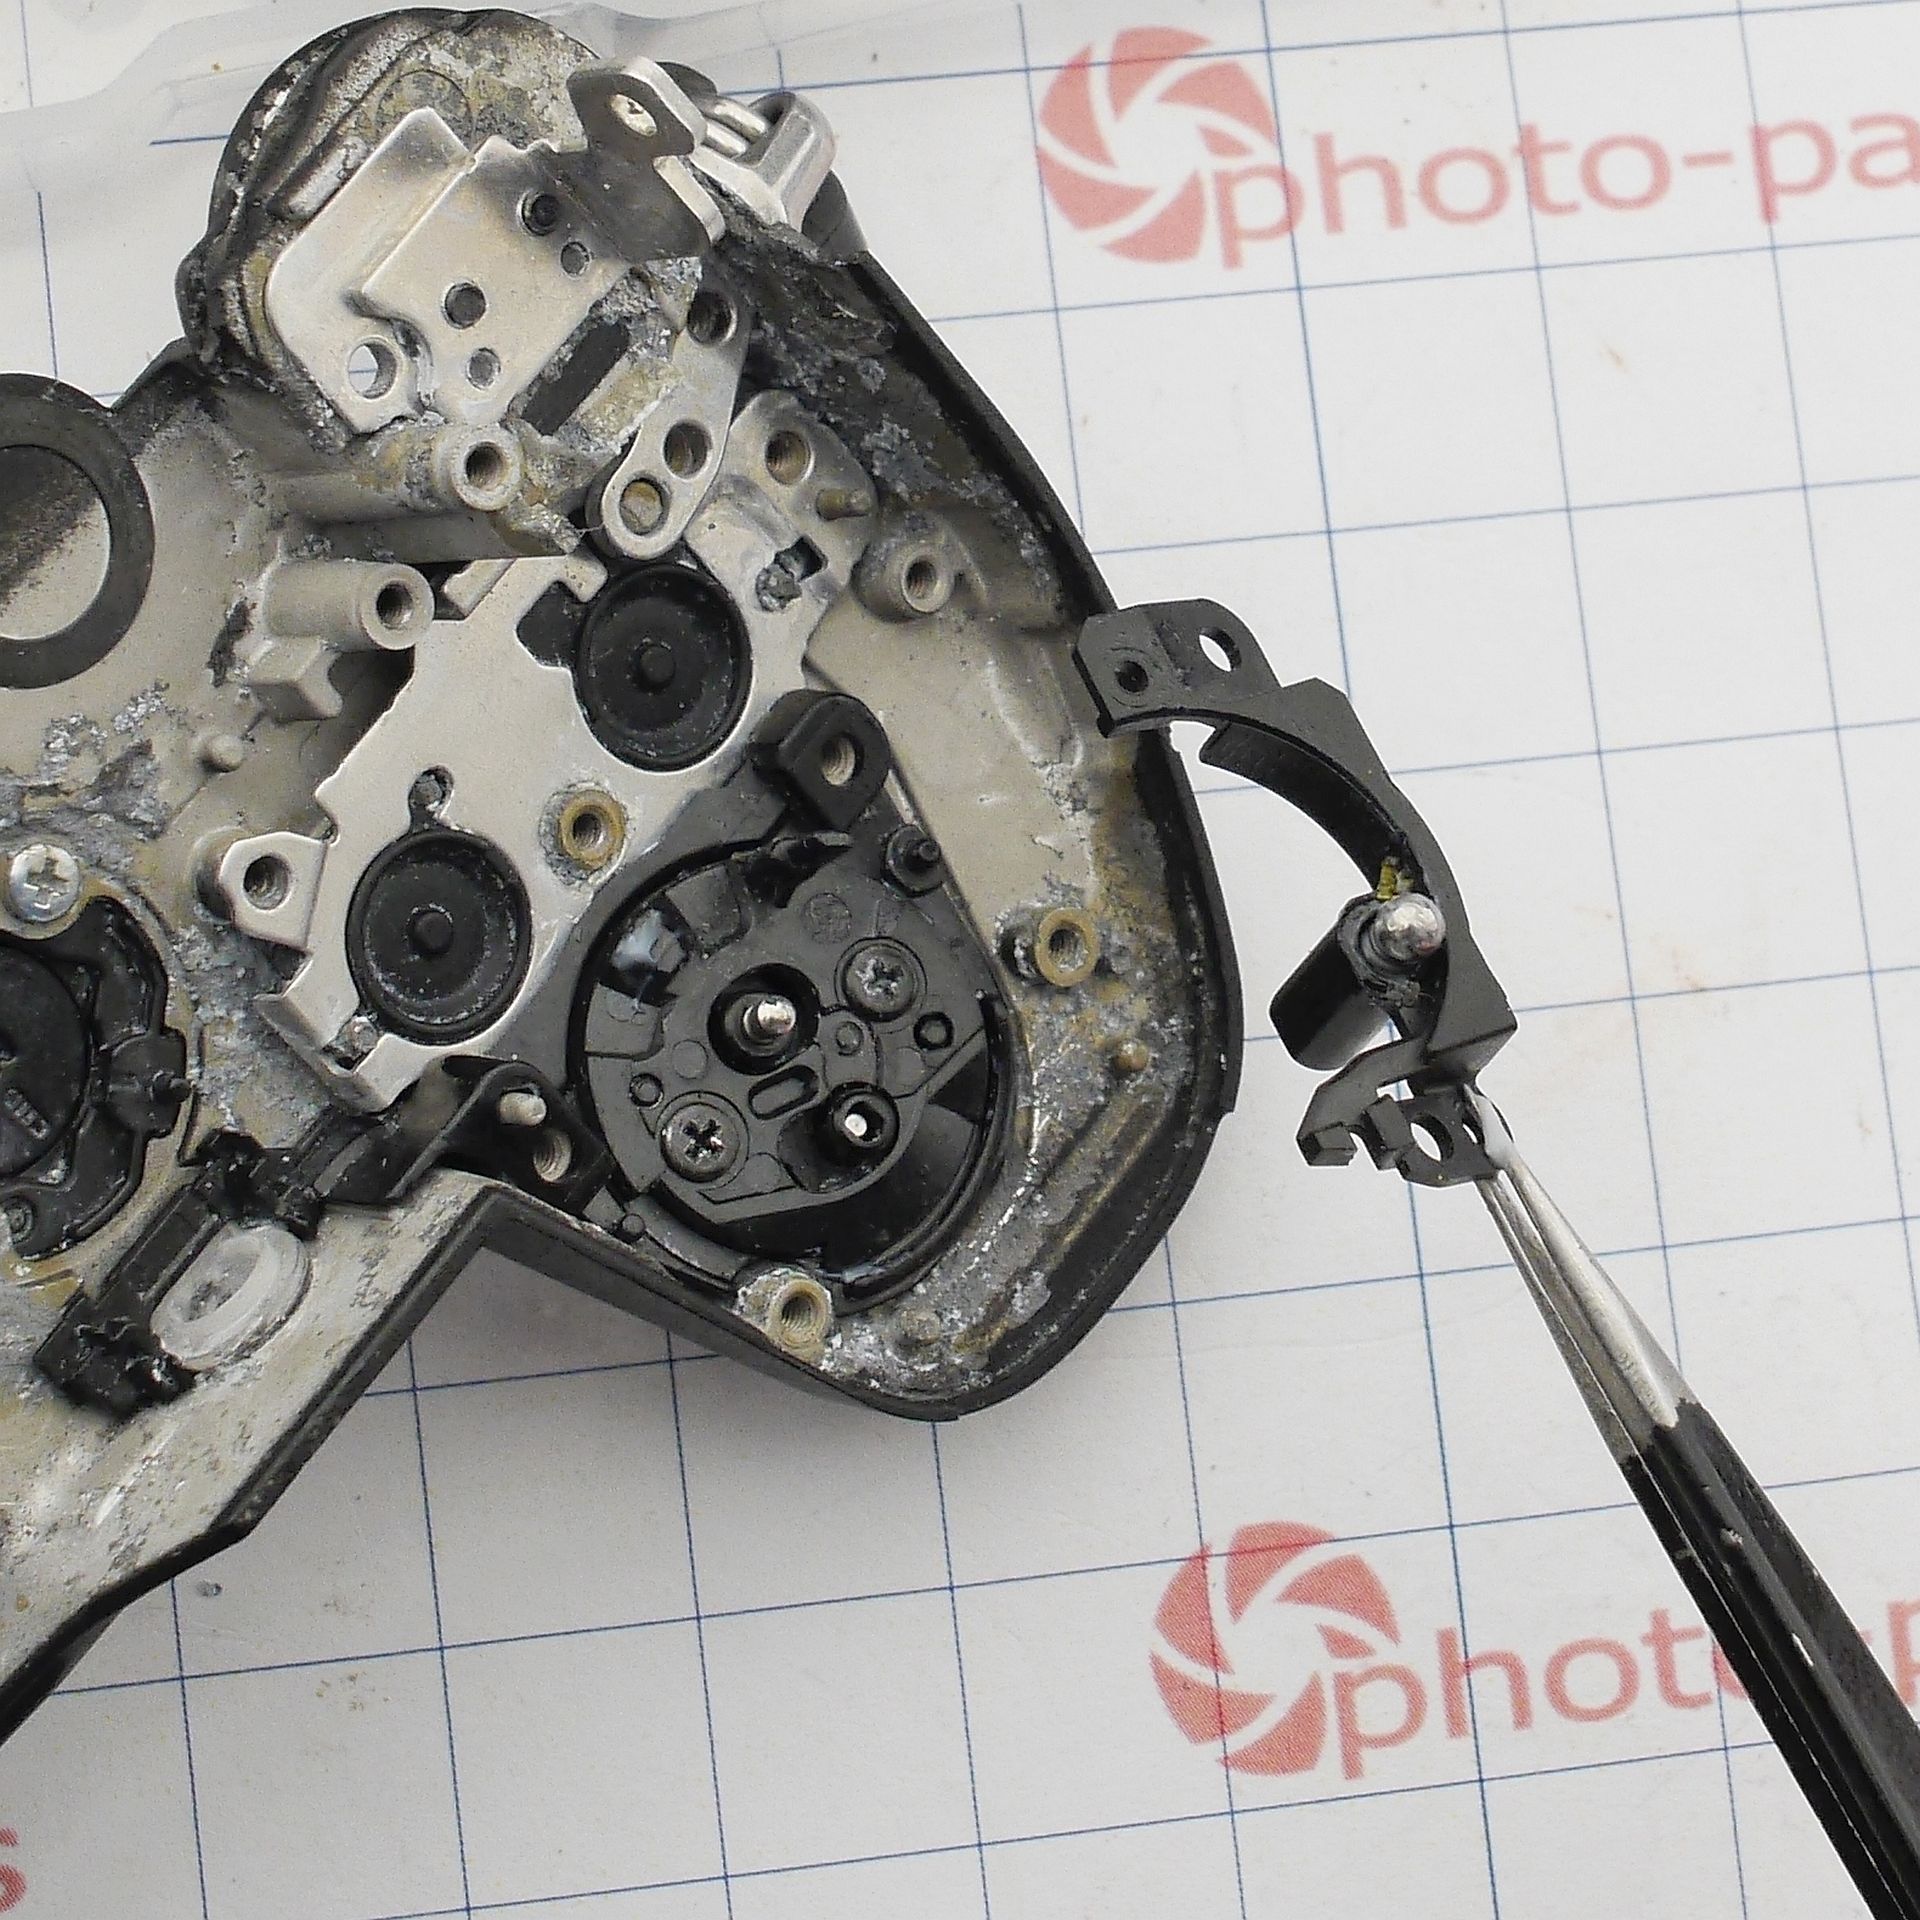
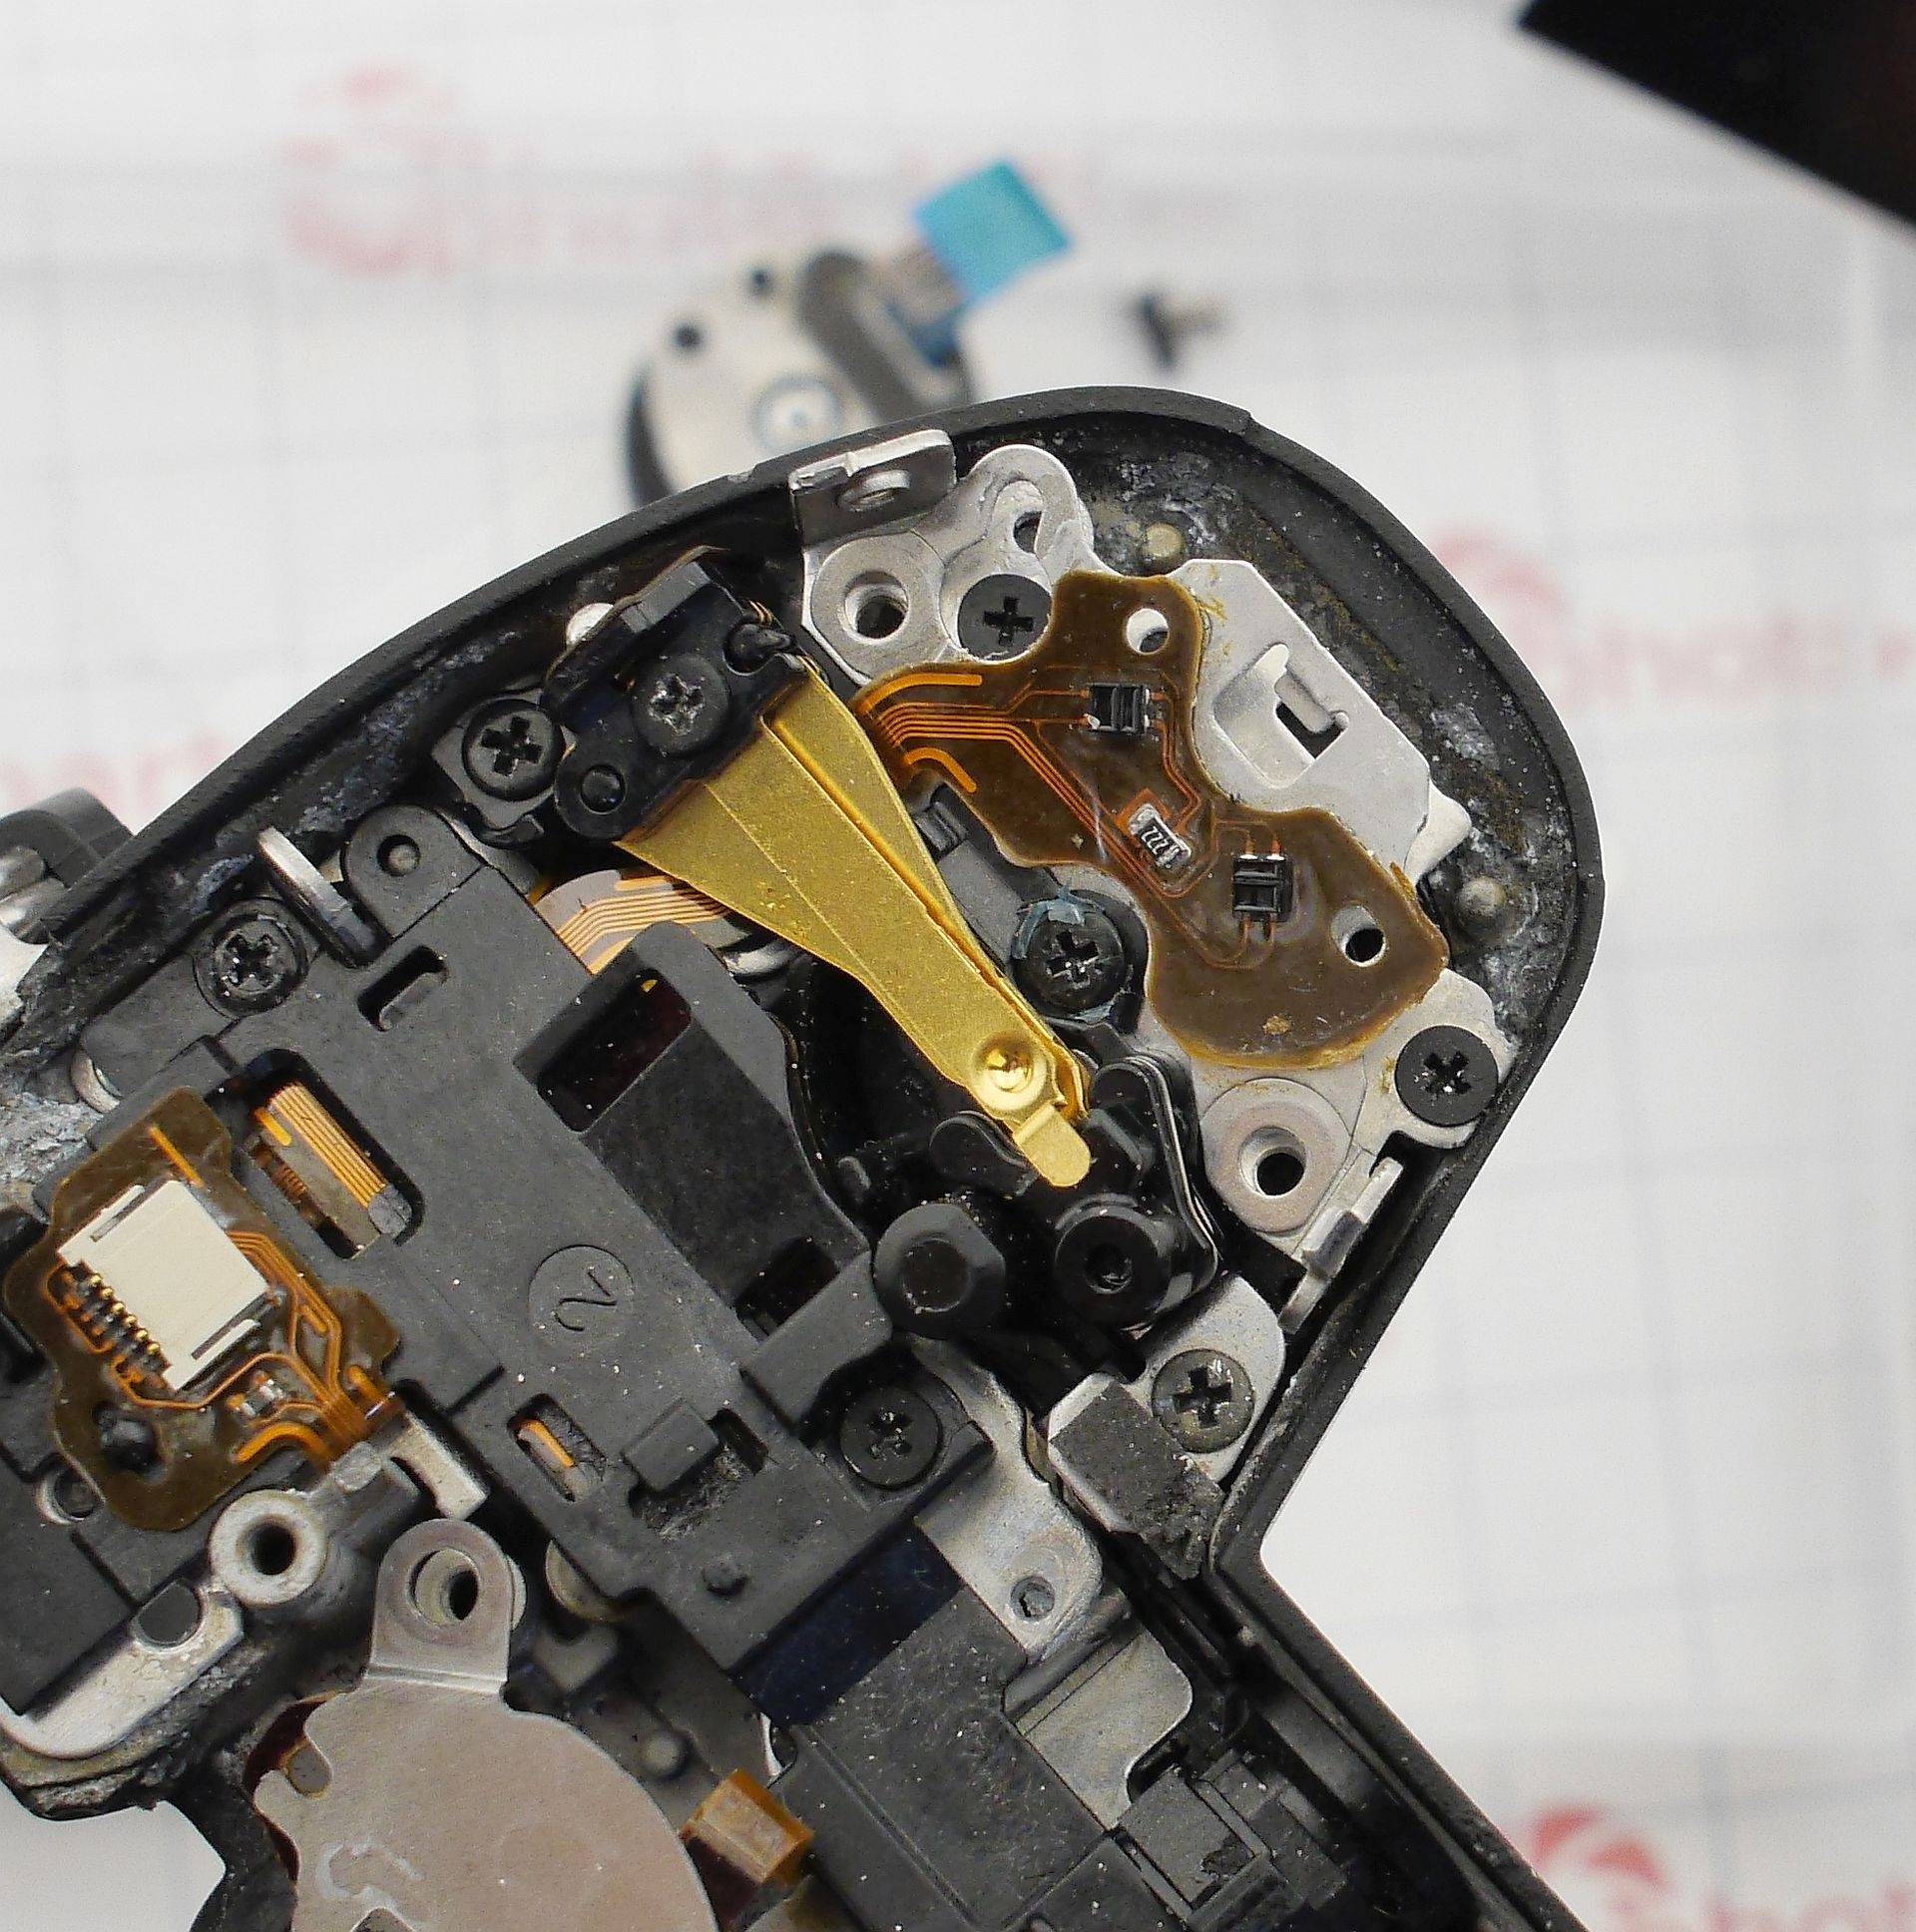
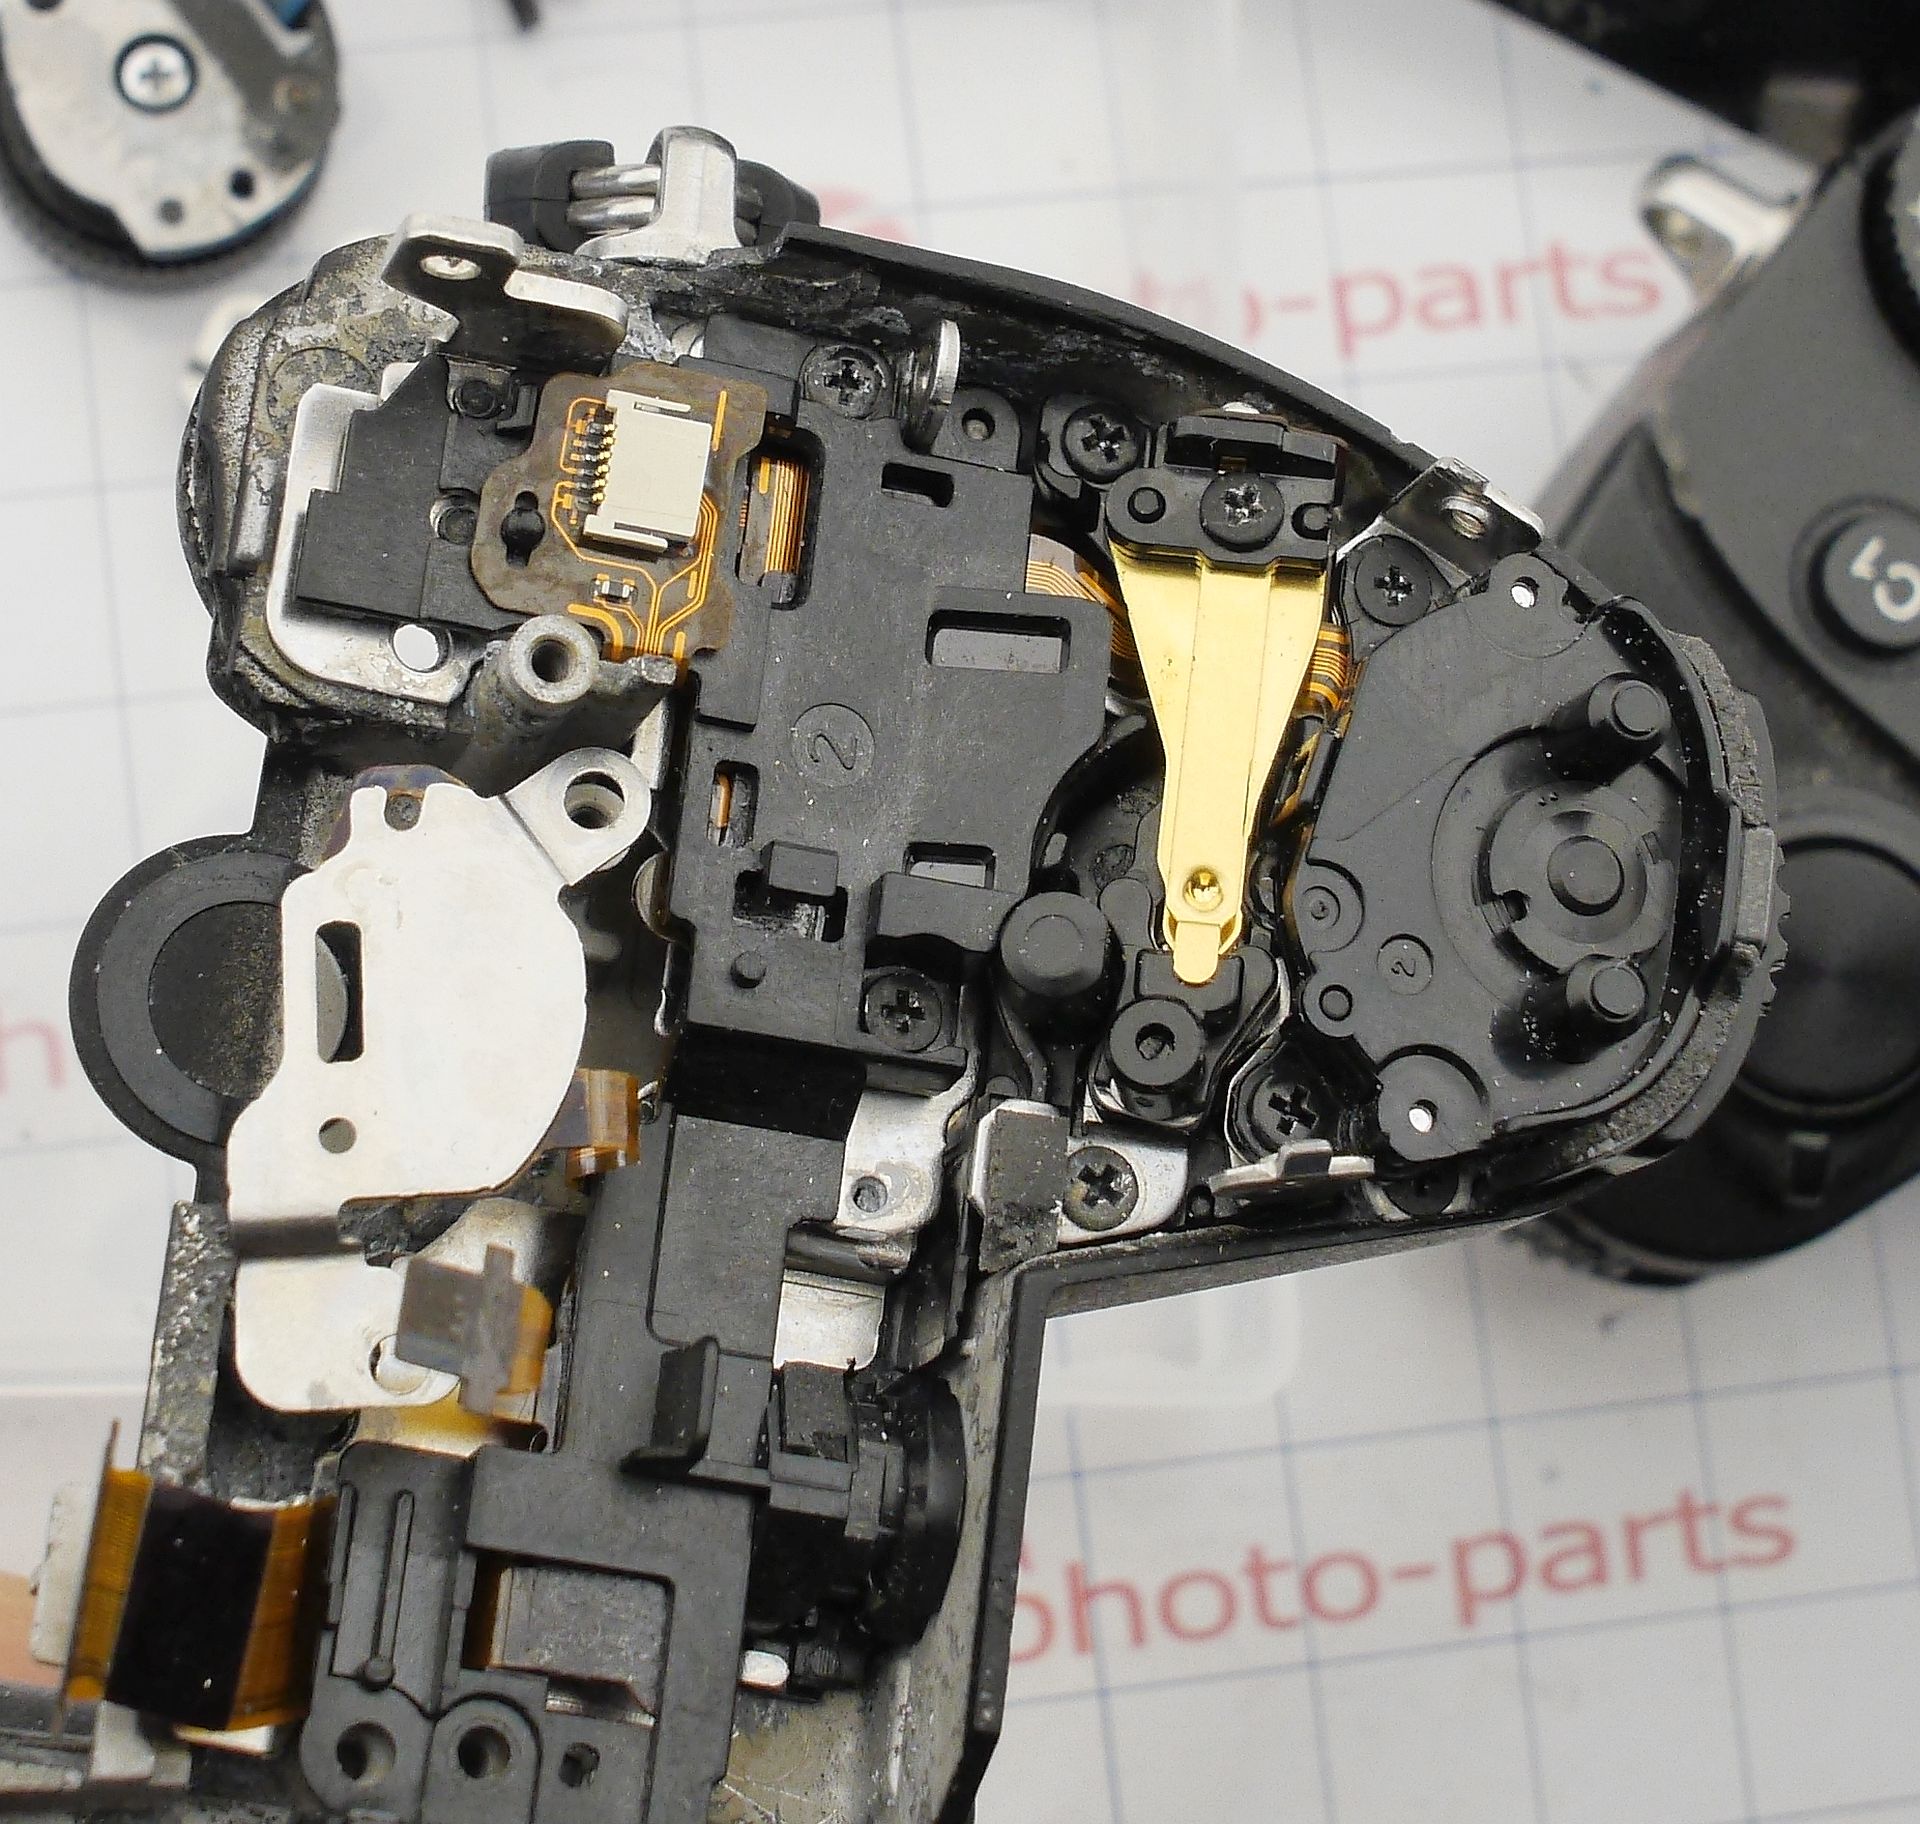
Let’s check out the mechanical parts - shutter and cocking mechanism.
Oh great - more vandalism. The arrows point to places where screws should be - they’re gone. A small mounting post near the motor is missing too.
Anyway, I repaired the IBIS module off-screen. I needed 3 ball bearings, thermal film, and one support pad to bring it back to life. Again - without a donor, don’t even try.
Let’s check out the mechanical parts - shutter and cocking mechanism.
Oh great - more vandalism. The arrows point to places where screws should be - they’re gone. A small mounting post near the motor is missing too.
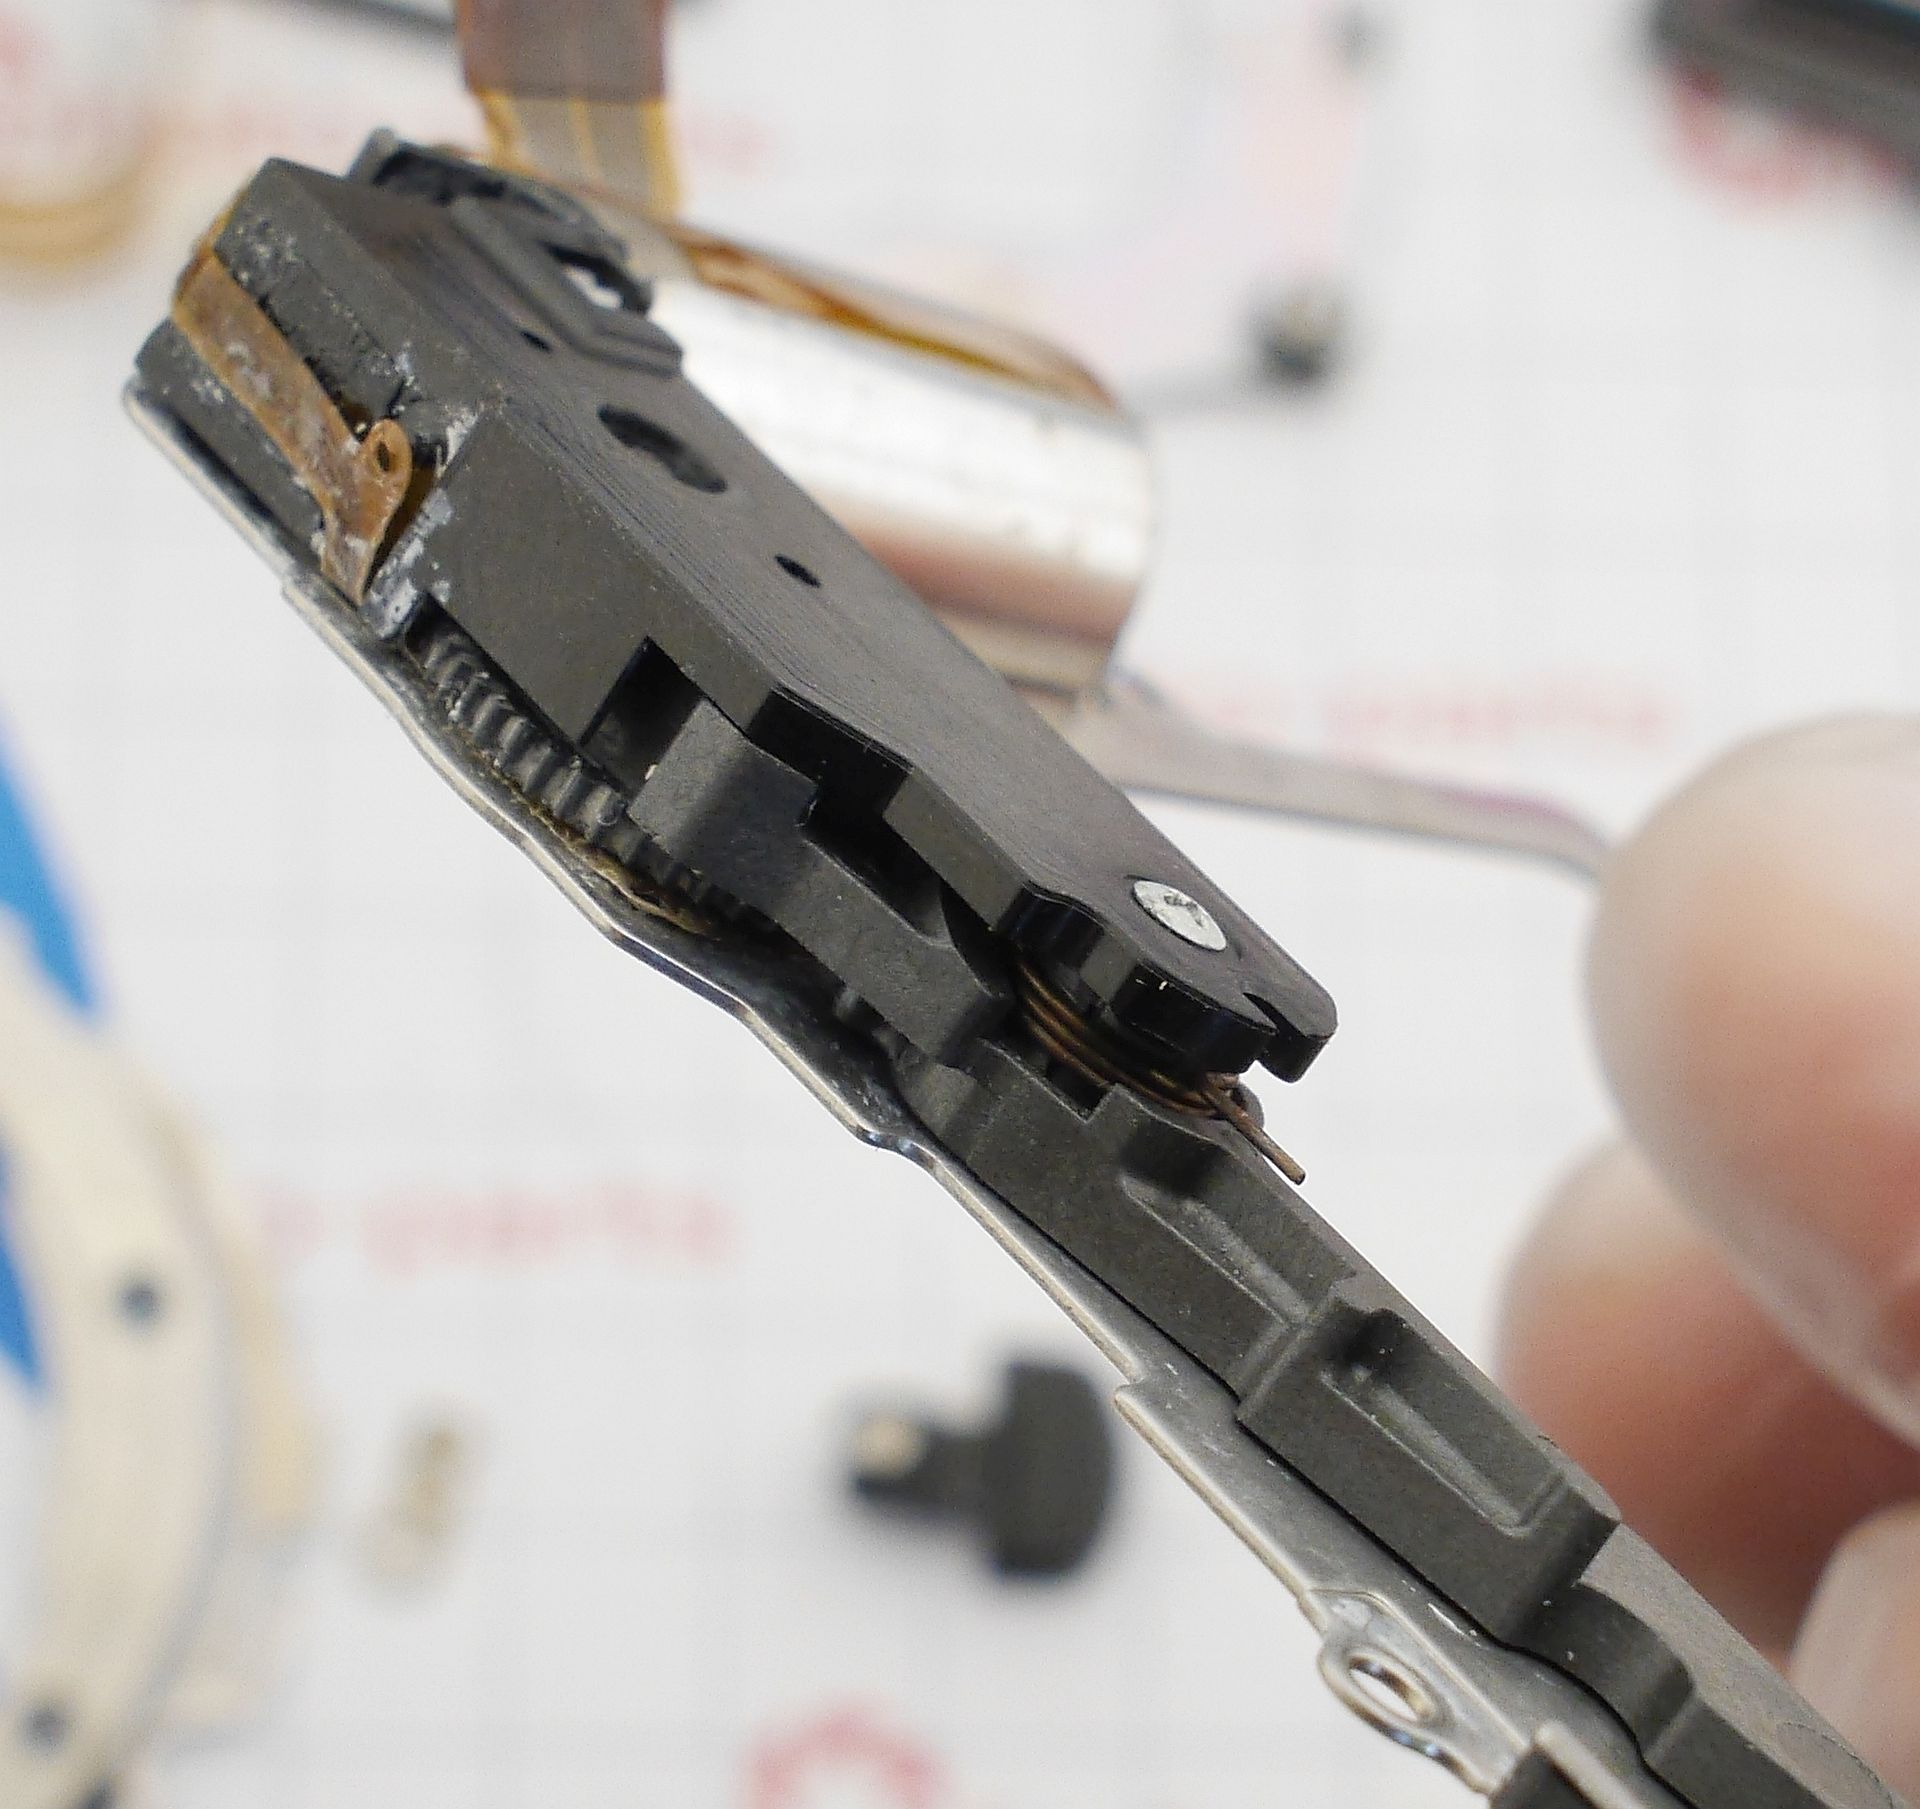
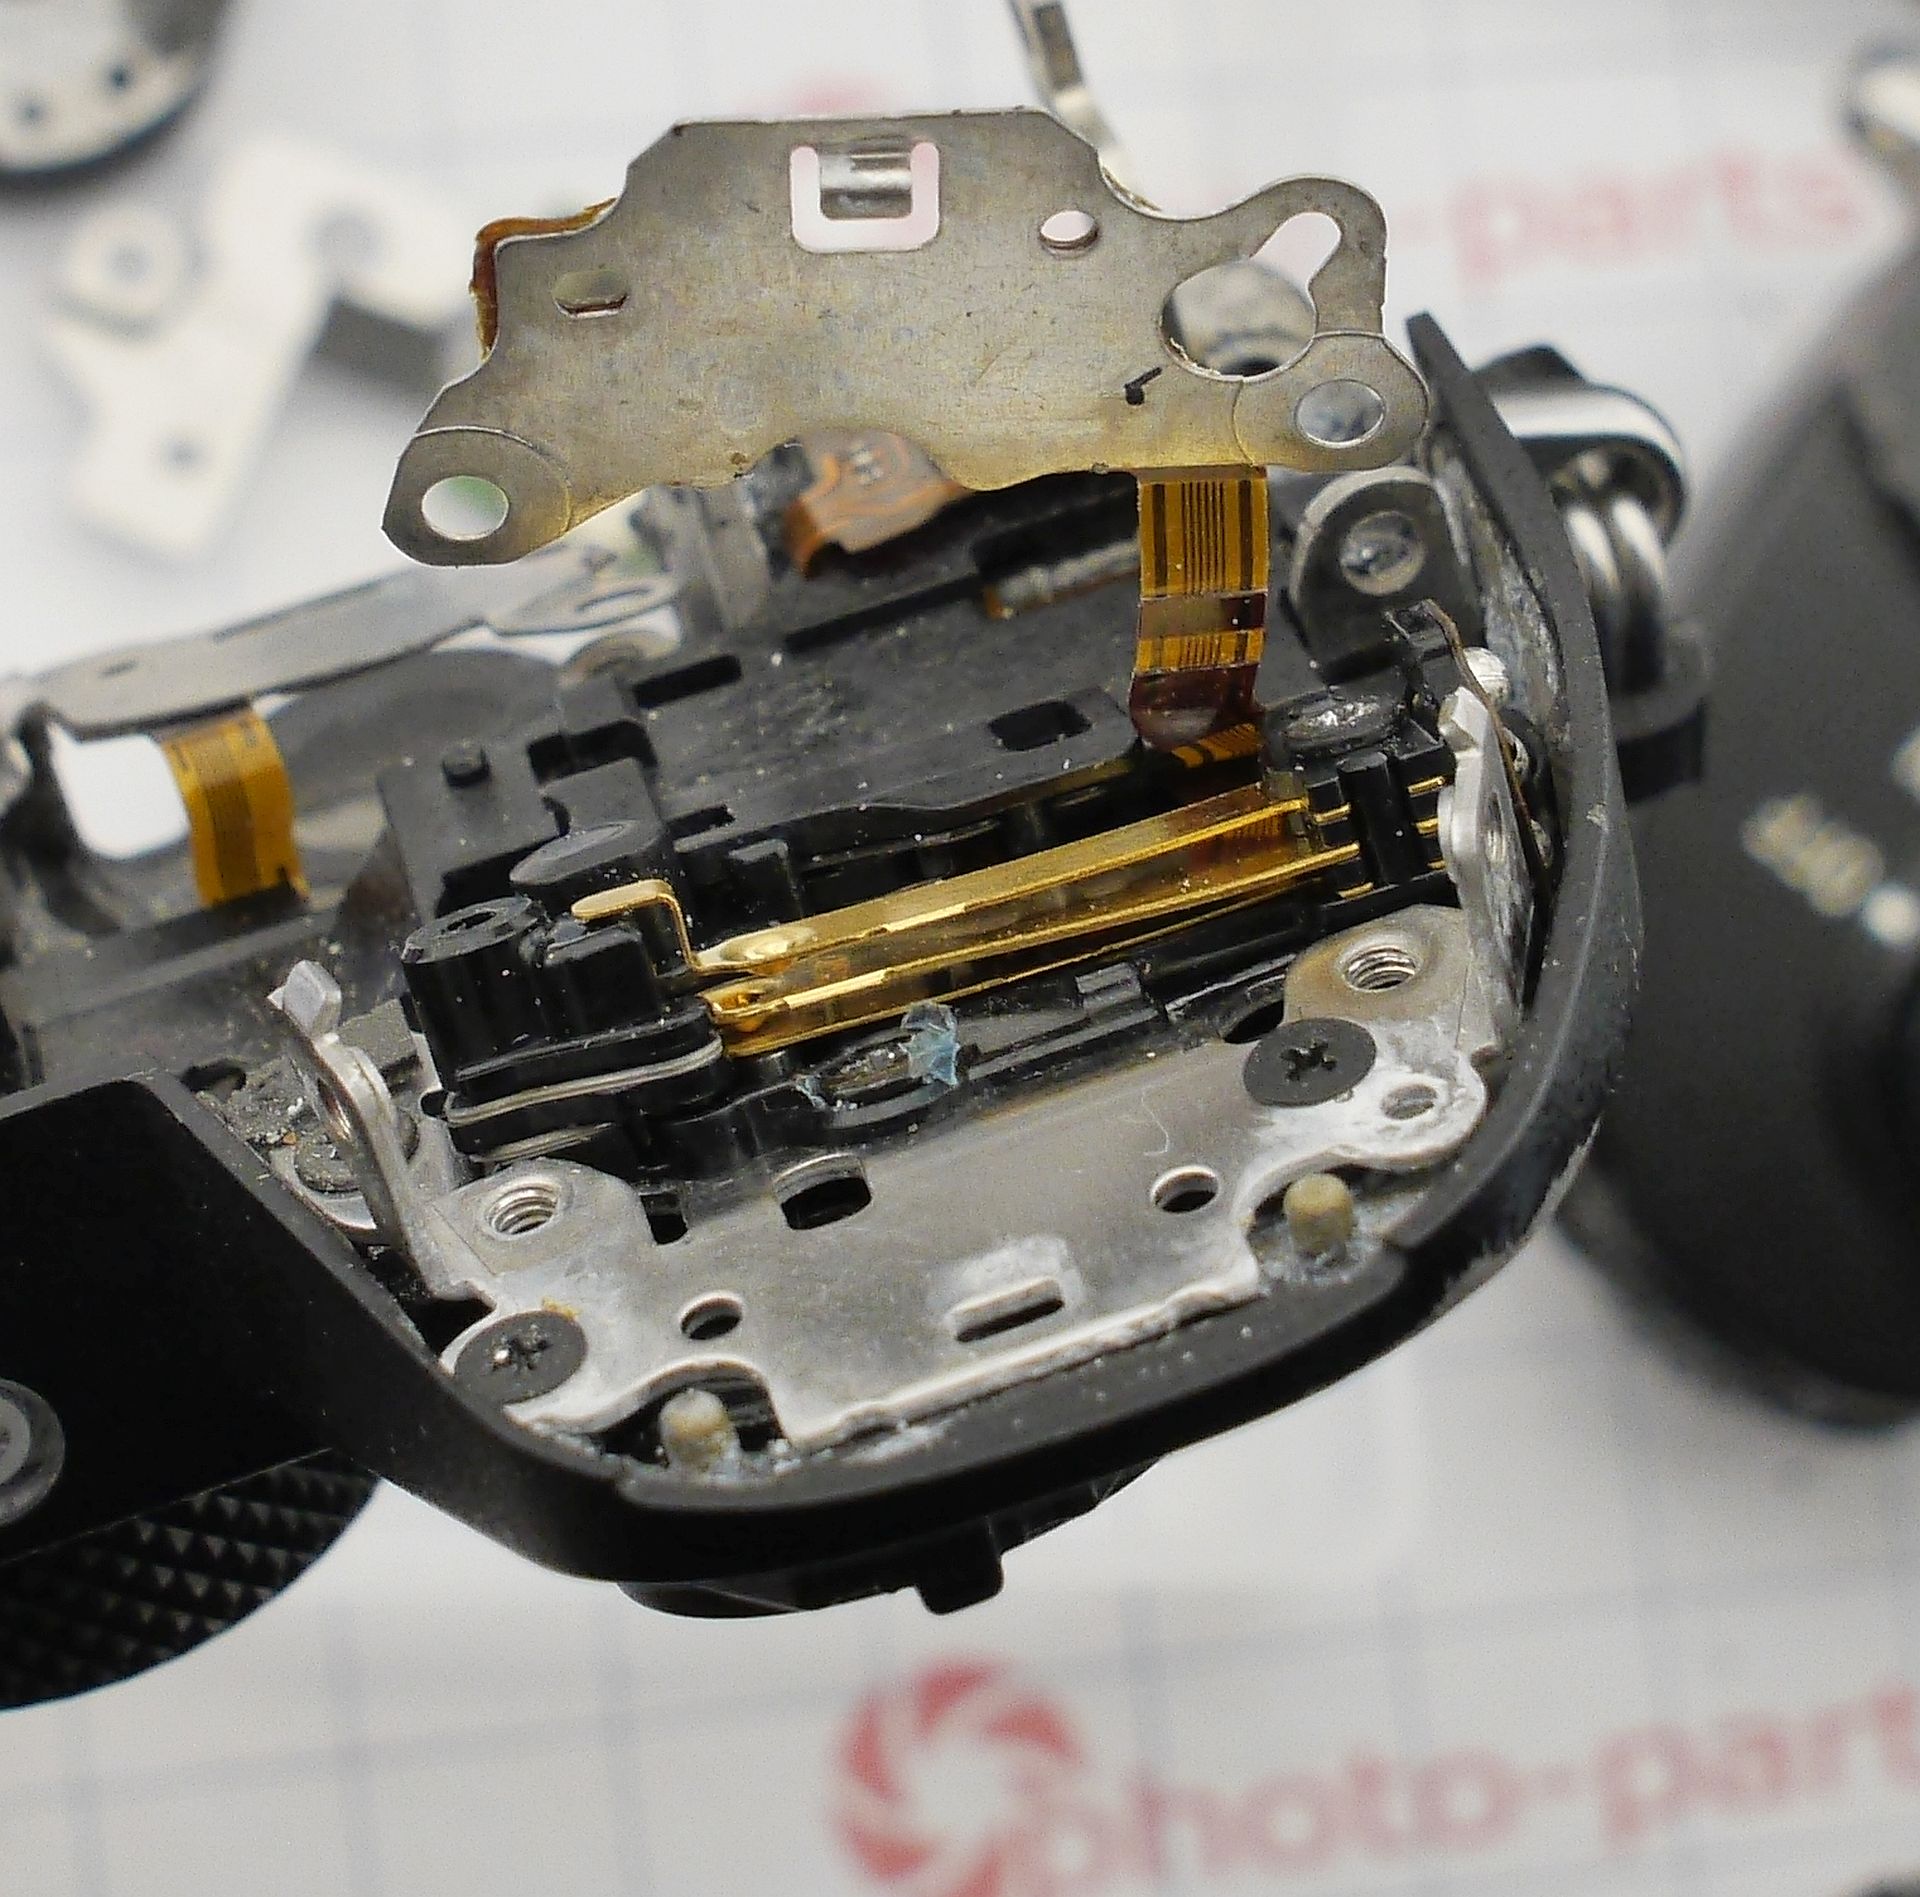
 The shutter has its own issues. One curtain is missing a blade, the mechanism is held by a single screw, and the springs are loose. Sadly - it’s junk. Not even usable as a donor.
You can’t remove curtain tension without marking spool positions - otherwise short exposures will fail.
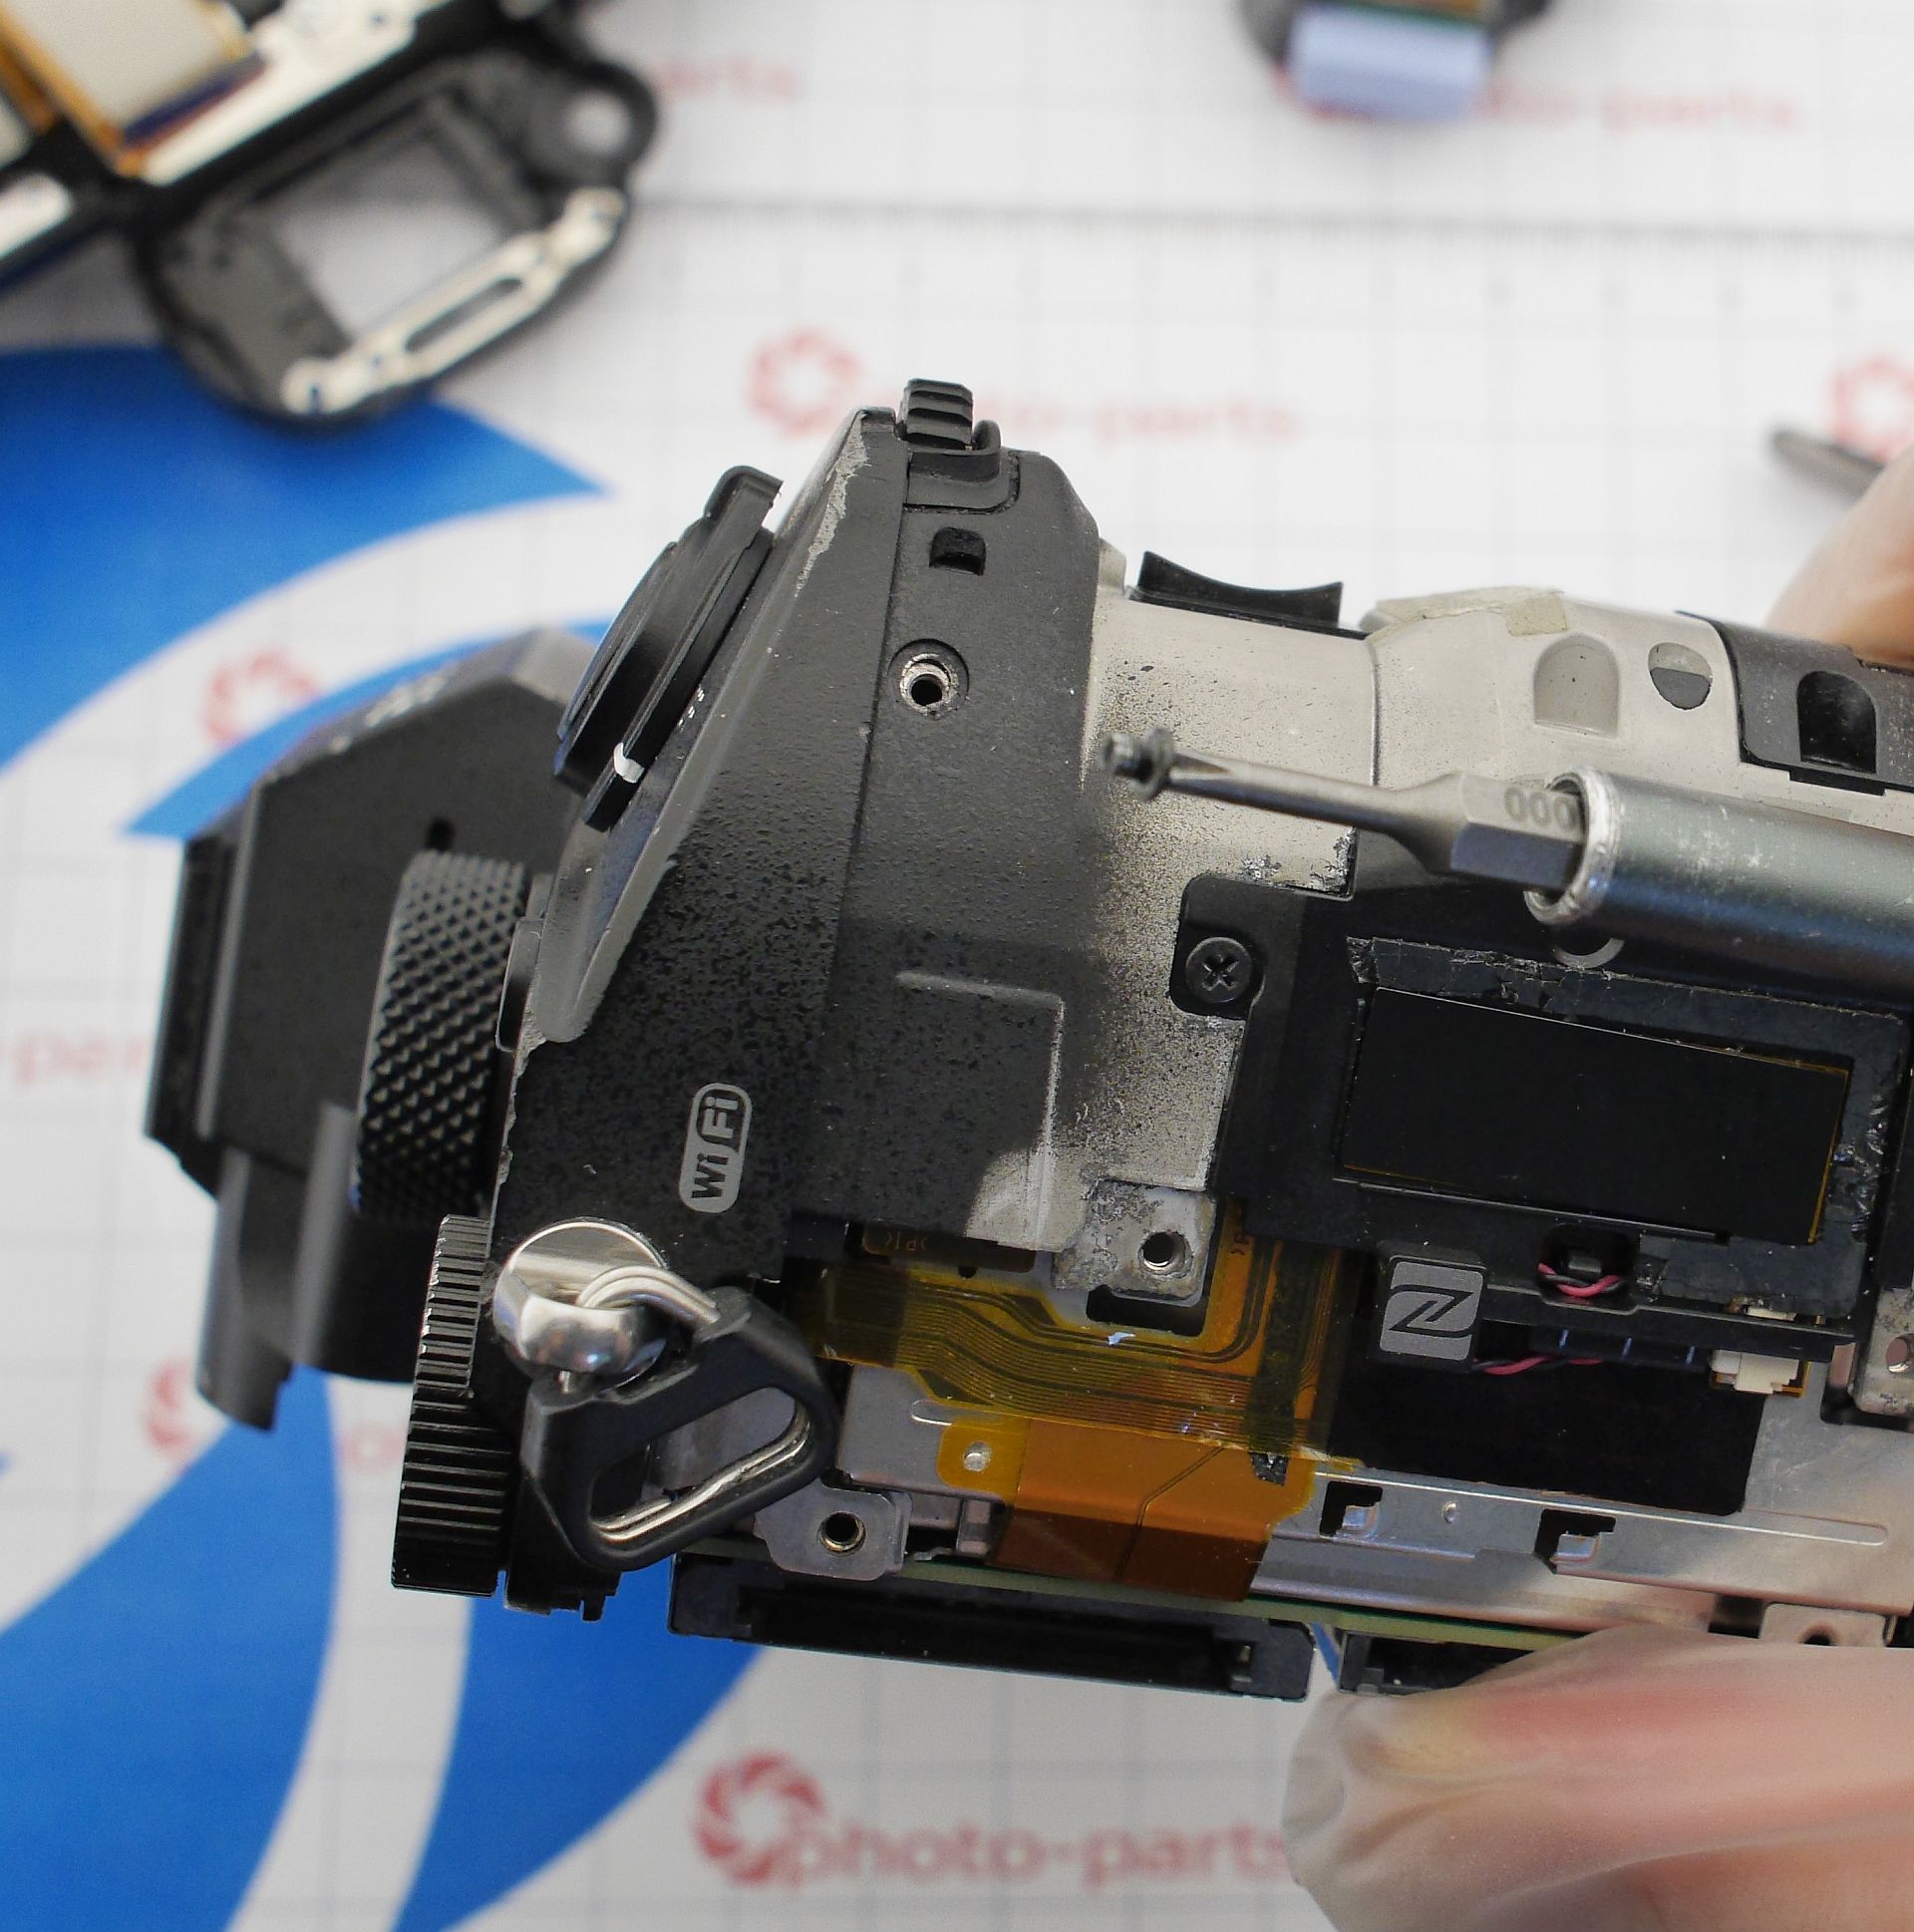
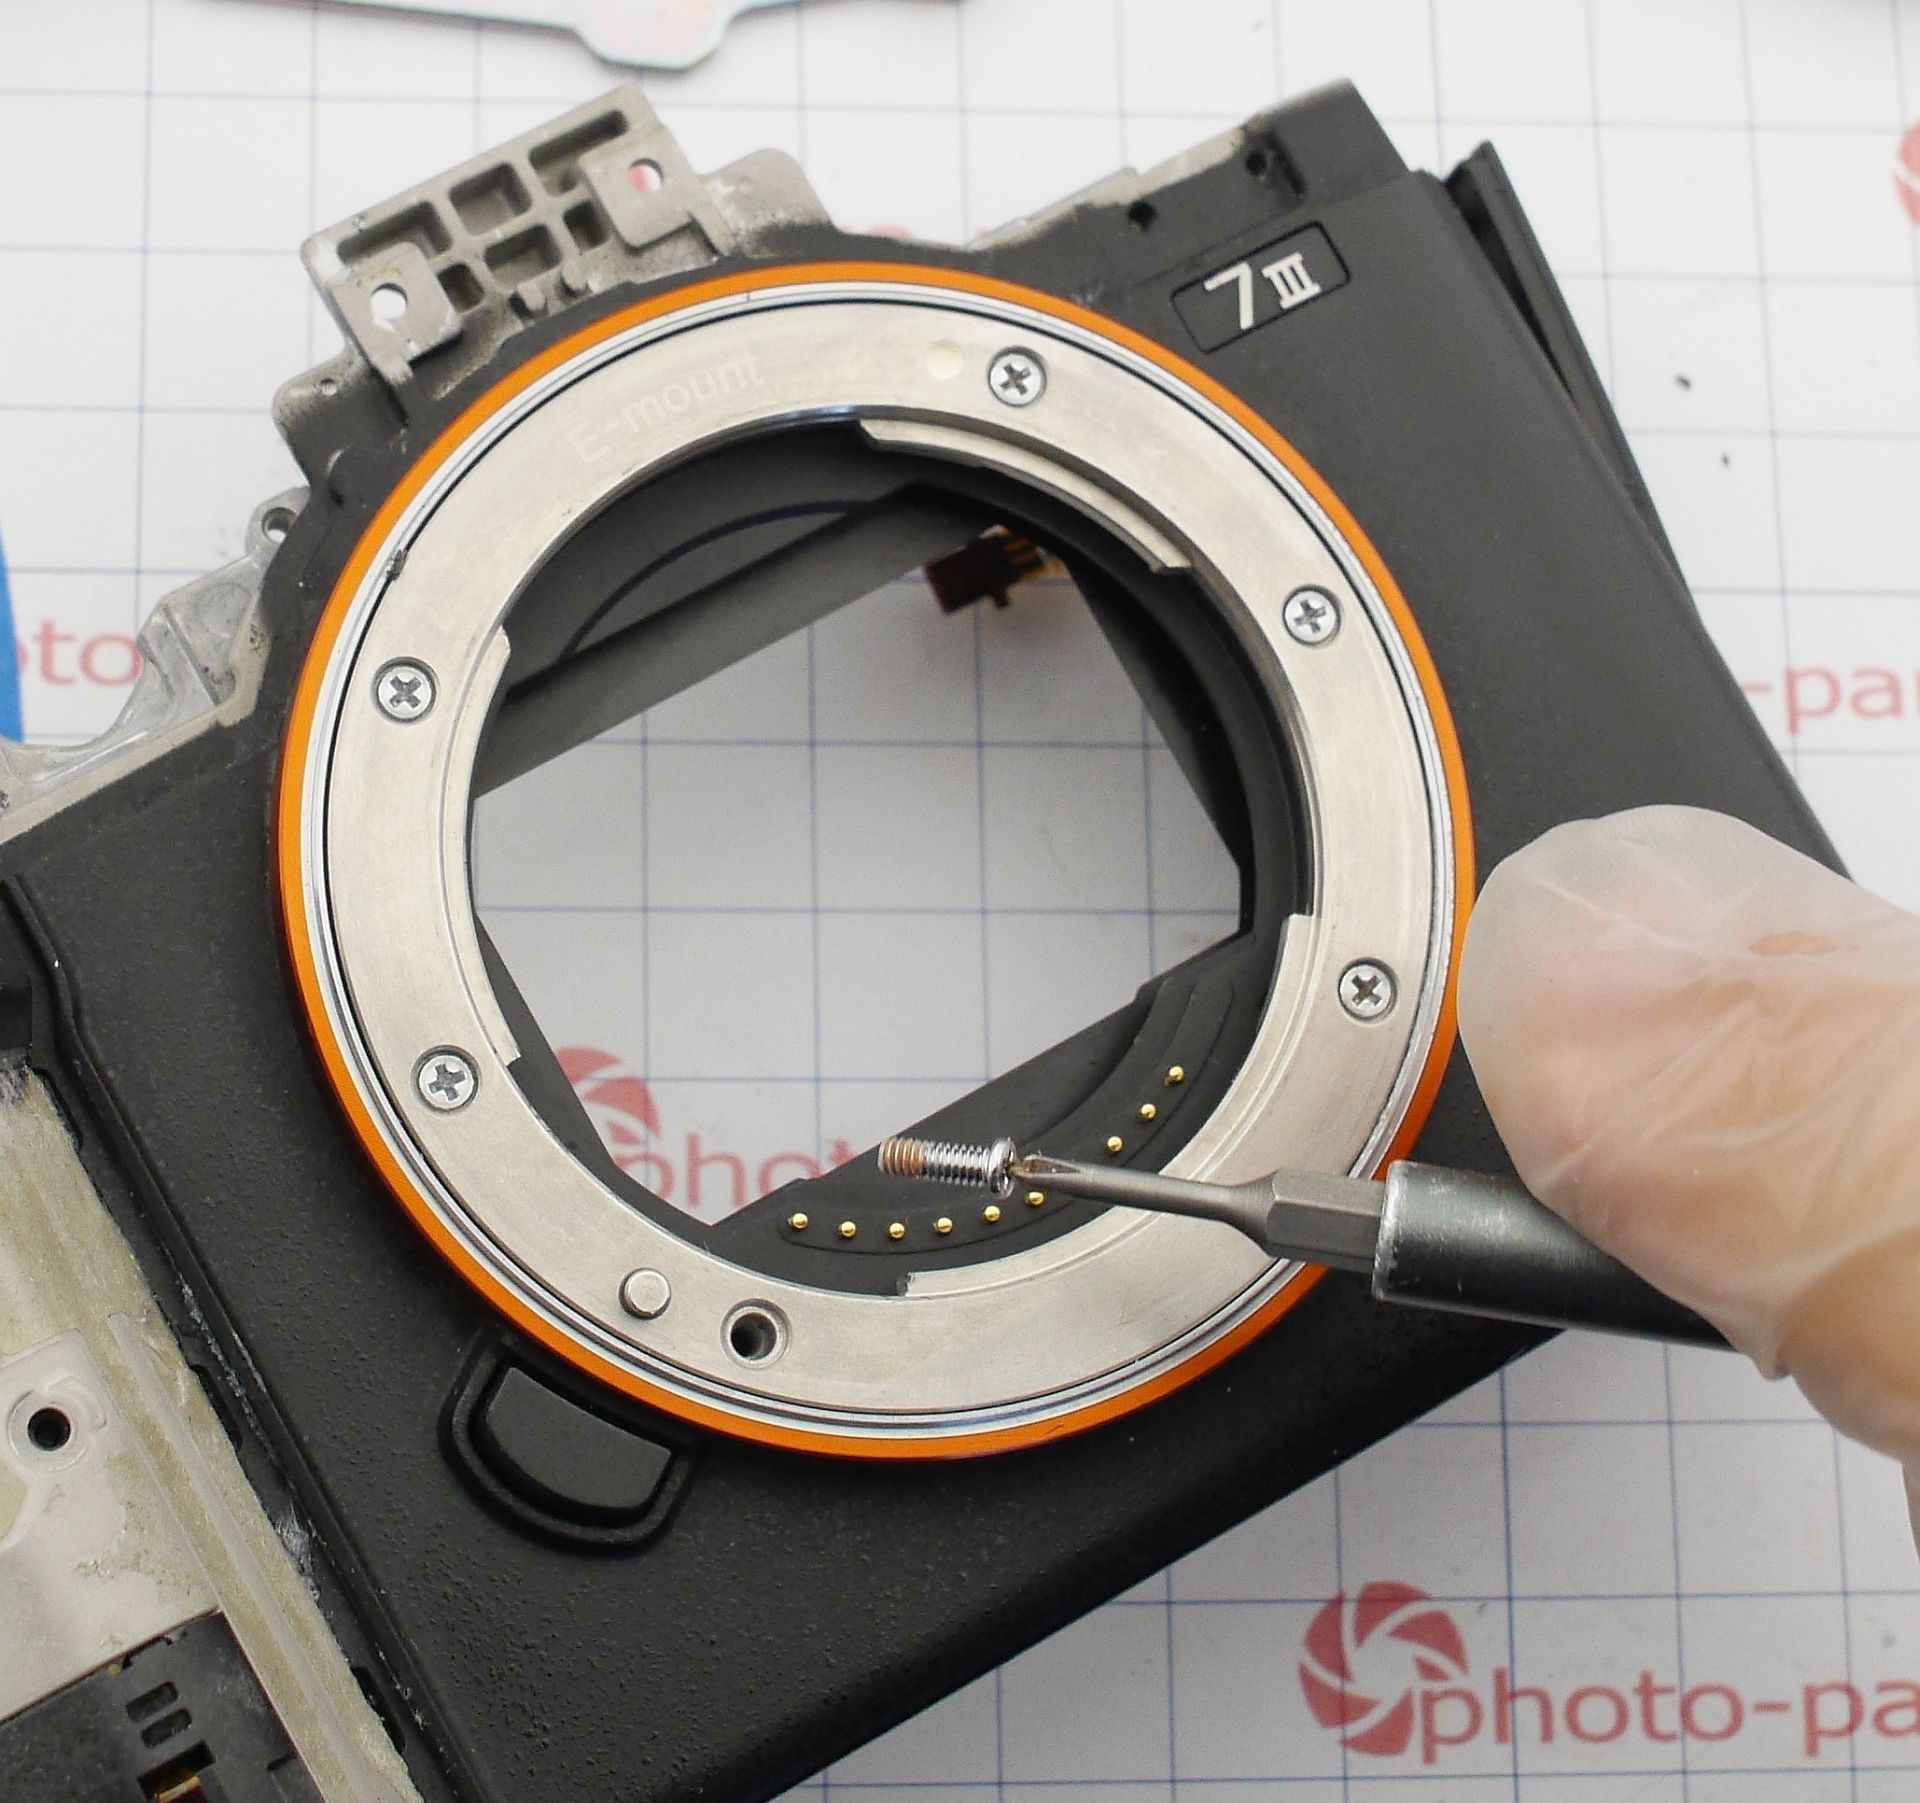
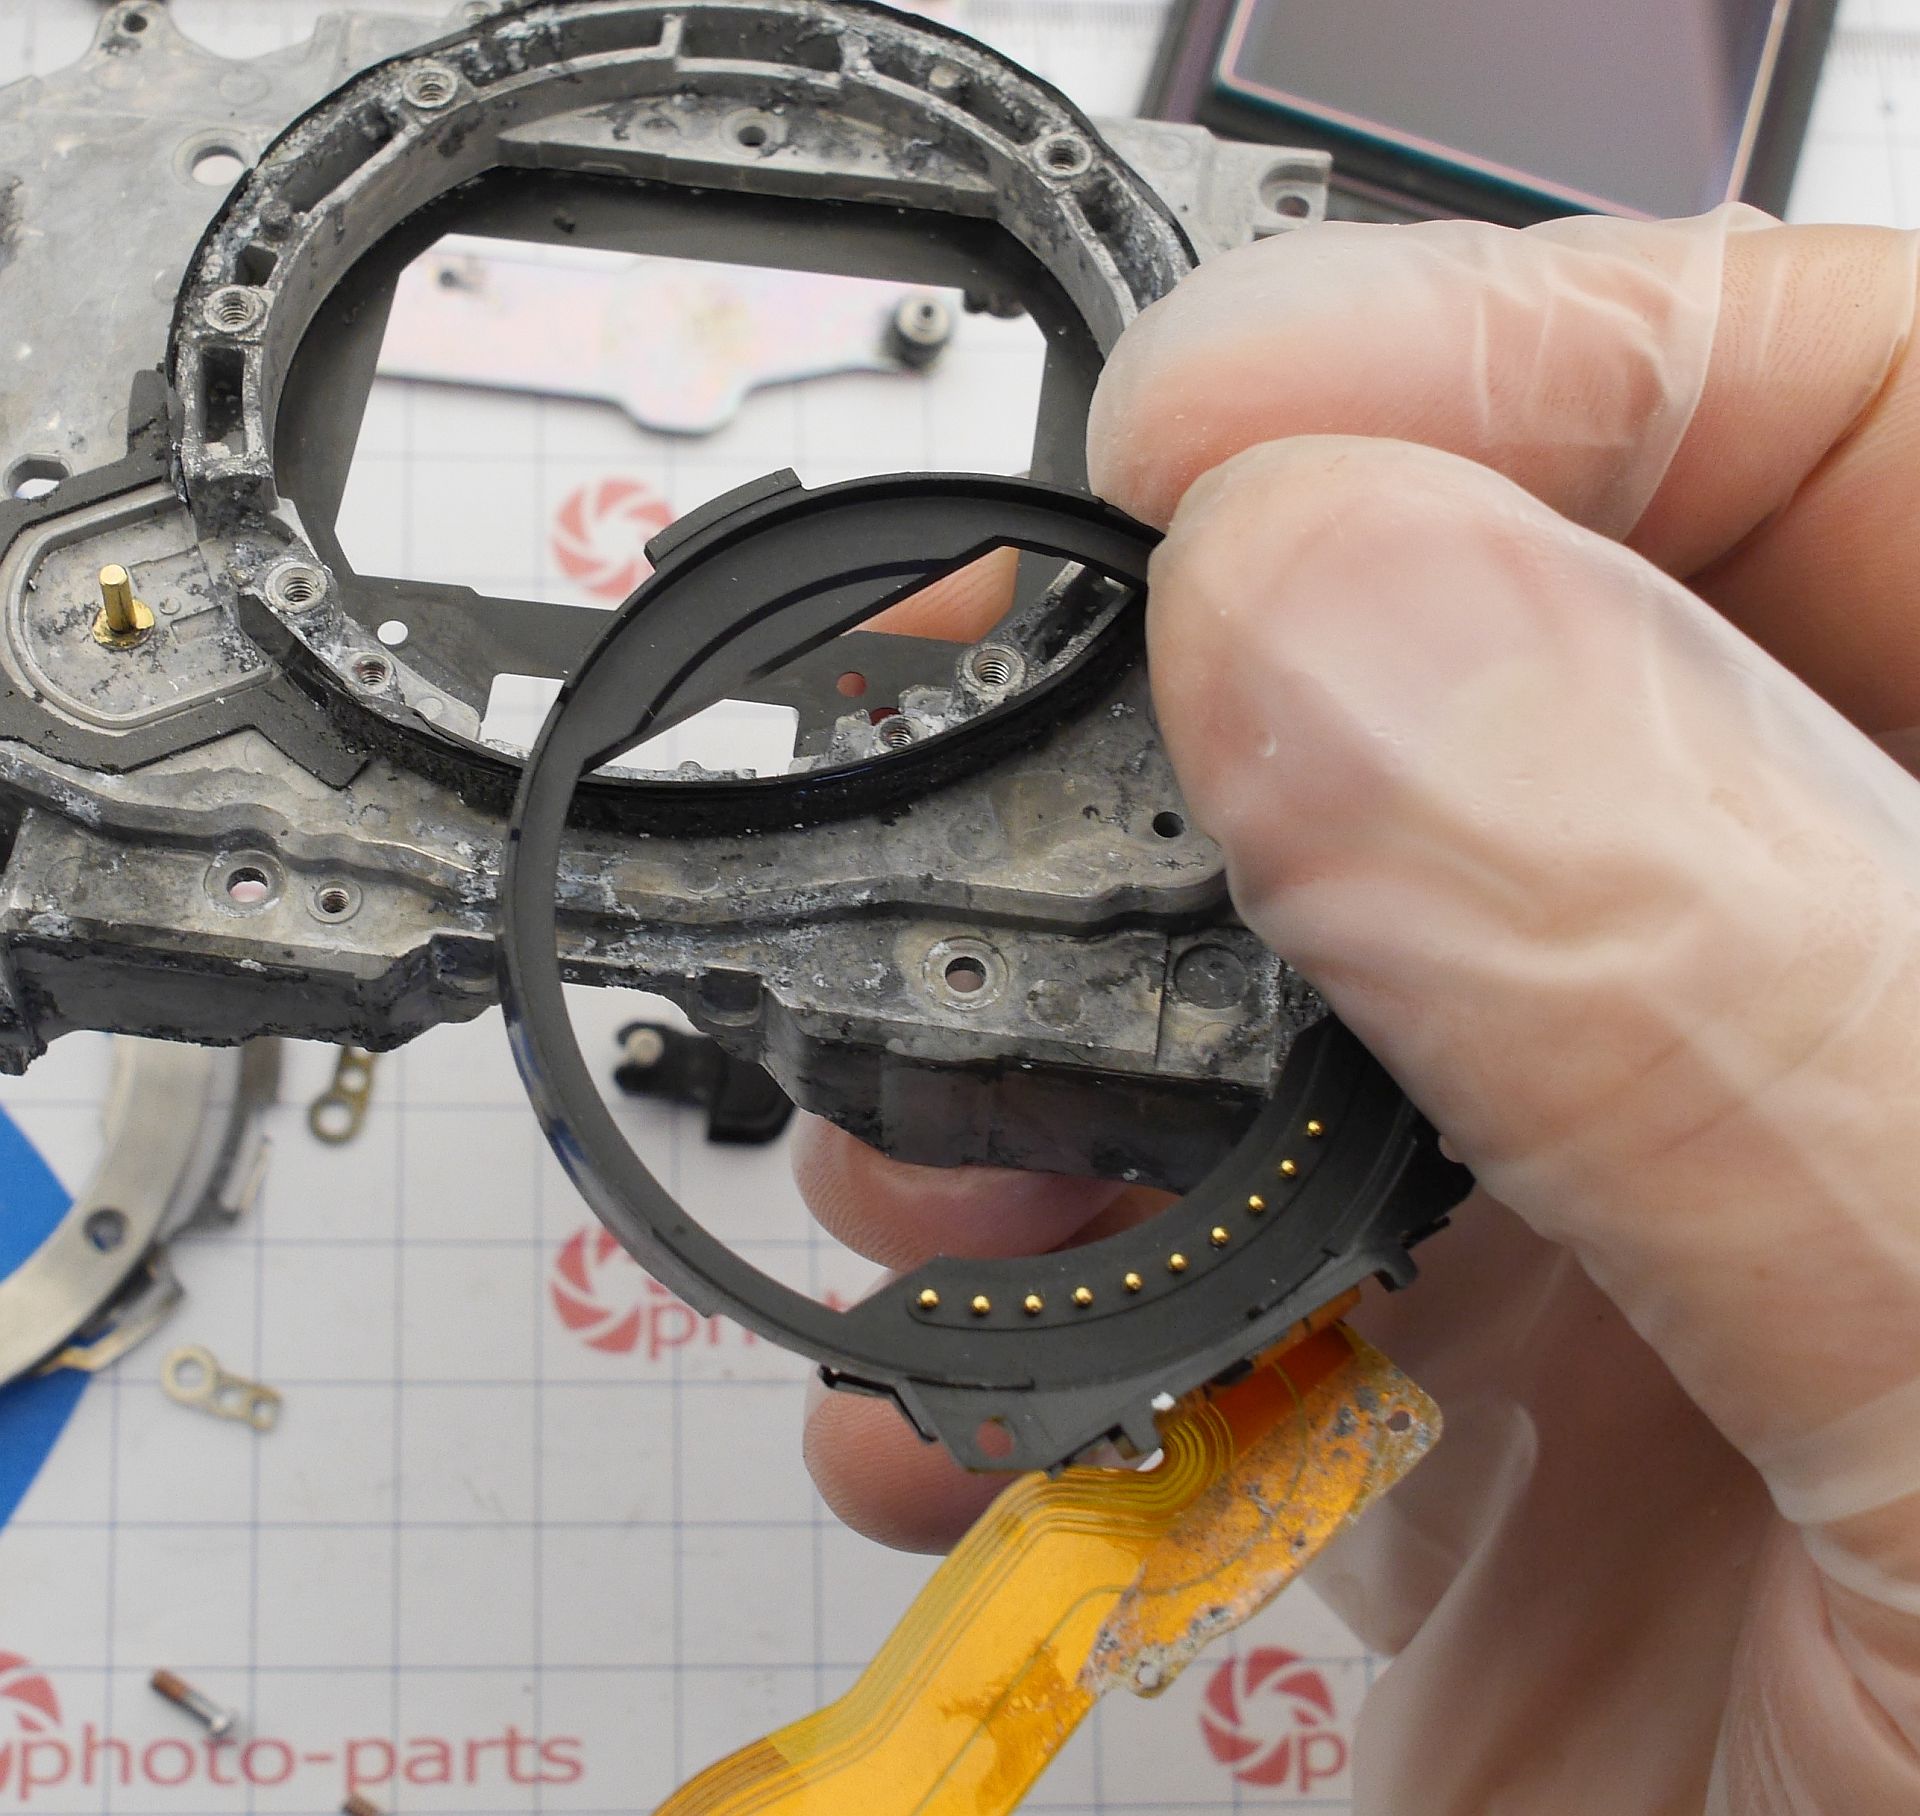
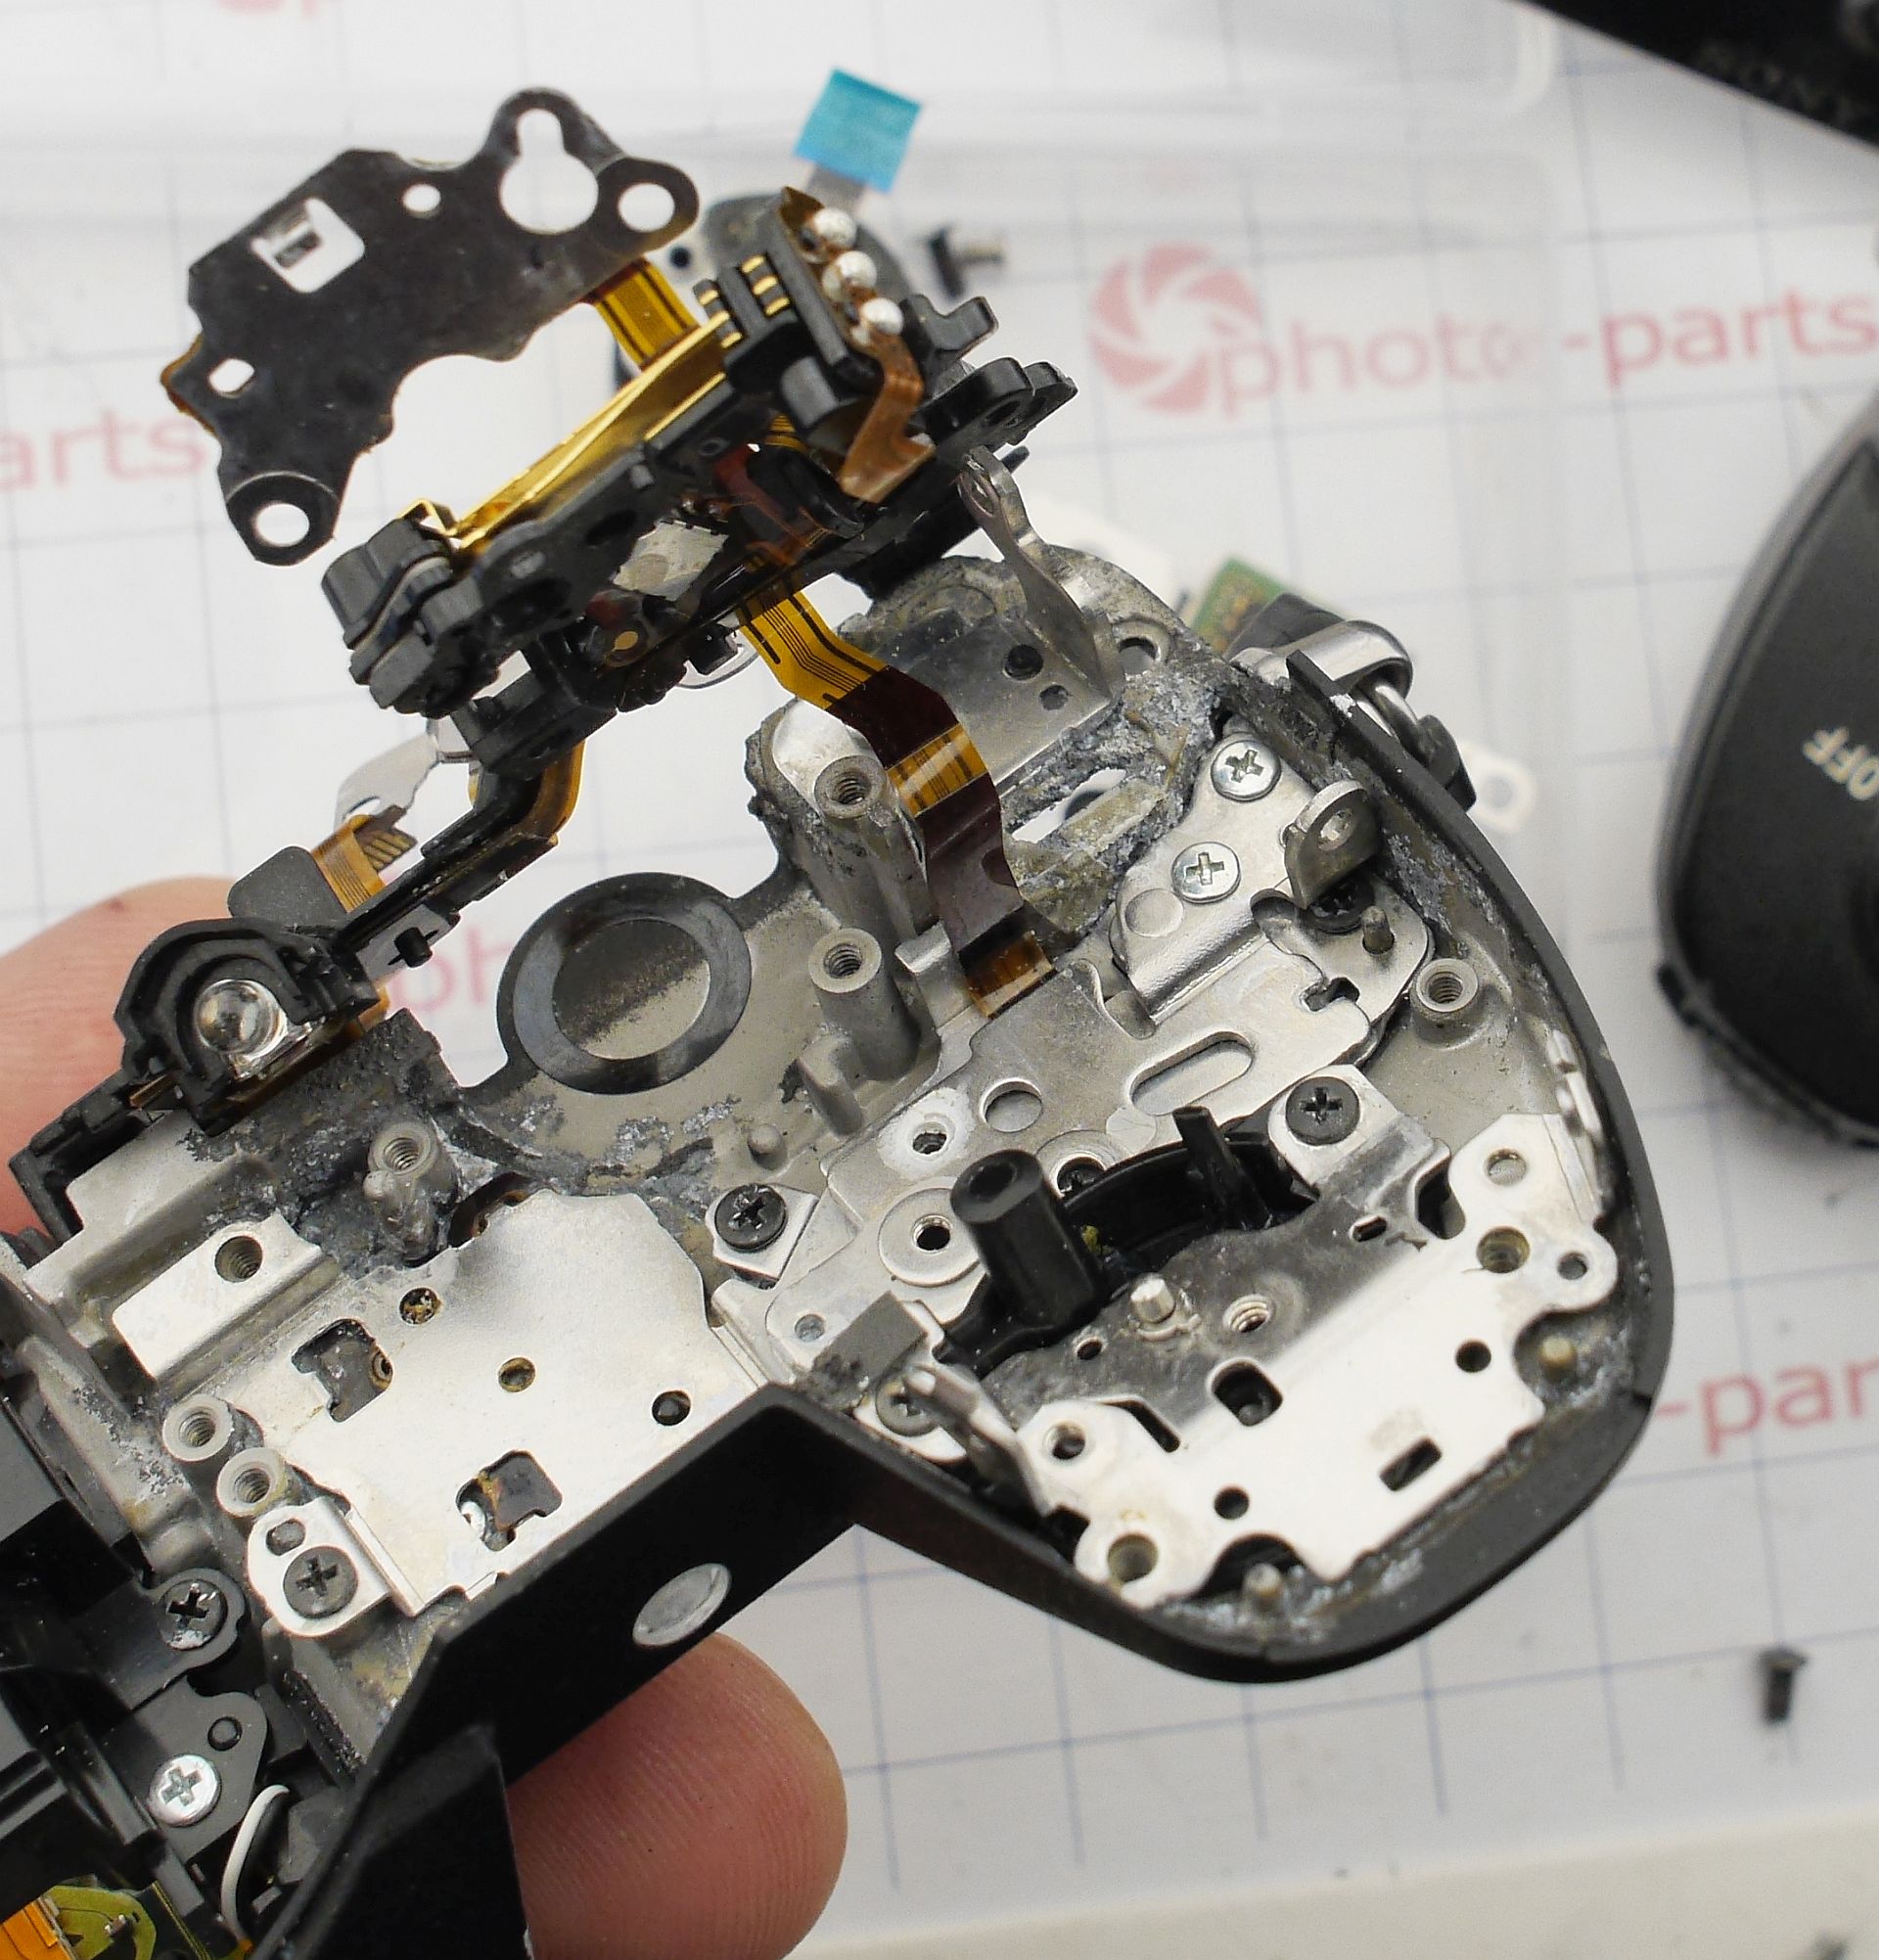
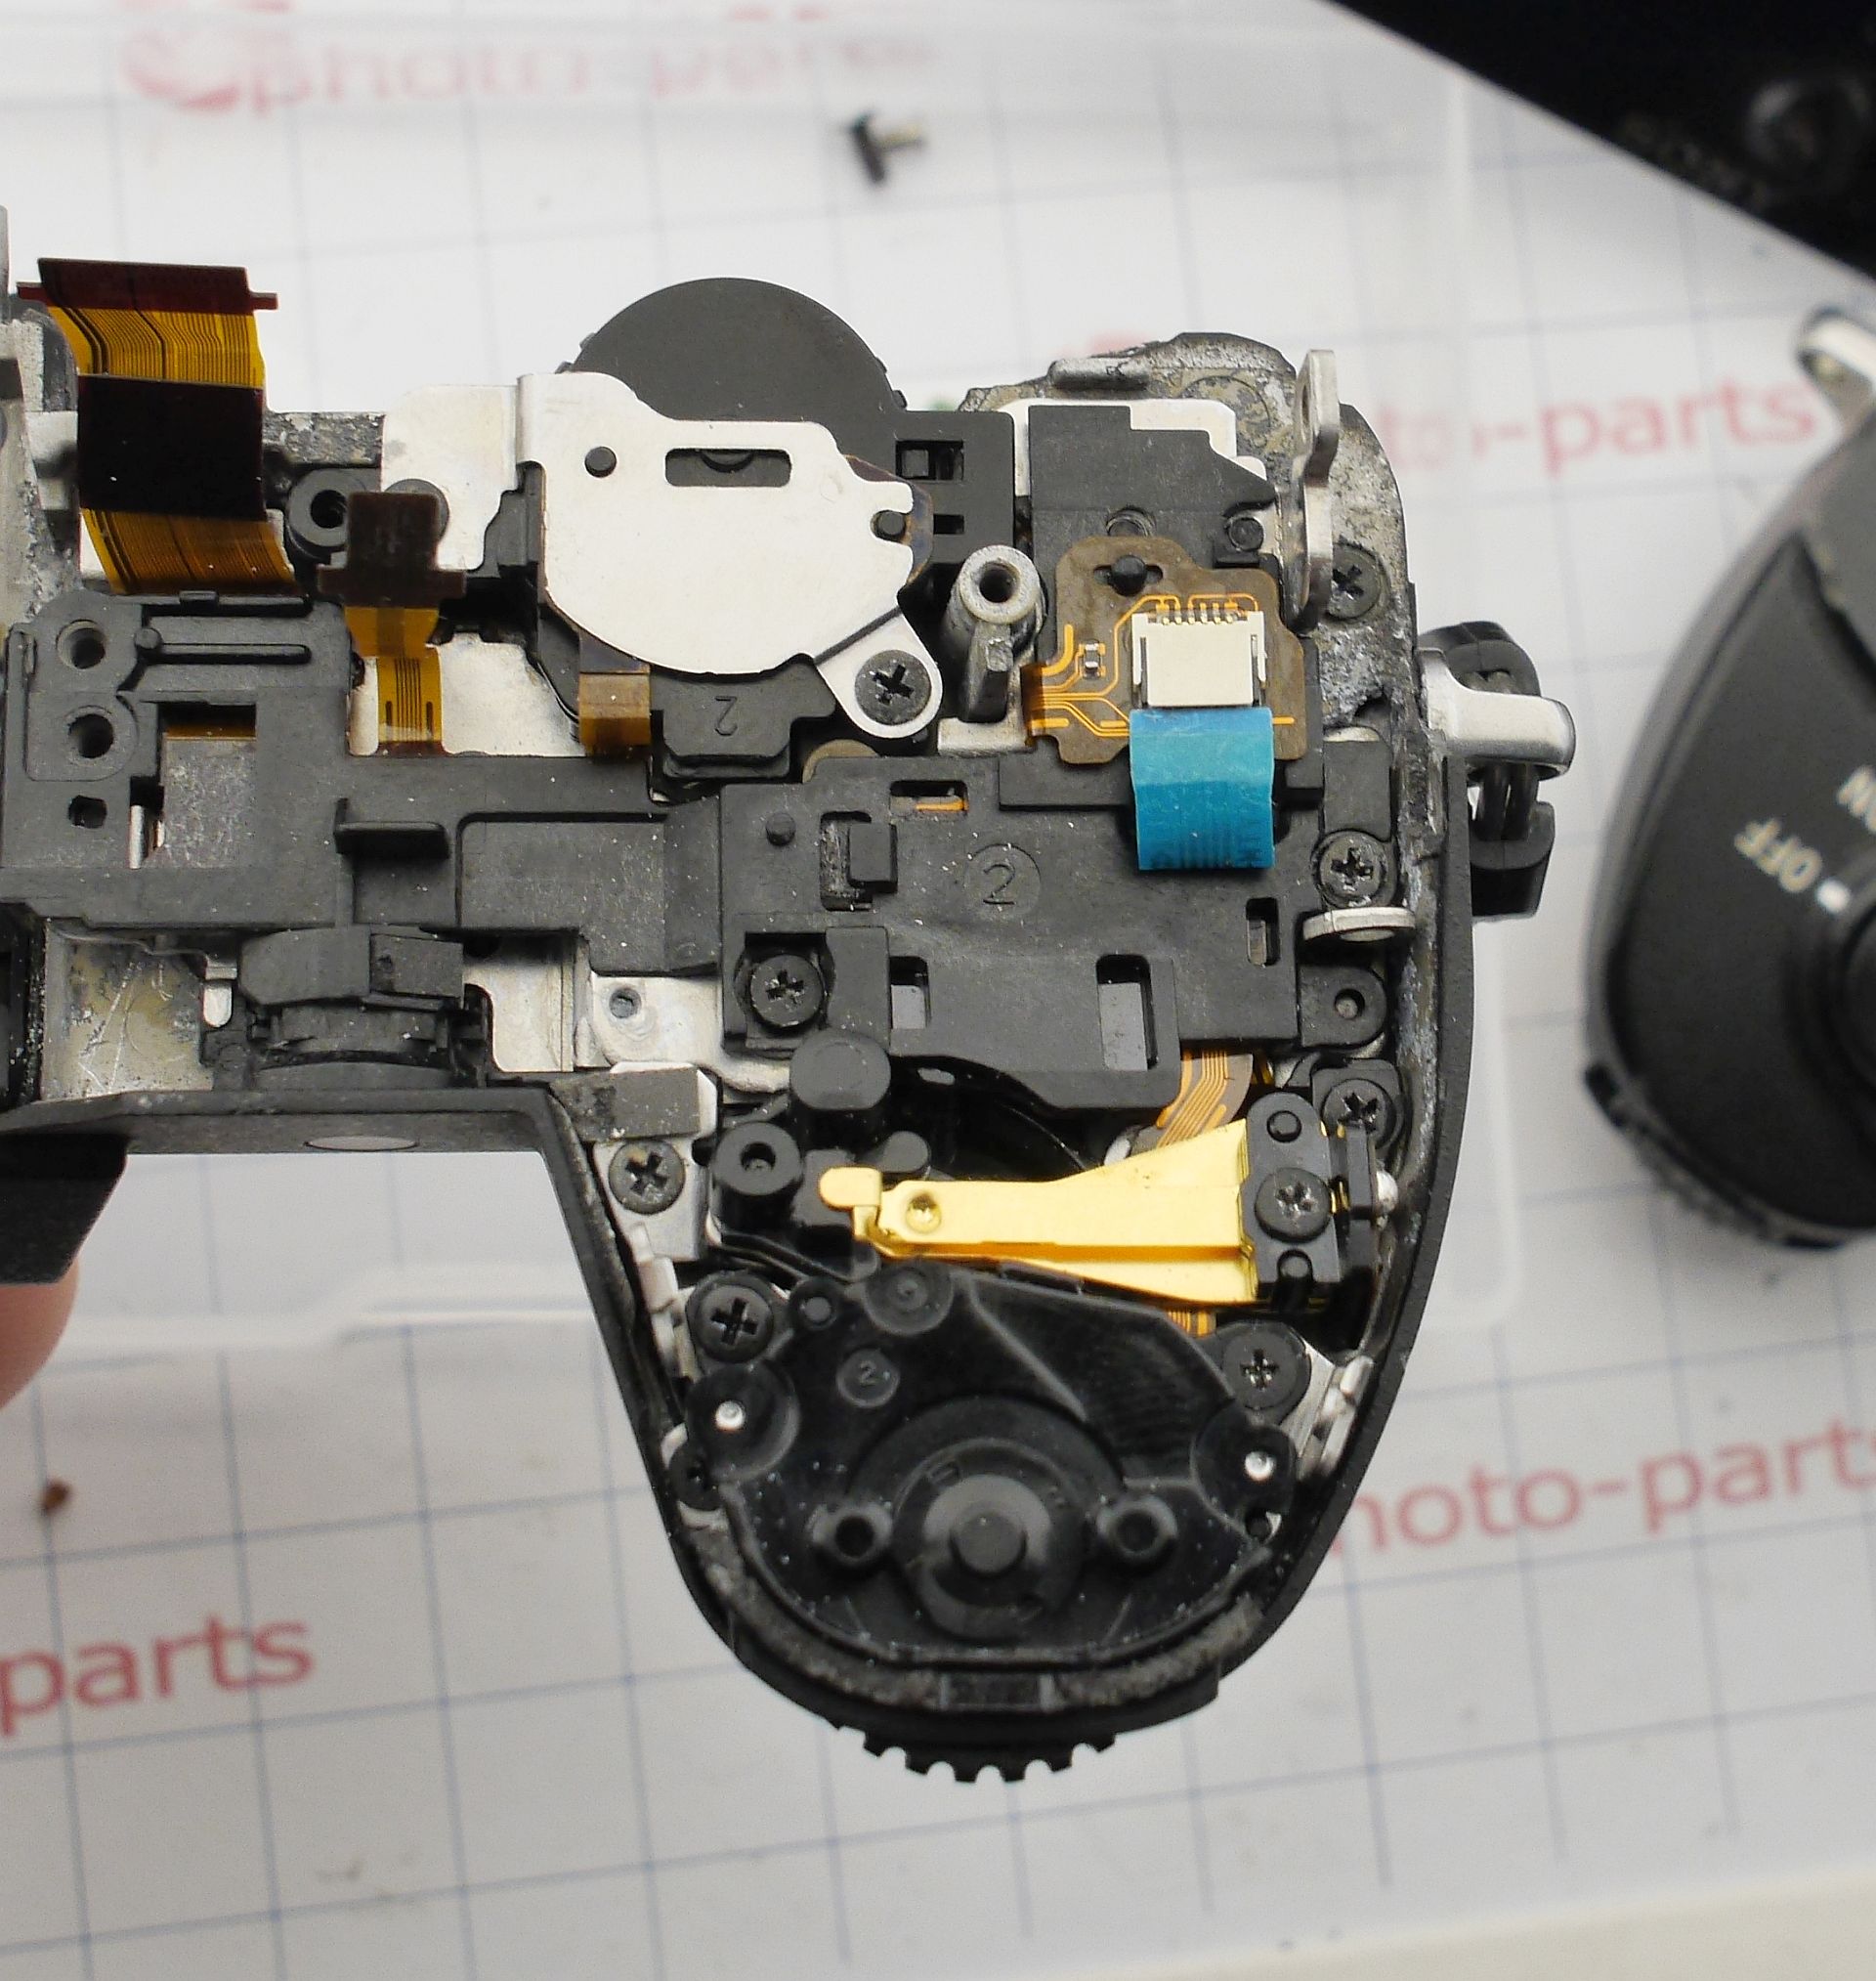
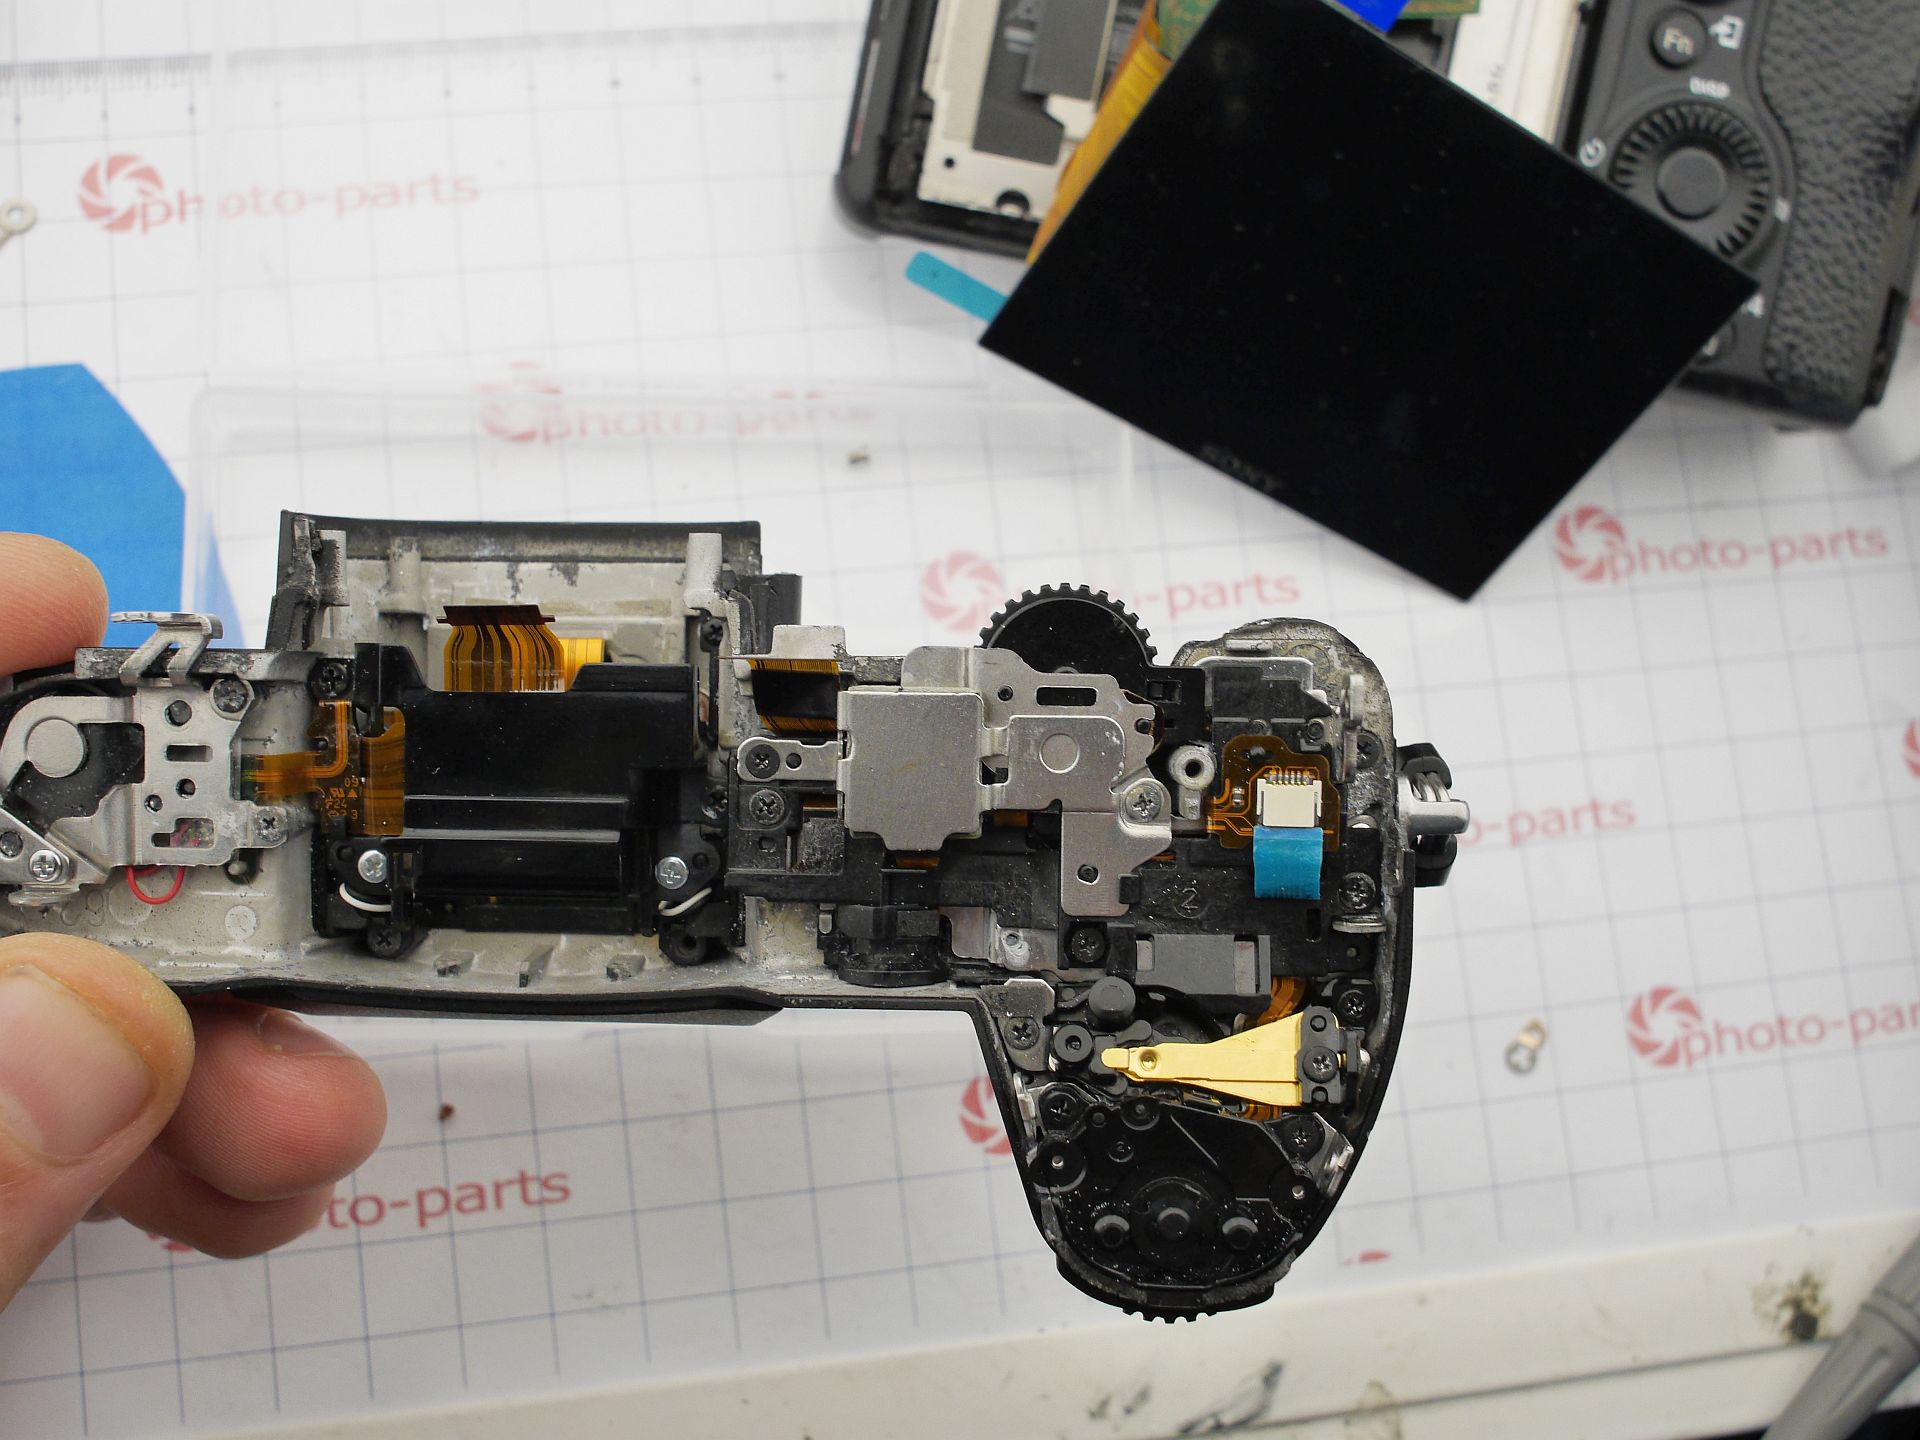
 Out of curiosity, I peeked under the bayonet mount. Given the missing shutter screws, who knows what else is wrong.
To remove the "mirror box" structure, the bayonet must come off. And - surprise - contacts block screws are missing too. Who removed them and why?
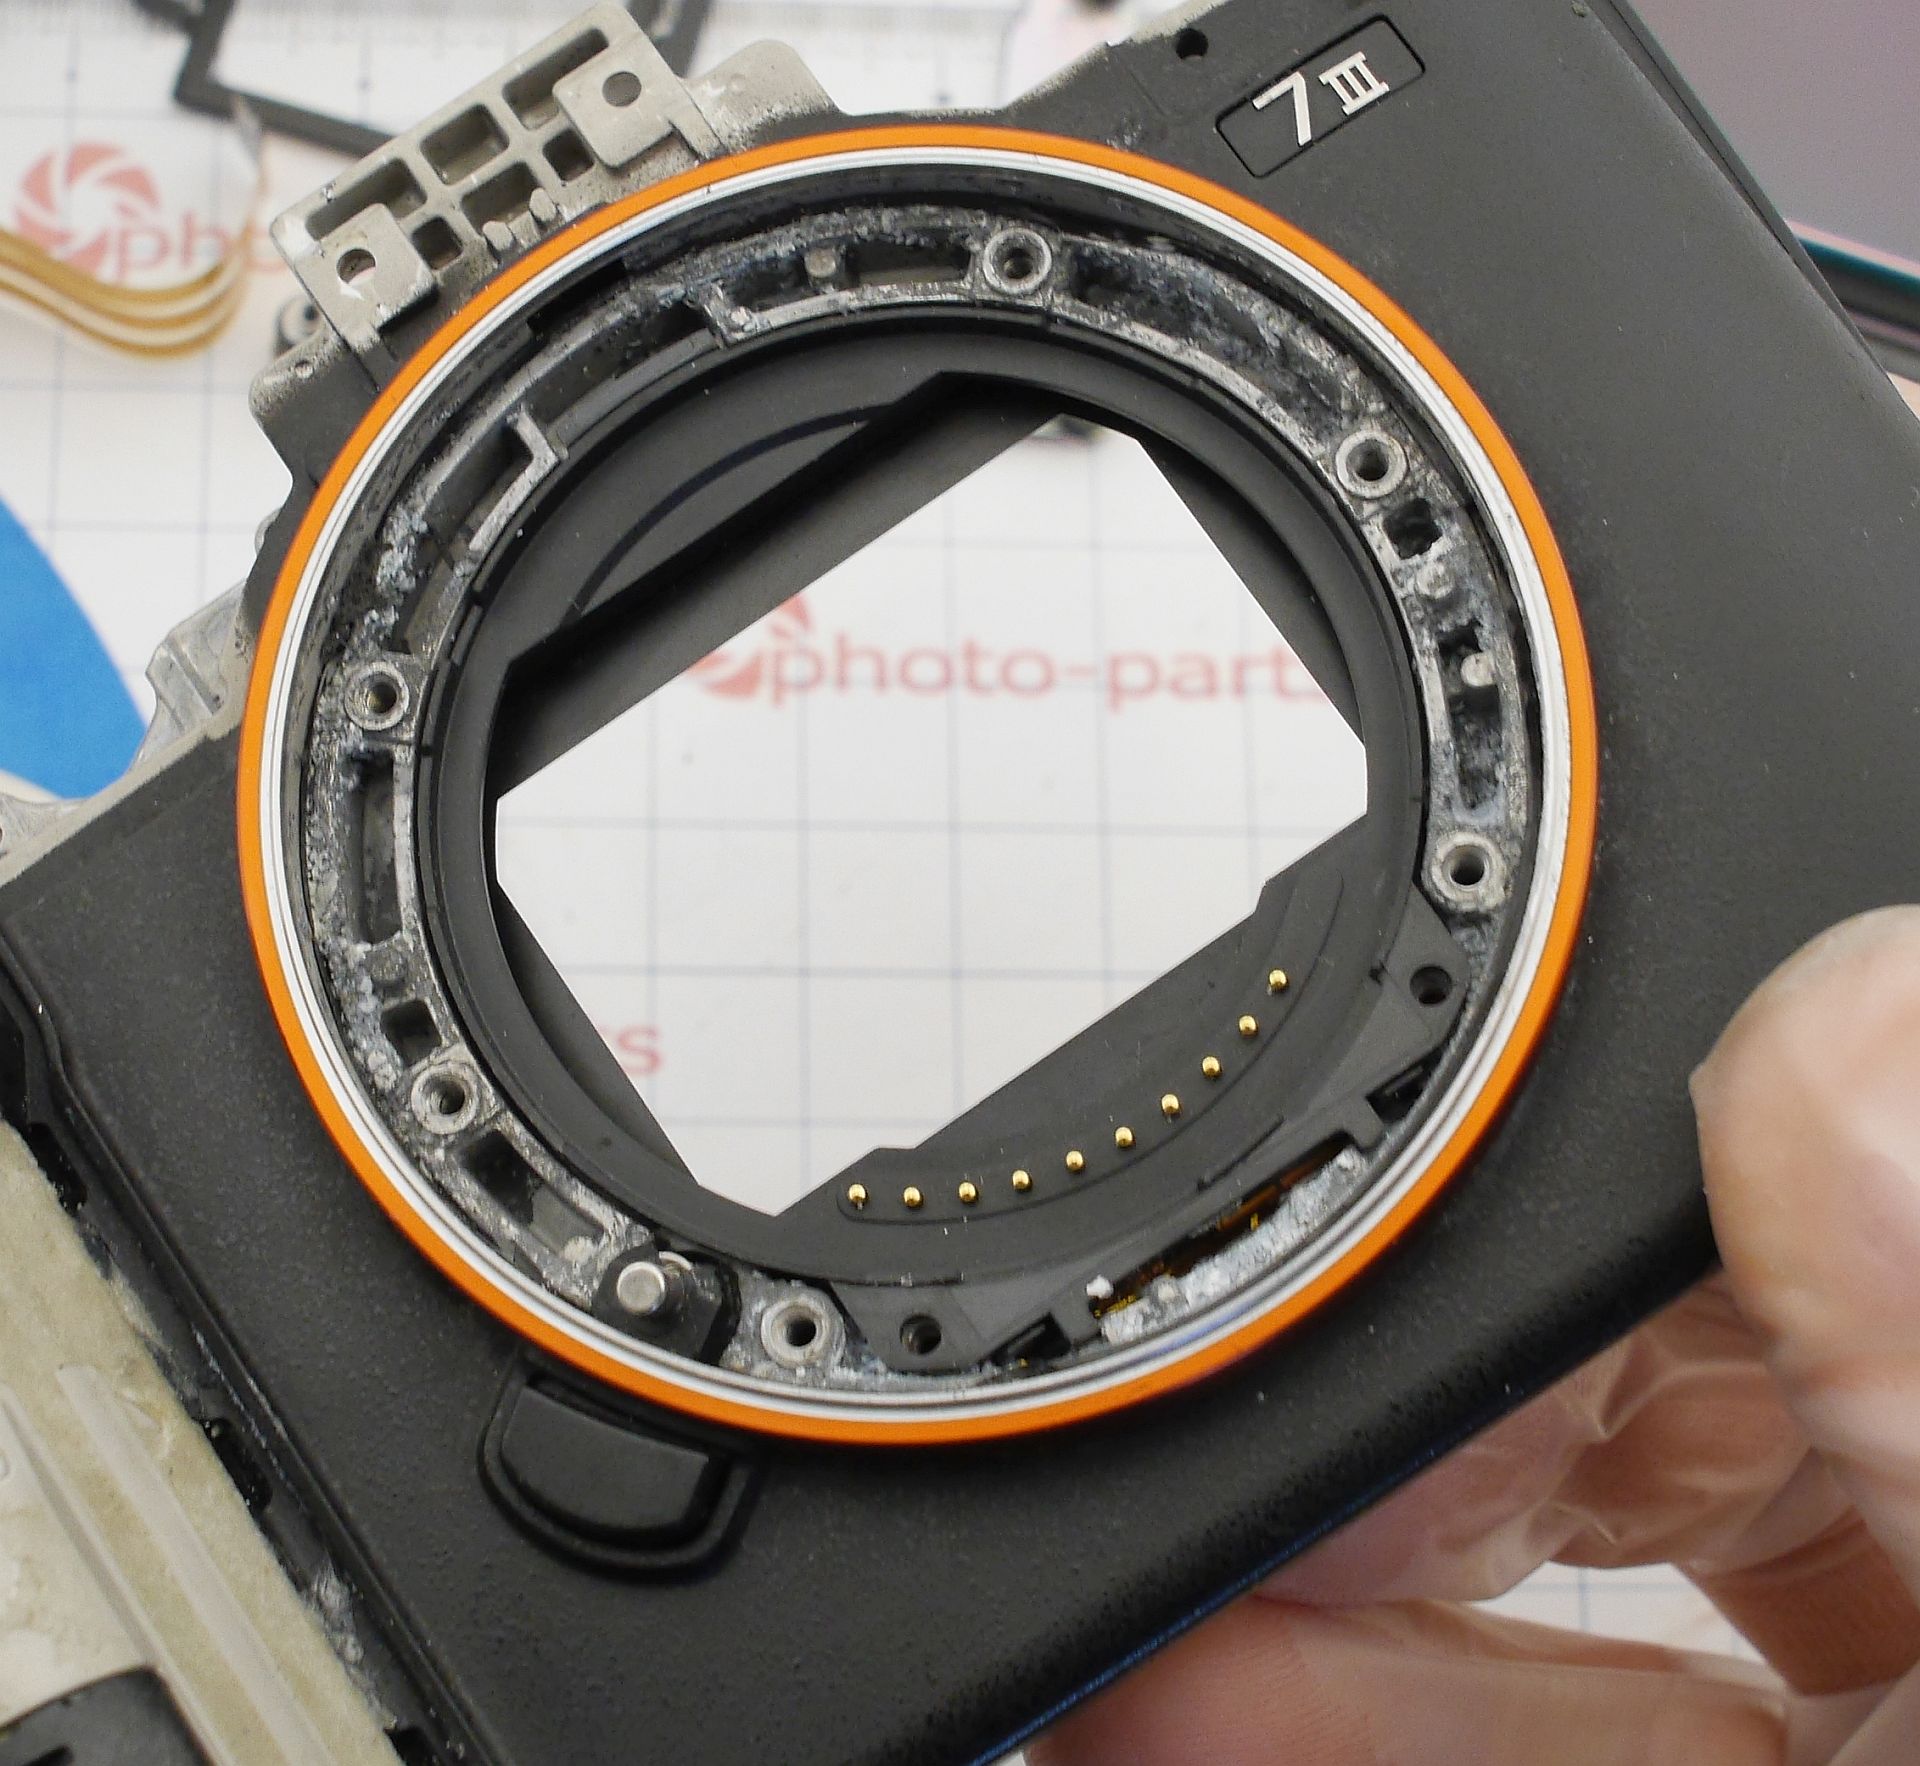
One screw ties together the cocking unit and shutter. Let’s look inside - and yes, it’s torn apart, spring removed, screws swapped.
In the end: I needed donor parts for the IBIS and shutter. The cocking unit just needed correct reassembly.
Back to the mainboard. Can the camera be revived now?
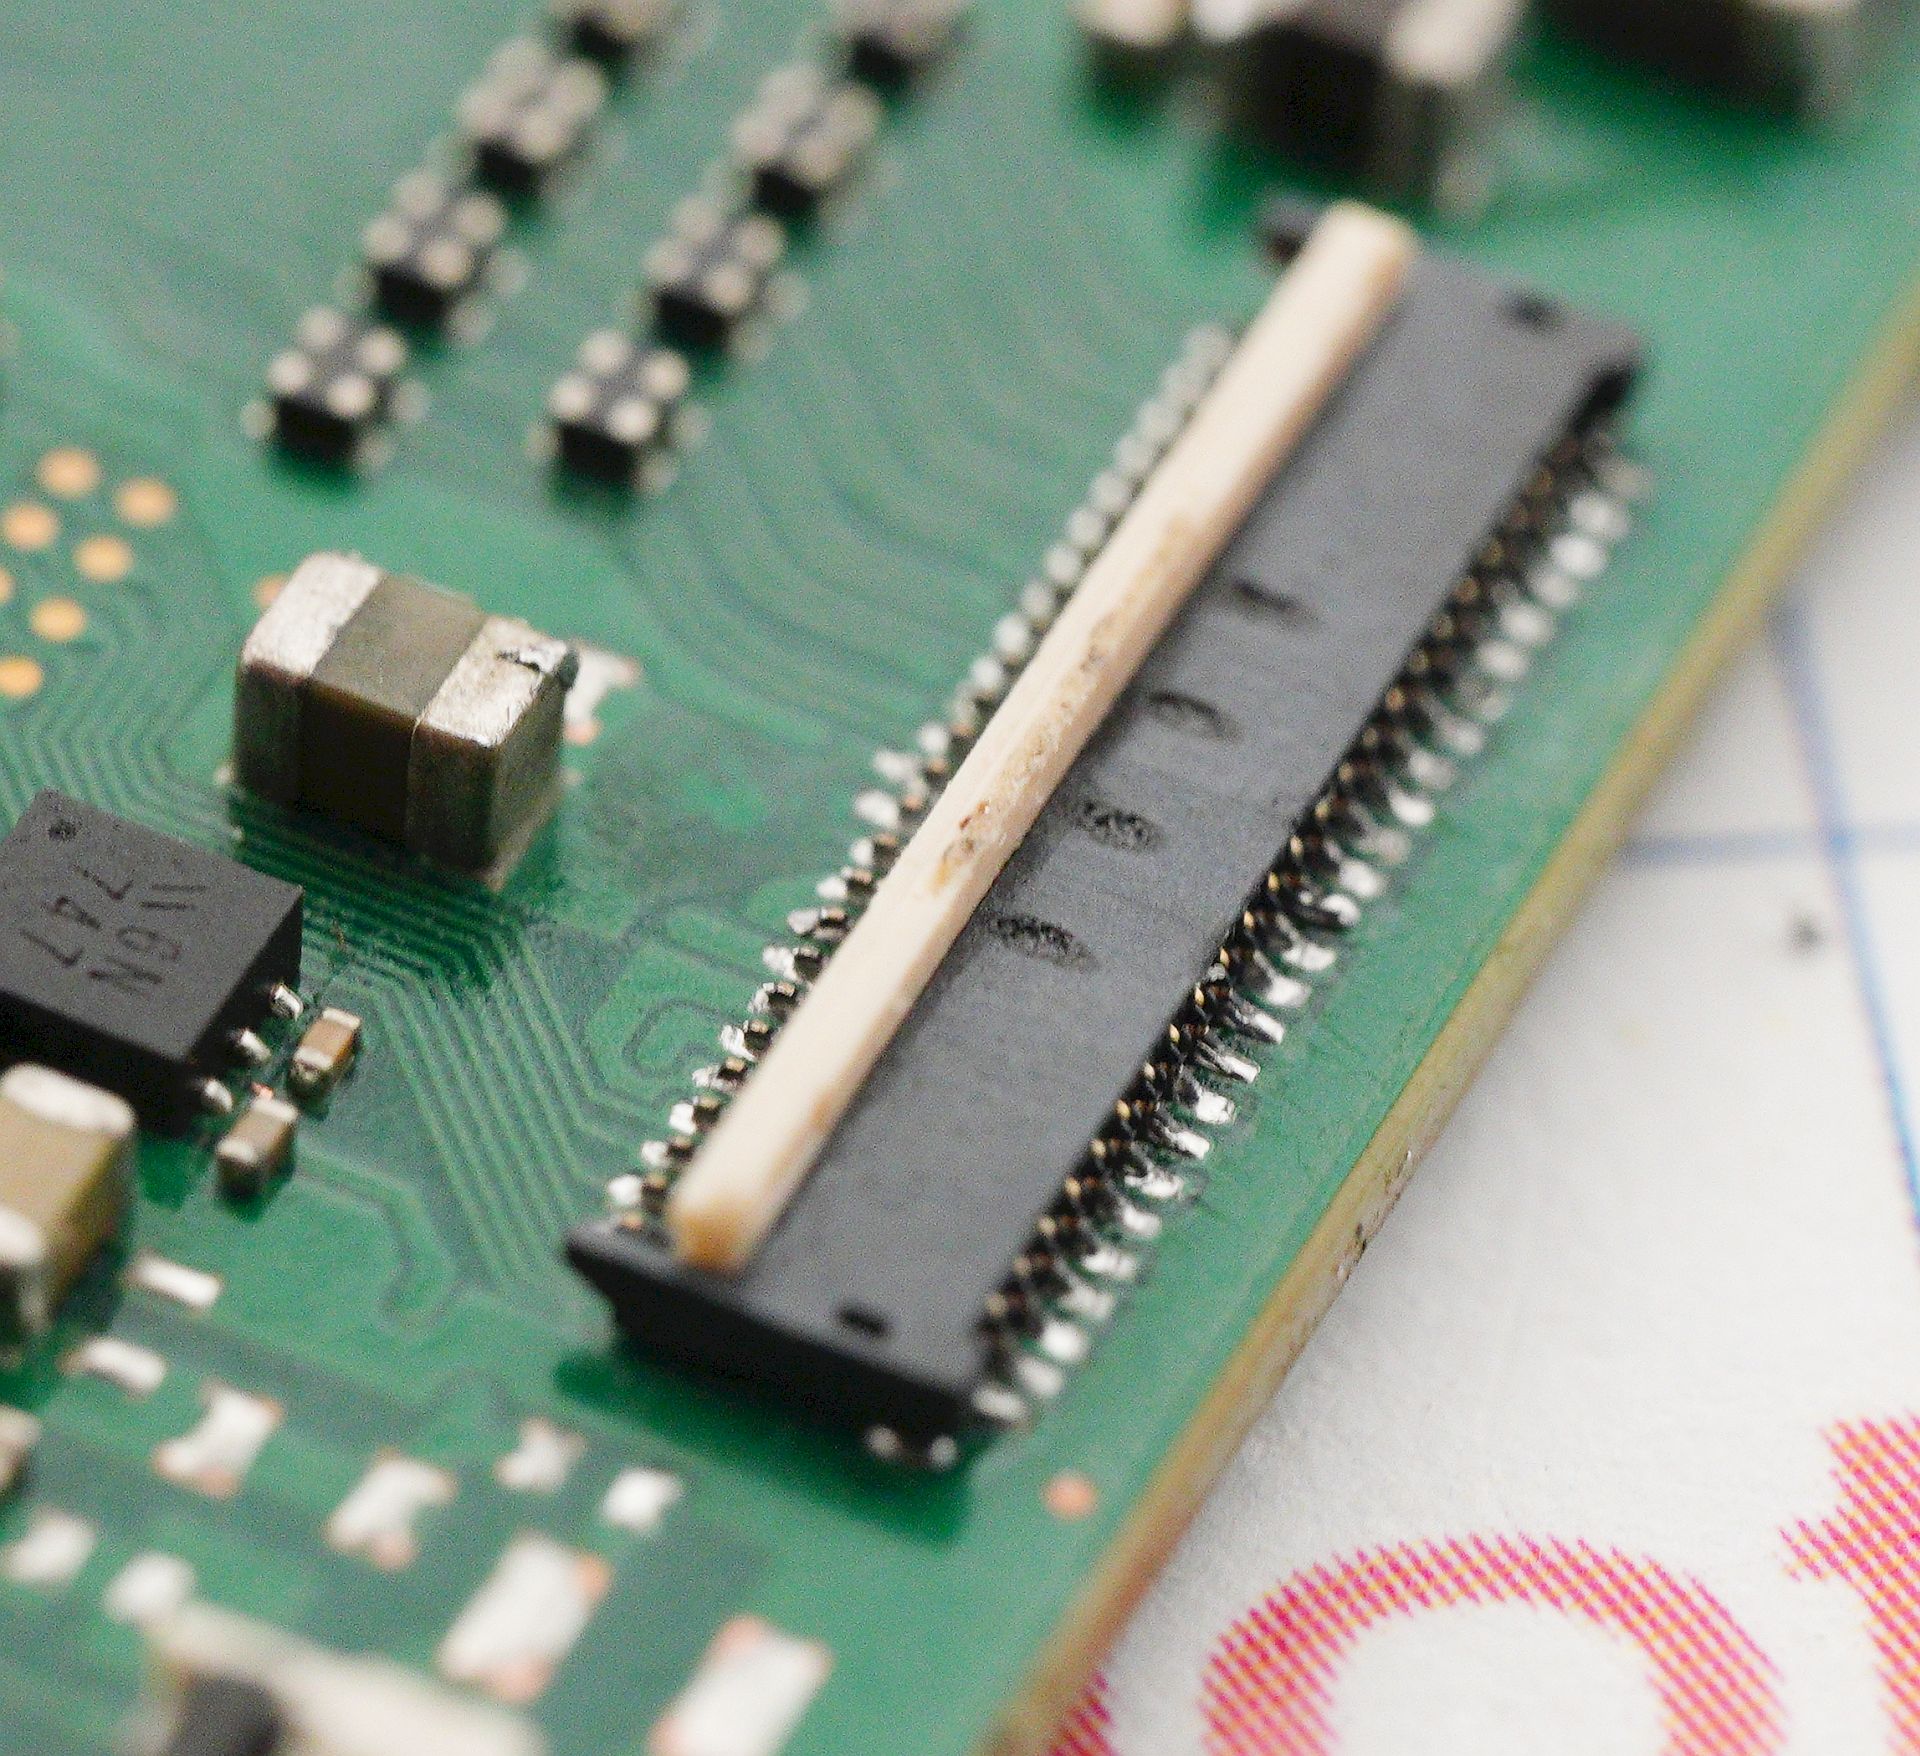
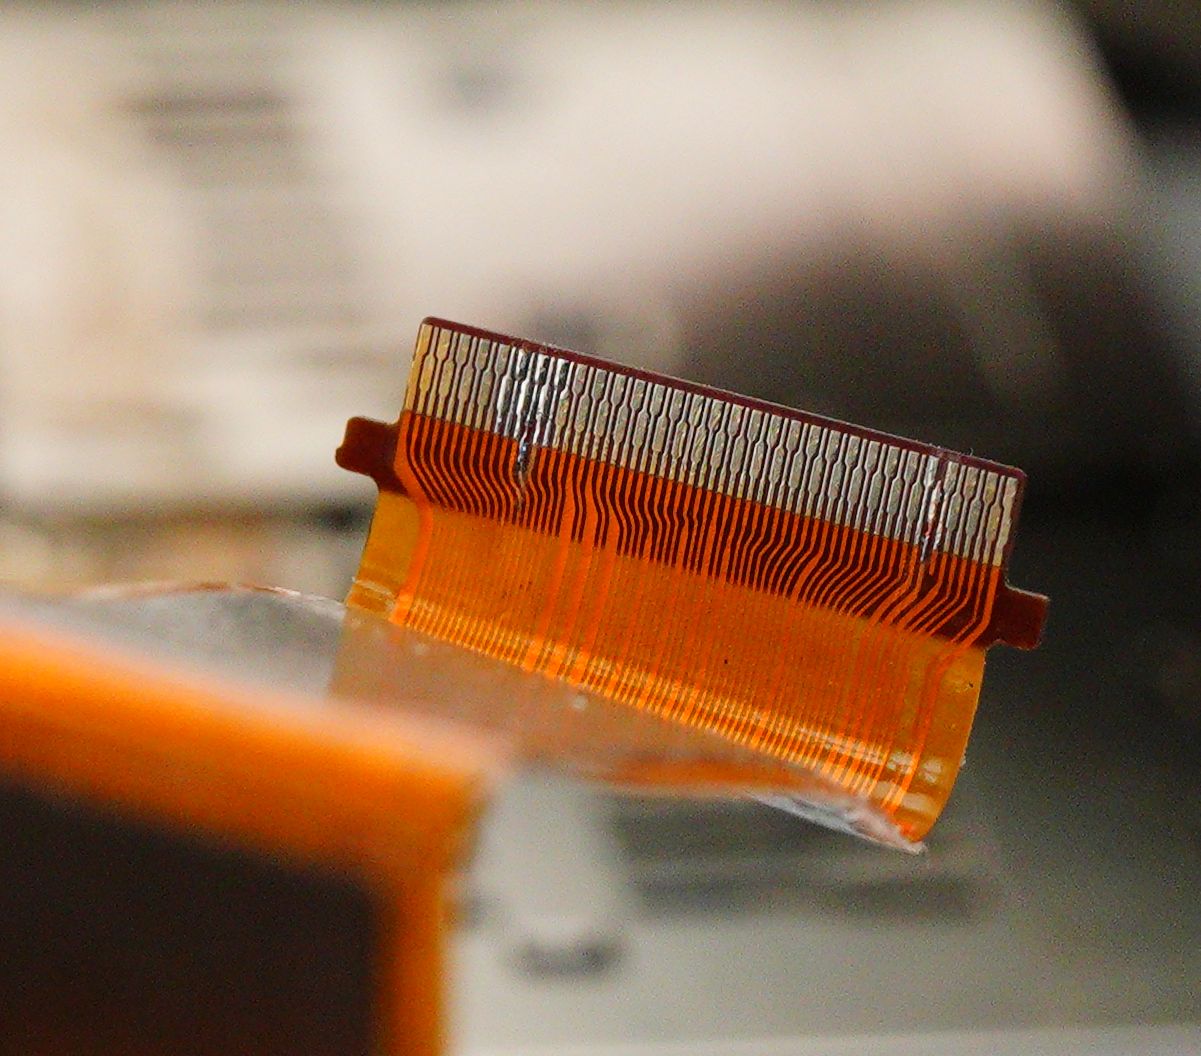
All bottom-edge flex connectors are badly corroded. Here’s what the CMOS connector looks like after removal:
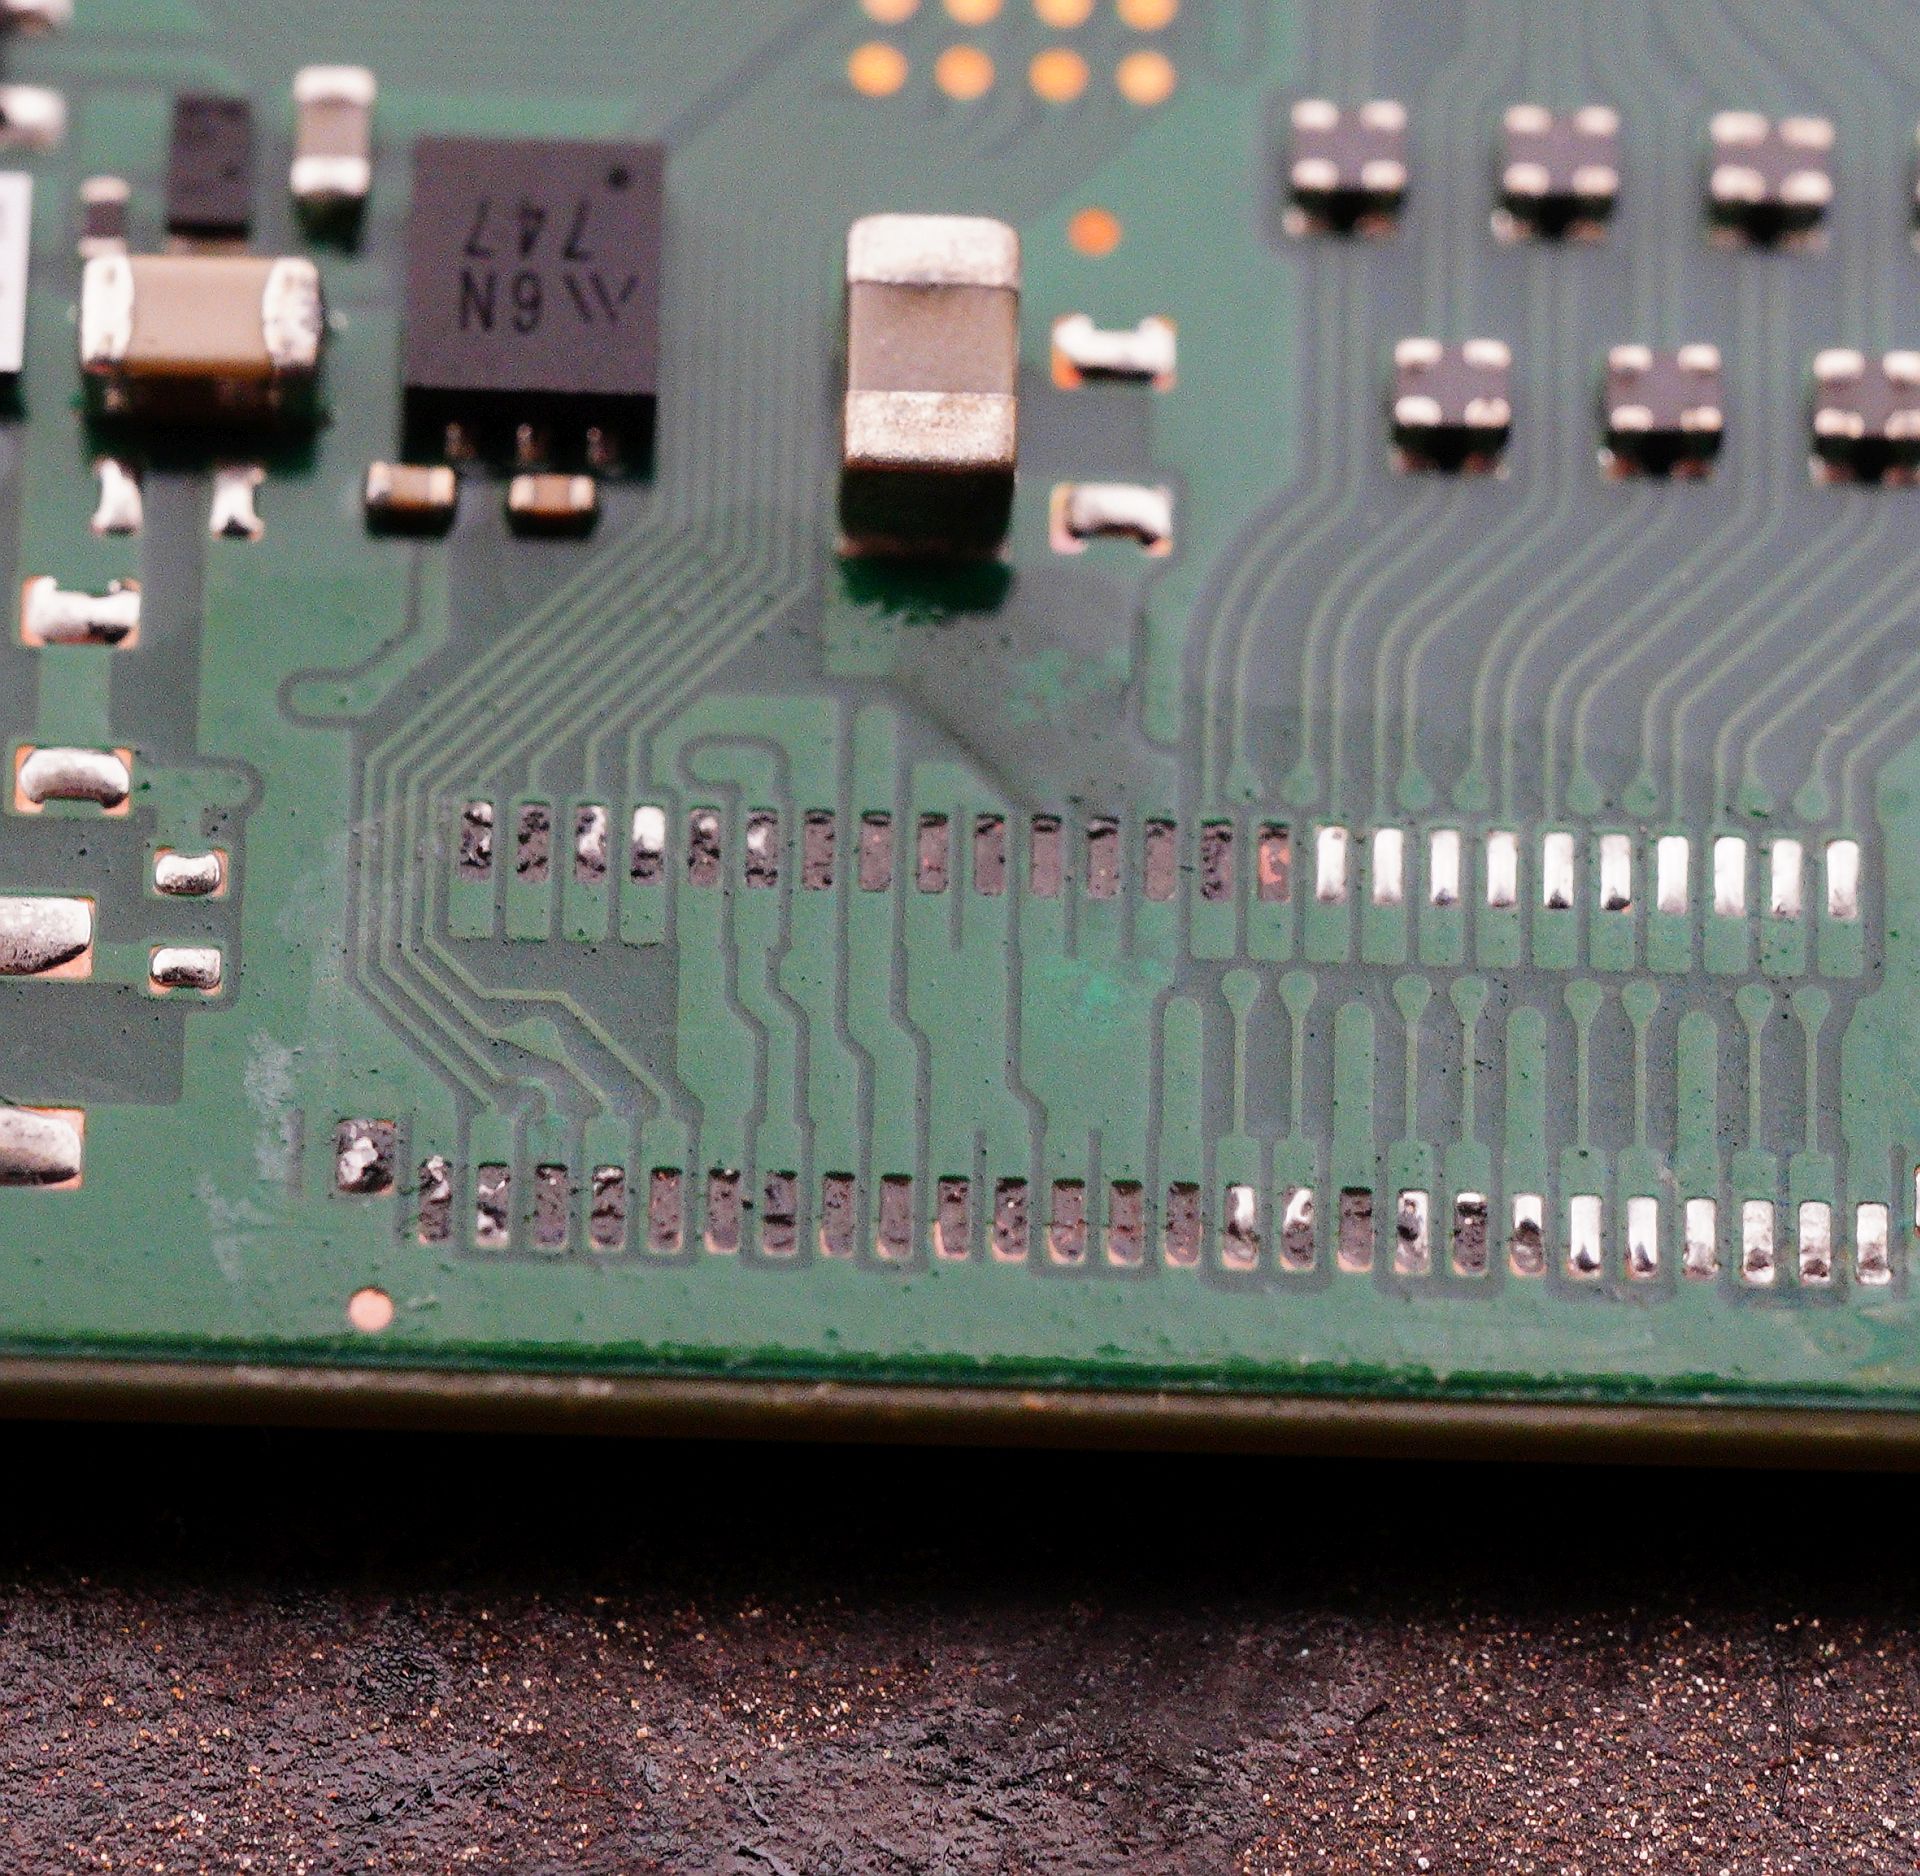 Half the traces were eaten down to bare copper. Soldering won’t stick - I had to mechanically clean each one, apply solder paste, and rebuild the contact pad cavities.
A new connector fits perfectly:
 Same thing happened with the stabilizer connector.
Still - the board wouldn’t power on. Always check the fuses! They’re on the back of the PCB:
Same thing happened with the stabilizer connector.
Still - the board wouldn’t power on. Always check the fuses! They’re on the back of the PCB:
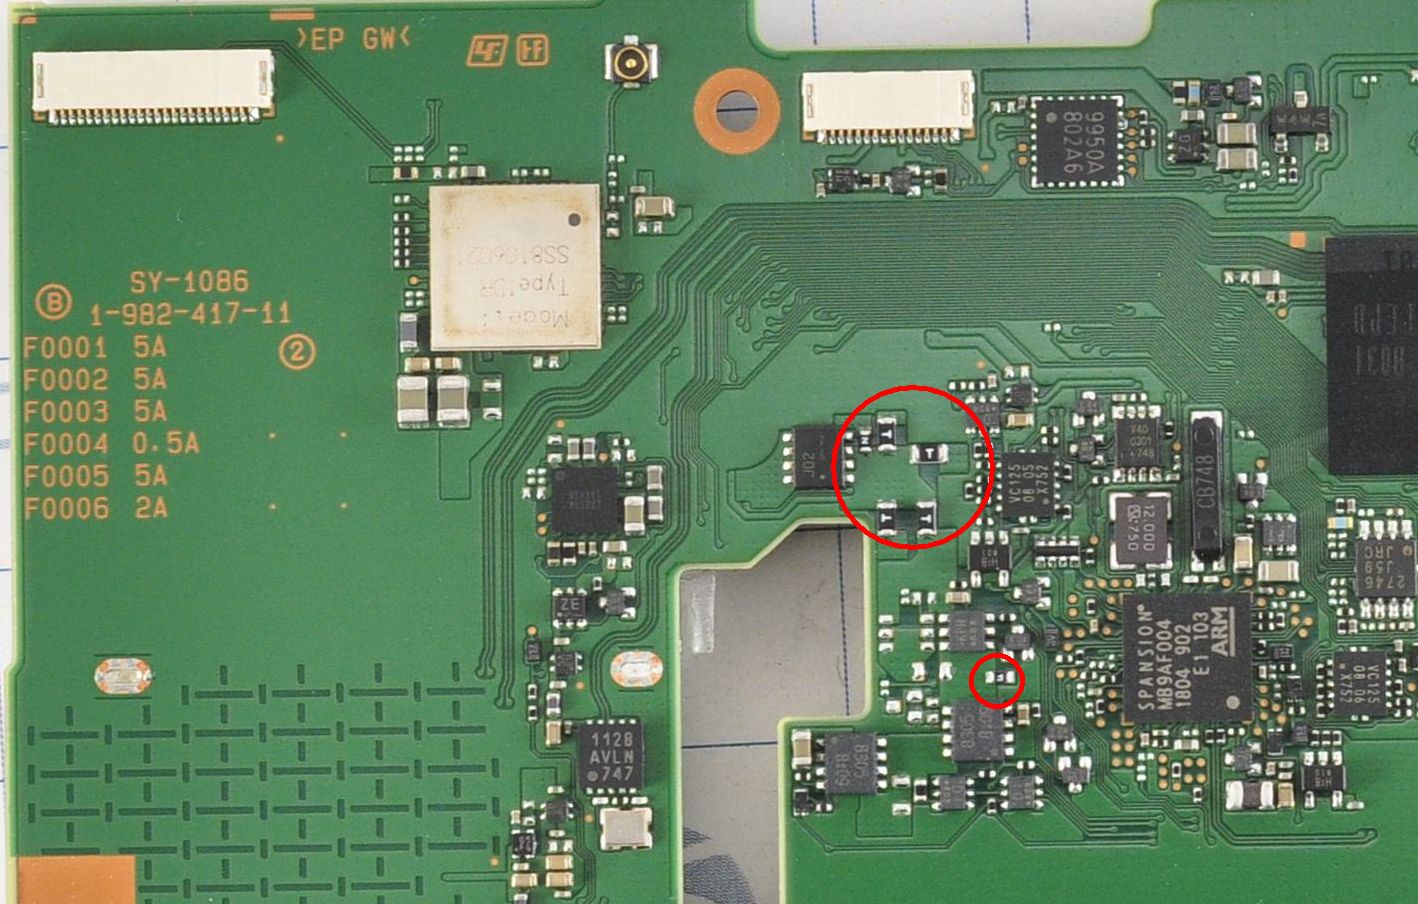 In my case, the fuses were okay, BUT the copper under them had rotted away. This is only visible after removing the fuses.
Once fixed - the camera booted! It initialized IBIS and took photos.
But output was only shown in the viewfinder. Why? Turns out two contacts on the rear panel flex had also corroded - the display power and, weirdly, the playback button. Fixable.
 The display panel itself was also dead - I replaced it.
Now it powers on, shows image, takes pictures. All good? Not quite.
The shutter button feels strange, images have noise, and if you point at a bright light, the camera reboots (what??). IBIS doesn't seem to work.
(three days of desperate diagnostics later…)
Sensor issue was due to a missing ground in the flex - I reflowed the connector again. That ground line created a huge analog ground loop otherwise.
The display panel itself was also dead - I replaced it.
Now it powers on, shows image, takes pictures. All good? Not quite.
The shutter button feels strange, images have noise, and if you point at a bright light, the camera reboots (what??). IBIS doesn't seem to work.
(three days of desperate diagnostics later…)
Sensor issue was due to a missing ground in the flex - I reflowed the connector again. That ground line created a huge analog ground loop otherwise.
The IBIS issue was traced to a completely rotten gyro, located on a small PCB in front of the battery compartment:
 The top panel had to be completely rebuilt. All internal parts had just been tossed inside without screws. Step-by-step reassembly:
NOW it works. Was it worth it? Probably not.
No amount of money can pay for the effort spent here - except maybe a bit of pride in saving something so broken.
Moral of the story? Don’t drop cameras in water - and don’t try fixing them without proper skills :)
Add Comment
This policy contains information about your privacy. By posting, you are declaring that you understand this policy:
- Your name, rating, website address, town, country, state and comment will be publicly displayed if entered.
- Aside from the data entered into these form fields, other stored data about your comment will include:
- Your IP address (not displayed)
- The time/date of your submission (displayed)
- Your email address will not be shared. It is collected for only two reasons:
- Administrative purposes, should a need to contact you arise.
- To inform you of new comments, should you subscribe to receive notifications.
- A cookie may be set on your computer. This is used to remember your inputs. It will expire by itself.
This policy is subject to change at any time and without notice.
These terms and conditions contain rules about posting comments. By submitting a comment, you are declaring that you agree with these rules:
- Although the administrator will attempt to moderate comments, it is impossible for every comment to have been moderated at any given time.
- You acknowledge that all comments express the views and opinions of the original author and not those of the administrator.
- You agree not to post any material which is knowingly false, obscene, hateful, threatening, harassing or invasive of a person's privacy.
- The administrator has the right to edit, move or remove any comment for any reason and without notice.
Failure to comply with these rules may result in being banned from submitting further comments.
These terms and conditions are subject to change at any time and without notice.
Comments