- Posted on
- • Camera repairs
When Weather Sealing Fails: Nikon D780 Water Damage Restoration
- Author
-
-

- User
- Photo-parts
- Posts by this author
- Posts by this author
-
By today's standards, the Nikon D780 is supposedly hopelessly outdated (of course not!), but I've never had a chance to look inside before. This model somehow got lost between the super-popular D750 and D850, and even spare parts for it were not eagerly sold. So when I was asked about the possibility of repairing one, I replied with great enthusiasm.
The problem, as described by the owner, was also unusual: one not-so-fine day, the camera simply stopped taking pictures. Pressing the shutter button only triggered a machine-gun burst of shutter actuations followed by an error. My repair intuition immediately suggested: this will not be a typical fix, and most likely not a mechanical fault at all. And indeed, it turned out that way.
What follows is the teardown, some surprises, desperate struggle against corrosion, and a few thoughts on "weather sealing.”
For the curious - the defect manifestation "before" is shown in a short video at the end of the article.
Teardown
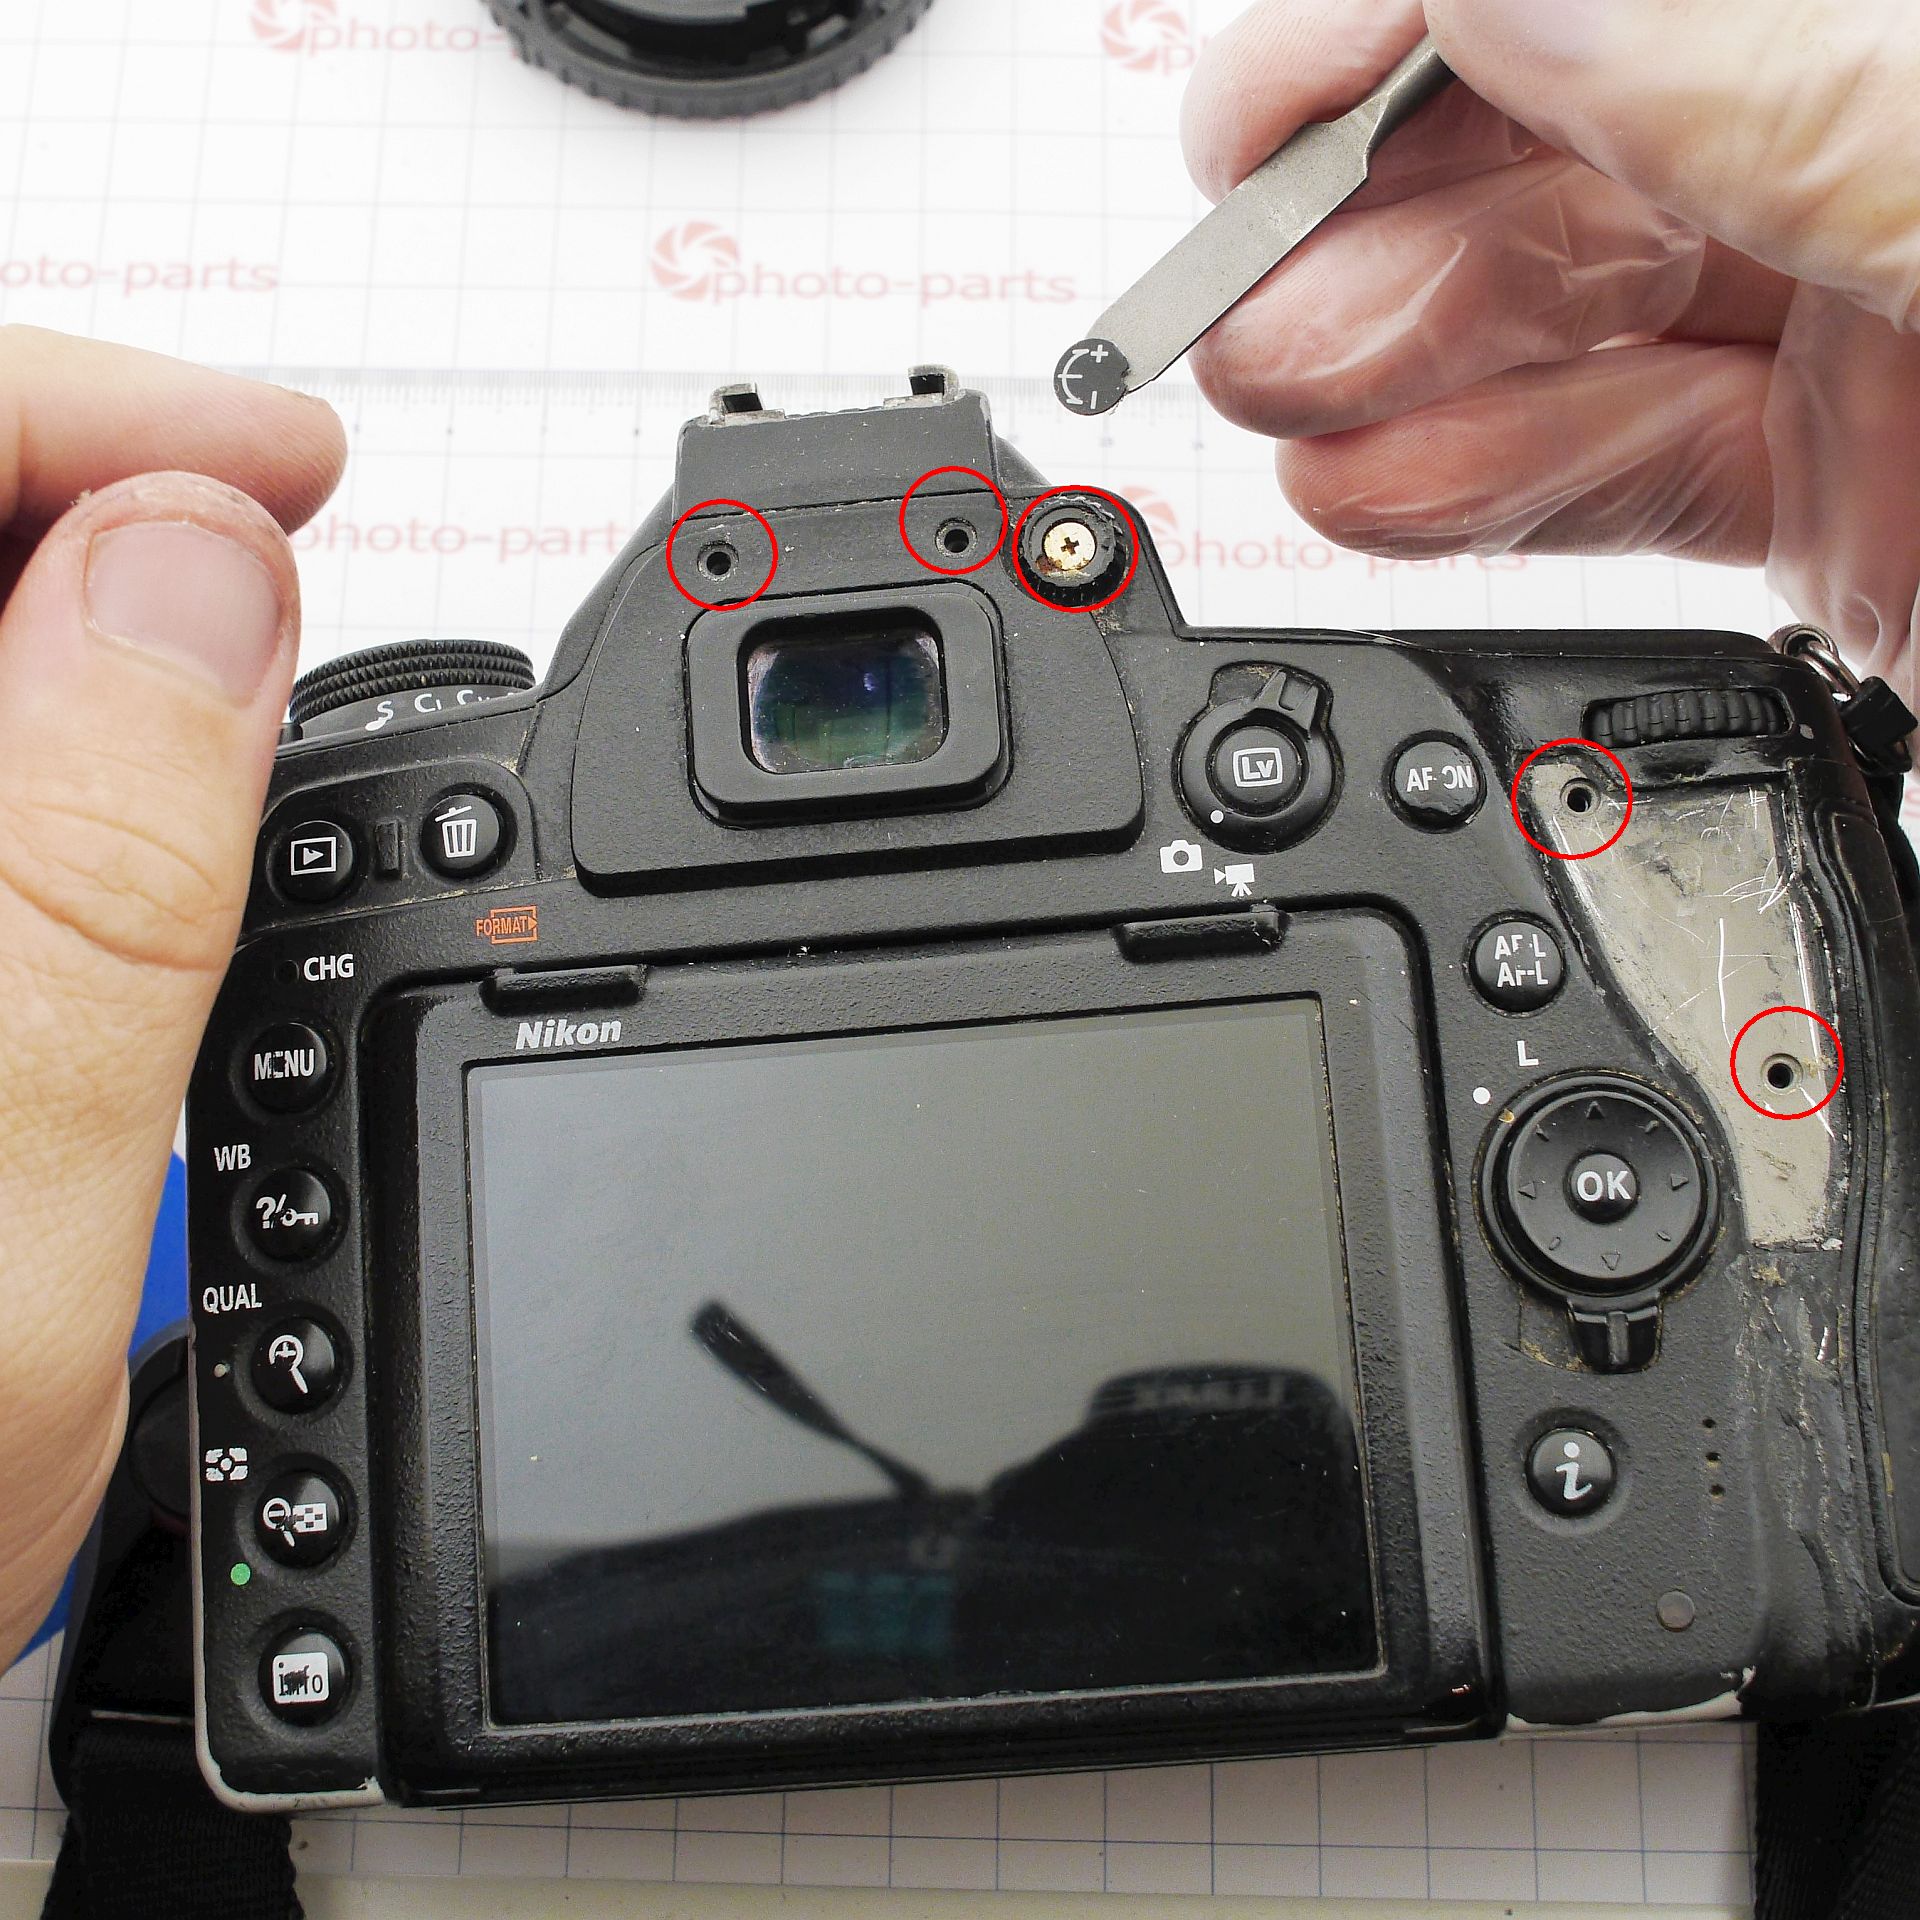
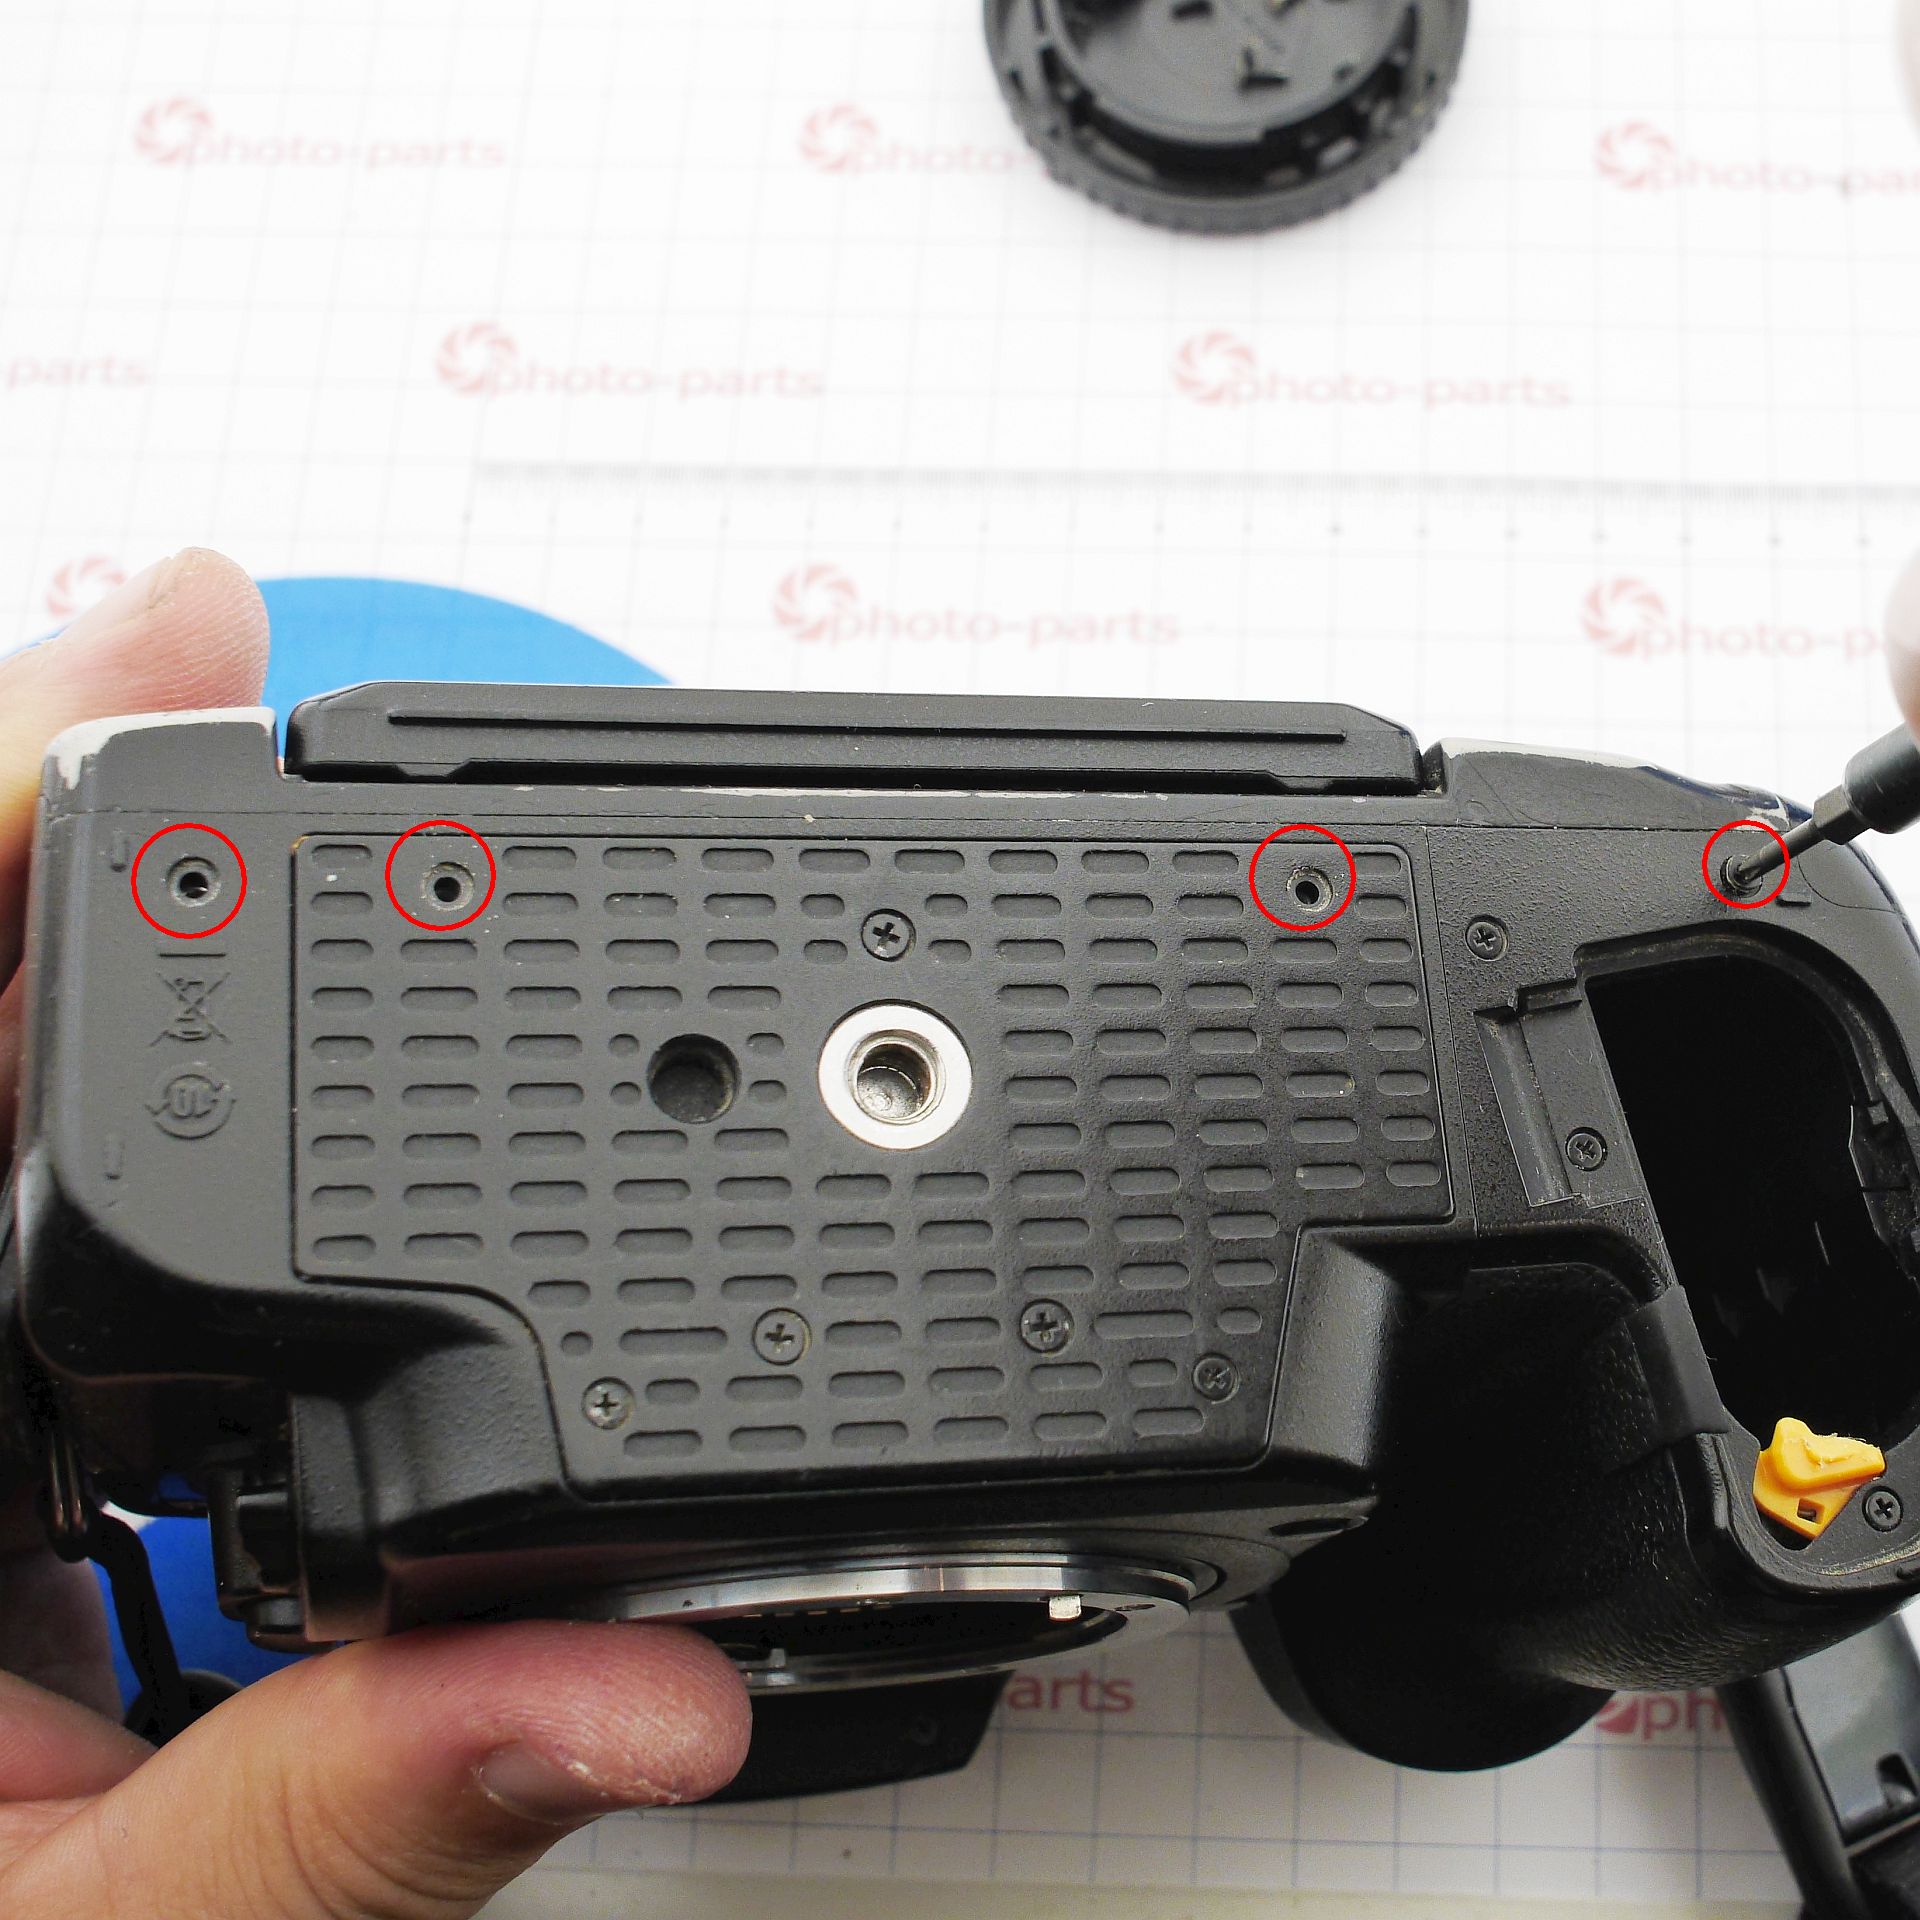
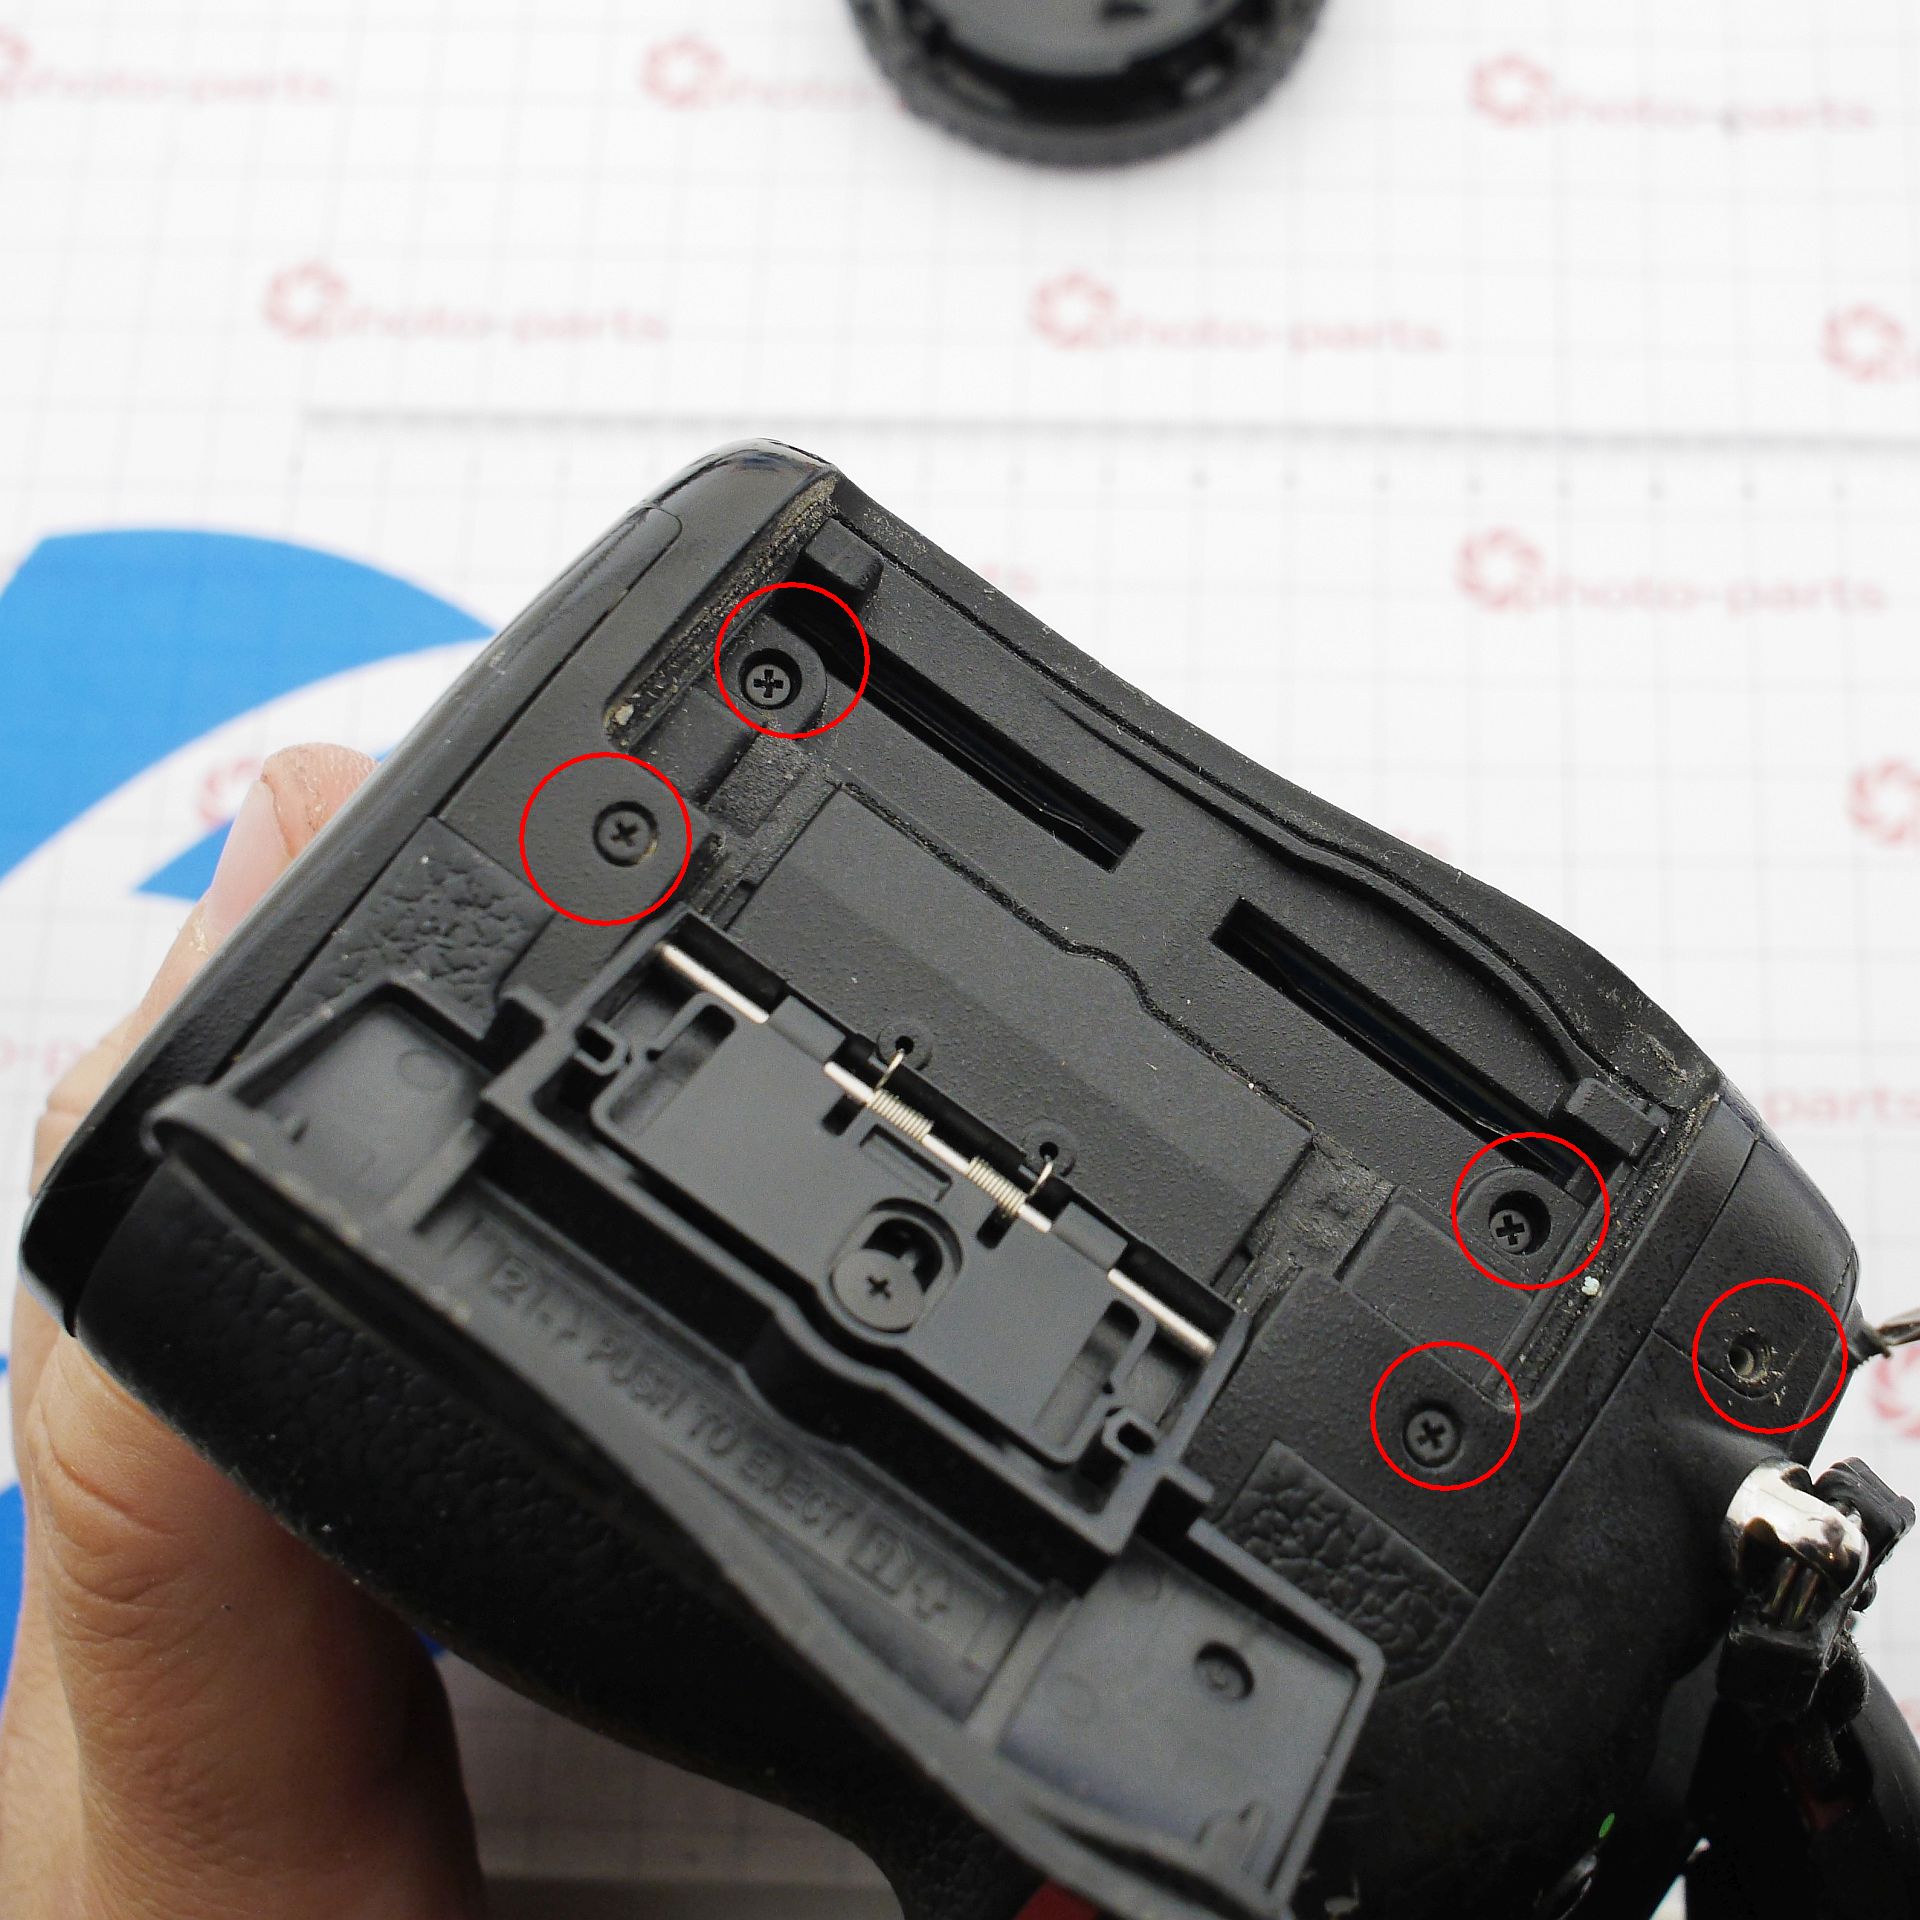
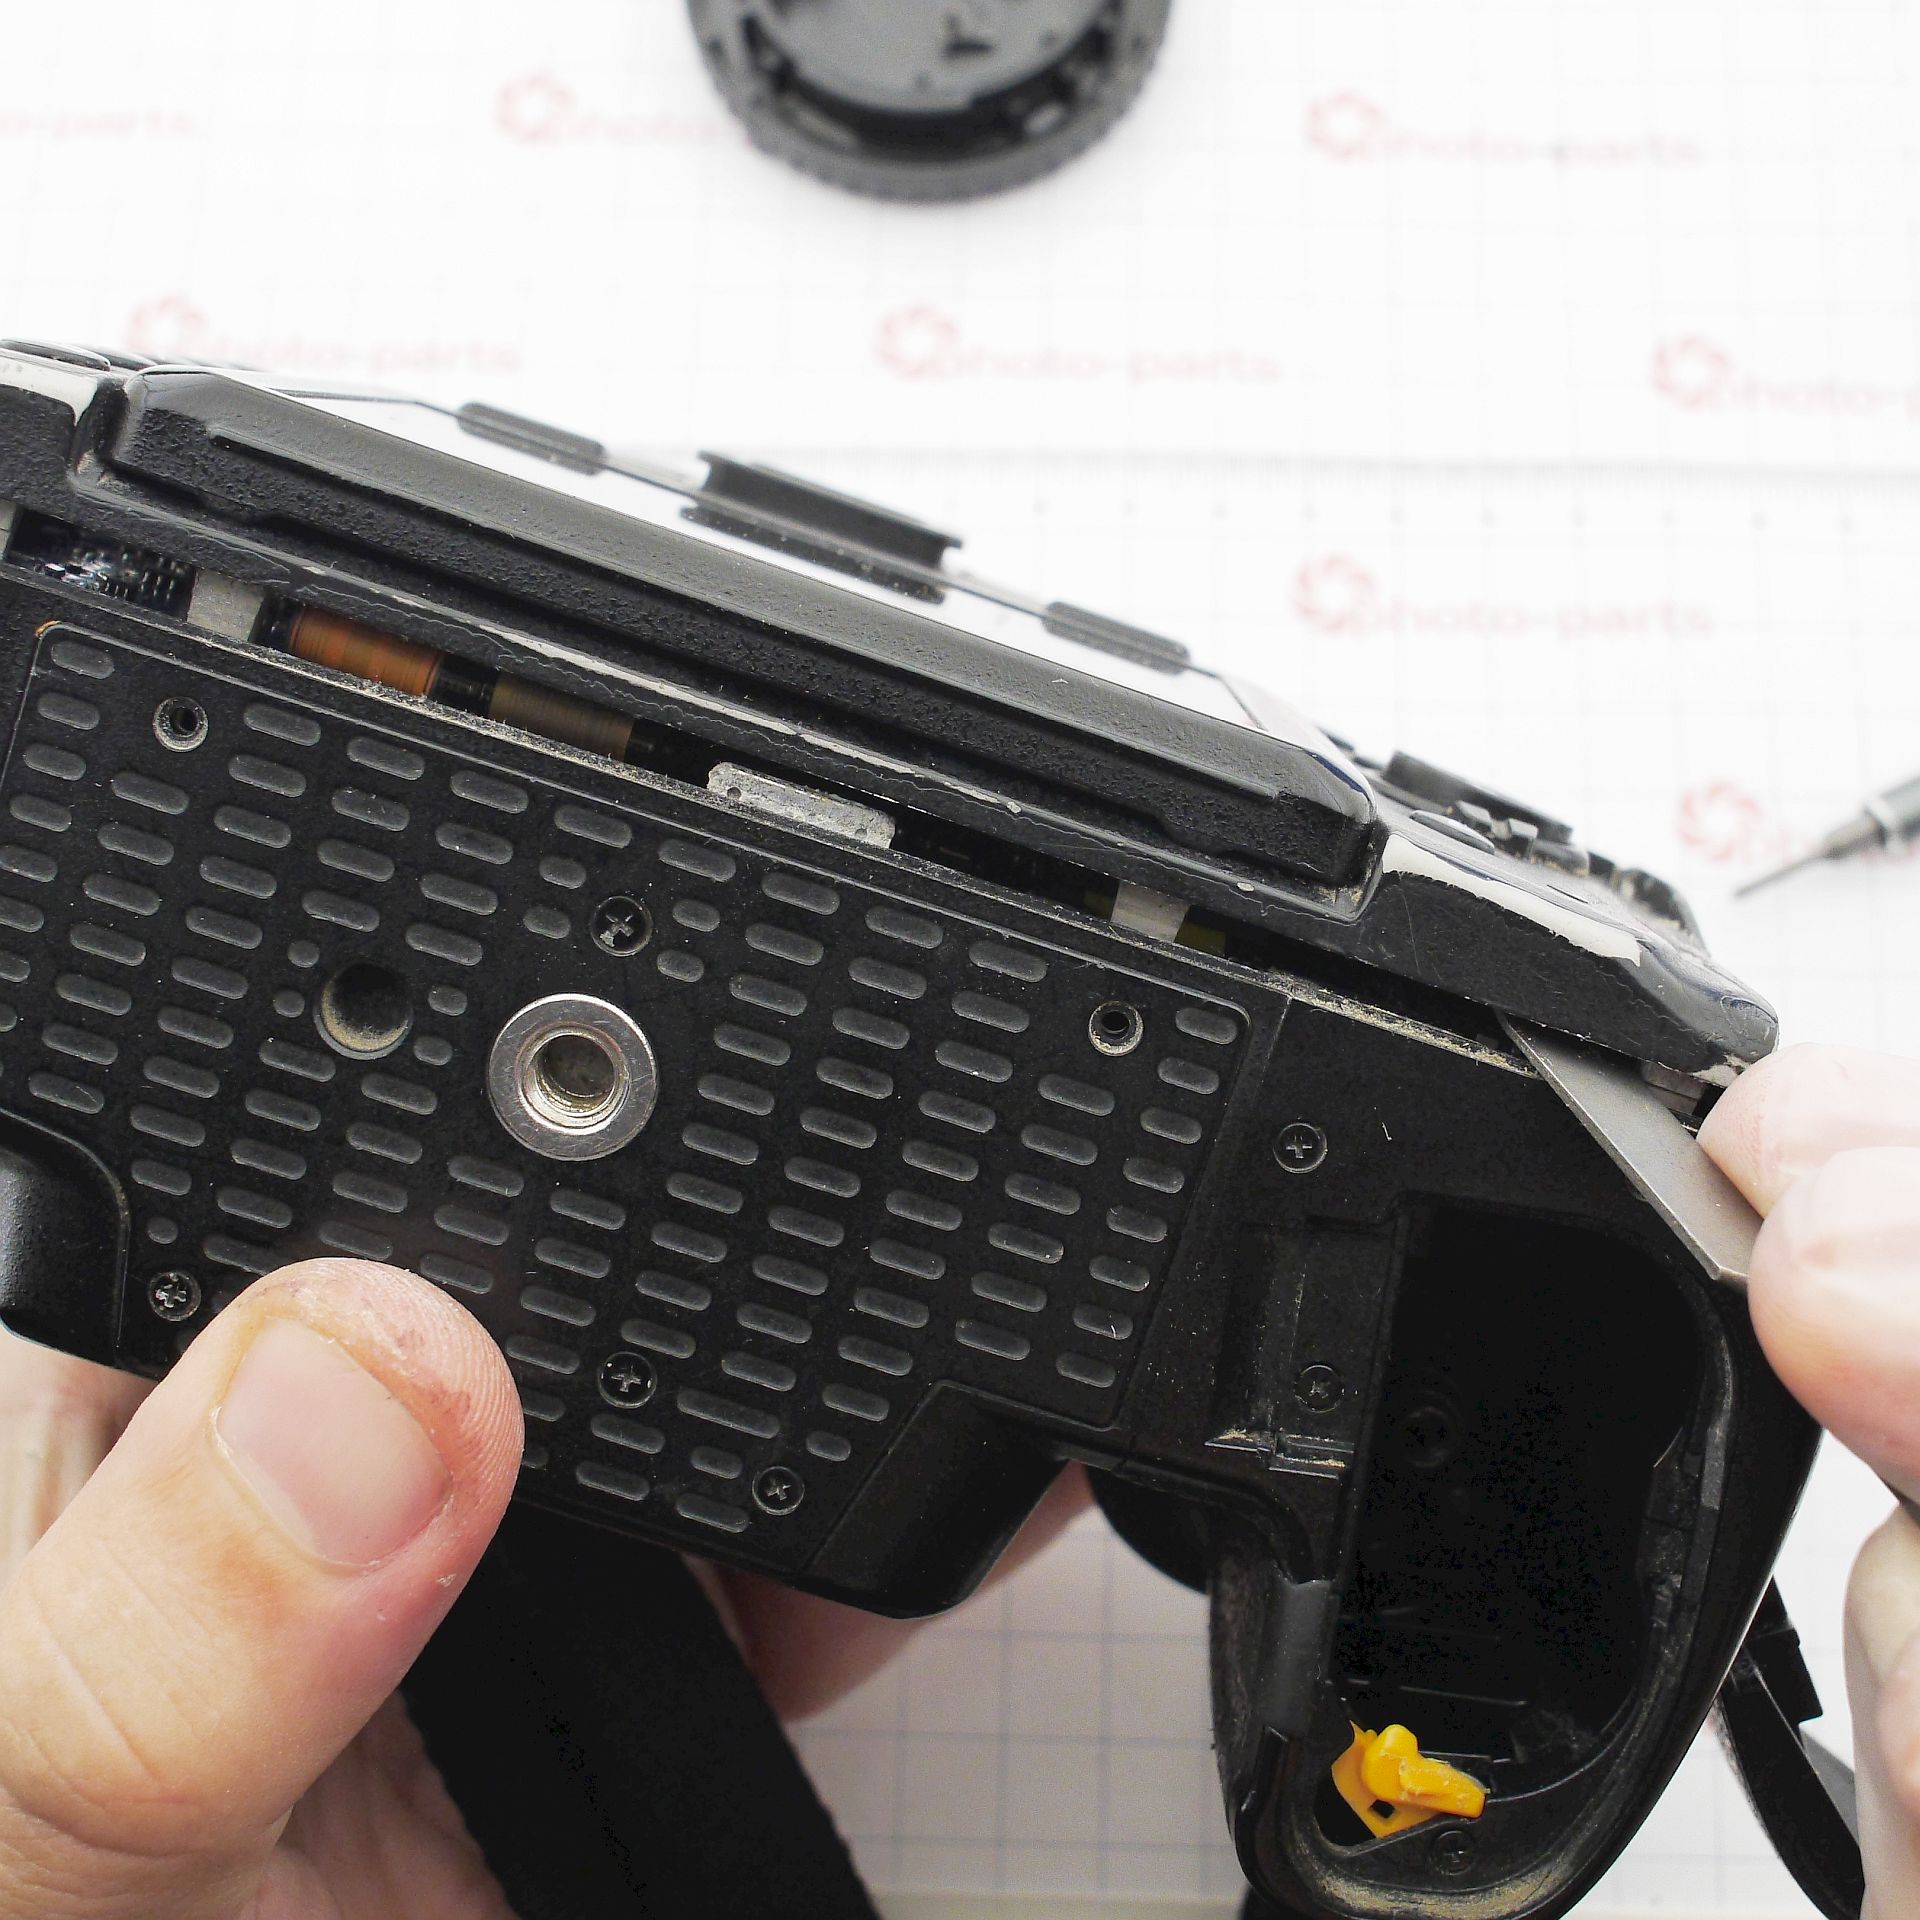
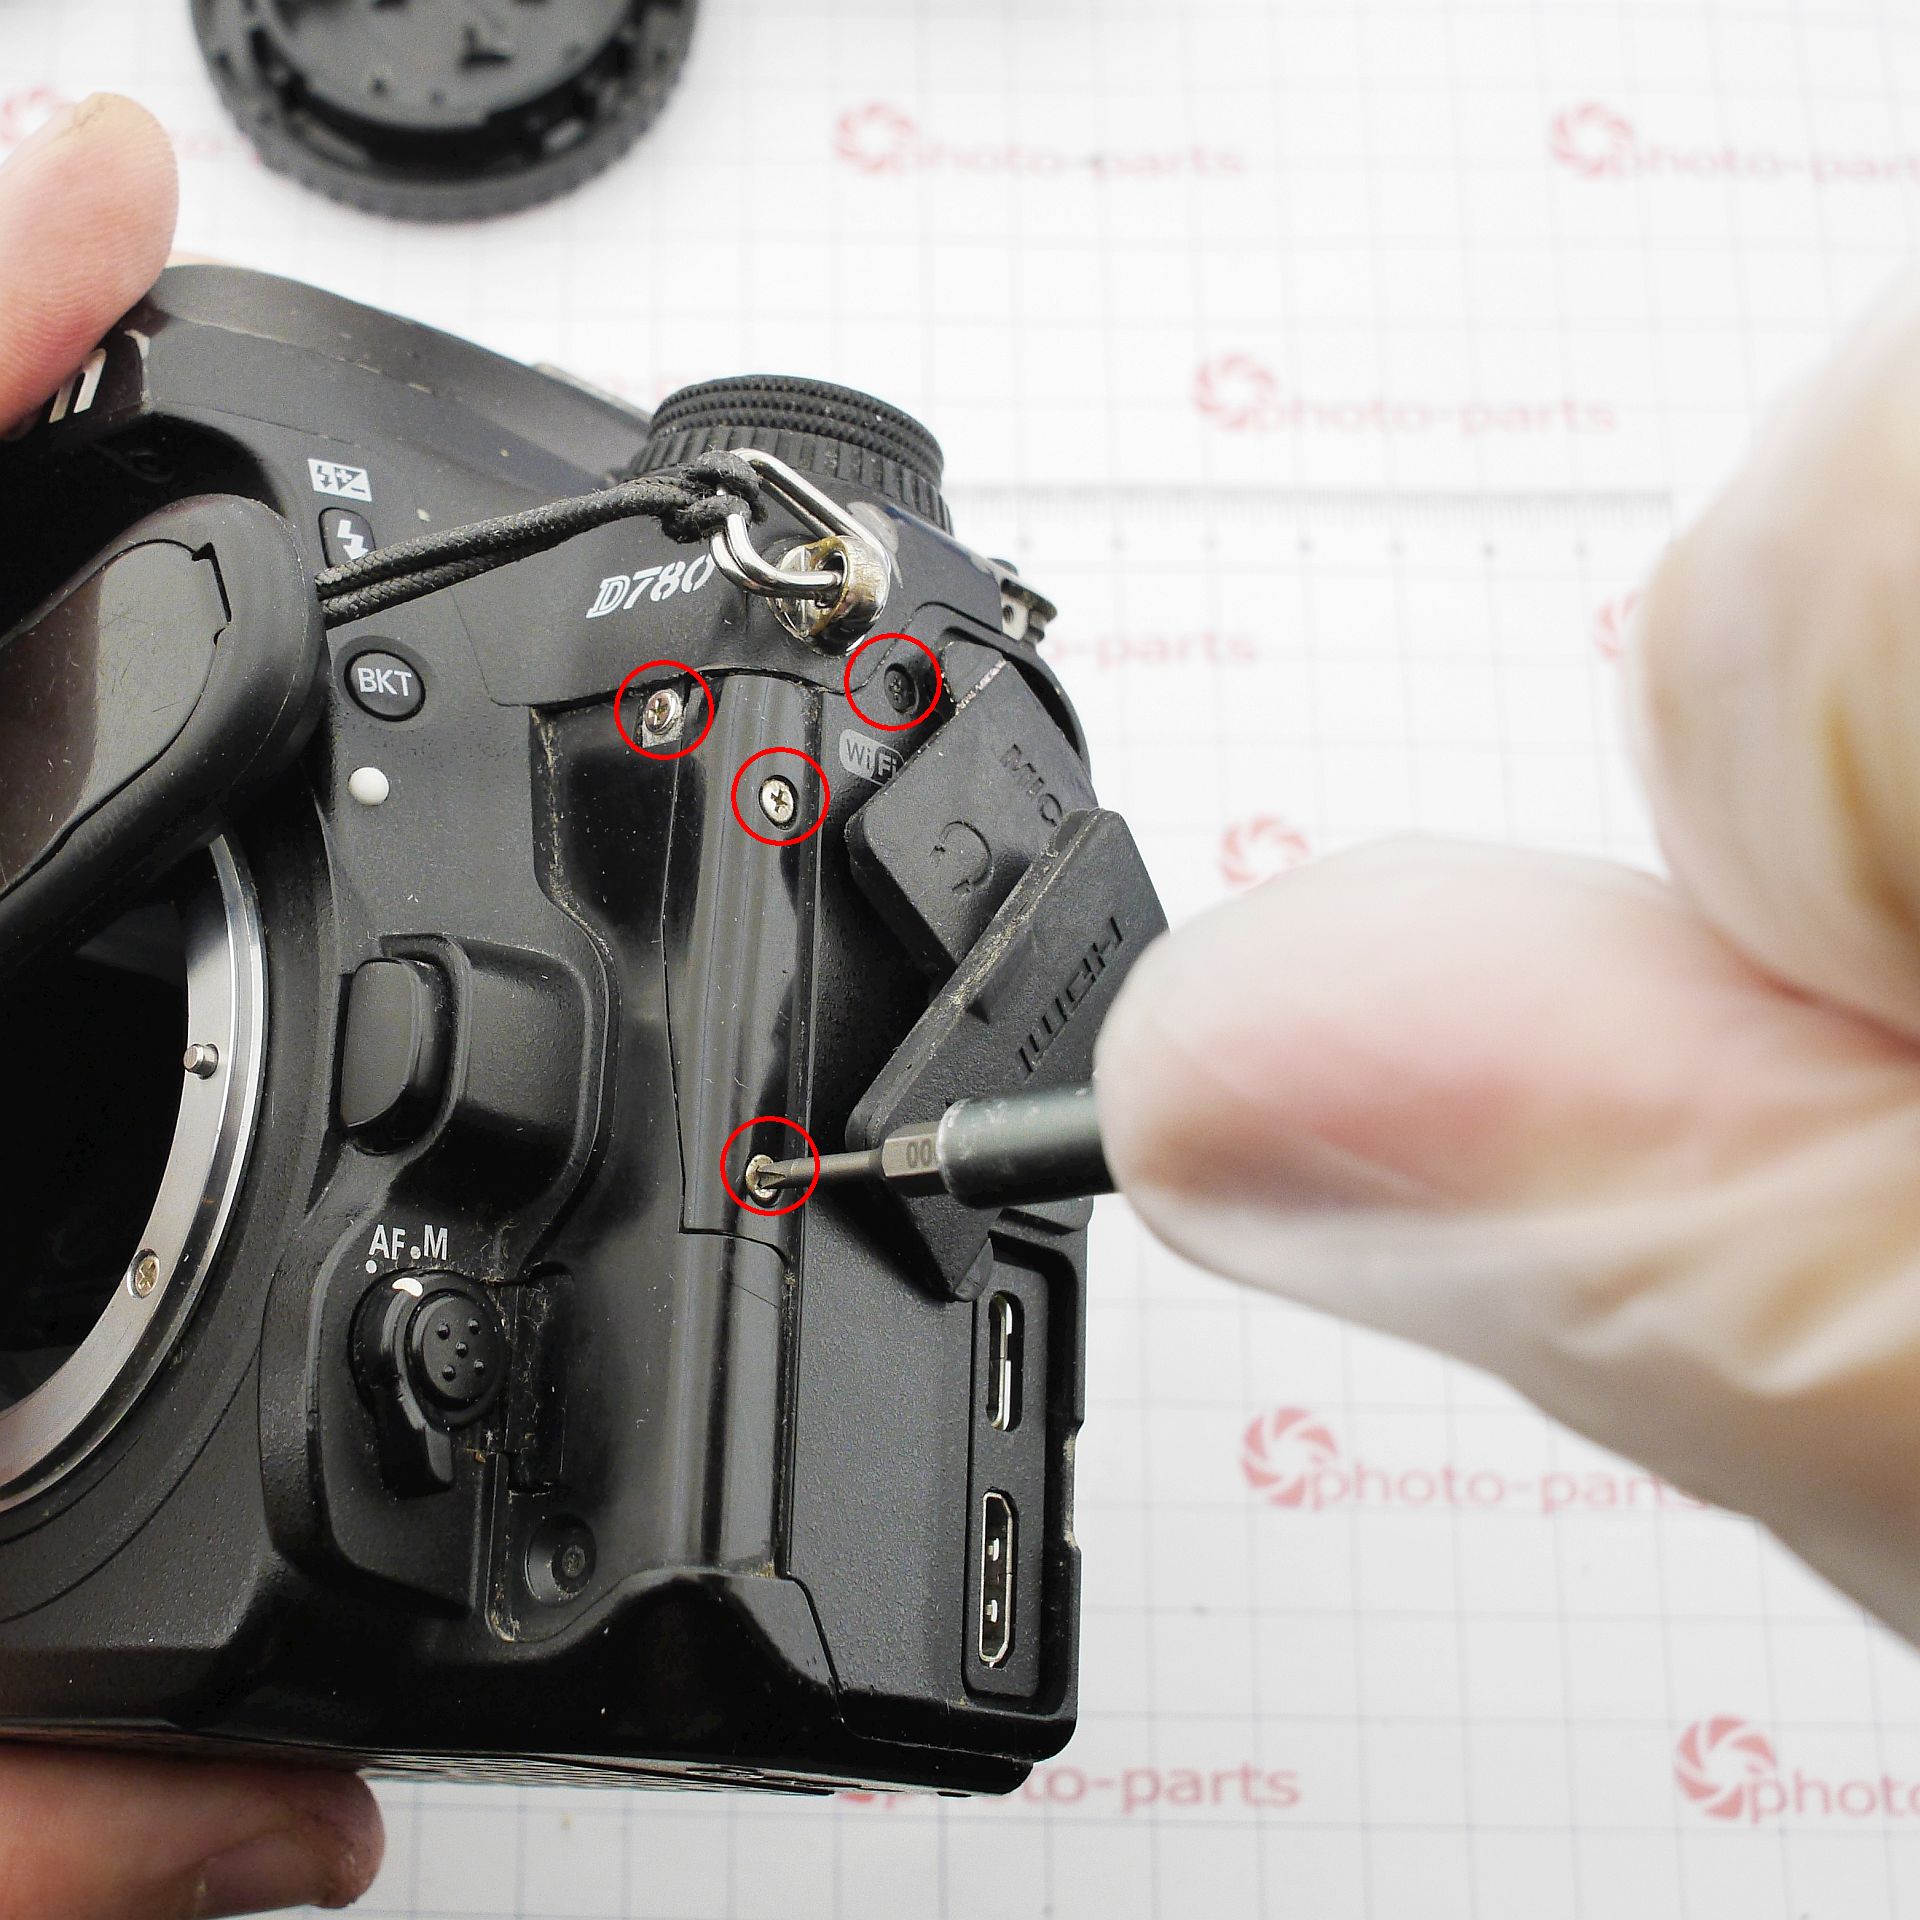
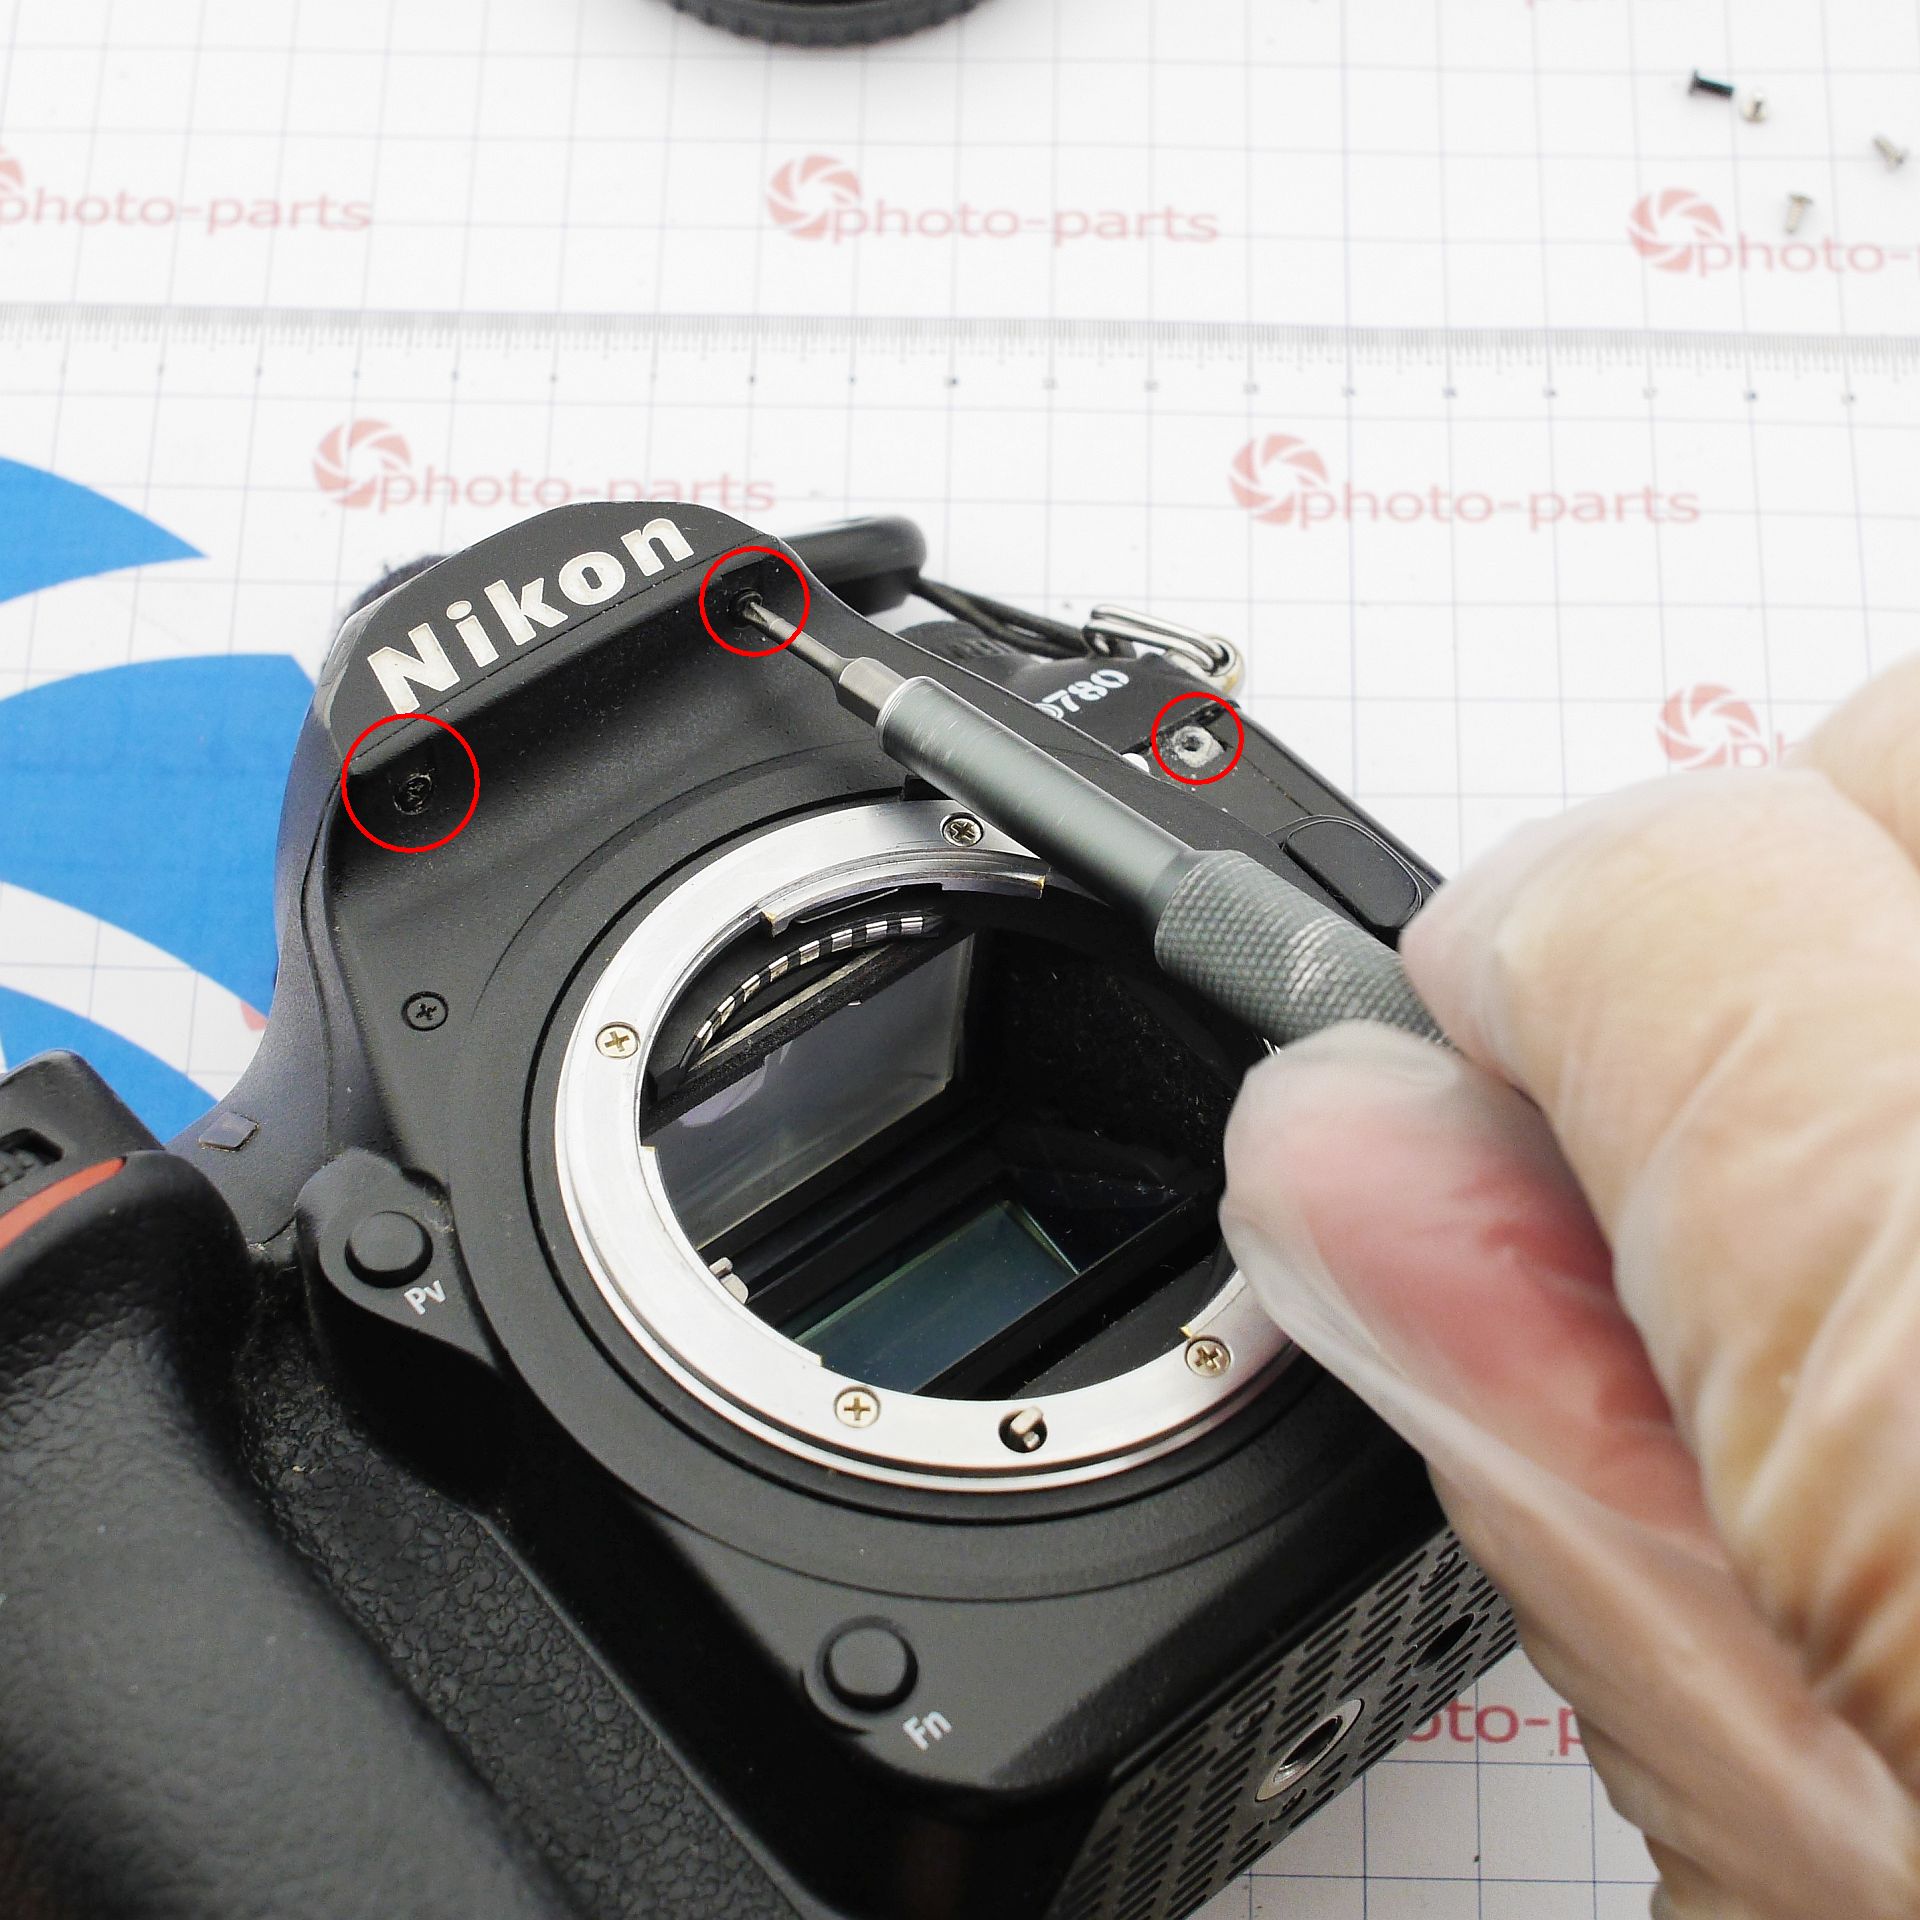
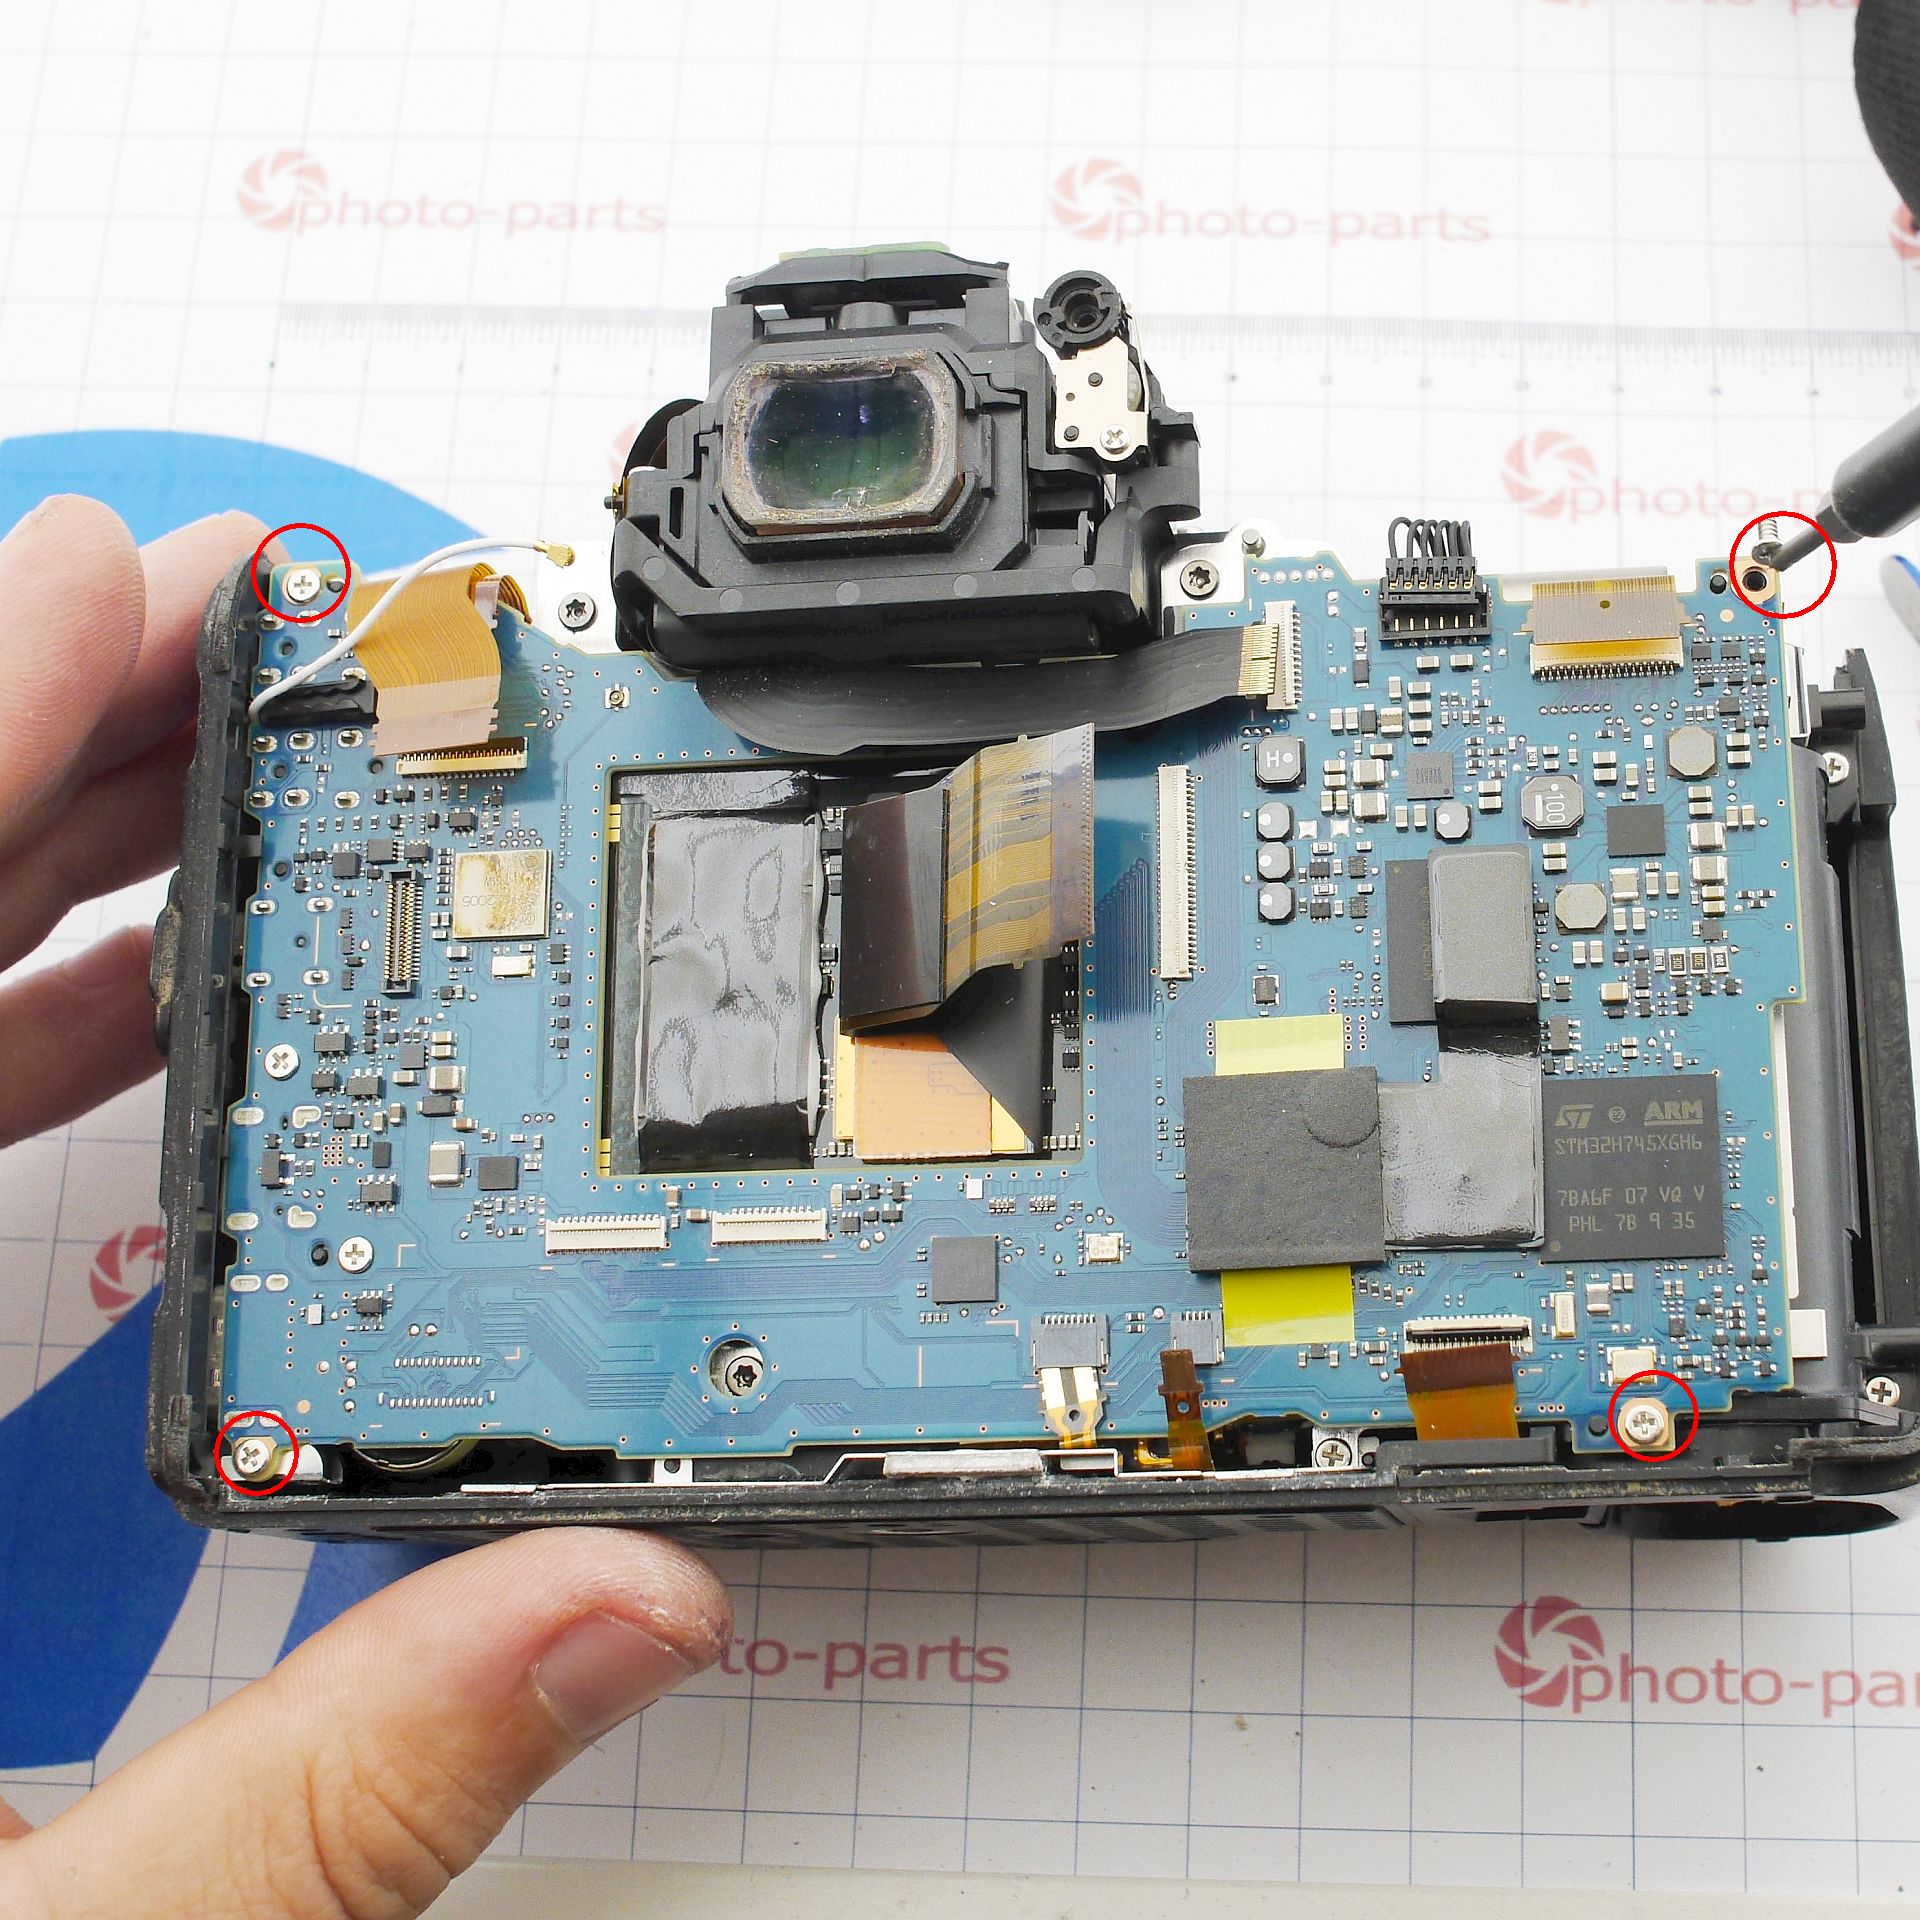
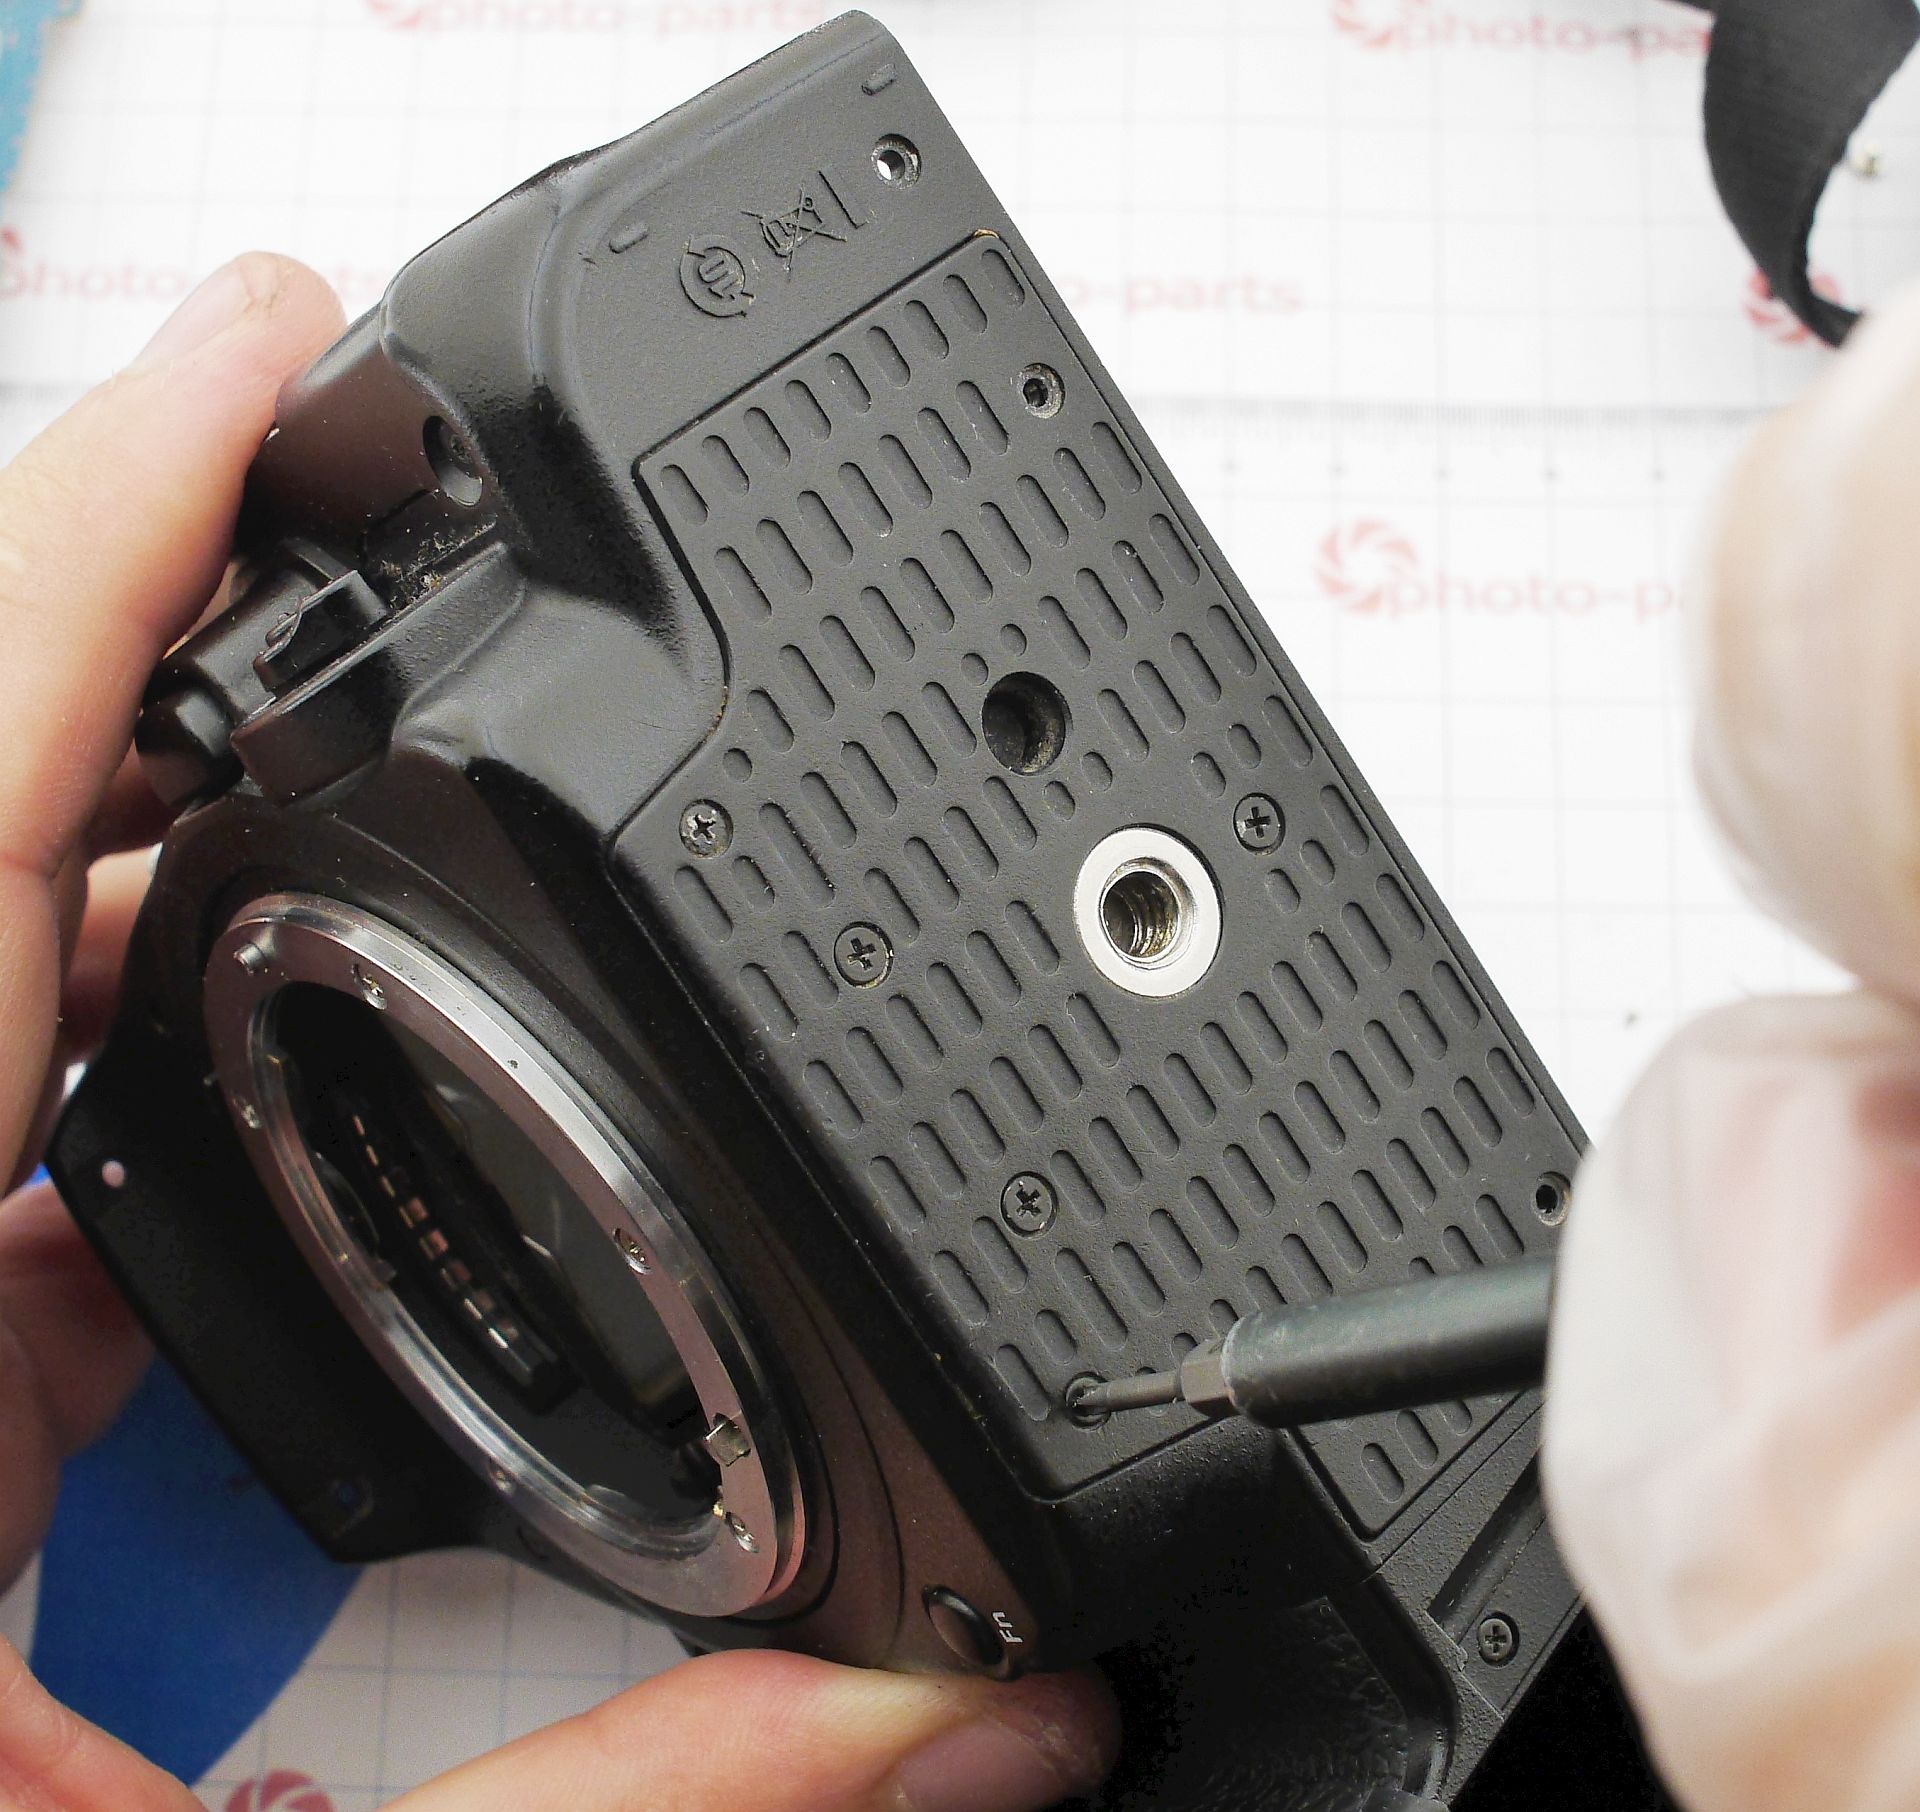
We begin with the rear panel, following the principle: "see a screw - unscrew it." The trick is in the hidden screws under the rubber grips, but this camera came to me without them, instead with generous amounts of superglue. In the photo you can see traces from the scraper I used to knock off the cyanoacrylate crystals. On the bottom panel, you don't need to remove all screws just yet - the camera would fall apart prematurely. For now, just remove the ones I've marked. Also, 4 screws are hidden under the memory card slot cover:
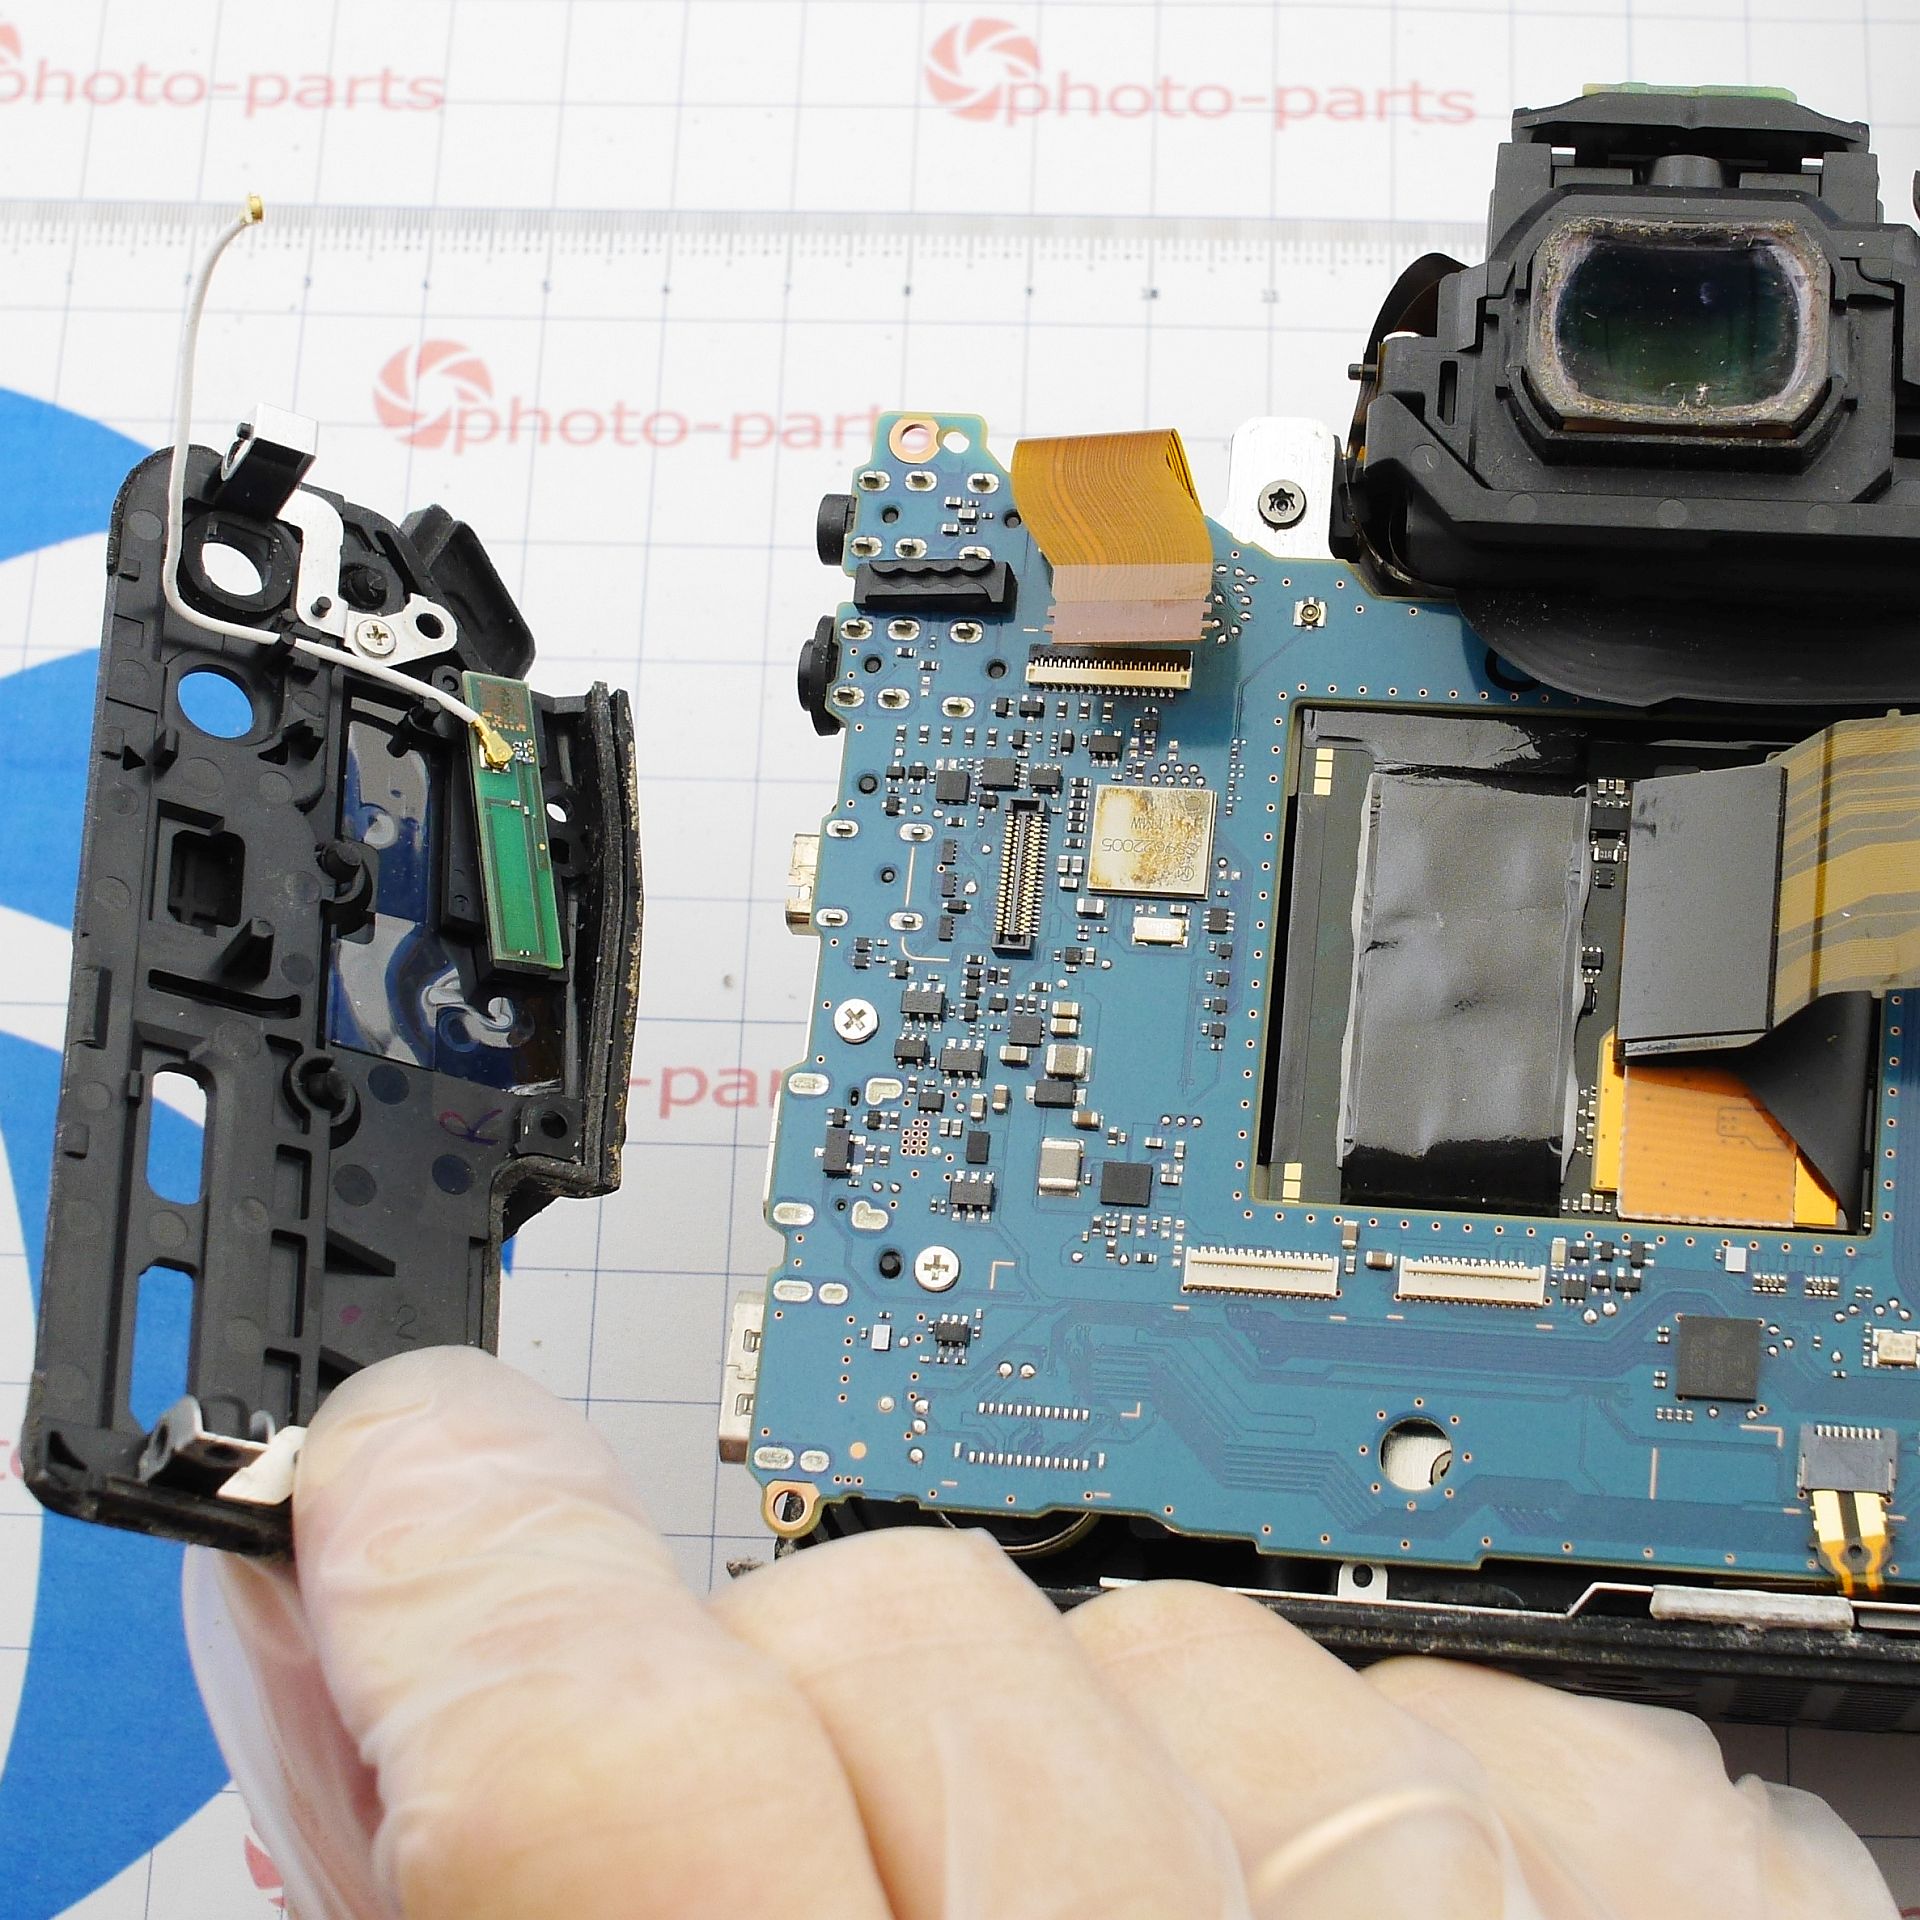
Now the rear panel can be gently lifted. At this point, caution is required - the rear panel is connected to the main board by two ribbon cables. If you tug too hard, the fragile cables will be damaged.
With the rear panel lifted, as shown below, use a spudger or fingernail to open the locks and release the ribbons:
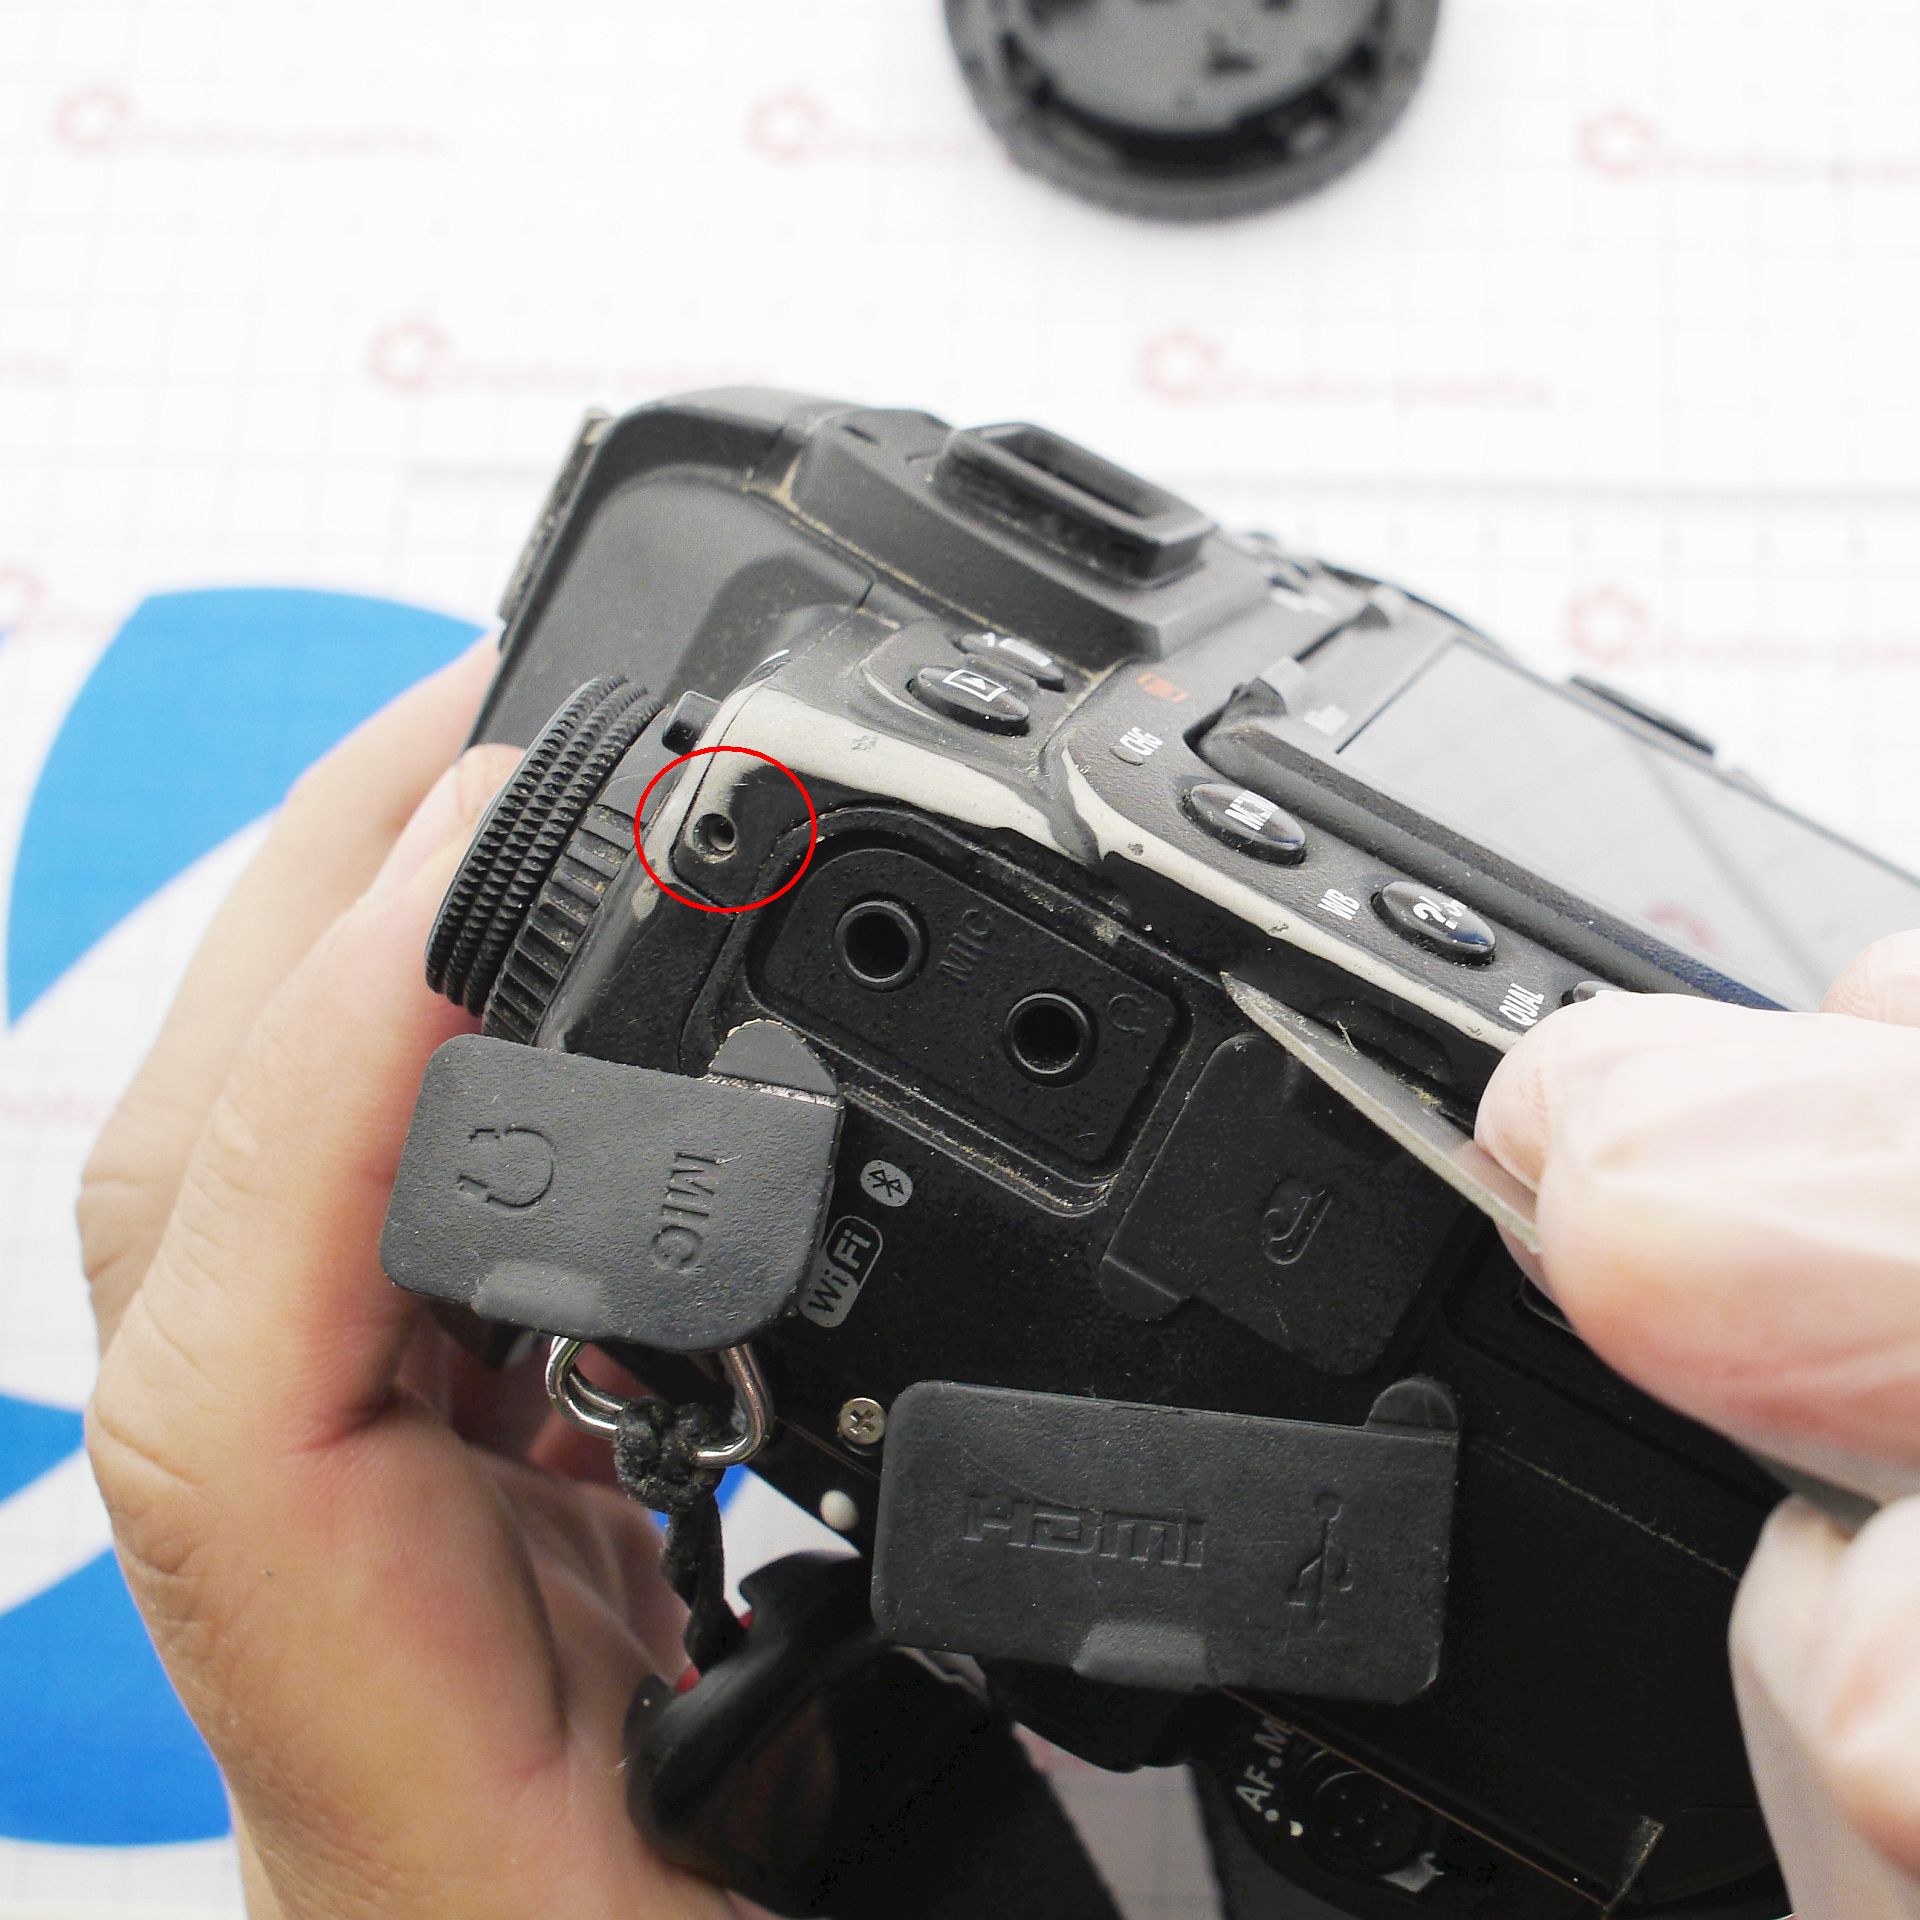
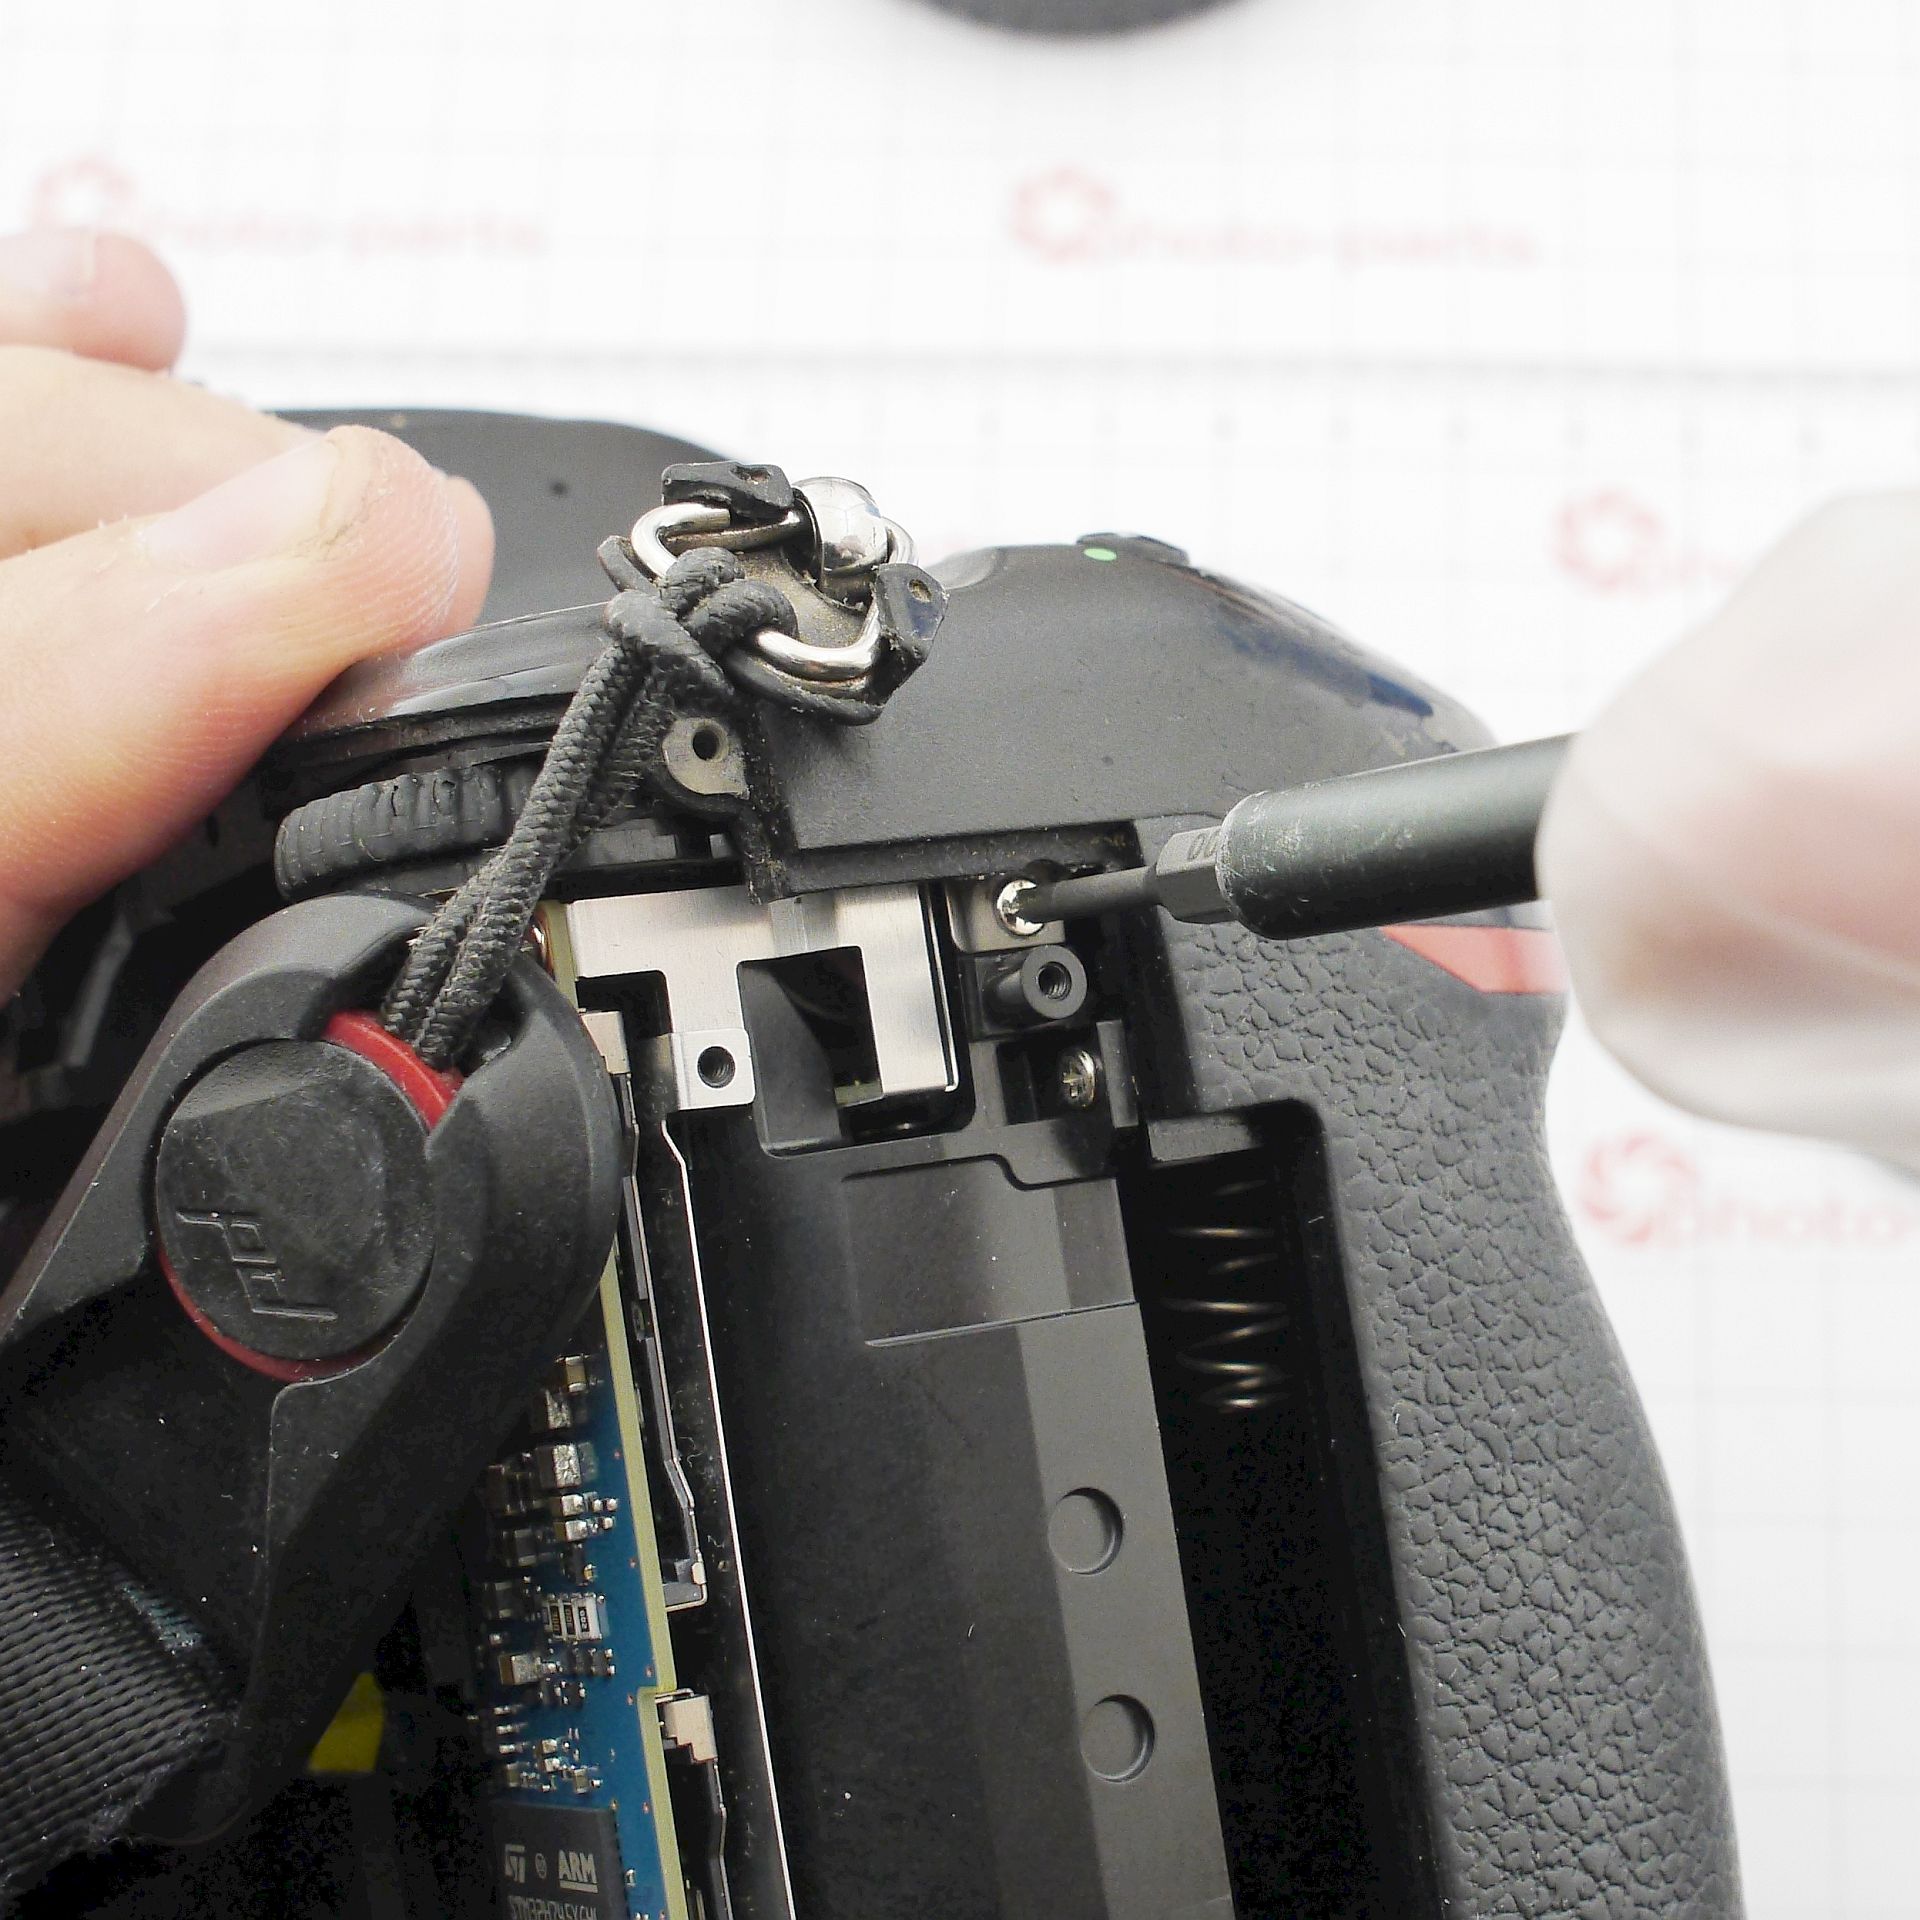
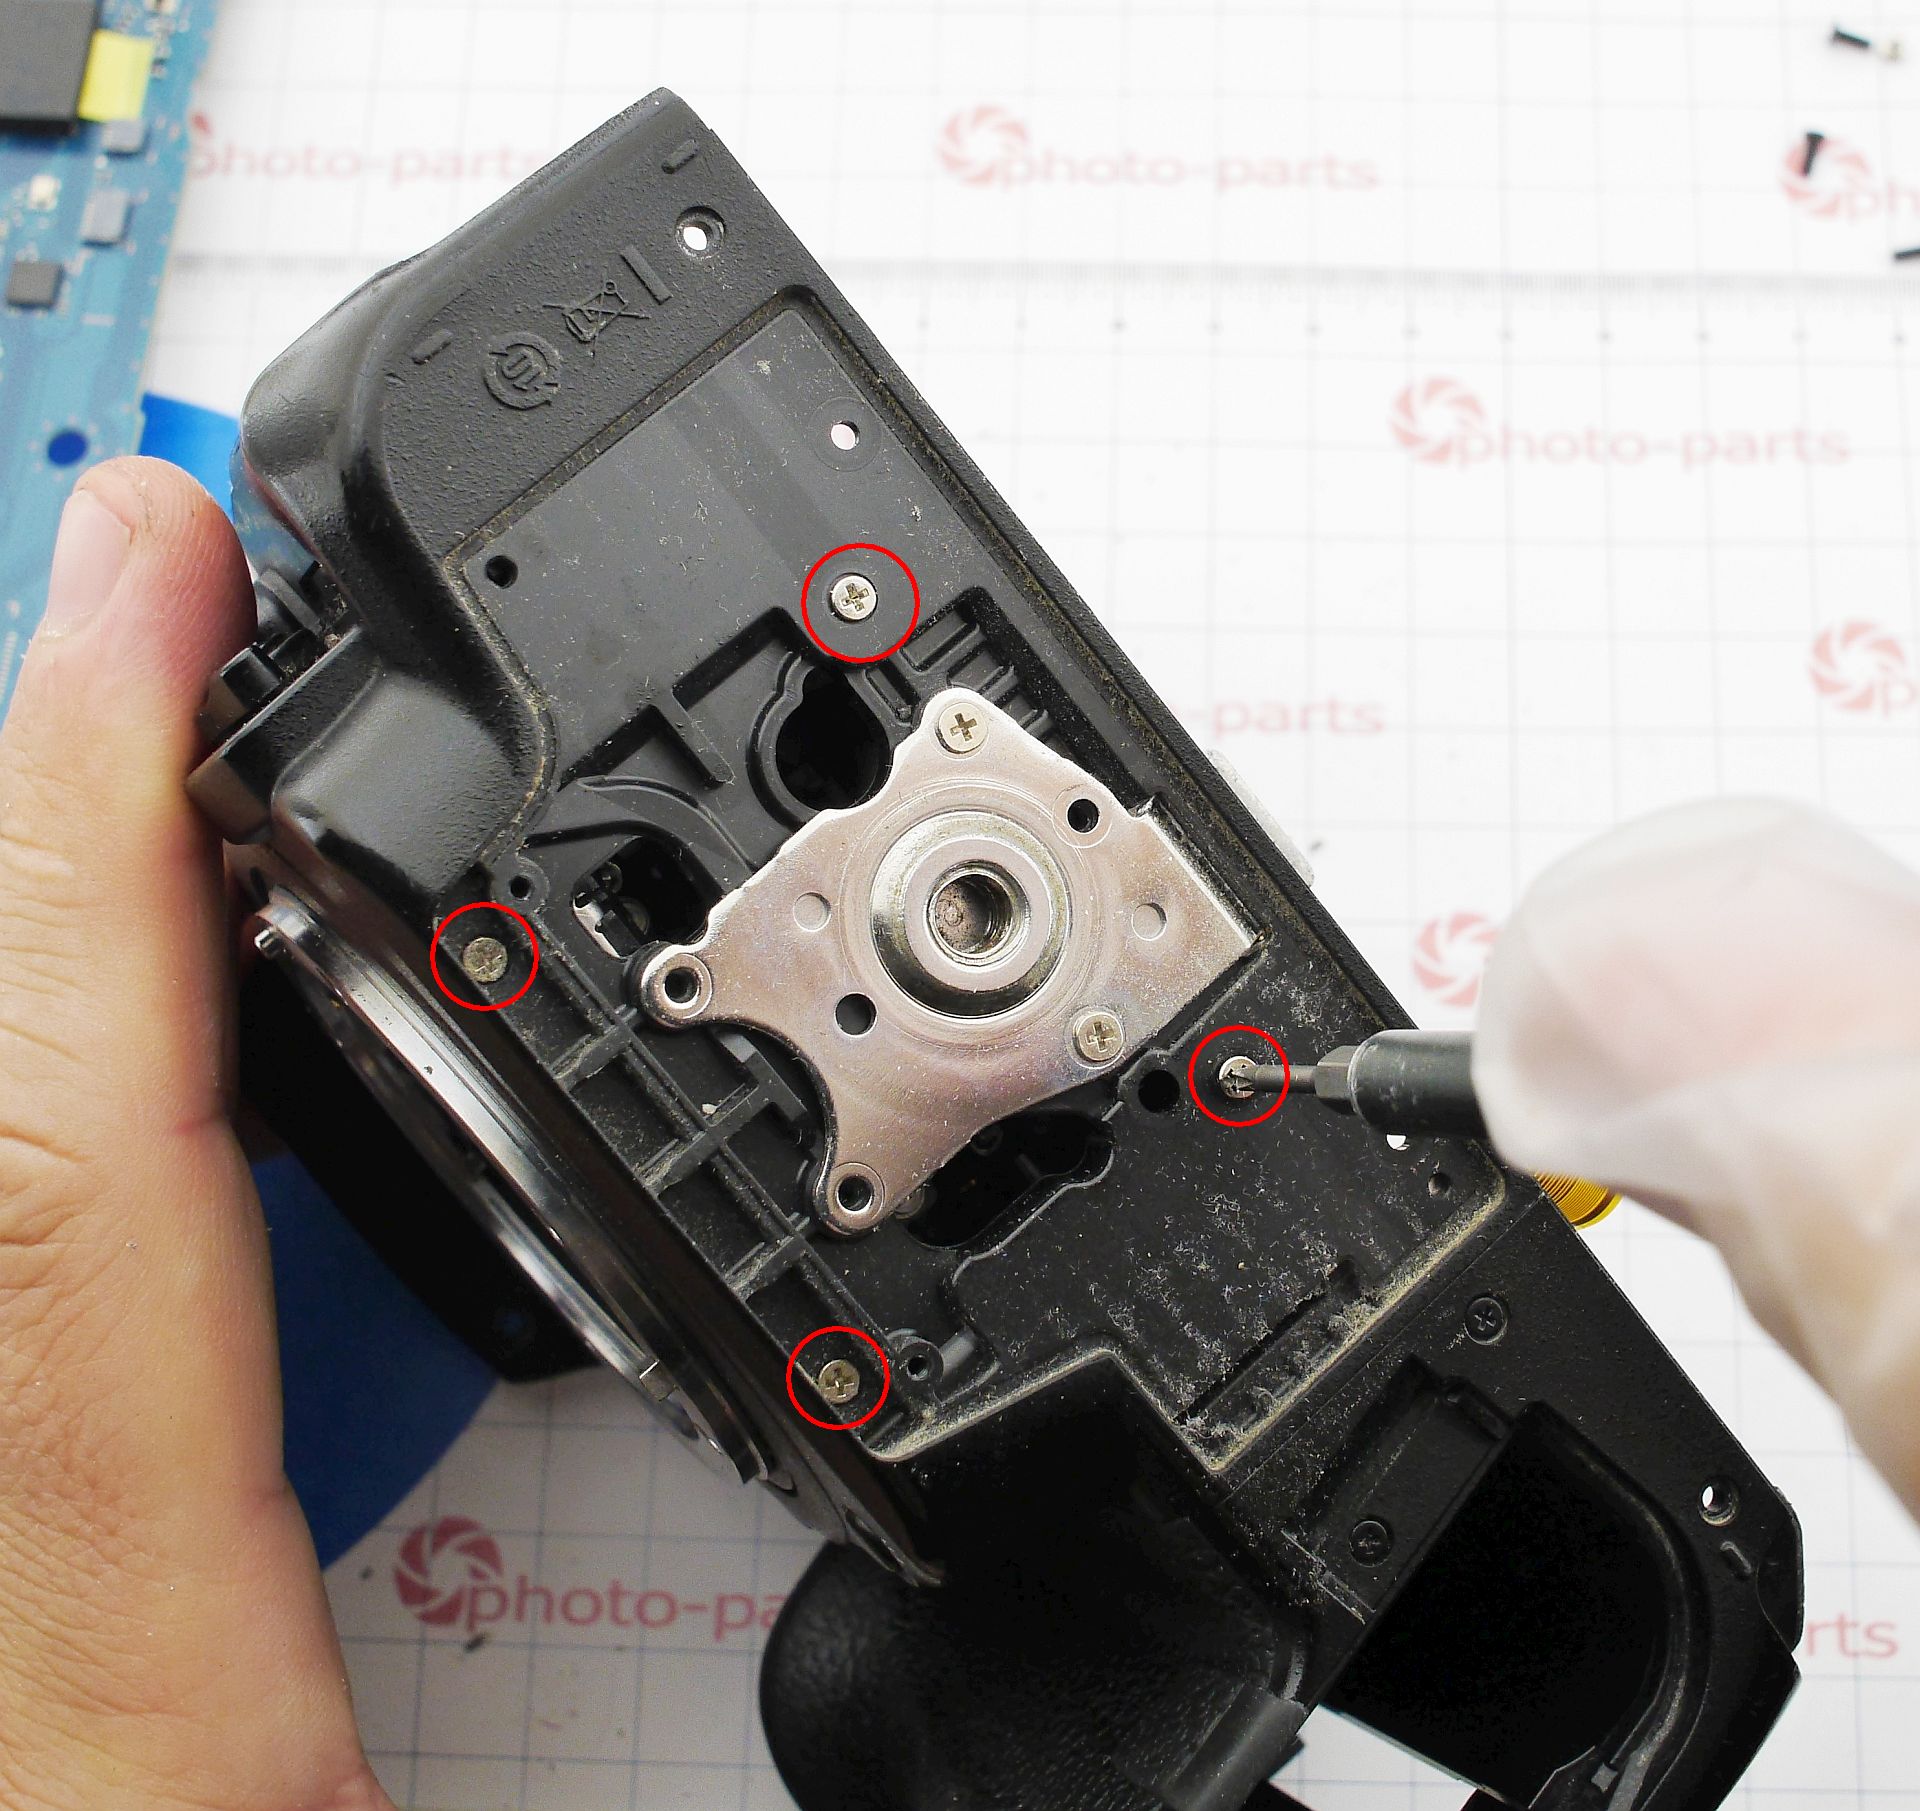
Next, the top panel and side I/O ports section need to be removed. One screw is hidden deep inside the battery compartment:
The top panel is connected by just one ribbon cable - convenient.
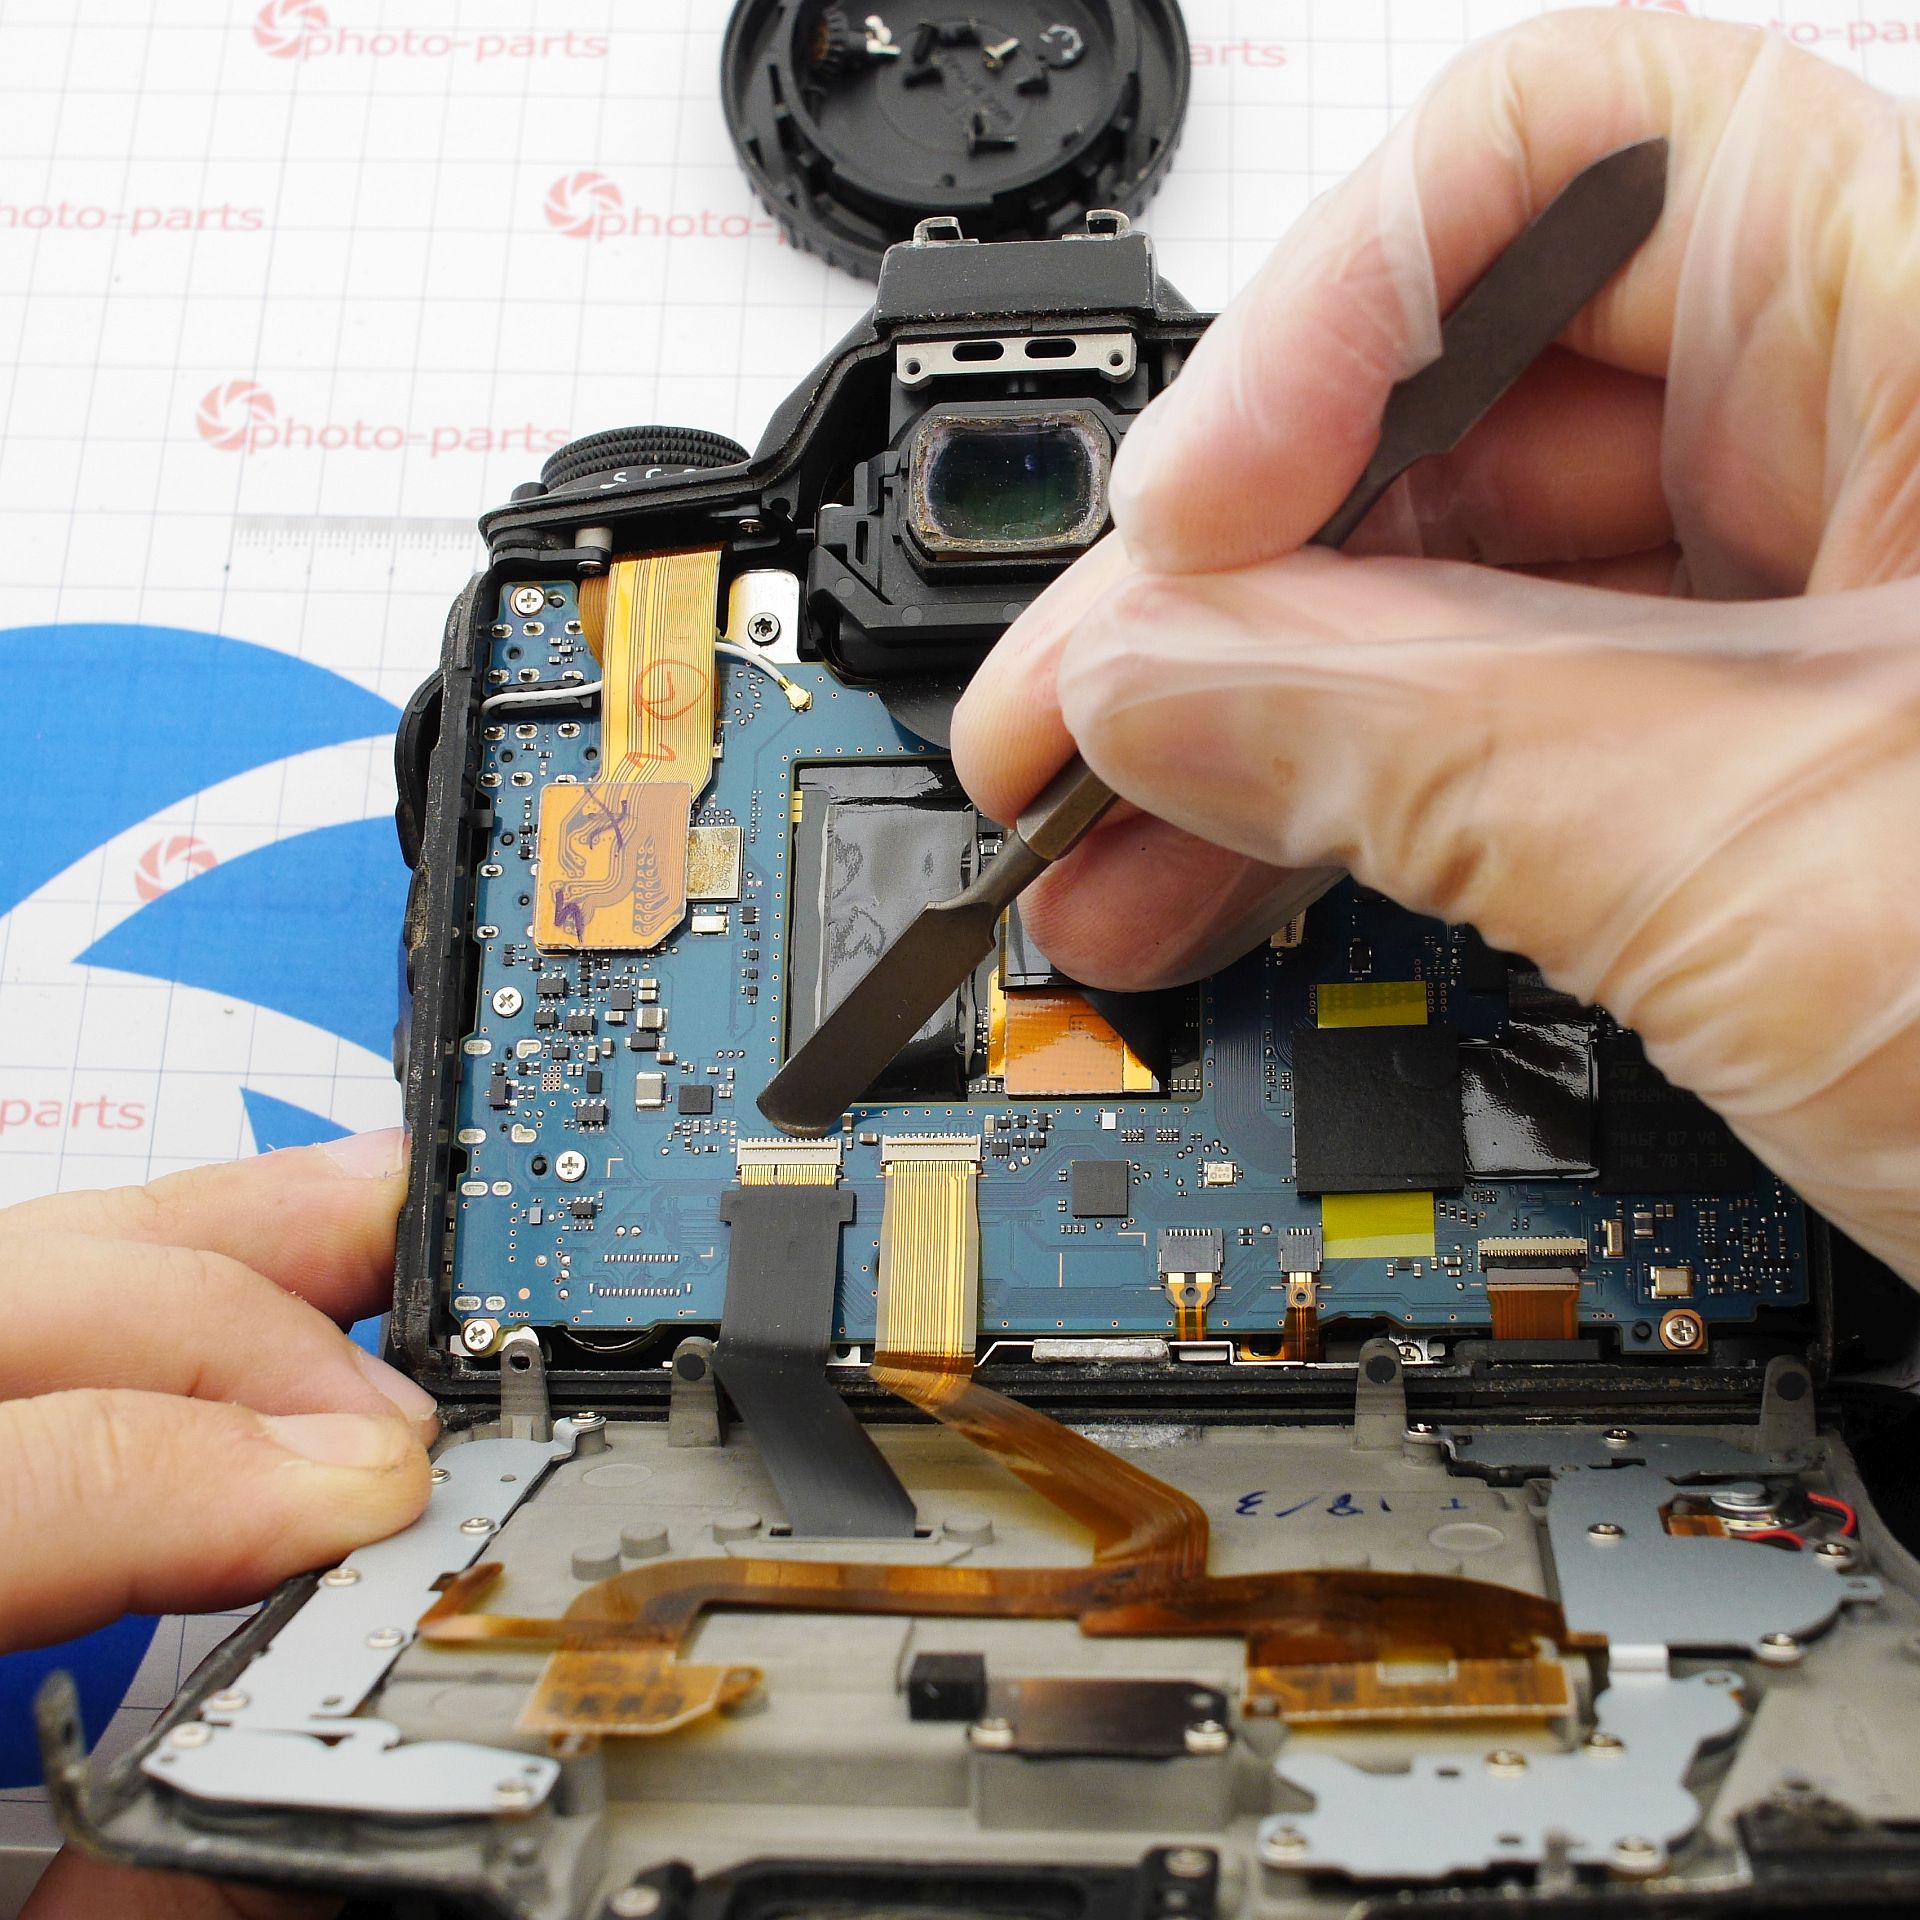
Now it's time for the main board. No special difficulties here - remove 4 screws and disconnect all the ribbons. Done.
If the fault lies in the main board, no further disassembly is needed. In my case it was "something with the shutter," so I continued.
Removing the mirror box
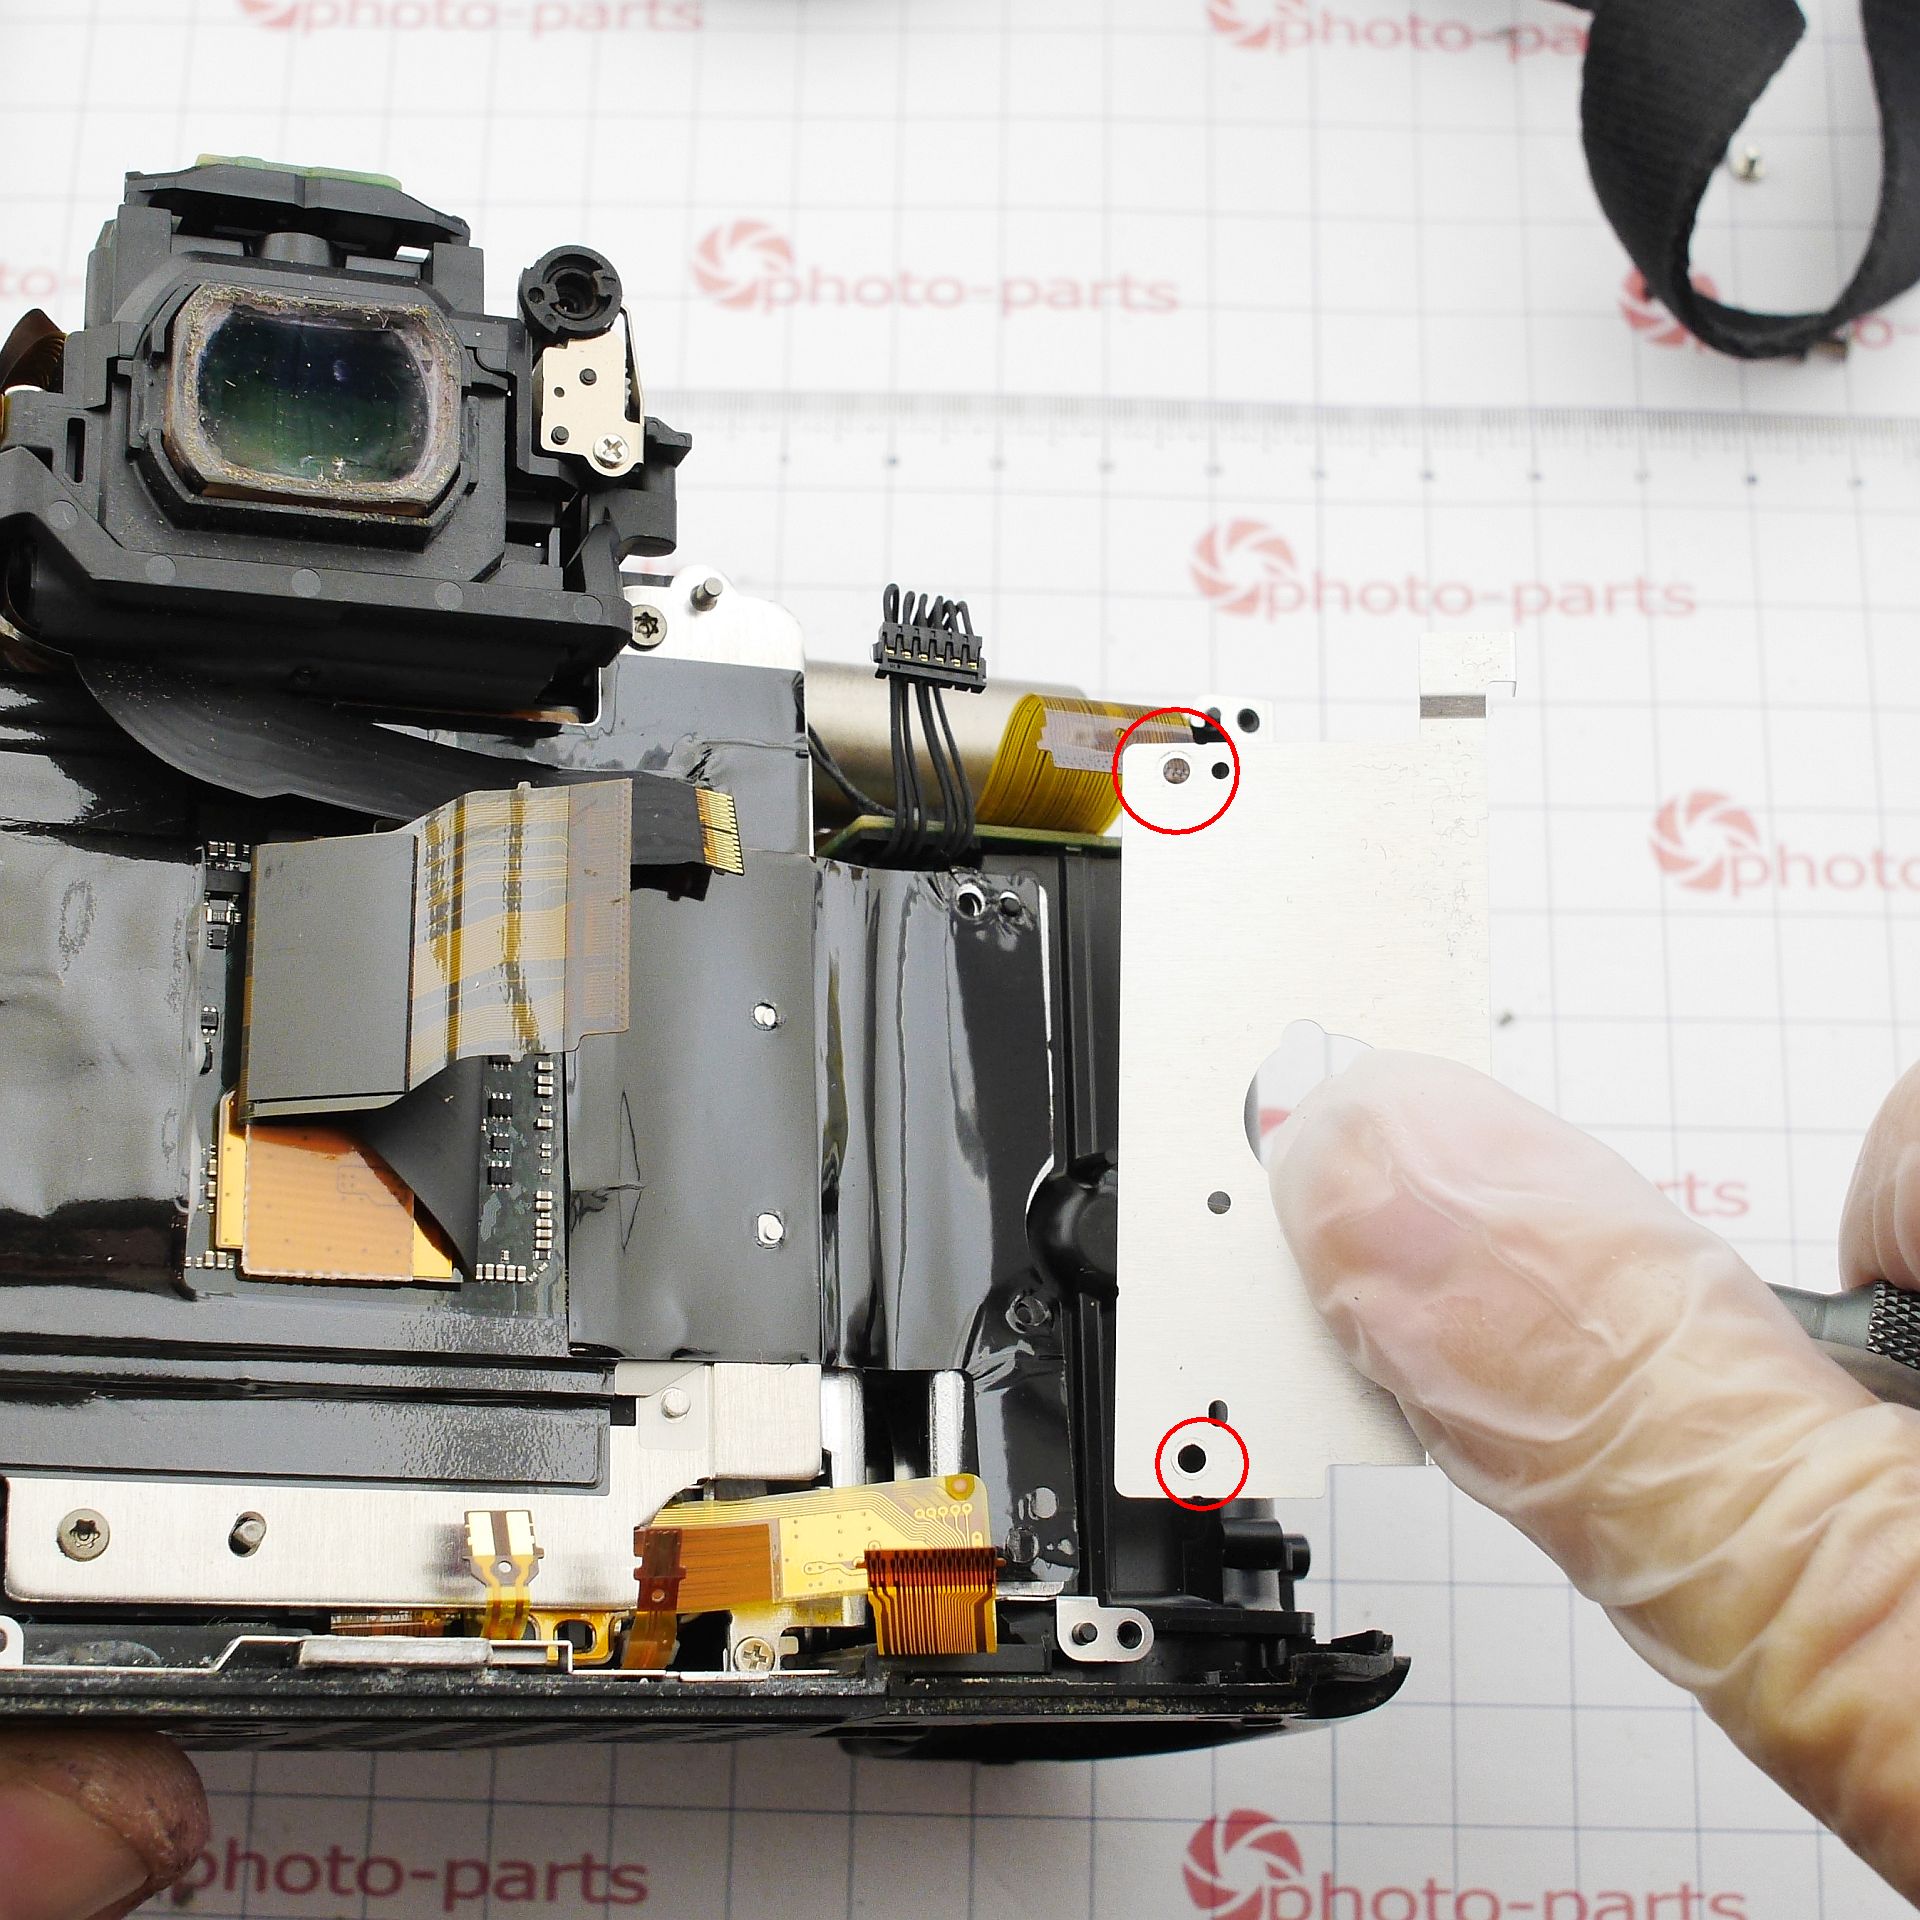
The mirror box is wrapped in a mass of wires, ribbons, and cooling foils. Before undoing the screws, we'll disconnect anything that's in the way. The sensor's cooling film is clamped to the frame by an aluminum plate - remove it. Also unscrew the grounding clip nearby:
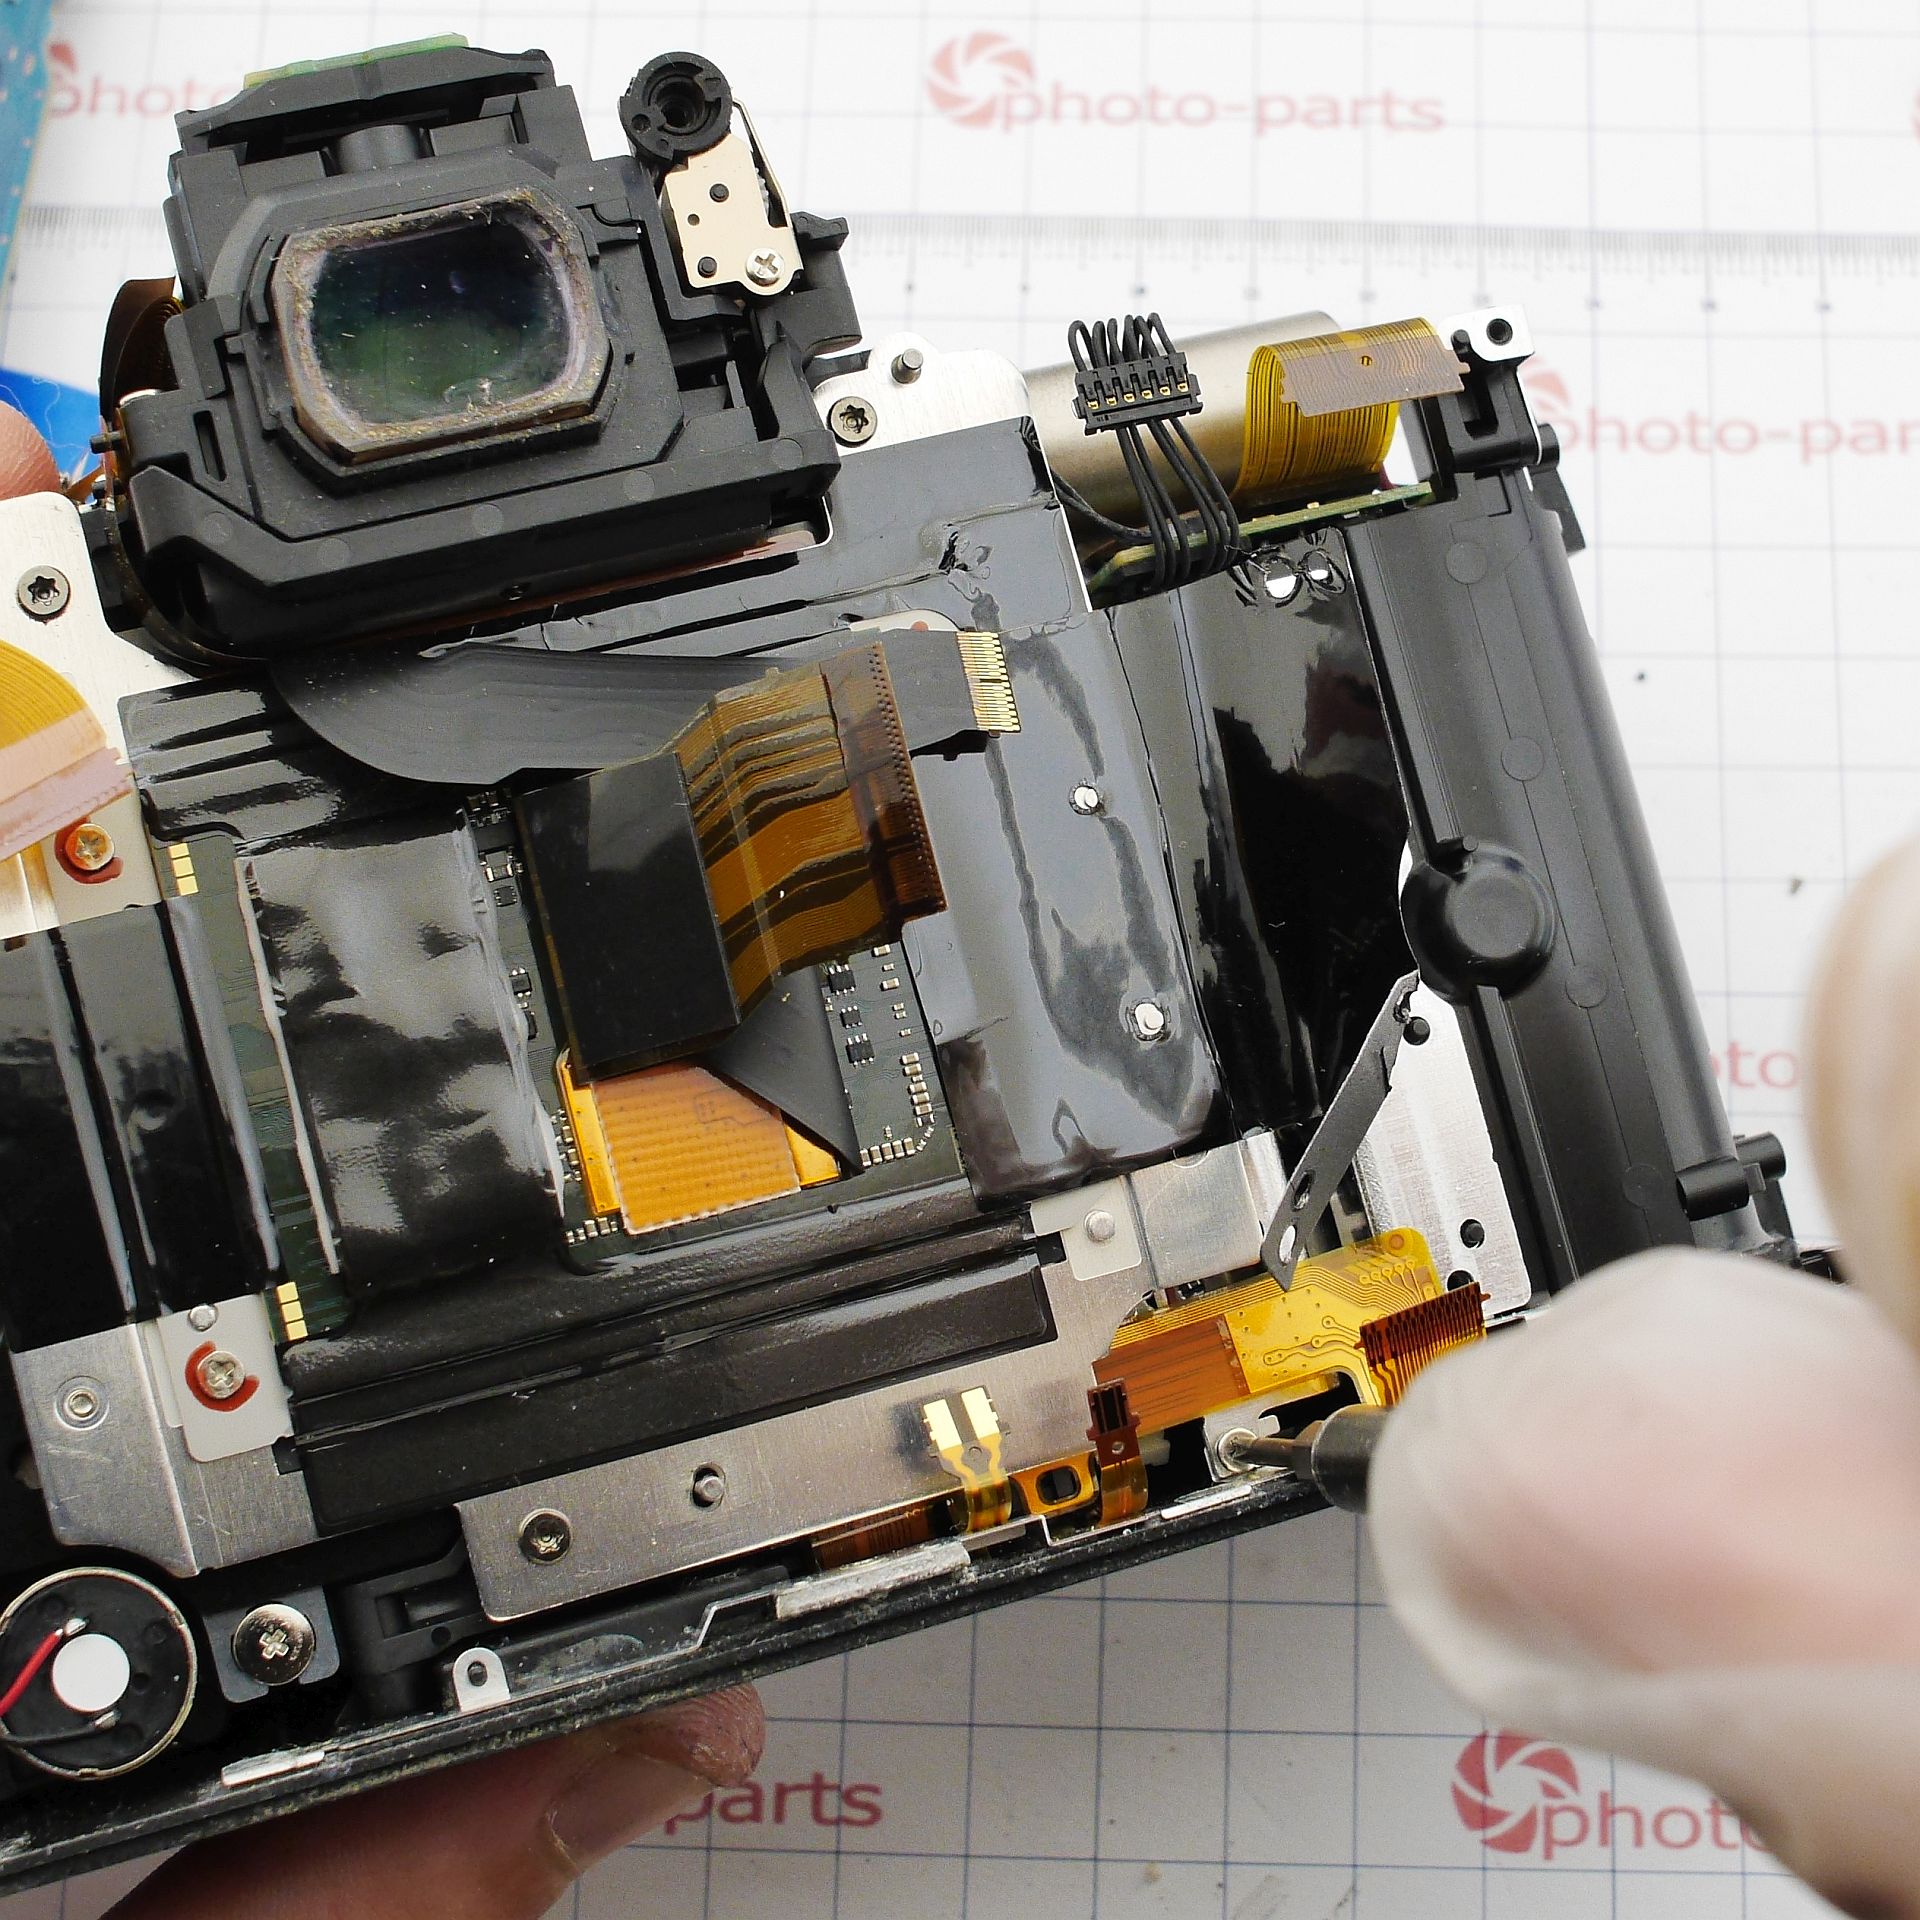
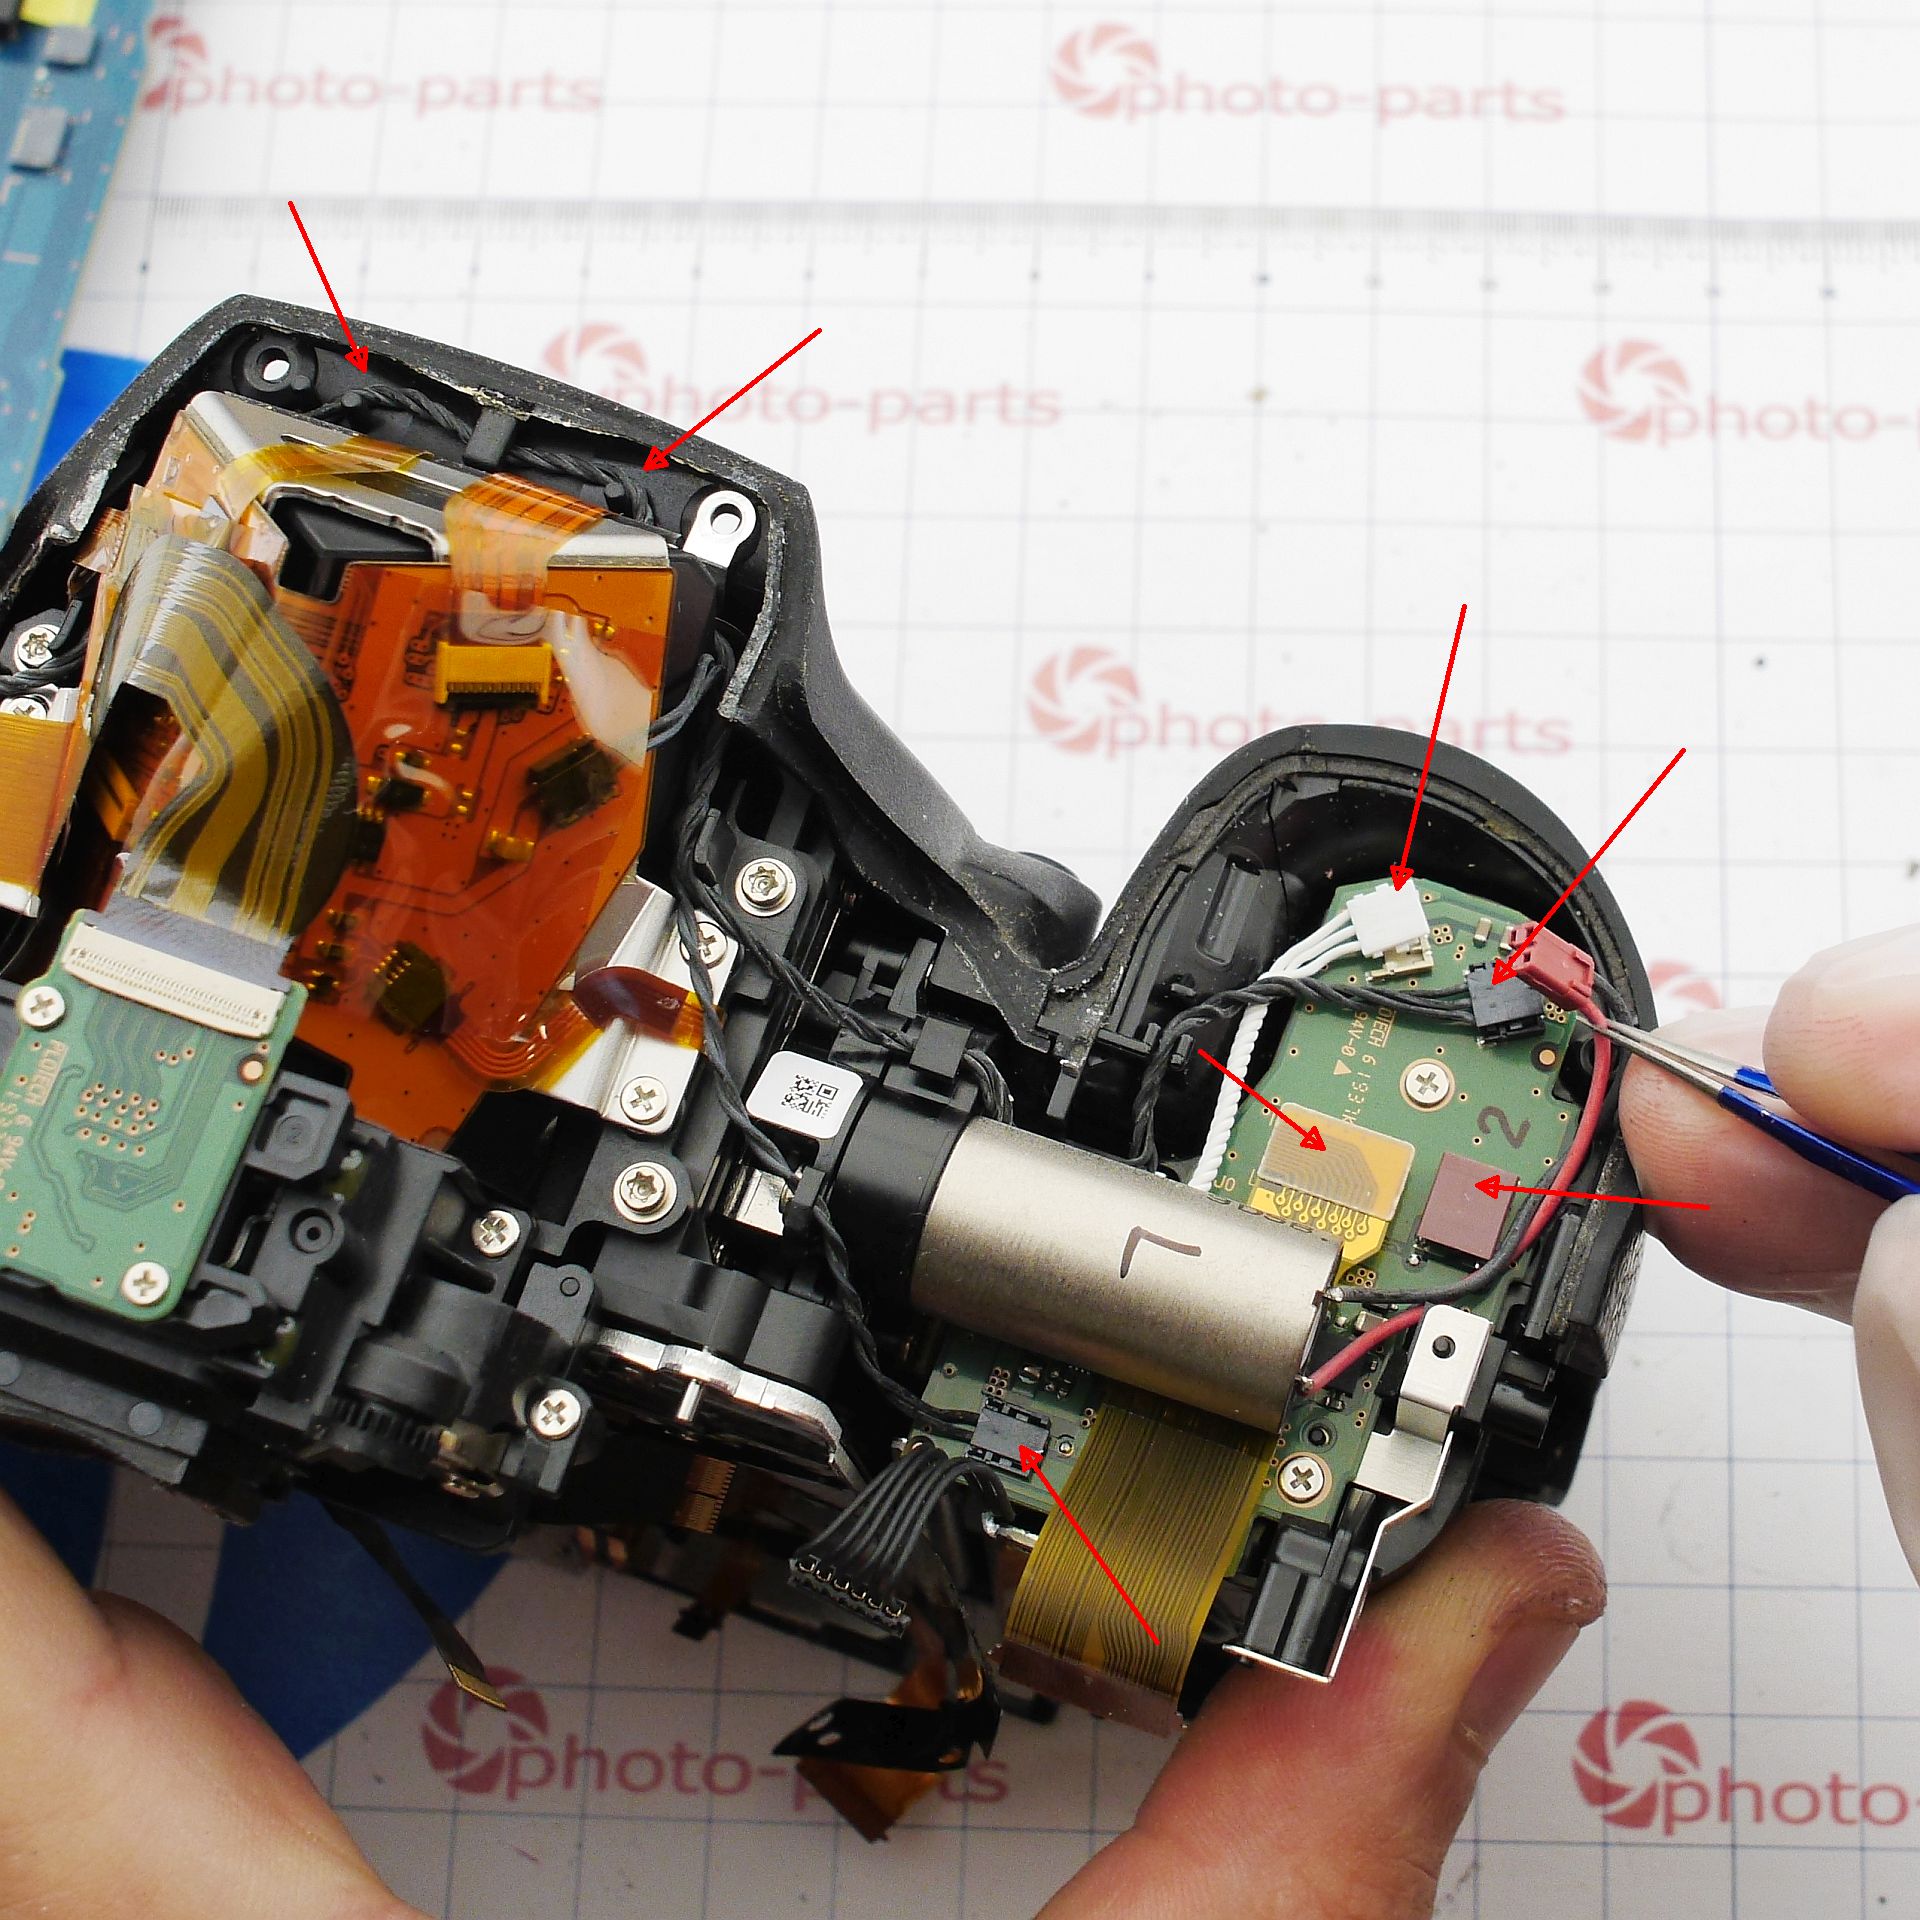
On the top edge of the camera, disconnect the marked connectors and free the flex cable near the pentaprism:
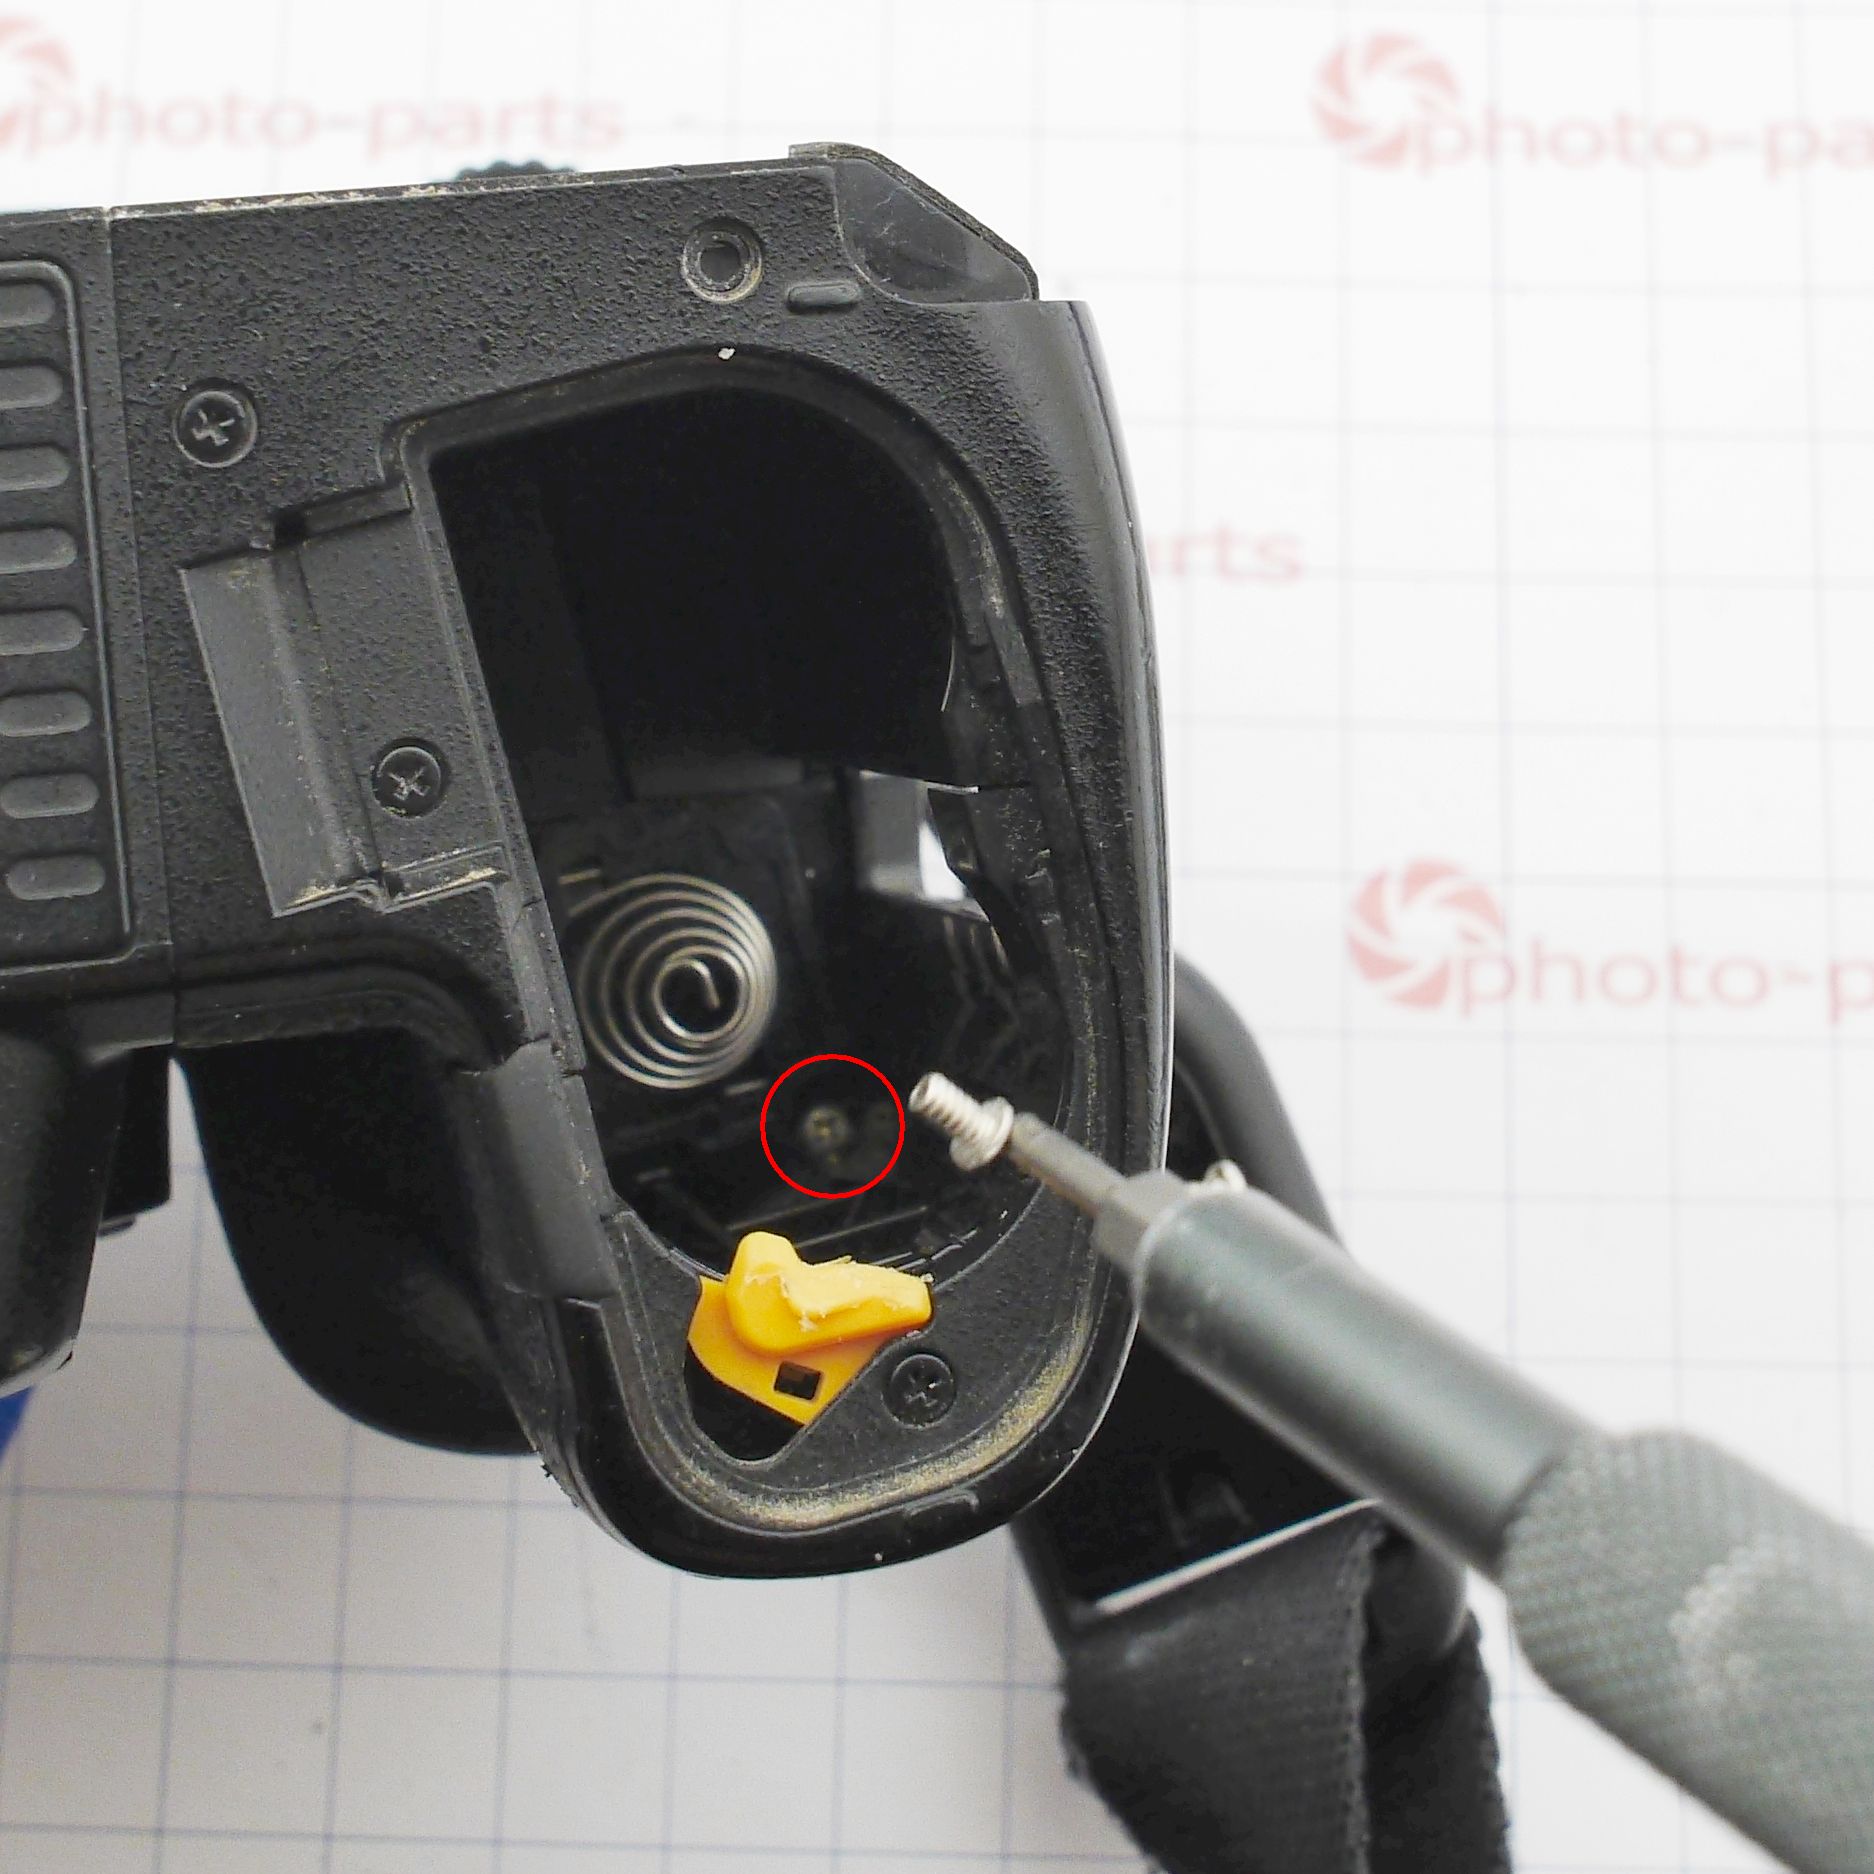
The mirror box is held in place by only six screws. Four are under the decorative plate at the bottom edge, and two are on the front panel of the camera:
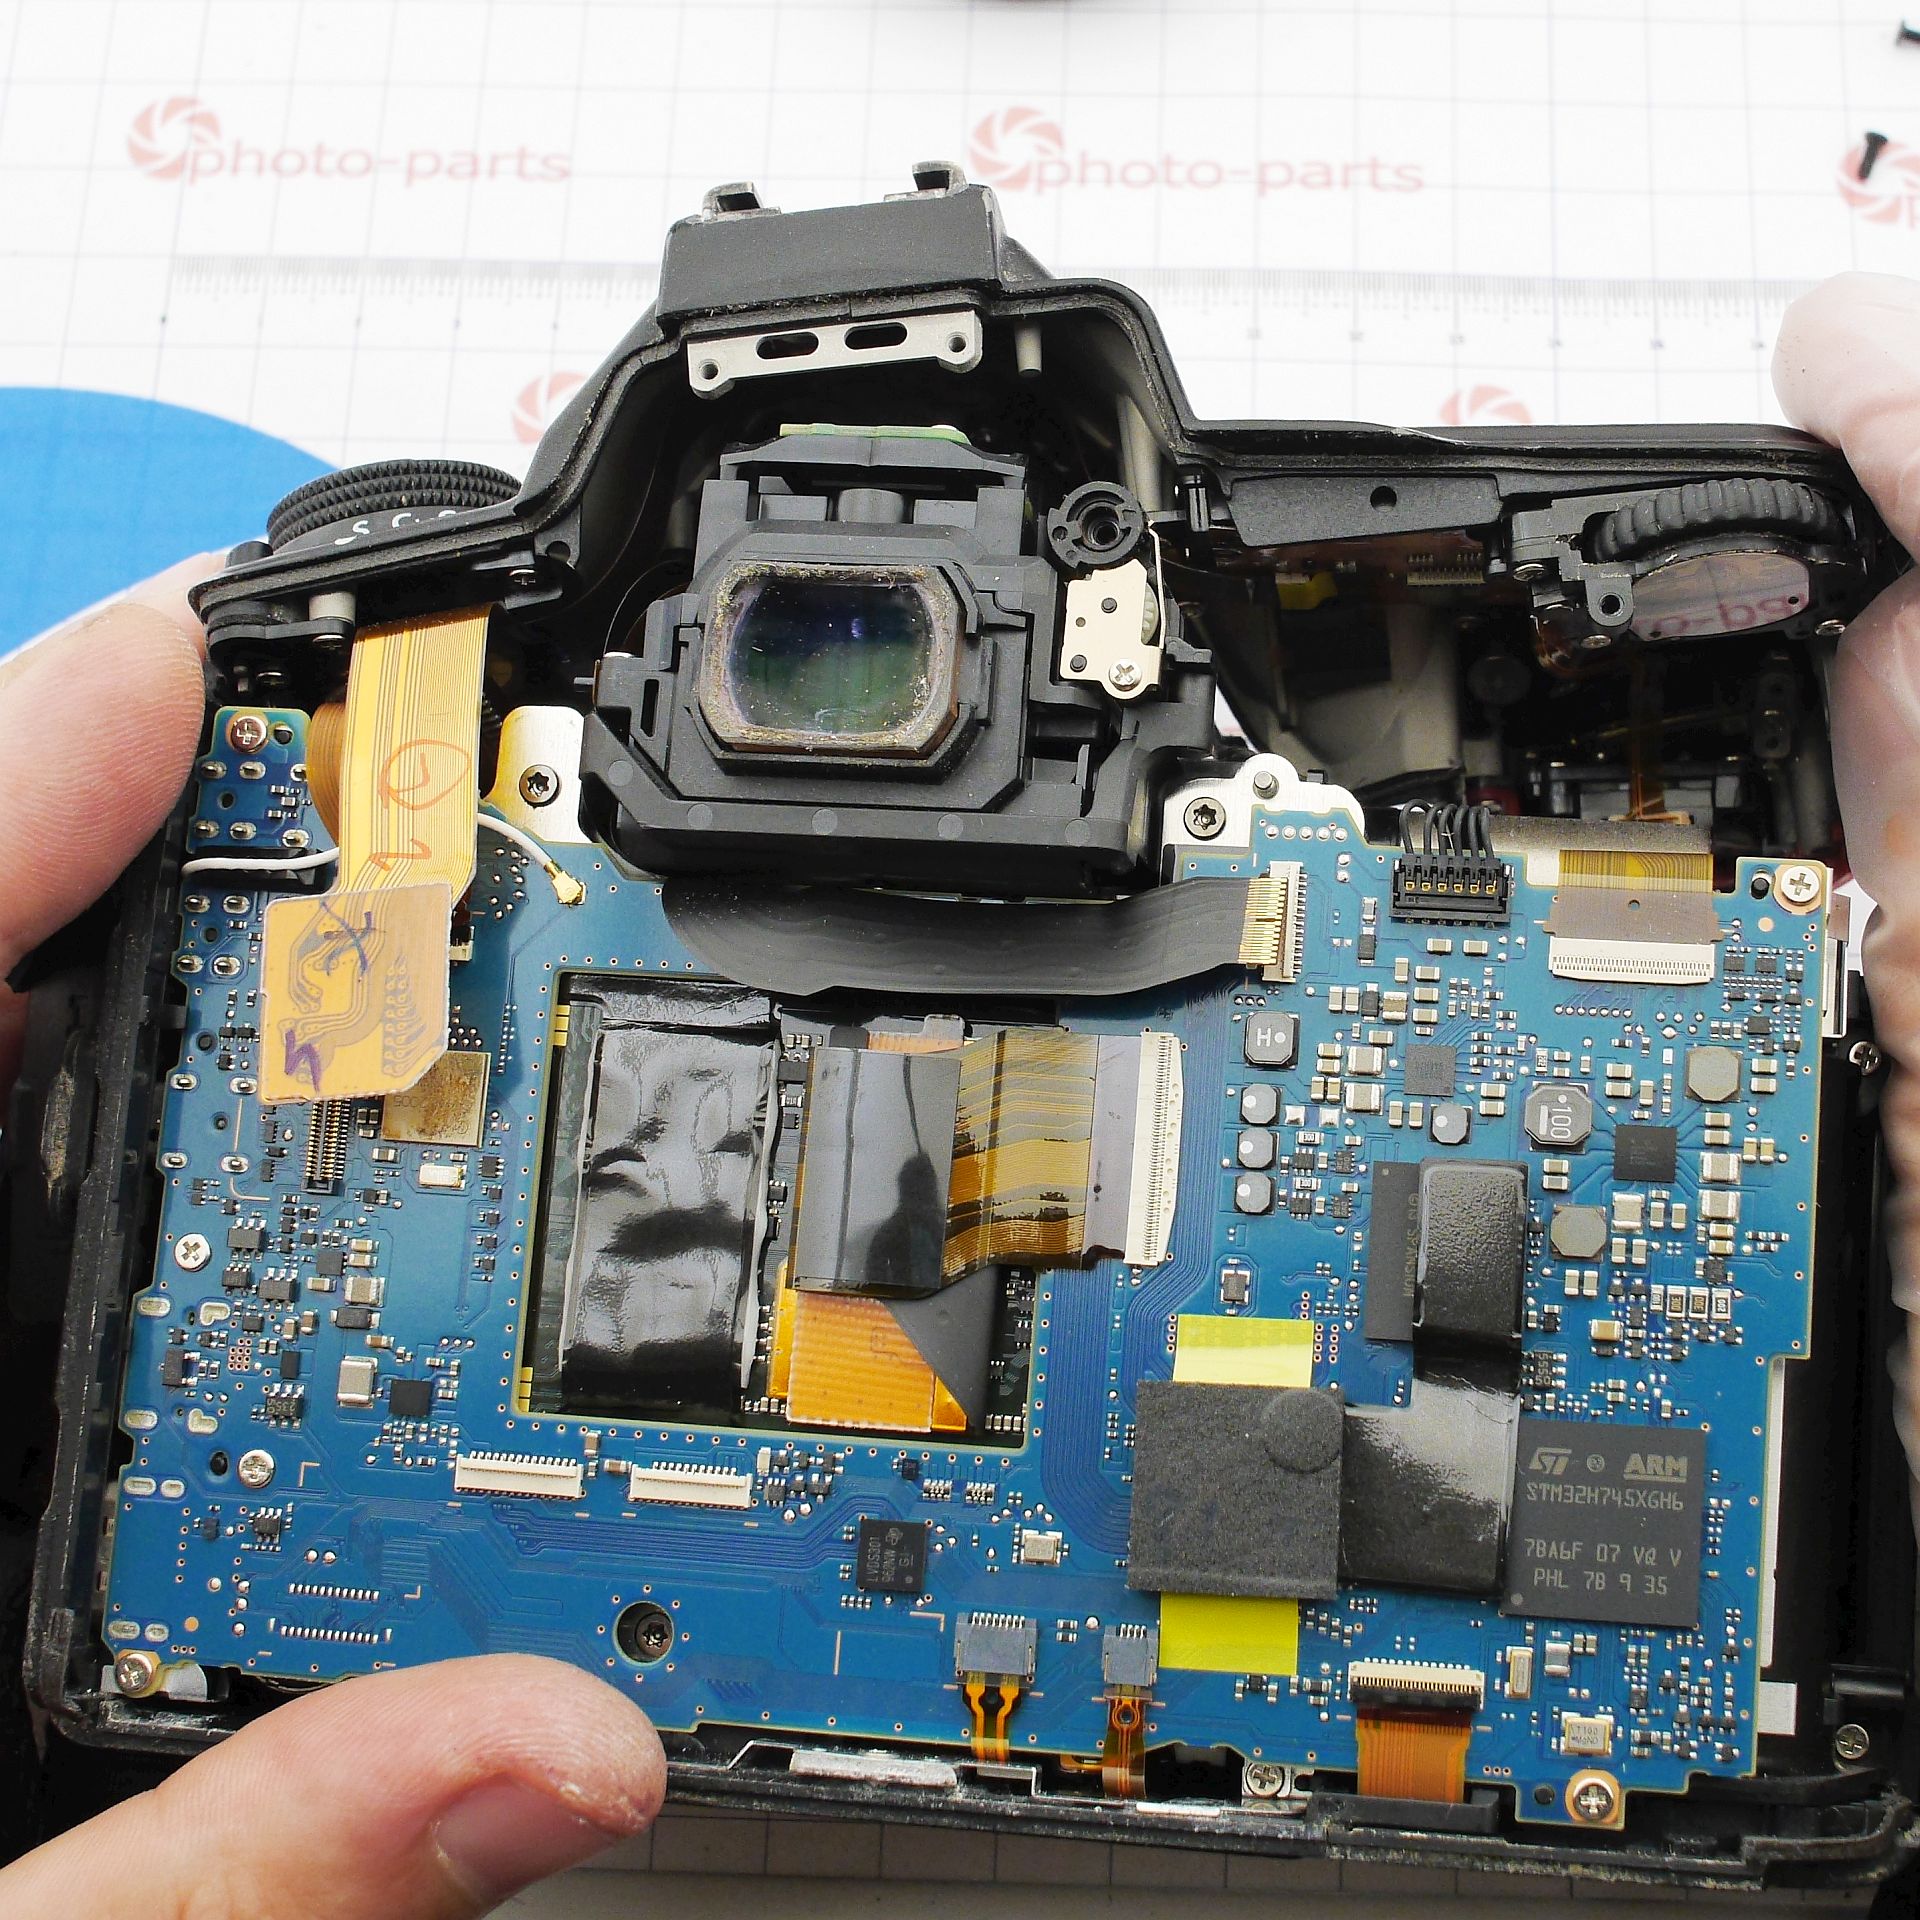
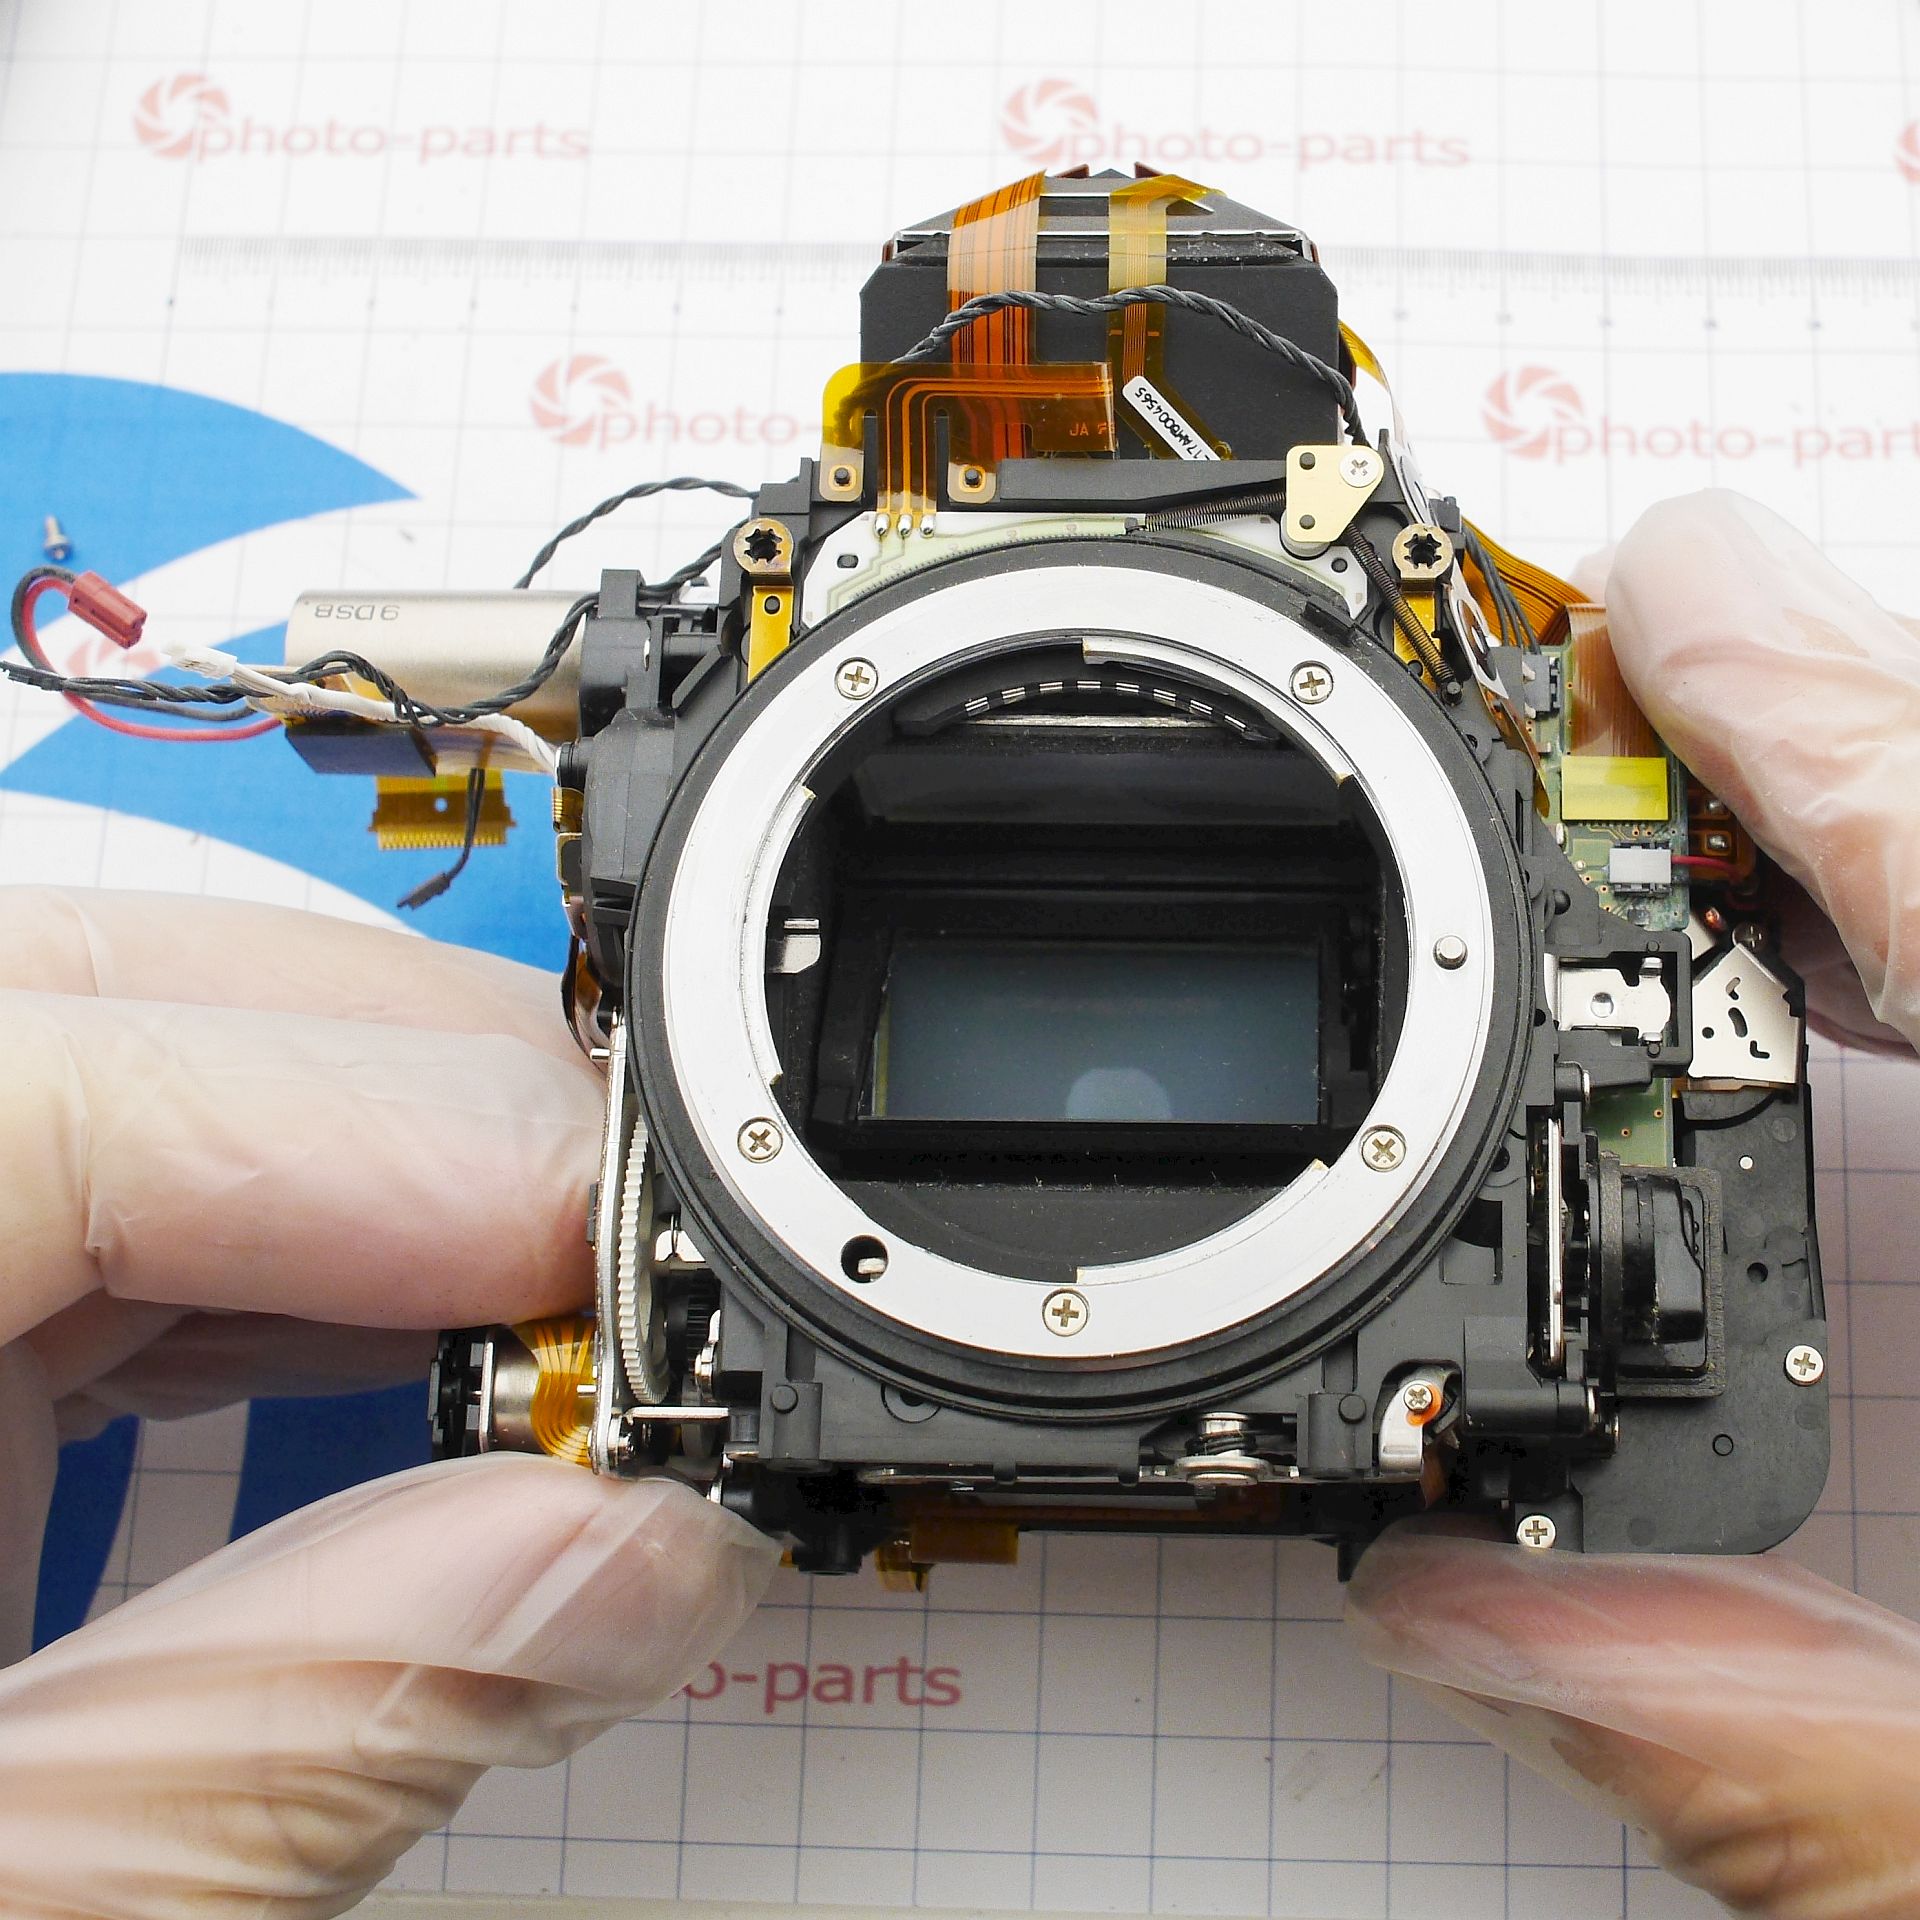
The mirror box comes out as a self-contained and fairly well-integrated unit. In older Nikon cameras, the construction was more of a sandwich - mirror box + frame + sensor - which I liked more, but this is fine too, objectively speaking.
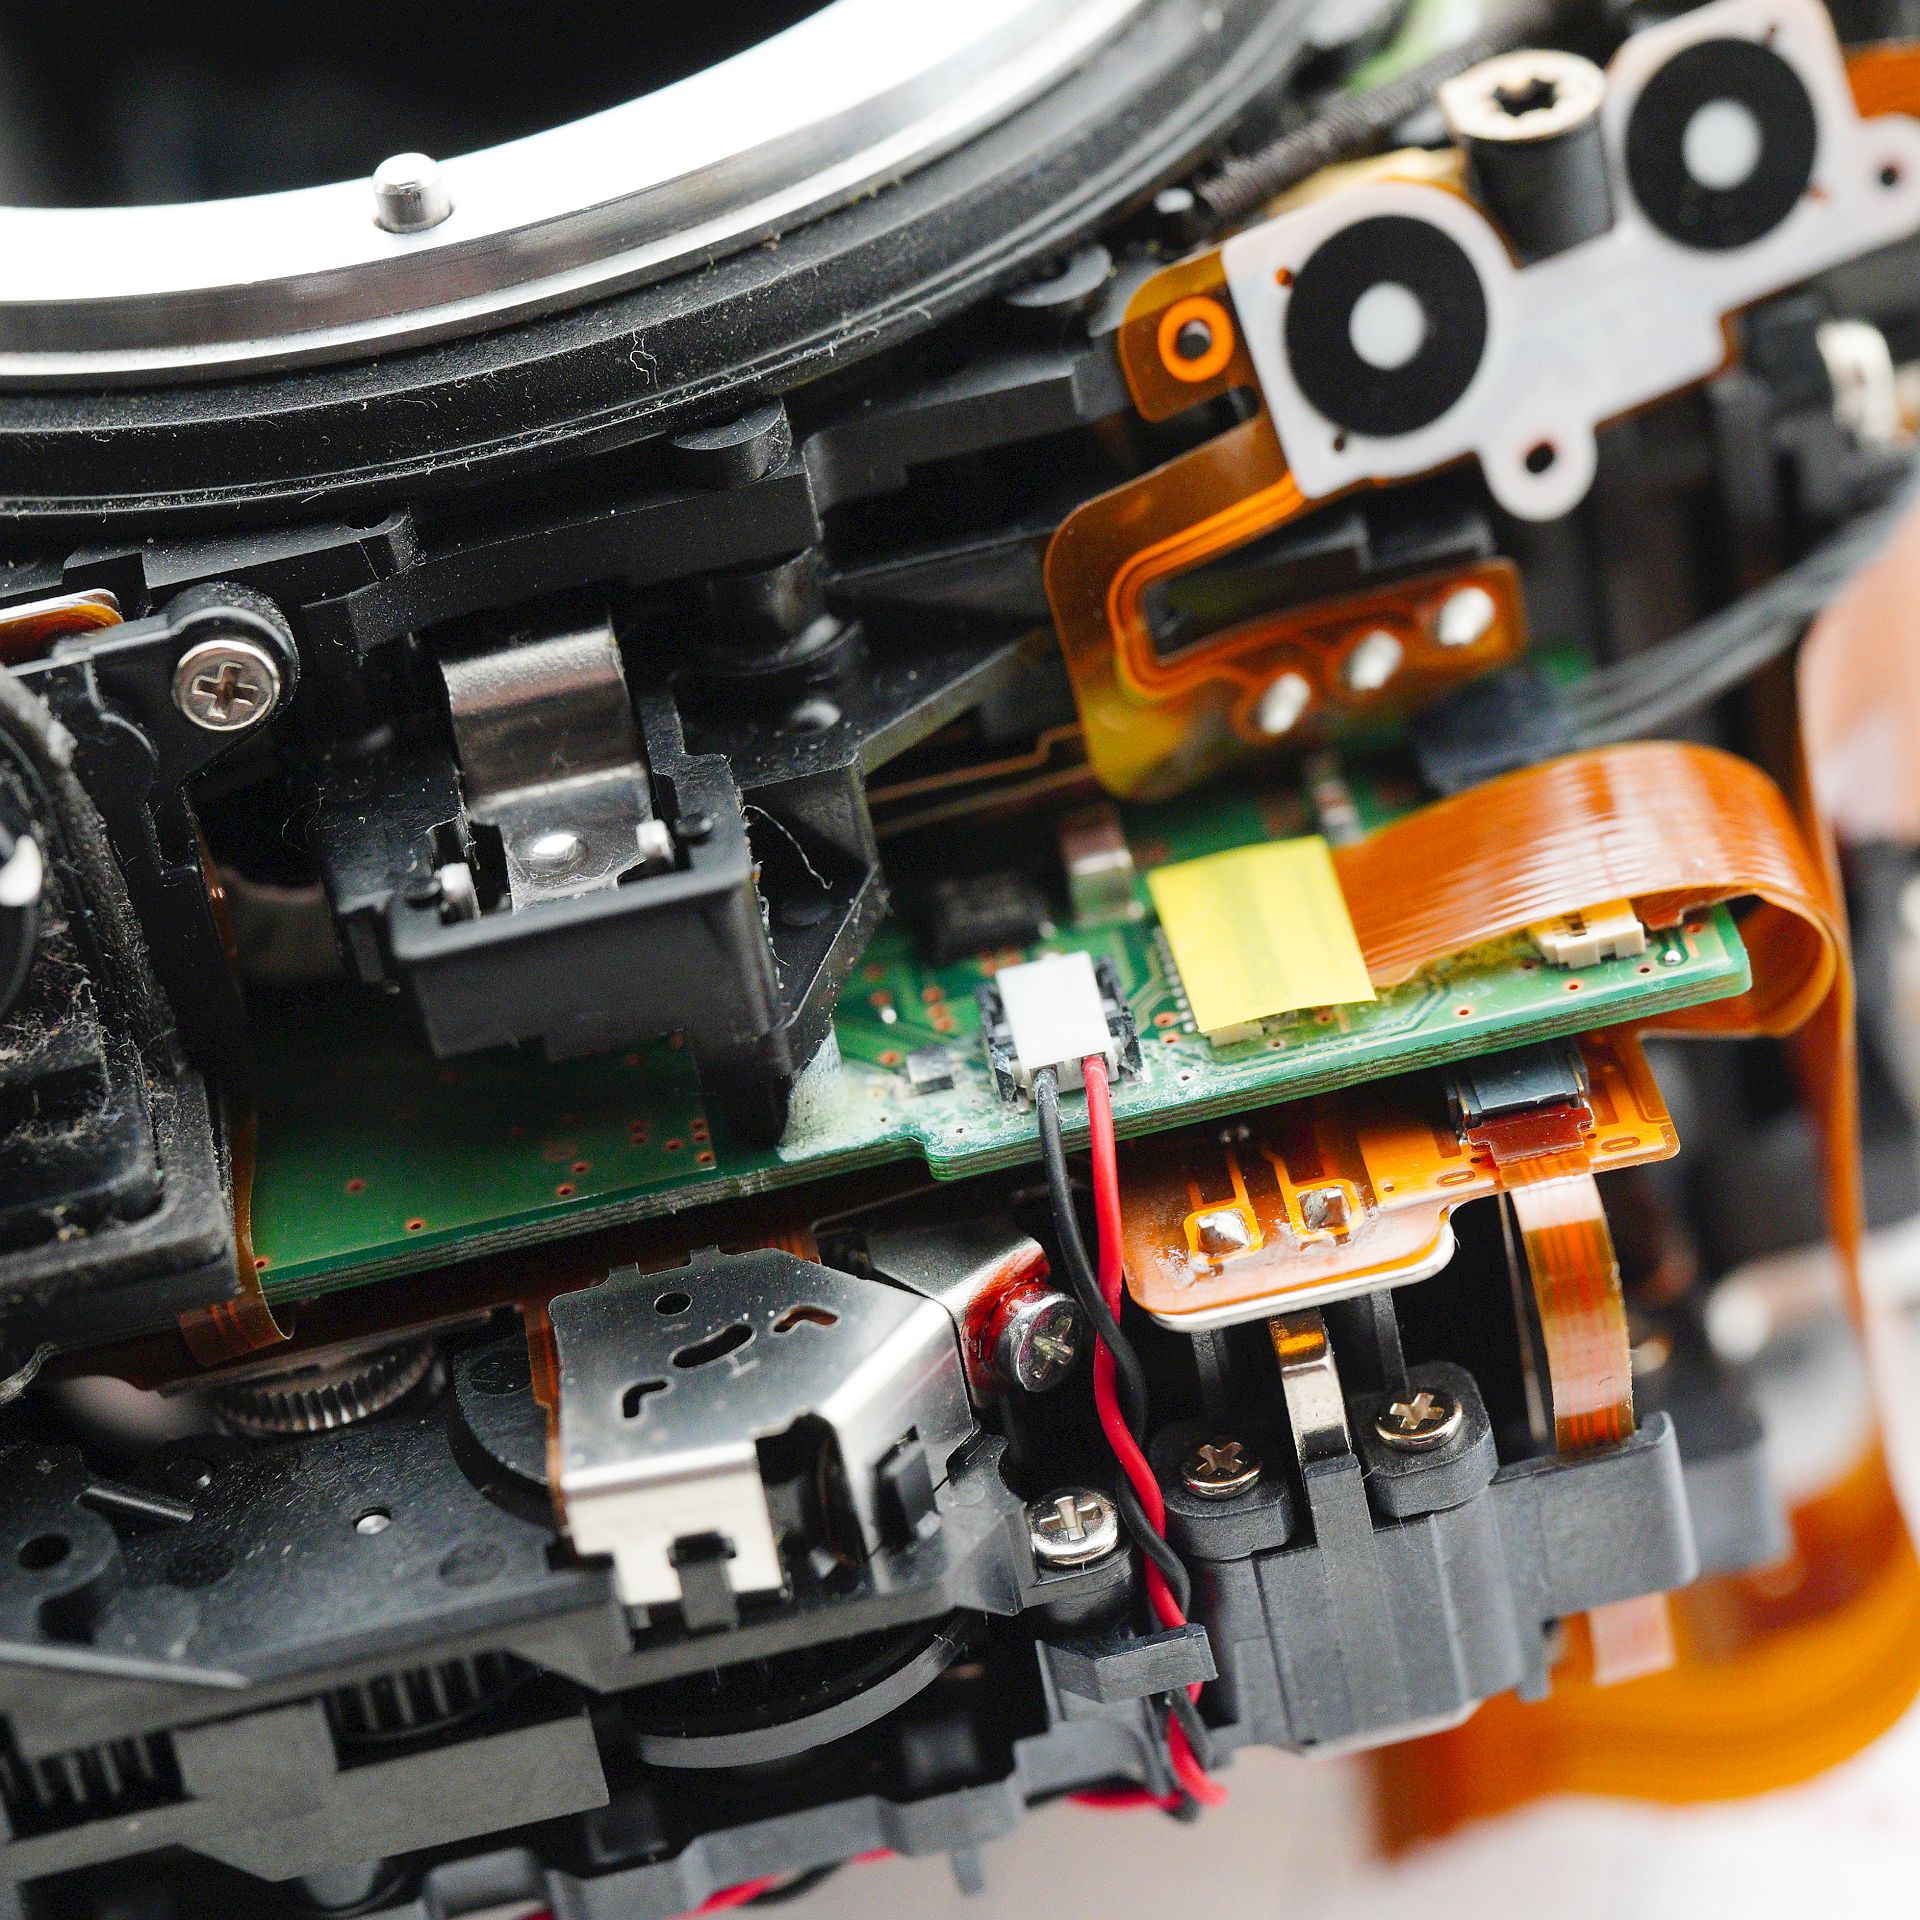
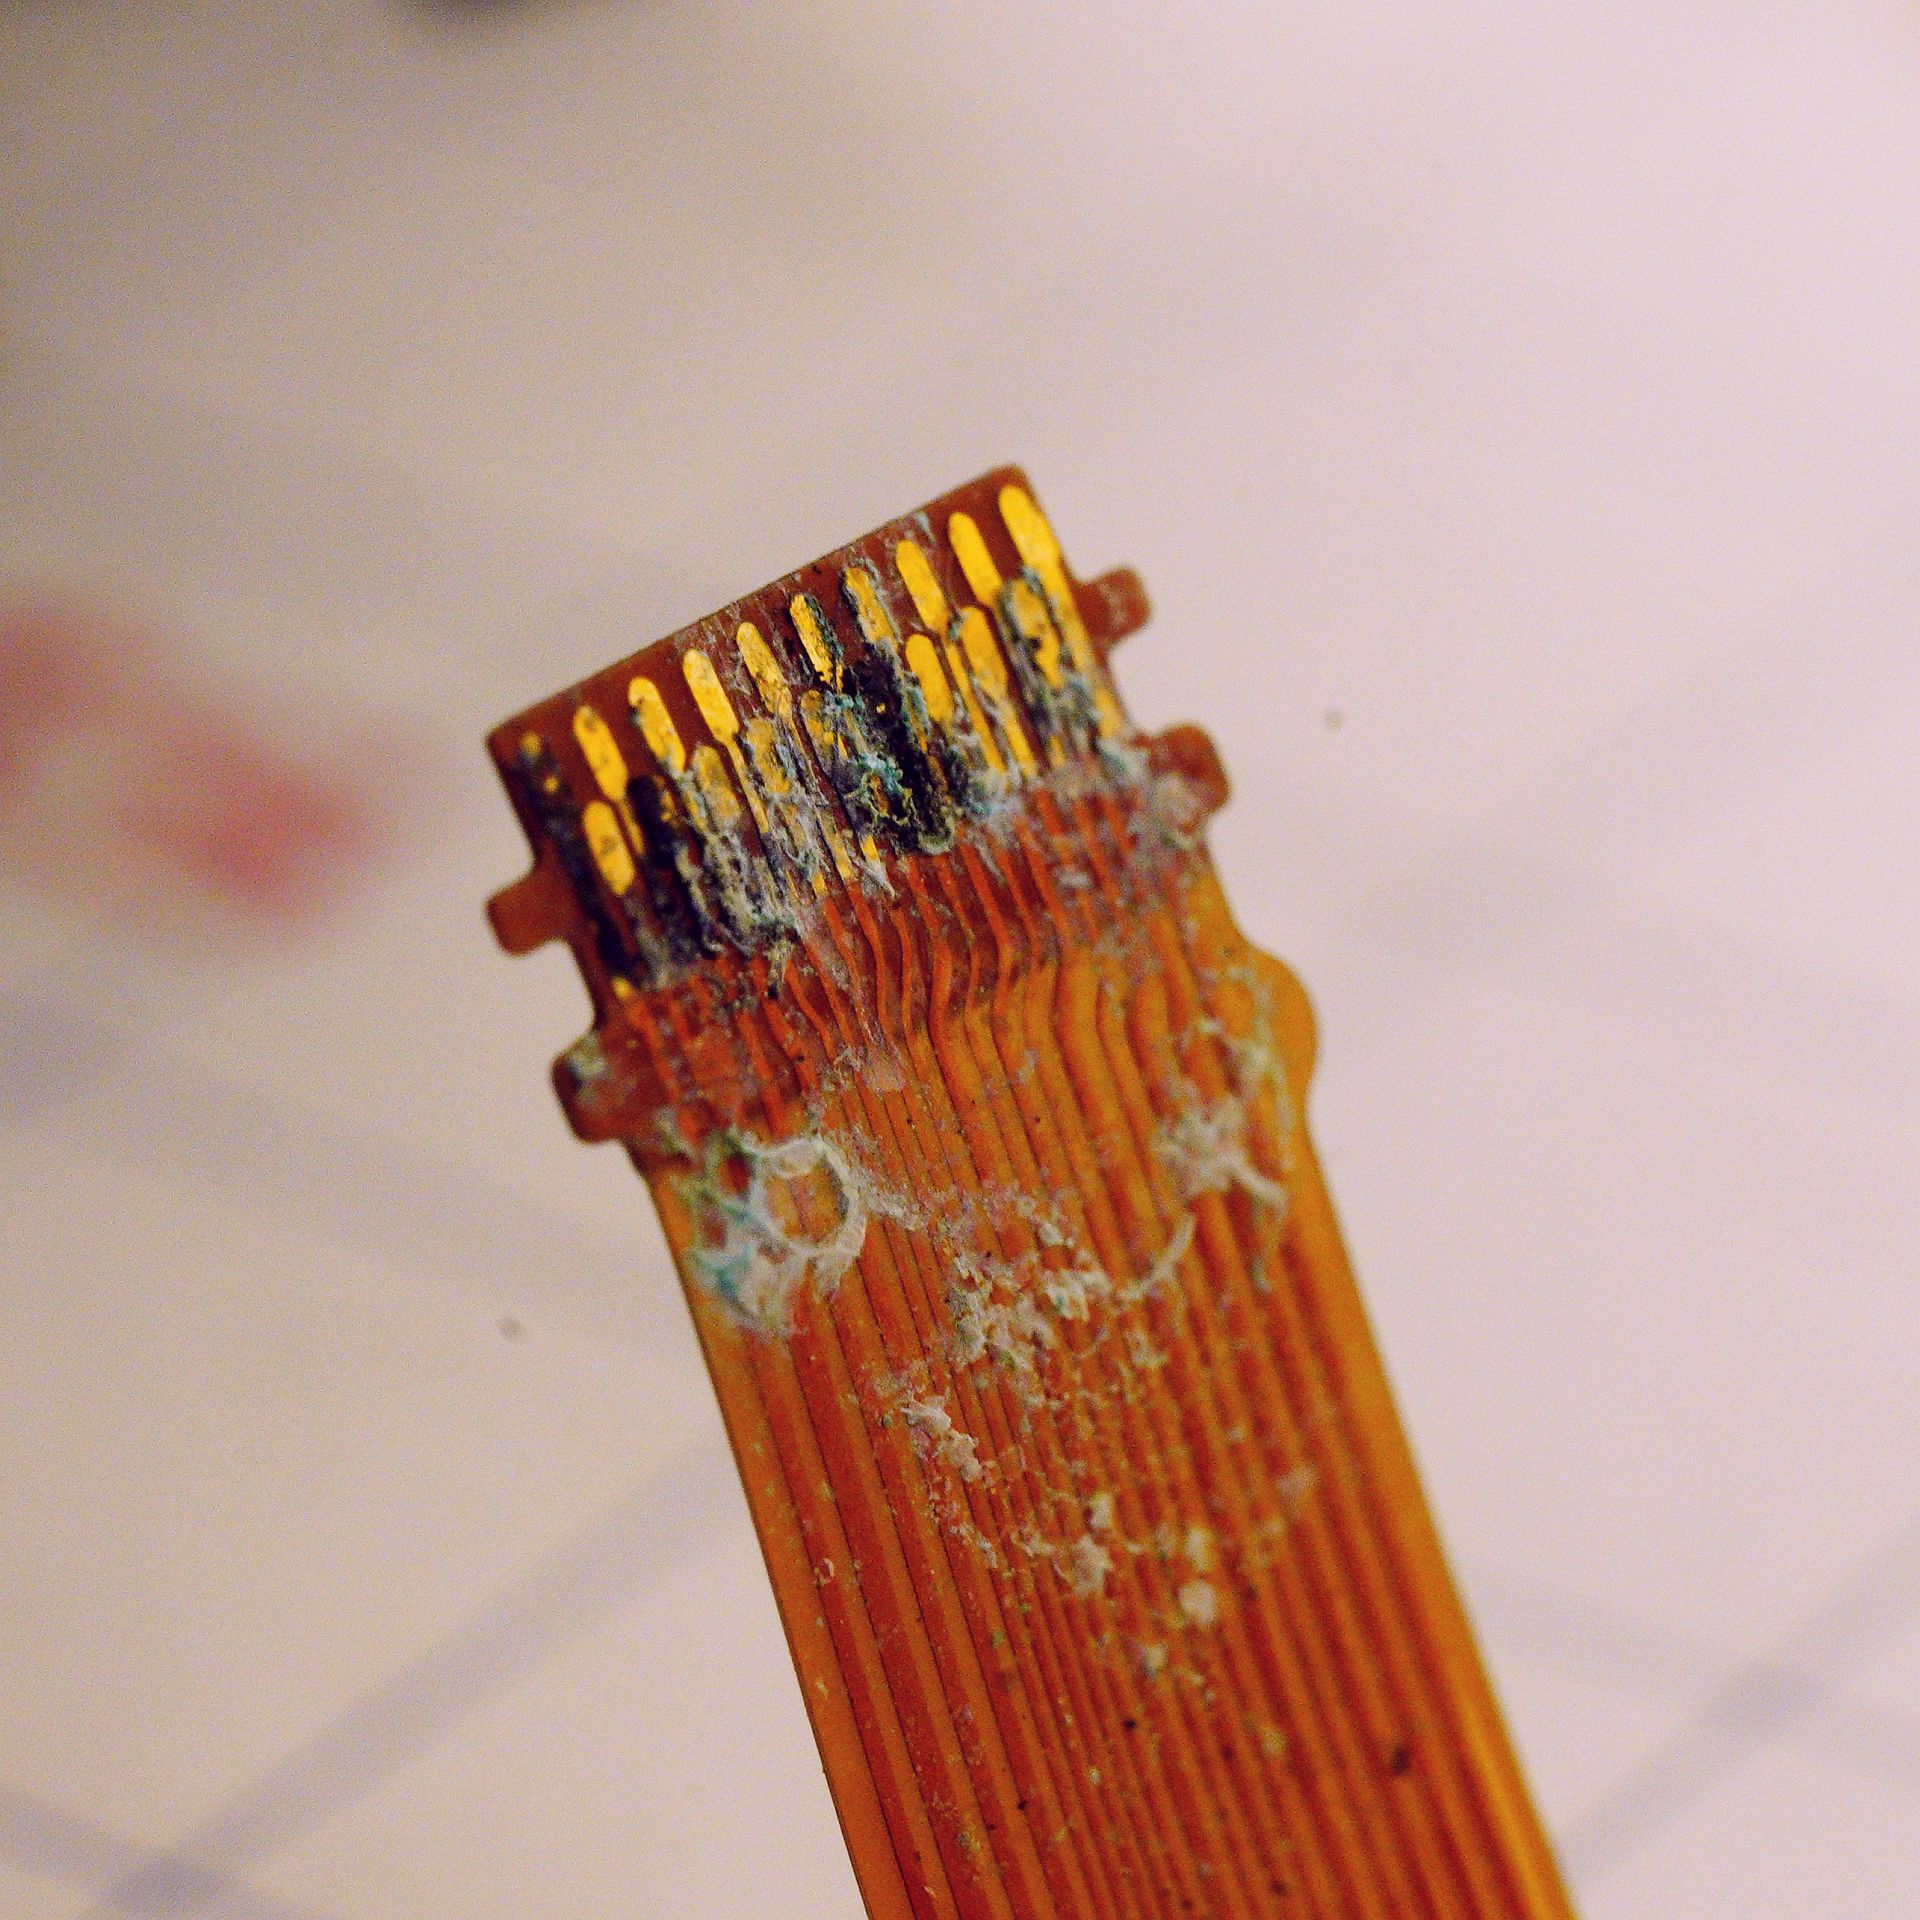
And here's something suspicious:
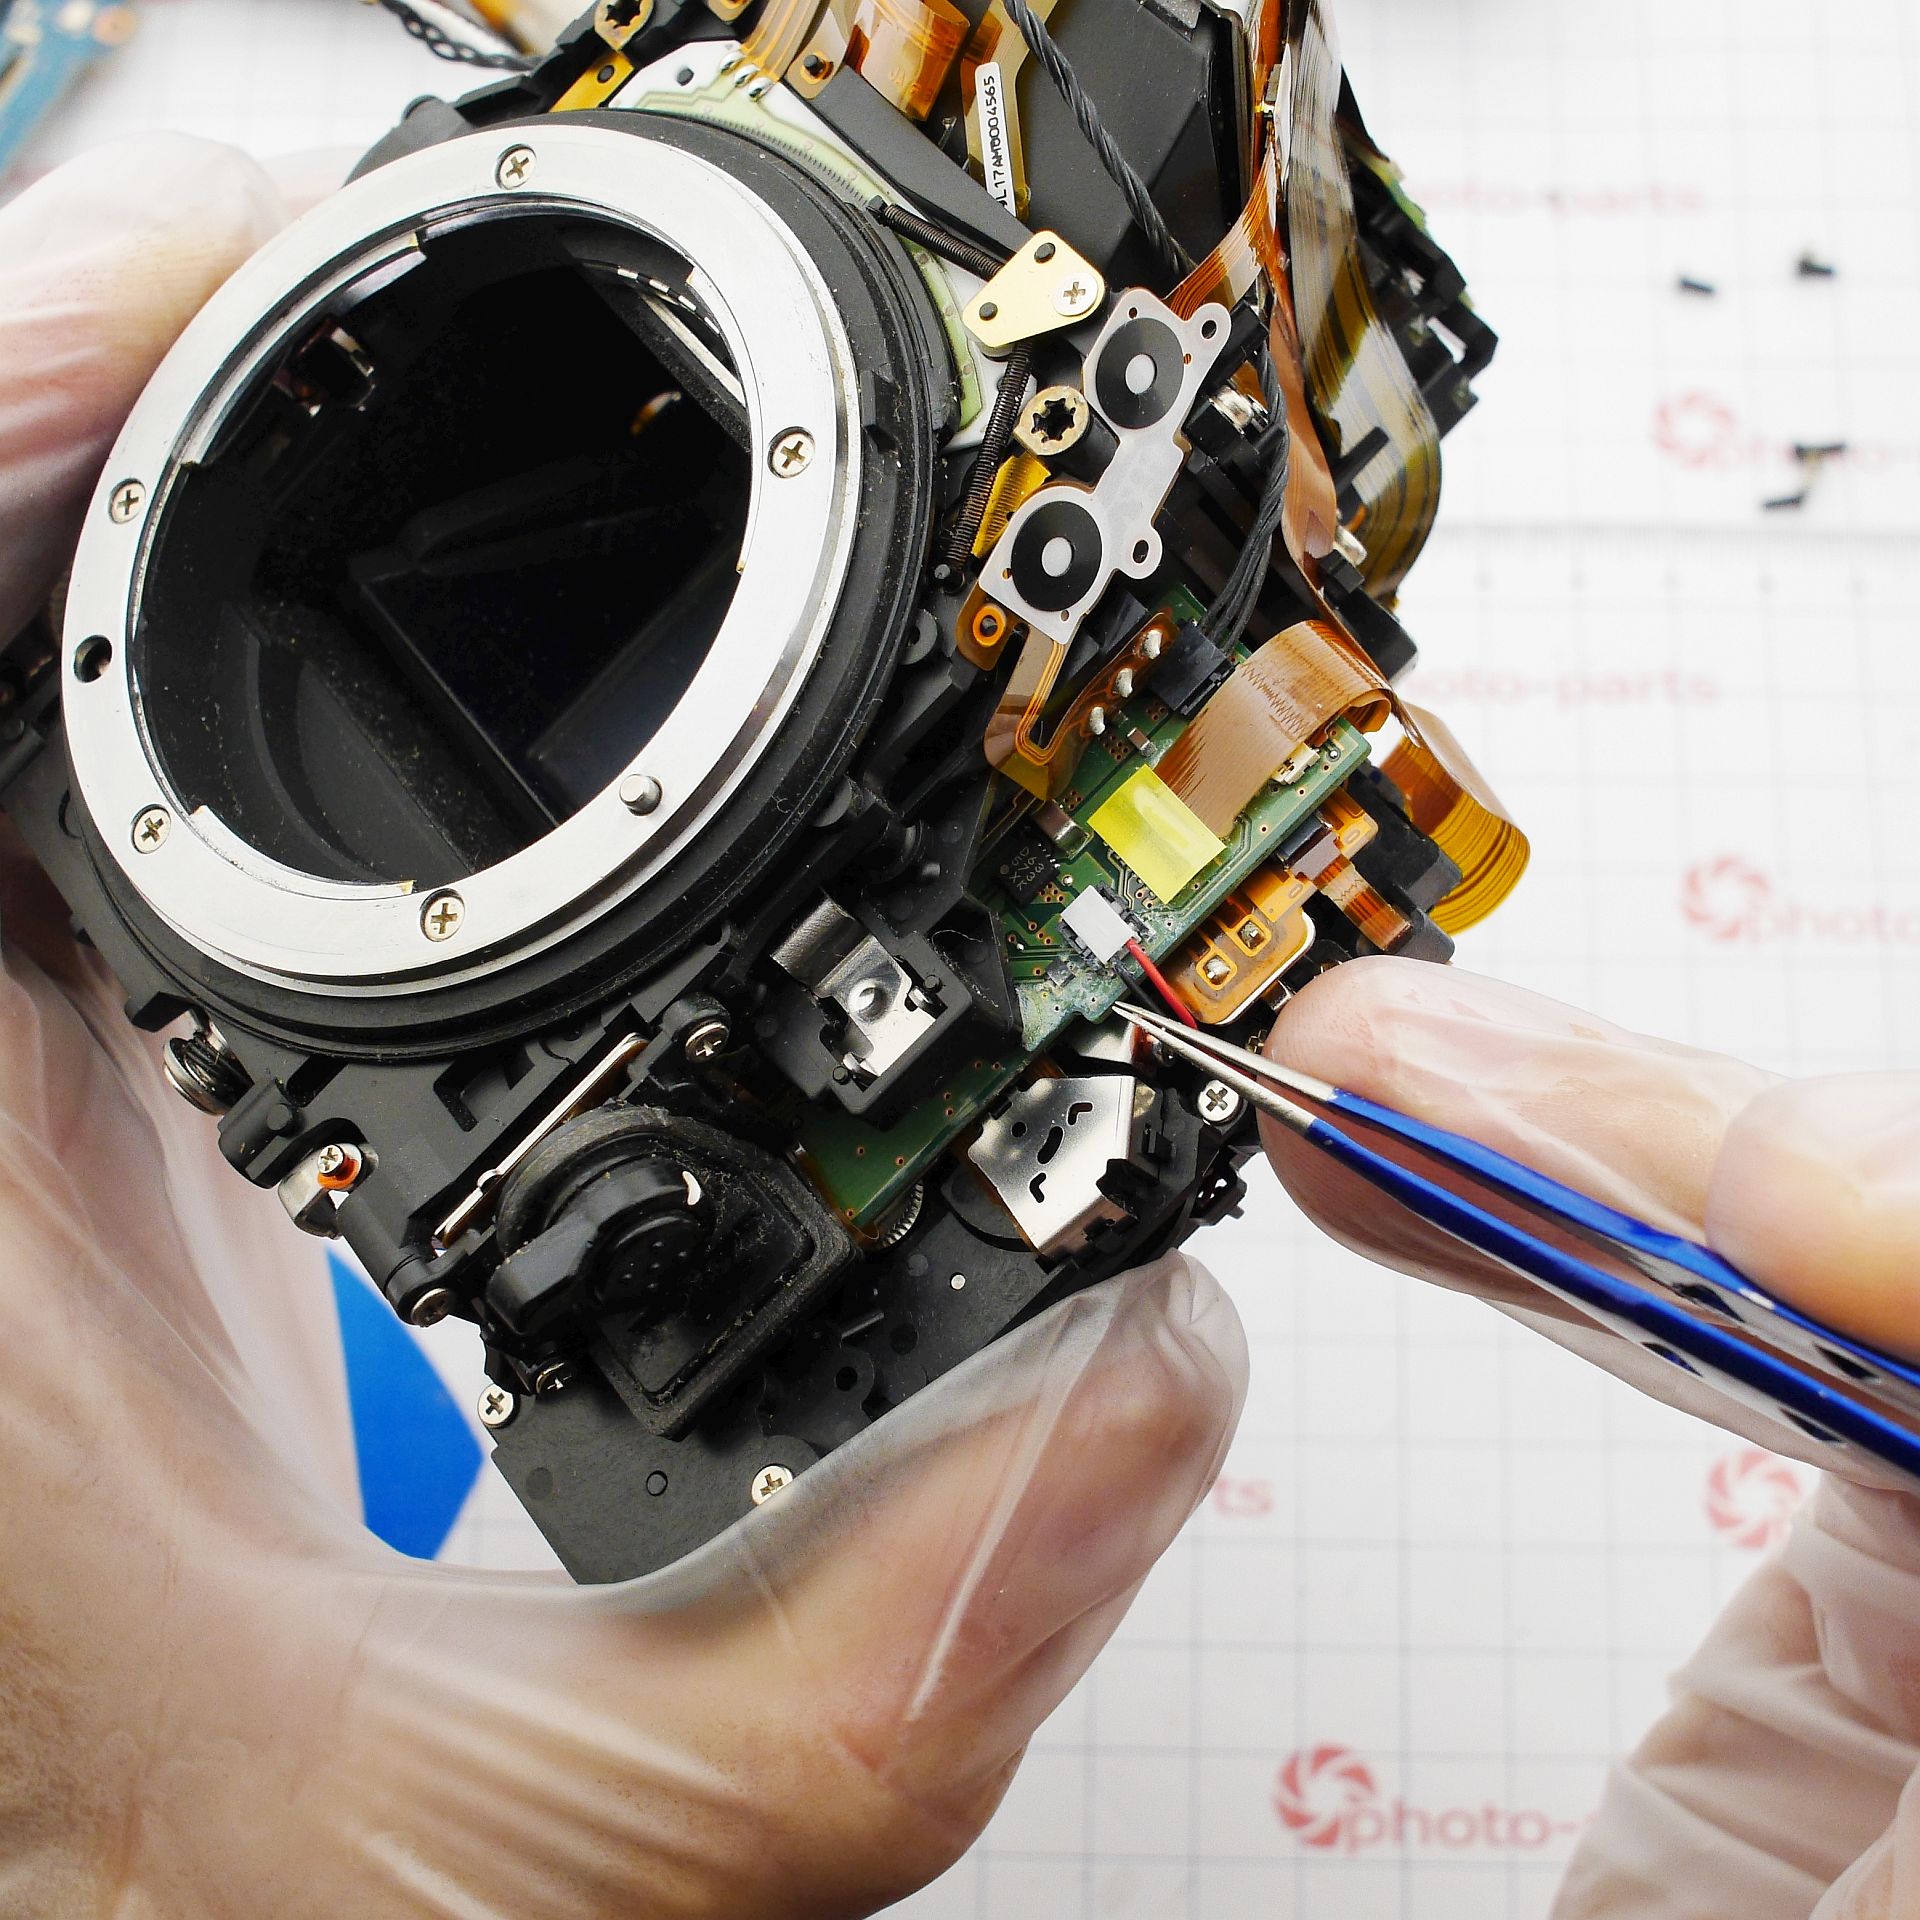

That's some heavy corrosion on the shutter driver board! The ribbon cables connected to it also suffered:
Water damage restoration
The repair procedure in such cases is fairly straightforward:
- Connectors damaged by corrosion are removed.
- The board is re-tinned, and any rotten vias are tinned from both sides, with a thin wire pushed through to restore connectivity.
- Connectors are replaced with new ones from donor boards or stock (more on this below).
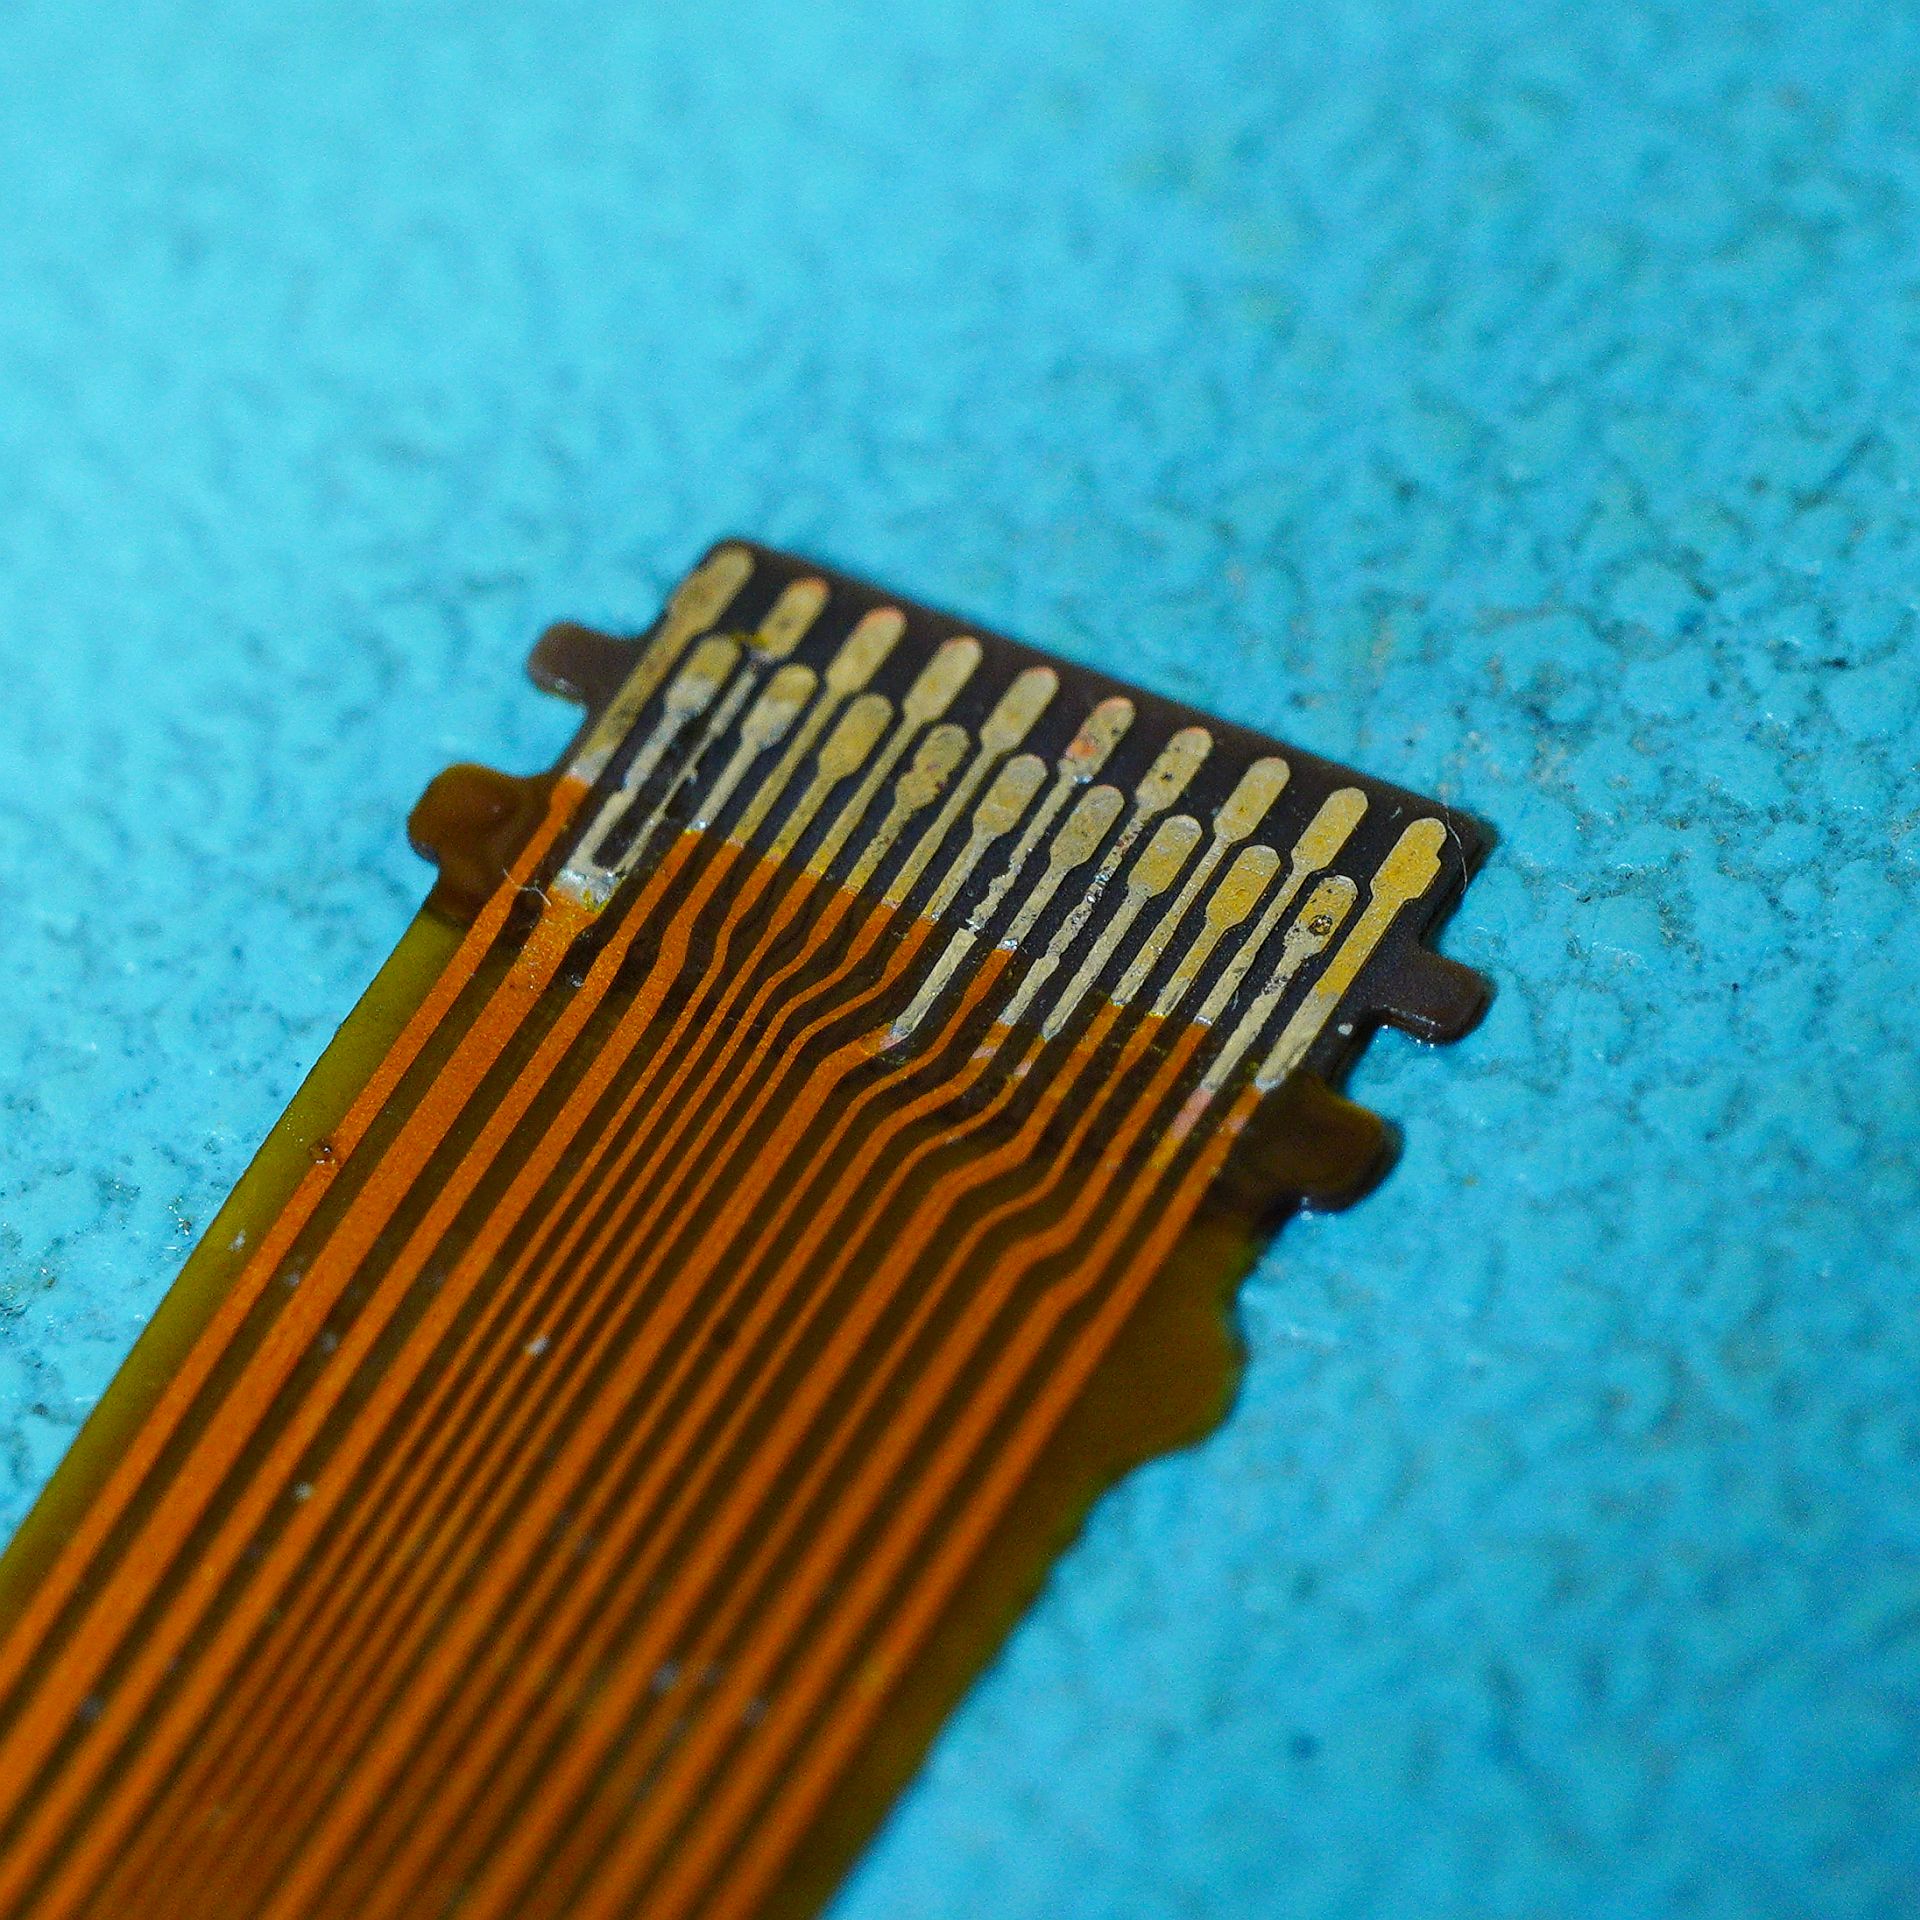
- Ribbon cables are polished with a felt wheel and polishing compound to clean off corroded spots.
- If lamella "necks" are damaged, fine jumper wires are soldered in.
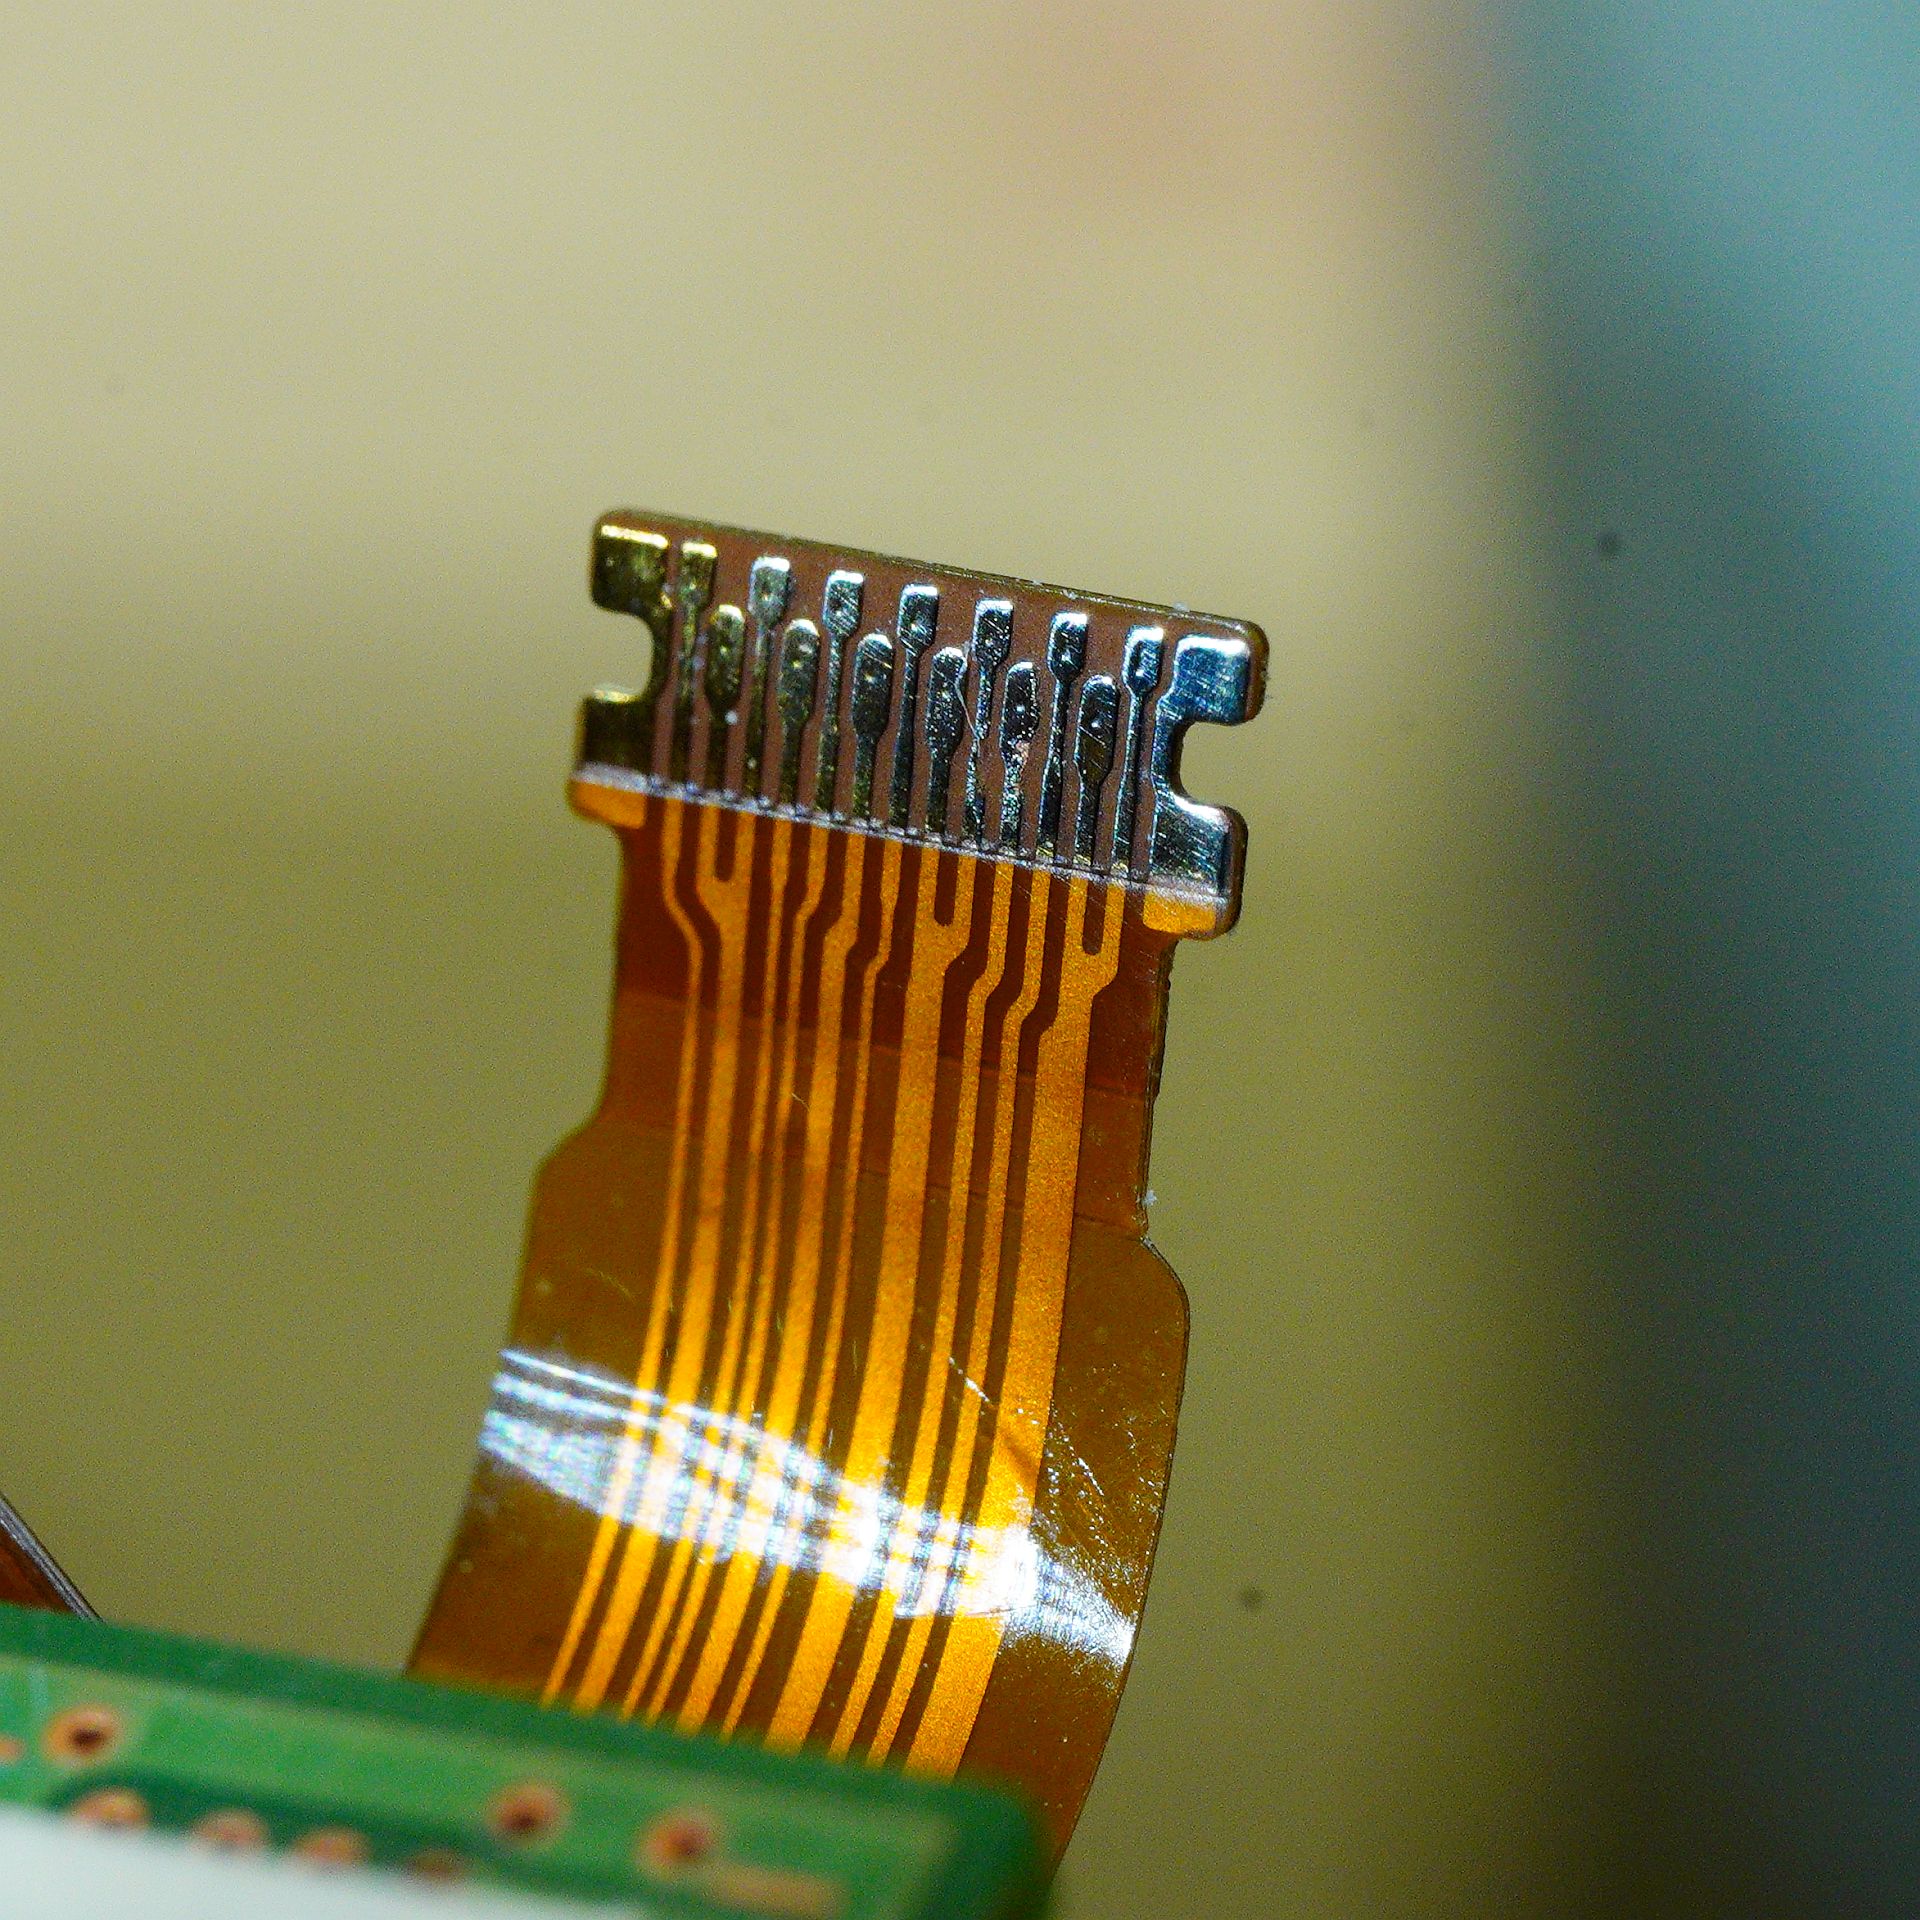
In my case the connectors had rotted completely - not only at the solder joints but also at the contact areas for the ribbon, so only replacement could help. What helped me was the I-Pex connector catalog: Catalogue-FPC-FFC-Connector-MINIFLEX-Series.pdf. My rotten parts turned out to be MINIFLEX® 3-BFN LK 0.3 mm pitch, Horizontal mating, Backflip, Mechanical lock, (Height = 0.9 mm). In fact, the majority of flex connectors in modern cameras are compatible, so having a full set from one manufacturer makes life very comfortable. New connectors in place:
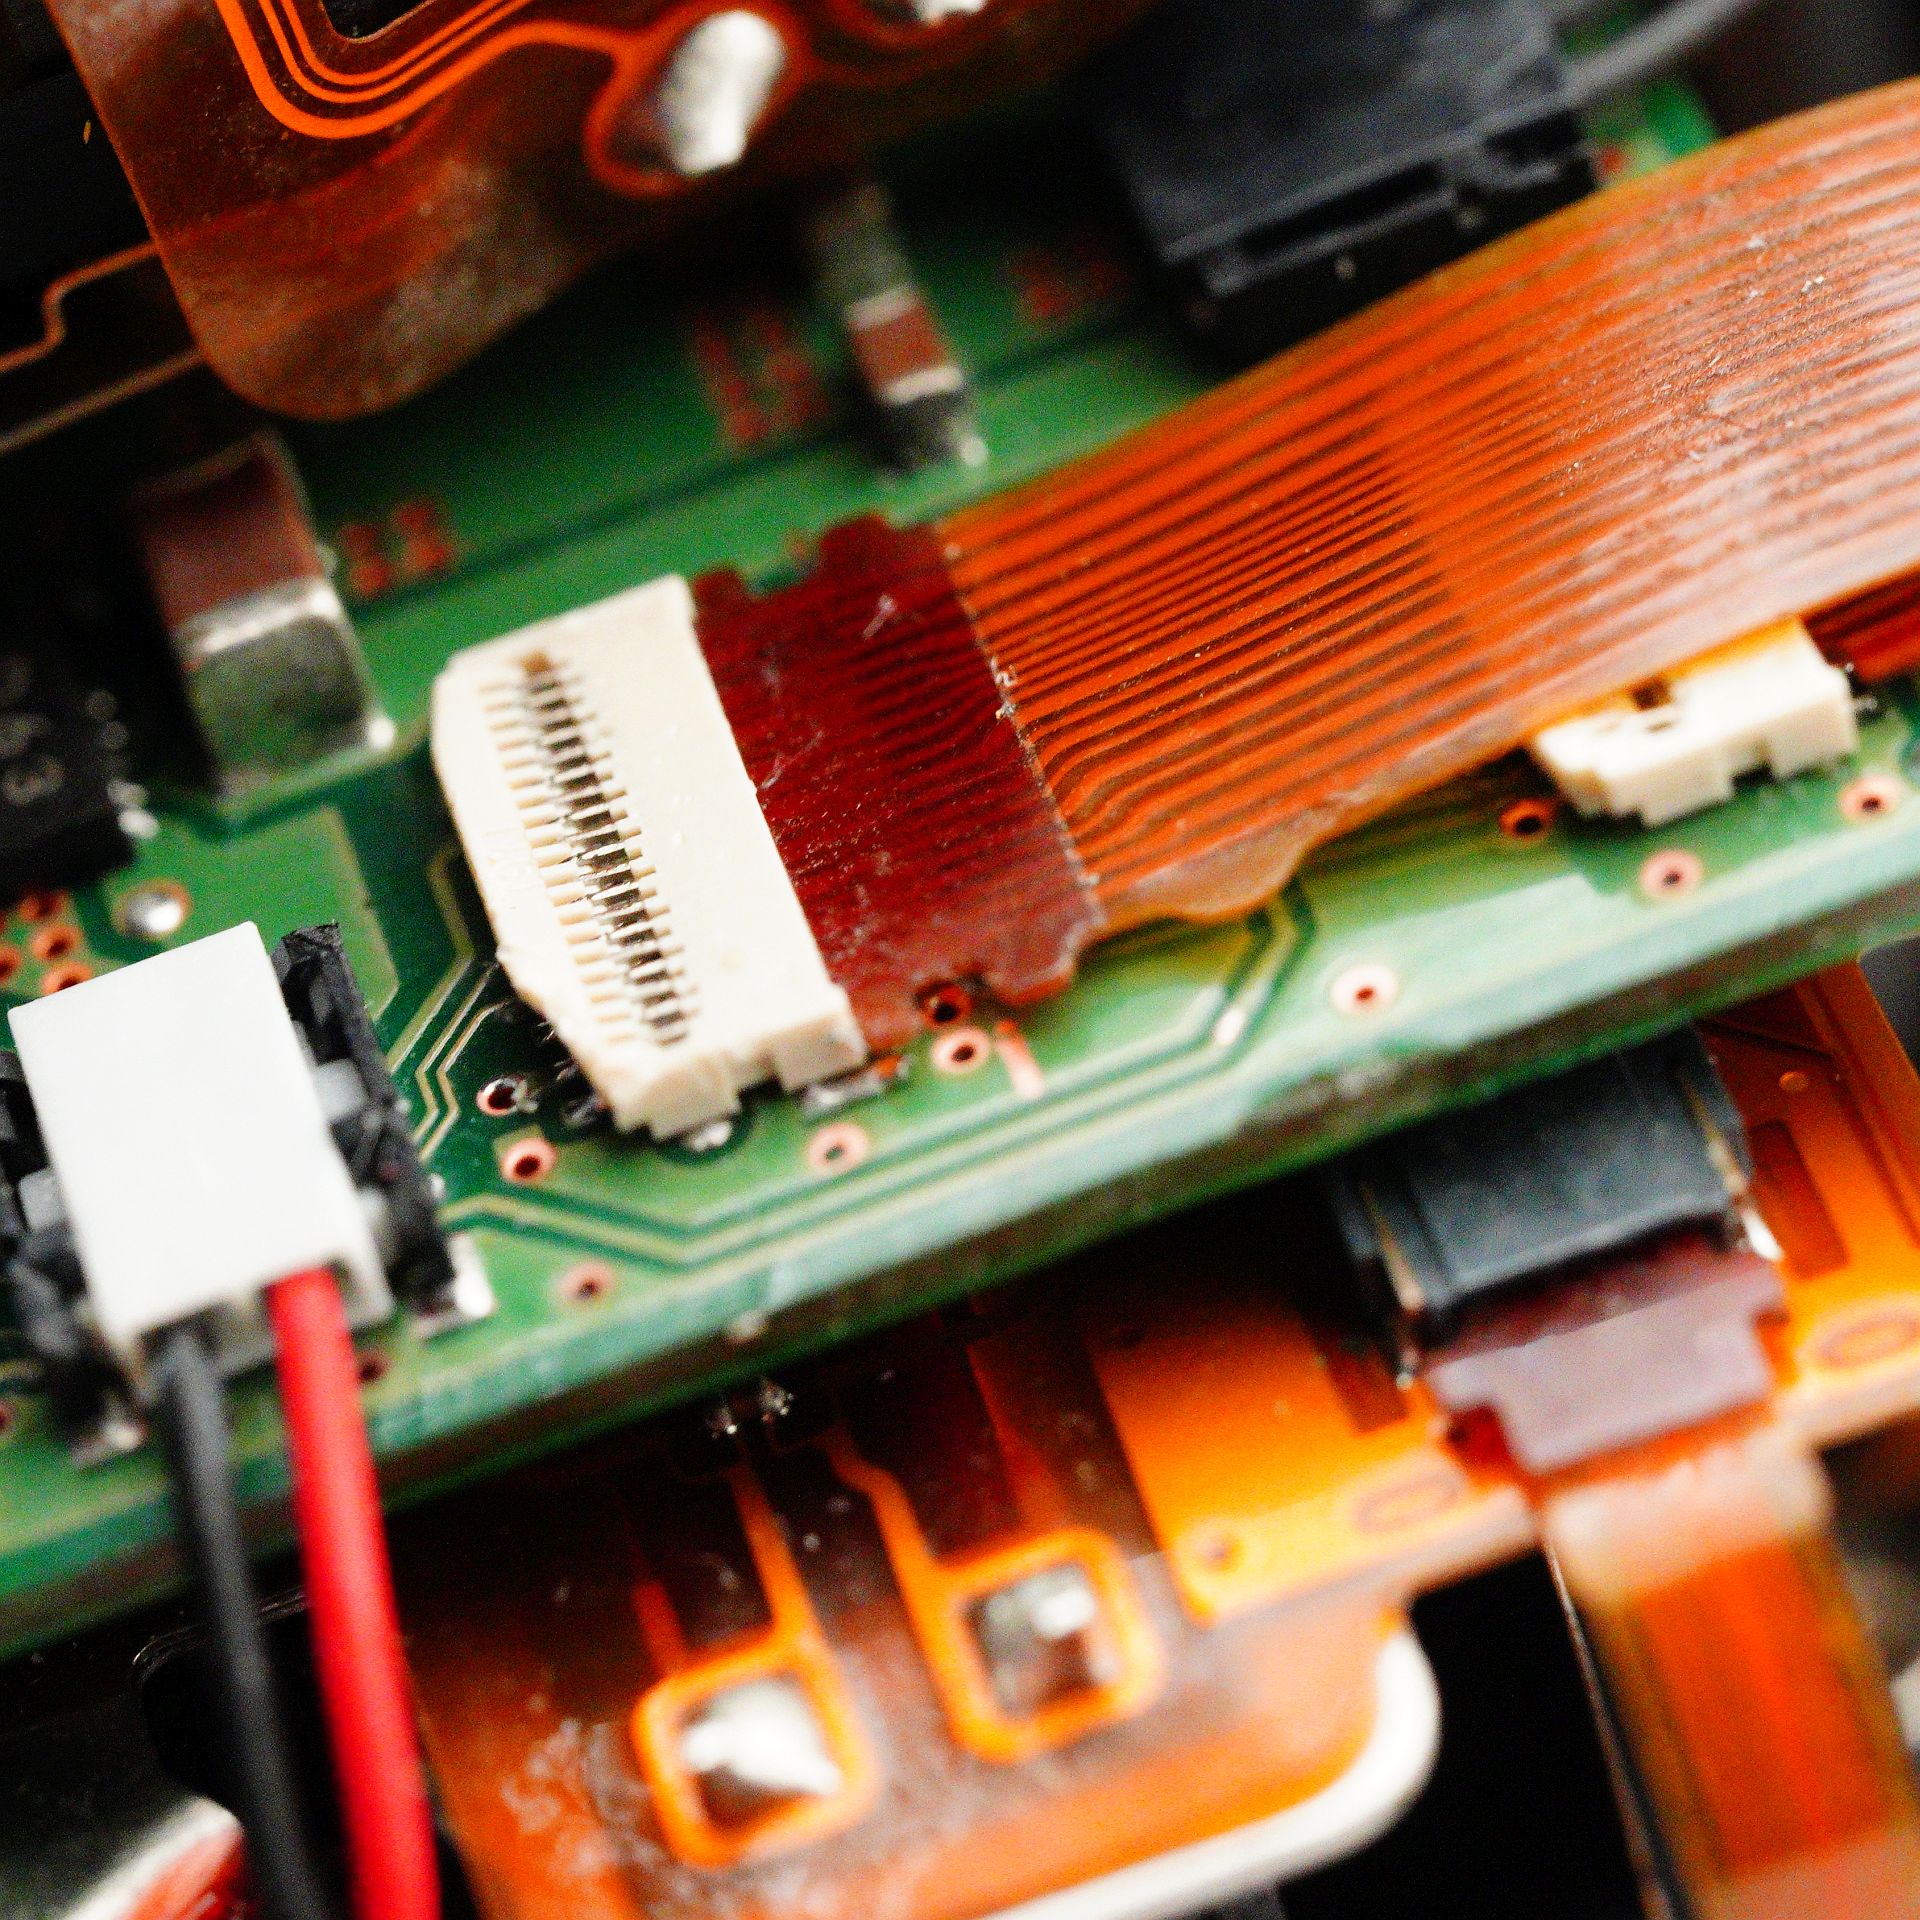
Restored ribbon cables:
Everything looks decent, electrical contact is present where it should be, and absent where it shouldn't. The end of the story? Unfortunately not. After reassembling the camera, its behavior didn't change at all. And I was so sure of success! What was wrong? I didn't photograph the next steps in the heat of debugging, so here's just a brief retelling.
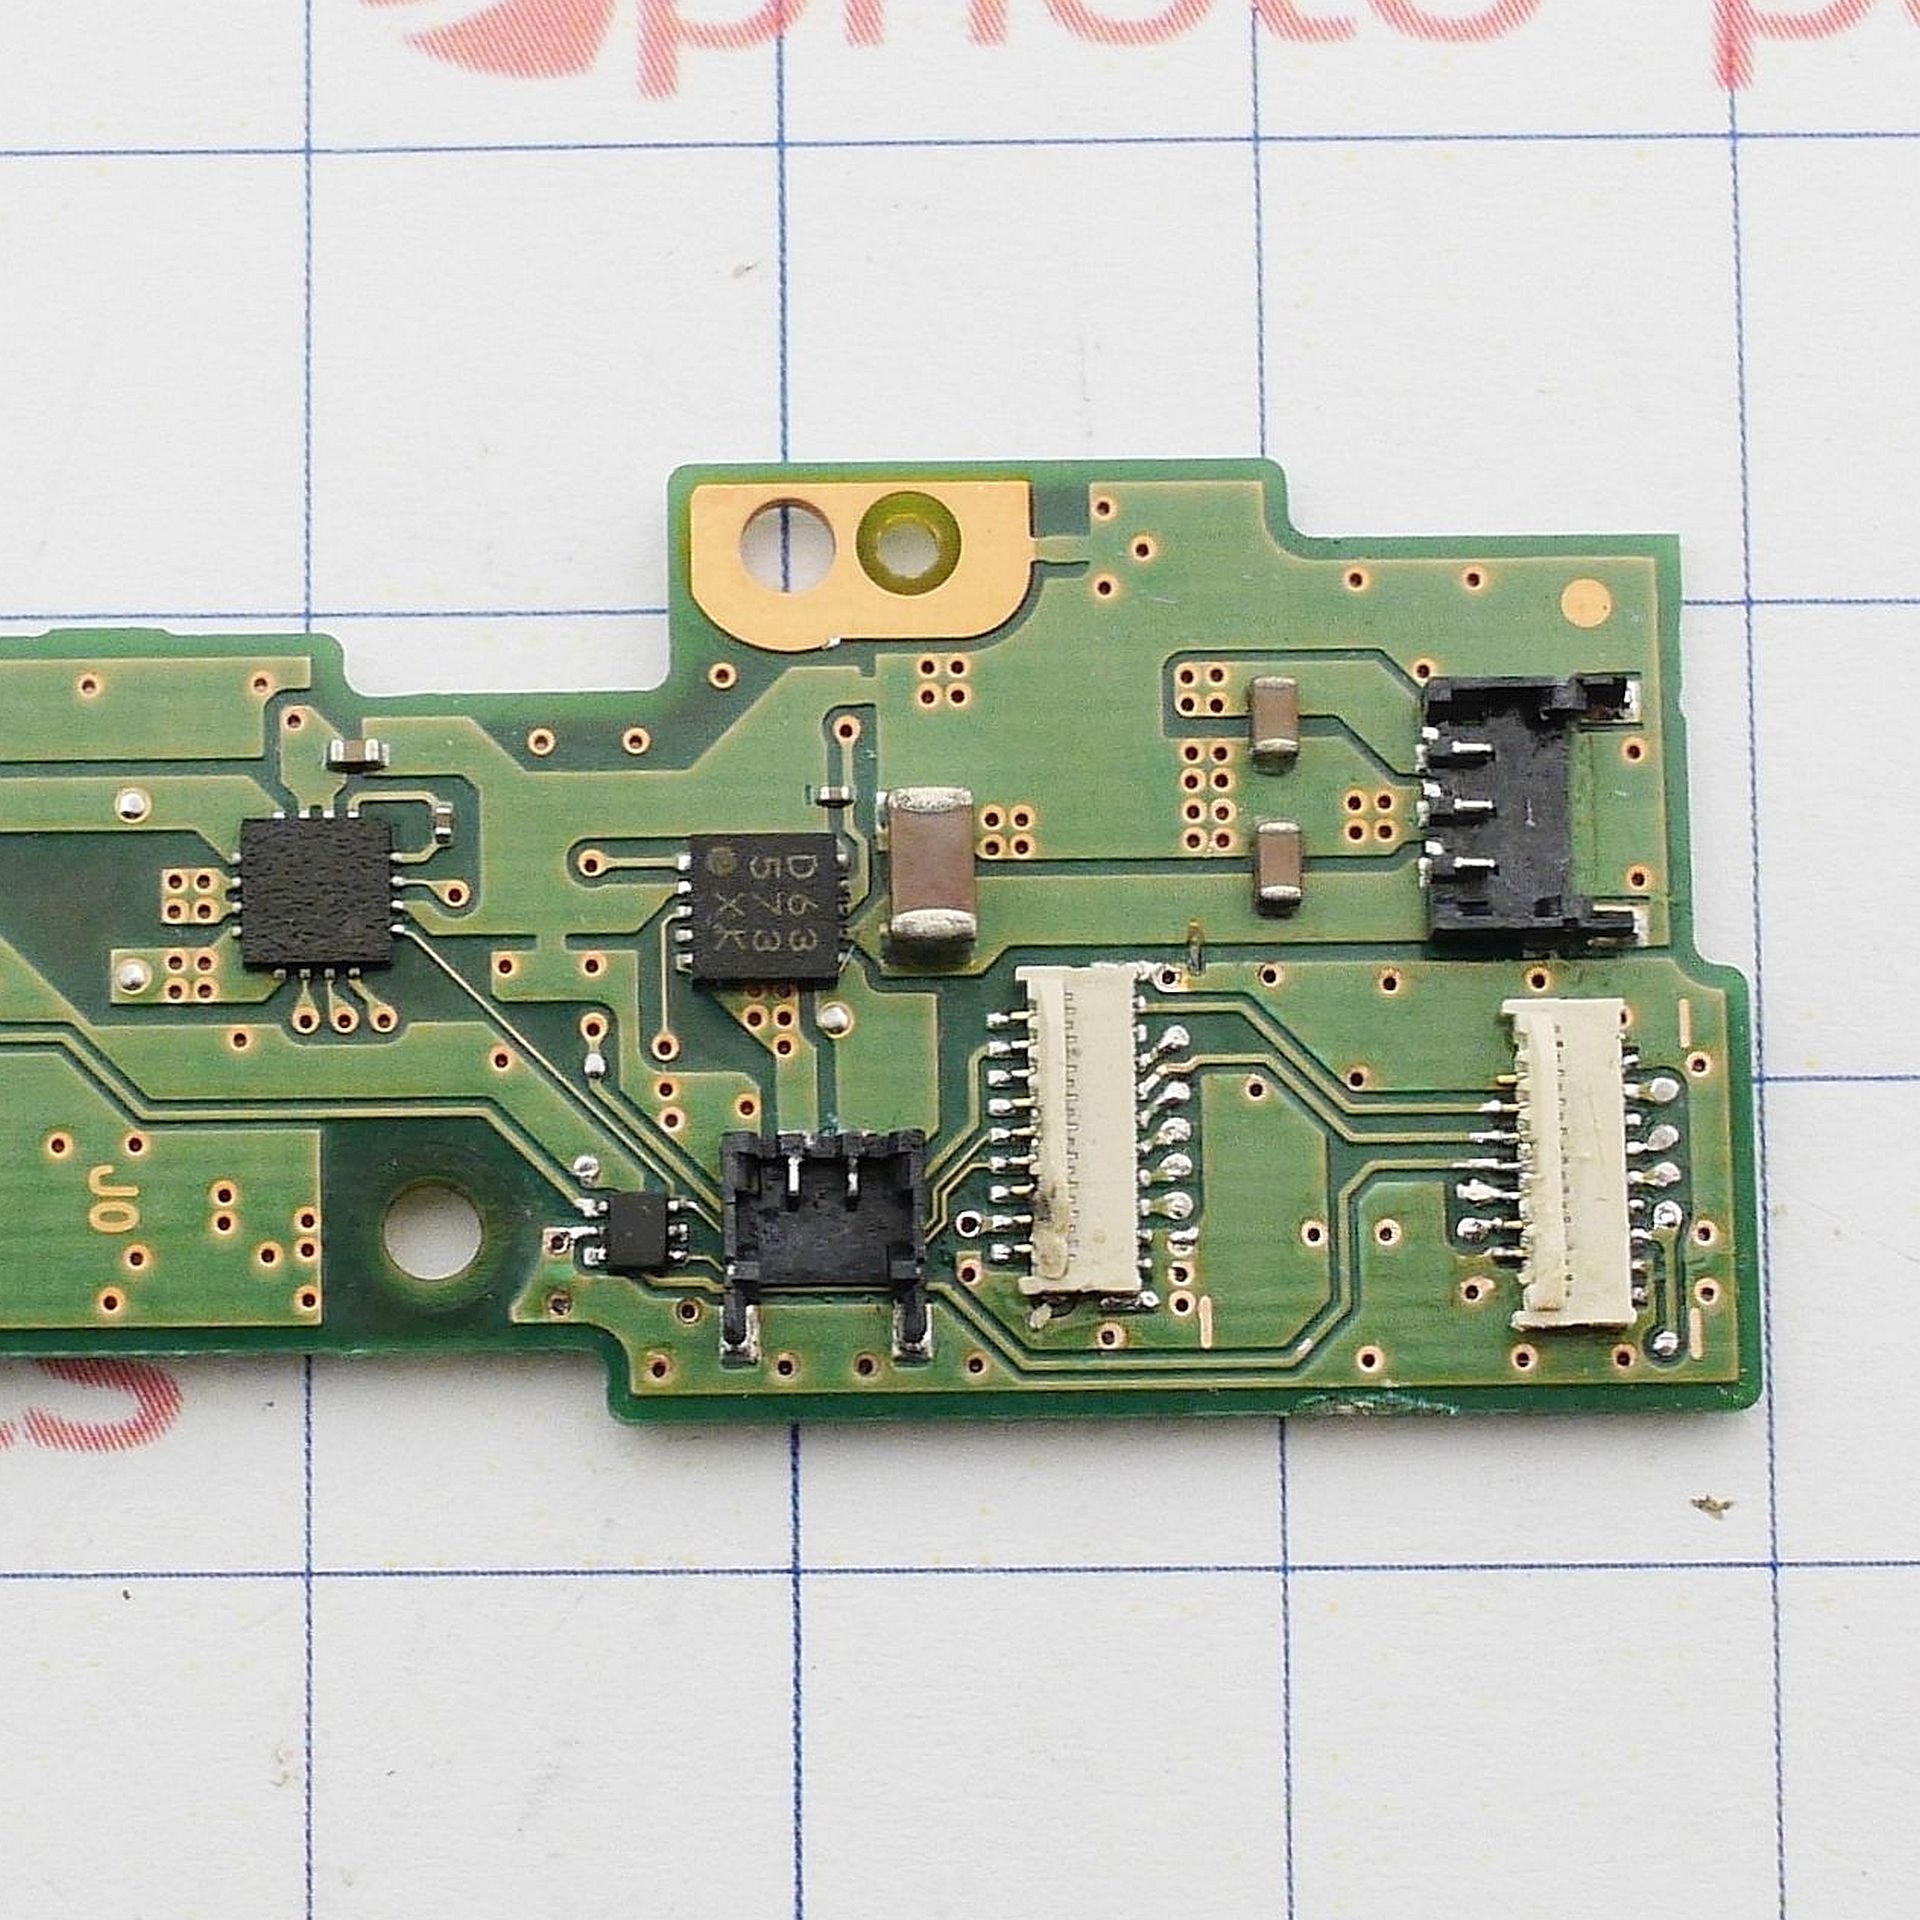
It was obvious that the chaotic shutter cocking was caused by a missing feedback signal about the position of the program gear. The position is tracked by two optocouplers, which are alternately blocked by a slotted disk. Removing the optocouplers didn't change behavior - yes, the fault was in this unit. Measuring voltages at all four electrodes of each optocoupler showed that the LEDs were powered correctly:
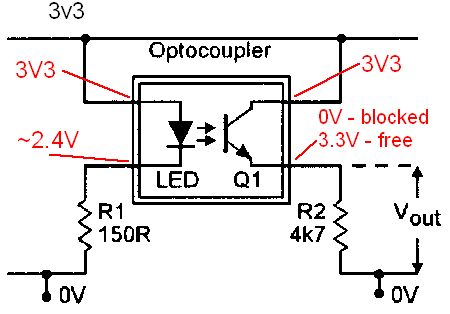 The circuit for optical sensors in cameras is also typical. The LED anode and phototransistor collector are tied to the positive supply rail (most often 3.3 V). The LED cathode is pulled to ground through a current-setting resistor, so we expect around 2.4 V at the cathode (3.3–0.9 V), which is what I measured. The sensor output is also pulled to ground with a higher-value resistor. Thus, when light is blocked, the output potential is near zero, and when open, near 3.3 V. And indeed, my measurements matched! So either the sensor outputs didn't reach the main board through the connector chain, or something happened on the main board itself. Luckily (purely by chance!) I had a donor board, and discovered a burnt resistor on the main board! Fixing it was a hassle, but after replacement the camera came back to life.
Why did the main board suffer? My best explanation is that corrosion created a conductive bridge in the shutter connector, where the 6 V shutter magnet drive line sits right next to the sensor outputs. In the end, full disassembly to access the shutter wasn't needed, and replacement of major units wasn't required either.
Which is great, because a by-the-book repair would have demanded replacing:
- The shutter (ribbon damaged by water)
- The mirror box (shutter driver board comes only as part of the assembly)
- The main board (because of a single burnt resistor)
Which would have made the repair truly uneconomical.
Some reflections
Should you trust the manufacturer when they claim a camera is "weather sealed"? What kind of exposure is acceptable, and what will lead to a repair like this? My opinion, based on years of camera repair: treat your camera as if a single drop of water could kill it. Considering the number of gaps, dials, and buttons in modern cameras, there's no doubt that even moderate rain will eventually find its way into the sensitive electronics. Fog or light drizzle that doesn't form a water film on the camera probably won't cause harm. Any heavier precipitation might, and in such cases, you'd better rely on more serious protection methods.
Happy shooting in any weather!
Add Comment
This policy contains information about your privacy. By posting, you are declaring that you understand this policy:
- Your name, rating, website address, town, country, state and comment will be publicly displayed if entered.
- Aside from the data entered into these form fields, other stored data about your comment will include:
- Your IP address (not displayed)
- The time/date of your submission (displayed)
- Your email address will not be shared. It is collected for only two reasons:
- Administrative purposes, should a need to contact you arise.
- To inform you of new comments, should you subscribe to receive notifications.
- A cookie may be set on your computer. This is used to remember your inputs. It will expire by itself.
This policy is subject to change at any time and without notice.
These terms and conditions contain rules about posting comments. By submitting a comment, you are declaring that you agree with these rules:
- Although the administrator will attempt to moderate comments, it is impossible for every comment to have been moderated at any given time.
- You acknowledge that all comments express the views and opinions of the original author and not those of the administrator.
- You agree not to post any material which is knowingly false, obscene, hateful, threatening, harassing or invasive of a person's privacy.
- The administrator has the right to edit, move or remove any comment for any reason and without notice.
Failure to comply with these rules may result in being banned from submitting further comments.
These terms and conditions are subject to change at any time and without notice.
Comments