- Posted on
- • Camera repairs
Nikon D750 - (just) an SD slot replacement
- Author
-
-

- User
- Photo-parts
- Posts by this author
- Posts by this author
-
The most ordinary type of repair - a true "walk-in job," as repair technicians like to say. Just replace a faulty memory card slot: minimal disassembly, a bit of soldering - and the camera is saved.
However, even in such a simple repair, there are a few nuances that can easily turn fatal for the camera.
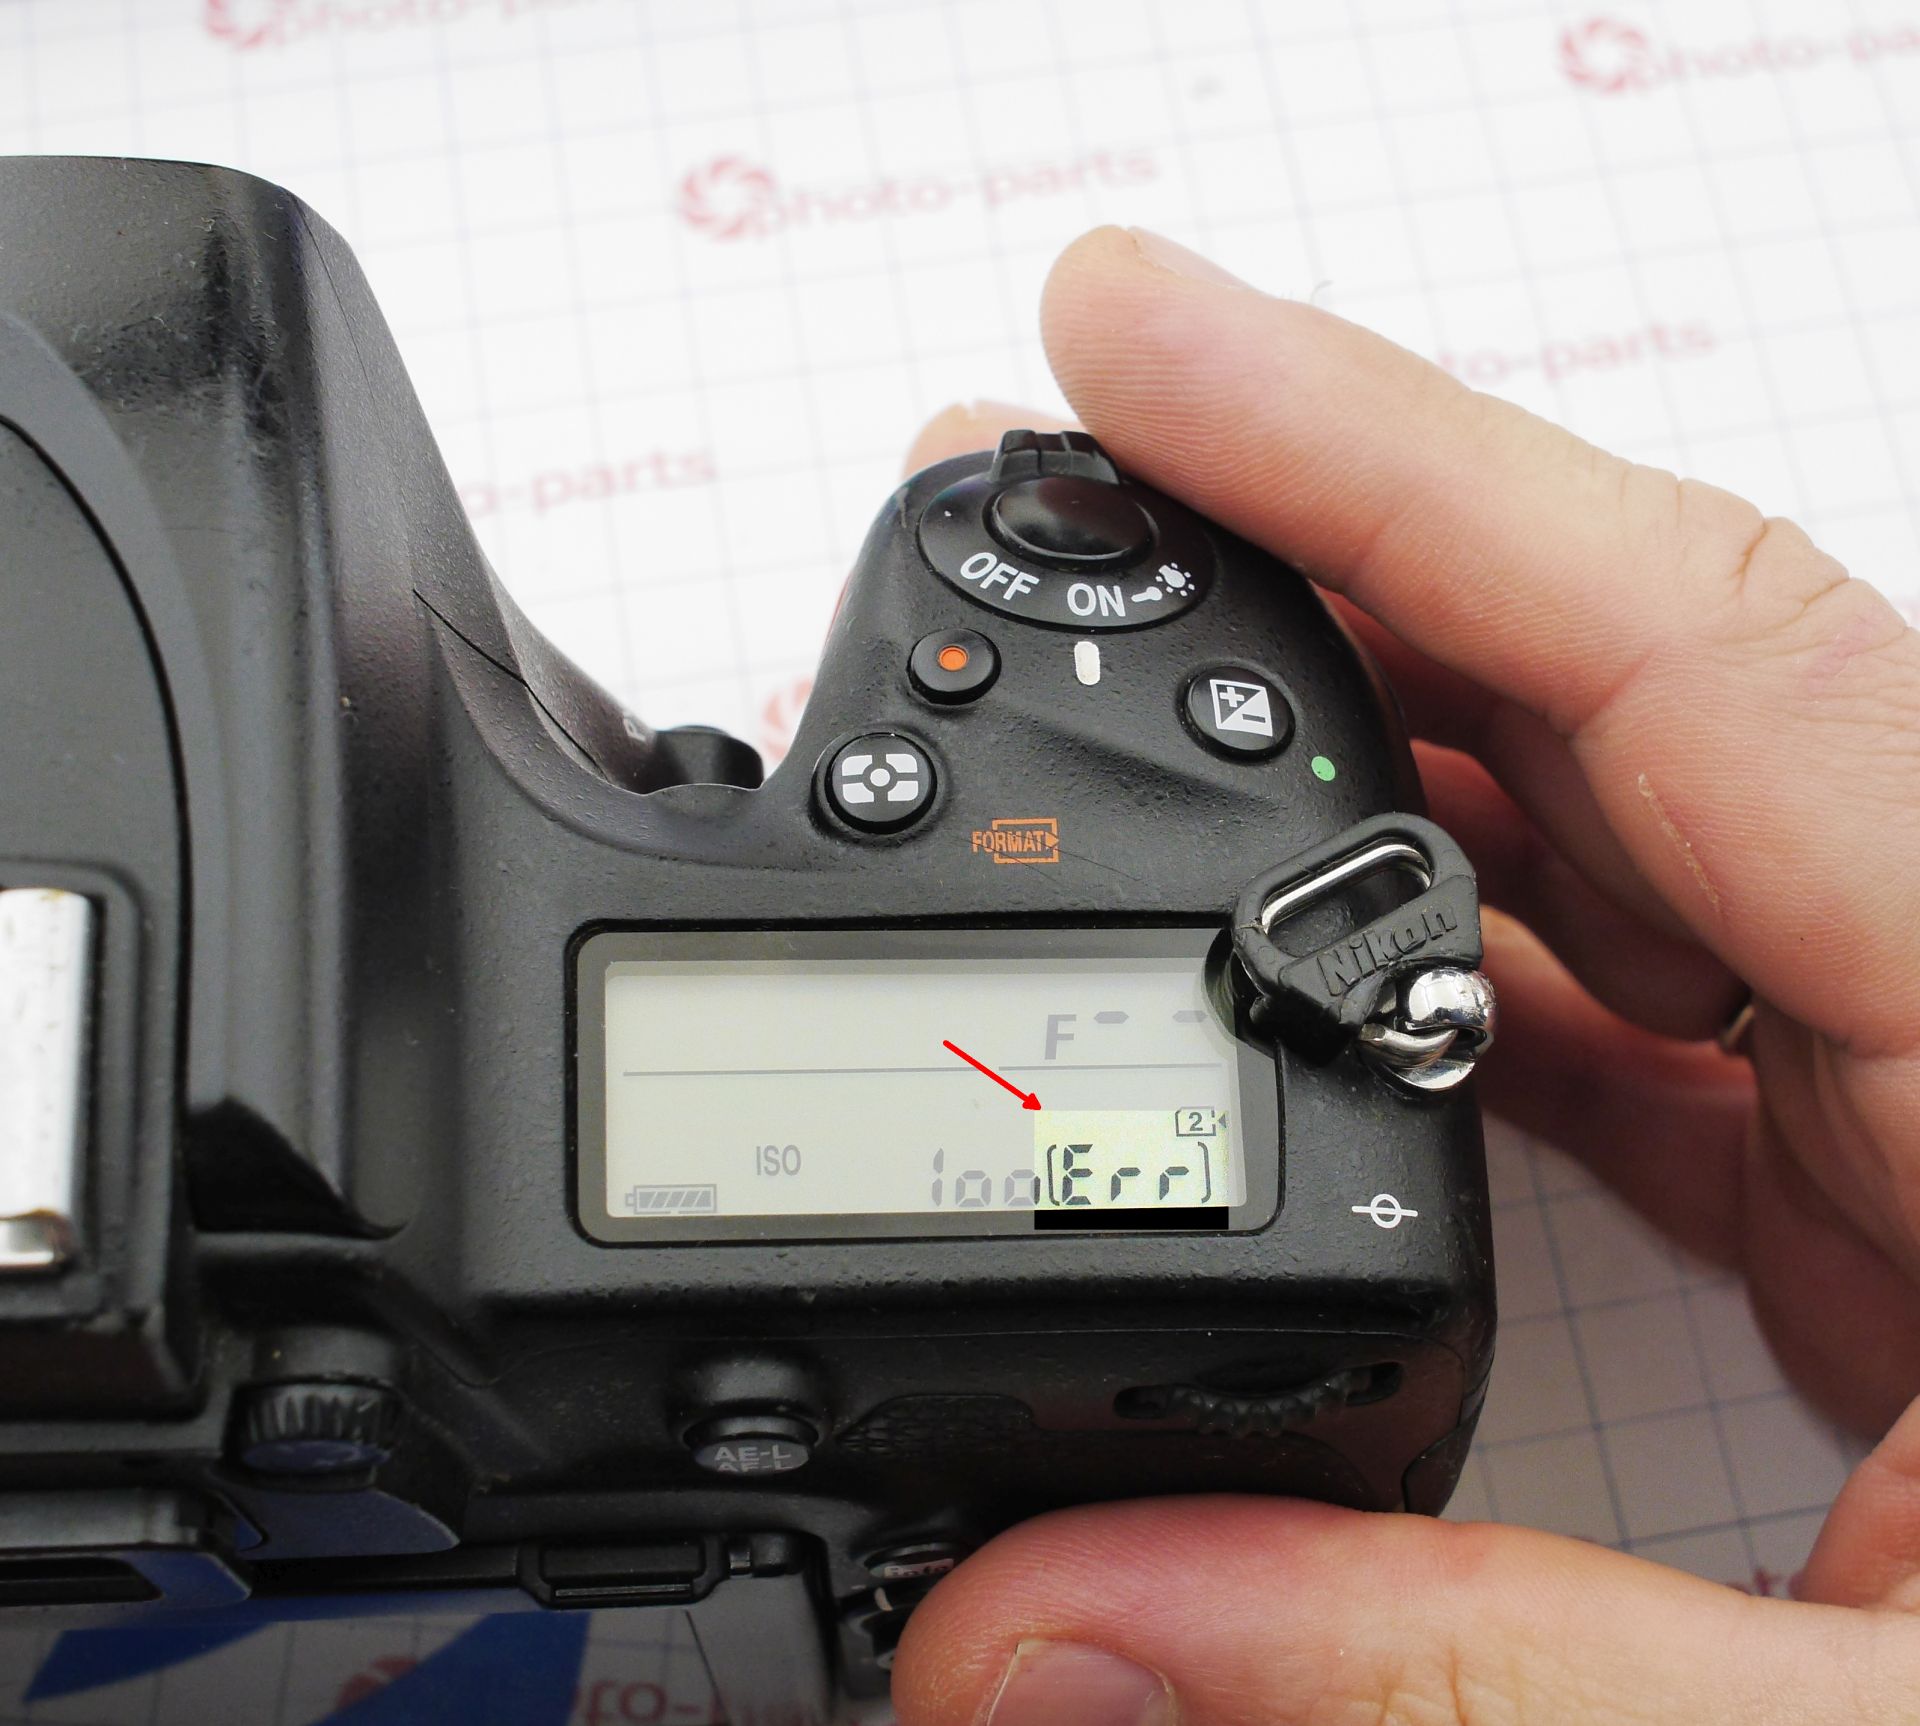
Our patient: Nikon D750, which, even without a memory card inserted, shows the "err" message instead of the frame counter. The camera is unusable - the shutter is locked, even if you try to shoot using the second slot.
This article covers disassembly down to the mainboard, a gentle card slot replacement without "baking" the board, and a look at the pitfalls of this seemingly simple job.
Disassembly
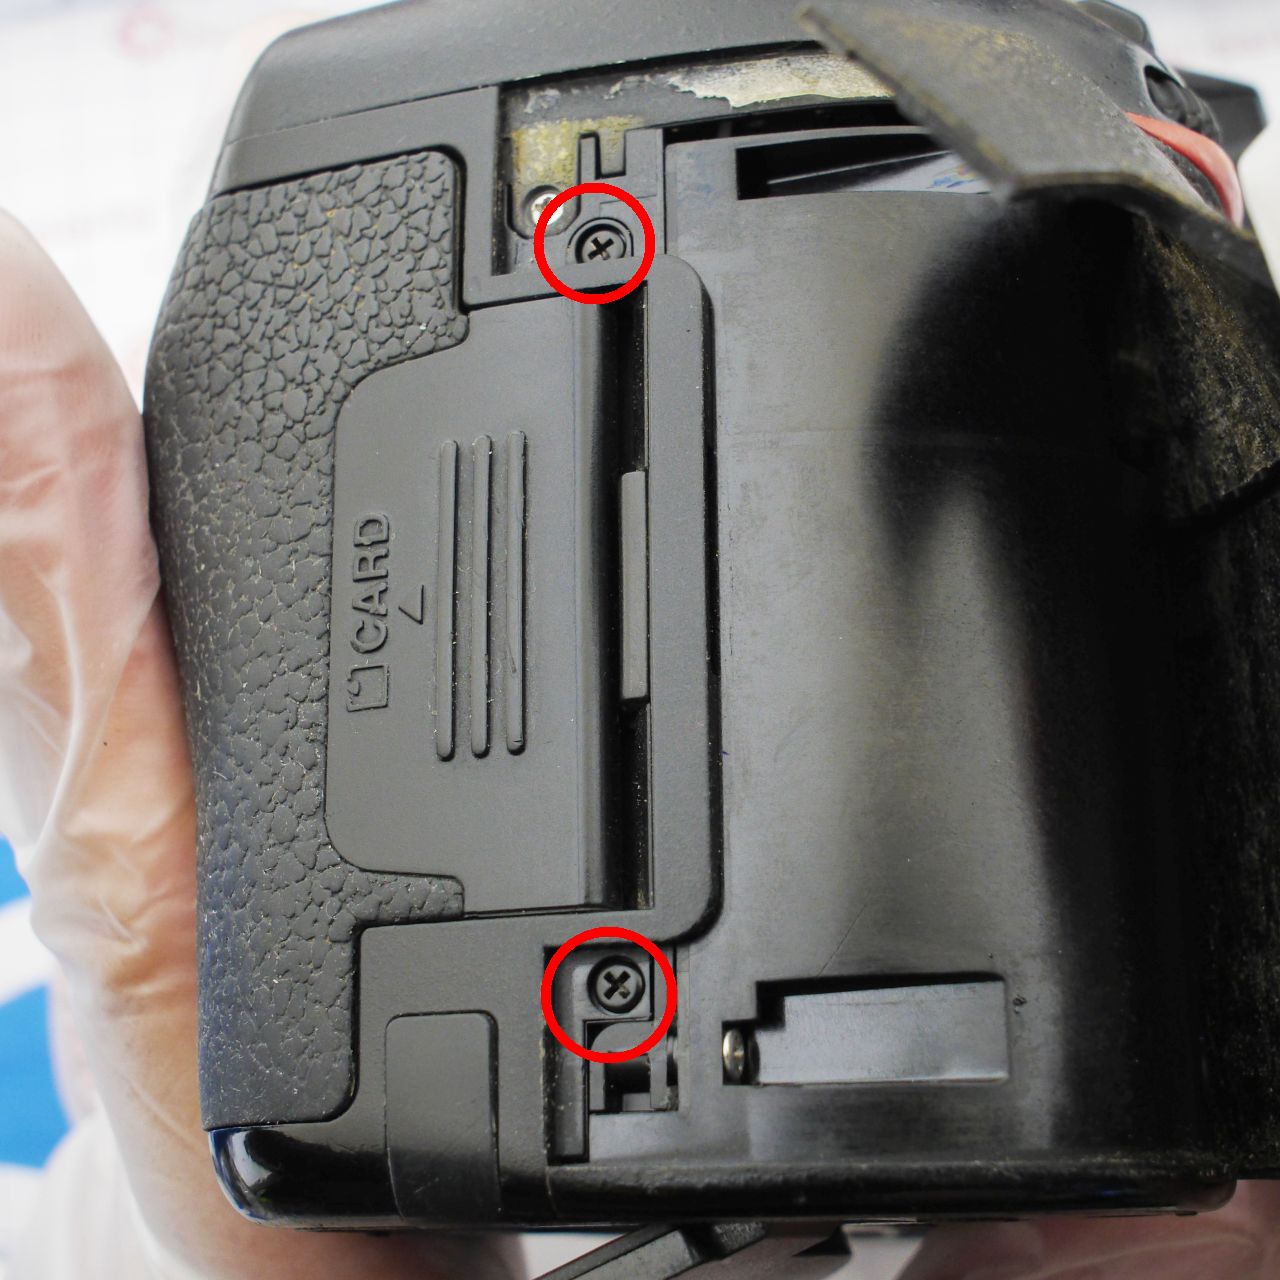
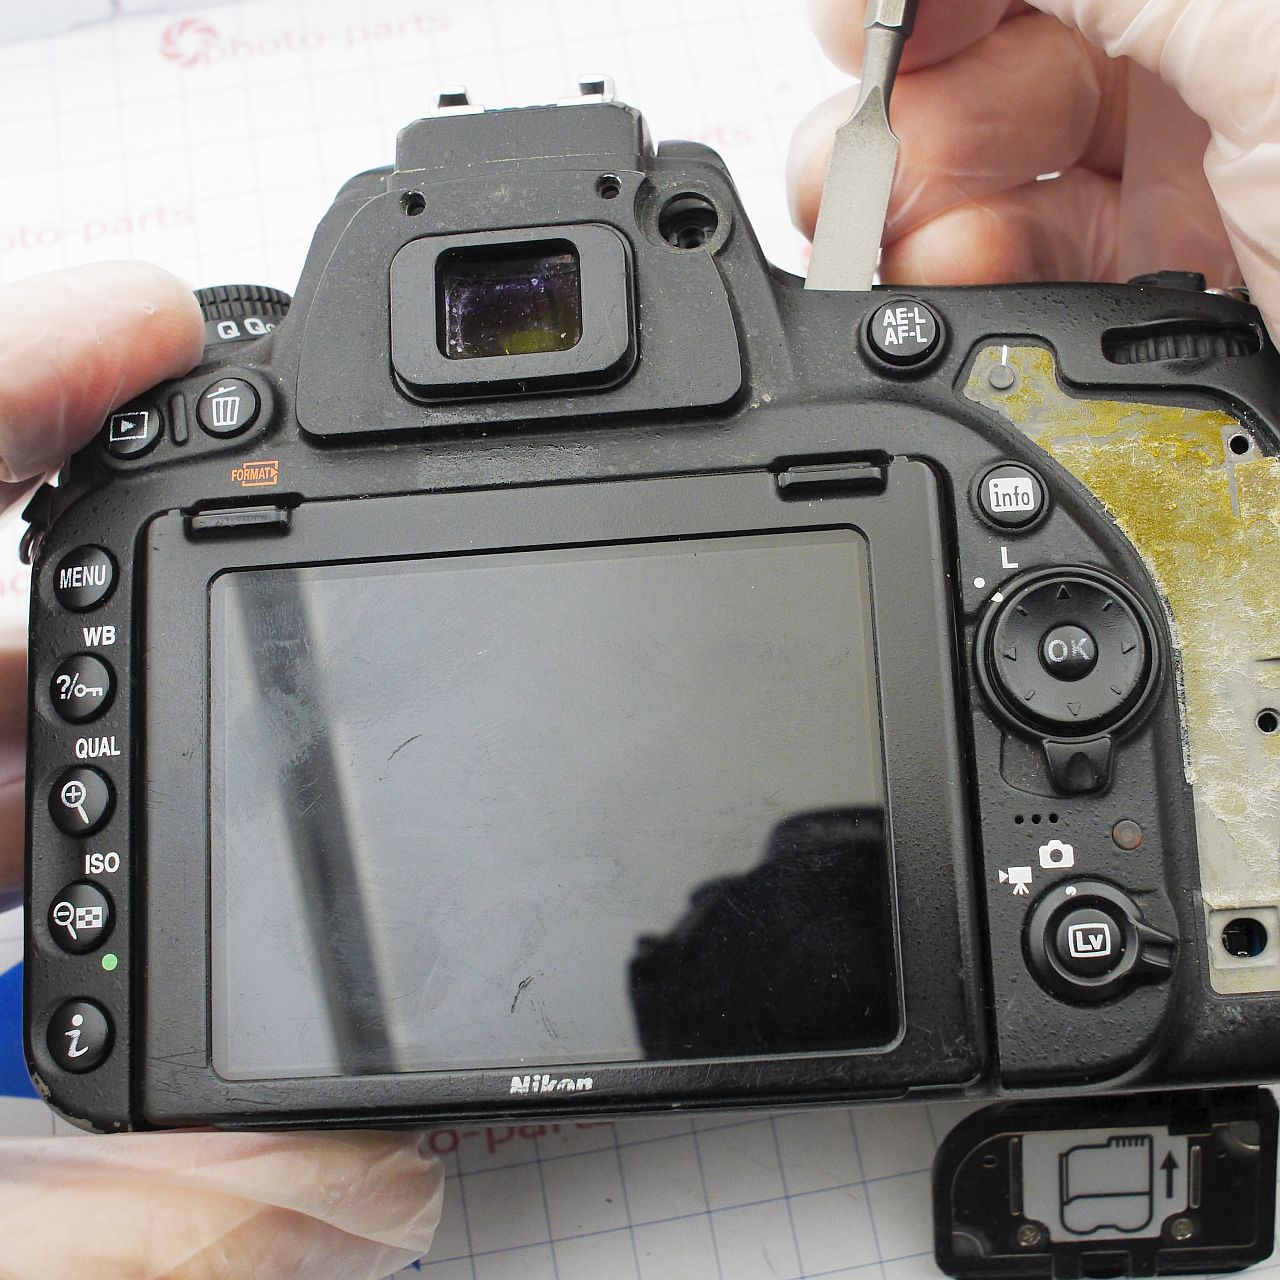
Disassembling this camera - if you don't go near the shutter and mirror mechanics - is extremely straightforward. The story changes if you need to replace the shutter or mirror box mechanisms; then this light walk turns into a marathon through a minefield of charged capacitors and fragile ribbon cables (not shown in this article :) On the rear panel, you'll need to pry off the decorative cap of the diopter adjustment screw and peel off the rubber grip under your thumb. Then remove the screws near the viewfinder, the diopter screw, two screws under the grip, one under the memory card door, and one near the Wi-Fi logo: 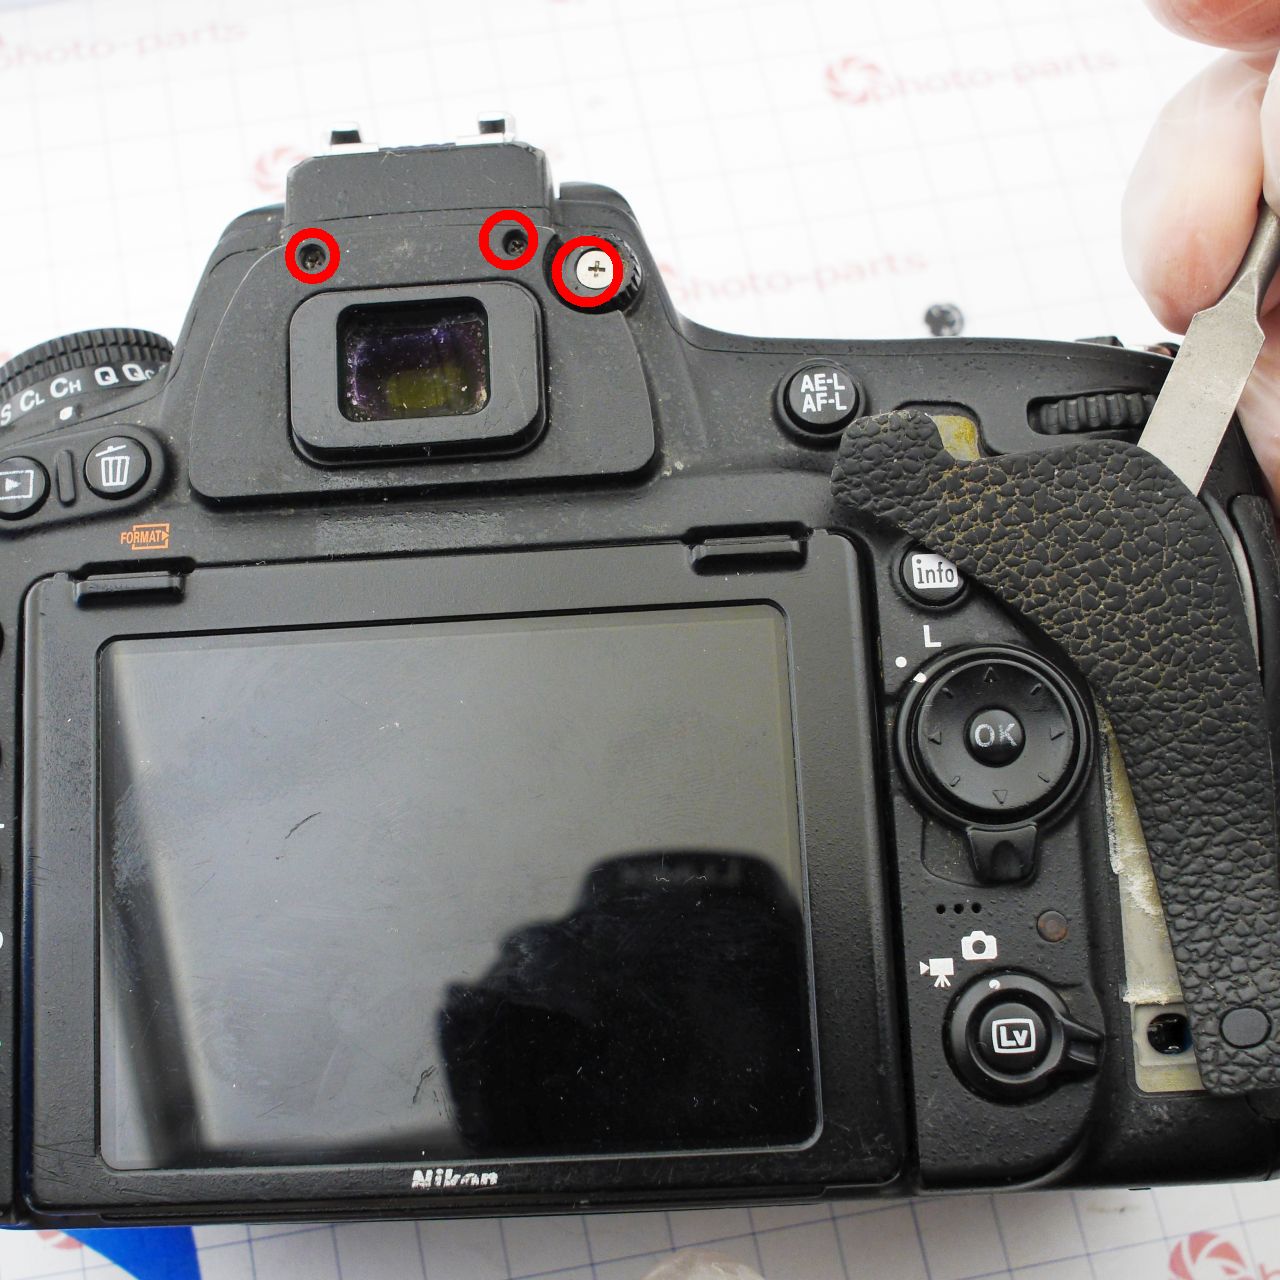
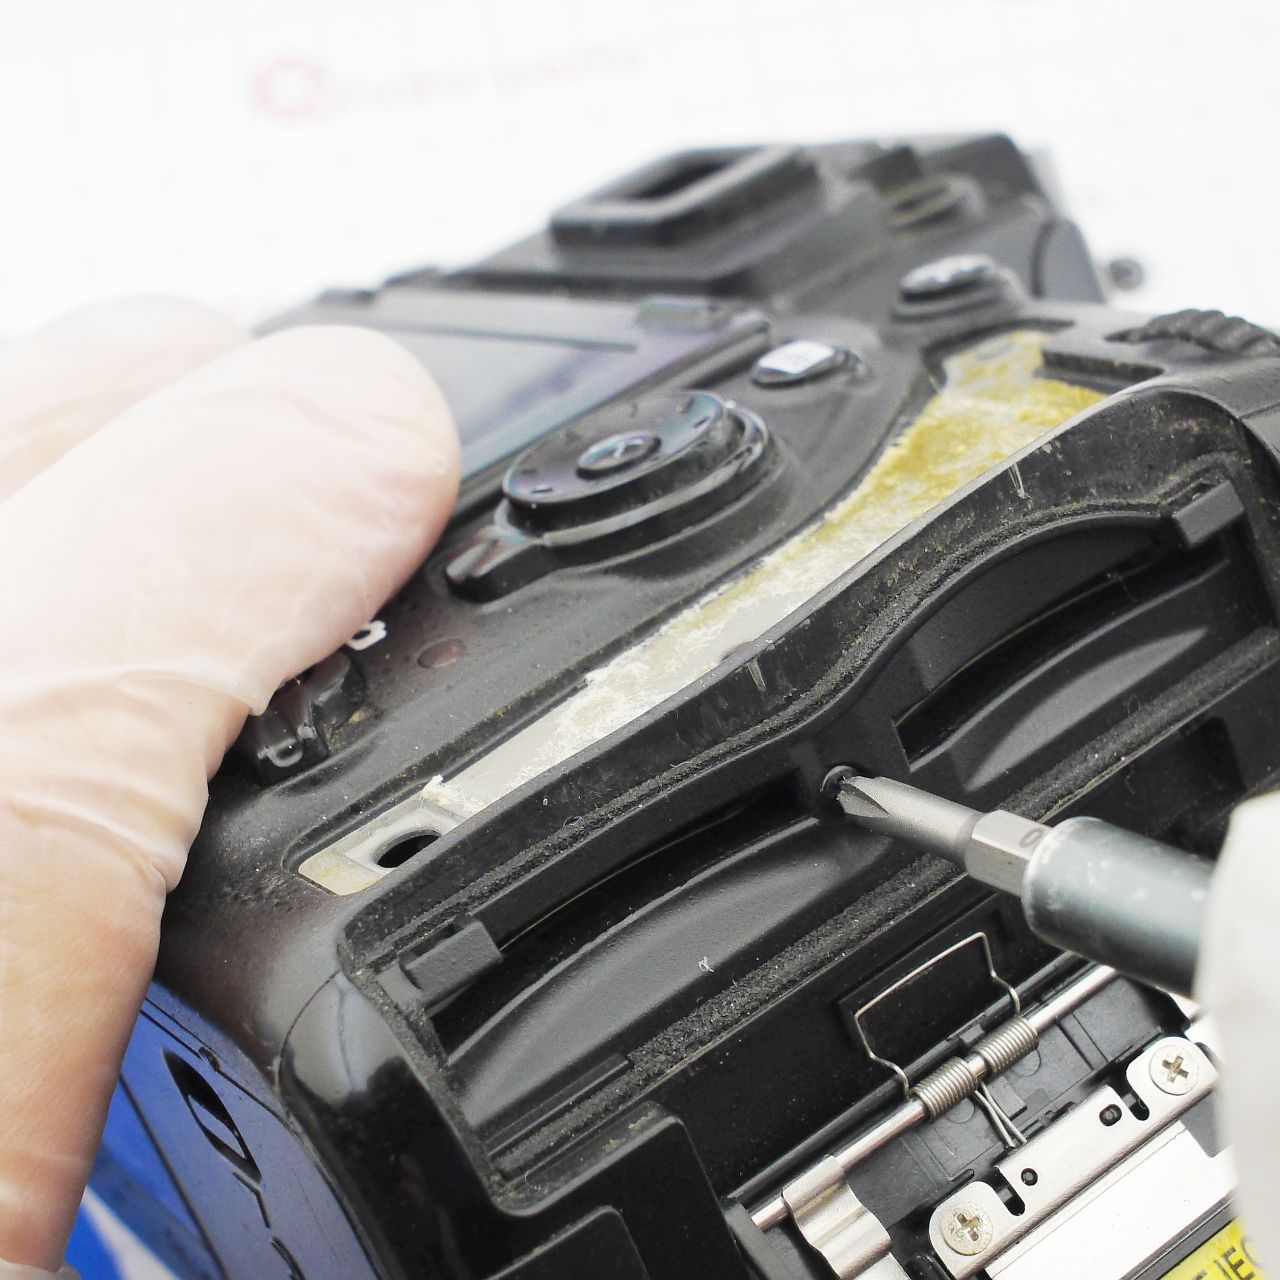

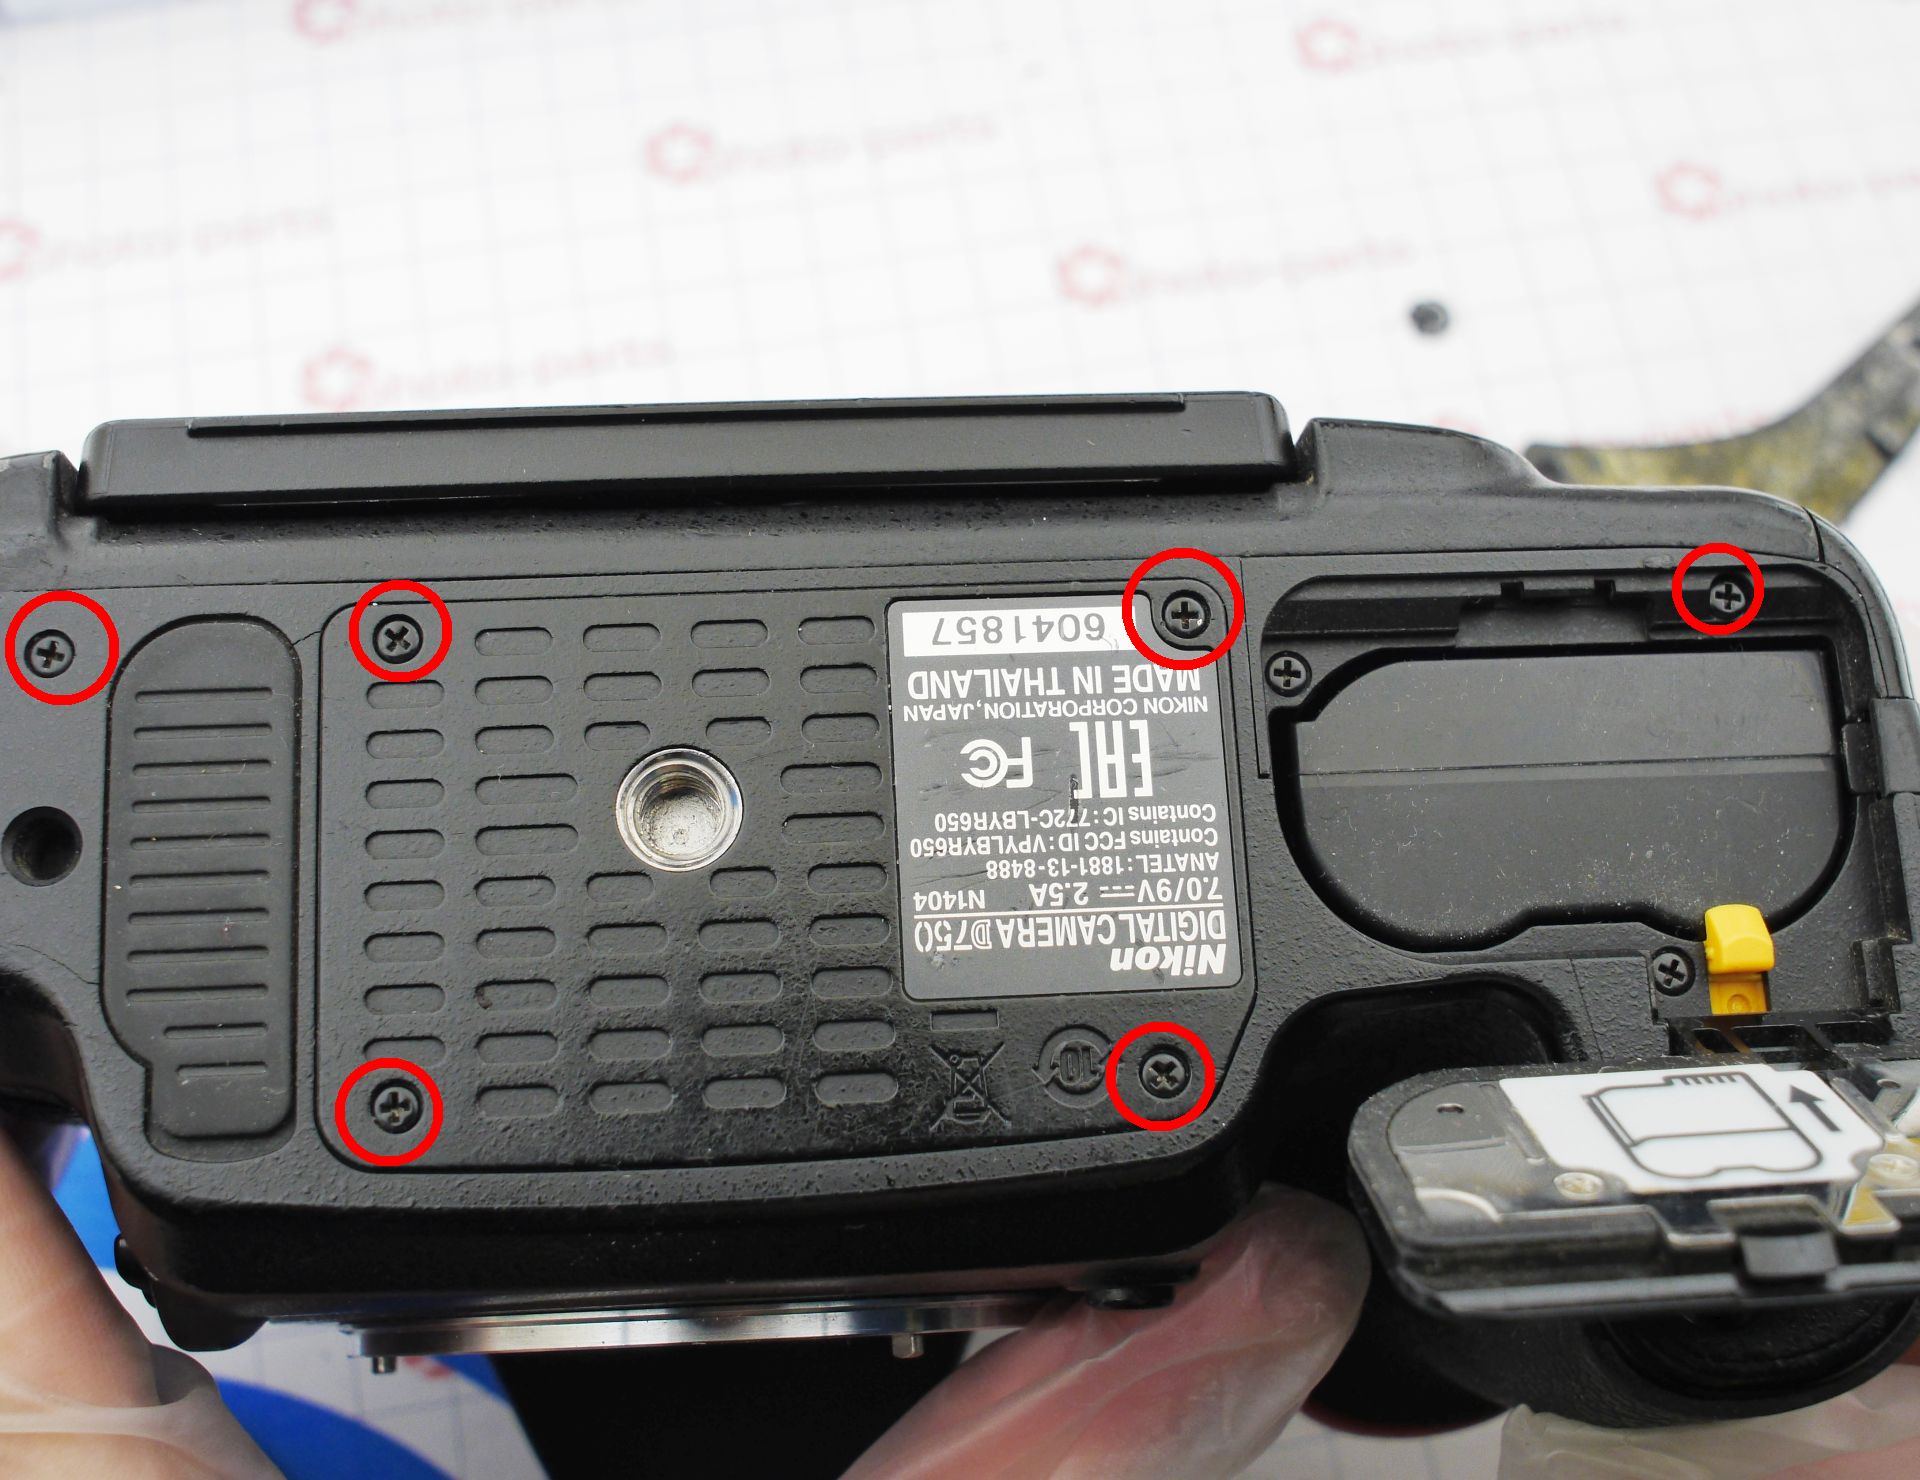
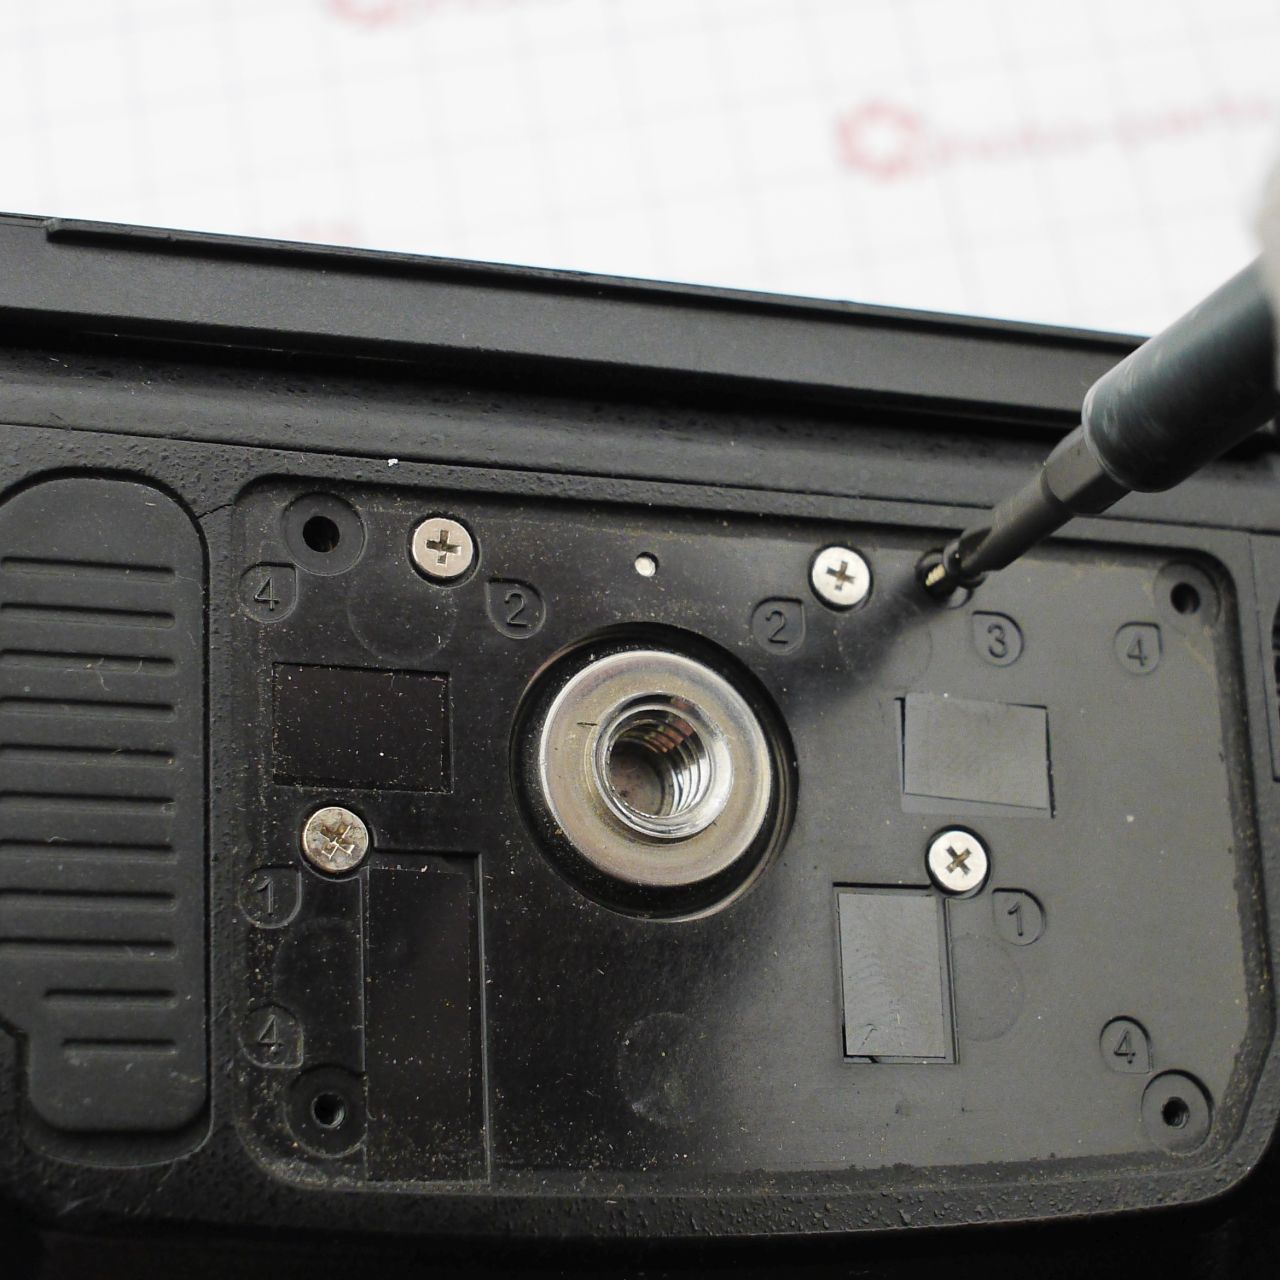
On the bottom panel, remove the marked screws and the nameplate - there's another screw hidden underneath:
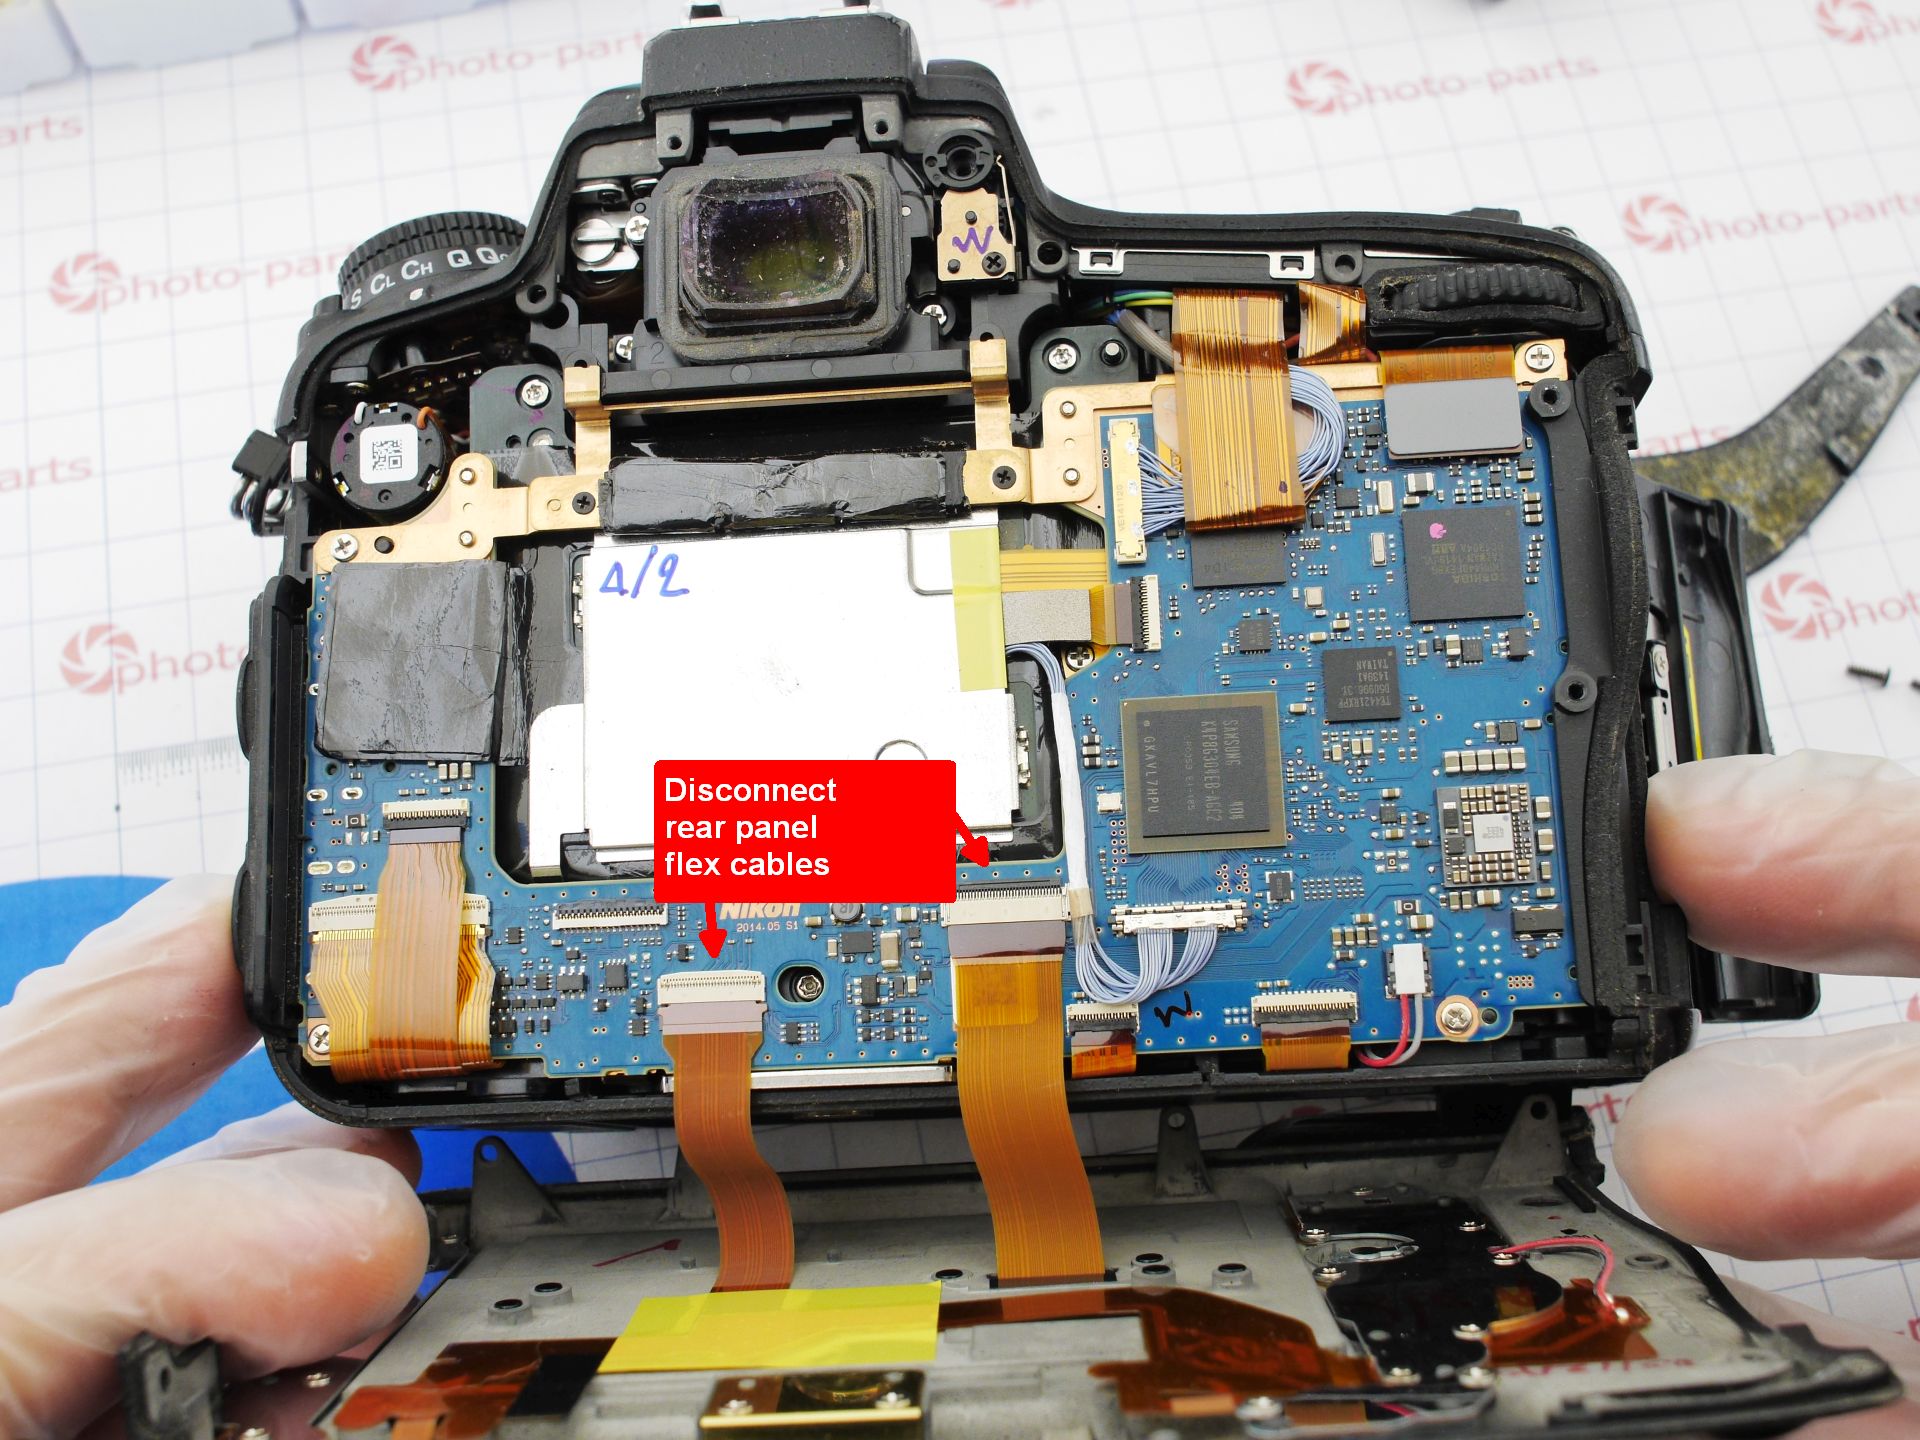
Carefully pry the rear panel along the edges, but don't pull it away from the camera! The rear ribbon cables are so short that they can be torn off with a single careless movement!
The correct sequence: lift the panel just a few millimeters, then tilt it back and down while constantly watching cable tension.
It's best to disconnect the rear panel right away. Needless to say - the battery must be removed before any disassembly.
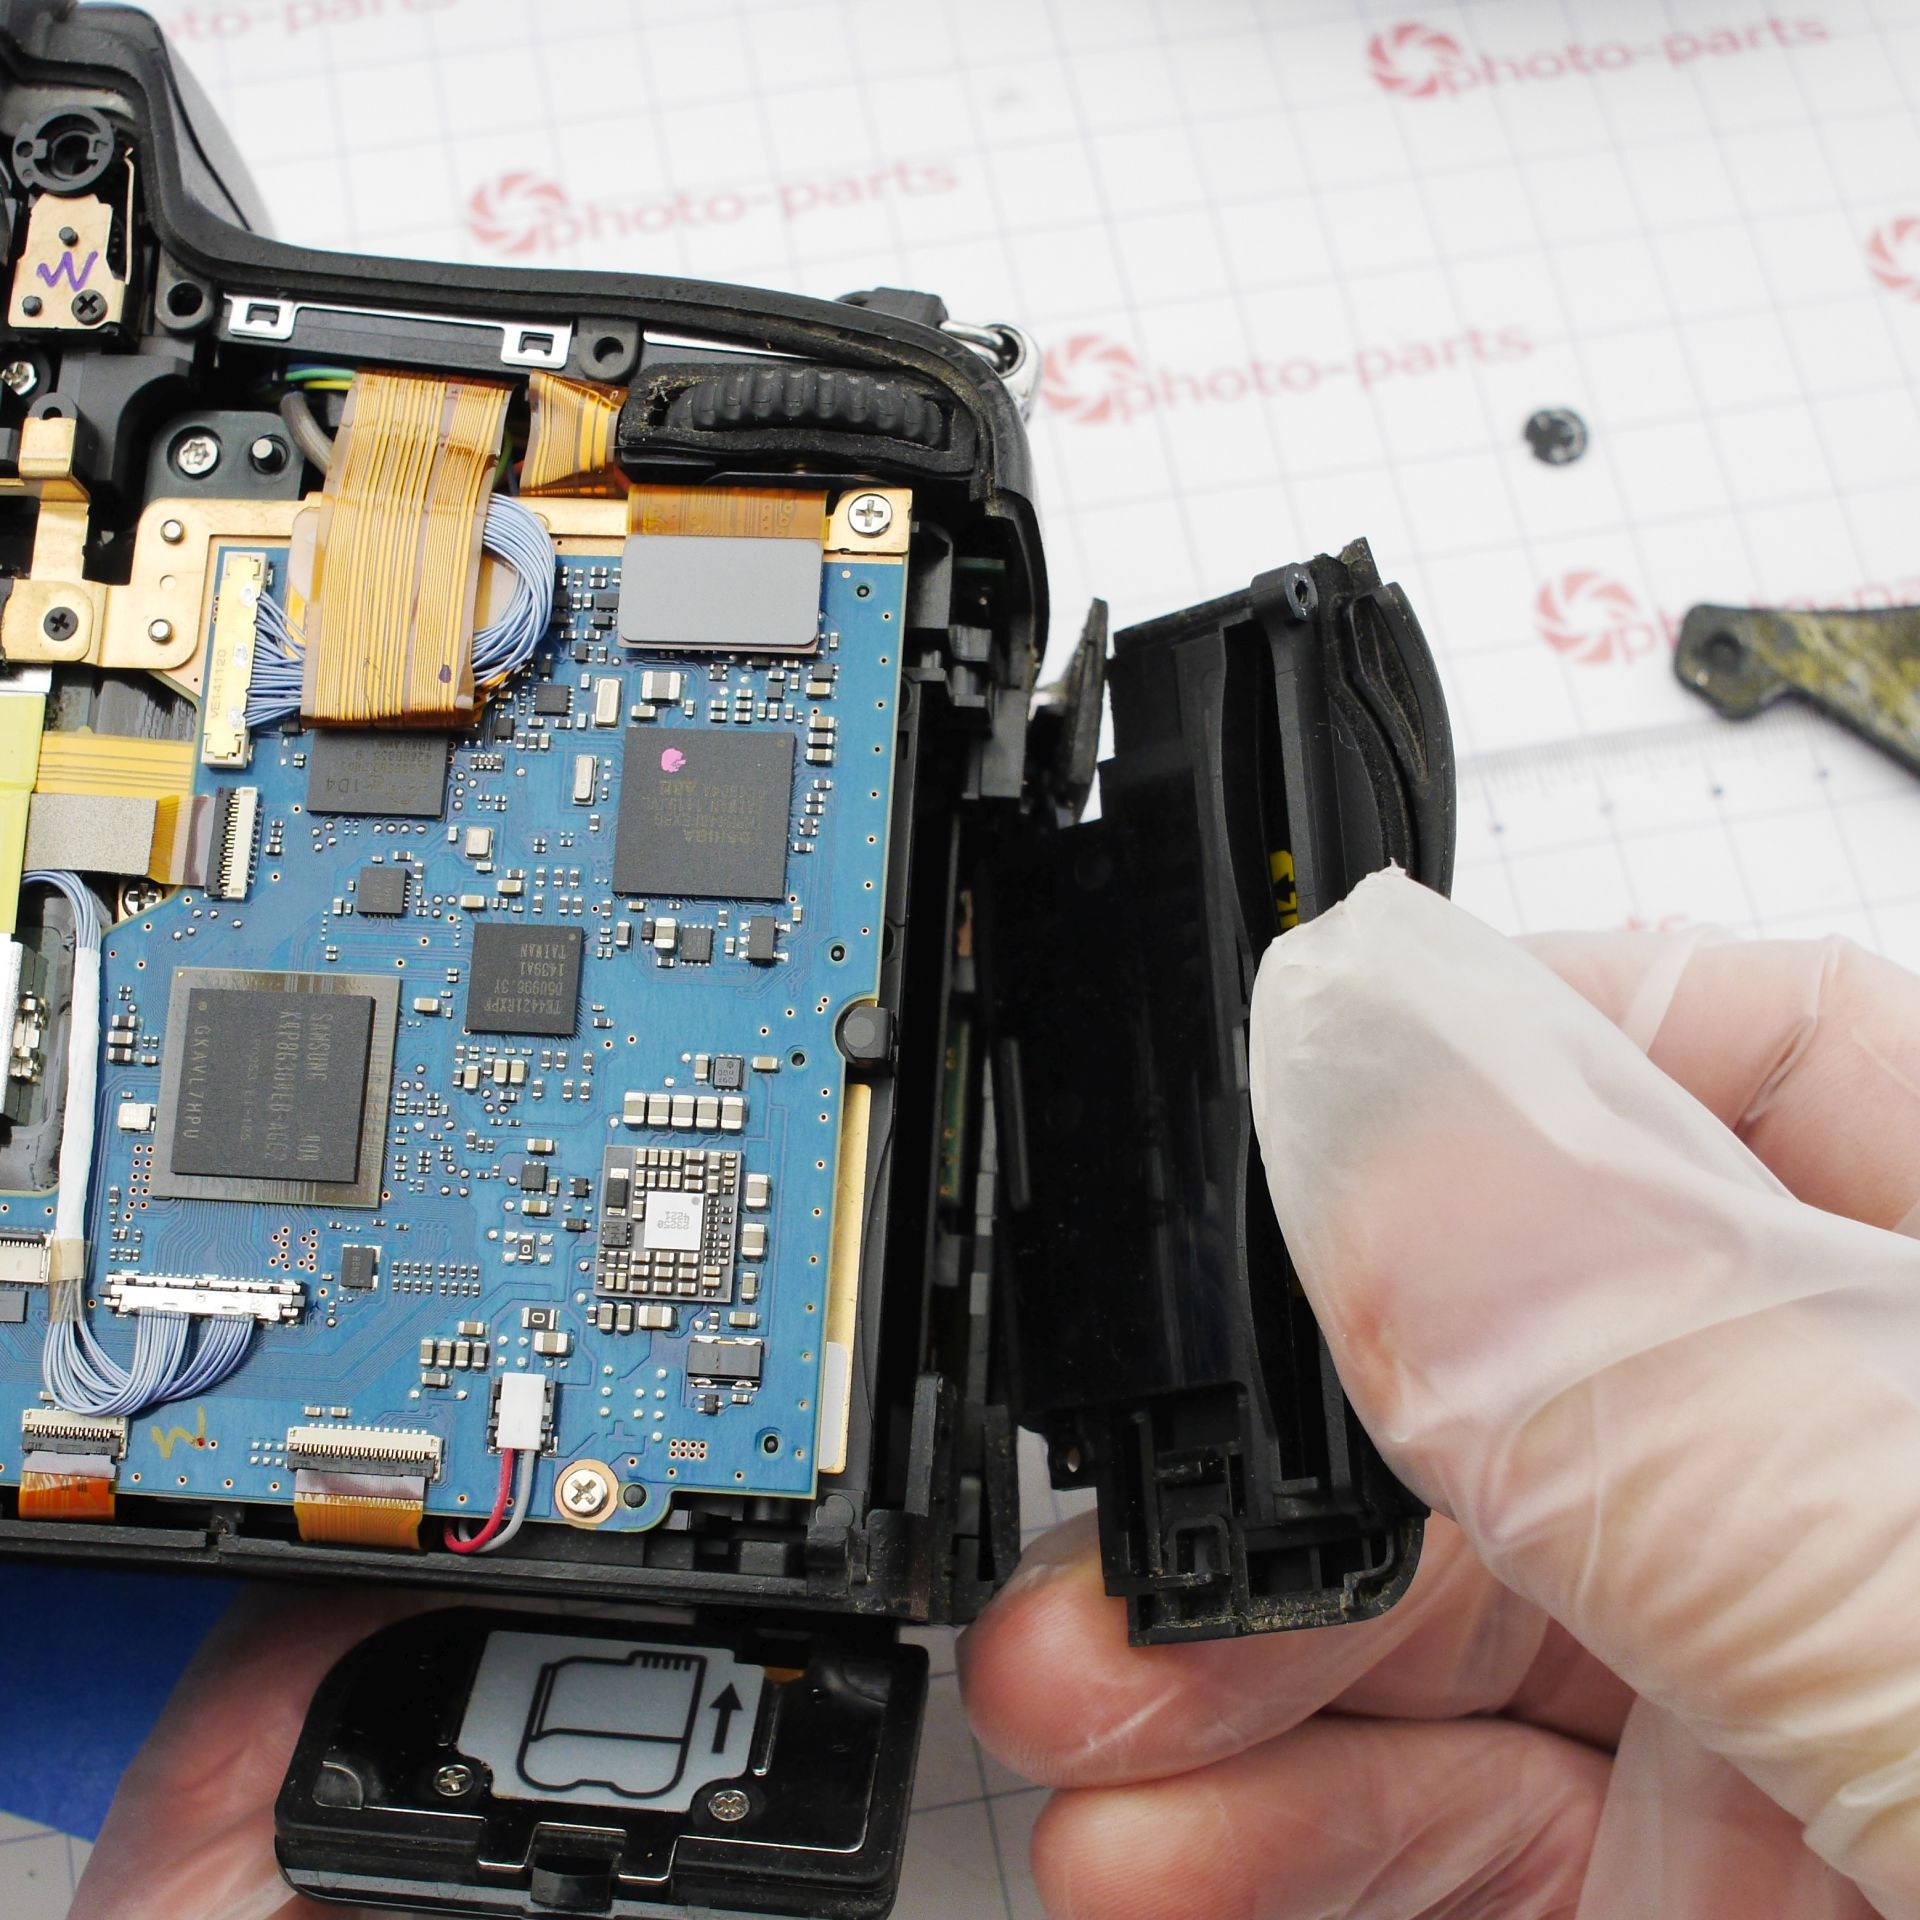
The memory card compartment cover blocks access to the board - remove it:
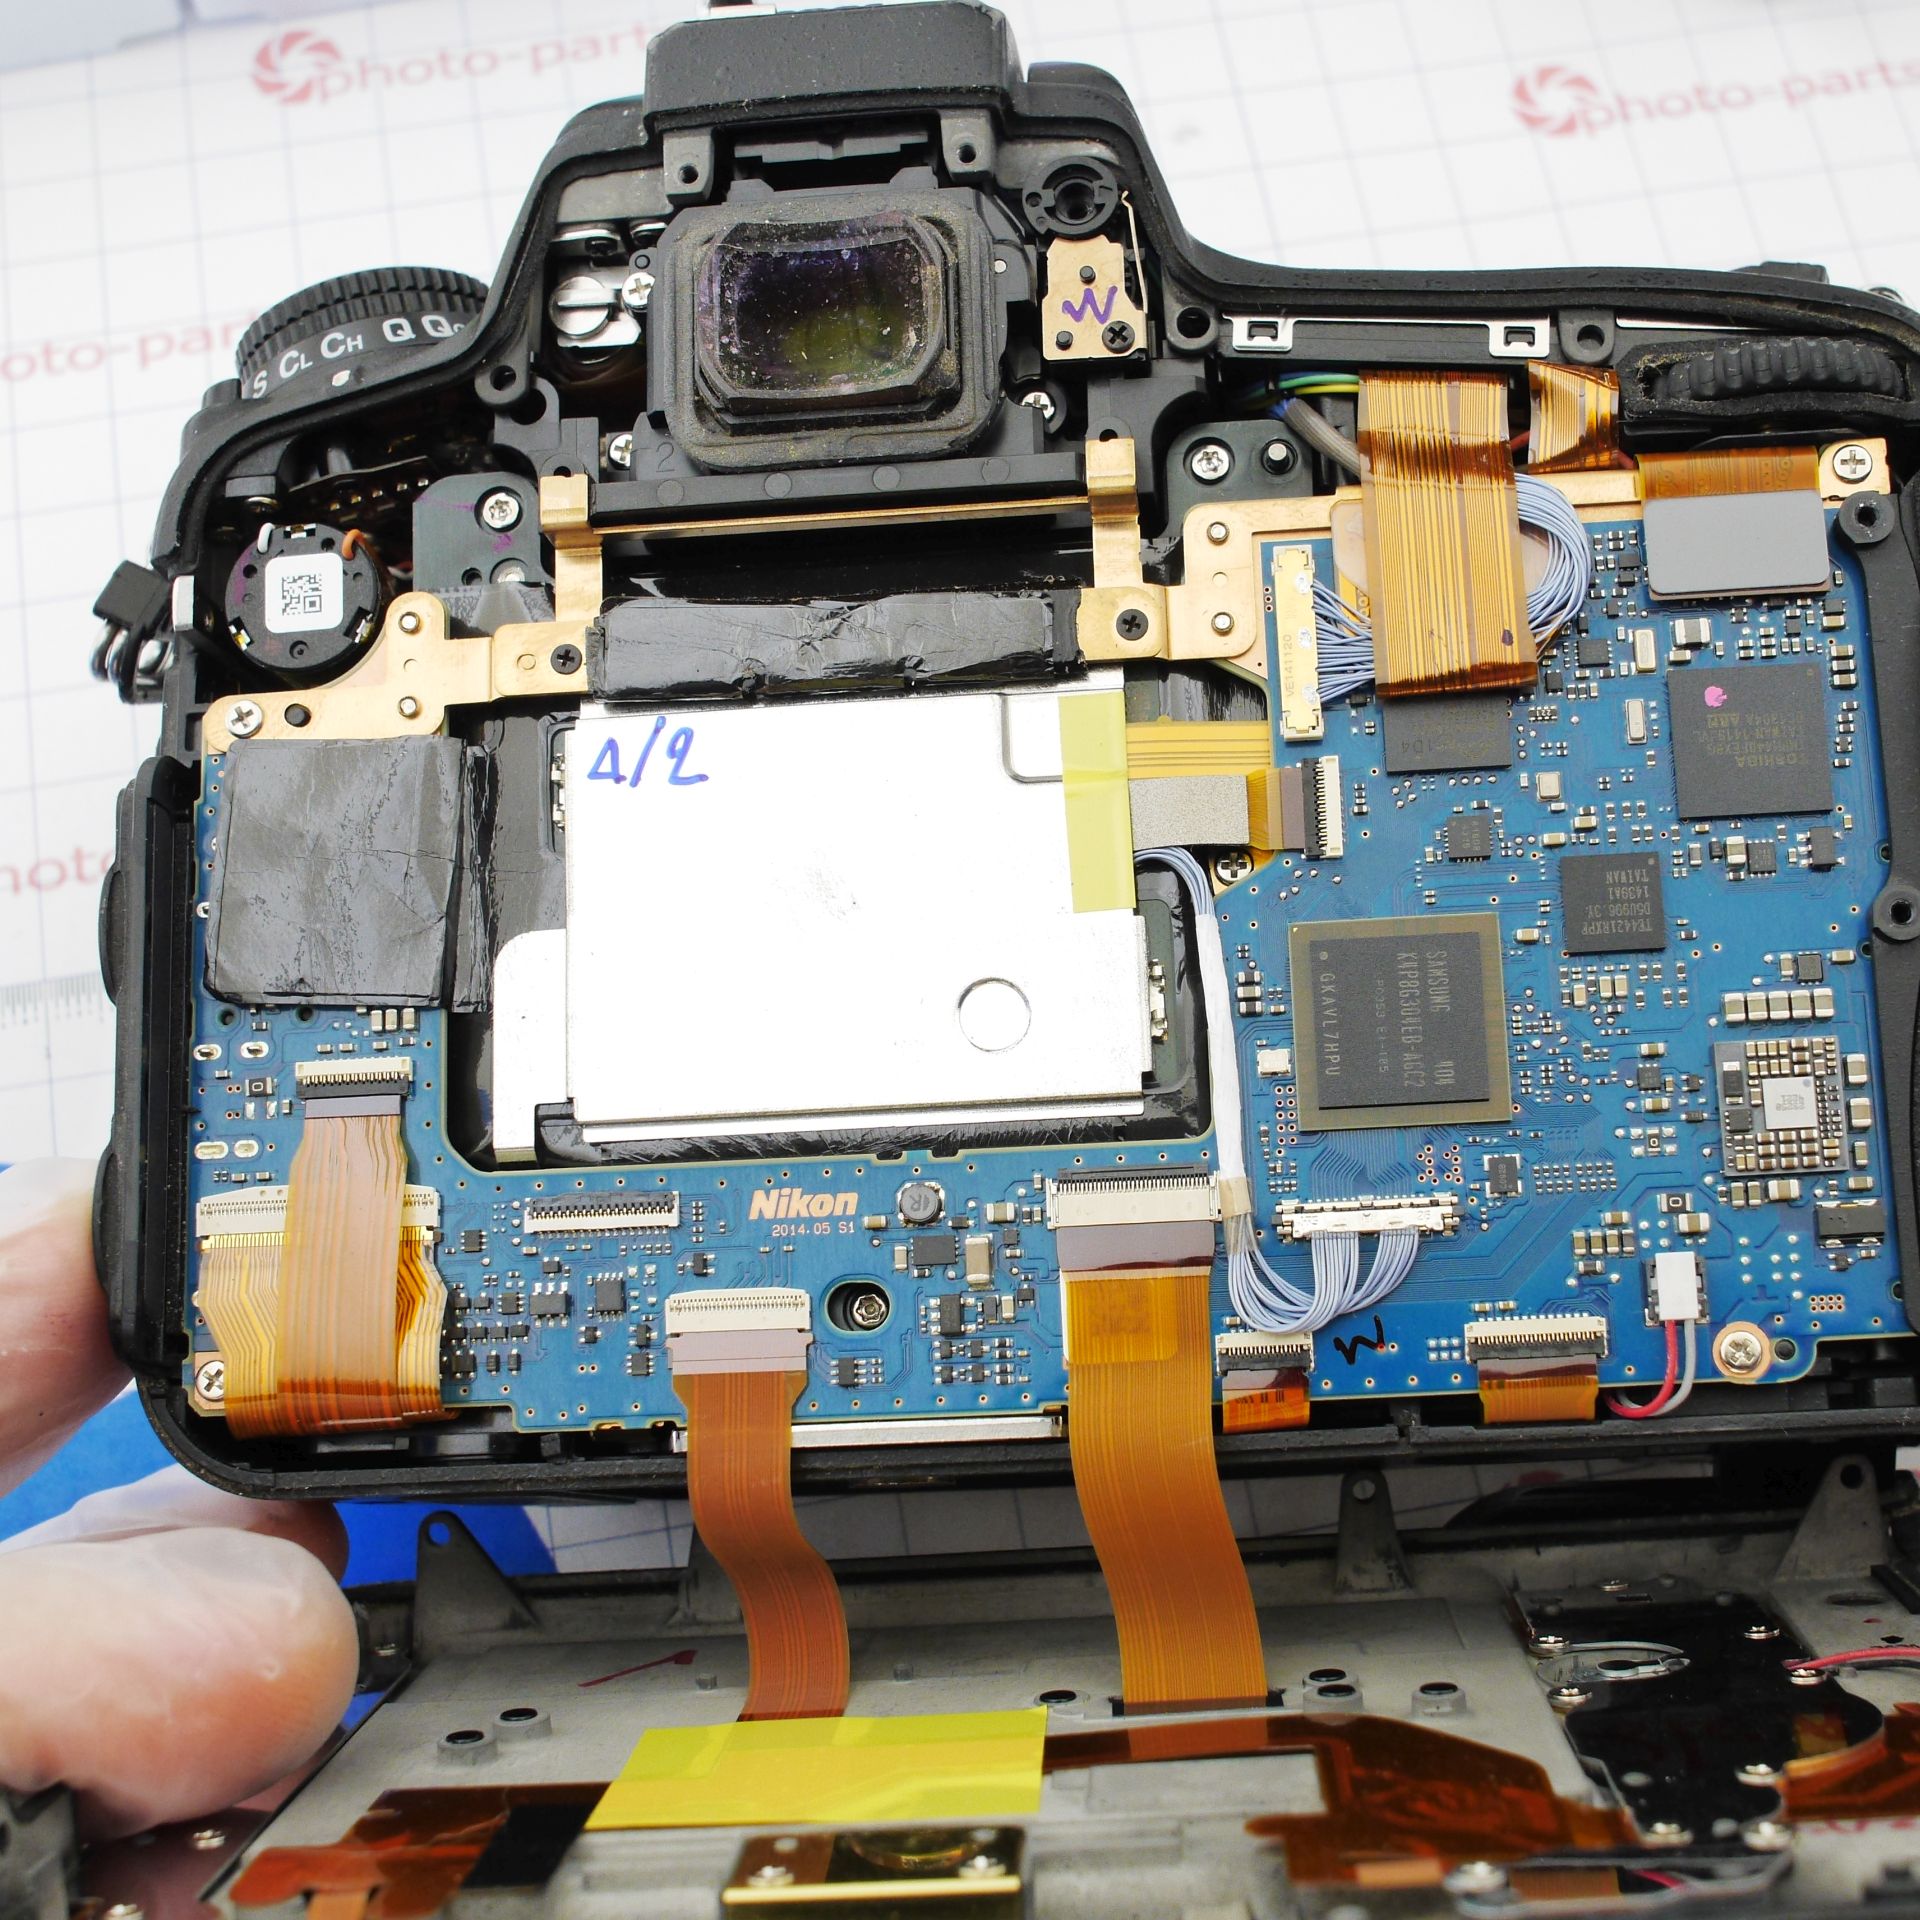
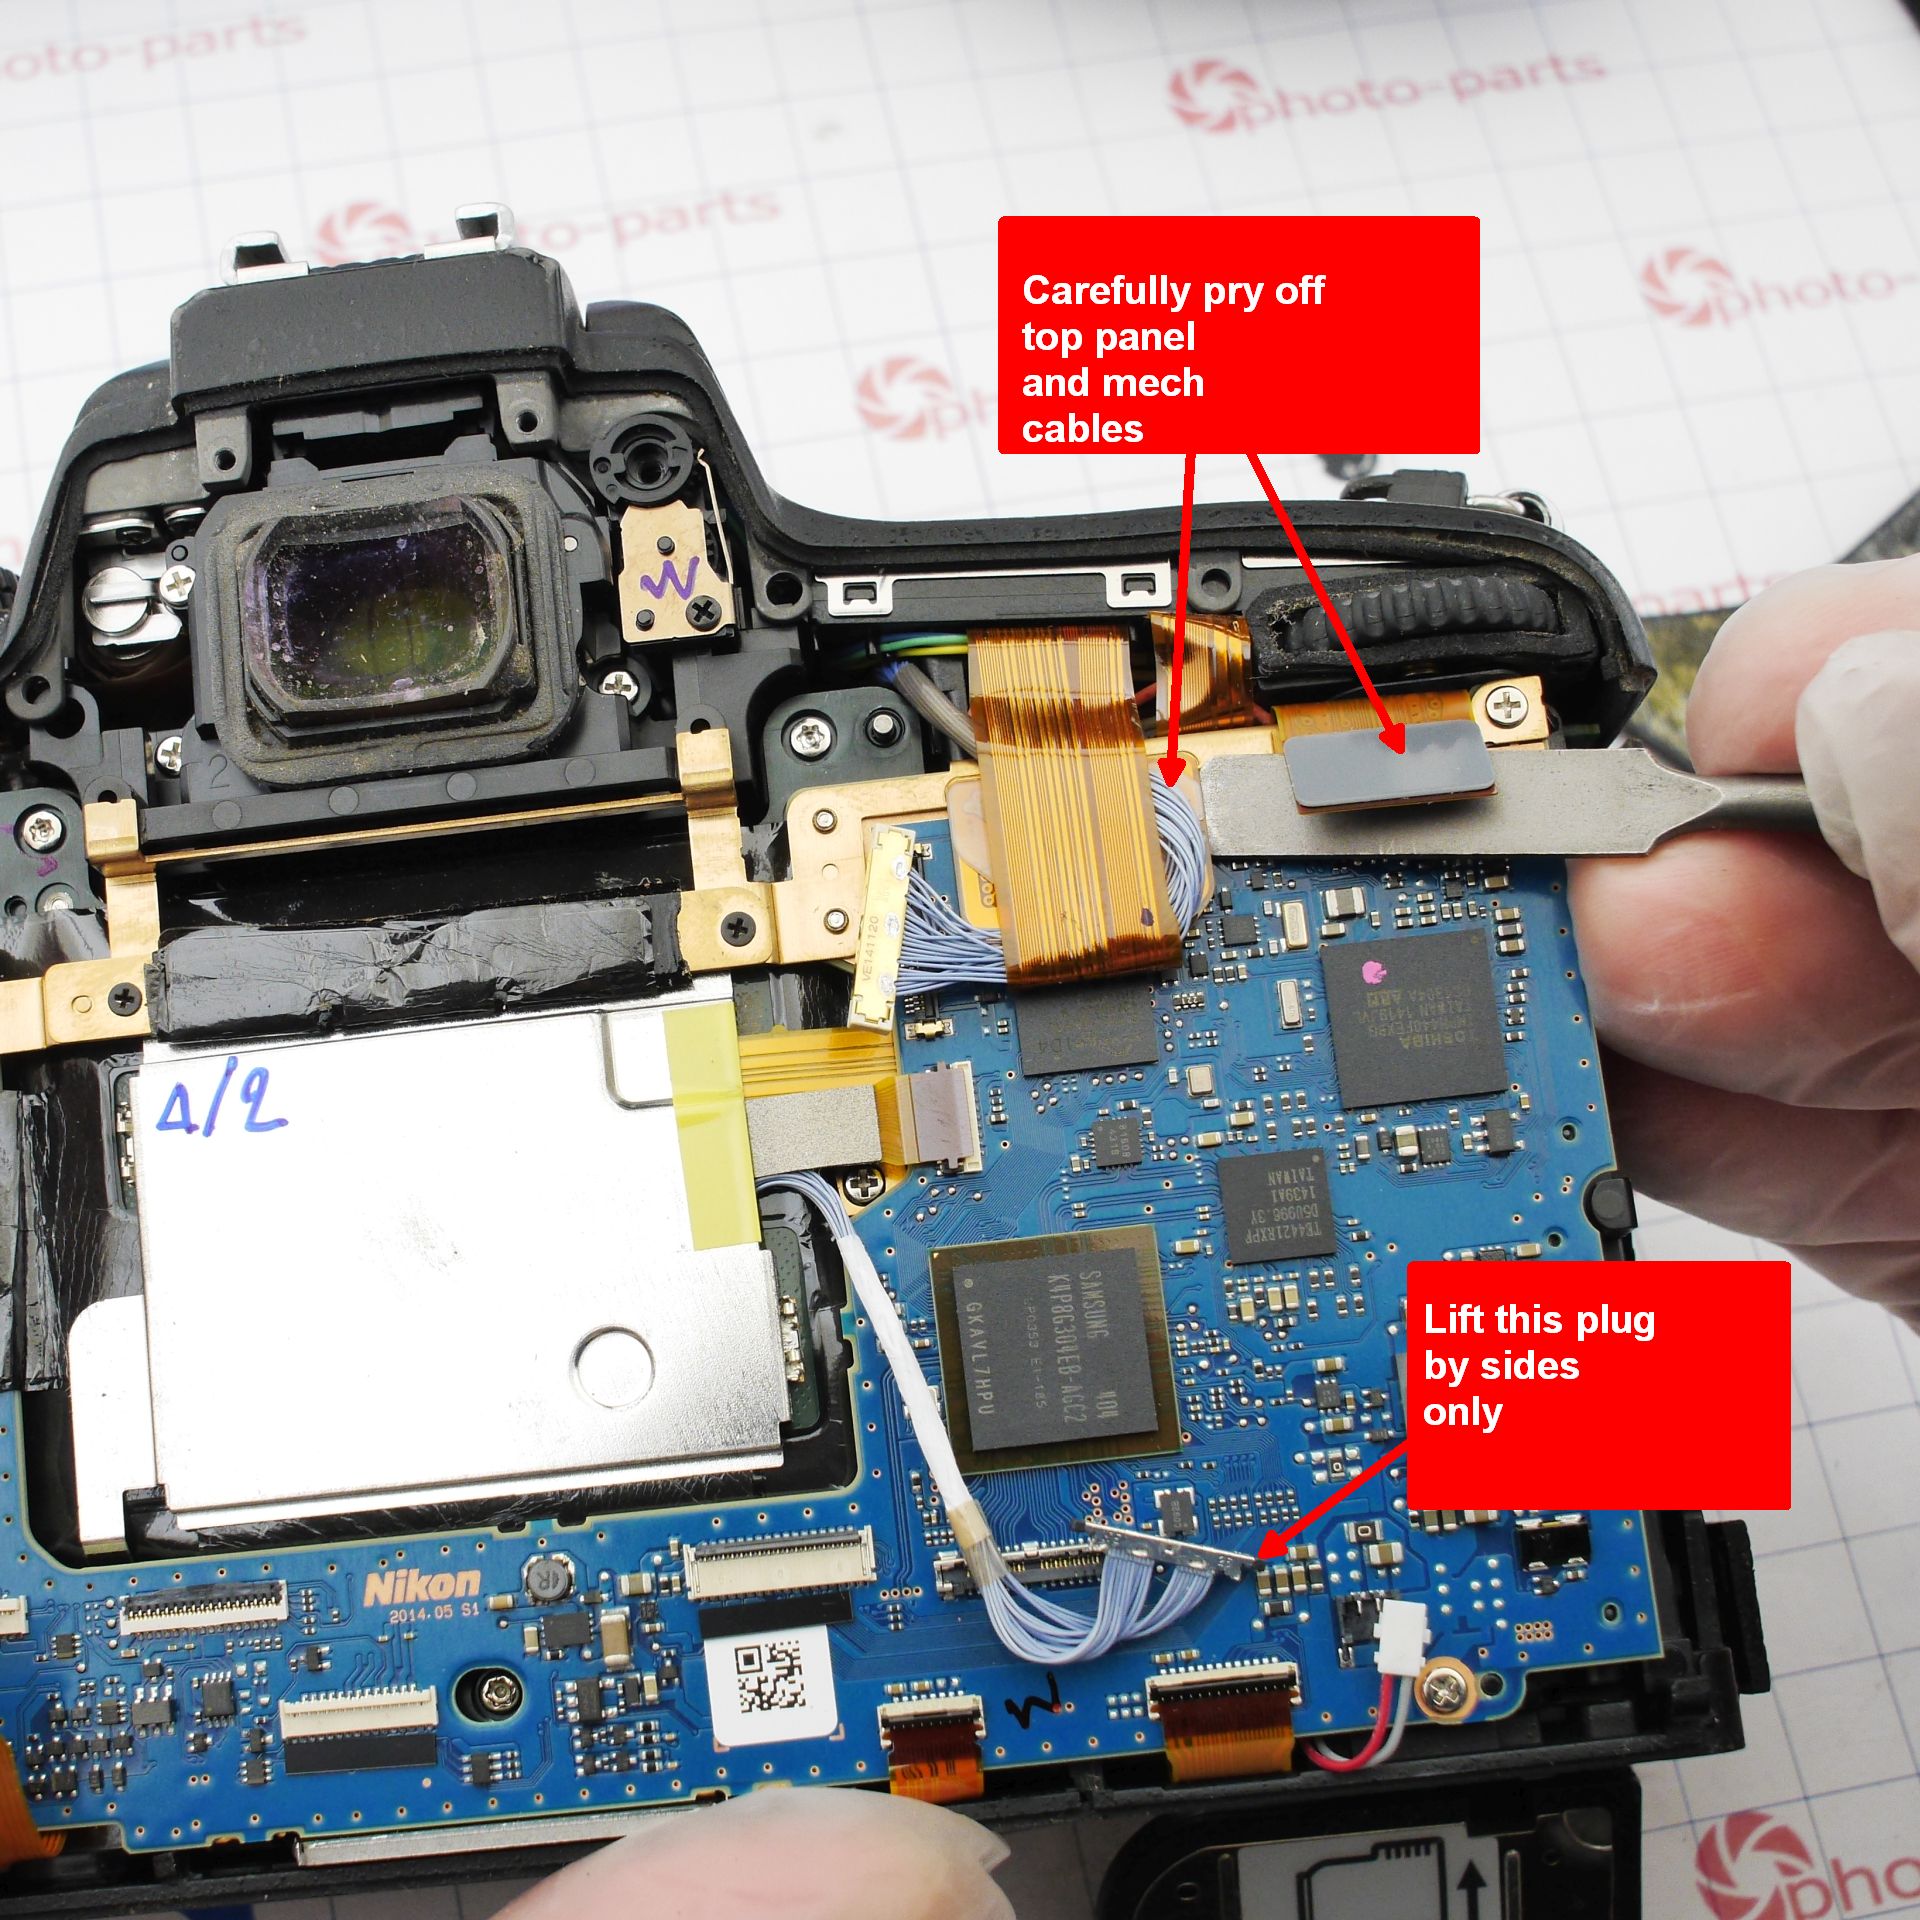
To remove the main board, disconnect all cables and flexes attached to it. And here come the details: the multi-core cable from the sensor is very fragile and easy to damage if you pull the connector by the wires or try to lift it from that side - it will be ruined. Always pry it gently from the edges with a pointed tool.
Two mezzanine-style connectors in the upper right corner are also tricky - pulling on the flex directly can tear the connector off the board (yes, that happens). The correct way is to slide a flat tool under the center of the connector and pop it off.
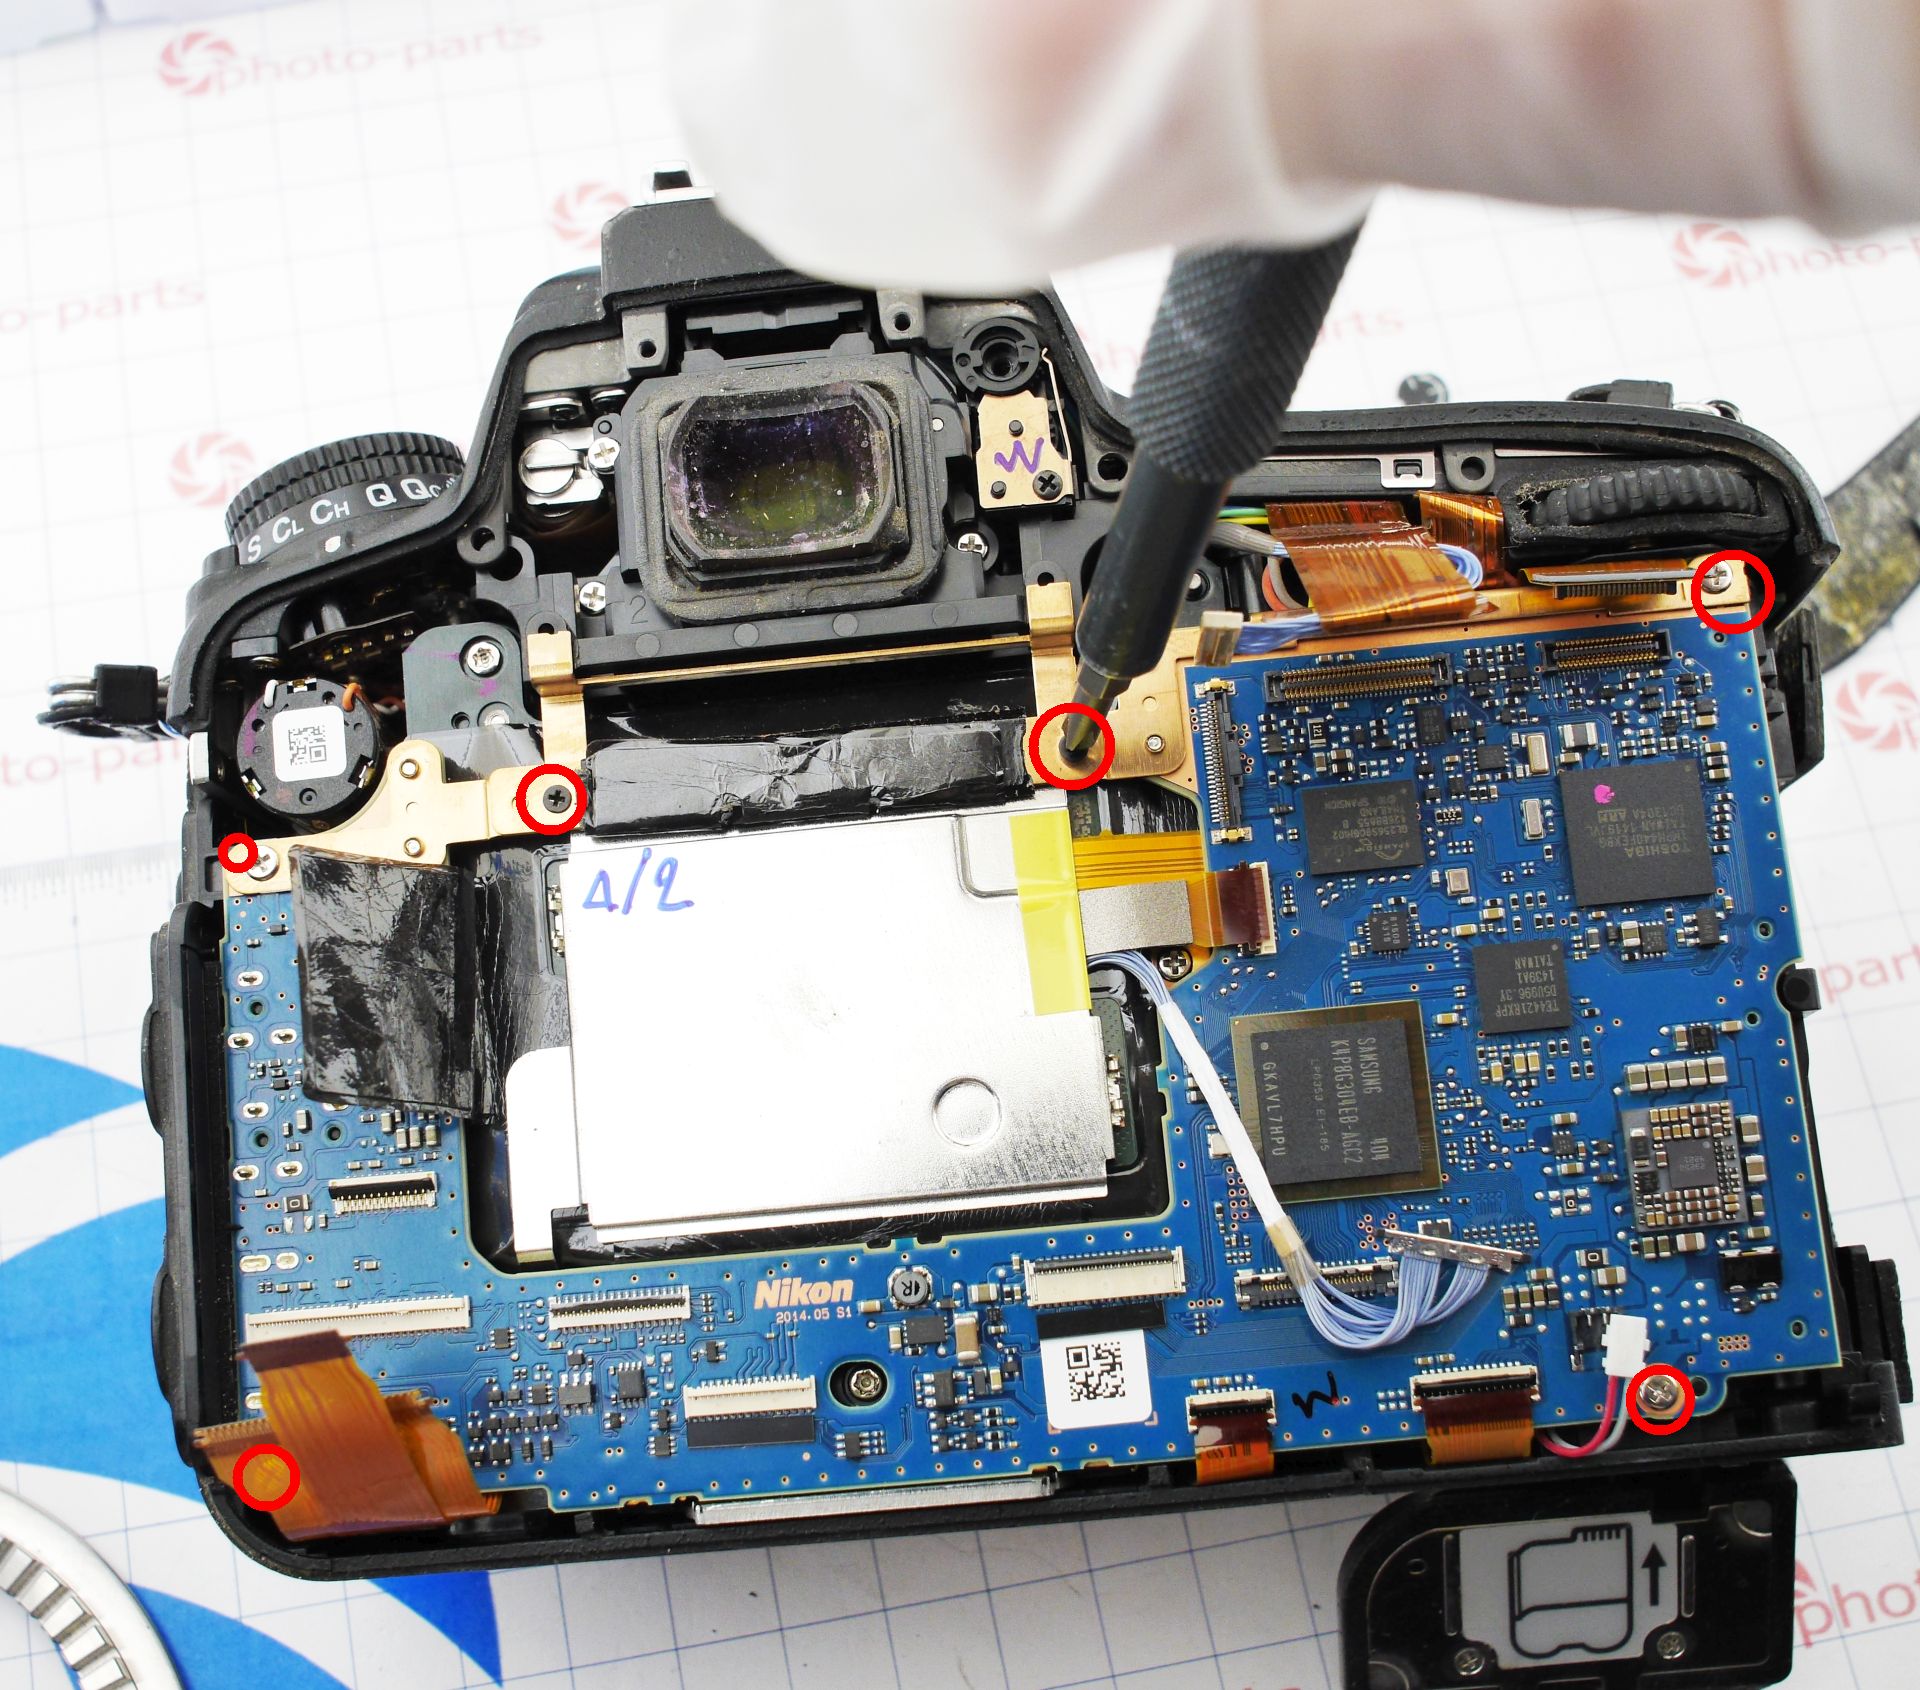
After disconnecting all connectors, remove four screws at the corners of the board and two more near the heat spreader plate.
The SD card slots are located on the underside of the board. On close inspection, it becomes clear what caused the failure. The culprit - the brittle plastic of modern SD cards. I've noticed many times that older cards from the 2–4 GB era survive just fine with intact, bright-blue plastic.
Newer ones, however, tend to lose corner tabs or bridges between contacts, and those tiny fragments end up inside the reader mechanism, breaking it. Frustrating!
Replacing the Card Slot
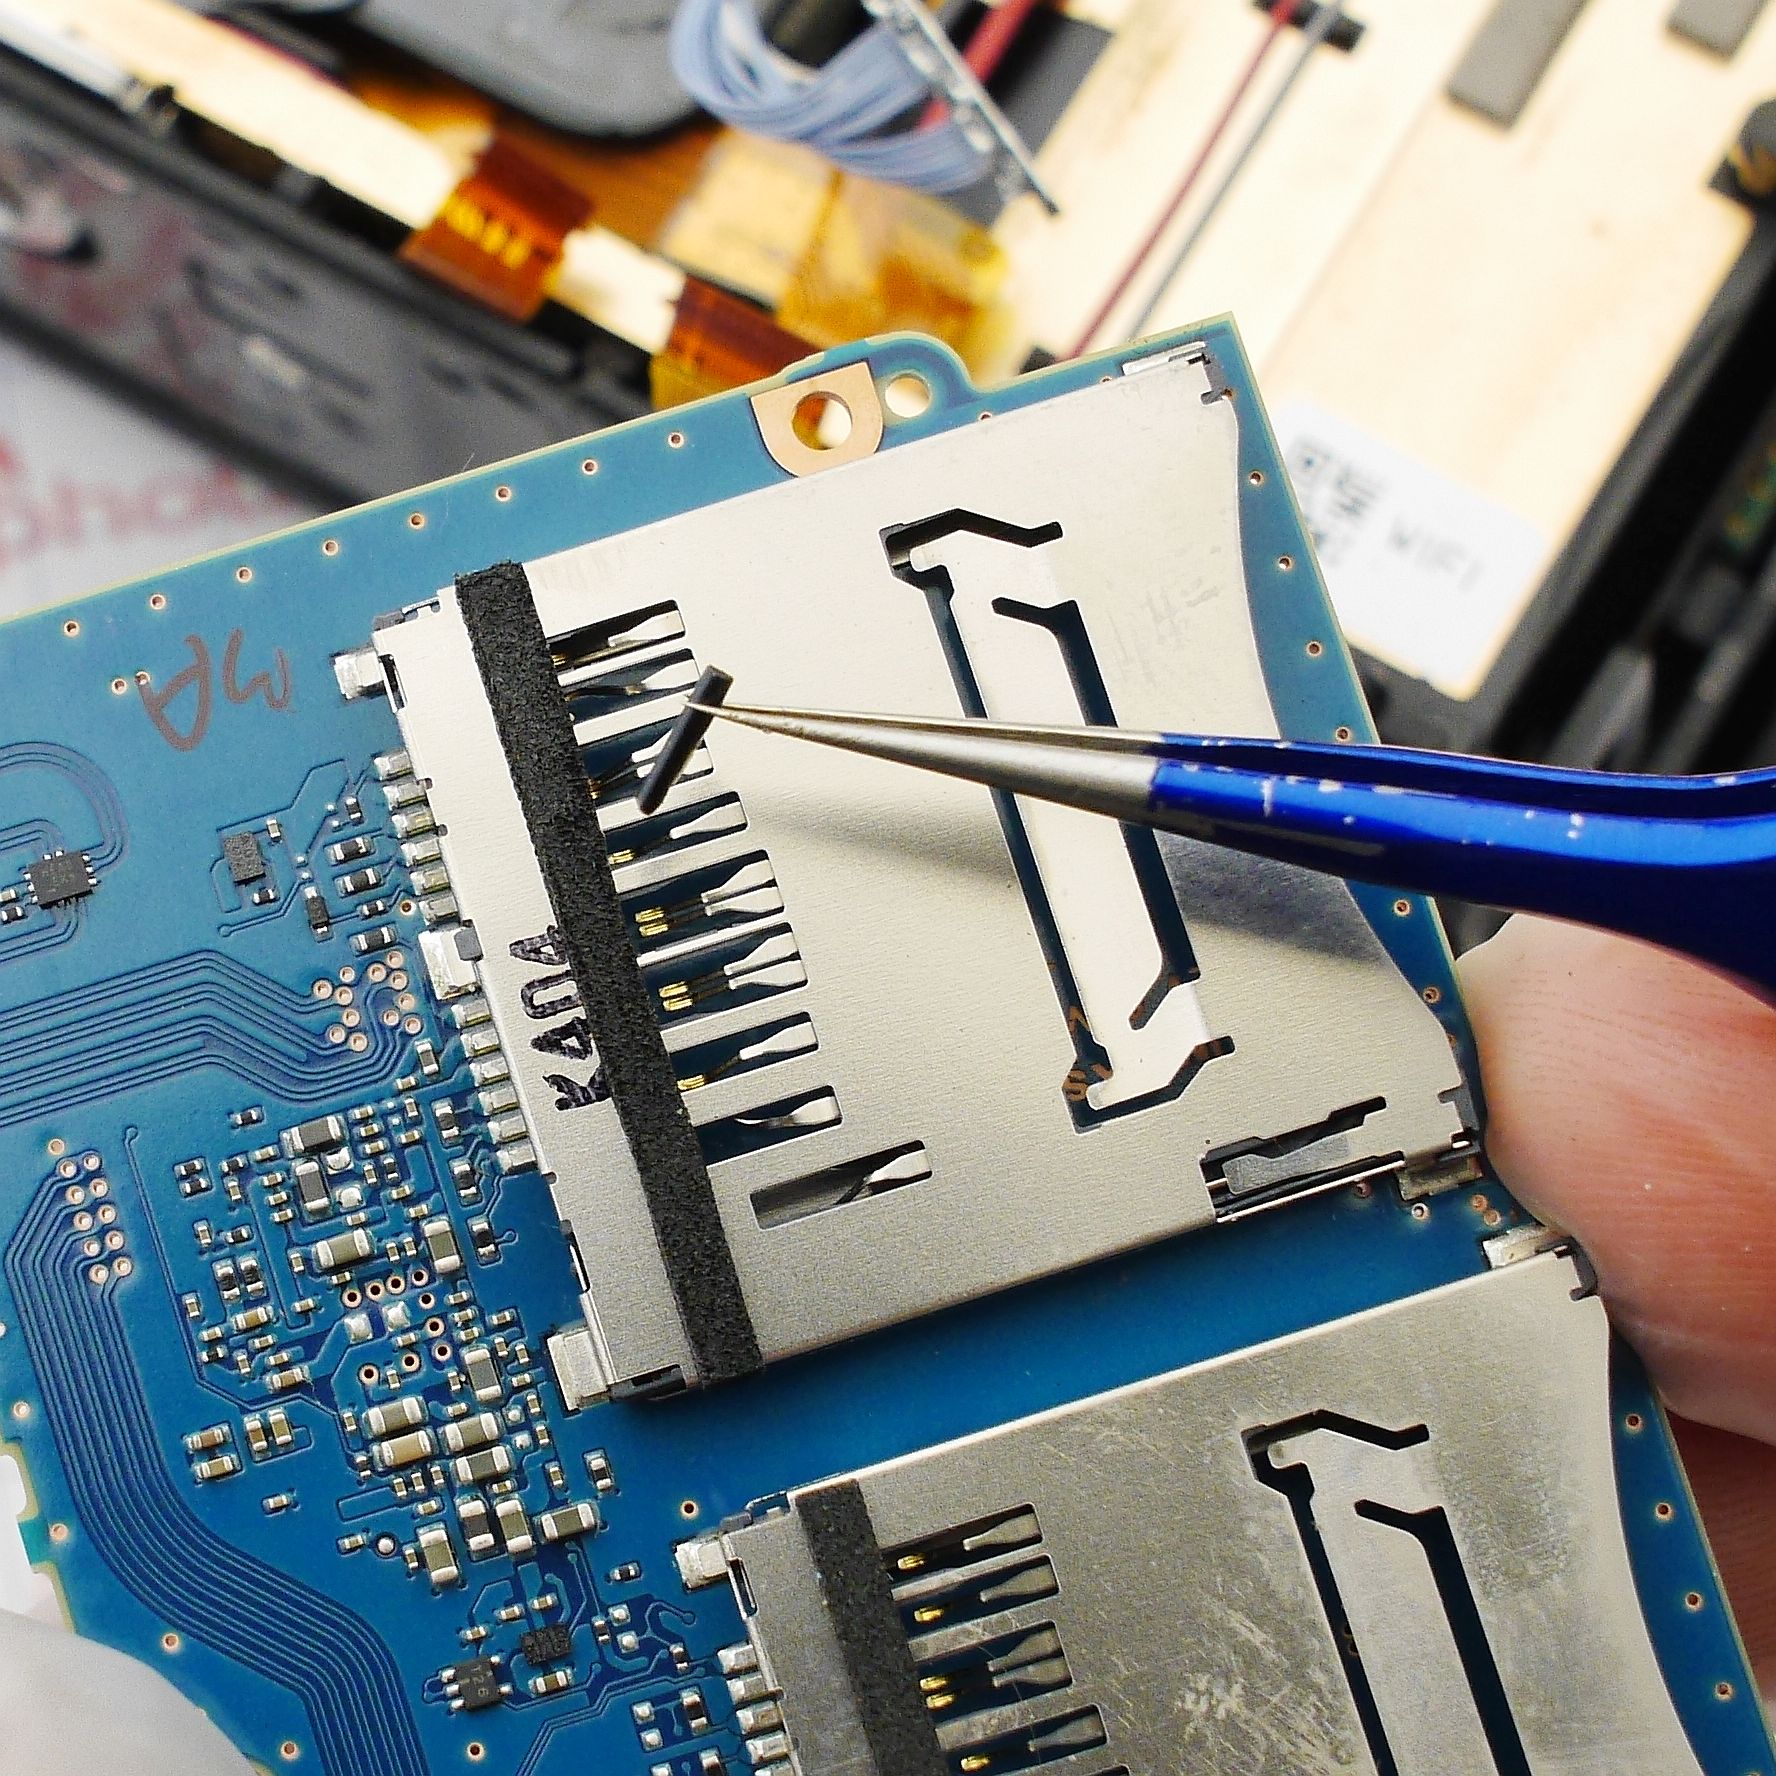
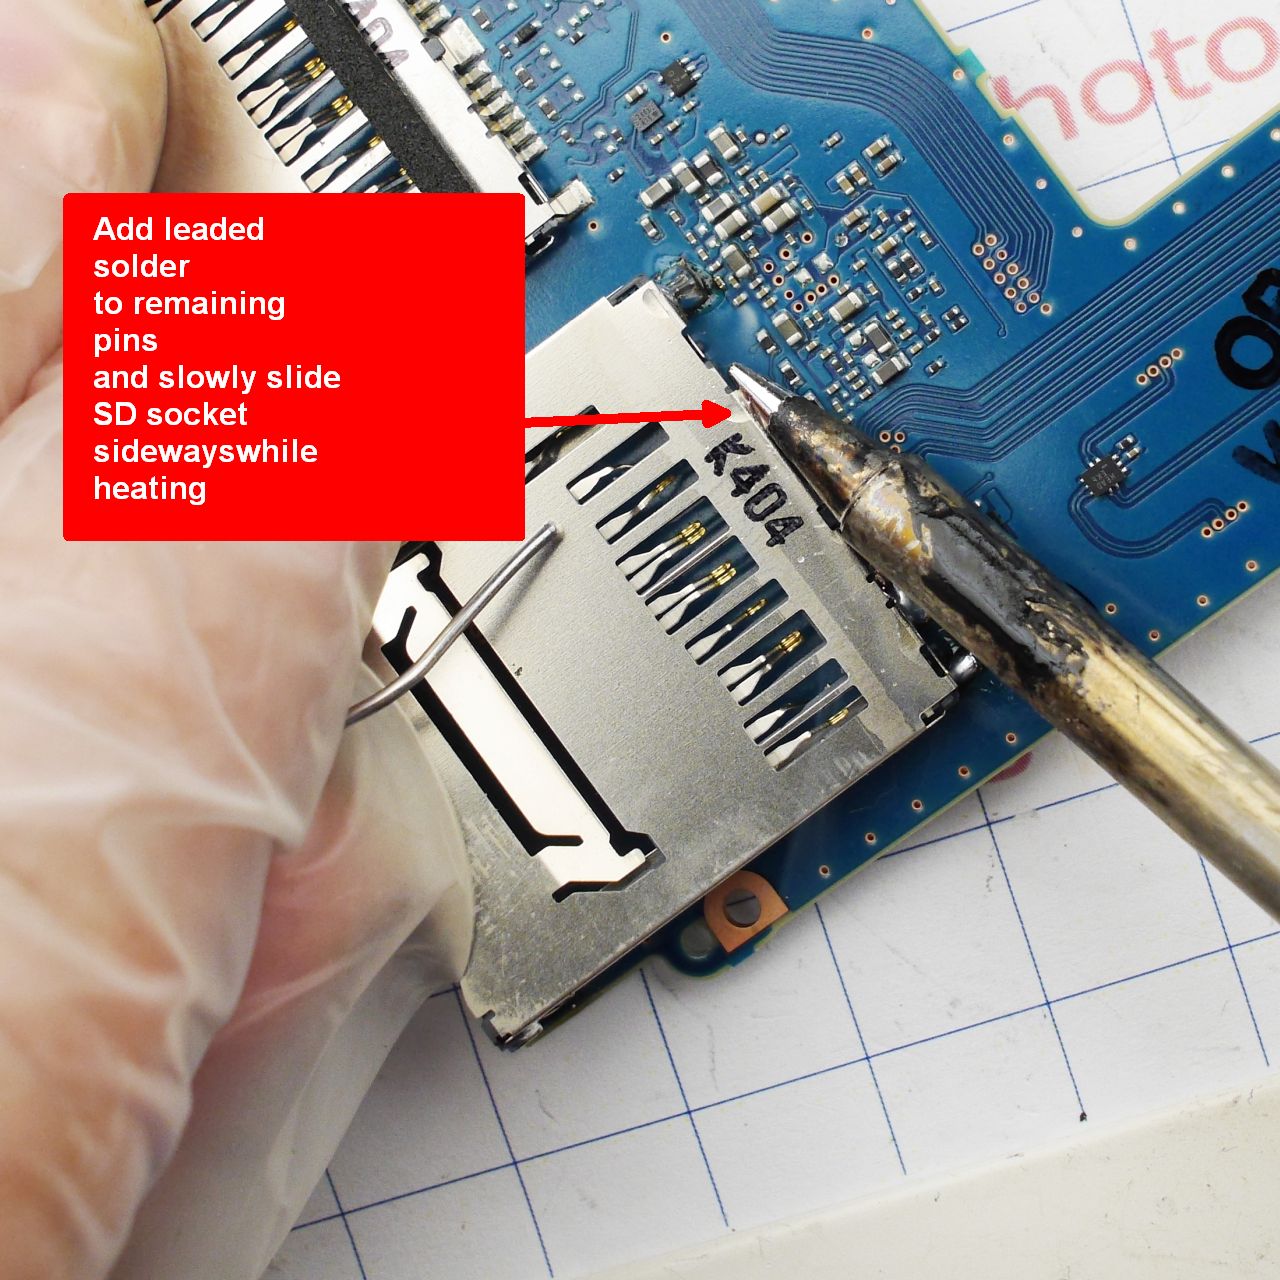
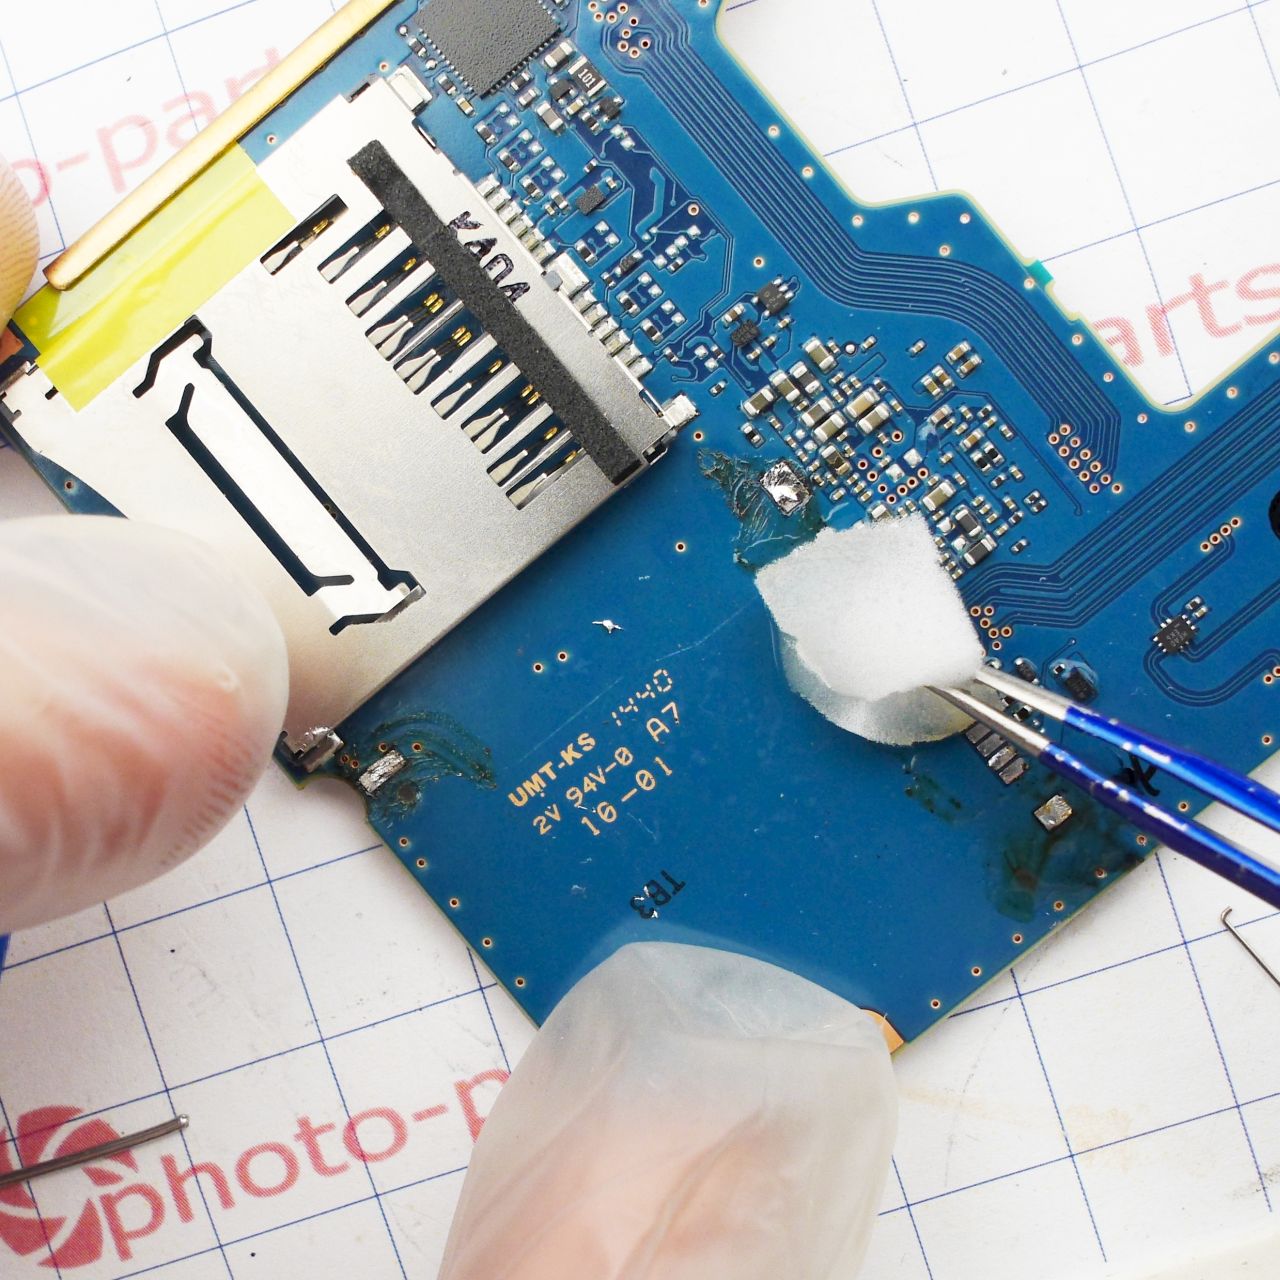
First question - where to get the part? A new SD slot can easily be found on platforms like AliExpress or eBay by searching for "Nikon D750 SD slot part". The price is around $10 - perfectly reasonable. I didn't want to wait, so I checked our own store's compatibility list: buy Nikon D750 card slot, compatibility - and happily discovered that the same reader is used in the Canon 70D, a dead board from which I conveniently had on hand. Removing the slot from the donor board is easy - all you need is to apply enough heat from the underside of the board to avoid melting the delicate plastic of the slot mechanism. I use a bottom preheater set to a very high temperature (around 170–180 °C). This isn't quite enough to melt lead-free solder, but with a quick touch of the hot-air gun from above, raising the temp by another 30 °C, the slot desolders perfectly intact: 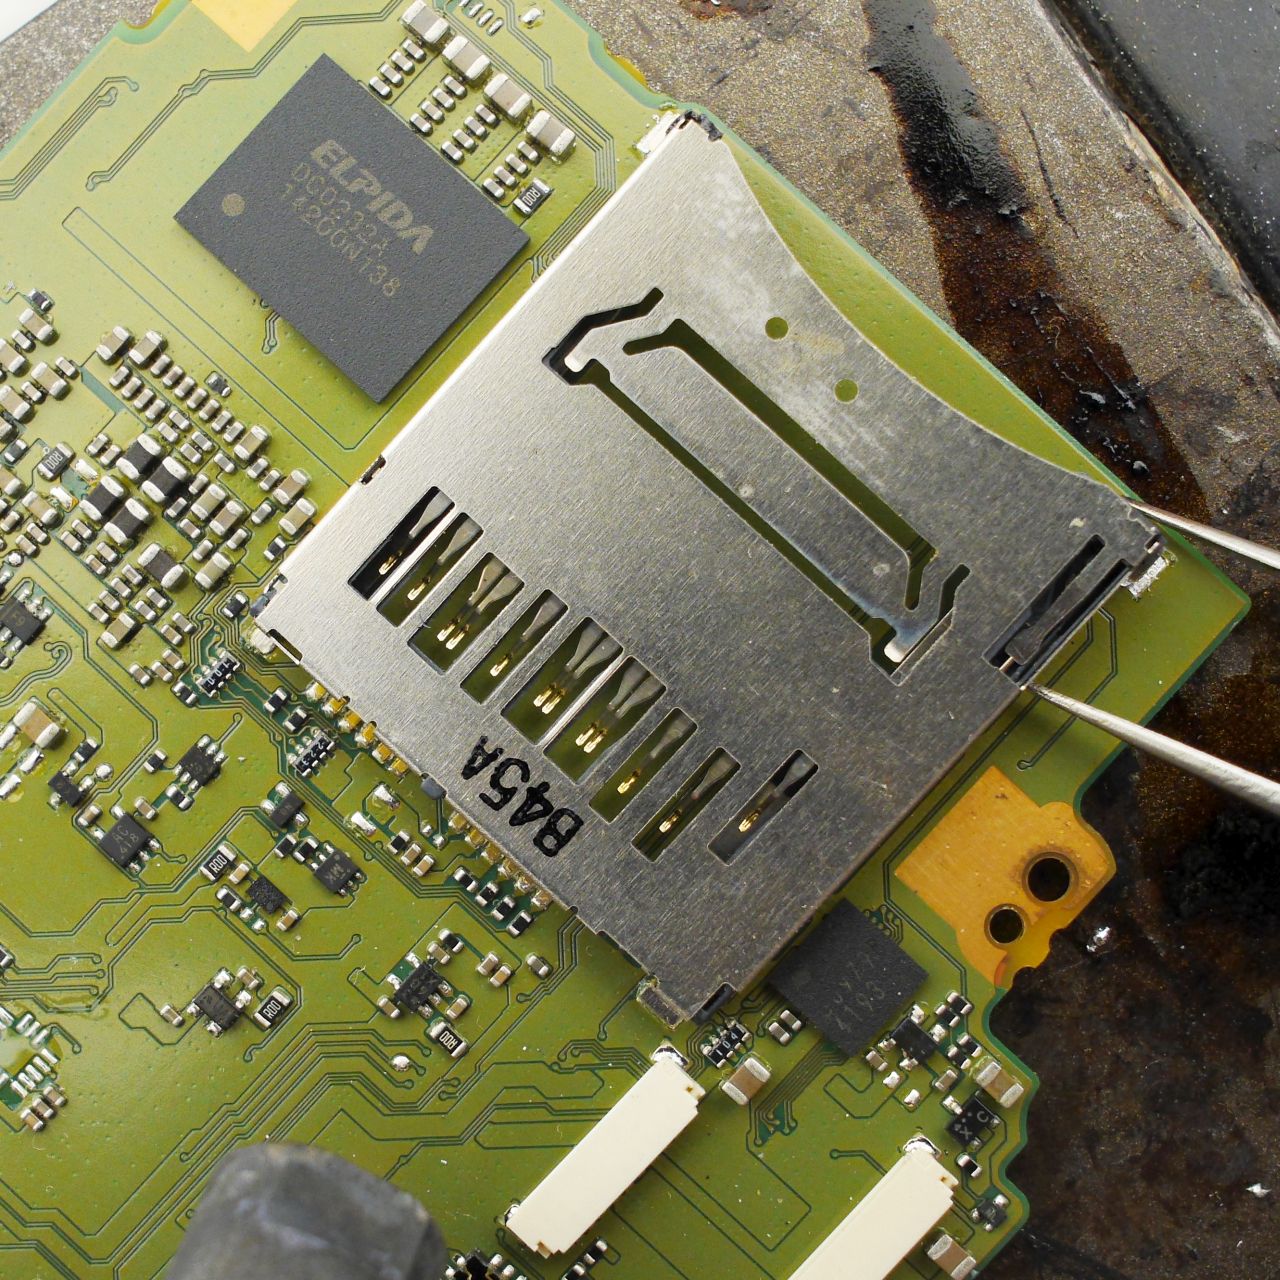 This trick doesn't always work when the goal is to keep the main camera board unharmed. So for removing the damaged slot from the Nikon D750, I used an old trusty soldering iron with a spool of leaded solder (melting point around 180 °C). First, I add plenty of solder to the "ears" of the slot at the board edge, then lift them one by one until the solder bridge breaks. Naturally, the iron must have enough power to heat the large ground planes properly. Now the slot is held only by the contact pins. Using a generous amount of lead solder, I heat all contacts at once, moving the tip from side to side. The slot can then be slowly pushed toward the edge - never pry it up or use it as a lever! That's a guaranteed way to lift pads off the PCB. Only gradual heating and gentle sliding. A bit of additional bottom heat (around 100 °C) helps as well.
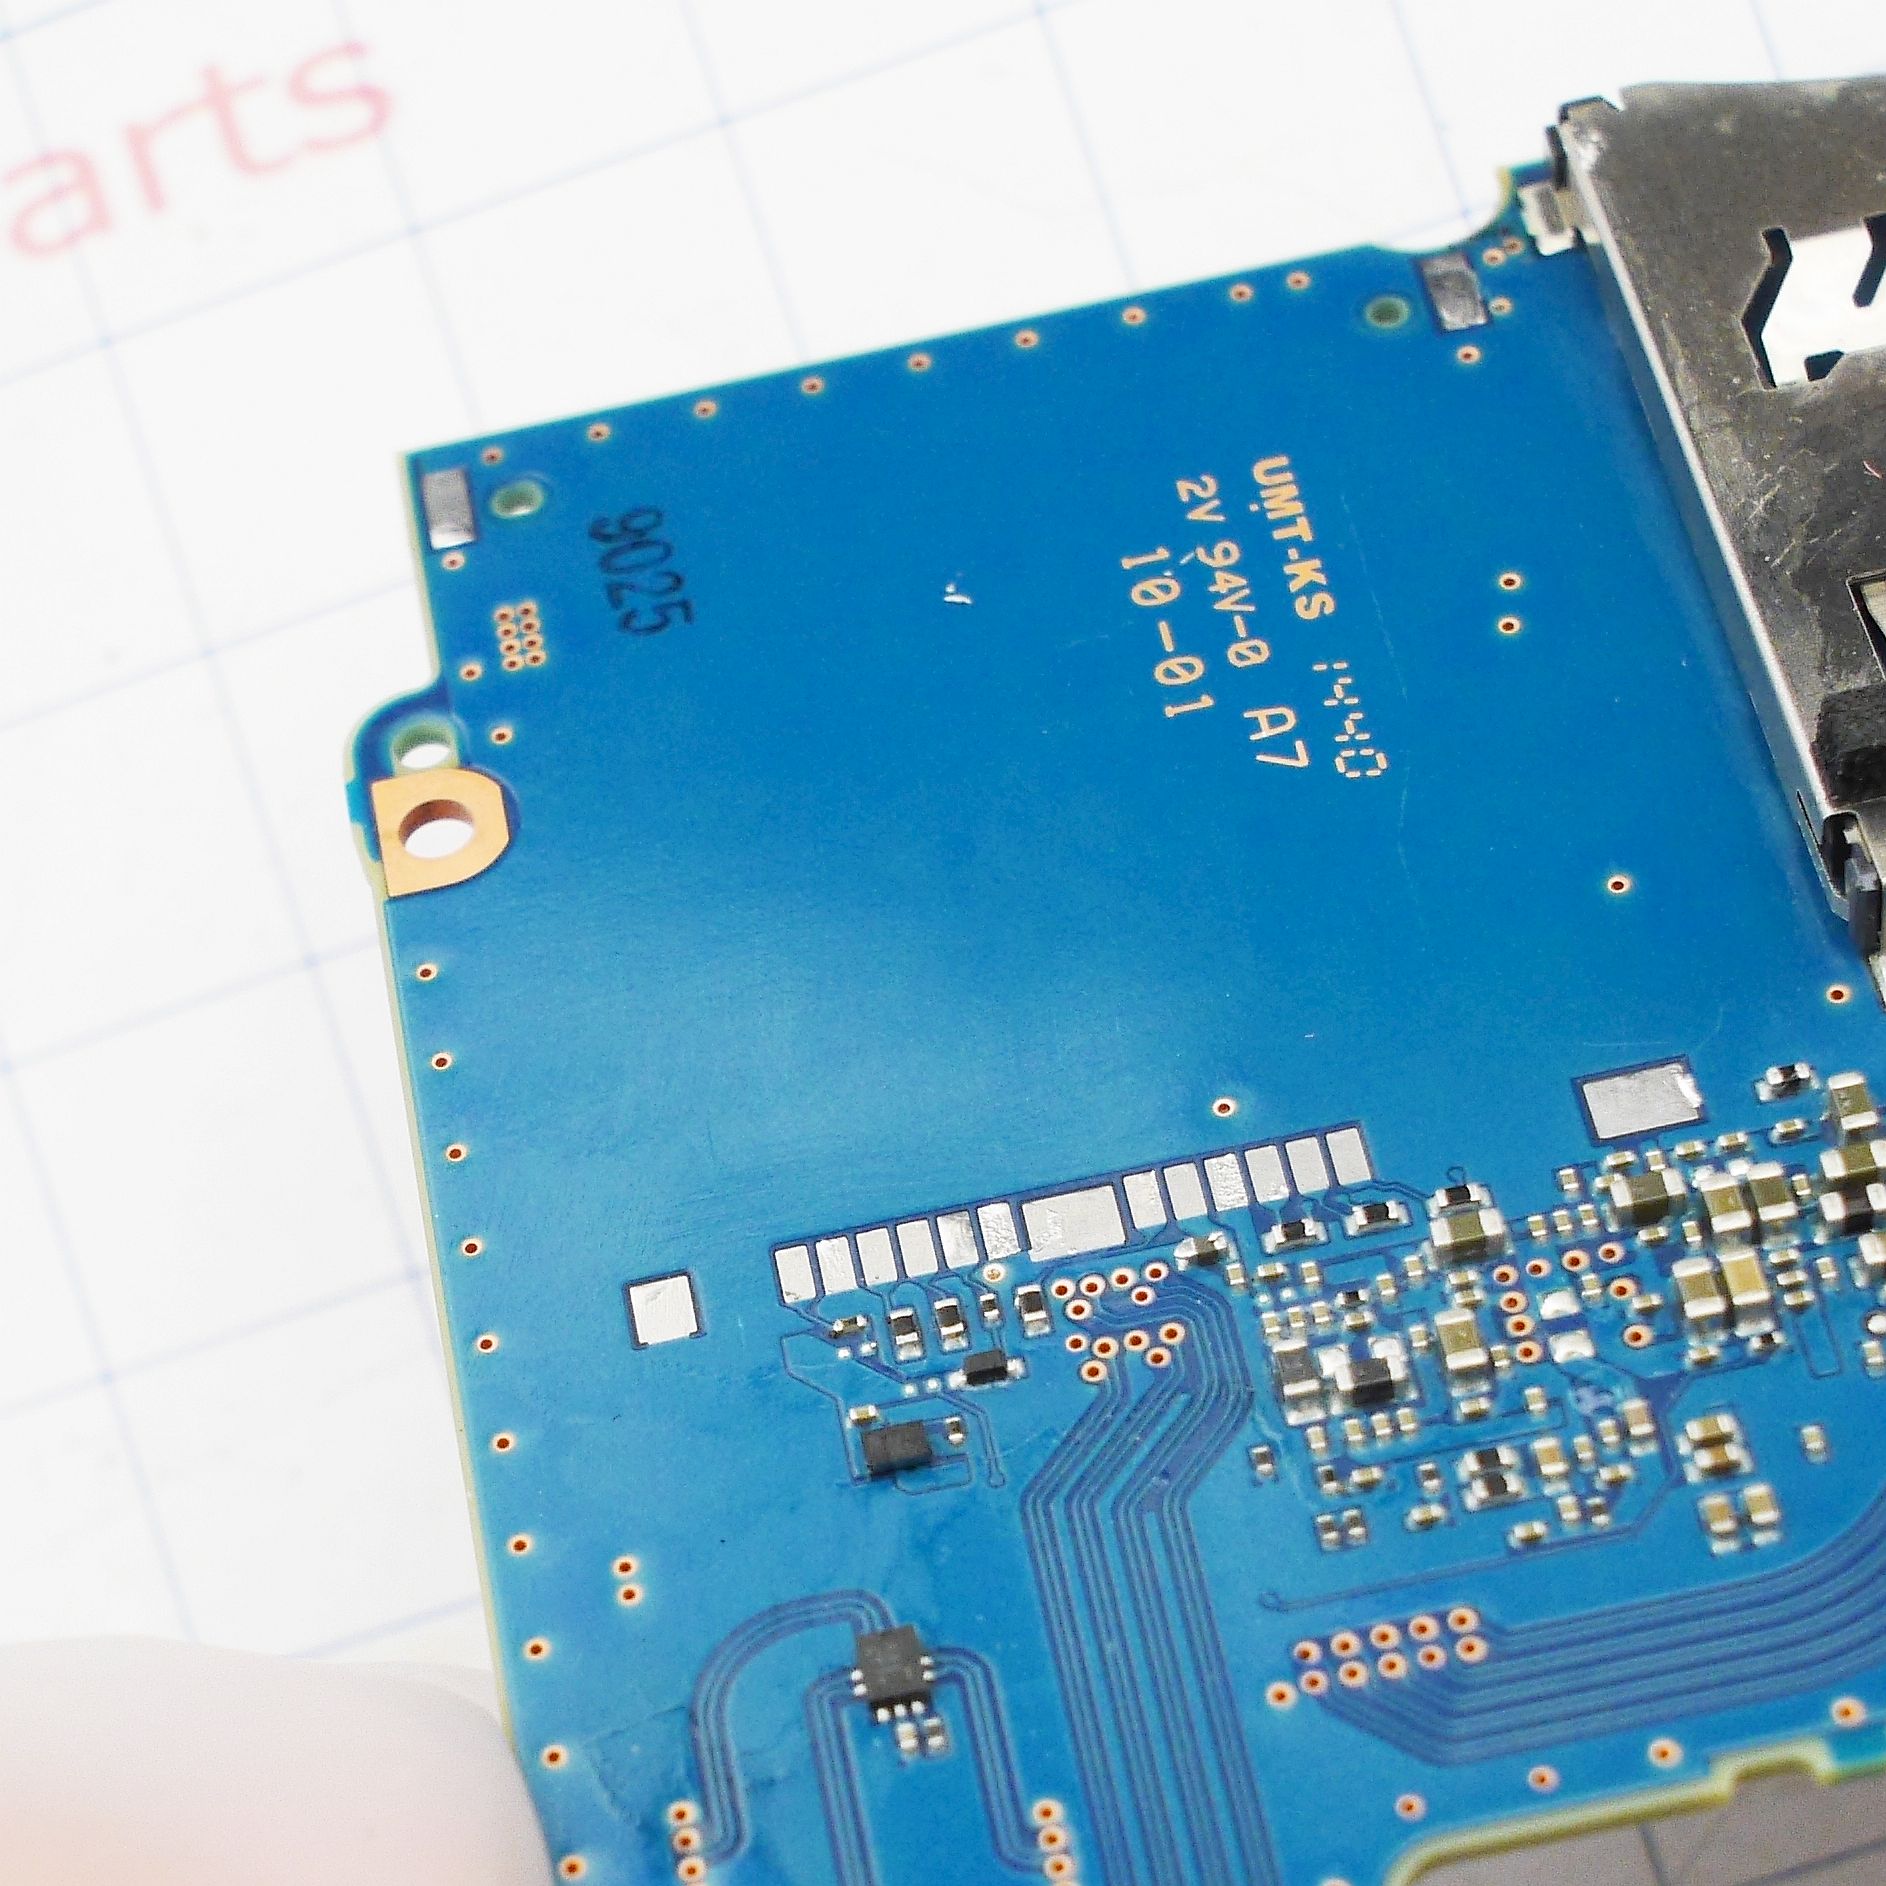
 The result - a messy "soup" of flux and solder, but with some desoldering braid, the board cleans up to a shiny finish:
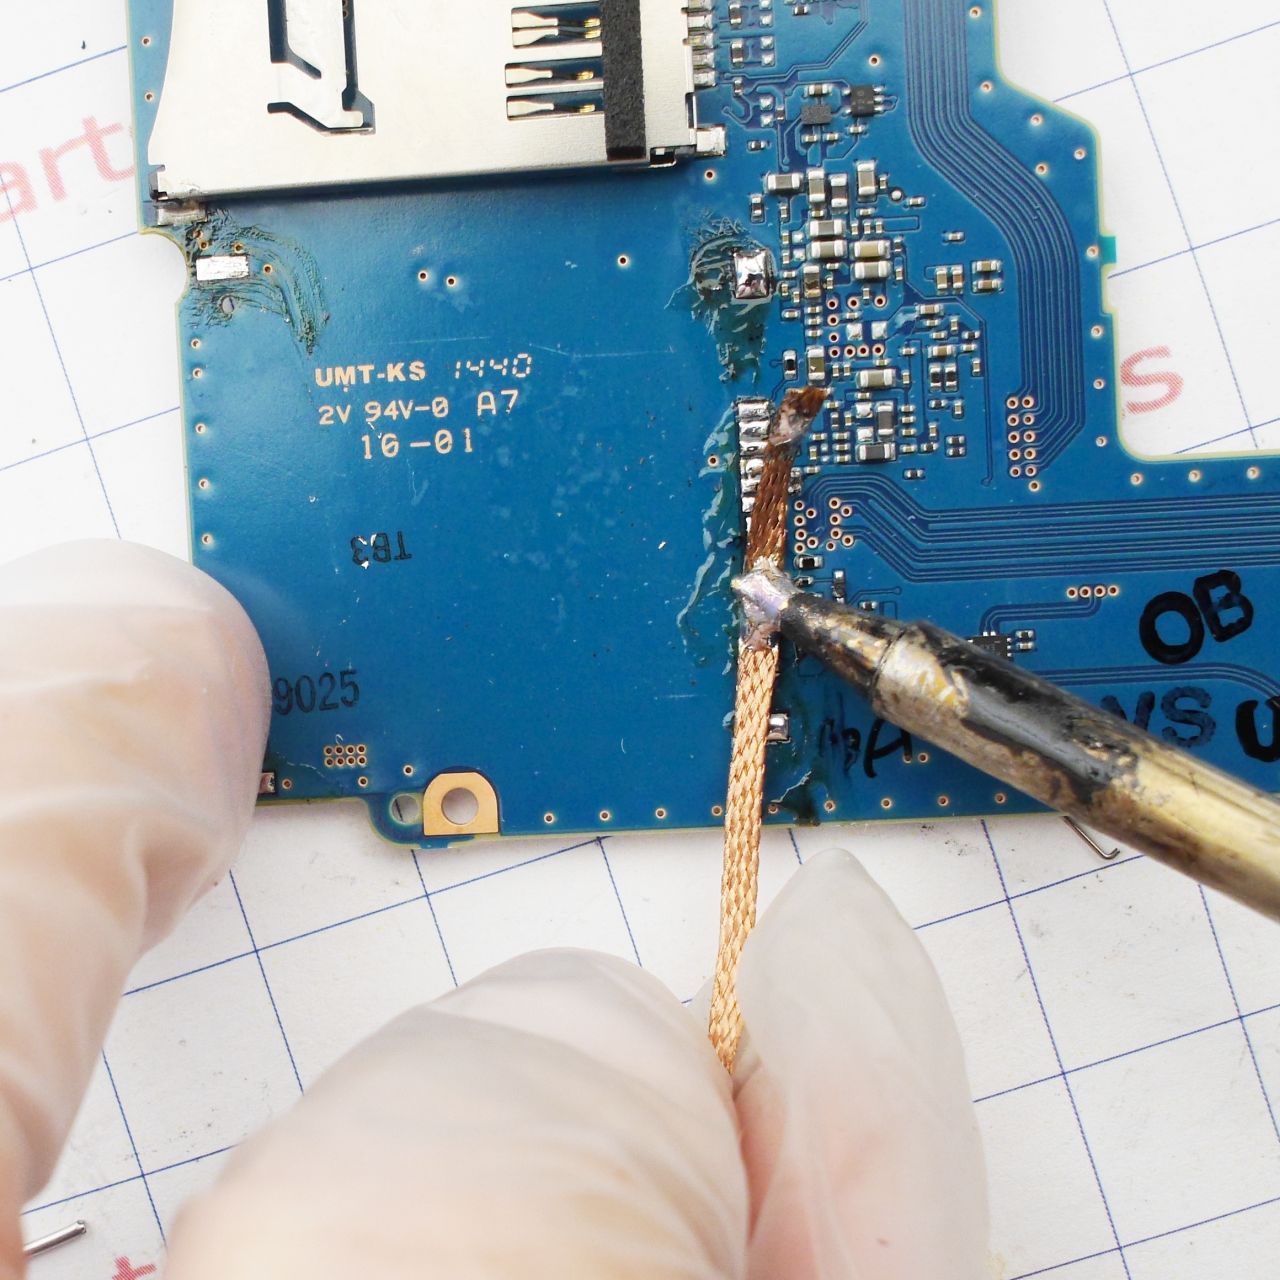
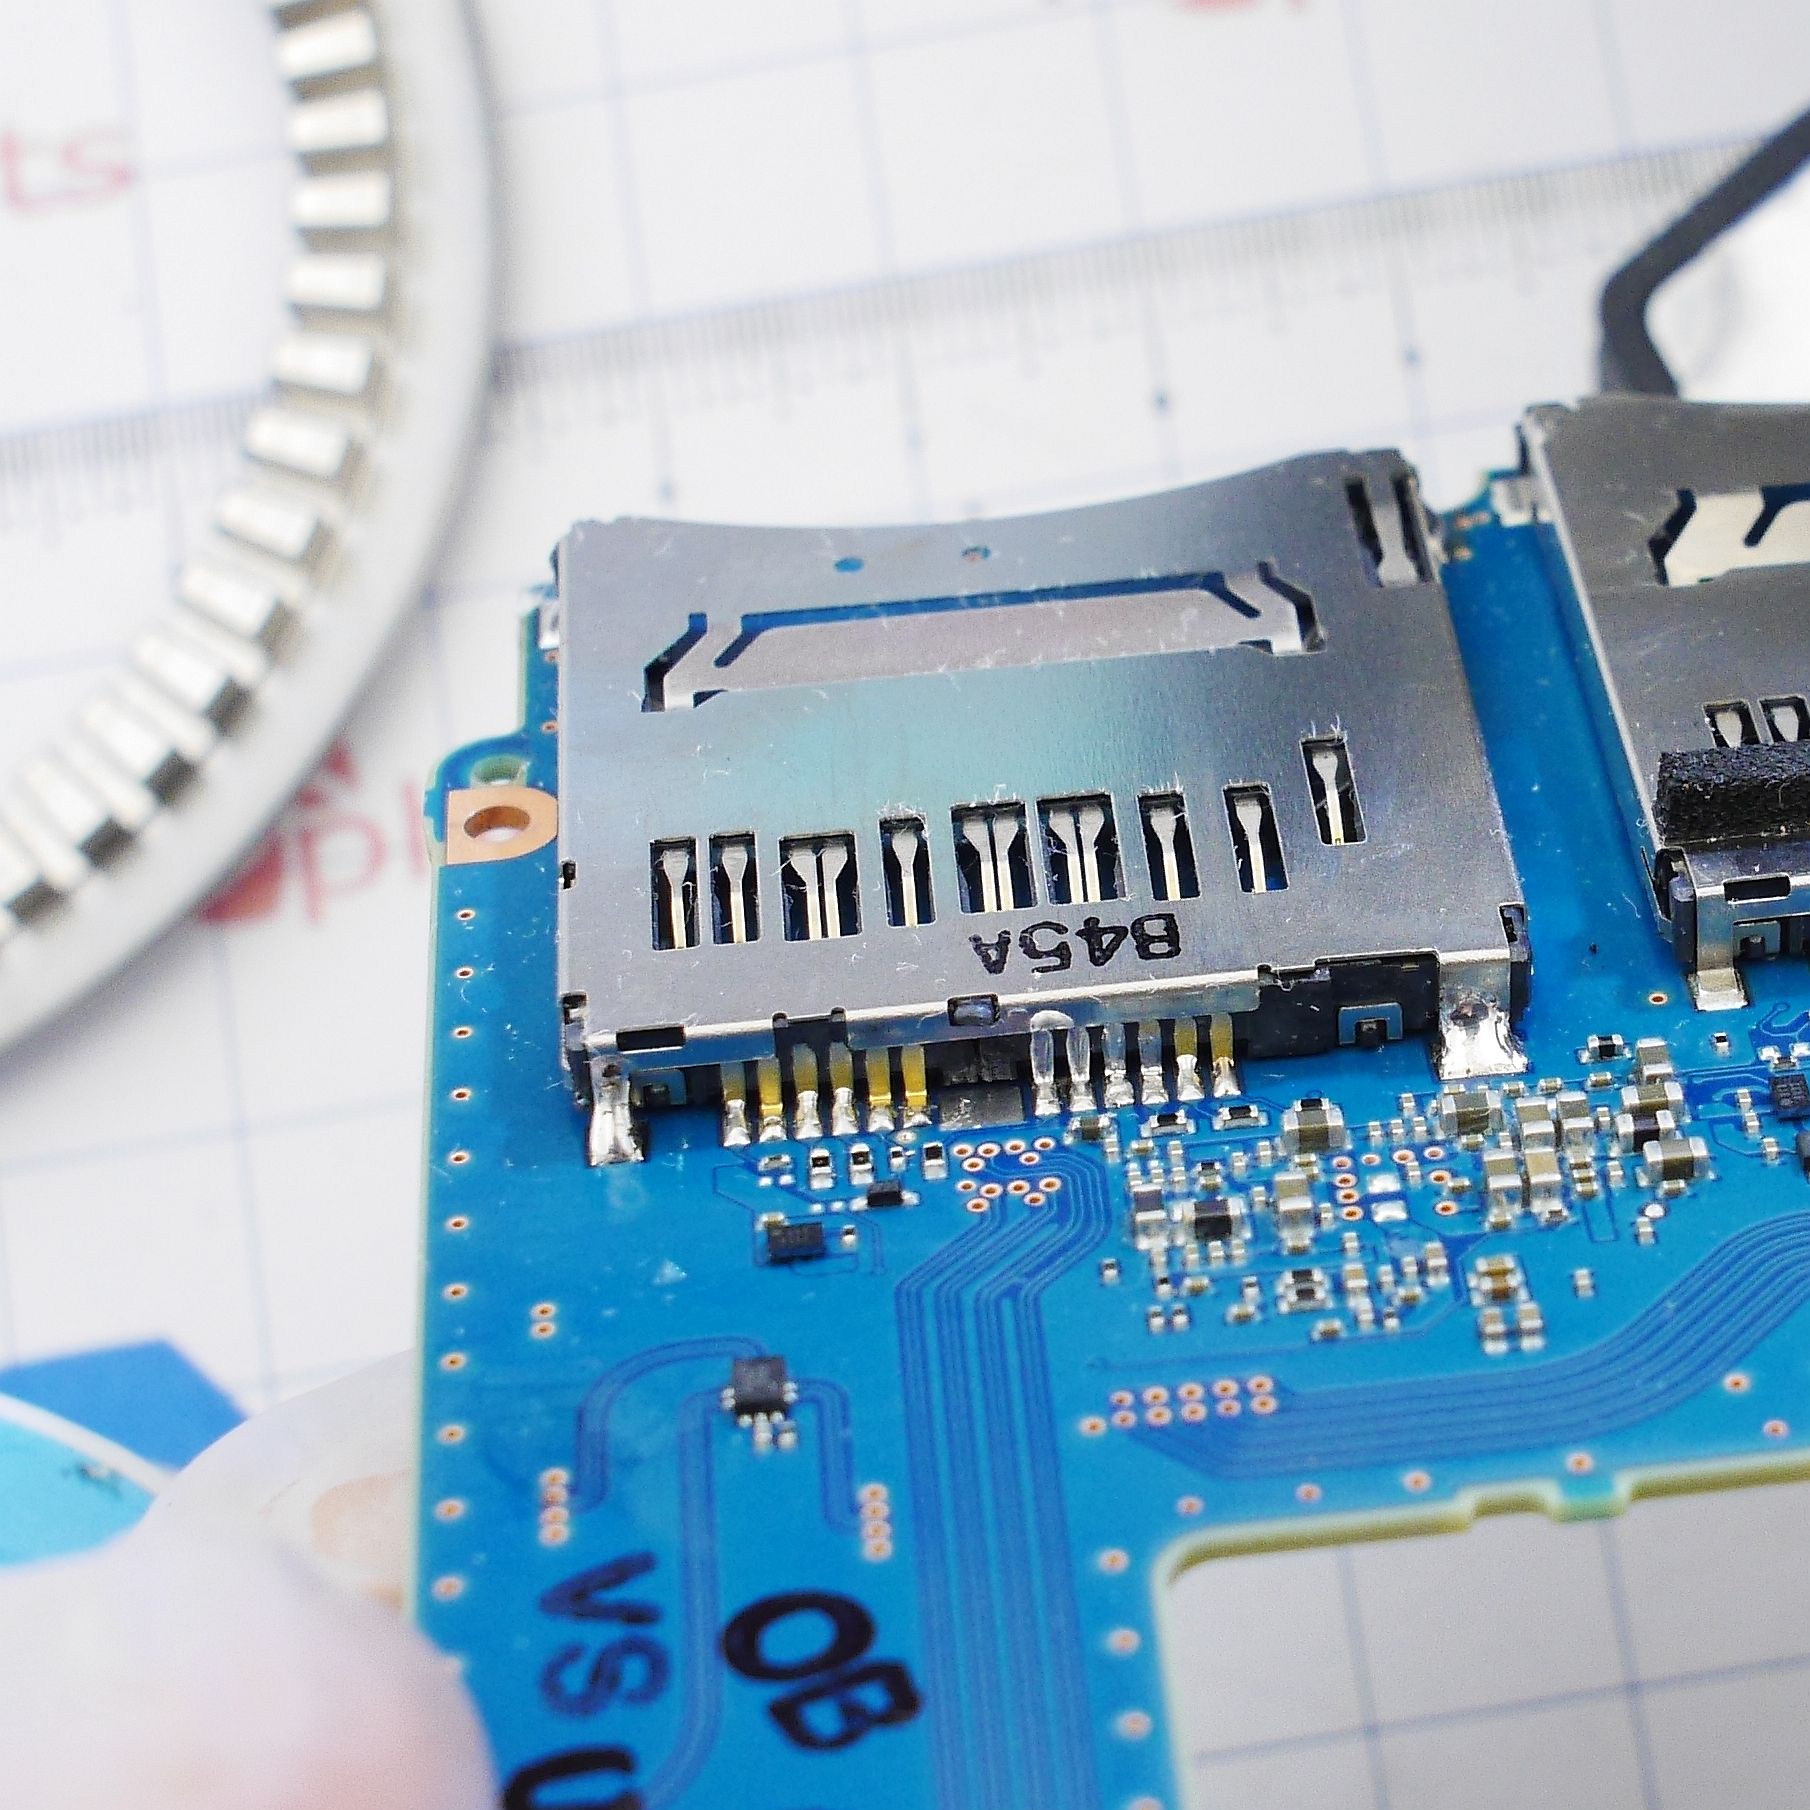
Soldering the new slot is simple: place it, align it to the pads, and touch each pin with a soldering iron. Sounds easy - but requires a steady hand and, ideally, a microscope for control. A more powerful iron and preheating make the process much smoother.
Ground pads are always the hardest - they wick away heat from the tip. If the solder doesn't form a clean round bead and instead sticks to the tip, heat the board more.
In the end, it should look something like this:
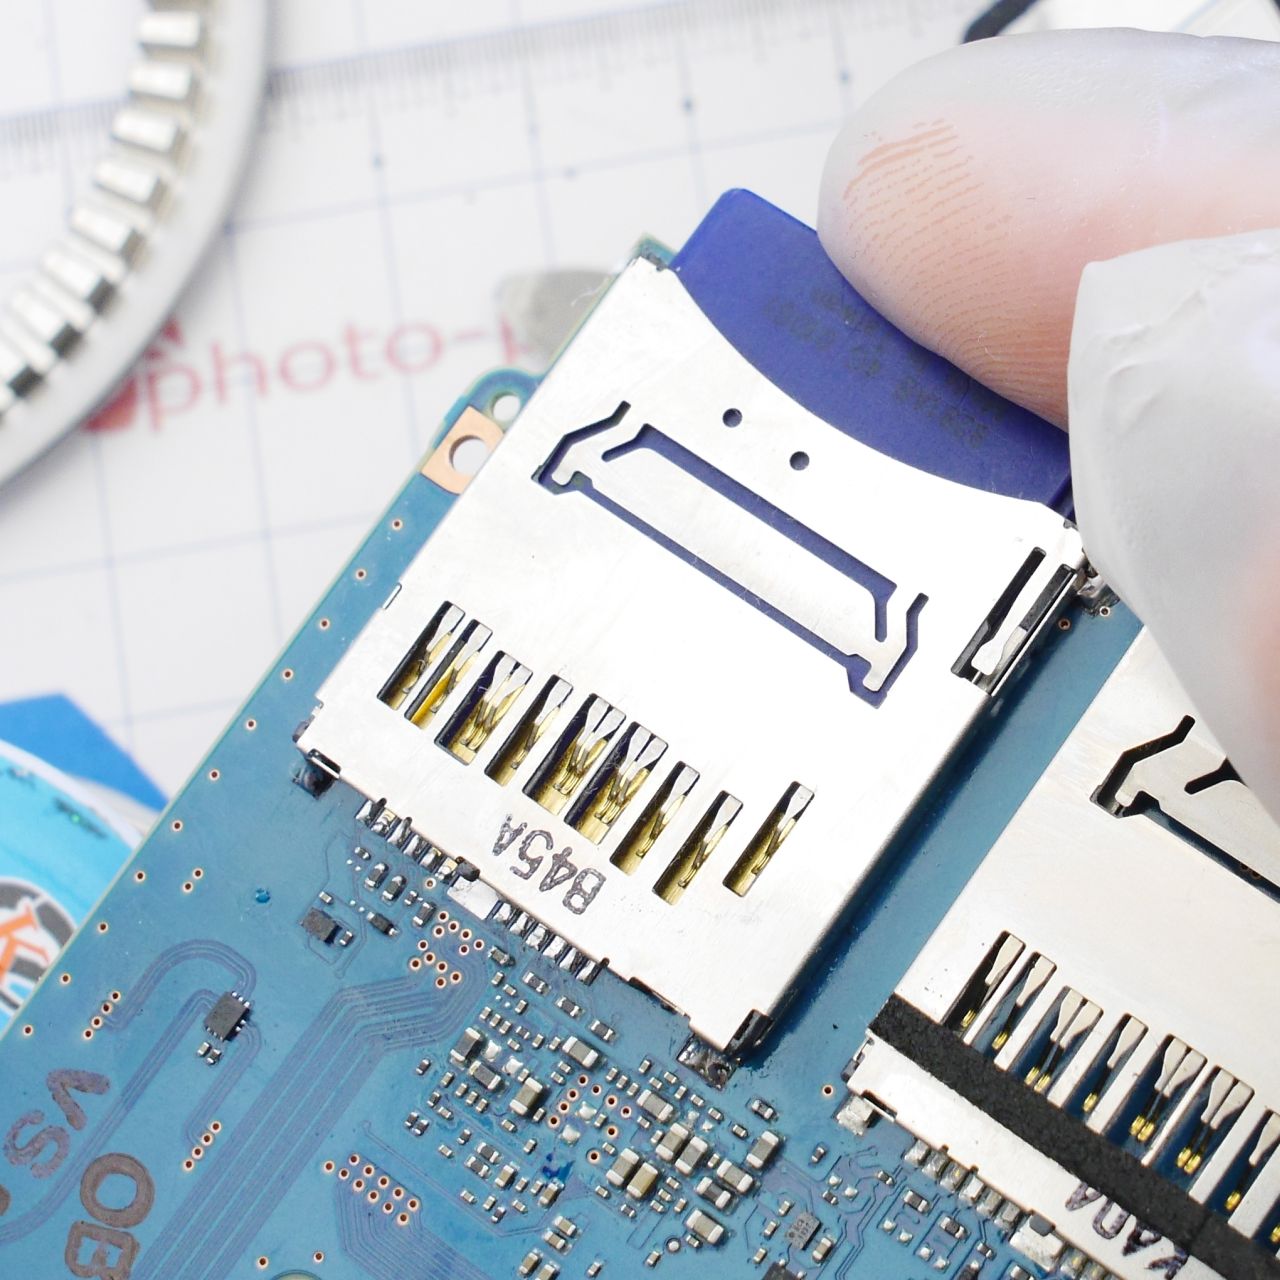
It's a good idea to check immediately whether the SD card locks properly into place.
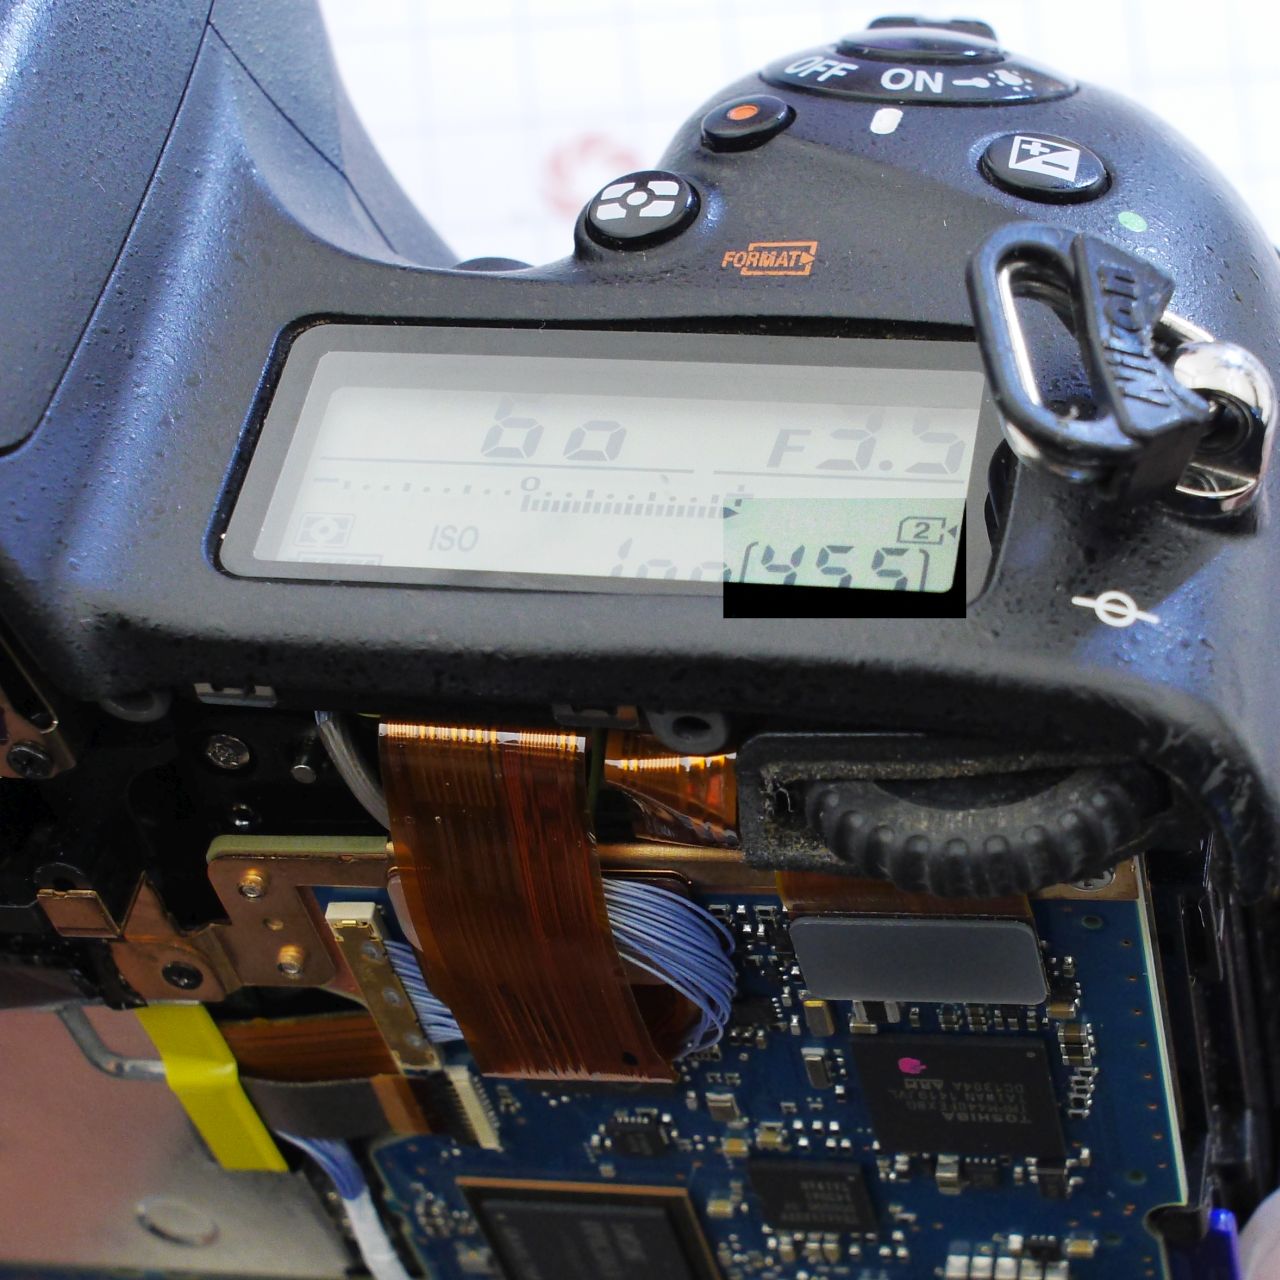
Reassemble the camera - and now, instead of "err", the display shows the number of shots remaining. Success!
Add Comment
This policy contains information about your privacy. By posting, you are declaring that you understand this policy:
- Your name, rating, website address, town, country, state and comment will be publicly displayed if entered.
- Aside from the data entered into these form fields, other stored data about your comment will include:
- Your IP address (not displayed)
- The time/date of your submission (displayed)
- Your email address will not be shared. It is collected for only two reasons:
- Administrative purposes, should a need to contact you arise.
- To inform you of new comments, should you subscribe to receive notifications.
- A cookie may be set on your computer. This is used to remember your inputs. It will expire by itself.
This policy is subject to change at any time and without notice.
These terms and conditions contain rules about posting comments. By submitting a comment, you are declaring that you agree with these rules:
- Although the administrator will attempt to moderate comments, it is impossible for every comment to have been moderated at any given time.
- You acknowledge that all comments express the views and opinions of the original author and not those of the administrator.
- You agree not to post any material which is knowingly false, obscene, hateful, threatening, harassing or invasive of a person's privacy.
- The administrator has the right to edit, move or remove any comment for any reason and without notice.
Failure to comply with these rules may result in being banned from submitting further comments.
These terms and conditions are subject to change at any time and without notice.
Comments